
Best Hot Cocoa Cookies with Gooey Marshmallow Centers
Delicious Hot Cocoa Cookies: The Perfect Winter Treat
Hot Cocoa Cookies are the ultimate indulgence for chocolate lovers during the chilly winter months. Imagine biting into a soft, chewy cookie infused with rich chocolate flavors and a hint of cocoa, delivering all the nostalgia of your favorite hot cocoa. These cookies are not only delicious but they also evoke feelings of warmth and comfort, making them the perfect treat to enjoy by the fireplace or as a sweet surprise for holiday gatherings. With every bite, you’ll be transported to a world of cozy, wintery bliss.
These cookies are incredibly easy to make and require minimal ingredients, yet they are bursting with flavor. The combination of cocoa powder, dark chocolate chips, and a touch of vanilla creates a delightful balance of sweetness and richness. The addition of fluffy marshmallows on top elevates these cookies to the next level, reminding one of the traditional hot cocoa experience. Perfect for sharing or enjoying solo, your friends and family will surely rave about these irresistible hot cocoa cookies.
Quick Recipe Highlights
- Flavor Profile: These cookies have a deeply chocolatey flavor, enhanced by the sweetness of sugar and a hint of vanilla.
- Texture: The interior is soft and chewy, while the exterior has a slight crispiness that adds to the overall experience.
- Aroma: They’ll fill your kitchen with an inviting and warm aroma of chocolate and vanilla that’s sure to make your mouth water.
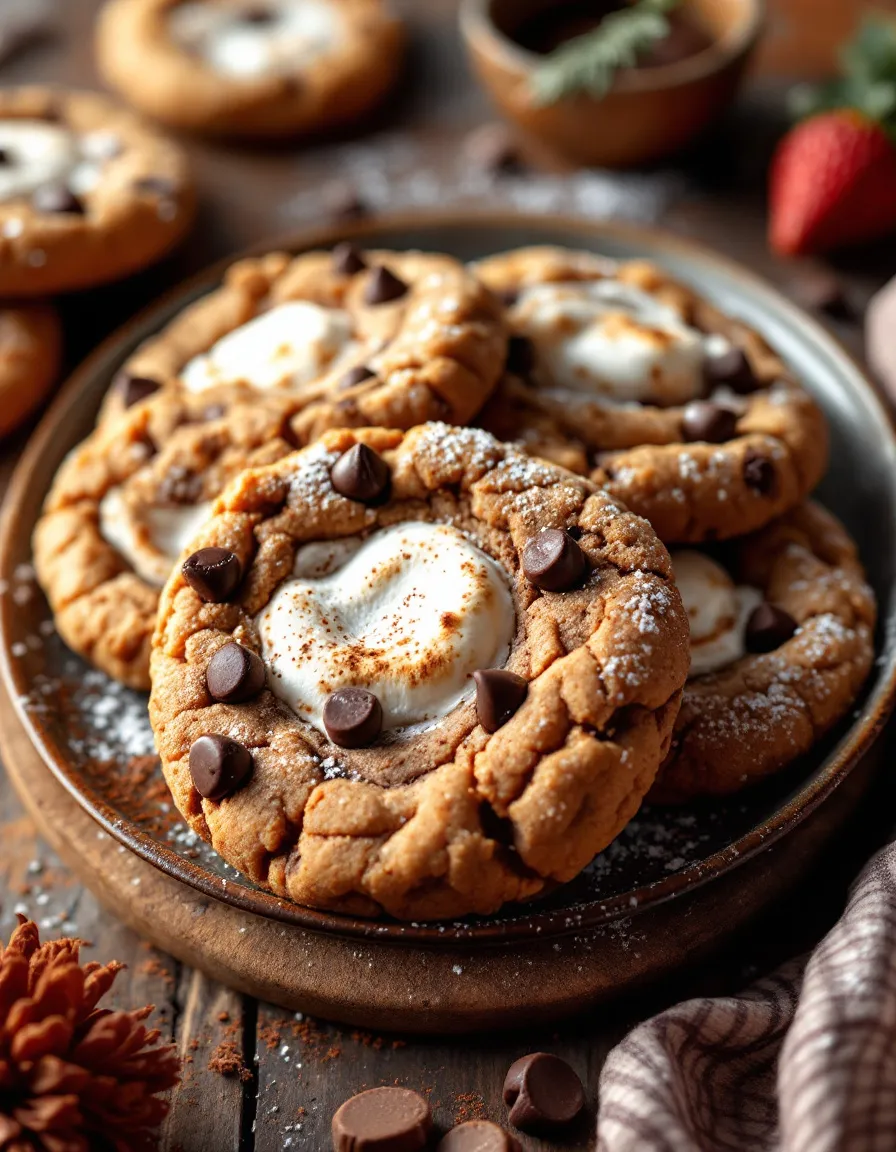
- Visual Appeal: The rich brown color of the cookies speckled with melted chocolate and fluffy marshmallows creates an enticing presentation.
- Skill Level Needed: Ideal for bakers of all levels, from beginners to seasoned pros, with clear and easy steps to follow.
- Special Equipment: All you need is a mixing bowl, measuring cups, and a baking sheet to whip up these delightful cookies.
Recipe Overview
- Difficulty Level: Rated easy, these Hot Cocoa Cookies are perfect for anyone looking to bake sweet treats without complex techniques.
- Category: They fall under dessert and afternoon snacks, ideal for warming up after outdoor winter activities.
- Cuisine: Inspired by classic American baking traditions, these cookies highlight comforting and nostalgic flavors.
- Cost: Typically inexpensive to make, the main ingredients like flour, cocoa, and sugar are pantry staples.
- Season: Best enjoyed in the winter months, these cookies warm hearts and stomachs during the holiday season.
- Occasion: Perfect for festive gatherings, cozy nights in, or simply as a treat to enjoy with a cup of hot cocoa.
Why You’ll Love This Recipe
Hot Cocoa Cookies not only please the palate but also create an unforgettable taste sensation. The soft, chewy texture pairs perfectly with the gooey chocolate chips and sweet marshmallows. Each cookie feels like a warm hug, bringing a sense of comfort when the temperatures drop. This satisfying dessert is sure to delight everyone, from children to adults, making it a universally adored snack.
In today’s busy world, convenience is key, and making these cookies fits seamlessly into any schedule. With just a few simple steps, you can create a batch in under half an hour, making them a spontaneous yet satisfying dessert option. With every batch, you engage in a simple yet rewarding ritual of baking, filling your kitchen with delightful scents and creating lasting memories.
Nutritionally, while they are a treat, Hot Cocoa Cookies can be balanced with the inclusion of quality ingredients. By choosing high-quality cocoa powder and dark chocolate, you can enjoy a cookie that provides an indulgent experience. Additionally, by incorporating whole grain flour, you can add a touch of fiber and nutrients to each bite.
These cookies are perfect for social interactions; they make a lovely addition to gatherings, holiday parties, and cookie exchanges. Sharing these treats with friends and family fosters connections, and the shared experience of baking them adds further joy to every bite. Plus, they can easily impress your guests and spark conversations around what makes them special.
Cost-effectiveness shines through with this recipe as well, as it allows you to create delicious cookies without breaking the bank. With simple ingredients that you likely already have at home, you’re able to whip up batch after batch, ensuring everyone can have a delightful treat whenever they desire.
Historical Background and Cultural Significance
The origins of cocoa date back thousands of years, originating from the ancient Mesoamerican cultures who first cultivated the cacao bean. The transition from drinking chocolate beverages to solid confectioneries has led to the creation of chocolate in various forms, including the cookie format we enjoy today. As chocolate became accessible, recipes evolved, leading to delightful adaptations such as Hot Cocoa Cookies.
Culturally, chocolate holds a significant place in many societies, celebrated for its luxury and treat status. During the winter months, particularly in North America, hot cocoa has long been associated with warmth, comfort, and festive spirit. Cookies embody the same sentiments, making them a cherished dessert during gatherings and holidays.
Over the years, variations of hot cocoa-infused baked goods have emerged, reflecting regional tastes and ingredients. Hot Cocoa Cookies pay homage to traditional recipes while allowing for delightful creativity in flavors and textures.
Regional adaptations show these cookies celebrated throughout various cultures, from the spiced versions in Mexican cuisine to the sweeter interpretations found in American households, illustrating how chocolate inspires global baking traditions.
Ingredient Deep Dive
Cacao is the star ingredient of Hot Cocoa Cookies and carries a fascinating history. Revered by ancient cultures, cacao was consumed primarily in liquid form and was believed to have health benefits. Today, it’s recognized not just for its delicious taste but also for its powerful antioxidants, making it a beloved ingredient in desserts. When selecting cocoa, opt for unsweetened varieties for baking, as they provide the most authentic flavor without added sugars.
Flour serves as the foundation of almost all baked goods, including cookies. The primary type of flour used in this recipe is all-purpose flour, which provides the right balance of structure and tenderness. Whole wheat flour can offer a nuttier taste and additional nutrients. It’s best stored in a cool, dry place to maintain freshness, and easier to measure using the spoon-and-level method.
Sugar not only sweetens but also amps up the cookie’s texture and aids in browning. Both granulated and brown sugar are used in this recipe, contributing to a chewy, delicious cookie. The molasses content in brown sugar adds moisture and a slight caramel flavor, rounding out the taste experience. Proper storage in an airtight container can prevent clumping and ensure longevity.
Lastly, the addition of butter enriches the flavor and affects the texture. Room temperature butter is essential for creaming with sugars, leading to a light and airy texture. While unsalted butter allows for more control over the final saltiness, alternatives such as coconut oil can also be considered for a dairy-free version.
Common Mistakes to Avoid
- Overmixing the dough can lead to tougher cookies; mix just until the dry ingredients are incorporated.
- Using cold butter can affect the consistency of your dough; always ensure it’s at room temperature for optimal creaming.
- Not measuring flour correctly can result in dense cookies; spoon the flour into your measuring cup and level off without packing it down.
- Skipping chilling the dough may lead to cookies spreading more than desired; chilling helps maintain the cookies’ shape.
- Baking at the wrong temperature can make cookies too dry or underdone; always preheat your oven for balanced baking.
- Overbaking can leave you with hard cookies; remove them when they are just set and allow them to cool on the baking sheet.
- Using expired baking powder can diminish the rise; check the expiration date before starting your recipe.
- Not allowing cookies to cool before transferring them can lead to breaking; give them a few minutes to set on the baking sheet.
- Ignoring the need for parchment paper may result in sticking; use parchment or a silicone mat for easier cleanup.
- Using mismatched baking sheets can affect cooking times; ensure your pans are all the same size for even baking.
Essential Techniques
One key technique in cookie making is creaming butter and sugar together. This step is crucial as it incorporates air into the mixture, leading to lighter cookies. To master this, use room temperature butter and beat until the mixture is fluffy and pale. Look for visual cues, such as a lighter color and a creamy texture, as signs of successful creaming.
Another important technique is properly measuring dry ingredients. Spoon the flour into your measuring cup and level it off rather than scooping directly. This ensures that you won’t end up with too much flour, which can create denser cookies. Pay attention to consistency and ensure you have the correct amounts for optimal results.
Pro Tips for Perfect Hot Cocoa Cookies
To enhance the chocolate flavor, consider using a combination of semi-sweet and dark chocolate chips. This adds depth and richness to your cookies. Another tip is to sprinkle a little sea salt on top of the cookies before baking, which balances the sweetness beautifully.
Adding an extra handful of chocolate chips or mini marshmallows into the dough elevates indulgence. Alternatively, you could drizzle melted chocolate on top for a decorative finish. For those who enjoy a slightly spiced flavor, try adding a pinch of cinnamon or cayenne pepper to the dough to give a subtle but interesting twist.
Chilling the dough for at least 30 minutes can significantly improve the cookie’s texture, resulting in thicker, chewier cookies. Additionally, consider lowering the oven temperature slightly to bake the cookies more evenly, which can prevent over-browning.
Experimenting with different types of flour, such as a blend of all-purpose and almond flour, can offer a unique flavor and texture. Lastly, for a more decadent treat, serve your cookies warm with a scoop of vanilla ice cream on the side.
Variations and Adaptations
Hot Cocoa Cookies can easily be transformed to cater to different tastes and dietary preferences. For a seasonal twist, incorporate peppermint extract or crushed candy canes for a festive flair. Additionally, you can replace the chocolate chips with white chocolate or butterscotch chips for various flavor profiles.
For those looking to adapt these cookies to be gluten-free, substituting all-purpose flour with a gluten-free blend works perfectly, maintaining the delightful texture. Vegan adaptations can be achieved using flax eggs and dairy-free chocolate chips to ensure no animal products are included.
Experimenting with texture variations is also fun—try adding nuts or dried fruit for an unexpected crunch or chew. For a touch of acidity, consider incorporating a splash of espresso or brewed coffee to highlight the chocolate flavors further.
Finally, presentation alternatives like shaping these cookies into fun holiday figures or serving them in decorative tins can make them more appealing for gifting during the holiday season.
Serving and Presentation Guide
When serving Hot Cocoa Cookies, consider arranging them on a festive platter to bring cheer to your gathering. If you’re crafting a dessert table, pair them with a pitcher of hot cocoa and a variety of toppings like whipped cream and chocolate shavings. For individual servings, plate them with a small scoop of ice cream, drizzled with chocolate sauce for an extra special touch.
Garnishing with freshly chopped mint or a sprinkle of powdered sugar adds a beautiful finishing touch. If you’re incorporating these cookies into a gift, consider placing them in clear cellophane bags tied with ribbons for a charming presentation.
Temperature can enhance the experience; warm cookies served straight from the oven provide comfort, while cooled cookies can maintain their shape better for decorative displays. Consider portion control by offering a small selection of different cookies to encourage tasting, making these Hot Cocoa Cookies an enjoyable treat for all.
Wine and Beverage Pairing
When it comes to pairing beverages with Hot Cocoa Cookies, rich, fruity red wines like Merlot or Zinfandel complement the chocolate beautifully without overpowering it. If you prefer non-alcoholic options, a warm cup of spiced apple cider or chai tea enhances the cozy experience.
For coffee enthusiasts, a medium roast coffee pairs delightfully, bringing out the chocolate notes and delivering a perfect afternoon pick-me-up. When serving these cookies warm, consider a glass of cold milk or chocolate milk to bring back the nostalgic feel of enjoying cookies as a child.
The key consideration for beverages is balancing sweetness with richness, so choose drinks that enhance or contrast with the cookies’ flavors. Presentation can also elevate the experience; try serving the accompanying drinks in cute mugs or decorative glassware.
Storage and Shelf Life
Proper storage of your Hot Cocoa Cookies is essential to maintain their freshness. Keep them in an airtight container at room temperature for up to one week. For longer shelf life, consider freezing them; place them in a freezer-safe container or heavy-duty freezer bag to enjoy at a later date.
If freezing, ensure the cookies are fully cooled before wrapping to avoid moisture buildup. For optimum flavor and texture, consume frozen cookies within three months. To enjoy, simply thaw or reheat them in the oven for a warm, freshly baked taste any time you crave them.
Signs of spoilage include an off smell or visible mold; if you notice either, it’s safer to discard the cookies. For reheating, a 5-minute return to a preheated oven will revive the original chewy texture, ensuring that every bite is as delightful as the first.
Make Ahead Strategies
If you’re planning to make Hot Cocoa Cookies ahead of time, you can prepare the dough in advance and refrigerate it for up to three days. Just ensure it’s well wrapped to prevent drying out. When ready to bake, simply scoop and bake as directed.
Alternatively, you can bake the cookies and freeze them. Cool completely and store them in a single layer in an airtight container, then separate layers with parchment paper to prevent sticking. Frozen baked cookies can be ready to serve in moments with a simple thaw.
Keep in mind the quality of your cookie might change slightly once frozen, so aim to serve them within two months for optimal taste. Fresh elements, like adding more marshmallows on top for a melted look, can give your cookies a new life when you’re ready to serve.
Scaling Instructions
When scaling Hot Cocoa Cookies, halving the recipe is straightforward; simply use half the amount of each ingredient and follow the same baking instructions. For doubling or tripling, ensure your mixing bowl is large enough to accommodate the increased volume to avoid overflow.
Keep in mind that baking times may vary slightly depending on the size of each cookie. Monitor closely, especially the first time you increase the recipe amount. It’s also a good idea to bake in batches to ensure even cooking.
For larger batches, you might need additional baking sheets, so prepare your space accordingly. If you have limited oven space, consider baking the cookies in rounds, keeping the dough chilled while the first batch is baking.
Nutritional Deep Dive
A serving of Hot Cocoa Cookies provides a moderate amount of calories primarily sourced from carbohydrates and fats. The macro breakdown typically features around 10g of fat, 35g of carbohydrates, and 2g of protein per cookie, making them a sweet treat rather than a primary food source for daily nutrition.
Micronutrient analysis reveals small amounts of essential nutrients such as calcium and iron, especially if you use whole grain flour. Health benefits can come from the antioxidants found in dark chocolate, contributing positively to heart health and overall wellness.
When considering portion sizes, aim for moderation, particularly if weight management is a concern. These cookies should be enjoyed as occasional treats alongside a balanced diet. Adjust your consumption based on daily activity levels to maintain overall health.
Dietary Adaptations
For those needing gluten-free options, substitute all-purpose flour with a quality gluten-free blend. Replacing traditional sugars may also cater to different dietary needs; consider using coconut sugar or a sugar alternative like erythritol for lower-calorie options.
Dairy-sensitive individuals can enjoy Hot Cocoa Cookies by utilizing plant-based substitutes like almond or coconut milk, as well as dairy-free chocolate alternatives. For vegan adaptations, the recipe can easily be modified with plant-based butter and flax eggs.
Keto enthusiasts can alter the original recipe to include almond flour and erythritol, keeping the carbohydrates low while preserving delicious flavors. For those following a paleo diet, consider substitute ingredients keeping with those guidelines for a wholesome treat.
Troubleshooting Guide
If your cookies turn out too dry, it may be due to flour measurement; ensure you are correctly leveling it off instead of packing it into the measuring cup. Adding an extra tablespoon of milk or water before baking can help hydrate dry dough.
Get the perfect flavor balance by tasting the dough before baking; adjust sweetness as necessary by adding a bit more sugar, especially if using dark chocolate which can be more bitter than semi-sweet varieties.
Temperature problems can arise if your oven runs hot or cold, regular calibration is necessary to ensure baking accuracy. Test with a separate oven thermometer to get consistent results.
If you find that your cookies spread too much, chilling the dough can help, as warm dough tends to flatten. Also, avoid greasing the baking sheet unless specified; using parchment paper can provide a non-stick surface.
In case you’re uncertain about ingredient substitutions, seek guidance or verify ratios carefully before proceeding, as certain ingredients behave differently when replaced.
Recipe Success Stories
Community feedback has praised Hot Cocoa Cookies for their nostalgic flavors and delightful textures, with many bakers sharing their successful adaptations. Individuals often highlight how the pleasant aroma while baking creates a welcoming atmosphere in the kitchen, encouraging friends and family to join in the experience.
Several users have experimented with variations, from adding peppermint chips for a festive touch to substituting chocolate with caramel, resulting in unique and delicious adaptations. Each alteration continues to provide good feedback in terms of taste and satisfaction, demonstrating the recipe’s flexibility.
Readers have also shared photography tips, encouraging new bakers to capture the gooey melted chocolate within. They suggest natural lighting for the best visual appeal and encourage adding colorful bowls or ingredients in the background for added charm.
Finally, many have noted how these cookies forge wonderful memories, whether making them with loved ones or sharing them during holiday festivities, further highlighting the joy of baking and its capacity to draw people together.
Frequently Asked Questions
Can I use milk chocolate instead of dark chocolate?
Yes, milk chocolate can be substituted for dark chocolate; however, you might want to reduce the sugar slightly as milk chocolate is generally sweeter.
Can I freeze the cookie dough?
Absolutely! You can freeze the cookie dough for up to three months. Roll it into logs, wrap tightly, and slice into rounds for fresh-baked cookies whenever you want.
How do I ensure my cookies are chewy?
To achieve chewy cookies, do not overbake them! They should be set at the edges but still soft in the center when you take them out of the oven.
Can I add nuts to the cookie dough?
Certainly! Adding nuts like walnuts or pecans will provide a delightful crunch alongside the chocolate, enhancing the overall texture of your cookies.
What can I use instead of eggs?
You can use flax eggs, applesauce, or commercial egg replacements if you’re looking for a vegan option. Each substitute varies in effectiveness, so testing for the best results is advised.
Why did my cookies come out flat?
Flat cookies can result from this happening due to too much butter, the dough being too warm, or not enough flour. Be sure to measure accurately and chill the dough if needed.
Can I use cocoa powder instead of melted chocolate?
While cocoa powder can be used, it will change the texture and taste slightly. If doing this, add some fat (like vegetable oil or butter) to maintain richness.
How long can I store my cookies?
Hot Cocoa Cookies can be stored in an airtight container at room temperature for about a week, or frozen for longer storage lengths.
What’s the best way to garnish these cookies?
Consider drizzling with melted chocolate or sprinkling with powdered sugar for a beautiful finish. Mini marshmallows can also be placed on top for that classic hot cocoa vibe.
Can this recipe be doubled or tripled?
Yes, you can easily double or triple this recipe! Just ensure your mixing bowl is large enough and adjust baking time if needed.
What should I do if my cookies burn on the bottom?
If this occurs, it suggests your baking sheets may be too dark or your oven temperature is too high. Consider using lighter-colored bakeware and lowering the temperature for future batches.
Additional Resources
For those craving more chocolate treats, check out our collection of chocolate recipes that highlight delicious brownies, cakes, and pies. There are also technique guides available that delve into the art of baking cookies perfectly every time, along with seasonal recipe suggestions to inspire your baking year-round.
Understanding the different types of chocolate can further enhance your baking experience. Find detailed ingredient information as well that can deepen your appreciation for chocolate products. You may also explore equipment recommendations that make the baking process more enjoyable and efficient.
Join the Conversation
We invite you to share your experiences baking Hot Cocoa Cookies on social media! Tag us in your delightful creations and share your feedback. Photography tips can help capture every delicious moment, while encouraging reviews allows others in the community to connect over these sweet treats.
Feel free to share your personal variations or adaptations to the recipe — we love hearing how you’re making it your own! Engage with fellow bakers, exchange tips, and spread the love of baking these scrumptious Hot Cocoa Cookies.
The Recipe
Hot Cocoa Cookies
Serves: 24 cookies
Prep Time: 15 mins
Cook Time: 10 mins
Total Time: 25 mins
Kitchen Equipment Needed
- Mixing bowl
- Measuring cups and spoons
- Baking sheet
- Parchment paper or silicone baking mat
- Whisk or electric mixer
Ingredients
- 1 cup unsalted butter, softened
- 1 cup granulated sugar
- 1/2 cup brown sugar, packed
- 2 large eggs
- 1 teaspoon vanilla extract
- 1 1/2 cups all-purpose flour
- 1/2 cup cocoa powder
- 1 teaspoon baking powder
- 1/2 teaspoon salt
- 1 cup chocolate chips (semi-sweet or dark)
- 1 cup mini marshmallows (optional for topping)
Directions
- Preheat your oven to 350°F (175°C) and line a baking sheet with parchment paper.
- In a mixing bowl, cream together the softened butter, granulated sugar, and brown sugar until light and fluffy.
- Add the eggs one at a time, mixing well after each addition, then stir in the vanilla extract.
- In a separate bowl, whisk together the flour, cocoa powder, baking powder, and salt.
- Gradually add the dry ingredients to the wet mixture, stirring until combined.
- Fold in the chocolate chips and mini marshmallows if using.
- Drop rounded tablespoons of dough onto the prepared baking sheet, spacing them 2 inches apart.
- Bake for 9-11 minutes, or until the edges are set but the center is still soft.
- Allow cookies to cool on the baking sheet for 5 minutes before transferring to a wire rack to cool completely.
Recipe Notes
- For a thicker cookie, refrigerate the dough for 30 minutes before baking.
- Feel free to substitute chocolate chips with your favorite mix-ins, like nuts or dried fruit.
- Store baked cookies in an airtight container at room temperature for up to a week.
- For a more indulgent cookie, drizzle melted chocolate over the tops after cooling.