
Easy Mini No-Bake Kit Kat Cheesecakes – Creamy & Crunchy
Delicious Mini No-Bake Kit Kat Cheesecakes: A Sweet Treat for Everyone
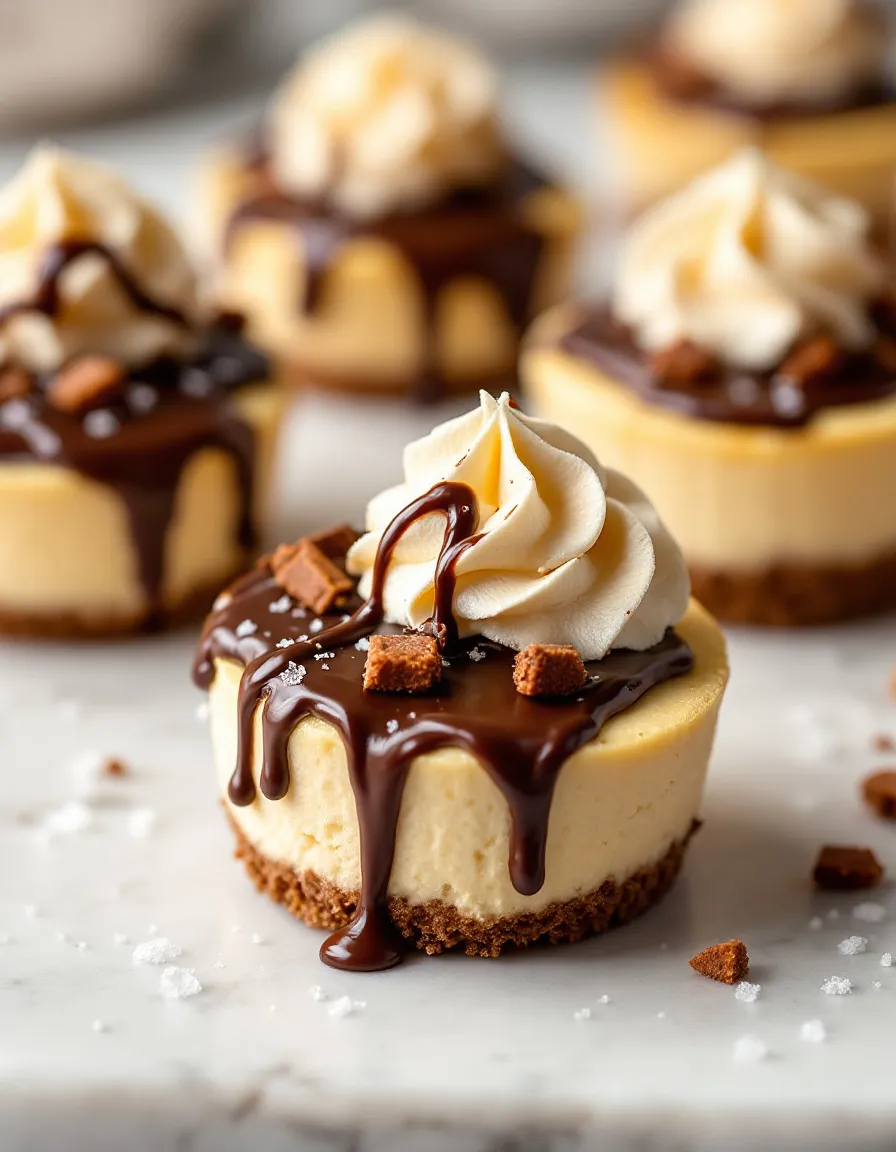
If you’re craving a delightful dessert that combines rich flavors and smooth textures, look no further than these Mini No-Bake Kit Kat Cheesecakes. This easy-to-make treat marries the creamy goodness of cheesecake with the crunchy chocolate delight of Kit Kats, creating a perfect balance of sweetness and texture. The best part? There’s no baking required, making it an ideal choice for warm days or last-minute gatherings.
These cheesecakes bring back childhood memories of snack time, wrapped up in a fun individual serving. Picture this: a luscious cheesecake filling, topped with crunchy pieces of Kit Kat and drizzled with chocolate. It’s a beautiful blend of nostalgia and modern dessert aesthetics, guaranteed to impress guests and satisfy cravings. Whether you’re serving them at a birthday party, holiday gathering, or simply a casual get-together, these petite desserts are sure to be the stars of the show.
Quick Recipe Highlights
- Flavor Profile: The combination of creamy cheesecake and crunchy chocolate creates a delightful blend of flavors.
- Texture: Enjoy the smooth, velvety filling paired with the crunch of Kit Kat pieces.
- Aroma: The sweet aroma of chocolate mingles with the fresh scent of cream cheese.
- Visual Appeal: The layered presentation topped with chocolate drizzle is visually striking.
- Skill Level Needed: This simple recipe is perfect for beginners and veterans alike.
- Special Equipment: Just a mixing bowl and cupcake tins are needed.
Recipe Overview
- Difficulty Level: This recipe is rated easy, requiring minimal skills and only mixing ingredients.
- Category: This dessert fits perfectly in the sweet treat category, ideal for parties or as an afternoon snack.
- Cuisine: Drawing from American dessert traditions, it adds a modern twist with its no-bake approach.
- Cost: Ingredients are budget-friendly, making this dessert accessible for everyone.
- Season: Great for any season, but especially refreshing in warmer months.
- Occasion: Perfect for birthdays, holidays, or just a fun family night in.
Why You’ll Love This Recipe
The taste and texture of these Mini No-Bake Kit Kat Cheesecakes are an absolute indulgence. The creamy filling melts in your mouth while the chocolate pieces add a satisfying crunch, satisfying all your dessert cravings in one bite. Each cheesecake is a perfect balance of sweet and creamy with a touch of richness from the chocolate, making it hard to stop at just one.
This recipe is not just delicious but incredibly convenient. With no baking required, you can whip these up in under 30 minutes. Just mix the ingredients, layer them, and refrigerate. It’s a perfect make-ahead dessert that allows you to spend more time with friends and family instead of being tied down in the kitchen.
On top of being a delicious treat, these cheesecakes can be a slightly healthier indulgence. You control the ingredients, allowing for adjustments based on dietary preferences. While it’s still a dessert, it can be made with lower fat cream cheese or lighter toppings, making it a bit more health-conscious without losing flavor.
Hosting friends or family? These mini cheesecakes are bound to impress! They offer a fun, interactive aspect to your dessert presentation. Guests will love the individual servings and the unique combination of flavors. It creates a delightful experience around the dining table.
Cost-effectiveness is another reason to love this recipe. It’s made with simple ingredients that are often already in your pantry. The ability to create an impressive and crowd-pleasing dessert for minimal investment is a plus for any home cook.
Historical Background and Cultural Significance
The history of cheesecake stretches back thousands of years, with origins traced to ancient Greece. It was initially served to athletes at the first Olympic Games in 776 BC, highlighting its popularity. Over time, cheesecake has evolved into various forms across different cultures, incorporating local ingredients and styles.
Kit Kat, on the other hand, made its debut in England in 1935. Initially launched as a chocolate-covered wafer bar, it quickly gained popularity globally. The combination of Kit Kat with cheesecake is a relatively modern innovation, showcasing the blending of traditional desserts with contemporary flavors.
This Mini No-Bake Kit Kat Cheesecake represents a fusion of these two rich culinary traditions, symbolizing how food can evolve by merging iconic treats into beloved desserts. Each bite tells a story of creativity, adaptation, and celebration of flavors from across the globe.
Regional variations of this dessert can be found, often with local ingredients or flavor twists. From different kinds of chocolate to unique flavoring in the cheesecake, it’s fascinating to see how recipes adapt in different cultures while keeping the core essence intact.
Ingredient Deep Dive
The primary ingredient, cream cheese, plays a significant role in the cheesecakes’ texture and flavor. Rich in calcium and protein, cream cheese also brings a creaminess that elevates the dessert experience. For selection, opt for full-fat or low-fat cream cheese based on preference, and store it tightly wrapped in the refrigerator to ensure its freshness. Cream cheese can also be substituted with Greek yogurt for a tangy twist.
Next, the Kit Kat bars that add a delicious crunch and chocolatey goodness contain cocoa and sugar, making them a favorite treat across the globe. Nutritionally, they provide a quick energy boost but should be consumed in moderation. When selecting Kit Kats, consider using different flavors available, and store them in a cool place to prevent melting.
Common Mistakes to Avoid
- Not using room temperature cream cheese can lead to lumps in the mixture. Ensure it’s at room temperature for smoother results.
- Overmixing the filling can incorporate too much air, causing the cheesecakes to crack while setting. Mix until just combined.
- Skipping the refrigeration step will lead to a runny cheesecake. Allow enough time for them to set properly.
- Incorrectly handling the Kit Kats while breaking them can result in uneven pieces. Use a sharp knife for clean cuts.
- Using too much whipped cream can make the filling overly fluffy instead of creamy. Balance is key.
- Not measuring your ingredients properly can affect the flavor and texture. Use measuring cups and spoons for accuracy.
- Ignoring the importance of toppings can result in a less visually appealing dessert. Garnish thoughtfully for the best presentation.
- Forgetting to line the cupcake tins can make for a messy extraction. Always use liners or grease the tins.
- Not chilled serving plates can cause the cheesecakes to soften too quickly during serving. Chill your serving plates in advance.
- Rushing the cooling process can affect the texture. Allow ample time in the fridge to stabilize before serving.
Essential Techniques
Mixing ingredients is crucial for the ideal cheesecake filling. It’s important to not overmix to avoid air bubbles that can lead to cracking. To master this, combine the cream cheese and sugar until smooth, and add other ingredients slowly.
Proper refrigeration is key to achieving the perfect consistency. By chilling the cheesecakes long enough, the mixture firms up to hold its shape when served. Common pitfalls include checking too early or not allowing enough time.
Pro Tips for Perfect Mini No-Bake Kit Kat Cheesecakes
1. Use a food processor for mixing the cheesecake filling, ensuring a perfectly smooth consistency.
2. For added flavor, incorporate a splash of vanilla or almond extract to the filling.
3. Crush some Kit Kats for the base layer to add extra chocolatey flavor.
4. Drizzle melted chocolate over the top for a beautiful finish that adds richness.
5. Experiment with different toppings like caramel or crushed nuts for variety.
6. Allow your cheesecakes to chill overnight for the best flavor melding.
7. If you prefer a gluten-free option, use gluten-free cookies for the crust.
8. Present your cheesecakes on an elegant platter for an upscale dessert experience.
Variations and Adaptations
For a twist on flavors, try using flavored Kit Kats, like matcha or strawberry, to match your preference. This can give your cheesecakes an exciting twist while maintaining the core recipe.
Seasonal adaptations include mixing in pumpkin puree or spices during the fall for a festive treat, or using fresh fruits like berries for a refreshing summer version.
For those with dietary restrictions, consider making a vegan version by substituting traditional ingredients with plant-based alternatives such as tofu or coconut cream.
If you’re looking for a different texture, try adding a layer of crunchy graham crackers or nuts between the filling and chocolate topping.
For presentation alternatives, use a clear jar to create layered versions of these cheesecakes, which can be visually stunning and are great for parties.
Serving and Presentation Guide
Plating techniques are essential for an impressive presentation. Consider using a simple white plate to allow the colors of the cheesecake to stand out.
Garnishing ideas include fresh mint leaves or a sprinkle of cocoa powder on top for added elegance. You can also use edible flowers for a colorful touch.
Traditional accompaniments might include a scoop of vanilla ice cream or fresh fruit on the side, blending perfectly with the flavors of the cheesecake.
Modern serving suggestions involve using mini dessert cups or jars, making them perfect for parties or events. This way, guests can enjoy individual servings easily.
Temperature considerations are also vital; serve these cheesecakes chilled for the best experience.
Portion control tips suggest serving them in cupcake liners or small glass jars for ideal serving sizes without overindulgence.
Wine and Beverage Pairing
For wine pairings, consider a sweet dessert wine or a light rosé. The fruit notes will complement the chocolate and cream well.
Non-alcoholic alternatives could include a rich hot chocolate or a versatile iced coffee, both of which frame the flavors beautifully without overpowering them.
Thoughtful coffee pairings may also enhance the dessert experience, with a light roast espresso bringing out the richness of the Kit Kat.
Temperature considerations are crucial when serving alongside drinks; make sure beverages are at the right temperature to create a balanced pair.
Serving suggestions might also include flavored seltzers or sparkling water with fruit, adding a refreshing contrast to the sweetness of the cheesecakes.
Storage and Shelf Life
Proper storage methods can help maintain the quality of your mini cheesecakes. Store uneaten cheesecakes in airtight containers in the fridge for up to 5 days.
Temperature requirements are vital for preserving flavor. Keep the cheesecakes refrigerated until serving time to prevent spoilage.
Container recommendations should include glass or plastic containers that can seal tightly to avoid drying out.
Signs of spoilage include off smells or a change in texture; if either is noted, it’s best to discard the dessert.
Reheating instructions aren’t applicable since these are served chilled, but if you made a crust that needs refreshing, a quick re-bake can help.
For those looking to freeze the cheesecakes, ensure they’re well-wrapped in plastic wrap and stored in a freezer-safe container for up to 3 months.
Make Ahead Strategies
For a simple prep timeline, you can prepare the cheesecake filling up to two days in advance, storing it in the refrigerator until assembly.
Storage between steps can include keeping the crust and filling separated in the fridge until ready to combine.
Quality impact assessment suggests that cheesecakes taste better the longer they chill, allowing flavors to meld beautifully.
Assembly tips include lining your cupcake tins with parchment for easy release and attractive presentation.
Reheating guidelines are not relevant for this dessert, but adding fresh toppings before serving can enhance the visual appeal.
Fresh element additions might involve adding fruit or whipped cream just before serving to ensure they stay intact and appealing.
Scaling Instructions
To halve the recipe, simply divide each ingredient amount accordingly and keep the same mixing and chilling instructions.
Doubling or tripling the recipe is straightforward as the ratios remain the same; just ensure you have larger vessels for mixing.
Equipment adjustments may require using larger mixing bowls and additional muffin tins or jars for serving the increased quantity.
Timing modifications may also involve adjusting chilling time if making a larger batch to ensure all are adequately set.
Storage considerations remain the same, allowing for ample time in the fridge to enjoy later.
Nutritional Deep Dive
The macro breakdown shows a balance of carbohydrates from the crust and sugars, alongside fats from the cream cheese, making this a richer dessert.
Micronutrient analysis highlights calcium from the cream cheese and essential vitamins from any fresh toppings you might use.
Health benefits include the enjoyment of a sweet treat with moderation, aiding in satiety and pleasure during dessert time.
Dietary considerations should take into account those wanting lower sugar or light variants, which are easily adjustable in this recipe.
Portion analysis may help with weight management; keeping servings small can satisfy cravings while controlling intake.
Dietary Adaptations
For gluten-free options, simply substitute regular cookies with gluten-free varieties in the crust.
To create a dairy-free version, consider using tofu or a nut-based cream cheese that approaches the same texture and flavor.
Vegan adaptations can be made using plant-based whipped cream and non-dairy chocolate to maintain the essence of the dessert.
If low-carb or keto is your preference, opt for almond flour for the crust and sugar substitutes for the filling.
The paleo diet can be accommodated by using natural sweeteners and raw nuts for the crust.
Low-FODMAP adjustments can manage lactose levels with suitable dairy alternatives and measured sugar allowances.
Troubleshooting Guide
Texture issues often arise from improperly blended ingredients. Ensure the mixture is smooth before filling the cups.
Flavor balance can be off if sugar content is not measured accurately. Adjust as necessary, adding flavors carefully.
Temperature problems can result in a soft filling when not chilled enough. Ensure refrigeration is sufficient before serving.
Equipment challenges might occur if you don’t have the right tools. Invest in quality mixing bowls and utensils for better results.
Ingredient substitutions may not always yield the same results. Look for tested substitutions to maintain flavor integrity.
Timing concerns when chilling can affect the structure. Always allow enough chill time regardless of batch size.
Recipe Success Stories
Community feedback has been overwhelmingly positive, with many sharing their adaptations and creative twists on the original recipe.
Variation successes often highlight the use of different chocolates and flavored crusts, enhancing the fundamental delight of these cheesecakes.
Readers have shared suggestions for enhancing the presentation, proving the visual appeal of these treats aligns perfectly with their taste.
Photography tips from the community emphasize the importance of lighting; shooting these cheesecakes in natural light can really enhance their beauty.
Frequently Asked Questions
Can I use different candies instead of Kit Kat?
Absolutely! Feel free to experiment with other chocolate bars or candies that appeal to you for a personal twist on the recipe.
How long can I store these cheesecakes?
These cheesecakes can be stored in the refrigerator for up to 5 days, or they can be frozen for longer storage.
Can I make these gluten-free?
Yes! Simply substitute the crust with gluten-free cookies, and ensure all other ingredients align with gluten-free standards.
Is this dessert suitable for vegan diets?
Yes, by using plant-based cream cheese and whipped cream, you can create a delicious vegan version of these cheesecakes.
What can I substitute for cream cheese?
Mascarpone, Greek yogurt, or non-dairy cream cheese can all work as great substitutes depending on the flavor profile you desire.
Can I prepare this dessert a day in advance?
Absolutely! In fact, making it the day before allows the flavors to meld together for a more delicious experience.
How do I remove the cheesecakes from the molds?
Using cupcake liners or greasing the molds can help with easy removal. Gently pull the sides to release them before lifting out.
Can I add fruit toppings?
Of course! Fresh fruit can add a burst of flavor and color to your cheesecakes, enhancing both taste and presentation.
How do I prevent my crust from being too dry?
Make sure your butter is melted and thoroughly mixed into the crumb mixture, ensuring it binds well without being overly dry.
What is the best way to serve them?
Serve chilled, and consider adding a dollop of whipped cream or a scoop of ice cream on the side for an extra treat.
Additional Resources
If you’re interested in more delightful treats, check out our recipes for chocolate mousse or mini fruit tarts that share a similar appeal.
Technique guides on how to properly mix and chill desserts can help ensure you achieve the perfect texture and flavor every time.
Learn more about ingredient options and where to find the best-quality chocolate and cream cheese for your dessert needs.
Equipment recommendations may also enhance your baking experience, including quality mixing bowls, spatulas, and cupcake tins.
For seasonal variations, consider summery fruit desserts or warm spiced options during the winter holidays that highlight festive flavors.
Join the Conversation
We love seeing your creations, so share your photos on social media with our hashtag and join the community in celebrating delicious desserts!
Photography tips can help you capture your desserts beautifully. Natural light and simple backgrounds often yield the best results.
Recipe reviews are always welcome, letting us know what worked for you or what variations you’ve tried enhances our culinary community.
Engaging with our community allows for sharing suggestions and encouraging one another in trying new creations!
Consider sharing your personal variations, as we embrace creativity and enjoy seeing how each recipe can be adapted!
The Recipe
Mini No-Bake Kit Kat Cheesecakes
Serves: 12
Prep Time: 20 mins
Cook Time: 0 mins
Total Time: 20 mins
Kitchen Equipment Needed
- Mixing bowl
- Cupcake tins or jars
- Electric mixer
- Spatula
Ingredients
- 1 package cream cheese (8 oz), softened
- 1/2 cup sugar
- 1/4 cup heavy cream
- 1 teaspoon vanilla extract
- 10 Kit Kat bars, crushed
- 1 cup crushed cookies for the crust
- 1/4 cup butter, melted
Directions
- In a mixing bowl, combine crushed cookies and melted butter. Press the mixture into the bottom of cupcake tins.
- In another bowl, beat the softened cream cheese and sugar until smooth.
- Add heavy cream and vanilla extract to the cream cheese mixture, and mix until fully combined.
- Carefully fold in the crushed Kit Kat pieces.
- Pour the cheesecake mixture over the cookie crust, filling each cup.
- Refrigerate for at least 4 hours or until set.
- Serve chilled, garnished with additional Kit Kat pieces or chocolate drizzle if desired.
Recipe Notes
- Feel free to use gluten-free cookies for a gluten-free option.
- Store leftovers in an airtight container in the fridge for up to 5 days.