Ice Cream Sandwiches Recipe
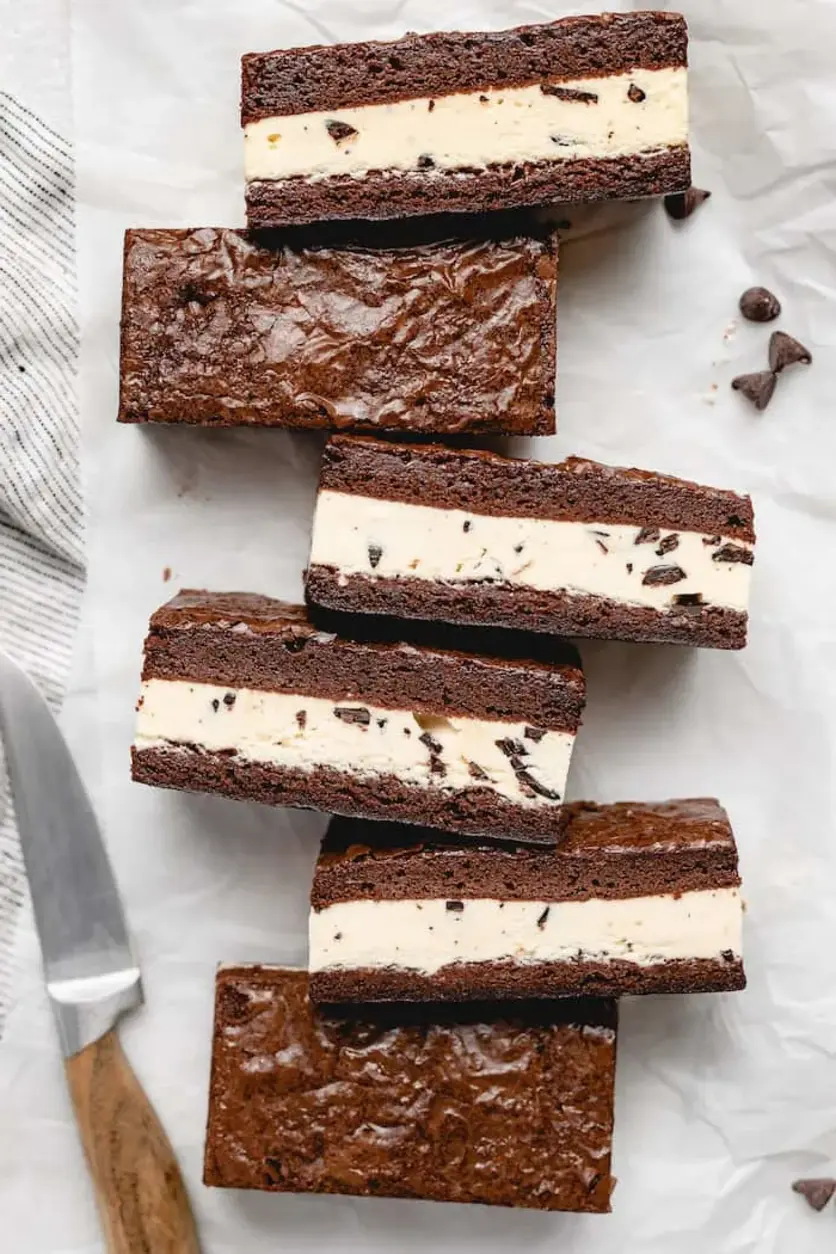
Table of Contents
Ice Cream Sandwiches Recipe – The Ultimate Summer Treat with Rich Fudge Brownies
I still remember the first time I made these ice cream sandwiches—it was a sweltering July afternoon in my tiny NYC apartment, and I had just come back from the Union Square Greenmarket with a pint of local strawberry ice cream. Growing up in Morocco, my mother would make a version of frozen treats using rich almond milk and honey, but it wasn’t until my time at Le Cordon Bleu in Paris that I learned how to truly master the art of the perfect brownie—fudgy, crackly on top, and deeply chocolatey. These ice cream sandwiches are the best of both worlds: the rich, fudge brownies my French pastry chef taught me to make, layered with your favorite ice cream. They’re indulgent, nostalgic, and the perfect summer treat that will impress everyone at your next barbecue.
The magic of these ice cream sandwiches lies in the contrast between the dense, almost truffle-like brownie and the cold, creamy ice cream. When you take your first bite, the brownie gives way with a slight crackle, revealing a soft, moist interior that melts into the ice cream. The cocoa powder I use (always Valrhona, a lesson from Paris) gives a deep, complex chocolate flavor that’s not too sweet, balanced by the vanilla and brown sugar. As a kid in Morocco, we’d sprinkle a pinch of sea salt on everything—even dessert—and I carry that habit here: a tiny fleck of flaky salt on top of the brownie before baking elevates the whole thing. You’ll smell the butter and vanilla as it bakes, and when you pull those pans out, the kitchen will smell like a bakery in Marrakech crossed with a patisserie in the 6th arrondissement.
As a professional cook who now lives in New York, I’ve tested this recipe more times than I can count—for my kids’ birthday parties, for late-night Netflix binges, and even for a friend’s rooftop wedding. I’ve perfected the technique so you get the perfect brownie texture every time (no dry edges, no gooey center that won’t slice cleanly). My secret? Using melted butter and both granulated and brown sugar, plus beating the eggs well to create that signature crackly top. One common mistake is overbaking—your toothpick should come out with just a few moist crumbs, not completely clean. A trick I swear by: line your pans with parchment paper overhang so you can lift the entire block out like a pro. Trust me—once you make these, you’ll never buy store-bought ice cream sandwiches again.
Why This Ice Cream Sandwiches Recipe Is the Best
The Flavor Secret: The brownie base is the real star here. I use a high ratio of butter to flour, plus both cocoa powder and melted chocolate (well, cocoa here, but the technique is the same). The brown sugar adds a subtle molasses note that pairs beautifully with any ice cream flavor—vanilla, chocolate, strawberry, or even pistachio. My Moroccan roots taught me to balance sweetness with a pinch of salt, so I always add a generous 1 1/2 teaspoons of salt to the batter. It sounds like a lot, but it’s what makes the chocolate sing. Plus, I use pure vanilla extract (never imitation) for that authentic, warm flavor.
Perfected Texture: After years of experimenting, I found that baking the brownies in two separate 8×8 pans (instead of one large pan) gives you the perfect thickness for sandwiching. The edges get that slight chew, while the center stays fudgy. The key step is beating the eggs and sugar until thick and pale—this aerates the batter and creates the crackly top we all love. I also let the brownies cool completely before assembly; warm brownies will melt the ice cream into a puddle. And here’s a chef trick: freeze the assembled sandwich for at least 6 hours (overnight is even better) so you can slice clean squares without any sliding.
Foolproof & Fast for Beginners: This recipe is incredibly forgiving. If you’ve never made brownies from scratch, don’t worry—the method is straightforward. You don’t need a stand mixer; a hand mixer works perfectly. The hardest part is waiting for the freezing, but that’s all hands-off time. I’ve had friends who claim they can’t bake make these for their kids’ school bake sales and come back raving. Just follow the step-by-step instructions, and use a sharp knife to cut (dip it in hot water and wipe dry between slices for the cleanest cuts). You’ll feel like a professional pastry chef when you lift that parchment paper and reveal perfect rows of ice cream sandwiches.
Ice Cream Sandwiches Ingredients
I always stock my pantry with these staples. For the butter, I grab Kerrygold from the Irish section at Whole Foods—it has a higher butterfat content that makes the brownies extra tender. The cocoa powder is my non-negotiable: I use Valrhona or Guittard, which you can find at specialty stores or online. And for the ice cream, I love using a good-quality vanilla bean ice cream from Van Leeuwen (a local NYC brand), but any favorite flavor works—chocolate, coffee, or even a fruity sorbet for a lighter version. My mother would always make a version with a touch of orange blossom water in the batter—I’ll share that variation later!
Ingredients List
- 1 1/2 cups unsalted butter (melted)
- 2 1/4 cups granulated sugar
- 1 1/2 cups light brown sugar (packed)
- 6 large eggs (room temperature)
- 3 tbsp vegetable oil
- 2 tbsp pure vanilla extract
- 2 1/4 cups all purpose flour
- 1 1/2 cups cocoa powder
- 1 1/2 tsps salt
- 1.5 qts favorite ice cream flavor (you can use less if you want)
Ingredient Spotlight
Unsalted Butter: This is the foundation of a great brownie—it adds richness and moisture. I always use unsalted so I can control the salt level. For a dairy-free version, you can use a high-quality vegan butter stick (like Miyoko’s), but note that the texture will be slightly less tender.
Cocoa Powder: I recommend Dutch-process cocoa for a smoother, less acidic chocolate flavor. If you only have natural cocoa, it will still work—the brownies will be slightly more bitter and the color lighter. My favorite brand is Valrhona; it’s worth the splurge.
Eggs: Room-temperature eggs incorporate more easily into the batter, creating a better emulsion. If you forget to take them out ahead, place them in a bowl of warm water for 5 minutes. This step matters—cold eggs can seize the butter mixture.
Ice Cream: Use a good-quality brand with a high fat content (at least 14% butterfat) for better scooping and less iciness. Classic vanilla is always reliable, but I love using a coffee or mint chip flavor for a grown-up twist. Let it soften for 5-10 minutes for easy spreading.
| Original Ingredient | Best Substitution | Flavor / Texture Impact |
|---|---|---|
| Unsalted Butter | Vegan butter (Miyoko’s) | Slightly less tender, dairy-free |
| All-Purpose Flour | Gluten-free 1:1 blend (with xanthan gum) | Denser texture, slightly crumblier |
| Granulated Sugar | Coconut sugar (use same amount) | Darker color, slight caramel note |
| Cocoa Powder | Cacao powder (raw) | More bitter, less rich flavor |
How to Make Ice Cream Sandwiches — Step-by-Step
Follow these simple steps, and you’ll have perfect ice cream sandwiches every time. I’ll walk you through each stage with my pro tips so you avoid the typical pitfalls.
Step 1: Prepare the Pans
Preheat the oven to 350 degrees. Grease two 8×8 pans with butter or baking spray, then line the bottom with parchment paper, leaving about 4-6 inches of paper hanging over the sides. This overhang is your lift—don’t skip it! Use a little extra butter under the parchment to keep it from sliding.
💡 Stella’s Pro Tip: Fold the parchment in half first, then crease the corners so it fits snugly into the pan. This prevents batter from seeping underneath.
Step 2: Mix Wet Ingredients
In a medium-sized bowl, add melted butter, granulated sugar and brown sugar and mix with your hand mixer on medium speed until well combined—about 2 minutes. The mixture should look glossy. Add eggs one at a time, mixing after each addition to incorporate. Mix well! This will create the crackled top we all love in brownies. Scrape the bowl between additions.
⚠️ Common Mistake to Avoid: Don’t overmix once you add the flour later—that develops gluten and makes tough brownies. Stop as soon as you don’t see white streaks.
Step 3: Add Remaining Wet Ingredients
Mix in oil and vanilla extract. The oil adds extra moisture, keeping the brownies fudgy even after freezing. Give it a good 30-second mix to incorporate completely.
Step 4: Combine Dry Ingredients
Combine flour, cocoa powder, and salt in a bowl. Whisk them together to break up any lumps—cocoa powder is notorious for clumping. Reduce speed of mixer to low, then add the flour mixture in thirds, mixing just until combined. Scrape the bottom of the bowl to catch any hidden flour pockets.
💡 Stella’s Pro Tip: Sift the cocoa powder if you have a sifter—it guarantees a smooth, lump-free batter.
Step 5: Fill and Bake Pans
Add half the brownie batter to each pan and use a rubber spatula to gently spread it into an even layer. Bake for 30-40 minutes or until a toothpick inserted into the center comes out just barely clean—a few moist crumbs are fine. Don’t overbake. Rotate the pans halfway through for even baking.
⚠️ Common Mistake to Avoid: If you see the edges pulling away from the pan, you’ve overbaked. Check at 30 minutes—every oven is different.
Step 6: Cool the Brownies
Remove from the oven. Allow brownies to cool for 10 minutes in the pans. Use parchment paper to carefully lift the brownies out onto a cooling rack. Only peel the parchment off one of the halves. Cool until they reach room temperature—about 1 hour. The half with parchment stays attached for the bottom layer.
Step 7: Soften the Ice Cream
Thaw the ice cream for 5-10 minutes at room temperature. You want it spreadable but not melted. For harder ice creams (like premium brands), give it 10 minutes.
Step 8: Assemble the Sandwich
Return the first half of the brownie to the pan (the one with the parchment paper on it). Use a large spoon or rubber spatula to spread the ice cream over the top. Use as much or as little ice cream as you would like. I usually add about 3/4s and see if that’s enough then add the rest if I want to really indulge. Spread evenly to the edges.
💡 Stella’s Pro Tip: If the ice cream gets too soft, pop it back in the freezer for 10 minutes. You want a thick, even layer—not melted puddles.
Step 9: Top and Freeze
Invert the second half of the brownie and place it over the top. Cover with aluminum foil or plastic wrap and freeze for at least 6 hours. Overnight is best. This ensures the layers fuse into one solid block.
Step 10: Slice and Serve
When ready to cut, remove from the freezer and thaw for 5-10 minutes. Use the parchment paper to lift the entire block out, then use a sharp knife to cut into 8 even squares. For clean cuts, dip the knife in hot water, wipe dry, and slice. Serve immediately.
| Step | Action | Duration | Key Visual Cue |
|---|---|---|---|
| 1 | Prep pans | 5 min | Parchment overhang 4-6 inches |
| 2-4 | Mix batter | 10 min | Glossy, thick batter |
| 5 | Bake | 30-40 min | Toothpick with moist crumbs |
| 6 | Cool | 1 hour | Room temperature |
| 7-8 | Assemble | 10 min | Even ice cream layer |
| 9 | Freeze | 6+ hours | Firm, solid block |
| 10 | Slice | 5 min | Clean, even squares |
Serving & Presentation
These ice cream sandwiches are a showstopper on any summer table. I like to serve them on a wooden board or a chilled slate platter—the contrast of the dark brownie against the cold surface looks gorgeous. For an extra touch, I drizzle a little warm fudge sauce or caramel over the top and sprinkle with flaky sea salt (a nod to my Moroccan spice habit). You can also roll the edges in mini chocolate chips, crushed cookies, or even toasted nuts for a crunchy finish.
In my NYC apartment, I often serve these with a side of fresh berries—strawberries and raspberries cut through the richness perfectly. If you’re feeling indulgent, add a dollop of whipped cream or a scoop of extra ice cream on the side. For a grown-up version, I sometimes add a splash of bourbon or espresso to the brownie batter (just 2 tablespoons, reduce the vanilla slightly). My kids love them straight from the freezer on a hot summer afternoon—no plating needed
Print
Ice Cream Sandwiches Recipe
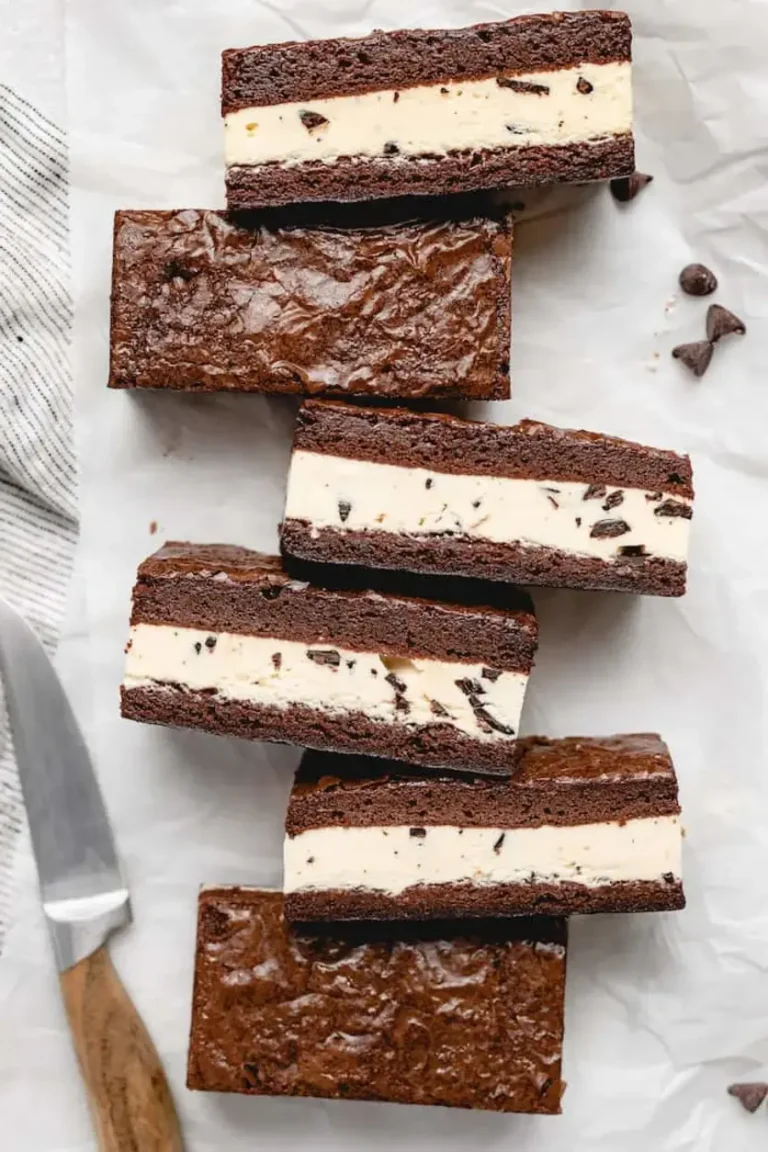
In these indulgent Ice Cream Sandwiches, rich fudge brownies and your fave ice cream get sandwiched together to create the perfect Summer treat!
Ingredients
- 1 1/2 cups unsalted butter (melted)
- 2 1/4 cups granulated sugar
- 1 1/2 cups light brown sugar (packed)
- 6 large eggs (room temperature)
- 3 tbsp vegetable oil
- 2 tbsp pure vanilla extract
- 2 1/4 cups all purpose flour
- 1 1/2 cups cocoa powder
- 1 1/2 tsps salt
- 1.5 qts fave ice cream flavor (can you use less if you want)
Instructions
- Preheat the oven to 350 degrees. Grease two 8×8 pans with butter or baking spray, then line the bottom with parchment paper, leaving about 4-6 of paper hanging over the sides.
- In a medium sized bowl, add melted butter, granulated sugar and brown sugar and mix with your hand mixer on medium speed.
- Add eggs one at a time, mixing after each addition to incorporate. Mix well! This will create the crackled top we all love in brownies.
- Mix in oil and vanilla extract.
- Combine flour, cocoa powder, and salt in a bowl. Reduce speed of mixer.
- In intervals, add flour mixture to wet mixture until all ingredients are incorporated.
- Add half the brownie batter to each pan and use a rubber spatula to gently spread it.
- Bake for 30-40 minutes or until a toothpick inserted into the center comes out just barely clean. Dont overbake.
- Remove from the oven. Allow brownies to cool for 10 minutes.
- Use parchment paper to carefully lift the brownies out onto a cooling rack. Only peel the parchment off one of the halves. Cool until they reach room temperature.
- Thaw the ice cream for 5-10 minutes.
- Return the first half of the brownie to the pan (the one with the parchment paper on it). Use a large spoon or rubber spatula to spread the ice cream over the top. Use as much or as little ice cream as you would like. I usually add about 3/4s and see if that's enough then add the rest if I want to really indulge.
- Invert the second half of the brownie and place it over the top. Cover with aluminum foil or plastic wrap and freeze for at least 6 hours. Overnight is best.
- When ready to cut, remove from the freezer and thaw for 5-10 minutes. Use the parchment paper to lift the entire block out, then use a sharp knife to cut into 8 even squares. Serve and enjoy!