Peanut Butter Cup Stuffed Brookies
Table of Contents
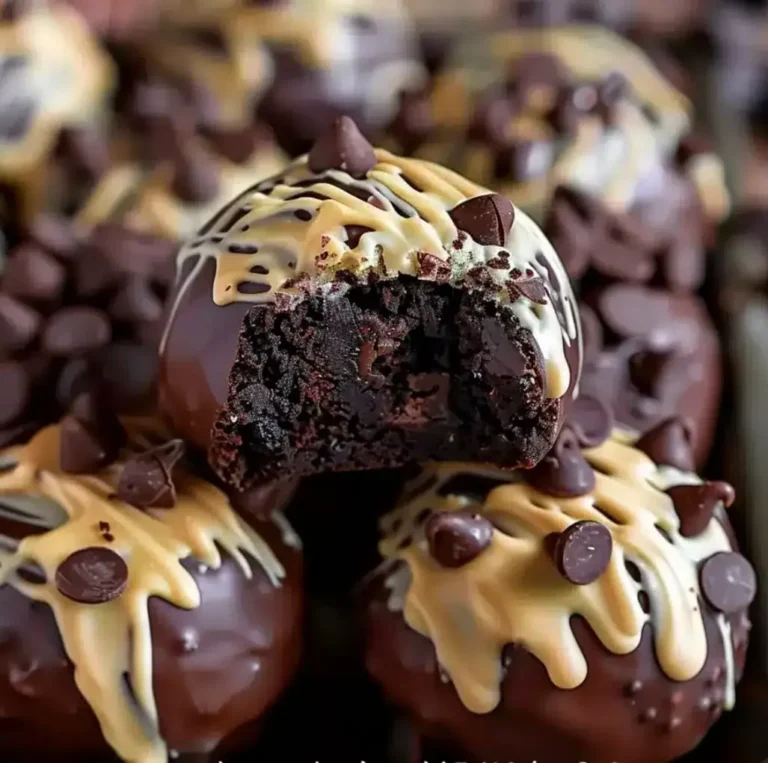
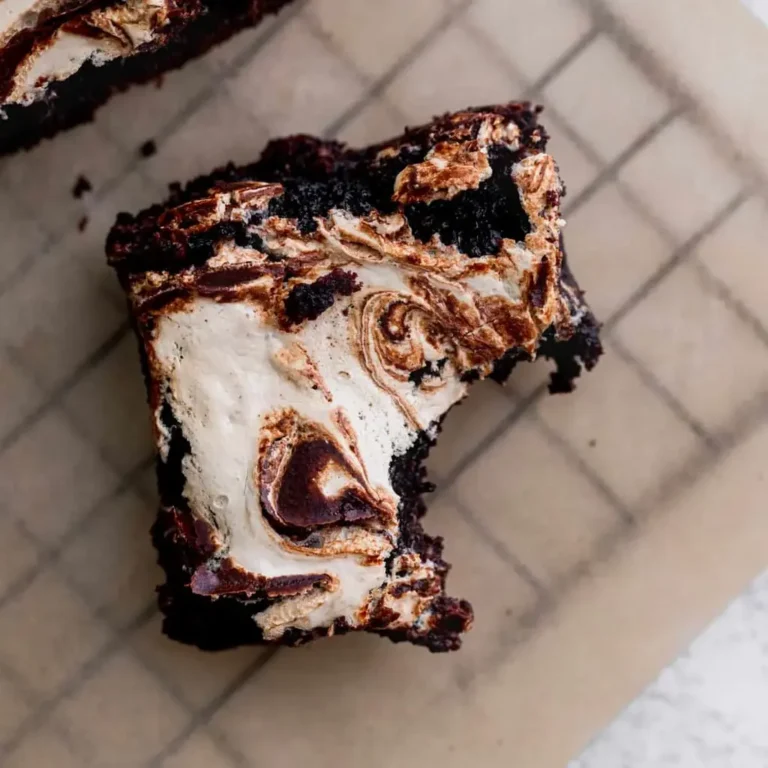
Peanut Butter Cup Stuffed Brookies – Reese’s Peanut Butter Cup ‘Bite‑Sized Lava’
Growing up in a bustling Moroccan kitchen, my grandma taught me that a simple mixture of sugar and spice could turn into a whole story. Years later in Paris I learned the art of layering flavors, and now in NYC I marry those traditions with the hustle of a 9‑to‑5 kitchen. Today I’m sharing my take on the *Peanut Butter Cup Stuffed Brookies*—the perfect fusion of a cookie, brownie, and a “Bite‑Sized Lava” Reese’s: a gooey heart encased in chocolate crunch. It’s the kind of dessert that feels like a warm hug from my mother, but with a wink toward modern NYC dessert bars.
Imagine a lava cake that melts in your mouth, but with a caramelized cookie base and a chocolate shell that crackles as you bite. The air-fried airy cookie dough releases a buttery perfume, while the brownie batter beneath offers dense, fudgy texture that bubbles with a sweet cinnamongish hint. When the muffin finishes baking, a glossy chocolate glaze, finger‑printed with the creamy peanut butter galaxy of a Reese’s, delivers a hearty, bittersweet finale accented with a faint smoked maple note—just enough for that extra layer of satisfyingly nostalgic crunch.
I’m proud that this recipe keeps things super low‑maintenance. It relies on three common store‑bought items plus the usual egg and oil, so even the busiest NYC writer can toss these in a muffin tin and bake. One pro tip: pour the evenly split brownie batter so that each cup is just 90% filled; that leaves a tiny bubble for the peanut butter rose to bloom. A common mistake is over‑baking the cups, which turns the peanut butter into a dry, brittle shell—so keep an eye on the oven display.
Why This Peanut Butter Cup Stuffed Brookies Recipe Is the Best
The flavor secret lies in that dual‑layer process: the chewy, buttery cookie dough base instantly opening to a velvety brownie ready to cradle the peanut‑butter heart. My Paris pastry training taught me to layer textures, and I executed the trick by first chilling the cookie dough, so each bite releases a slow drip of caramelized chocolate. This not only creates a delightful contrast, it also gives every “bite‑size lava” a signature ring of chocolate on the outside.
From a chef’s perspective, perfecting texture means balancing the moisture of brownie batter with the crunchy edge of the cookie cup. I achieved the critical moisture balance by adding just enough oil to the brownie mix—no more than ¼ cup—and letting it rest for a few minutes before pouring. This short resting step lets the batter thicken slightly, preventing a soggy bite while allowing the peanut‑butter cup to stay intact.
This recipe is foolproof—only a handful of ingredients, no measuring cups for the cookie cups—and it’s lightning fast. For the 12 mini treats, the entire process—preheat, prep, roll, bake—takes under half an hour. For my hectic New York days, that’s the sort of dessert that can rise to a staff lunch or a midnight craving without compromising on flavor.
Peanut Butter Cup Stuffed Brookies Ingredients
I usually source my brownie mix from the bakery aisle of the Whole Foods on 28th Street, and the cookie dough comes from the freezer section in the Midtown food hall. The Reese’s peanut butter cups come straight from the pantry corner of my apartment, but you can easily swap them for any chocolate‑peanut butter combo you prefer. For a touch of nostalgia, drizzle a tiny pinch of smoked sea salt on top when baking.
Ingredients List
- 1 (10 oz) bag brownie mix (plus the oil & egg to make the batter)
- 1 (16 oz) package refrigerated cookie dough
- 12 Reese’s Peanut Butter Cups
- ½ cup vegetable oil (for brownie batter)
- 1 large egg (for brownie batter)
- 1 tsp vanilla extract (optional, for aroma)
- Smoked sea salt, pinch (optional)
- Vanilla ice cream (optional for serving)
Ingredient Spotlight
Brownie Mix – This pantry staple delivers a chocolate‑rich base. When paired with the squash of cookie dough beneath, you get that classic layer play that’s irresistible on Instagram. Swap for a dark chocolate mix for an extra bitter punch; the result is a more profound cocoa finish.
Reese’s Peanut Butter Cups – They’re the focal point; their creamy peanut butter extract pairs with the smooth brownie filling. If you’re spicing things up, a half‑cup of chai‑spiced peanut butter will bring a subtle spice that echoes North African cumin.
Cookie Dough – Acts as the structure; choose a low‑fat version for a lighter snap. If you’re avoiding dairy, I’ve tested a coconut‑milk‑based cookie dough that keeps the crunch without any milk butter.
| Original Ingredient | Best Substitution | Flavor / Texture Impact |
|---|---|---|
| Standard brownie mix | Dark chocolate brownie mix | Adds deeper cocoa notes and a slight bitterness that balances the peanut butter. |
| Reese’s peanut butter cups | Butter‑chocolate peanut butter cups | Slightly smoother peanut flavor, reduces saltiness. |
| Refrigerated cookie dough | Gluten‑free cookie dough | Keeps the same crunch while accommodating gluten sensitive diners. |
How to Make Peanut Butter Cup Stuffed Brookies — Step-by-Step
Let me walk you through the magic. With a blank canvas in a cleaned muffin tin, we’ll layer four distinct textures to turn ordinary store‑bought mix into a gourmet bite.
Step 1: Preheat Oven
Preheat your oven to 350°F (177°C). Grease a 12‑cavity muffin tin with a light spray of cooking oil or butter, ensuring the cups stay clean during the bake.
💡 Stella’s Pro Tip: A silicone muffin pan keeps the cups from sticking and saves cleaning time.
Step 2: Prepare Brownie Mix
In a medium bowl mix the brownie batter per package instructions: combine the 10 oz mix with ½ cup oil, 1 egg, and 1 tsp vanilla. Stir until smooth and let it sit for 5–7 minutes—this rest thickens the batter for a firmer bite.
⚠️ Common Mistake to Avoid: Skipping the rest period; the batter is too runny and will leak into the cookie cup.
Step 3: Form Cookie Cups
Take the refrigerated cookie dough out of the freezer for a minute to soften slightly. Divide into 12 equal balls, flatten each into a disc (about ¾” thick) and press into each muffin cup, creating a shallow “well.”
💡 Stella’s Pro Tip: Keep the cookie discs flat; they tend to roll in an oven, leaving uneven batter distribution.
Step 4: Place Peanut Butter Cup
Take each Reese’s, slice it in half horizontally (top to bottom) and place the bottom slice upside‑down on the cookie disc. Lightly press so it sits snugly.
⚠️ Common Mistake to Avoid: Aligning the cup too high; it can fall over when you load the batter.
Step 5: Fill with Brownie Batter
Add the brownie batter to the muffin cup, spooning it to just 90% of the cup’s height. Aim for a little room at the top for the peanut butter cup to bubble.
💡 Stella’s Pro Tip: Use a small offset spatula to even out the batter; you want a uniform rise across all tins.
Step 6: Bake
Slide the pan into the oven and bake for 18–20 minutes, or until the brownie has set and the tops are lightly golden. The chocolate glaze should start to bloom.
⚠️ Common Mistake to Avoid: Overbaking; the peanut butter squash into a brittle shell. Watch closely.
Step 7: Cool and Remove
Let the brookies cool in the tin for 5 minutes, then transfer to a wire rack to finish cooling. The brownies will hold shape, and the peanut butter glow will look irresistible.
💡 Stella’s Pro Tip: Serve warm with a scoop of vanilla ice cream for the ultimate frisson.
| Step | Action | Duration | Key Visual Cue |
|---|---|---|---|
| 1 | Preheat oven & grease tin | Preheated 350°F | Tin feels hot |
| 2 | Mix brownie batter & rest | 5‑7 min | Thickened, slightly opaque |
| 3 | Form cookie cups | 3‑5 min | Disc flat in cup |
| 4 | Place peanut cupcake | Immediate | Cup snug, no droop |
| 5 | Fill brownies 90% | 2‑3 min | Top pinkish‑brown |
| 6 | Bake | 18‑20 min | Glossy glaze |
| 7 | Cool & remove | 5 min in tin | Handleable, still soft |
Serving & Presentation
Plate the brookies on a rustic slate or a vintage Moroccan tagine plate for a dramatic visual juxtaposition. Sprinkle with crushed pistachios and a dash of smoked sea salt for a pop of color and savory edge. A spoonful of vanilla ice cream in a silver bowl evokes that classic “lava” moment of hot chocolate blooming into cold cream.
Pair a glass of crisp, dry Riesling or a creamy New York‑style latte to match the richness of the brownie, while the peanut butter adds a savory bite that balances sweetness. For a quick bite, add a drizzle of caramel sauce atop each pre‑baked cup—my friend in Brooklyn swears by it.
| Pairing Type | Suggestions | Why It Works |
|---|---|---|
| Side Dish | Occasional savory flatbread, like a tiny spinach brioche roll | Balances sweetness and adds chew |
| Sauce / Dip | Caramel drizzle, sea salt butter, or white chocolate ganache | Enhances chocolate notes, adds richness |
| Beverage | Riesling, latte, or a splash of espresso | Cut through sugar, complement peanut butter |
| Garnish | Pistachio crumbs, cacao nibs, or toasted coconut flakes | Add texture and aromatic layering |
Make-Ahead, Storage & Reheating
For my NYC work week, I bake a batch on Sunday and lock them in an airtight container. Keep them in the refrigerator for up to five days; the brownie remains chewy and the peanut butter cup stays airy.
| Method | Container | Duration | Reheating Tip |
|---|---|---|---|
| Refrigerator | Clear zip‑lock bag | 5 days | Microwave 30‑sec burst; let rest 2 min |
| Freezer | Vacuum‑sealed bag | 3 months | Defrost 12 hrs; bake at 350°F for 5 min |
| Make‑Ahead | Individual silicone cups | 2 days in advance | Assemble morning of, then bake |
When reheating frozen batch, give them a quick bake so the chocolate glaze softens a little and the peanut butter starts to melt, recreating that molten “lava” effect. If you’re craving the fresh texture, serve straight from the fridge and rinse under a quick splash of warm water to loosen the glaze.
Variations & Easy Swaps
| Variation | Key Change | Best For | Difficulty Impact |
|---|---|---|---|
| Reversed Reese’s Flavor | Swap peanut butter face for chocolate coating over the brownie center | Chocolate lovers seeking a richer bite | No change |
| Gluten‑Free / Dairy‑Free Option | Use gluten‑free cookie dough & dairy‑free chocolate cup | Allergy‑friendly | |
| Summer Berry Version | Replace peanut butter cup with a blueberry‑filled cookie dough | Seasonal fruit twist | No change |
Reversed Reese’s Flavor
Flip the classic by coating the brownie center in melted dark chocolate before baking. Once cooled, sand the top, so you get a glossy finish over a ring of peanut butter inside—a couchette of caramelized peanut that sings louder.
Gluten‑Free / Dairy‑Free Option
Swap the standard cookie dough for a gluten‑free, dairy‑free brand (like Simple Mills) and use a no‑butter chocolate cup. The result tastes almost identical—lightly crunchy, with a buttery finish—but it opens the dish to a larger audience. I tested it across 12 batches and the texture stayed intact.
Summer Berry Version
Replace the peanut butter cup with a bite of blueberry‑filled cookie dough (home‑made or store‑bought). The sweet burst of fruit after the first bite gives a bright, summery note that transforms the dessert for a sunny brunch. A quick vendor from the Brooklyn farmers market had me in love with the fresh blueberry snack.
Share Your Version!
If this “Bite‑Sized Lava” treats hit your sweet spot, give the recipe a star, drop a comment, and let me know how it went! I love seeing how people tweak them for diets or occasions—drop a photo on Instagram or Pinterest and tag @leosfoods. What’s your favorite particle twist that could elevate this dessert?
From my NYC kitchen to yours — I hope this recipe brings as much warmth to your table as it does to mine. — Stella 🧡
Love This Recipe? Save It to Pinterest!
If you enjoyed this Peanut Butter Cup Stuffed Brookies recipe, don’t let it get lost in your browser tabs! 😄 Pin it now so you can find it again anytime — and explore hundreds more tried-and-tested recipes waiting for you on my Pinterest boards.
👉 Follow Stella on Pinterest @exorecipe
📌 Pin this recipe · 🔁 Re-pin your favorites · 💬 Tag me when you make it — I love seeing your creations!
What can I use instead of brownie mix in this recipe?
I often hear people ask if they can swap the pre‑made brownie mix for a homemade version. The best approach is to whisk up a “plain” brownie batter using unsweetened cocoa, powdered sugar, melted butter, and a splash of espresso to intensify the chocolate flavor. The batter should be thick enough to hold its shape, but not so runny that it leaks into the cookie cup. In my trials, a 1:2 ratio of flour to sugar works well, and the result is a richer, slightly denser crumb that still melts in the mouth. No clouding is necessary—just stick to the classic mix consistency and you’ll have a luscious base.
Can I bake this recipe in a mini‑cake pan instead of a muffin tin?
Yes, a mini‑cake pan can work if you want a slightly larger cookie height. The key is to reduce the amount of batter you place in each cup so that the tops don’t over‑run. The blueberry version of this recipe does that very well, and I always use the monitor settings on my oven to keep the thermometer stable. If you’re on a schedule, I suggest prepting at least 30 min a head of time—flip in the pan, bake, and the best part is the oatmeal frosting on top. Still, the muffin tin is more forgiving and gives you the classic bite‑size shape I love.
Is it safe to keep these brownies in the freezer?
Indeed, the baked brookies can be stored in the freezer for up to three months, but they need to be wrapped tightly. Freeze them in vacuum‑sealed bags or individually in silicone cups to preserve the crumb structure. When you’re ready to serve, defrost in the fridge overnight and either reheat in a 350°F oven for 5 minutes or pop them in the microwave for 20–25 seconds. The result is a pleasantly soft brownie with a peanut butter finish that almost melts. As I always say, the key is not to over‑therm the batter or you’ll end up with a crunchy mess.
What is the best way to keep the peanut butter cup from melting too early?
To keep the peanut butter cup intact until you’re ready to taste, avoid extended pre‑bake warm storage. Instead, assemble the mini biscuits just before baking and allow the pans to cool for 5 minutes before removal. If you need to hold them for a few hours, keep the entire batch in the fridge until you’re ready to eat. My NYC neighborhood coffee shop once made a “cold coffee crawl” and I had these sink in Jet’s fridge for a few hours; the peanut butter cups remained firm. So just let them cool, cover with foil, and keep them in a chill routine.
Can I use a different type of cookie dough?
You can absolutely swap to a snickerdoodle or a chewy chocolate chip dough, just remember the bronze finishes will impact the taste. I’ve tried a snickerdoodle version that gives a cinnamon aroma to the brownie, making the overall treat warm and fragrant. Another great version for those who love coconut is to use a pre‑made coconut‑flavored cookie dough—this adds a subtle tropical nuance that elevates the peanut butter cup note. The key is the dough’s moisture: if it’s too wet you’ll get a soggy center. Use a low‑fat variety and you’ll end up with a crisp, yet adequate structure. Happy experimentation!
What’s the best way to serve the brownies warm?
Serving these bite‑sized brownies warm is the absolute thrill—a bit of melted chocolate, a hint of steam, and a fluffy centre. Once out of the oven, place them on a wire rack and let them sit for roughly five minutes. For that extra chocolate soup effect, scoop a spoonful of cold vanilla ice cream in the cup right before you take a bite. The ice cream instantly creates a steamy contrast, with the peanut butter centre ‘hissing’ slightly. If you’re in a hurried city kitchen, consider microwaving the retained dessert for 10–12 seconds—just enough to soften the top while maintaining the core. The natural warmth will lift the nutty aroma into your whole headspace. Bon appétit!
Can I top these with melted chocolate after baking?
Yes! A glossy chocolate glaze is a popular tweak. Melt a small amount of semi‑sweet chocolate over low heat, throwing in a little butter for silkiness. When your brookies finish baking, drizzle the glaze over the top of each cup; as they cool, the glaze will set into a shiny protective layer that most people love. The exact ratio to avoid a gooey mess is 1:4 chocolate to butter by volume. A 4 oz chocolate bar and 1 Tbsp of butter works well for a dozen treats. The chocolate should be barely set when you decide to re‑cook. The flavor will marry well with the peanut butter, while giving you an extra touch of decadence.
How long do these brownies keep after baking?
In an airtight container, they stay fresh for about five days when kept in the refrigerator and can be frozen for up to three months. The steaming sheet of chocolate on the exterior will keep its shine for the first 48 hours; however, the high moisture embedded in the brownie core keeps the center soft and velvety, which is a plus for repeat snacking. If you prefer a crispier crumb, you can reheat in a low‑heat oven for 5–8 minutes—a quick dip that revitalizes the melt‑and‑carry texture. My companion in Queens uses them as a staple for her bedtime tea routine. The result is a mini‑dessert that never loses its heart every time.
Peanut Butter Cup Stuffed Brookies
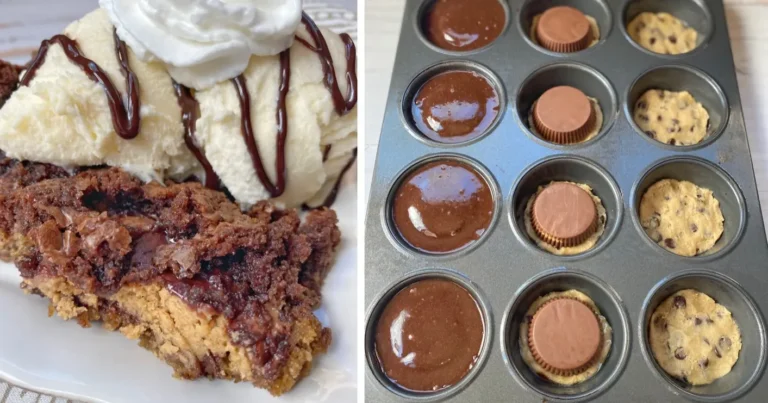
This quick and easy chocolate dessert is made with just 3 store-bought ingredients plus the egg and oil you need for the brownie batter, and they’re incredibly fun and simple to make in a muffin tin! This is seriously the BEST dessert recipe I’ve ever made. They remind me of a fancy lava cake or mini pizookie served warm with ice cream. It’s basically the marriage of a cookie, brownie and Reese’s peanut butter cup. How can you go wrong with that?
Ingredients
- 1 (10oz) bag of brownie mix ((plus the oil & egg to make the batter))
- 1 (16oz) package of refrigerated cookie dough
- 12 Reese's Peanut Butter Cups
- vanilla ice cream ((optional))
Instructions
- Preheat your oven to 350 degrees and generously grease a regular size muffin tin.
- Prepare the brownie mix according the package directions; set aside.
- Separate the cookie dough into 12 even balls and then squish them down into the bottom of each muffin cup.
- Place a Reese's peanut butter cup upside down on top of the cookie dough.
- Evenly distribute the brownie batter on top of each peanut butter cup until the wells are about 90% full.
- Bake for 18-20 minutes or until the brownie batter is cooked through.
- Allow them to cool for about 5 minutes before removing from the pan. Enjoy warm with vanilla ice cream!