Death By Chocolate Poke Cake
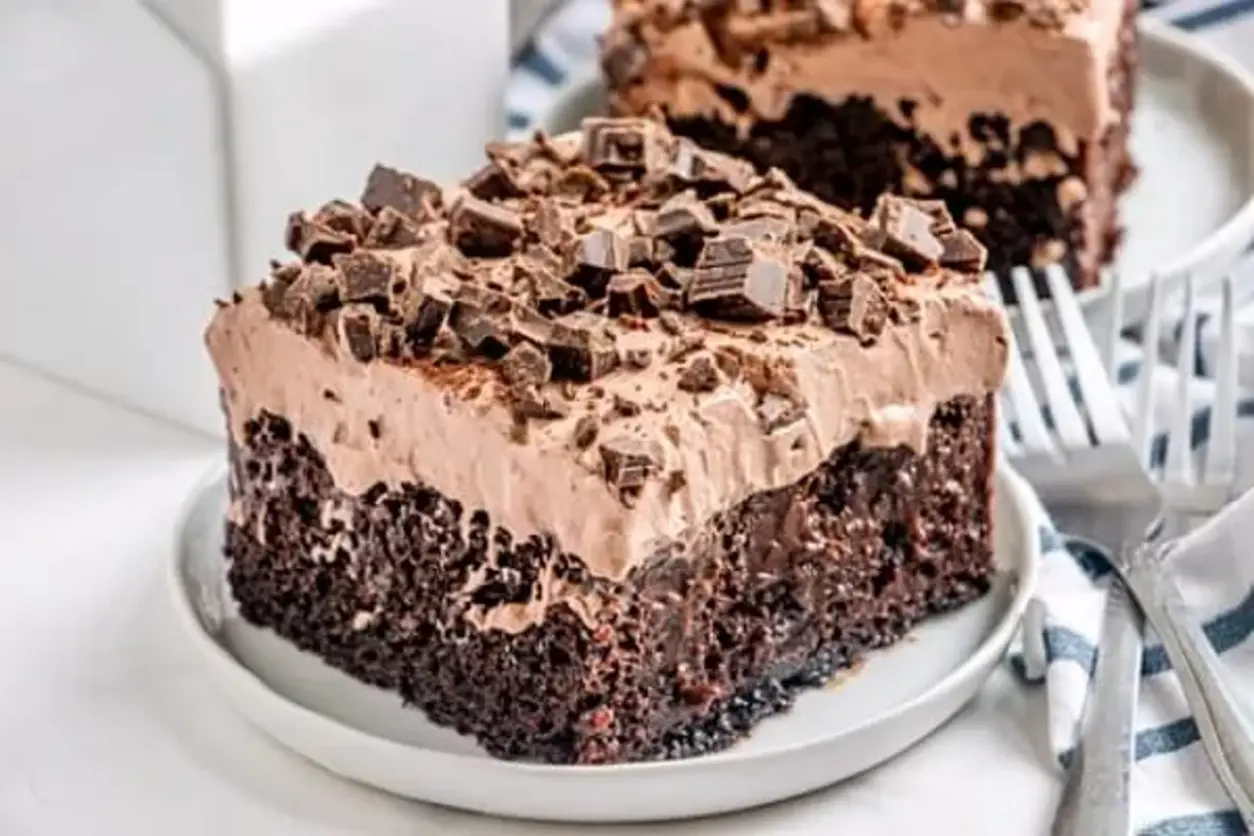
Table of Contents
Death By Chocolate Poke Cake: Ultimate Chocolate Layered Indulgence – Too Deep for the Ordinary
Growing up in a bustling Moroccan kitchen, I learned that the sweetest moments were built on layers of flavor. Years later, in the heart of New York City, I fused that tradition with my Parisian pastry training to create the Death By Chocolate Poke Cake. It’s a bold homage to indulgence—every slice burbles with chocolate, yet each bite also surprises your palate with a silky, creamy surprise, marrying texture with decadence.
From the fragrant, smoky scent of melting dark chocolate to the glossy sheen of a perfectly poured chocolate topping, this cake is a feast for the eyes and a symphony of taste. The cocoa’s bittersweet bite contrasts with the airy, sweet mousse, while a hint of sea salt released from the chocolate bar accentuates its depth. I can’t help but feel the aroma of my mother’s tagine workshop mingle with my own pastry counter, as the cake stands like a decadent tower before me.
I’ve refined this recipe by adding a “poke” step that infuses every crumb with rich chocolate mousse, then butter‑free whipped topping to keep it light. A pivotal detail is quickly pouring the pudding over freshly baked cake when it’s still hot—otherwise the holes clog. A common mistake is letting the cake cool before poking, which turns the next steps into mush. I’ll reveal a pro tip on how to keep the texture pure, ensuring each bite delivers a melt‑in‑mouth effect without any heaviness.
Why This Death By Chocolate Poke Cake Recipe Is the Best
The secret sauce is a daring poke technique borrowed from Moroccan tagine slow‑cooking: you create thoughtful cavities that trap a luscious chocolate mousse, then add a glossy, chocolate glaze that simmers lightly, guaranteeing every piece bursts with flavor. My training in Parisian patisserie taught me that the exact temperature of the cake and the ratio of chocolate flavors can elevate a simple dessert into a studio‑approved classic.
Texture-wise, the cake remains airy and moist while the circulating chocolate filling creates a creamy interior that gives the cake a “unicorn‑like” feel—soft yet structured. I use the high cocoa content of a single chocolate bar to promote deep chocolate notes, then overlay with a lighter, airy whipped topping, balancing richness and lightness.
This recipe is foolproof because it leverages commercially available mixes that simplify baking, while my small twists—curated cocoa blend, precise poking, and that chocolate glaze—ensure that even novice cooks can achieve a professional finish and wow their family or guests.
Chocolate Poke Cake Ingredients
I always shop for these ingredients in the aisles of Columbia Market or from the small specialty shops near Union Square. The dark chocolate cake mix gives the base, while the instant pudding mixes and chocolate topping provide the dramatic layers. The frozen whipped topping comes from a French‑style electric mixer I bought in Paris. On a rainy day in New York, the aroma of melted chocolate feels like a warm hug—so I keep these staples on hand for whenever a quick dessert is needed.
Ingredients List
- 1 package dark chocolate cake mix (15.25 oz.)
- Ingredients listed on the box to make the cake
- 1 box instant Hershey’s Special Dark Chocolate Pudding mix (3.56 oz.)
- 4 cups milk (divided)
- 1 box Hershey’s Special Dark Chocolate topping (12.8 oz.)
- 1 container frozen whipped topping, thawed (8 oz.)
- 1 Giant Hershey Dark Chocolate candy bar, chopped (6.8 oz.)
Ingredient Spotlight
Dark Chocolate Cake Mix – Choose the variety packed with at least 61 % cocoa for a robust flavor. In U.S. grocery stores, look for brands like Dr. Oetker or Pillsbury. If you prefer a homemade base, use a double‑batch of flour, cocoa, sugar, baking powder, and butter.
Instant Dark Chocolate Pudding – Hershey’s mix contains stabilizers to keep it ultra‑smooth. For an alternative, blend 1 cup heavy cream with 2 tablespoons cocoa, 3 tablespoons sugar, and a pinch of salt; this will mimic the texture without additives.
Chocolate Topping – This liquid chocolate coating seals the cake. Use a fresh jar of dark chocolate chips or a sheet of high‑grade chocolate melted in a double‑boiler for a richer finish.
Whipped Topping – The proprietary French‑style for the airy foam. You can substitute with homemade whipping cream beaten with powdered sugar, or coconut whipped cream if you need a dairy‑free option.
Chocolate Candy Bar – Chopped Giant Hershey Dark Chocolate adds a crunchy texture. Swap it for chopped dark chocolate chips or a single flake of couverture to adjust intensity.
| Original Ingredient | Best Substitution | Flavor / Texture Impact |
|---|---|---|
| Dark Chocolate Cake Mix | Homemade chocolate cake batter | More control over sweetness and texture; richer flavor |
| Instant Dark Chocolate Pudding Mix | Heavy cream + cocoa + sugar | Smoother, dairy‑free option; may be slightly less uniform |
| Chocolate Topping | Melted dark chocolate chips | Less sheen but thicker coating |
| Whipped Topping | Coconut whipped cream | Light, dairy‑free; trim natural coconut flavor |
| Chocolate Candy Bar | Dark chocolate chips | Same crunch, slightly lighter texture |
How to Make Death By Chocolate Poke Cake – Step‑by‑Step
This step‑by‑step guide will take you from flouring a pan to the final chill in seconds—just follow my recipe and you’ll have a show‑stopping dessert for any occasion.
Step 1: Bake the Cake
Preheat oven to 350 °F (175 °C). Grease a 9×13‑inch pan, pour the cake mix batter, and bake for 25–30 minutes or until a toothpick comes out clean. Let it cool in the pan for 5 minutes before transferring to a ruler.
💡 Stella’s Pro Tip: Use a candy thermometer to keep an eye on the batter’s internal temp—450 °F will ensure a moist crumb.
Step 2: Poke and Flood
While the cake is still hot, take a wooden spoon’s round end and create 1‑inch holes all over its surface. In a medium bowl, whisk together 2 cups milk and the first pudding mix until smooth. Gently pour the mixture into the holes, watching it seep inward like a savory volcano.
⚠️ Common Mistake to Avoid: Using cold pudding or milk will cause the chocolate to snap and send puddings spilling out of the holes.
Step 3: Serve Chocolate Cream
Microwave the chocolate topping in 30‑second bursts, stirring after each, until it’s thin enough to drizzle. Evenly pour over the cake, letting it trickle into the filled pockets. Allow the cake to cool completely; the chocolate will set into a glossy cacao lake.
💡 Stella’s Pro Tip: For a crystal‑clear glaze, microwave the topping while packing the lid (don’t seal it) to create steam that thins the chocolate.
Step 4: Cream Finish
In another bowl, dump the second pudding mix, the remaining 2 cups milk, and fold in the thawed whipped topping until silky. Spread the mixture over the chilled chocolate layer. Sprinkle chopped candy bar for a decadent crunch.
⚠️ Common Mistake to Avoid: Mixing the cream too vigorously—dilutes the airy foam, leaving a heavy finish.
Step 5: Refrigerate
Cover the cake, refrigerate for at least 4 hours so everything sets. Store in the fridge, and bring it to room temperature before cutting for a perfect slice.
💡 Stella’s Pro Tip: For a flash‑served dessert, let it chill for 30 minutes and serve immediately for a moist, yet firm, bite.
| Step | Action | Duration | Key Visual Cue |
|---|---|---|---|
| 1 | Bake cake | 25‑30 mins | Golden crumb, clear center |
| 2 | Poke & pour pudding | Instant to 1 min | Pudding visibly filling holes |
| 3 | Pour chocolate topping | 30‑60 s | Glossy sheen spread evenly |
| 4 | Add whipped cream layer | 5‑10 min | Smooth top with chocolate specks |
| 5 | Refrigerate | ≥4 hrs | Firm set, easy slicing |
Serving & Presentation
Slice this cake with a wide, serrated knife for neat, steak‑style portions that display the molten chocolate inside. In my city, I often plate a slice on a dark ceramic plate, side‑arm a leaf of fresh mint, and drizzle a little espresso reduction. The contrast of wet chocolate melt against the crisp, cool mint gives each bite a culinary narrative tied to both the French café and Moroccan melange.
A simple garnish of shaved nuts such as pistachios—an ingredient I grew up smelling in markets—adds a nutty crunch. A light dusting of sea salt atop the chocolate glaze brings out the subtle bitters, letting the dessert linger on the tongue like a fine wine on Rockefeller Plaza.
For an iconic NYC experience, serve a slice warm at brunch with a cup of chai‑spiced espresso or a chilled glass of Ruby Pinot Noir; they both accentuate the deep chocolate tones and balance the sweetness.
| Pairing Type | Suggestions | Why It Works |
|---|---|---|
| Side Dish | Fresh beet salad or roasted pepper medley | Earthy tones counterbalance chocolate |
| Sauce / Dip | raspberry coulis or Caramelized caramel drizzle | Sweet contrast and aromatic lift |
| Beverage | Espresso, espresso‑infused iced tea, or Pinot Noir | Adds bitterness, enhances chocolate |
| Garnish | Gold leaf, fresh mint, shaved pistachios | Visual appeal, adds texture |
Make‑Ahead, Storage & Reheating
Because the city never sleeps, I prep slices a day ahead when my workday surrounds me with deadlines. The cake stays fresh in a sealed container; a few hours late in the afternoon or a lunch break merely sets the cream and chocolate to a satisfying snap. The layered textures stay intact and taste just as bold.
| Method | Container | Duration | Reheating Tip |
|---|---|---|---|
| Refrigerator | Greased parchment cup or wok‑style loaf tin | Up to 5 days | Let cool to room temp before slicing; skip reheating |
| Freezer | Vacuum‑sealed bag | Up to 3 months | Thaw overnight; do NOT microwave |
| Make‑Ahead | Pre‑bake mini cakes or dip portions | 2 weeks | Assemble just before serving for texture integrity |
To reheat a slice, wrap it in parchment paper and place in a warm oven at 350 °F for just 4‑5 minutes. This will lift the richness without overcooking the mousse layers.
Variations & Easy Swaps
| Variation | Key Change | Best For | Difficulty Impact |
|---|---|---|---|
| Espresso Kick | Add 1/4 cup espresso to pudding mix | Coffee lovers or brunch | Easy to add |
| Gluten‑Free Canvas | Use a gluten‑free cake mix or almond flour batter | Allergy‑friendly | Same effort |
| Seasonal Flavor Twist | Embed diced ripe kiwi or candied orange peel | Fresh, picnic joy | Extra prep step |
Espresso Kick
Combine a shot of fresh espresso (about 1 oz) into the pudding mix before pouring it into the cake. The bold coffee flavor pairs perfectly with the bittersweet chocolate, creating a caffeinated chocolate stone that wakes up your senses like a Parisian morning meet‑up in a Manhattan cafe.
Gluten‑Free Canvas
Replace the dark chocolate cake mix with a homemade gluten‑free batter made from almond flour, coconut flour, cocoa, sugar, and eggs. The resulting cake will be more tender, but it still holds the chocolate flavors — it’s a texture lift that I have tested in my own kitchen and found to be delightfully stable.
Seasonal Flavor Twist
During spring, I mix diced fresh kiwi and candied orange peel into the pudding when filling the cake’s holes. The bright citrus cuts through the chocolate’s richness, giving each bite a fresh, juicy spark reminiscent of my early mornings in the Marrakech markets.
Is this cake suitable for a picky chocolate lover?
Absolutely! This recipe was built for the serious chocolate enthusiast. Every layer—from the moist cake base, through the silky chocolate mousse that fills the crumb, to the glossy chocolate glaze on top—ensures a deep chocolaty experience. The richness is intensified by the use of dark chocolate in the mix and topping, and the slight crunch of chopped chocolate bar raises the indulgence factor. The final result is a decadent dessert that satisfies even the most discerning chocoholics while still remaining approachable for those who appreciate a balanced, not overly sweet, finish.
What makes the poke technique important in this cake?
The poke method is a cornerstone that differentiates this cake from a regular chocolate dessert. By creating holes in the freshly baked cake and pouring chocolate mousse into them, you distribute the chocolate throughout the crumb evenly while keeping the textures varied—moist core, airy layers, and a glossy surface. It also increases the surface area for the chocolate glaze, ensuring the cake absorbs the chocolate’s sheen deep into every bite. The result is a textural contrast that feels like tasting a chocolate haven, yet the cake stays structurally intact and sliceable.
Can I make this as a one‑cup cake?
Yes, but you’ll have to balance the ratios carefully. A one‑cup version calls for roughly 1/4 cup of chocolate cake mix, a quarter of the puddings, halved liquid, and a smaller chocolate glaze portion. Because of the smaller size, the chocolate from the glaze can cling more to the edges. I recommend using a deeper baking dish for a higher cake to avoid sogginess. Scaling down keeps the texture vibrant and preserves flavor depth, yet it will be smaller, so keep an eye on it to prevent overbaking.
How long can I store this cake in the refrigerator?
The chocolate layers and mousse together are best enjoyed within 5 days if refrigerated in a sealed container. The silhouette remains crisp while the cream stays stable. For longer storage, you can freeze portions up to three months and thaw them overnight in the fridge before reheating each piece for a moment to soften the texture. Take care not to refreeze once thawed.
What substitutes can I make for the vanilla package of chocolate?
For a twist, replace the chocolate topping with compatible melted dark chocolate chips or granulated chocolate. If you wish for a flavored overlay, melt a bar of chili‑spiced chocolate or sprinkle flavored cocoa. The muffins’ flavour is best preserved if you keep a neutral chocolate taste by using a dark bar with a higher cocoa percentage. If you’re aiming for a dairy‑free version, try a coconut‑based whipped cream and a vegan pudding mix infused with cocoa.
Can I use a different chocolate mix for the cake base?
Indeed. Replacing the standard chocolate cake mix with a homemade base of flour, cocoa powder, sugar, and eggs will give you an even deeper flavor intensity. A 61‑percent cocoa content or higher will provide the richest crumb, and the slight acidity of the base will make the frosting layer cling better. It is important to keep the batter levels consistent so you don’t end up with a dry result, which might have less chocolate impact but is still delicious.
Do I need to let the cake cool before adding the chocolate topping?
The best practice is to keep the cake warm when pouring the chocolate mousse to allow the holes to soak. Then let it cool for a few minutes before pouring the chocolate glaze. This short cooling period turns the glaze into a glossy smile without over‑melting the inner mousse. It also allows the colors to differentiate—golden amber glaze over a dark chocolate base—making the visual presentation as appealing as the taste.
Can I serve a piece of this cake without the glaze?
While the glaze adds a glossy finish and deep chocolate flavor, you can leave it out if you prefer a lighter chocolate profile. The pudding inside and whipped topping will still give you a sweet‑aroma bite, but the cake may look less opulent. Without the glaze, you’ll lose overlapping chocolate notes and the “shake” effect, consequently yielding a slipperier surface that holds better when cutting but may feel less celebratory.
What is the best way to keep the mousse from separating?
The key is to handle the mousse gently after mixing. Oliv a whipping technique, fold ingredients until the splash is uniform but keep it soft; do not over‑beat. Pour the mousse into the cake hooks immediately while still warm as it thickens; its firm consistency will ensure it remains inside the cups. You can also reduce sugar content slightly to prevent separation or use a small amount of cornstarch for extra gumption—though this might change the pure chocolate feel slightly.
Can I adapt this for a vegan or dairy‑free version?
Yes, a vegan variation will replace the standard pudding with a thick, dairy‑free base like avocado or silken tofu blended with cocoa and maple syrup. The whipped topping is swapped with a coconut‑based whipped cream. The chocolate cake mix can stay the same but be careful to use a vegan recipe or add ground flaxseed to thicken if needed. The mousse will still be glossy, and the overall texture will be buttery and chocolatey with the delicate pumpkin aroma of a livelong afternoon.
Share Your Version!
I’d love for you to give this creamy, chocolate‑filled springboard a try and share your tweaks. Drop a rating, comment below, and let me know what magic you added or observed. Post a pic on Instagram or Pinterest – tag @leosfoods or @chefrecipes2 and let everyone see your variations.
From my NYC kitchen to yours — I hope this recipe brings as much warmth to your table as it does to mine. — Stella 🧡
Love This Recipe? Save It to Pinterest!
If you enjoyed this Death By Chocolate Poke Cake recipe, don’t let it get lost in your browser tabs! 😄 Pin it now so you can find it again anytime — and explore hundreds more tried‑and‑tested recipes waiting for you on my Pinterest boards.
👉 Follow Stella on Pinterest @chefrecipes2
📌 Pin this recipe · 🔁 Re‑pin your favorites · 💬 Tag me when you make it — I love seeing your creations!
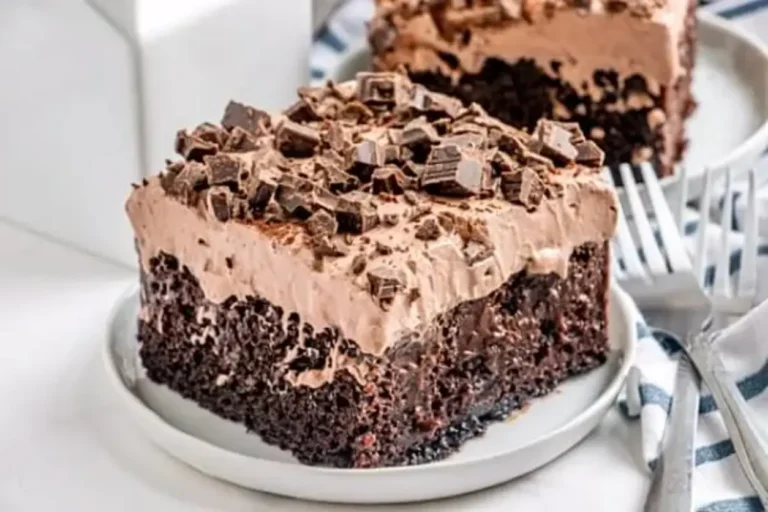
Death By Chocolate Poke Cake
This Death By Chocolate Poke Cake is for the serious chocolate lover! A chocolate cake that has been poked, filled, and covered with so much chocolate … Can you handle it?!
Ingredients
- 1 package dark chocolate cake mix (15.25 oz. )
- Ingredients listed on the box to make the cake
- 1 box instant Hershey's Special Dark Chocolate Pudding mix (3.56 oz. )
- 4 cups milk (divided)
- 1 box Hershey's Special Dark Chocolate topping (12.8 oz. )
- 1 box instant Hershey's Special Dark Chocolate Pudding mix (3.56 oz. )
- 1 container frozen whipped topping, thawed (8 oz. )
- 1 Giant Hershey Dark Chocolate candy bar, chopped (6.8 oz. )
Instructions
- Bake the cake according to package directions using a 9×13-inch baking pan.
- Mix the pudding mix with 2 cups of milk in a medium bowl. Poke holes in the hot cake with the round end of a wooden spoon and slowly pour this mixture over the cake, trying to fill the holes.
- Microwave the chocolate topping (with the lid off) for about 45 seconds or until it pours easily. Pour evenly over the top of the cake. Let the cake cool completely.
- In a medium bowl, combine the second pudding mix with the additional 2 cups of milk. Carefully fold in the whipped topping. Spread the mixture evenly over the top of the cake. Sprinkle the chopped candy bar over the top.
- Refrigerate for at least 4 hours. Store the cake (covered) in the refrigerator.