Cheesy Garlic Chicken Wraps
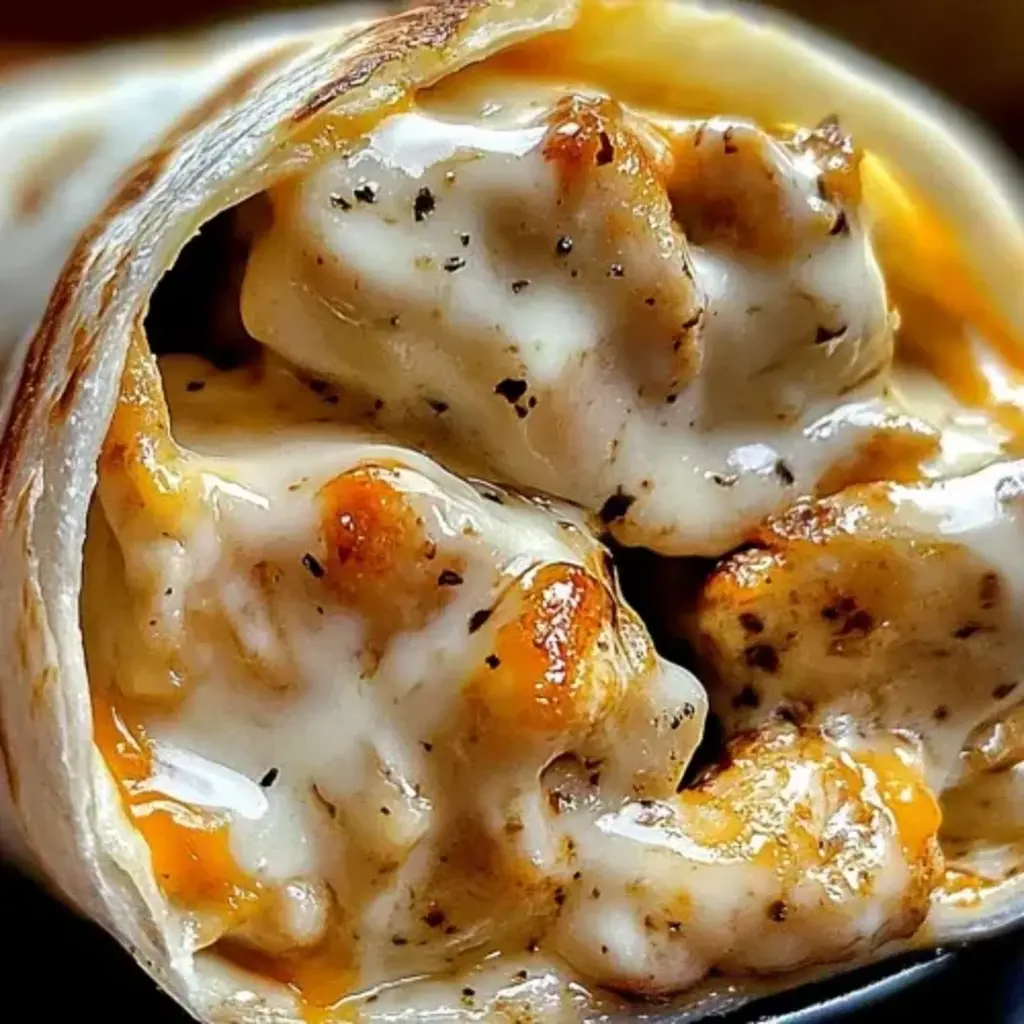
Table of Contents
Cheesy Garlic Chicken Wraps Cheesy Garlic Twist – Quick & Melty Wraps for Any Meal
I still remember the smell of cumin and garlic sizzling in my mother’s kitchen in Fez, November 1999, and how that aroma would drift into the streets of Paris where I first learned to fold dough with a buttery touch. Today, I bring that memory straight into my NYC apartment, turning ordinary chicken into an unforgettable wrap that’s brimming with a **Cheesy Garlic Twist**. The combination of creamy mozzarella, crunchy pepper, and a hint of fresh parsley invites both nostalgia and modern flavor in one bite.
When the cheese starts to melt and the garlic fills the air, you’re tempted to close your eyes and savor the silky texture—there’s a silky cream base, a burst of peppery zest, and the gentle crunch of fresh sautéed garlic. The golden tortillas carry a delicate crisp, a comforting bite that feels like a hug in every bite. The aroma is unmistakable: the scent of melted cheese, roasted garlic, and a whisper of thyme that you can taste by looking at it and hearing it.
I’ve spent years pairing techniques from Parisian patisseries with North African spice blends. In this version, the key twist is blending a velvety cream cheese mixture that creates a luscious filling while keeping the Mediterranean flair alive. One of the most common mistakes is cooking the wraps too hot, which can cause the tortillas to split. To avoid that, keep the heat medium and press lightly with a spatula.
Why This Cheesy Garlic Chicken Wraps Recipe Is the Best
The secret lies in the cheese–garlic compote, which saturates the chicken in a caramelized, umami‑rich sauce. My culinary training in Paris taught me how to balance dairy richness with aromatic depth, resulting in a wrapper that’s both indulgent and light.
The texture is perfected by first gently sautéing minced garlic until golden, then rendering the chicken in the same skillet so that every crumb is coated. The temperature is carefully controlled so that the cheese melts into silky ribbons, while the tortillas retain a slightly crisp exterior for a satisfying bite.
Even for beginners, the method is straightforward: no complicated sauces, minimal equipment, and room temperature ingredients. You just blend, assemble, and sear—no elaborate steps or prep. The result—wrappers that steam just enough to be melty but stay sturdy and delicious.
Cheesy Garlic Chicken Wraps Ingredients
I source the bulk of these ingredients at the Union Square Farmers Market or a local Brooklyn store—often the freshest produce and cheese come from the farmers nearby, while French baked goods are found in a specialty shop on 7th Avenue.
Ingredients List
- 2 cups cooked chicken (shredded or diced)
- 1 ½ cups shredded mozzarella or cheddar cheese
- ¼ cup cream cheese (softened)
- 2 tbsp butter (melted)
- 3 cloves garlic (minced)
- ¼ cup sour cream
- 1 tsp garlic powder
- 1 tsp Italian seasoning
- 4 large tortillas
- Salt and pepper to taste
- Fresh parsley (for garnish, optional)
Ingredient Spotlight
Butter gives this wrap a buttery sheen while melting the garlic; choose a good quality unsalted butter for maximum flavor. If you’re vegan, replace with a neutral oil.
Cream cheese adds a luscious, tangy base; if you want a richer crust, pull the cream cheese out of the fridge for a few minutes before mixing. For a dairy‑free version, use a coconut‑based soft cheese.
Tortillas are the backbone of the wrap. Opt for a whole‑wheat option for fiber, or a flour tortilla for a milder result. If you’re cutting carbs, switch to a low‑carb tortilla from a health food store.
| Original Ingredient | Best Substitution | Flavor / Texture Impact |
|---|---|---|
| Fresh parsley (optional) | Chopped cilantro | Adds a bright, herbal kick with citrus notes. |
| Whole wheat tortillas | Regular flour tortillas | Gives a softer, plain flavor and easier roll. |
How to Make Cheesy Garlic Chicken Wraps — Step-by-Step
Let’s spin effortless layers of flavor that come together in under twenty minutes.
Step 1: Sauté Garlic
Melt the butter in a medium skillet over medium heat. Add minced garlic and cook for 1–2 minutes until fragrant, stirring constantly so it never burns. A golden, aromatic base will perfume the rest of the wrap.
💡 Stella’s Pro Tip: Add a pinch of salt early to bring out the garlic’s sweetness.
Step 2: Heat Chicken
Add the pre‑cooked chicken to the skillet. Sprinkle garlic powder, Italian seasoning, salt and pepper. Stir to coat, then cook for 3 minutes, allowing the flavors to mingle and the chicken to warm through.
⚠️ Common Mistake to Avoid: Overcrowding the pan. Use a wide skillet to let the chicken brown slightly.
Step 3: Mix Cheeses
In a bowl, blend softened cream cheese, sour cream, and half of the shredded cheese until smooth. The cream cheese should be at room temperature to achieve a silky consistency.
💡 Stella’s Pro Tip: Fold in a splash of milk or buttermilk to thin the mixture if it feels too thick.
Step 4: Combine Chicken and Cheese Mixture
Take the skillet off the heat and stir the warm chicken into the cheese blend until the chicken is fully coated and the mixture begins to thicken. The heat will create a mini-melt without overcooking.
⚠️ Common Mistake to Avoid: Cooking the mixture again. Keep the pan off the flame to preserve dairy integrity.
Step 5: Assemble Wraps
Lay a tortilla flat and spoon equal portions of the chicken mixture down the center. Sprinkle the remaining shredded cheese on top. Fold the sides over the filling and roll tightly to create a sealed cylinder.
💡 Stella’s Pro Tip: Secure the wrap with a toothpick or a strip of parchment paper while cooking.
Step 6: Cook Wraps
Heat a clean skillet or grill pan over medium heat. Place the wraps seam‑side down and cook for 2–3 minutes per side, until golden brown and the cheese melts inside. Press gently with a spatula to achieve even browning and sealing.
⚠️ Common Mistake to Avoid: Moving the wraps too often. Allow each side to brown completely before flipping.
| Step | Action | Duration | Key Visual Cue |
|---|---|---|---|
| 1 | Sauté garlic | 1–2 min | Light golden, fragrance released |
| 2 | Heat chicken | 3 min | Chicken warm, slightly golden |
| 3 | Mix cheeses | 1 min | Creamy, smooth blend |
| 4 | Combine chicken & cheese | 1–2 min | Coated, thickened mixture |
| 5 | Assemble wraps | 1 min | Full, sealed tortilla |
| 6 | Cook wraps | 4–6 min total | Golden brown exterior, melted cheese inside |
Serving & Presentation
Cut the wraps in half diagonally and serve hot. Drizzle a light drizzle of Greek yogurt sauce or a simple tzatziki to echo the Mediterranean roots, adding a bright, cooling counterpoint to the rich cheese.
Garnish with fresh parsley or a sprinkle of paprika for color. Pair with a crisp green salad of mixed arugula, cherry tomatoes, and a drizzle of olive oil, or serve alongside a side of roasted carrots glazed with honey and thyme.
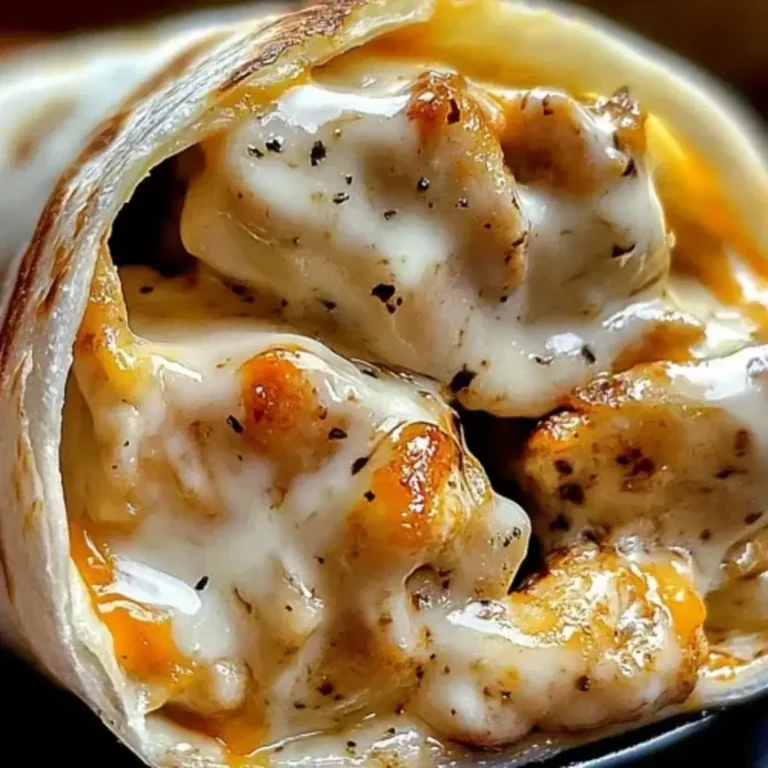
When you plate, the warm cheese should peek through the tortilla, creating a delightful mosaic of golden and ivory that pleases the eye and the palate. The combination of textures—soft, gooey, slightly crunchy—makes these wraps an instant crowd‑pleaser at brunch, dinner or a quick weekday lunch.
| Pairing Type | Suggestions | Why It Works |
|---|---|---|
| Side Dish | Roasted carrots, arugula salad, quinoa pilaf | Provides plant‑based balance and nutritional variety. |
| Sauce / Dip | Tzatziki, garlic aioli, light vinaigrette | Accompanies the richness and adds acidity. |
| Beverage | Ice‑cold sparkling water, white wine (Pinot Grigio), chilled lager | Balances the savory profile and refreshes the palate. |
| Garnish | Fresh parsley, crushed red pepper, lemon zest | Adds brightness and visual appeal. |
Make-Ahead, Storage & Reheating
I usually prep the filling a day ahead and store it in an airtight container. This way, I can quickly assemble and cook in the morning—perfect for a busy New York lunch break.
| Method | Container | Duration | Reheating Tip |
|---|---|---|---|
| Refrigerator | Ziploc bag | Up to 2 days | Reheat in skillet 3–4 minutes. |
| Freezer | Mylar container | Up to 3 months | Thaw overnight, then reheat gently. |
| Make-Ahead | Half‑pre‑assembled wrap (cheese folded) | Up to 1 day | Assemble fresh; heat as before. |
When reheating from the freezer, I add a splash of milk when melting the cheese to keep it from becoming chalky. For a crisp finish, finish the last minute on a hot grill pan, and let the cheese bubble avant reaching a golden crust.
Variations & Easy Swaps
| Variation | Key Change | Best For | Difficulty Impact |
|---|---|---|---|
| Extra‑Spicy Kick | Swap Italian seasoning for harissa | Heat lovers | Minimal change, same effort. |
| Mediterranean Grilled | Add chickpeas & lemon zest | Vegan diners | Requires an extra prep step. |
Extra-Spicy Kick
Simply ingest harissa in place of the Italian seasoning, which adds smoky, peppery heat. The whole wrap turns into a vibrant dish that echoes the fiery spices I taste in the souks of Marrakech.
Mediterranean Grilled
A handful of chickpeas, a squeeze of fresh lemon, and a pinch of paprika turn this into a wholesome vegetarian wrap that still delivers the creamy cheese center. I’ve tested it on a sunny rooftop and it was a hit with friends.
Seasonal Twist
During the fall, I swap in roasted butternut squash cubes and sprinkle cinnamon for a sweet depth. The farmhouse vibe makes the wrap feel more like a cozy Sunday brunch.
Can I use grilled chicken instead of cooked chicken?
Yes! Grilled chicken will add a smoky flavor that can complement the creamy cheese. Be sure to shred or dice it finely before adding to the skillet so it heats evenly. If you choose grilled chicken, keep it moist by coating it in a little olive oil or butter before assembling the wraps.
How do I keep the wraps from falling apart?
First, make sure the tortilla is warm when you start. A warm tortilla expands more easily and grips the filling. Next, use enough cheese; the melted cheese acts as a natural binder. Finally, lightly press the sides together before cooking and add a toothpick if you’re nervous— it keeps the shape while the cheese melts.
Is it possible to freeze these wraps?
Absolutely. Assemble the wraps loosely, wrap them in parchment, and freeze in a freezer bag. When you’re ready, thaw overnight in the fridge, then reheat in a skillet or the oven at 350°F for 10–12 minutes, covering loosely to keep the cheese from drying out.
What kind of tortillas do you recommend?
I like using large, soft flour tortillas for comfort, but for a healthier version, choose whole‑wheat tortillas. You can also try corn tortillas if you want a subtle, earthy flavor. Whatever choice you make, just warm the tortilla slightly before adding the filling.
Can I make this recipe vegan?
Replace butter with a neutral oil, swap dairy cheese for a plant‑based cheese, and use a vegan cream cheese. The structure remains the same, and the resulting wrap still melts beautifully. The texture may be slightly creamier, but the flavor stays vibrant.
How long can I store the pre‑assembled wraps?
The assembled wraps keep in the refrigerator for up to 24 hours if wrapped tightly in foil. For longer storage, freeze immediately after assembly; they turn out great after reheating in the oven or skillet. Always check for moisture buildup to prevent sogginess.
What’s a good side dish to pair with these wraps?
A light green salad—arugula, cherry tomatoes, cucumber, and a drizzle of lemon vinaigrette—breaks the richness perfectly. Roasted vegetable medleys can also add hearty texture, while a crisp cucumber and tzatziki dip keeps the meal balanced.
Which cheese gives the best melt?
Cheddar offers a sharp flavor while mozzarella provides a melting, stringy texture. Using a blend of cheddar and mozzarella creates the best of both worlds: rich taste, perfect gooeyness, and a buttery sheen that clings to the tortilla.
Share Your Version!
If you try this wrap, drop a star rating and a comment below so I know how it turned out in your kitchen. Snap a selfie of the plated wraps, tag me on Instagram or Pinterest, and let me taste the show! Share a photo or a quick tip that made it even better—maybe some of my friends using extra cashews for crunch. The one question I’d love to hear: How did you tweak the cheese blend to personalize the recipe?
From my NYC kitchen to yours — I hope this recipe brings as much warmth to your table as it does to mine. — Stella 🧡
Love This Recipe? Save It to Pinterest!
If you enjoyed this Cheesy Garlic Chicken Wraps recipe, don’t let it get lost in your browser tabs! 😄 Pin it now so you can find it again anytime — and explore hundreds more tried-and-tested recipes waiting for you on my Pinterest boards.
👉 Follow Stella on Pinterest @chefrecipes2
📌 Pin this recipe · 🔁 Re-pin your favorites · 💬 Tag me when you make it — I love seeing your creations!
Love the flavor? Share this post on social, comment a photo, or ask me anything about the cooking journey—let’s keep the conversation rolling!
Cheesy Garlic Chicken Wraps
Ingredients
- 2 cups cooked chicken (shredded or diced)
- 1 ½ cups shredded mozzarella or cheddar cheese
- ¼ cup cream cheese (softened)
- 2 tbsp butter (melted)
- 3 cloves garlic (minced)
- ¼ cup sour cream
- 1 tsp garlic powder
- 1 tsp Italian seasoning
- 4 large tortillas
- Salt and pepper (to taste)
- Fresh parsley (for garnish, optional)
Instructions
- Sauté Garlic:
- In a skillet, melt the butter over medium heat. Add the minced garlic and sauté for 1-2 minutes until it becomes fragrant.
- Tip: Be careful not to burn the garlic as it will turn bitter.
- Heat Chicken:
- Add the cooked chicken to the skillet. Season with garlic powder, Italian seasoning, salt, and pepper. Stir well to coat the chicken evenly and heat through.
- Tip: Use leftover rotisserie chicken for added flavor and convenience.
- Mix Cheeses:
- In a bowl, combine the softened cream cheese, sour cream, and half of the shredded cheese. Mix until smooth.
- Tip: Ensure the cream cheese is softened for easy mixing.
- Combine Chicken and Cheese Mixtures:
- Remove the skillet from heat. Add the chicken to the cream cheese mixture and stir until fully combined.
- Assemble Wraps:
- Lay out the tortillas and divide the chicken mixture evenly in the center of each. Sprinkle the remaining shredded cheese on top. Fold the sides of each tortilla over the filling and roll tightly into wraps.
- Cook Wraps:
- Heat a clean skillet or grill pan over medium heat. Place the wraps seam-side down and cook for 2-3 minutes per side, until golden brown and the cheese is melted.
- Tip: Press down gently with a spatula for even browning and to help seal the wraps.