Mississippi Mud Pie
“`html
Table of Contents
Mississippi Mud Pie: Triple Chocolate Decadence – The Ultimate Southern Chocolate Dream
I still remember the first time I tasted a Mississippi Mud Pie that stopped me in my tracks. It was a sweltering July afternoon in Manhattan, and a friend from Jackson, Mississippi had brought one to a rooftop gathering. As the sun set over the Hudson, I took one bite of that fudgy, creamy, Oreo-studded slice and thought — this is the dessert equivalent of the Mississippi River itself: deep, dark, and impossibly rich. That moment sparked my obsession with perfecting this classic Southern pie, and after years of testing in my NYC kitchen, I’m sharing my triple-chocolate version of the Mississippi Mud Pie that combines my French pastry training with pure American indulgence.
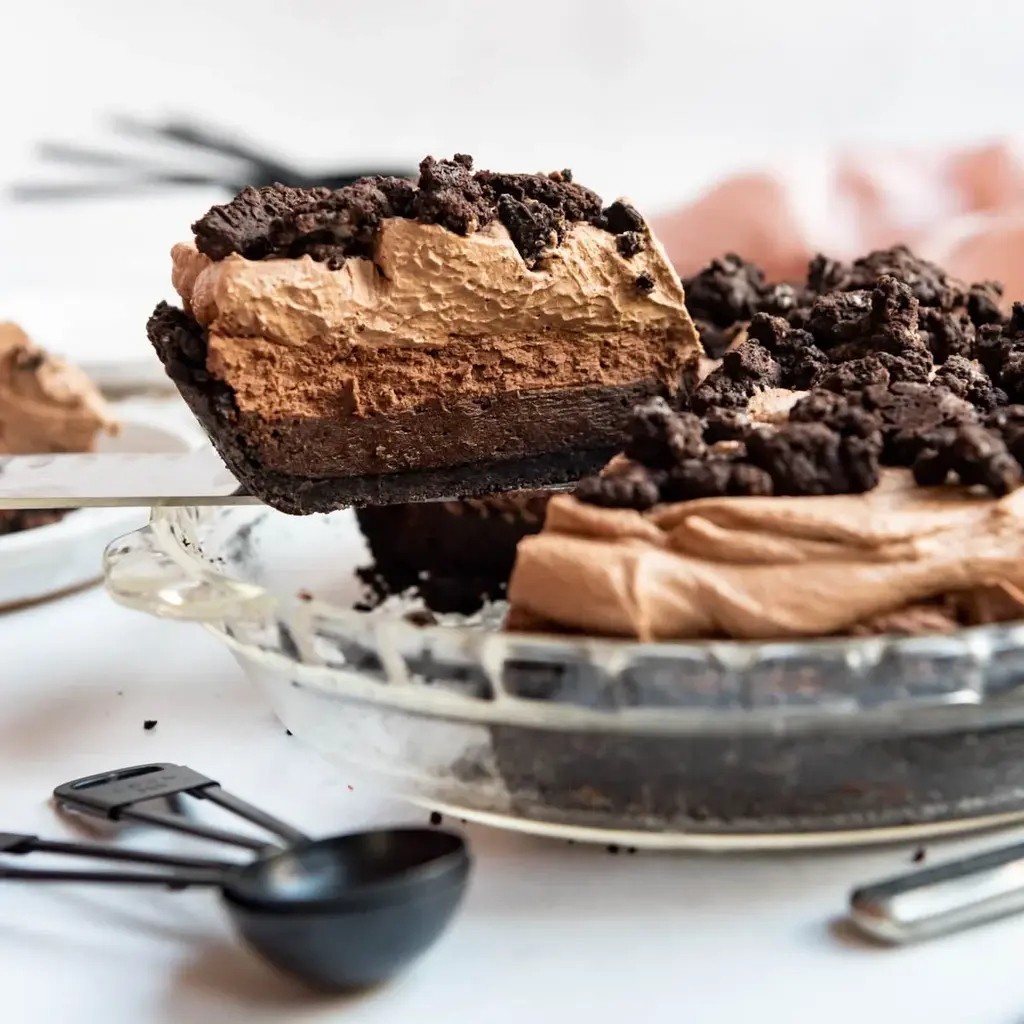
Picture this: a crunchy Oreo cookie crust cradling a fudgy brownie-like base that’s dense and intensely chocolate. On top of that, a silky chocolate mousse made with milk chocolate and billowy chocolate whipped cream — light as a cloud but packed with cocoa flavor. And then, the crowning glory: crunchy Oreo crumbles scattered across the top, adding texture and that beloved cookies-and-cream vibe. Every spoonful gives you a different ratio of crust, brownie, mousse, and cream — and every single combination is pure bliss. The pie is decadent, over-the-top, and unapologetically chocolate-forward.
What sets my Mississippi Mud Pie apart is the technique I learned at Le Cordon Bleu in Paris: properly tempering the chocolate for the mousse layer so it stays silky and doesn’t seize, and using a precise oven temperature for the brownie layer so it stays fudgy in the center. I also add a pinch of salt to every chocolate layer — a trick my mother used in her Moroccan kitchen to deepen and brighten dark chocolate. The result is a Mississippi Mud Pie that’s rich but not cloying, complex but crowd-pleasing, and absolutely unforgettable. 💡 Stella’s Pro Tip: Using an instant-read thermometer on the brownie layer (180°F) is the secret to that perfect fudgy texture every time.
Why This Mississippi Mud Pie Recipe Is the Best
The Flavor Secret: This Mississippi Mud Pie has three distinct chocolate layers — each with its own personality. The brownie base uses bittersweet chocolate for deep, dark intensity. The mousse layer uses milk chocolate for creamy sweetness. And the whipped cream topping uses unsweetened cocoa powder for a light, airy chocolate finish. This layering of chocolate types, a technique I refined during my pastry training in Paris, creates a complexity that keeps every bite interesting. I also add a touch of Dutch-processed cocoa to the mousse and whipped cream for a smoother, more refined chocolate flavor.
Perfected Texture: The textural contrast in this pie is what makes it truly special. The Oreo crust is baked until crisp and sturdy. The brownie layer is intentionally underbaked — hitting exactly 180°F internal temperature — so it stays fudgy and dense. The mousse is light and airy from properly folded whipped cream, and the topping is billowy and soft. Finally, those baked Oreo crumbles add a satisfying crunch. I learned the importance of textural contrast from my mother’s Moroccan cooking, where every dish balances soft, crunchy, and creamy elements.
Foolproof & Fast: Despite its impressive four-layer appearance, this Mississippi Mud Pie is surprisingly approachable. I’ve broken down every step with clear visual cues and temperatures so home bakers of any level can succeed. The crust comes together in a food processor, the brownie batter is a one-bowl wonder, and the mousse uses a simple fold-in technique that’s hard to mess up. I’ve tested this recipe with beginner bakers from my NYC cooking classes, and every single one has pulled it off beautifully.
Mississippi Mud Pie Ingredients
I source most of my ingredients from the Union Square Greenmarket and my favorite specialty grocery in Chelsea. The quality of chocolate makes a real difference here — I always recommend using a brand you love eating straight. My Paris-trained palate insists on European-style butter for the richest flavor, but American butter works beautifully too. When I’m testing recipes in my NYC kitchen, I reach for these exact ingredients every time.
Ingredients List
For the Oreo Crust:
- 25 Oreo cookies (about 2 ½ cups finely crushed)
- 6 Tablespoons salted butter, melted
For the Fudgy Brownie Layer:
- 4 ounces bittersweet chocolate, chopped
- 3 Tablespoons salted butter, melted
- 3 Tablespoons vegetable oil
- 2 Tablespoons unsweetened cocoa powder
- 2/3 cup light brown sugar, packed
- 2 large eggs, at room temperature
- 2 teaspoons vanilla extract
- 1/4 teaspoon salt
- 3 Tablespoons all-purpose flour
For the Oreo Crumb Topping:
- 8 Oreo cookies, roughly crushed
- 2 Tablespoons powdered sugar
- 1 Tablespoon Dutch-processed cocoa powder
- Pinch of salt
- 2 Tablespoons salted butter, melted
For the Chocolate Mousse Layer:
- 6 ounces milk chocolate, chopped
- 1 cup cold heavy cream
- 2 Tablespoons Dutch-processed cocoa powder
- 2 Tablespoons powdered sugar
- Pinch of salt
For the Chocolate Whipped Cream Topping:
- 1 cup heavy cream, cold
- 1/4 cup granulated sugar
- 3 Tablespoons unsweetened cocoa powder
Ingredient Spotlight
Oreo Cookies: These are non-negotiable for the crust and topping. The chocolate wafer and cream filling add both flavor and structure. For the crust, you want the entire cookie — filling and all — finely ground. For the topping, rough crushing gives you those satisfying chunks. Gluten-free chocolate sandwich cookies work perfectly as a 1:1 swap if needed.
Bittersweet Chocolate (for the brownie layer): I recommend a 60-70% cacao chocolate for the ideal balance of sweetness and depth. A good bar from Guittard, Ghirardelli, or Valrhona works wonders. Do not use chocolate chips — they contain stabilizers that affect melting. Chop a bar instead for the smoothest melt. If you only have semisweet (around 55%), reduce the brown sugar by 2 tablespoons to balance sweetness.
Dutch-Processed Cocoa Powder: This alkalized cocoa has a darker color, smoother flavor, and dissolves more easily than natural cocoa. I use it in the mousse and the crumb topping because it creates a more refined chocolate taste. For the whipped cream topping, I use natural unsweetened cocoa powder for a lighter, brighter chocolate flavor. The two types play different roles — don’t swap them without understanding the effect.
Heavy Cream: Cold heavy cream with at least 36% milkfat is essential for both the mousse and the whipped cream. I keep my mixing bowl and whisk in the freezer for 15 minutes before whipping — a trick from pastry school that guarantees stiff peaks every time. Ultra-pasteurized cream works, but if you can find cream-line or non-homogenized heavy cream, the texture is even more luxurious.
| Original Ingredient | Best Substitution | Flavor / Texture Impact |
|---|---|---|
| Oreo cookies (crust) | Gluten-free chocolate sandwich cookies | Slightly less sweet, same texture, fully GF |
| Bittersweet chocolate (brownie) | Semisweet chocolate + reduce brown sugar by 2 Tbsp | Sweeter brownie, slightly less complex, still fudgy |
| Dutch-processed cocoa (mousse) | Natural unsweetened cocoa powder | Lighter color, more acidic flavor, still works |
| Heavy cream (36% milkfat) | Coconut cream (chilled, solid part only) | Dairy-free, slight coconut flavor, less stable but delicious |
| Milk chocolate (mousse) | High-quality white chocolate | Much sweeter, less chocolatey, very creamy |
How to Make Mississippi Mud Pie — Step-by-Step
Trust me, this pie looks more complicated than it is. I’ve broken it into five clear stages, and if you follow the temperatures and visual cues I’ve noted, you’ll have a stunning Mississippi Mud Pie that tastes like it came from a fancy NYC bakery.
Step 1: Make the Oreo Crust
Preheat your oven to 325°F. Place 25 Oreo cookies in a food processor and pulse until you have fine, even crumbs. (You can also put them in a heavy-duty ziplock bag and crush them with a rolling pin — a great arm workout!) Transfer the crumbs to a medium bowl, pour in 6 Tablespoons of melted salted butter, and stir with a fork until every crumb is moistened. Press the mixture firmly and evenly into the bottom and up the sides of a 9-inch pie plate. I use the bottom of a measuring cup to get it perfectly compact. Bake for 12-15 minutes until the crust is set and fragrant. Set aside to cool while you make the brownie layer.
💡 Stella’s Pro Tip: Press the crust firmly — if it’s too loose, it will crumble when you slice the pie. I press for a full 60 seconds using the flat bottom of a glass.
Step 2: Make the Fudgy Brownie Layer
In a large microwave-safe bowl, combine 4 ounces chopped bittersweet chocolate, 3 Tablespoons melted butter, 3 Tablespoons vegetable oil, and 2 Tablespoons unsweetened cocoa powder. Microwave in 20-second bursts, stirring well between each burst, until completely melted and smooth. Let the mixture cool for 2 minutes, then whisk in 2/3 cup packed light brown sugar, 2 large eggs (one at a time), 2 teaspoons vanilla extract, and 1/4 teaspoon salt. Whisk vigorously until the batter is glossy and smooth. Finally, fold in 3 Tablespoons all-purpose flour just until combined — do not overmix. Pour the brownie batter into the cooled Oreo crust and spread evenly.
⚠️ Common Mistake to Avoid: Overmixing the flour activates gluten and makes the brownie layer cakey instead of fudgy. Stir just until you see the last streak of flour disappear, then stop.
Step 3: Bake the Brownie Layer
Bake the pie at 325°F for 25-30 minutes. The brownie layer is done when a toothpick inserted into the center comes out with a few moist crumbs attached — it should look slightly underbaked. For precision, use an instant-read thermometer: 180°F is your magic number. This ensures the brownie sets up fudgy and dense, not dry and cakey. Let the pie cool completely on a wire rack, then refrigerate for at least 1 hour before adding the mousse layer.
💡 Stella’s Pro Tip: 180°F is the exact internal temperature for a fudgy brownie texture. I learned this from a pastry chef in Paris — it’s the most reliable way to get perfect results every time.
Step 4: Make the Oreo Crumb Topping
While the brownie bakes, prepare the crunchy topping. Place 8 Oreo cookies in a ziplock bag and pound them a few times with a rolling pin — you want a mix of coarse crumbs and small chunks. Transfer to a bowl and toss with 2 Tablespoons powdered sugar, 1 Tablespoon Dutch-processed cocoa powder, and a pinch of salt. Drizzle 2 Tablespoons melted butter over the mixture and toss until evenly moistened. Spread the pieces on a parchment-lined baking sheet and bake at 325°F for 10 minutes. Let cool completely — they’ll crisp up as they cool.
⚠️ Common Mistake to Avoid: Don’t crush the cookies too fine for the topping — you want texture. Aim for pieces about the size of small peas so they stay crunchy and don’t turn to dust.
Step 5: Make the Chocolate Mousse
Melt 6 ounces chopped milk chocolate in a large microwave-safe bowl using 20-second bursts, stirring well between each. Let the melted chocolate cool for 10 minutes until it reaches 90-100°F — it should feel warm to the touch but not hot. In a separate large bowl (or the bowl of a stand mixer with the whisk attachment), beat 1 cup cold heavy cream, 2 Tablespoons Dutch-processed cocoa powder, 2 Tablespoons powdered sugar, and a pinch of salt until soft peaks form. Stir 1/3 of the chocolate whipped cream into the cooled melted chocolate to lighten it, then gently fold in the remaining whipped cream using a rubber spatula until no streaks remain. Spread the mousse evenly over the cooled brownie layer. Refrigerate for at least 3 hours, or overnight, until the mousse is set.
💡 Stella’s Pro Tip: Cooling the melted chocolate to exactly 90-100°F is crucial — if it’s too hot, it will deflate the whipped cream; if too cold, it will seize. A digital thermometer takes the guesswork out.
Step 6: Make the Chocolate Whipped Cream Topping & Assemble
In a large bowl, beat 1 cup cold heavy cream, 1/4 cup granulated sugar, and 3 Tablespoons unsweetened cocoa powder with an electric mixer or stand mixer fitted with the whisk attachment until stiff peaks form. Spread the chocolate whipped cream over the set mousse layer, creating swirls and peaks with a spatula or piping bag. Sprinkle the cooled Oreo crumb topping generously over the entire surface. Refrigerate the finished pie for at least 30 minutes before slicing to allow the whipped cream to firm up.
⚠️ Common Mistake to Avoid: Whipping cream to stiff peaks without overshooting is key. Stop as soon as the cream holds firm peaks and doesn’t droop — if you go too far, it will turn into butter.
| Step | Action | Duration | Key Visual Cue |
|---|---|---|---|
| 1 | Make Oreo crust | 15 min bake | Crust is set and fragrant, edges slightly darker |
| 2-3 | Make & bake brownie layer | 25-30 min bake | Toothpick with moist crumbs, internal temp 180°F |
| 4 | Make Oreo crumb topping | 10 min bake | Pieces are dry and crisp, not soft |
| 5 | Make chocolate mousse | 15 min + 3 hr chill | Mousse is set and holds its shape when spooned |
| 6 | Make topping & assemble | 10 min + 30 min chill | Whipped cream holds stiff peaks, topping is crunchy |
Serving & Presentation
This Mississippi Mud Pie is a showstopper, and how you serve it matters. I like to take the pie out of the refrigerator about 15-20 minutes before slicing — it allows the textures to soften slightly so each layer shines. Use a sharp chef’s knife dipped in hot water and wiped dry between slices for the cleanest cuts. Each slice should show the distinct layers: dark Oreo crust, fudgy brownie, silky mousse, billowy whipped cream, and crunchy crumbles on top.
For serving, I love a minimalist approach — a small dollop of extra whipped cream on the side and perhaps a few fresh raspberries for a pop of color and acidity that cuts through the richness. In the summer, I sometimes serve it with a scoop of vanilla bean ice cream (a nod to my NYC childhood summers). In colder months, a dusting of cocoa powder and a sprinkle of flaky sea salt on top is perfection. My French-trained plating instinct says: let the pie be the star.
When I bring this Mississippi Mud Pie to a dinner party in Brooklyn, it never lasts long. It pairs beautifully with strong coffee or espresso — the bitterness of the coffee balances the sweetness of the pie. For a truly decadent dessert spread, serve it alongside fresh strawberries and a glass of cold milk. And if you’re feeling extra festive, a drizzle of warm caramel sauce over each slice takes it to another level entirely.
| Pairing Type | Suggestions | Why It Works |
|---|---|---|
| Side Dish | Fresh raspberries, sliced strawberries, mint sprigs | Acidity and freshness cut through the rich chocolate |
| Sauce / Dip | Warm caramel sauce, espresso drizzle, crème anglaise | Adds another layer of flavor and texture contrast |
| Beverage | Strong black coffee, espresso, cold milk, bourbon | Coffee bitterness balances sweetness; milk is classic |
| Garnish | Flaky sea salt, cocoa powder dusting, chocolate shavings | Enhances chocolate flavor and adds visual appeal |
Make-Ahead, Storage & Reheating
One of the best things about Mississippi Mud Pie is that it’s actually better when made ahead. The layers have time to meld and set, making for cleaner slices and more developed flavor. In my busy NYC schedule, I often make this pie over two days — the crust and brownie layer on day one, then the mousse and assembly on day two. Here’s everything you need to know about storing and prepping ahead.
| Method | Container | Duration | Reheating Tip |
|---|---|---|---|
| Refrigerator | Covered pie plate or airtight container | Up to 5 days | Serve cold or let sit 15 min at room temp; do not reheat |
| Freezer | Wrap tightly in plastic wrap then foil | Up to 3 months | Thaw overnight in fridge; add fresh whipped cream and topping after thawing |
| Make-Ahead | Crust + brownie layer, unbaked topping | Up to 2 days in advance | Add mousse layer the day of serving; bake topping fresh for crunch |
For the best texture, I recommend assembling the pie no more than 24 hours before serving. The Oreo crumb topping stays crunchiest if added within 2-3 hours of serving. If you have leftovers (unlikely, but possible!), cover the pie plate tightly with plastic wrap. The mousse and whipped cream layers will soften the crumb topping over time, but the flavor remains incredible. I’ve personally tested this — day three leftovers are still a 10/10 in my book.
To freeze, I recommend freezing the pie before adding the whipped cream topping and Oreo crumbles. Wrap the pie (after the mousse layer is set) tightly in plastic wrap and then foil. When ready to serve, thaw overnight in the refrigerator, then make fresh whipped cream and add the crumb topping. The brownie and mousse layers freeze beautifully, and this approach ensures every element tastes freshly made.
Variations & Easy Swaps
Over the years, I’ve experimented with many versions of this Mississippi Mud Pie — some inspired by my Moroccan heritage, others by seasonal ingredients from the NYC farmers market. Here are my favorite variations that still deliver that over-the-top chocolate experience.
| Variation | Key Change | Best For | Difficulty Impact |
|---|---|---|---|
| Moroccan Spice Twist | Add 1 tsp cinnamon + ½ tsp cayenne to brownie | Adventurous palates, holiday tables | Same — just stir in spices |
| Gluten-Free Version | Use GF sandwich cookies + GF flour blend | GF guests, Celiac-friendly | Same — swap 1:1 |
| Peanut Butter Dream | Add ½ cup peanut butter to mousse layer | Peanut butter + chocolate fans | Same — fold in melted peanut butter |
Moroccan Spice Twist
Growing up in Morocco, my mother often added warm spices to chocolate desserts — a tradition I’ve carried into my NYC kitchen. For this variation, whisk 1 teaspoon of ground cinnamon and ½ teaspoon of cayenne pepper into the brownie batter along with the dry ingredients. The cinnamon adds warmth and depth, while the cayenne provides a subtle heat that makes the chocolate taste even richer. This is my personal favorite way to enjoy Mississippi Mud Pie, especially during the holiday season.
Gluten-Free Version
I’ve tested this Mississippi Mud Pie with gluten-free sandwich cookies (like Glutino or Kinnitoons) and a 1:1 gluten-free all-purpose flour blend (I recommend Bob’s Red Mill 1:1 or King Arthur Measure for Measure). The crust holds together beautifully — just make sure the crumbs are fine and the butter is well incorporated. The brownie layer bakes up slightly more delicate but still fudgy and delicious. Pro tip: let the pie chill for a full 4 hours before slicing for cleaner cuts with gluten-free crusts.
Peanut Butter Dream
For a classic flavor duo that never fails, melt ½ cup of creamy peanut butter (I like Skippy or a natural no-stir variety) and fold it into the chocolate mousse layer along with the melted milk chocolate. Use smooth peanut butter for the silkiest texture. This variation is a hit at NYC birthday parties and game-day gatherings. If you want extra peanut butter crunch, sprinkle chopped peanut butter cups on top alongside the Oreo crumbles.
What is Mississippi Mud Pie made of?
Mississippi Mud Pie is a layered chocolate dessert that typically consists of an Oreo or chocolate cookie crust, a fudgy brownie-like chocolate layer, a creamy chocolate mousse or pudding layer, and a topping of chocolate whipped cream or meringue. This version includes an Oreo crust, a bittersweet chocolate brownie base, a milk chocolate mousse, chocolate whipped cream, and crunchy baked Oreo crumbles on top. The pie is named for its dark, muddy appearance that resembles the banks of the Mississippi River.
Can I make Mississippi Mud Pie ahead of time?
Absolutely — Mississippi Mud Pie is actually an excellent make-ahead dessert. You can prepare the crust and brownie layer up to 2 days in advance and store them covered in the refrigerator. The mousse layer can be added the day before serving, and the pie needs at least 3 hours to chill after the mousse is added. For best results, add the whipped cream topping and Oreo crumbles within 2-3 hours of serving so they stay fresh and crunchy. The fully assembled pie keeps well in the refrigerator for up to 5 days.
Why is my Mississippi Mud Pie brownie layer too cakey?
A cakey brownie layer in Mississippi Mud Pie is usually the result of overmixing the batter or overbaking. When you stir in the flour, mix only until the last streak disappears — overmixing develops gluten, which makes the brownie tough and cakey. For the baking time, the brownie should be slightly underbaked: a toothpick inserted in the center should come out with moist crumbs, not clean. Using an instant-read thermometer is the most reliable method — remove the pie from the oven when the brownie layer reaches 180°F internal temperature for a perfectly fudgy texture.
Can I freeze Mississippi Mud Pie?
Yes, Mississippi Mud Pie freezes beautifully, but I recommend a specific approach for best results. Freeze the pie after the mousse layer is set but before adding the whipped cream topping and Oreo crumbles. Wrap the pie plate tightly in plastic wrap, then a layer of aluminum foil, and freeze for up to 3 months. When ready to serve, thaw overnight in the refrigerator, then prepare fresh chocolate whipped cream and bake a fresh batch of Oreo crumb topping. This method ensures every layer tastes freshly made and the topping stays crunchy.
What is the difference between Mississippi Mud Pie and regular chocolate pie?
Mississippi Mud Pie is distinctly richer and more layered than a standard chocolate pie. While a regular chocolate pie might have a single chocolate pudding or cream filling, Mississippi Mud Pie features multiple distinct chocolate layers — typically a cookie crust, a dense fudgy brownie layer, a light chocolate mousse or pudding, and a whipped cream topping. The texture is intentionally varied: crunchy, fudgy, silky, and airy all in one slice. Traditional chocolate pies are often simpler in structure, while Mississippi Mud Pie is meant to be decadent, over-the-top, and deeply chocolatey.
How do I get clean slices of Mississippi Mud Pie?
Getting clean, beautiful slices of Mississippi Mud Pie requires a few key techniques. First, make sure the pie is well-chilled — at least 4 hours in the refrigerator, or preferably overnight. Use a long, sharp chef’s knife and dip it in hot water for 10 seconds, then wipe it completely dry with a clean towel before each cut. The hot knife glides through the layers without dragging or smearing. Make each cut in one smooth motion rather than sawing back and forth. For the first slice, expect a little imperfection — that’s the cook’s treat!
Can I use natural cocoa powder instead of Dutch-processed in Mississippi Mud Pie?
Yes, you can substitute natural unsweetened cocoa powder for Dutch-processed in most layers of Mississippi Mud Pie, but there are trade-offs. Natural cocoa is more acidic and lighter in color than Dutch-processed, which has been alkalized for a smoother, darker flavor. In the mousse layer, using natural cocoa will give you a lighter brown color and a slightly tangier chocolate flavor. In the crumb topping, Dutch-processed provides a deeper color that contrasts beautifully with the whipped cream. For the brownie layer, either works fine. I recommend keeping Dutch-processed for the mousse and topping if you can find it, but natural cocoa is a perfectly fine substitute in a pinch.
What can I use instead of Oreo cookies for the crust?
If you don’t have Oreo cookies, you can use any chocolate sandwich cookie for the crust — brands like Newman-O’s, Trader Joe’s Joe-Joe’s, or gluten-free alternatives all work wonderfully. You can also make a traditional graham cracker crust with chocolate graham crackers for a slightly different texture and flavor. For a completely different take, use crushed chocolate wafer cookies (like Nabisco Famous Chocolate Wafers) mixed with a little sugar and melted butter. Whatever you choose, you’ll need about 2 ½ cups of fine crumbs and 6 tablespoons of melted butter for a 9-inch pie plate.
How long does Mississippi Mud Pie need to chill?
Mississippi Mud Pie needs a total of at least 3-4 hours of chilling time after the mousse layer is added, but overnight is ideal for the best texture. The brownie layer should cool completely (about 1 hour at room temperature) before adding the mousse, then the mousse needs a minimum of 3 hours in the refrigerator to set properly. If you try to slice the pie too early, the mousse will be soft and the layers will run together. For the cleanest slices and the best flavor development, I recommend making the pie a day ahead and letting it chill for 8-12 hours.
Can I use milk chocolate instead of bittersweet in the brownie layer?
You can use milk chocolate in the brownie layer, but the result will be significantly sweeter and less intensely chocolatey. Milk chocolate has a higher sugar content and lower cacao percentage (usually 30-40%) compared to bittersweet (60-70%). If you make this swap, I recommend reducing the brown sugar by 2-3 tablespoons to balance the sweetness. The texture will still be fudgy, but the flavor profile will be more like a milk chocolate brownie — delicious in its own right, but different from the deep, dark chocolate experience of the original Mississippi Mud Pie.
Share Your Version!
I absolutely love seeing how this Mississippi Mud Pie turns out in your kitchen! Every time someone tags me in their creation, it reminds me why I do what I do — sharing the joy of baking with others. If you make this pie, please leave a star rating and comment below to let me know how it went. Did you try one of the variations? Did you add your own twist? Your feedback helps other readers and inspires me to keep creating new recipes.
Snap a photo of your beautiful Mississippi Mud Pie and share it on Instagram or Pinterest — tag me @leosfoods so I can see your masterpiece. I feature my favorite reader recreations in my stories every month! And if you have a question about any step in the recipe, drop it in the comments. I personally read and respond to every single one. From my NYC kitchen to yours — I hope this recipe brings as much warmth to your table as it does to mine. — Stella 🧡
Love This Recipe? Save It to Pinterest!
If you enjoyed this Mississippi Mud Pie recipe, don’t let it get lost in your browser tabs! 😄 Pin it now so you can find it again anytime — and explore hundreds more tried-and-tested recipes waiting for you on my Pinterest boards.
👉 Follow Stella on Pinterest @exorecipe
📌 Pin this recipe · 🔁 Re-pin your favorites · 💬 Tag me when you make it — I love seeing your creations!
“`
Print
Mississippi Mud Pie
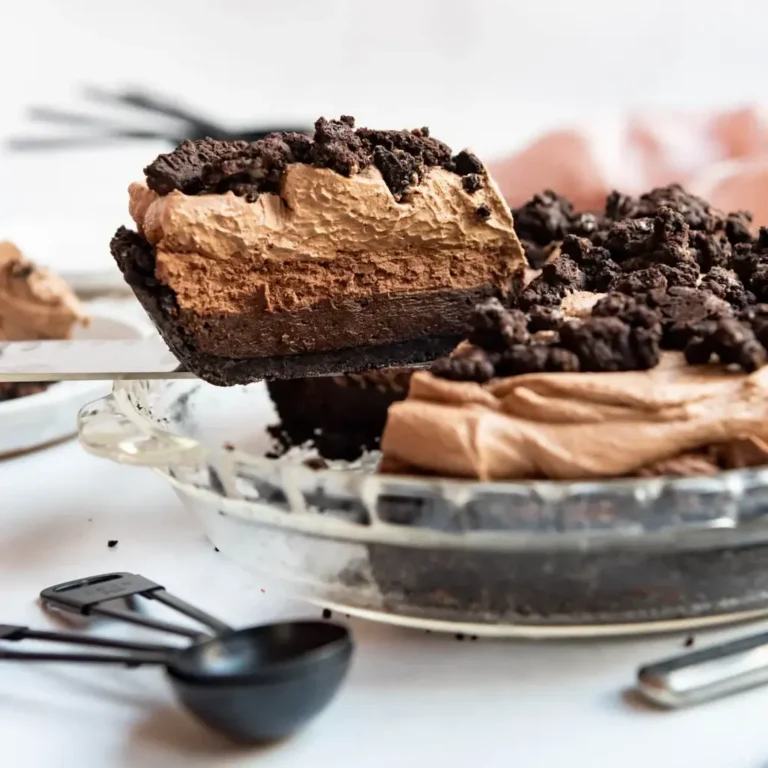
Rich and dark as the muddy Mississippi itself, this Mississippi Mud Pie recipe is any chocolate lover’s dream dessert with an Oreo cookie crust, a fudgy brownie-like base, chocolate mousse and chocolate whipped cream with Oreo crumbles sprinkled on top! It’s decadent and over-the-top in the best possible way!
Ingredients
- 25 Oreo cookies
- 6 Tablespoons salted butter (melted)
- 4 ounces bittersweet chocolate (chopped)
- 3 Tablespoons salted butter (melted)
- 3 Tablespoons vegetable oil
- 2 Tablespoons unsweetened cocoa powder
- 2/3 cup light brown sugar
- 2 large eggs
- 2 teaspoons vanilla extract
- 1/4 teaspoon salt
- 3 Tablespoons all-purpose flour
- 8 Oreo cookies
- 2 Tablespoons powdered sugar
- 1 Tablespoon dutch-processed cocoa powder
- Pinch of salt
- 2 Tablespoons salted butter (melted)
- 6 ounces milk chocolate, (chopped)
- 1 cup cold heavy cream
- 2 Tablespoons dutch-processed cocoa powder
- 2 Tablespoons powdered sugar
- Pinch of salt
- 1 cup heavy cream
- 1/4 cup granulated sugar
- 3 Tablespoons unsweetened cocoa powder
Instructions
- Preheat oven to 325°F. Finely crush Oreos into crumbs in a food processor or using a rolling pin and a heavy-duty ziplock bag.
- Add melted butter and stir until evenly moistened. Press into a 9-inch pie plate.
- Bake for 12-15 minutes until set.
- Heat chocolate, butter, oil, and cocoa powder in 20 second increments in the microwave, stirring between each burst of heat until completely melted.
- Add brown sugar, eggs, vanilla, and salt. Whisk well to combine.
- Stir in flour. Pour brownie batter into the prepared Oreo cookie crust.
- Bake 25-30 minutes just until a toothpick inserted into the brownie layer comes out barely wet with a little batter on it still. You can also test the brownie layer with an instant digital thermometer. It should read 180 degrees F when this layer is done so the pie will set up nice and fudgy.
- Roughly crush the cookies by pounding them a few times in a ziplock bag with a rolling pin.
- Add the powdered sugar, cocoa powder, and salt. Toss well.
- Drizzle the melted butter into the crushed cookie mixture and toss until evenly moistened. Spread the cookie pieces onto a baking sheet lined with parchment paper and bake for 10 minutes. Cool completely before sprinkling on top of the finished pie.
- Melt the chocolate in a large microwave-safe bowl by heating it for 20 second bursts and stirring well between each burst of heat. Once melted, let the chocolate cool for 10 minutes until about 90 to 100 degrees F.
- Meanwhile, beat cream, cocoa powder, powdered sugar, and salt the large bowl of a stand mixer fitted with the whisk attachment or with an electric mixer until soft peaks form.
- Stir 1/3 of the chocolate whipped cream into the cooled, melted chocolate. Then fold the remaining whipped cream into the chocolate mixture using a rubber spatula.
- Spread the chocolate mousse on top of the cooled brownie layer. Transfer the pie to the fridge and let it chill for at least 3 hours or overnight.
- Beat cream, sugar, and cocoa powder in a large bowl with a whisk attachment until stiff peaks form. Spread over the finished pie, then sprinkle with the crushed cookie pieces to finish.