Air Fryer Blooming Onion
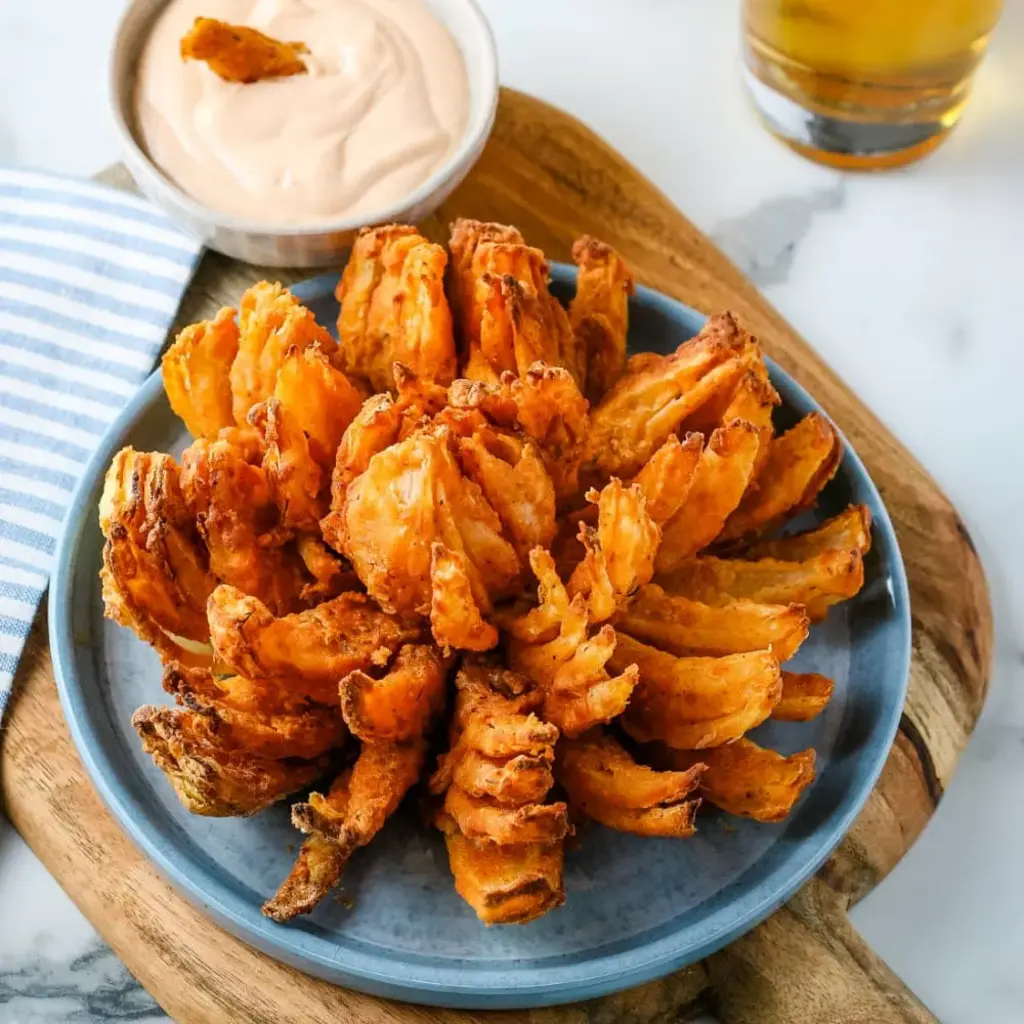
Table of Contents
Air Fryer Blooming Onion – Crispy, Healthier Game Day Snack with a Moroccan Spice Twist
I still remember the first time I saw a blooming onion at a state fair in Texas, years after moving to the US. I was stunned — a whole onion transformed into golden petals, crisp and seasoned, made for sharing. But when I tried it, the grease weighed me down. So I went back to my kitchen in New York City, pulled out my air fryer, and set out to create a lighter version that still delivered that satisfying crunch. This Air Fryer Blooming Onion is the result: all the drama and flavor of the original, with far less oil and a spice blend inspired by my Moroccan roots.
Imagine pulling apart petal after petal of tender sweet onion, each one coated in a perfectly seasoned, golden-crisp crust. The paprika and cayenne bring warmth, the cumin and thyme add depth, and every bite has that satisfying shatter before giving way to soft, sweet onion inside. It’s the kind of appetizer that disappears in minutes — ideal for game day, family gatherings, or just a fun weekend treat. And because we’re using the air fryer, you get that deep-fried texture with a fraction of the oil.
What makes my version special? I trained at Le Cordon Bleu in Paris and grew up helping my mother in our tiny kitchen in Marrakech, where she taught me that spices are the soul of any dish. I’ve taken that philosophy here, building a custom flour blend with Moroccan-inspired warmth. This recipe is foolproof — I’ll guide you through every cut and every coating. 💡 Stella’s Pro Tip: The key to perfect petals is letting the onion rest after cutting so the layers open naturally. Stick with me and you’ll nail it on the first try.
Why This Air Fryer Blooming Onion Recipe Is the Best
The Flavor Secret — Most blooming onion recipes rely on generic seasoning. I grew up watching my mother blend spices by feel in our kitchen in Marrakech, and I bring that same care here. The combination of paprika, cayenne, cumin, thyme, and oregano isn’t random — it’s a nod to the warm, layered spice profiles of North African cooking. Each ingredient has a role: the cumin adds earthiness, the cayenne brings heat that builds slowly, and the dried herbs lend a subtle floral note that makes this onion unforgettable.
Perfected Texture — At culinary school in Paris, I learned that great texture comes from proper technique. The double-coating method — flour, egg wash, then flour again — ensures every petal is completely covered. The air fryer then circulates hot air around each layer, creating a crust that’s shatteringly crisp without being greasy. The key is spraying the onion generously with oil mid-cook, which I’ll walk you through step by step.
Foolproof & Fast — I’ve tested this recipe over a dozen times in my NYC kitchen to make sure it works for home cooks. The cutting method may look intimidating, but once you master the 16-cut pattern, it becomes second nature. With the air fryer doing the heavy lifting, you get a restaurant-quality appetizer in under an hour — and cleanup is a breeze. Whether you’re hosting a Super Bowl party or just craving something crunchy, this recipe delivers every time.
Air Fryer Blooming Onion Ingredients
I picked up my sweet onions at the Union Square Greenmarket last weekend — they’re so large and juicy this time of year. The spices come from a little shop in Brooklyn that imports directly from Morocco, but everything you need is easily found at any US grocery store. Let me walk you through what to grab.
Ingredients List
- 1 large sweet onion (such as Vidalia or Walla Walla)
- 2 ½ cups all-purpose flour
- 1 tablespoon paprika
- 1 teaspoon cayenne pepper
- ½ teaspoon ground cumin
- ½ teaspoon dried thyme
- ½ teaspoon dried oregano
- 2 large eggs
- 1 cup milk (whole or 2%)
- 1 cup water
- Salt and pepper to taste
- Oil in a spray bottle (avocado or vegetable oil)
Ingredient Spotlight
Sweet Onion — The star of the show. Sweet onions like Vidalia or Walla Walla have a higher sugar content and lower sulfur content than standard yellow onions, which means they caramelize beautifully and taste mild and sweet even when raw. Look for onions that feel heavy for their size with no soft spots. A great sweet onion makes the difference between a good blooming onion and a great one.
Paprika & Cayenne — These two work together to create the signature color and heat. Paprika gives that deep red-orange hue and a subtle sweetness, while cayenne adds the kick. I use sweet Hungarian paprika for its rich color and flavor. If you want more heat, you can increase the cayenne to 1½ teaspoons — but taste your spice blend first.
Cumin — This is my Moroccan touch. Cumin adds an earthy, slightly nutty warmth that makes the seasoning blend unique. It’s not traditional in American blooming onion recipes, but once you try it, you’ll never go back. Toast whole cumin seeds and grind them yourself for the most vibrant flavor.
| Original Ingredient | Best Substitution | Flavor / Texture Impact |
|---|---|---|
| Sweet onion | Yellow onion + 1 tsp sugar in flour | Slightly sharper flavor; sugar helps caramelization |
| All-purpose flour | Gluten-free 1:1 flour blend | Slightly less crispy; add 1 tsp xanthan gum for structure |
| Cayenne pepper | Aleppo pepper or ½ tsp red pepper flakes (crushed) | Milder heat; Aleppo adds fruity notes |
| Milk | Unsweetened almond milk or oat milk | Slightly thinner wash; still works well |
How to Make Air Fryer Blooming Onion — Step-by-Step
Don’t let the cutting technique intimidate you — I’ve broken it down into simple steps. Once you see the petals open in the air fryer, you’ll be so proud of yourself. Let’s get started!
Step 1: Slice the Onion to Bloom
Cut off about ½ inch from the top of the onion and peel away the outer skin. Place the onion cut-side down on your cutting board. Starting about ½ inch from the root end, make a downward cut all the way through to the board. Repeat to make four evenly spaced cuts around the onion. Then make 3 additional cuts between each section until you have 16 evenly spaced cuts total. Turn the onion over and let it rest for 5 minutes — the petals will naturally begin to separate.
💡 Stella’s Pro Tip: Use a sharp chef’s knife and cut with confidence. The root end holds everything together, so keep it intact. If you cut too close to the root, the petals will fall apart during breading.
Step 2: Separate the Petals
After resting, use your fingers to gently separate the outer pieces of the onion. Work from the outside in, being careful not to tear the layers. The petals should fan out naturally like a flower. If any inner layers feel stuck, give them a few more minutes to relax.
⚠️ Common Mistake to Avoid: Rushing this step. If you try to force the petals apart, they’ll tear. Let the onion rest the full 5 minutes — patience here pays off with beautiful, intact petals.
Step 3: Prepare the Breading Station
In a large bowl, whisk together the flour, paprika, cayenne, cumin, thyme, oregano, 1 teaspoon salt, and ½ teaspoon black pepper. In a separate medium deep bowl, whisk the eggs, milk, and water until fully combined. Set both bowls side by side with a clean bowl nearby for the reserved flour.
💡 Stella’s Pro Tip: Taste your seasoned flour before using it — just a pinch on your tongue. The seasoning should be bold since some will be lost during frying. Adjust salt or cayenne now if needed.
Step 4: First Flour Coating
Place the onion in a clean bowl, cut-side up. Pour half the flour mixture over the top. Using a large spoon, work the flour between every petal — get deep into all the layers. Turn the onion over and pat off the excess flour. Reserve the remaining flour in the bowl for the final coating.
⚠️ Common Mistake to Avoid: Skipping the spaces between petals. If you don’t coat the inner layers now, they’ll be pale and soft after cooking. Be thorough — use your fingers to gently separate each petal and sprinkle flour inside.
Step 5: Dip in Egg Wash
Submerge the floured onion in the egg mixture, making sure it coats every petal. Lift the onion out and let the excess drip off for about 10 seconds. The egg wash helps the second flour layer adhere and creates that shatteringly crisp crust.
💡 Stella’s Pro Tip: Let the excess egg drip off thoroughly. Too much egg wash will make the second flour coating gummy instead of crispy. I give it a gentle shake over the bowl.
Step 6: Second Flour Coating
Transfer the onion back into the reserved flour mixture. Repeat the coating process, making sure every petal is covered again. Gently tap off any excess flour — you want a light, even coating, not a thick, clumpy one. There will be leftover flour in the bowl when you’re done.
⚠️ Common Mistake to Avoid: Pressing the flour into the onion. Be gentle — you want a delicate crust. Pressing too hard will compress the layers and make the coating heavy.
Step 7: Chill the Onion
Place the breaded onion in the refrigerator for 15 minutes. This helps the coating set and adhere to the onion, preventing it from sliding off during cooking. While it chills, preheat your air fryer.
💡 Stella’s Pro Tip: Chilling is non-negotiable. It firms up the coating and ensures the onion cooks evenly. If you’re short on time, 10 minutes is the absolute minimum.
Step 8: Preheat the Air Fryer
Preheat your air fryer to 350ºF for 10 minutes. A properly preheated air fryer ensures the onion starts cooking immediately, creating a crisp crust right away. Most air fryers have a preheat function, but if yours doesn’t, just run it empty for 10 minutes at 350ºF.
⚠️ Common Mistake to Avoid: Not preheating. A cold air fryer will cause the coating to absorb oil and become soggy rather than crisp. Always preheat fully.
Step 9: Spray with Oil and Place in Air Fryer
Remove the onion from the refrigerator and spray it generously all over with vegetable oil from a spray bottle. Make a sling from a sheet of aluminum foil — fold a long piece of foil into a 3-inch-wide strip — and place it under the onion to help you lift it in and out of the air fryer basket. Transfer the onion cut-side up into the basket.
💡 Stella’s Pro Tip: Spray every visible bit of flour with oil. Any dry spots will remain pale and floury after cooking. I spray from multiple angles to reach the inner petals.
Step 10: Air Fry
Set the timer for 25 minutes and cook at 350ºF. Spray the onion with cooking oil 2 to 3 times during cooking — open the basket and give it a quick spritz at the 10-minute and 20-minute marks. If any spots still have visible flour, spray them directly. The onion should be deep golden brown and crisp when done.
⚠️ Common Mistake to Avoid: Skipping the mid-cook spray. Unlike deep frying, air frying relies on oil for browning. Those interim sprays are what give you that golden, crunchy exterior.
Step 11: Season and Serve
After 25 minutes, carefully remove the onion using the aluminum foil sling. Transfer to a serving plate and season immediately with salt and pepper while it’s still hot. This is the moment of truth — the petals should be crisp, golden, and ready to pull apart. Serve with your favorite blooming onion dip.
💡 Stella’s Pro Tip: Season while the onion is hot so the salt sticks to the oiled surface. I use flaky sea salt for a nice crunch and extra burst of flavor.
| Step | Action | Duration | Key Visual Cue |
|---|---|---|---|
| 1 | Slice the onion | 5 min + 5 min rest | Petals begin to separate naturally |
| 2 | Separate petals | 2 min | Outer layers fan out like a flower |
| 3 | Prepare breading | 5 min | Flour is evenly seasoned |
| 4–6 | Coat the onion | 8 min | Even coating on all petals |
| 7 | Chill onion | 15 min | Coating feels firm to the touch |
| 8 | Preheat air fryer | 10 min | Air fryer reaches 350°F |
| 9 | Spray & transfer | 2 min | Onion is fully coated in oil |
| 10 | Air fry | 25 min | Deep golden brown, crisp petals |
| 11 | Season & serve | 2 min | Salt and pepper to taste |
Serving & Presentation
This Air Fryer Blooming Onion is a showstopper on any table. Place it in the center of a large platter with a small bowl of dipping sauce in the middle — the petals naturally cradle the dip, making it perfect for pulling and sharing. I love serving it with a spicy chipotle mayo or classic ranch. The contrast of the warm, crispy onion against a cool, creamy dip is pure magic.
In my NYC apartment, I often serve this alongside grilled burgers or a simple green salad for a complete game day spread. My Paris-trained chef instinct says to garnish with a sprinkle of fresh parsley and a pinch of smoked paprika for color. It’s also wonderful with a side of pickled jalapeños for extra heat.
| Pairing Type | Suggestions | Why It Works |
|---|---|---|
| Side Dish | Grilled burgers, hot dogs, BBQ chicken, simple salad | The crisp onion complements smoky, charred flavors |
| Sauce / Dip | Chipotle mayo, ranch, blue cheese, sriracha aioli | Cool creamy dips balance the warm spice |
| Beverage | IPA beer, margarita, iced tea, sparkling water with lime | Bubbles and citrus cut through the richness |
| Garnish | Fresh parsley, smoked paprika, chives, pickled jalapeños | Adds color, freshness, and a pop of flavor |
Make-Ahead, Storage & Reheating
Between my busy NYC schedule and recipe testing, I’ve learned the best ways to prep this blooming onion ahead of time. You can bread the onion up to a day in advance and keep it chilled, then air fry just before serving. Leftovers — though rare in my house — reheat beautifully in the air fryer.
| Method | Container | Duration | Reheating Tip |
|---|---|---|---|
| Refrigerator | Covered baking sheet or airtight container | Up to 2 days | Reheat in air fryer at 350°F for 3–5 min |
| Freezer | Freezer-safe bag, remove as much air as possible | Up to 2 months | Air fry from frozen at 350°F for 6–8 min |
| Make-Ahead | Breaded, on a baking sheet, covered | Up to 24 hours in advance | Add 2–3 minutes to cook time if starting from cold |
For reheating, the air fryer is your best friend. Leftover petals can go back in at 350°F for 3 to 5 minutes — they come out nearly as crisp as the first time. Avoid the microwave at all costs; it will turn the coating soggy. I’ve tested this after a late-night NYC dinner party, and the air fryer revival is truly impressive.
Variations & Easy Swaps
| Variation | Key Change | Best For | Difficulty Impact |
|---|---|---|---|
| Moroccan Spice Bloom | Add 1 tsp ras el hanout + ½ tsp turmeric | Unique flavor, dinner party wow factor | Easy (same method) |
| Gluten-Free Bloom | Use gluten-free 1:1 flour + 1 tsp xanthan gum | Gluten-sensitive guests | Easy (same method) |
| Buffalo-Style Bloom | Add 2 tbsp hot sauce to egg wash | Spicy food lovers, game day | Easy (same method) |
Moroccan Spice Bloom
This variation is closest to my heart. Add 1 teaspoon of ras el hanout and ½ teaspoon of turmeric to the flour mixture. Ras el hanout — a classic Moroccan blend — brings warm notes of cinnamon, coriander, and cardamom that pair beautifully with sweet onion. The turmeric gives the crust a gorgeous golden hue. I made this version for a dinner party in my NYC apartment and my guests couldn’t stop asking for the recipe. Serve with a harissa yogurt dip for the full experience.
Gluten-Free Bloom
I developed this version for a friend who has celiac disease, and it works beautifully. Use a high-quality gluten-free 1:1 flour blend — I recommend the one from King Arthur Flour. Add 1 teaspoon of xanthan gum to help the coating adhere and provide structure. The texture is slightly less shatteringly crisp than the original but still very satisfying. Make sure all your spices are certified gluten-free as well. This version has become a staple at my NYC friend gatherings.
Buffalo-Style Bloom
For those who love heat, this one’s for you. Whisk 2 tablespoons of your favorite hot sauce — Frank’s RedHot is my go-to — into the egg wash before coating the onion. The hot sauce adds a tangy, spicy kick that penetrates the crust. After air frying, drizzle a little extra hot sauce over the finished onion or serve with a blue cheese dip. It’s a fantastic twist for game day and pairs perfectly with cold beer.
How do you cut a blooming onion for an air fryer?
Start by cutting off about ½ inch from the top of a large sweet onion and peeling the outer skin. Place the onion cut-side down on your cutting board. Make a downward cut about ½ inch from the root end, cutting all the way through to the board. Repeat to make four evenly spaced cuts around the onion, then make 3 additional cuts between each section to create 16 total cuts. Turn the onion over and let it rest for 5 minutes so the petals naturally separate. The root end holds everything together, so be careful to leave it intact.
Can you make a blooming onion in an air fryer?
Yes, absolutely! The air fryer is actually one of the best ways to make a blooming onion at home. It produces a crust that’s just as crispy as deep frying but with significantly less oil — about 80% less fat. The key is to preheat the air fryer fully, spray the onion generously with oil before cooking, and give it a few extra sprays during the cooking process. At 350°F for 25 minutes, you’ll get a perfectly golden, crunchy blooming onion that rivals any restaurant version.
Why is my blooming onion not crispy in the air fryer?
There are a few common reasons your blooming onion might not be crispy. First, make sure you’re preheating the air fryer for a full 10 minutes — a cold start leads to soggy coating. Second, spray the onion generously with oil before cooking and again at the 10- and 20-minute marks; oil is essential for browning and crisping in an air fryer. Third, don’t overcrowd the basket — the onion needs space for hot air to circulate around every petal. Finally, make sure your coating isn’t too thick; tap off excess flour after each coating step.
What is the best onion for a blooming onion?
Sweet onions are the best choice for a blooming onion. Varieties like Vidalia, Walla Walla, or Texas Sweet have a higher sugar content and lower sulfur content than standard yellow or white onions. This means they caramelize beautifully during cooking and taste mild and sweet even when raw, which is important since some petals will be less cooked than others. Look for onions that are large (about the size of a baseball or bigger), feel heavy for their size, and have no soft spots or signs of sprouting.
How do you keep a blooming onion from falling apart?
The key to keeping a blooming onion intact is to leave about ½ inch of the root end uncut. This is the anchor that holds all the petals together. When you make your cuts, stop about ½ inch above the root — don’t cut all the way through. Additionally, handle the onion gently during the breading process, especially when dipping it in the egg wash. Chilling the breaded onion for 15 minutes before air frying also helps the coating set and provides extra stability during cooking.
Can I use gluten-free flour for a blooming onion?
Yes, you can definitely make a gluten-free blooming onion. Use a high-quality gluten-free 1:1 flour blend — I recommend King Arthur Flour’s Measure for Measure blend. Add 1 teaspoon of xanthan gum per 2½ cups of flour to help the coating adhere and provide structure. The texture will be slightly less crisp than the traditional version but still very good. Make sure all your spices and other ingredients are certified gluten-free as well. The rest of the method remains exactly the same.
What dip goes with blooming onion?
Blooming onions pair wonderfully with a variety of dips. The classic choice is a creamy ranch dressing or a chipotle mayo — the cool, creamy texture balances the warm, spicy crunch of the onion. I also love a spicy sriracha aioli, blue cheese dip, or a simple mixture of mayonnaise, ketchup, and horseradish (sometimes called “blooming onion sauce”). For a Moroccan-inspired twist, try a harissa yogurt dip. The key is to choose something creamy with a bit of tang or heat to complement the savory onion.
How long do you cook a blooming onion in the air fryer?
Cook a blooming onion in the air fryer at 350°F for 25 minutes total. Preheat the air fryer for 10 minutes before adding the onion. During cooking, spray the onion with oil at the 10-minute and 20-minute marks to ensure even browning and crispiness. The onion is done when it’s deep golden brown and the petals are crisp to the touch. If your air fryer runs hot or cool, check at 22 minutes and add time as needed. Every air fryer is slightly different, so get to know yours.
Can you reheat a blooming onion in the air fryer?
Yes, reheating a blooming onion in the air fryer is the best way to bring back its crispiness. Place leftover petals in the air fryer basket at 350°F for 3 to 5 minutes. You don’t need to add extra oil — the residual oil in the coating will be enough to re-crisp the exterior. Avoid using a microwave, as it will make the coating soggy and chewy. I’ve tested this many times in my NYC kitchen, and the air fryer revival is nearly as good as the freshly cooked version.
Is blooming onion healthy in the air fryer?
An air fryer blooming onion is significantly healthier than the traditional deep-fried version. By using a spray bottle to apply oil rather than submerging the onion in hot oil, you reduce the fat content by about 80%. A typical deep-fried blooming onion can have over 30 grams of fat per serving, while this air fryer version has about 6 grams. Plus, sweet onions are rich in antioxidants and prebiotic fibers that support gut health. It’s still a treat — but a much lighter one that you can feel good about enjoying on game day.
Love This Recipe? Save It to Pinterest!
If you enjoyed this Air Fryer Blooming Onion recipe, don’t let it get lost in your browser tabs! 😄 Pin it now so you can find it again anytime — and explore hundreds more tried-and-tested recipes waiting for you on my Pinterest boards.
👉 Follow Stella on Pinterest @exorecipe
📌 Pin this recipe · 🔁 Re-pin your favorites · 💬 Tag me when you make it — I love seeing your creations!
Share Your Version!
I hope you love this Air Fryer Blooming Onion as much as my family and friends do here in NYC. If you make it, I’d be so grateful if you’d leave a star rating and comment below — it helps other readers find the recipe and lets me know what you think. Did you try the Moroccan spice twist? Or maybe you invented your own variation? I’d love to hear about it.
Snap a photo of your blooming onion and share it on Instagram or Pinterest — tag @leosfoods so I can see your creation. And if you have any questions about the cutting technique or the air fryer timing, drop them in the comments and I’ll answer personally. Your feedback makes this community so special.
From my NYC kitchen to yours — I hope this recipe brings as much warmth to your table as it does to mine. — Stella 🧡
Air Fryer Blooming Onion
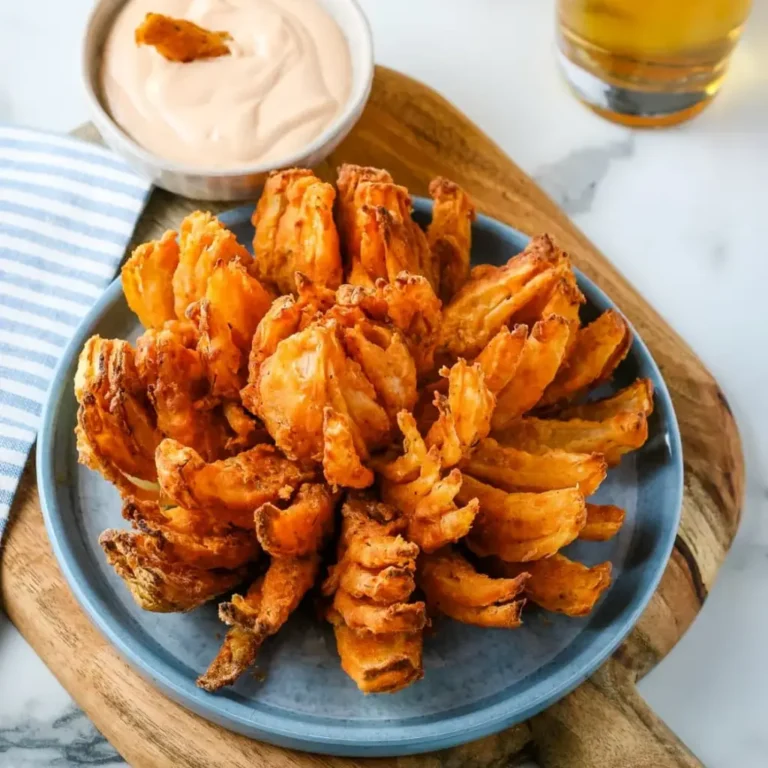
Learn how to make this restaurant quality appetizer at home for a fun game day snack that your family and friends will love!
Ingredients
- 1 large sweet onion
- 2 ½ cups all-purpose flour
- 1 tablespoon paprika
- 1 teaspoon cayenne pepper
- ½ teaspoon ground cumin
- ½ teaspoon dried thyme
- ½ teaspoon dried oregano
- 2 large eggs
- 1 cup milk
- 1 cup water
- Salt and pepper to taste
- Oil in a spray bottle
Instructions
- Slice the onion to make it bloom. Start by cutting off 1/2 inch from the top of the onion, then peel the outer skin from the onion.
- Place the onion cut-side down. Starting about 1/2 inch from the root, make a downward cut all the way through to the cutting board.
- Repeat to make four evenly spaced cuts around the onion. Make 3 additional cuts between each section until you have 16 evenly spaced cuts.
- Turn the onion over and set aside for 5 minutes to allow the petals to relax.
- Prior to breading use your fingers to gently separate the outer pieces.
- Whisk the flour, paprika, cayenne, cumin, thyme, oregano, salt and pepper in a large bowl. In a medium deep bowl, whisk the eggs, milk, and water.
- Place the onion in a clean bowl, cut-side up, and pour the flour mixture on top. Using a large spoon to coat the onion with the flour mixture, especially between the onion petals. Turn the onion over and pat off the excess flour. Reserve the bowl of flour.
- Put the onion in the egg mixture and coat evenly. Remove and let the excess drip off.
- Then transfer the onion back into the reserved flour mixture and repeat the flouring process. Be sure you gently tap off extra flour. There will be leftover flour in the bowl when you are done.
- Place the onion in the refrigerator.
- Preheat the air fryer for 10 minutes to 350ºF.
- Remove the onion from the refrigerator and spray generously with vegetable oil from a spray bottle.
- After making a sling from a sheet of aluminum foil transfer the onion cut side up into the fryer basket.
- Set the timer for 25 minutes and cook. Spray the onion with the cooking oil 2-3 times as you cook it. If any spots still have visible flour spray them with the oil.
- After 25 minutes remove onion using the aluminum foil sling and season with salt and pepper.
- Serve with the blooming onion dip.