Rose Gold Raspberry Cheesecake Bombs with Mirror Glaze
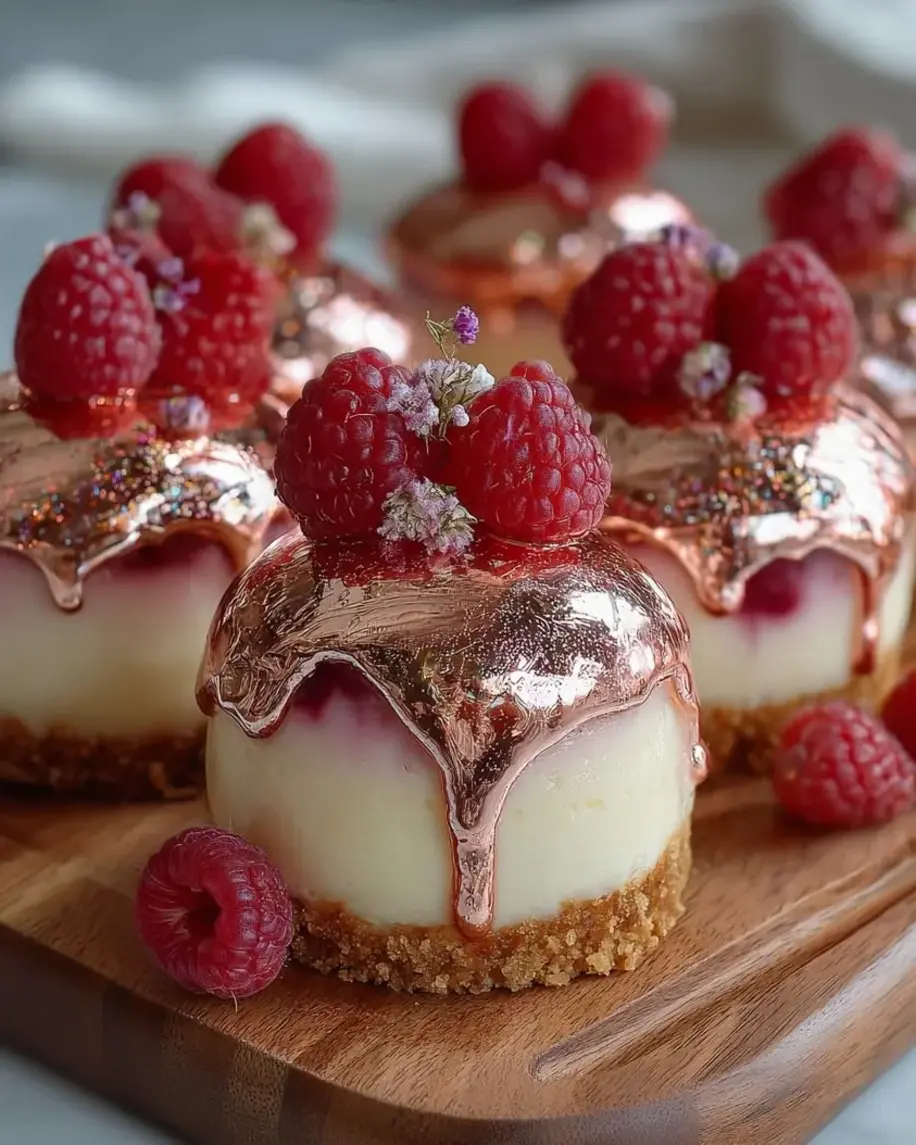
Table of Contents
Rose Gold Raspberry Cheesecake Bombs – A Showstopping Mirror Glaze Dessert
I still remember the exact moment I perfected my rose gold raspberry cheesecake bombs. It was a drizzly Tuesday in my New York City apartment, but I was determined to create something that felt like pure glamour. Growing up in Morocco, I was surrounded by vibrant colors and luxurious ingredients like rose water and gold leaf. Years later, during my pastry training in Paris, I fell in love with the precision of mirror glazes. Combining these worlds, I knew this easy cheesecake dessert had to be something special. The very first bite—a cold, creamy cheesecake shell giving way to a tart raspberry heart—told me I had struck gold.
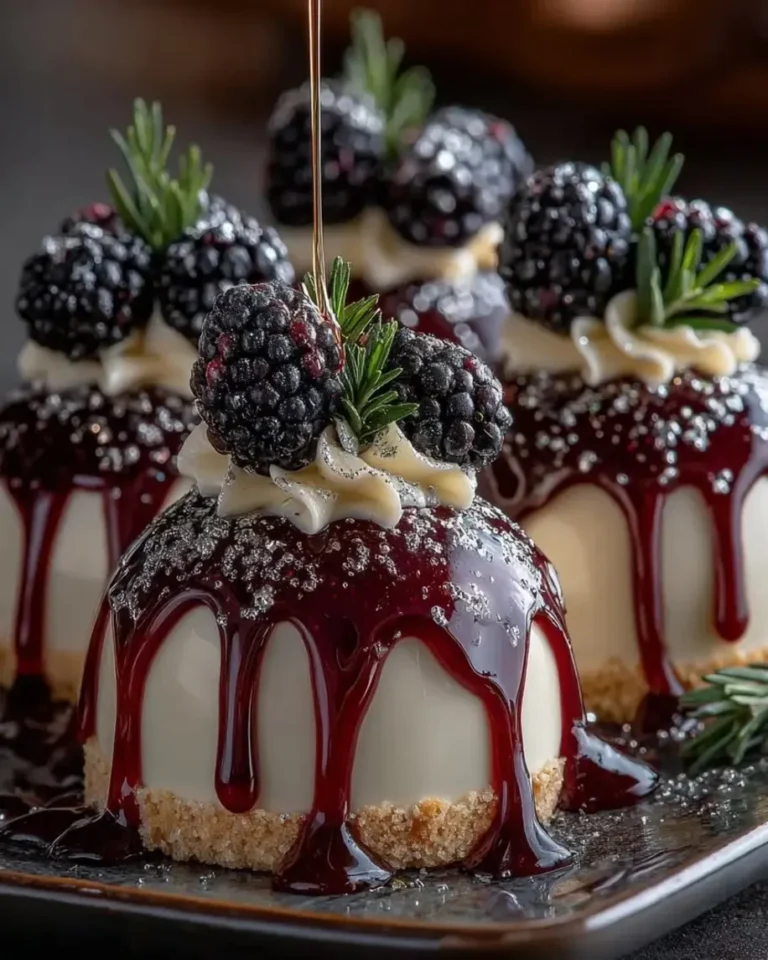
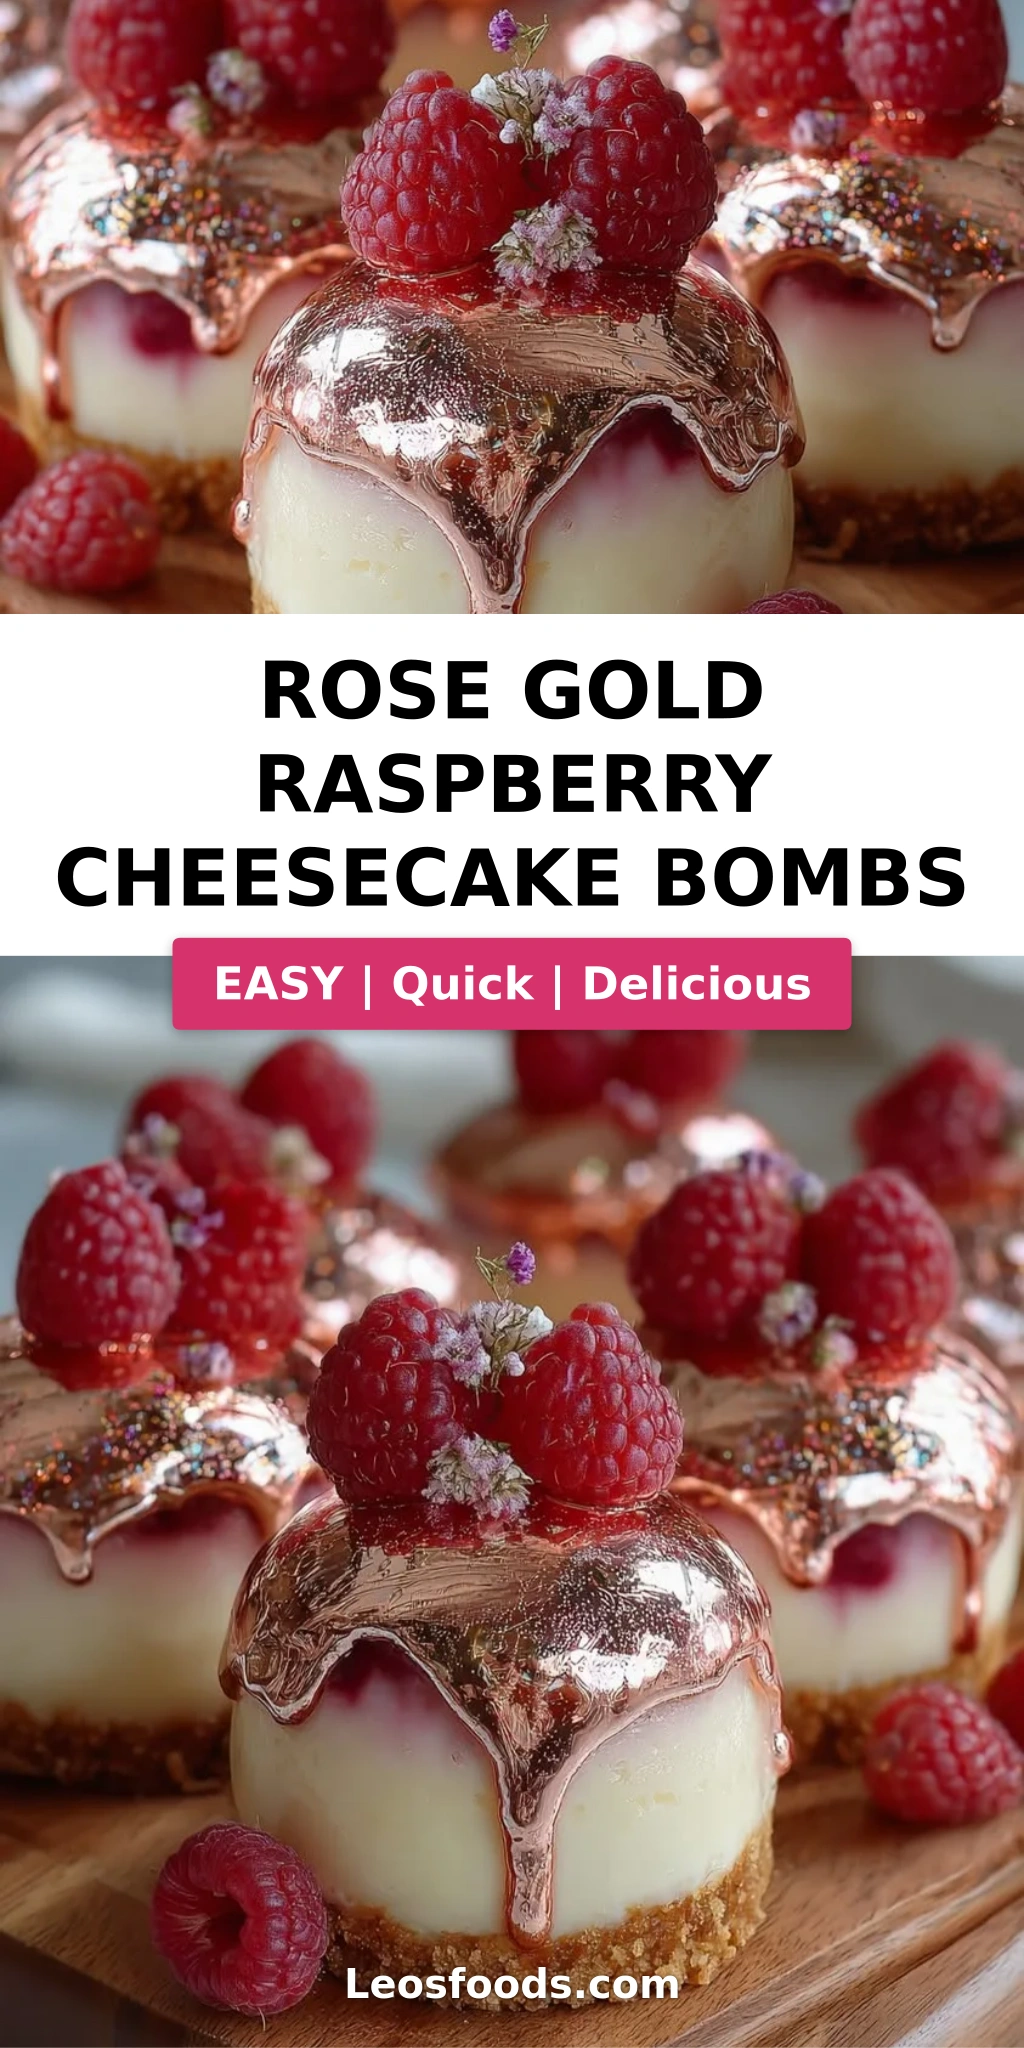
Imagine this: a perfectly round, frozen cheesecake ball enrobed in a shimmering, jewel-toned rose gold mirror glaze. The fork glides through the glossy exterior, revealing a velvety raspberry-infused cheesecake interior. Nestled right in the center is a burst of bright, tangy raspberry preserves that cuts through the richness like a vibrant exclamation point. Each component is designed to harmonize—the buttery graham cracker base adds a familiar crunch, while the edible shimmer dust catches the light with every single bite. These are not just homemade cheesecake bombs; they are little spheres of edible art.
You might think a recipe this stunning is best left to professional patissiers, but I promise you can master this in your own kitchen. My version breaks down the French technique into foolproof, American-friendly steps. The secret to a flawless mirror glaze is all in the temperature—and I’ll walk you right through it. 💡 Stella’s Pro Tip: Getting the glaze to exactly 90-95°F is the difference between a glossy masterpiece and a cracked mess. I will also share the common mistake to avoid: not freezing the cheesecake bombs long enough before glazing. Trust me, patience here is your greatest ally.
Why This Rose Gold Raspberry Cheesecake Bombs Recipe Is the Best
The Flavor Secret: This isn’t just another sweet dessert. I’ve layered flavors like a chef. The tangy cream cheese mixture is balanced by the intense sweetness of the white chocolate glaze. The raspberry puree in the cheesecake adds a subtle fruitiness, while the surprise center of lemon-spiked raspberry preserves delivers a jolt of brightness. It’s a perfectly orchestrated bite, inspired by the balance I learned to love in Moroccan tagines and refined through French patisserie.
Perfected Texture: This recipe is a masterclass in contrast. The frozen, mousse-like cheesecake core is luxuriously creamy. The mirror glaze, once set, offers a delicate, snappy shell that shatters softly as you cut into it. The graham cracker crust provides a buttery, sandy finish. I’ve tested the ratios of gelatin and cream to ensure that the filling is firm enough to hold its shape for glazing, but melts in the mouth like a cloud.
Foolproof & Fast for Entertaining: While the total time is long, the active work is only 40 minutes. The hardest part is waiting! These raspberry cheesecake balls are the ultimate make-ahead dessert for a dinner party. You can prepare and freeze them weeks in advance. Then, on the day of your event, simply whip up the glaze, dip them, and watch your guests’ jaws drop. I’ve streamlined the gelatin blooming and glaze technique so that even a complete beginner can achieve a professional, glossy finish.
Rose Gold Raspberry Cheesecake Bombs Ingredients
I source my ingredients from the best spots around NYC. I get my cream cheese from a deli in Chelsea Market, my white chocolate from a specialty shop in SoHo, and my raspberries from the Union Square Greenmarket. But don’t worry—everything here is easy to find at any well-stocked US grocery store.
Ingredients List
For the Cheesecake Bombs:
- 12 oz cream cheese, softened
- 1/2 cup heavy cream
- 1/3 cup powdered sugar
- 1 tsp vanilla extract
- 1/2 cup raspberry puree
- 1 tsp unflavored gelatin
- 2 tbsp warm water
For the Raspberry Center:
- 1/2 cup raspberry preserves
- 1 tbsp lemon juice
For the Rose Gold Mirror Glaze:
- 1/2 cup white chocolate, chopped
- 1/3 cup sweetened condensed milk
- 1/4 cup water
- 1 tbsp gelatin powder
- 2 tbsp warm water
- Rose gold food coloring
- 1 tsp edible shimmer dust
For the Cookie Base:
- 1 cup crushed graham crackers
- 3 tbsp melted butter
- 1 tbsp brown sugar
For Garnish (optional):
- Fresh raspberries
- White chocolate curls
- Dried rose petals
Ingredient Spotlight
Cream Cheese: This is the backbone of our homemade cheesecake bombs. Use full-fat, block-style cream cheese for the best texture and stability. Philadelphia brand is my go-to. Avoid whipped or low-fat spreads, as they contain too much water and will make your filling grainy or too soft.
White Chocolate: A high-quality white chocolate with cocoa butter (like Valrhona or Guittard) is essential for a smooth, glossy mirror glaze. Avoid white “melting wafers” or candy melts, as they are designed for different purposes and won’t create the same shiny, fluid finish.
Gelatin: This is the magic ingredient for both the cheesecake structure and the mirror glaze. I use powdered, unflavored gelatin (like Knox). Proper “blooming” in cold water is non-negotiable—it ensures a silky-smooth texture without lumps.
Raspberries: For the puree, fresh or frozen raspberries work beautifully. If using frozen, just thaw them and use the juice. For the center, I prefer a good quality seedless raspberry preserves for a perfectly smooth texture.
| Original Ingredient | Best Substitution | Flavor / Texture Impact |
|---|---|---|
| Cream Cheese | Dairy-free cream cheese (e.g., Kite Hill) | Slightly less tangy, softer set. Freeze for 8+ hours for stability. |
| White Chocolate | High-quality white chocolate chips (e.g., Ghirardelli) | May require straining for a perfectly smooth glaze. Still glossy. |
| Raspberry Preserves | Fresh raspberries cooked down with sugar | Brighter, more tart flavor. Will have seeds unless strained. |
| Graham Crackers | Gluten-free graham crackers or crushed almonds | Adds a nutty flavor or makes the recipe gluten-free. |
How to Make Rose Gold Raspberry Cheesecake Bombs — Step-by-Step
Let’s break this down into manageable steps. I’ve organized them so you can work efficiently while the components chill. Trust the process, and you’ll be rewarded with the most stunning rose gold raspberry cheesecake bombs.
Step 1: Bloom the Gelatin
In a small bowl, sprinkle 1 tsp of unflavored gelatin over 2 tbsp of warm water. Stir gently and let it sit for 5 minutes until it becomes a firm, rubbery mass. This is called “blooming.”
💡 Stella’s Pro Tip: Always sprinkle the gelatin over the water, not the other way around. This ensures even hydration and prevents clumps.
Step 2: Make the Cheesecake Base
In a large bowl, beat the softened 12 oz cream cheese, 1/3 cup powdered sugar, 1 tsp vanilla extract, and 1/2 cup raspberry puree until completely smooth and lump-free. Use a stand mixer or hand mixer on medium speed.
Step 3: Whip the Cream
In a separate cold bowl, whip the 1/2 cup heavy cream to stiff peaks. Be careful not to over-whip it into butter. You want it to hold its shape firmly.
⚠️ Common Mistake to Avoid: Under-whipping the cream. Soft peaks will deflate when folded into the cream cheese, resulting in a dense, heavy cheesecake bomb.
Step 4: Fold Everything Together
Gently melt the bloomed gelatin in the microwave for 5-10 seconds until liquid. Quickly stir it into the cream cheese mixture. Then, using a rubber spatula, gently fold in the whipped cream until just combined. No white streaks should remain.
Step 5: Assemble the Bombs
Fill silicone dome molds halfway with the cheesecake mixture. In a small bowl, mix the 1/2 cup raspberry preserves with 1 tbsp lemon juice. Spoon about 1/2 tsp of the preserve mixture into the center of each mold. Cover with the remaining cheesecake mixture, ensuring the filling is completely enclosed.
Step 6: Freeze Solid
Place the filled molds on a baking sheet and freeze for at least 6 hours, or preferably overnight. This is critical. The bombs must be frozen solid to withstand the warm glaze.
💡 Stella’s Pro Tip: If you want to speed this up, freeze them for 2 hours, then pop them out of the molds and freeze them directly on the baking sheet for another 2 hours. They freeze faster individually.
Step 7: Make the Cookie Base
While the bombs freeze, combine 1 cup crushed graham crackers, 3 tbsp melted butter, and 1 tbsp brown sugar. Press about 1 tablespoon of the mixture into small, compact rounds on a parchment-lined tray. Chill in the fridge until ready to use.
Step 8: Make the Rose Gold Mirror Glaze
Bloom 1 tbsp of gelatin powder in 2 tbsp of warm water. In a small saucepan, heat 1/4 cup water and 1/3 cup sweetened condensed milk until warm (do not boil). Pour this hot liquid over 1/2 cup chopped white chocolate. Let it sit for 1 minute, then stir until smooth. Add the bloomed gelatin, a few drops of rose gold food coloring, and 1 tsp edible shimmer dust. Use an immersion blender to blend until completely smooth and glossy. Let the glaze cool to 90-95°F.
⚠️ Common Mistake to Avoid: The glaze is too hot or too cold. If it’s over 100°F, it will melt the frozen bomb. If it’s under 85°F, it will set too thick and not create a smooth mirror finish. Use a candy thermometer!
Step 9: Glaze and Garnish
Remove the frozen cheesecake bombs from the molds. Place them on a wire rack set over a baking sheet. Pour the prepared rose gold mirror glaze evenly over each bomb until fully coated. The excess glaze will drip onto the baking sheet. Immediately transfer the glazed bombs onto the chilled cookie bases. Garnish with a fresh raspberry, a white chocolate curl, and a sprinkle of dried rose petals before the glaze sets completely.
| Step | Action | Duration | Key Visual Cue |
|---|---|---|---|
| 1 | Bloom Gelatin | 5 mins | Firm, rubbery mass |
| 2-4 | Make Cheesecake Filling | 10 mins | Smooth, no lumps |
| 5 | Fill Molds | 10 mins | Center filled, sealed |
| 6 | Freeze Bombs | 6+ hours | Rock solid |
| 7 | Make Cookie Base | 5 mins | Compact, holds shape |
| 8 | Make Mirror Glaze | 10 mins | Glossy, 90-95°F |
| 9 | Glaze & Garnish | 5 mins | Smooth, shiny coating |
Serving & Presentation
These beauties are best served straight from the refrigerator, not the freezer. Let them thaw in the fridge for about 20-30 minutes before serving. This softens the cheesecake to a perfect mousse-like consistency while keeping the center firm and the glaze intact. I love to plate them simply on a white or mirrored cake stand to let the colors pop. A delicate dusting of extra shimmer dust right before serving adds an ethereal glow.
Growing up in Morocco, we often served sweet pastries with fresh mint tea. While these cheesecake bombs are a world away from that tradition, the principle remains the same—balance. The richness of the dessert begs for a counterpart. A dollop of lightly sweetened crème fraîche or a few fresh blackberries on the side can elevate the entire experience, cutting through the sweetness with a touch of elegant acidity.
| Pairing Type | Suggestions | Why It Works |
|---|---|---|
| Side Dish | Fresh berries, mint leaves | Adds freshness and color contrast. |
| Sauce / Dip | Crème fraîche, berry coulis | Tangy sauces balance the sweet glaze. |
| Beverage | Espresso, rosé champagne, mint tea | Bitter or bubbly drinks cleanse the palate. |
| Garnish | Dried rose petals, gold leaf, white chocolate shards | Adds visual flair and a hint of floral aroma. |
Make-Ahead, Storage & Reheating
As a busy NYC food blogger, I rely on make-ahead recipes. These homemade cheesecake bombs are perfect for that. You can keep the unglazed, frozen bombs in a freezer bag for up to 1 month. When you’re ready to serve, just make the fresh glaze. This is my favorite way to manage stress for big dinner parties!
| Method | Container | Duration | Reheating Tip |
|---|---|---|---|
| Refrigerator | Airtight container | 3-4 days | Serve directly from fridge; no reheating needed. |
| Freezer | Freezer-safe bag (unglazed) | 1 month | Glaze directly from frozen. |
| Make-Ahead | Molded & frozen in pan | 2 weeks in advance | Pop out of molds and glaze day of serving. |
If you have leftover glazed bombs, store them in an airtight container in the refrigerator. The glaze might lose some of its high shine after a day or two, but it will still taste incredible. I do not recommend freezing the glazed bombs, as the glaze can weep and become sticky when thawed.
Variations & Easy Swaps
Once you master the basic technique, the possibilities are endless. Here are some of my favorite twists on this easy cheesecake dessert.
| Variation | Key Change | Best For | Difficulty Impact |
|---|---|---|---|
| Chocolate Lover’s | Chocolate center + dark chocolate glaze | Chocolate enthusiasts | Easy |
| Gluten-Free Friendly | Almond flour crust | Gluten-free guests | Easy |
| Tropical Twist | Mango puree + passion fruit center | Summertime treats | Medium |
Chocolate Lover’s Variation
For a deeply decadent twist, swap the raspberry puree in the cheesecake for 1/4 cup of melted dark cocoa powder, and replace the raspberry preserve center with a dollop of Nutella or a chunk of dark chocolate. Use a dark chocolate mirror glaze instead of white chocolate for a rich, midnight finish. It reminds me of the intense, bittersweet chocolate mousse we made in Paris.
Gluten-Free Friendly Variation
This one is incredibly simple. Instead of graham crackers for the base, use 1 cup of almond flour mixed with 3 tablespoons of melted butter and 1 tablespoon of maple syrup. Press and bake at 350°F for 8 minutes until golden. This creates a nutty, buttery base that is entirely gluten-free and adds a lovely texture contrast.
Tropical Twist Variation
Inspired by the vibrant fruit markets in Morocco, I love making a tropical version of these raspberry cheesecake balls. Swap the raspberry puree for mango puree. Replace the raspberry preserves with a passion fruit curd or guava paste. The floral, tangy notes of passion fruit pair magically with the creamy cheesecake and the sweet rose gold glaze.
What is the best way to achieve a rose gold shimmer on raspberry cheesecake bombs?
The key to a stunning rose gold shimmer is using a combination of high-quality rose gold gel food coloring and edible shimmer dust (also called luster dust). The gel coloring gives the glaze its base pinky-copper hue, while the shimmer dust suspended in the glaze creates the metallic, mirror-like finish. I recommend using an immersion blender to ensure the shimmer dust is fully dispersed without creating air bubbles. Apply the glaze when it is between 90-95°F for the thinnest, most reflective coating.
Can I substitute fresh raspberries with frozen ones in cheesecake bombs?
Absolutely! Frozen raspberries work perfectly, especially when making the raspberry puree for the cheesecake base. In fact, frozen fruit is often picked at peak ripeness and can be more flavorful than out-of-season fresh berries. Simply thaw the frozen raspberries, drain any excess liquid (or use the juice to intensify the flavor), and blend or mash them into a smooth puree. You can strain out the seeds if you prefer a smoother texture, just as I do in my NYC kitchen.
How long do rose gold raspberry cheesecake bombs need to chill before serving?
Once glazed and assembled, the cheesecake bombs need to thaw in the refrigerator for at least 20-30 minutes before serving. This crucial step transforms the frozen, solid filling into a luxuriously creamy, mousse-like texture that is easy to bite through. If you serve them straight from the freezer, the filling will be too hard and icy. If you let them sit out at room temperature for too long, the mirror glaze can become sticky and the structure may soften too much. The fridge is the perfect middle ground.
What type of chocolate works best for coating homemade cheesecake bombs?
For a flawless mirror glaze, you must use a high-quality white chocolate that contains real cocoa butter. Couverture chocolate (like Valrhona or Callebaut) is ideal because it melts smoothly and has a high cocoa butter content, which creates the perfectly fluid and glossy consistency needed for a mirror finish. Avoid “white melting wafers,” almond bark, or candy melts, as they are formulated to set hard and thick, not to create the thin, shiny shell that defines a mirror glaze.
Can I make these cheesecake bombs ahead of time for a party?
Yes, and I highly recommend it! This is the ultimate make-ahead dessert. You can prepare the cheesecake bombs fully (without the glaze) and freeze them solid in an airtight container for up to one month. On the day of your party, simply prepare the rose gold mirror glaze, which takes about 15 minutes. Dip the frozen bombs, add your garnishes, and let them thaw in the fridge for 30 minutes before serving. This makes entertaining completely stress-free.
My mirror glaze cracked. What went wrong?
A cracked mirror glaze is almost always a temperature issue. The most common culprit is the glaze being too cold when poured, making it too thick to form a smooth, self-leveling layer. Conversely, if the cheesecake bomb isn’t frozen solid, the warm glaze can cause it to expand and crack the shell. Always ensure your bombs are rock hard (frozen for 6+ hours) and your glaze is precisely between 90-95°F. Using a reliable digital thermometer is the best way to guarantee success.
Can I use a different fruit for the center?
Definitely! The technique is incredibly versatile. Strawberry, blackberry, or cherry preserves all work beautifully as a substitute for the raspberry center. For a more sophisticated twist, try a spoonful of passion fruit curd or a dollop of salted caramel. Just ensure that whatever filling you use is thick and not too runny, or it will bleed into the cheesecake mixture. A thick jam or curd creates the best defined “surprise” center.
How do I store leftover cheesecake bombs?
Store any leftover glazed cheesecake bombs in an airtight container in the refrigerator for up to 3-4 days. Keep in mind that the mirror glaze will lose its high-shine mirror effect over time due to condensation in the fridge, but the flavor will remain delicious. I do not recommend freezing the glazed bombs, as the glaze can weep and become tacky upon thawing. If you have unglazed frozen bombs, they can be kept in a freezer bag for up to a month.
Share Your Version!
I absolutely love seeing how you put your own spin on my recipes! If you try these Rose Gold Raspberry Cheesecake Bombs, please leave a star rating and a comment below telling me how it went. Did you try one of the variations? Did the mirror glaze turn out perfectly shiny? Your feedback helps me create more foolproof recipes for you.
Don’t forget to snap a photo of your beautiful creation and share it on Instagram or Pinterest. Tag me @leosfoods so I can feature my favorites in my stories! I still remember the first time my mirror glaze came out perfectly—it felt like winning a Michelin star in my own kitchen. I can’t wait to see your masterpieces. From my NYC kitchen to yours — I hope this recipe brings as much warmth to your table as it does to mine. — Stella 🧡
Love This Recipe? Save It to Pinterest!
If you enjoyed this Rose Gold Raspberry Cheesecake Bombs recipe, don’t let it get lost in your browser tabs! 😄 Pin it now so you can find it again anytime — and explore hundreds more tried-and-tested recipes waiting for you on my Pinterest boards.
👉 Follow Stella on Pinterest @stellarecipeblog
📌 Pin this recipe · 🔁 Re-pin your favorites · 💬 Tag me when you make it — I love seeing your creations!
Rose Gold Raspberry Cheesecake Bombs
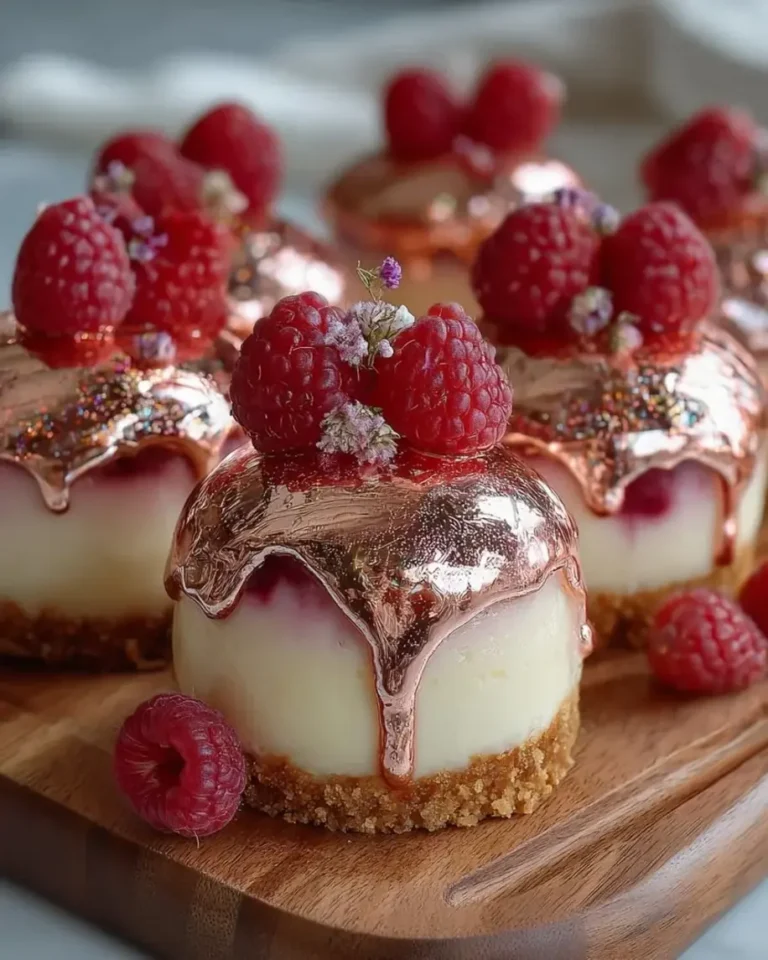
Decadent cheesecake bombs with a raspberry center, coated in a rose gold mirror glaze and served on a cookie base.
- Total Time: 6 hours 40 minutes (includes freezing)
- Yield: 6 1x
Ingredients
- For the Cheesecake Bombs:
- 12 oz cream cheese, softened
- 1/2 cup heavy cream
- 1/3 cup powdered sugar
- 1 tsp vanilla extract
- 1/2 cup raspberry puree
- 1 tsp unflavored gelatin
- 2 tbsp warm water
- For the Raspberry Center:
- 1/2 cup raspberry preserves
- 1 tbsp lemon juice
- For the Rose Gold Mirror Glaze:
- 1/2 cup white chocolate, chopped
- 1/3 cup sweetened condensed milk
- 1/4 cup water
- 1 tbsp gelatin powder
- 2 tbsp warm water
- Rose gold food coloring
- 1 tsp edible shimmer dust
- For the Cookie Base:
- 1 cup crushed graham crackers
- 3 tbsp melted butter
- 1 tbsp brown sugar
- For Garnish (optional):
- Fresh raspberries
- White chocolate curls
- Dried rose petals
Instructions
- Dissolve gelatin in warm water and let bloom for 5 minutes.
- Beat cream cheese, powdered sugar, vanilla extract, and raspberry puree until smooth.
- Whip heavy cream to soft peaks and fold into the cheesecake mixture.
- Melt the bloomed gelatin gently and stir into the cheesecake mixture.
- Fill silicone dome molds halfway with cheesecake filling.
- Mix raspberry preserves with lemon juice and spoon a small amount into the center of each mold.
- Cover with remaining cheesecake mixture and freeze for at least 6 hours until firm.
- Combine crushed graham crackers, melted butter, and brown sugar. Press into small rounds and chill.
- Bloom gelatin for the glaze in warm water for 5 minutes.
- Heat water and condensed milk until warm. Pour over white chocolate and stir until smooth.
- Add bloomed gelatin, rose gold food coloring, and shimmer dust. Blend until glossy and slightly cooled.
- Remove frozen cheesecake bombs from molds and place on a wire rack.
- Pour the mirror glaze evenly over each bomb until fully coated.
- Transfer the glazed bombs onto the cookie bases.
- Garnish with fresh raspberries, white chocolate curls, and dried rose petals before serving.
Notes
The cheesecake bombs need to be frozen for at least 6 hours before glazing to ensure a smooth mirror finish.
- Prep Time: 40 minutes
- Cook Time: 0 minutes
- Method: Dessert
- Cuisine: American
Nutrition
- Calories: 430
- Sugar: 27g
- Fat: 30g
- Carbohydrates: 34g
- Protein: 6g
Tried This Recipe? Leave a Comment!
Did you make this recipe? I’d love to hear how it turned out! Please leave a comment and a rating below. Your feedback helps other home cooks and supports cheerychop.com!
For more delicious inspiration, follow me on Pinterest!