No-Bake Coconut Lime Dream Bombs with Gloss Finish
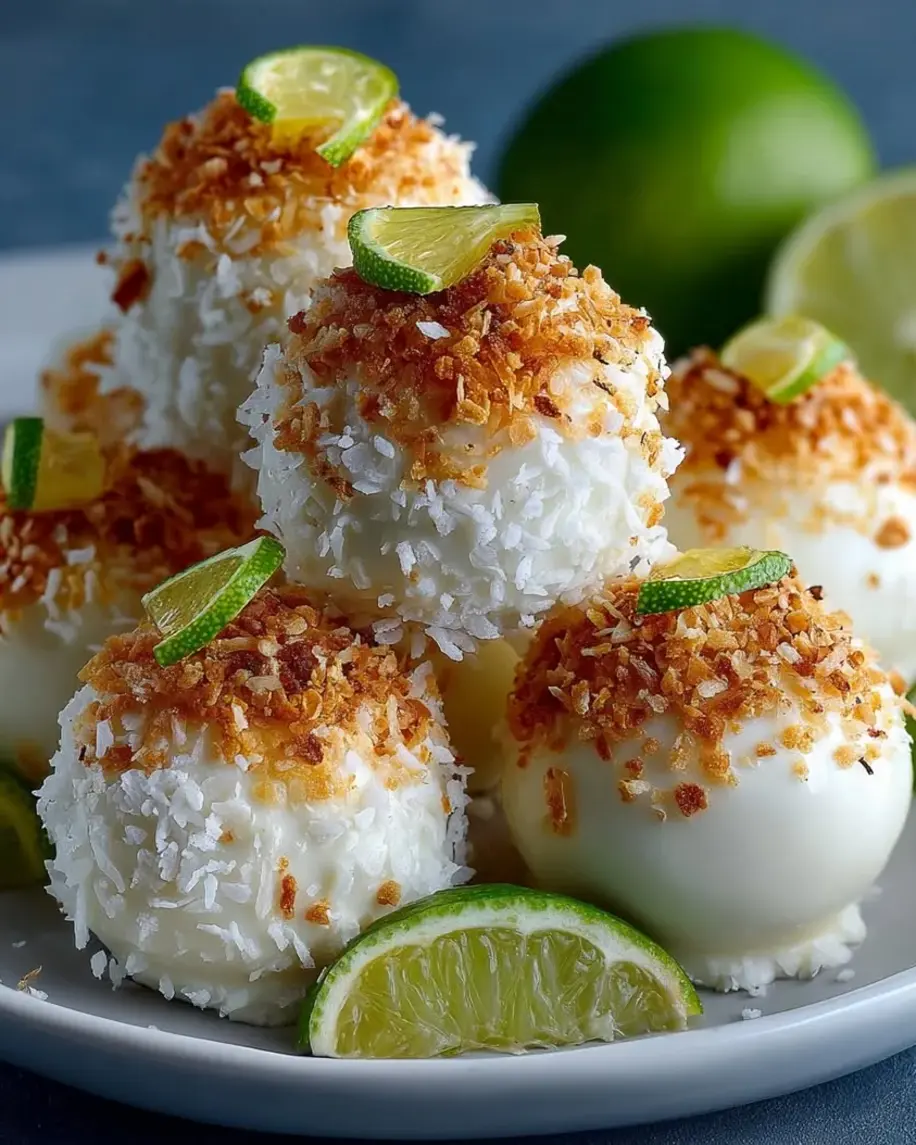
Table of Contents
Tropical Coconut Lime Dream Bombs with Gloss Finish – No-Bake Bites of Paradise
Growing up in Morocco, my mother’s kitchen was a fragrant haven of citrus and coconut — she’d press fresh lime juice into everything from tagines to sweet couscous. When I moved to New York and trained in Paris, I realized that the brightest flavor combinations are often the simplest. These Tropical Coconut Lime Dream Bombs with Gloss Finish are my love letter to that heritage: a no-bake dessert that brings together creamy coconut, zesty lime, and a glossy white chocolate shell that shatters beautifully when you bite in. They’re the kind of treat that makes you close your eyes and sigh — and they come together in under an hour with zero oven time.
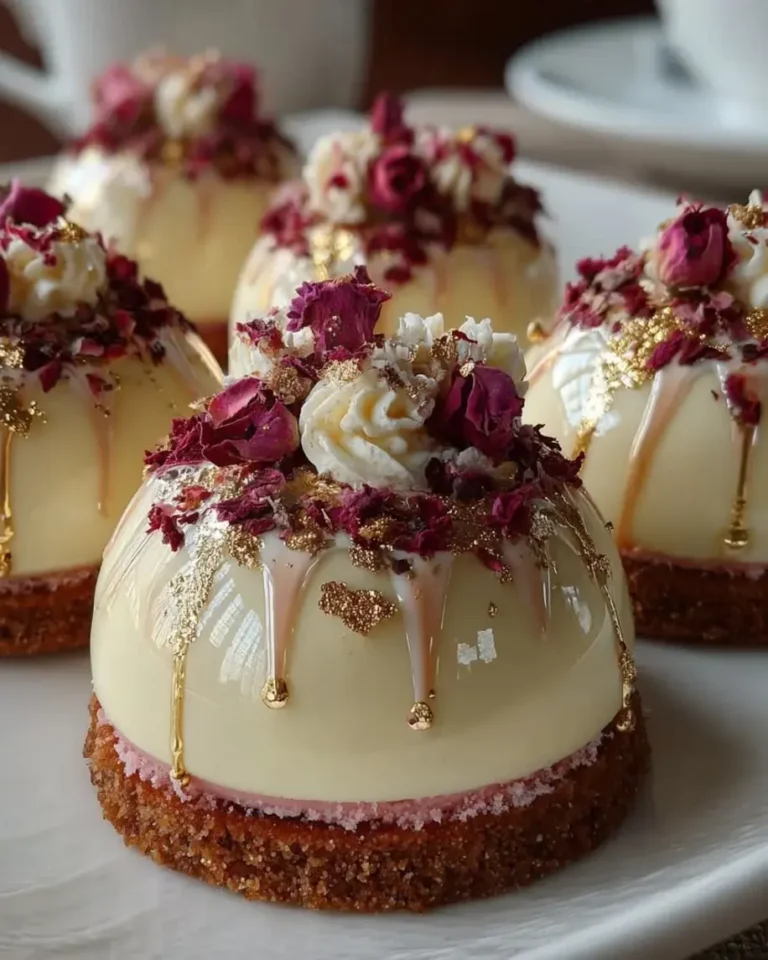
Imagine a center so silky it melts on your tongue — cream cheese and coconut cream whipped into a cloud, then brightened with fresh lime juice and zest. Each ball is cushioned in a layer of shredded coconut that adds a gentle chew, then dipped in a white chocolate gloss that shimmers like morning light on the Atlantic. The contrast between the tangy lime, the sweet coconut, and the rich coating is pure harmony. I love making these for dinner parties, baby showers, or just a quiet afternoon when I need a little tropical escape from the NYC chill.
What sets my version apart is the double-chill method and that glossy finish — a trick I picked up in pastry school in Paris. The first chill firms the center so you can roll clean balls; the second sets the coating to a flawless shine. Many recipes skip the coconut oil in the white chocolate, but that tiny addition is what gives you that professional-grade gloss. I’ll walk you through every step, share my best pro tips, and help you avoid the one mistake that can make your coating crack. Trust me — once you make these, you’ll never buy store-bought truffles again.
Why This Tropical Coconut Lime Dream Bombs Recipe Is the Best
The Flavor Secret: The magic here is balance. I use coconut cream — not milk — for a luxuriously dense center, and fresh lime zest and juice for a citrus kick that cuts through the richness. Growing up in Morocco, we learned that the best dishes layer acidity and sweetness rather than masking one with the other. This recipe lets every ingredient sing: the lime is bright but never harsh, the coconut is sweet but not cloying, and the white chocolate gloss ties it all together with a buttery finish.
Perfected Texture: Texture is everything in a no-bake truffle, and I’ve tested this until it’s just right. The cream cheese base gives a mousse-like lightness, the shredded coconut coating adds a subtle chew, and the white chocolate shell snaps cleanly when you bite. The trick is using melted coconut oil in the coating — it thins the chocolate just enough to create a thin, even layer that sets to a glossy, non-sticky shine. My Paris pastry chef taught me that a glossy finish is 90% technique and 10% ingredients, and I’m sharing every detail.
Foolproof & Fast: This is a genuinely beginner-friendly recipe. There’s no tempering chocolate, no baking, no complicated equipment — just a bowl, a spatula, and a little patience for chilling. I’ve made these with my niece on a rainy Saturday, and they turned out perfect. The hands-on time is only about 20 minutes, and the result looks like you spent hours. Whether you’re a seasoned baker or someone who’s never made a truffle in your life, you can nail these coconut lime dessert bites on the first try.
Tropical Coconut Lime Dream Bombs Ingredients
I source most of my ingredients from the Union Square Greenmarket and a little specialty shop in the East Village that carries excellent coconut products. There’s something about using real, high-quality ingredients that makes these no-bake coconut lime truffles taste like they came from a patisserie. Here’s everything you’ll need.
Ingredients List
- For the Coconut Cream Center:
- 8 oz (225 g) cream cheese, softened
- 1/2 cup coconut cream
- 1/4 cup powdered sugar
- 1 tsp vanilla extract
- For the Lime Layer:
- 2 tbsp lime juice (fresh-squeezed, about 1 lime)
- 1 tbsp lime zest (from about 2 limes)
- 2 tbsp sweetened condensed milk
- For the Coconut Coating:
- 1 1/2 cups shredded coconut (fine, unsweetened)
- 2 tbsp coconut oil, melted
- For the Gloss Finish:
- 1/3 cup white chocolate, melted
- 1 tsp coconut oil
- For Garnish (optional):
- Lime zest curls
- Toasted coconut flakes
Ingredient Spotlight
Cream Cheese: This is the backbone of the center, providing structure and a luscious mouthfeel. Use full-fat block cream cheese — not the spreadable kind in a tub, which has too much air and water. Bring it to room temperature before mixing so it blends smoothly without lumps. If you need a dairy-free option, use a high-quality vegan cream cheese, but note that the texture will be slightly less firm.
Coconut Cream: Not to be confused with coconut milk or cream of coconut. Coconut cream is the thick, rich layer that separates from canned coconut milk — or you can buy it in cartons. It adds deep coconut flavor without thinning the mixture. For the best results, use a brand like Aroy-D or Chaokoh that has a high fat content. Avoid cream of coconut, which is sweetened and will throw off the sugar balance.
Fresh Lime: There is no substitute for fresh lime juice and zest in these white chocolate lime bombs. Bottled lime juice has a metallic edge and lacks the bright, floral notes of fresh. Zest the limes first, then juice them — you’ll get about 2 tablespoons of juice from one large lime. Use organic limes if possible, since you’re eating the zest. The zest contains essential oils that give these truffles their signature perfume.
White Chocolate: For a glossy finish that actually shines, use a good-quality white chocolate with cocoa butter (not palm oil). I prefer Ghirardelli or Callebaut. The 1 teaspoon of coconut oil is non-negotiable — it thins the chocolate and gives it that mirror-like sheen. White chocolate chips can work, but they contain stabilizers that make the coating thicker, so add 1 1/2 teaspoons of coconut oil instead of 1.
| Original Ingredient | Best Substitution | Flavor / Texture Impact |
|---|---|---|
| Cream Cheese | Vegan cream cheese (full-fat) | Slightly less firm center, still creamy |
| Coconut Cream | Full-fat coconut milk (thick part only) | Less rich, may need extra chill time |
| Fresh Lime Juice | Lime extract (start with 1/2 tsp) | Slightly artificial flavor, skip zest |
| White Chocolate | Dark or milk chocolate (same method) | Bolder flavor, less sweet coating |
| Shredded Coconut | Finely chopped almonds or pistachios | Nutty flavor, different crunch |
How to Make Tropical Coconut Lime Dream Bombs — Step-by-Step
Trust me — this process is simpler than it looks. Each step builds on the last, and I’ve added my best chef’s tricks so you get that glossy, professional finish every time.
Step 1: Make the Cream Center
In a large mixing bowl, beat 8 oz softened cream cheese, 1/2 cup coconut cream, 1/4 cup powdered sugar, and 1 tsp vanilla extract together until smooth and fluffy. Use a hand mixer or a sturdy spatula — you want a mixture that’s light and holds a soft peak. Scrape the bowl at least once to ensure everything is incorporated.
💡 Stella’s Pro Tip: Set your cream cheese on the counter for a full 45 minutes before starting. If it’s too cold, you’ll get lumps. If you’re in a hurry, microwave it at 50% power for 8-second bursts until just soft — not melted.
Step 2: Add the Lime Layer
Stir in 2 tbsp fresh lime juice, 1 tbsp lime zest, and 2 tbsp sweetened condensed milk until fully incorporated. The mixture will thin out slightly — that’s normal. The sweetened condensed milk adds a silky sweetness that balances the tangy lime. Taste it here: you should get a bright lime kick with a creamy finish.
⚠️ Common Mistake to Avoid: Don’t use bottled lime juice! It’s less acidic and has a flat flavor that won’t brighten the coconut. Always use fresh limes — and zest them before juicing.
Step 3: Chill and Shape
Cover the bowl and refrigerate for 25–30 minutes, or until the mixture is firm enough to hold its shape when scooped. The mixture should feel like a soft cookie dough — not sticky, but pliable. Once chilled, use a small cookie scoop or a tablespoon to portion out even balls (about 1.5 inches). Roll each portion gently between your palms to form a smooth ball.
💡 Stella’s Pro Tip: Lightly wet your hands with cold water before rolling — it prevents sticking and gives you perfectly smooth balls. Wipe and re-wet between batches.
Step 4: Roll in Coconut
In a shallow bowl, mix 1 1/2 cups shredded coconut with 2 tbsp melted coconut oil until the coconut is evenly coated. Roll each ball in the coconut mixture, pressing gently so it adheres. The coconut oil helps the coating stick and adds a subtle richness. Place the coated balls on a parchment-lined tray.
⚠️ Common Mistake to Avoid: If your coconut isn’t sticking, your balls are too cold or too dry. Let them sit at room temperature for 2-3 minutes before rolling, or brush each ball lightly with a little coconut oil first.
Step 5: Chill to Set
Place the tray in the refrigerator for 20 minutes to set the coconut coating. This step is crucial — it firms up the outer layer so the white chocolate gloss doesn’t soak into the coconut. Don’t skip it, or your coating will look streaky instead of glossy.
💡 Stella’s Pro Tip: Line your tray with wax paper or a silicone mat — the balls will release cleanly without sticking, and cleanup is a breeze.
Step 6: Gloss Finish
Melt 1/3 cup white chocolate with 1 tsp coconut oil in a double boiler or microwave (30-second bursts at 50% power, stirring in between). Stir until glossy and smooth. Dip each ball into the melted white chocolate using a fork or dipping tool, letting excess drip off. Alternatively, drizzle the chocolate over the balls with a spoon for a more rustic look. Return to the tray.
⚠️ Common Mistake to Avoid: If your white chocolate seizes or turns grainy, it got too hot or moisture got in. Always use a completely dry bowl and melt slowly. If it seizes, stir in 1/2 tsp coconut oil (off heat) — it sometimes saves the batch.
Step 7: Chill and Garnish
Refrigerate the tray again until the coating is fully set — about 20–30 minutes. The chocolate should be firm to the touch and shiny. Just before serving, garnish with lime zest curls and toasted coconut flakes for a beautiful presentation. Serve chilled for the best texture contrast between the creamy center, chewy coconut, and snappy shell.
💡 Stella’s Pro Tip: To make lime zest curls, use a vegetable peeler to strip wide ribbons from a fresh lime, then curl them around a skewer. They unfurl slightly on the chilled chocolate for a gorgeous garnish.
| Step | Action | Duration | Key Visual Cue |
|---|---|---|---|
| 1 | Beat cream cheese, coconut cream, sugar, vanilla | 3–4 mins | Fluffy, smooth, no lumps |
| 2 | Add lime juice, zest, condensed milk | 1–2 mins | Pale yellow, fragrant, slightly thin |
| 3 | Chill mixture | 25–30 mins | Firm like soft cookie dough |
| 4 | Scoop and roll into balls | 5–7 mins | Smooth, round, uniform size |
| 5 | Roll in coconut + oil mixture | 5 mins | Fully coated, no bare spots |
| 6 | Chill coated balls | 20 mins | Coconut is firm, balls are cold |
| 7 | Dip in melted white chocolate | 5–8 mins | Glossy, even coating |
| 8 | Chill to set coating | 20–30 mins | Shiny, firm to touch |
| 9 | Garnish and serve | 2–3 mins | Bright, festive, elegant |
Serving & Presentation
These coconut lime dessert bites are stunning on their own, but a little styling makes them truly unforgettable. Arrange them on a white platter or a wooden board — the contrast between the glossy white shells and the bright green lime zest curls is absolutely gorgeous. I like to sprinkle a few toasted coconut flakes around the plate and tuck in a few fresh mint leaves for color. They’re perfect for bridal showers, birthday parties, or holiday dessert tables.
In my NYC kitchen, I often serve these with a side of fresh tropical fruit — mango slices, kiwi wedges, or dragon fruit — to echo the island flavors. For a Moroccan twist, dust the plate with a pinch of cinnamon or cardamom; the warm spice plays beautifully with the lime and coconut. Pair them with a tall glass of iced coconut water or a chilled lime spritzer for a truly transportive experience.
If you’re serving these at a dinner party, present them on a tiered stand for a dramatic effect. The glossy finish catches the light, and guests always reach for seconds. For a casual gathering, I sometimes serve them straight from the fridge in a pretty ceramic bowl — no fuss, just pure deliciousness.
| Pairing Type | Suggestions | Why It Works |
|---|---|---|
| Side Dish | Fresh mango, kiwi, berries | Bright acidity cuts the richness |
| Sauce / Dip | Dark chocolate ganache, passion fruit coulis | Adds depth and tangy contrast |
| Beverage | Iced coconut water, lime spritzer, iced green tea | Refreshing, cleanses the palate |
| Garnish | Lime zest curls, toasted coconut, mint | Adds color, texture, and freshness |
Make-Ahead, Storage & Reheating
These white chocolate lime bombs are a meal-prepper’s dream. I often make a double batch on Sunday and keep them in the fridge for last-minute guests or a sweet treat after dinner. The flavors actually deepen and meld after a day or two — the lime becomes more fragrant, and the coconut flavor infuses the center. Here’s how to store them for maximum freshness.
| Method | Container | Duration | Reheating Tip |
|---|---|---|---|
| Refrigerator | Airtight container, layers separated by parchment | Up to 7 days | Serve directly from fridge; no reheating needed |
| Freezer | Freezer-safe container, wax paper between layers | Up to 3 months | Thaw in fridge 2 hours; do not microwave |
| Make-Ahead | Assemble without gloss; add coating before serving | Up to 3 days in advance | Add gloss finish 1-2 hours before serving |
For the best texture, always serve these gluten free lime coconut sweets chilled — straight from the refrigerator. The center stays creamy, the coconut coating maintains its gentle chew, and the white chocolate shell snaps cleanly. If you’ve frozen them, transfer to the refrigerator 3-4 hours before serving. Never microwave frozen truffles — the white chocolate will bloom and lose its gloss. I learned that lesson the hard way during a busy holiday season!
One of my favorite make-ahead strategies: prepare the lime-coconut center and shape the balls up to 3 days ahead. Store them plain (without coconut coating or gloss) in an airtight container in the fridge. On serving day, roll them in the coconut mixture, chill, then dip in the glossy white chocolate. This way the coating is always fresh and shiny, and you save the most impressive step for last.
Variations & Easy Swaps
One of the things I love most about these no-bake coconut lime truffles is how versatile they are. I’ve tested dozens of variations in my NYC kitchen, and these three are my absolute favorites. Each one brings a new personality to the base recipe while keeping that creamy, glossy magic intact.
| Variation | Key Change | Best For | Difficulty Impact |
|---|---|---|---|
| Moroccan Orange Blossom | Add 1 tsp orange blossom water + swap lime for orange | Elegant dinner parties | Easy |
| Vegan / Dairy-Free | Use vegan cream cheese + dairy-free white chocolate | Plant-based diets | Easy |
| Mango Passion Fruit | Replace lime with passion fruit pulp + mango puree | Summer parties, tropical themes | Medium (adjust liquid) |
Moroccan Orange Blossom Variation
This one takes me straight back to my mother’s kitchen in Marrakech. Replace the lime juice and zest with fresh orange juice and zest, and add 1 teaspoon of orange blossom water to the cream mixture. The floral notes of the orange blossom pair beautifully with the coconut, and the white chocolate gloss takes on a subtle honeyed flavor. Garnish with candied orange peel and a sprinkle of pistachios for a truly stunning dessert that tastes like a Moroccan garden.
Vegan / Dairy-Free Variation
Making these gluten free lime coconut sweets vegan is surprisingly simple. Use a full-fat vegan cream cheese (Miyoko’s or Violife work beautifully) and a dairy-free white chocolate. The coconut cream is already plant-based, and sweetened condensed coconut milk (Nature’s Charm makes an excellent one) replaces the regular condensed milk. The texture is slightly less firm but equally creamy, and the glossy finish still works perfectly with refined coconut oil and vegan white chocolate.
Mango Passion Fruit Variation
When I find gorgeous mangoes at the Union Square market in summer, I swap the lime for a tropical duo: replace lime juice with 2 tablespoons of passion fruit pulp (seeds and all) and add 2 tablespoons of mango puree. Reduce the sweetened condensed milk to 1 tablespoon since the mango adds natural sweetness. The result is a sunshine-yellow bomb with a tangy, seedy crunch from the passion fruit and a silky mango finish. This one disappears fast at summer barbecues.
How do you make a glossy finish for coconut lime truffles or dessert bombs?
The secret to a professional glossy finish is adding a small amount of coconut oil to melted white chocolate. For every 1/3 cup of white chocolate, stir in 1 teaspoon of coconut oil until smooth. This thins the chocolate slightly, allowing it to flow evenly over the truffle and set with a mirror-like shine. Always melt the chocolate gently — use a double boiler or microwave in 30-second bursts at 50% power — and make sure your bowl is completely dry. Any moisture will cause the chocolate to seize and turn grainy. Chill the coated truffles for 20-30 minutes until the coating is firm and glossy.
What is the best way to substitute fresh coconut in Tropical Coconut Lime Dream Bombs?
If you have fresh coconut, you can absolutely use it in place of shredded dried coconut. Crack open a mature coconut, remove the flesh, and grate it finely using a box grater or food processor. Toast the fresh coconut lightly in a dry skillet over medium heat for 2-3 minutes to reduce moisture and boost flavor. For the coating, use 1 1/2 cups of this grated fresh coconut mixed with 2 tablespoons of melted coconut oil. The texture will be slightly more tender and less crunchy than dried shredded coconut. For the center, fresh coconut meat can be blended with coconut cream for an even more intense flavor, but stick with the recipe proportions to keep the texture balanced.
Can I use lime zest instead of lime extract in coconut dessert bombs?
Yes, absolutely — and I actually prefer lime zest over lime extract in these bombs. Lime zest contains essential oils that provide a bright, natural citrus fragrance that extract can’t replicate. Use 1 tablespoon of freshly grated lime zest from 2-3 organic limes. If you don’t have fresh limes, you can substitute 1/2 teaspoon of lime extract, but the flavor will be slightly more artificial and less complex. Avoid dried lime zest, which lacks the oils. If using extract, add it along with the vanilla extract in the cream center step. The best approach is always fresh zest plus fresh juice — that combination gives you the full citrus profile.
How long do homemade coconut lime dream bombs last in the refrigerator?
Stored properly in an airtight container with parchment paper between layers, homemade coconut lime dream bombs will stay fresh for up to 7 days in the refrigerator. The cream cheese and coconut cream base keeps well, and the white chocolate coating helps seal in moisture. For best texture, serve them chilled straight from the fridge — the center stays creamy and the shell remains snappy. If you’re storing them longer than 3 days, I recommend adding the garnish (lime zest curls and toasted coconut) just before serving, as the zest can dry out and the coconut can soften. These bombs also freeze beautifully for up to 3 months.
Are these coconut lime dream bombs gluten-free?
Yes, this recipe is naturally gluten-free! None of the ingredients — cream cheese, coconut cream, powdered sugar, sweetened condensed milk, shredded coconut, white chocolate, or lime — contain gluten. However, always double-check the labels on your white chocolate and sweetened condensed milk, as some brands may contain gluten-based additives or be processed in facilities that handle wheat. For certified gluten-free options, look for white chocolate labeled gluten-free and use a trusted brand of sweetened condensed milk. This makes these bombs a perfect dessert for gluten-sensitive guests, and they’re also easily adaptable to dairy-free and vegan diets.
Can I use dark chocolate instead of white chocolate for the gloss finish?
Absolutely — dark chocolate makes a wonderful alternative for the gloss finish. Use 1/3 cup of dark chocolate (60-70% cocoa) melted with 1 teaspoon of coconut oil for the same glossy effect. The flavor contrast is stunning: bittersweet dark chocolate against the sweet, tangy coconut-lime center. Keep in mind that dark chocolate is thicker than white chocolate, so you may need 1 1/2 teaspoons of coconut oil to achieve the right dipping consistency. Also, dark chocolate sets faster, so work quickly when dipping. This variation is especially lovely for holiday platters, and the deep chocolate color creates a beautiful visual contrast with the green lime zest garnish.
What can I use instead of cream cheese in this recipe?
If you don’t have cream cheese or want a dairy-free option, the best substitutes are full-fat vegan cream cheese or thick coconut yogurt. For vegan cream cheese, choose a brand like Miyoko’s or Violife that has a firm, spreadable texture — not the soft tub varieties. If using coconut yogurt, strain it through a cheesecloth for 2-3 hours to remove excess water, as extra liquid will make the center too soft. Another option is mascarpone cheese, which is richer and slightly sweeter than cream cheese — reduce the powdered sugar to 2 tablespoons if using mascarpone. Each substitute will change the texture slightly: vegan cream cheese gives a softer center, while mascarpone makes it more decadent.
How do I get the coconut coating to stick properly?
The key to getting the shredded coconut coating to adhere is to mix it with melted coconut oil before rolling. The oil acts as a glue, helping the coconut stick to the chilled balls. Here’s my tested method: after shaping the balls, let them sit at room temperature for 2-3 minutes — this slightly softens the surface so the coconut adheres better. Then roll each ball in the coconut-oil mixture, pressing gently with your palms. If you find the coating isn’t sticking well, lightly brush each ball with a thin layer of melted coconut oil before rolling. This extra step creates a tacky surface that grabs the coconut perfectly. Also, make sure your shredded coconut is finely ground — large flakes don’t adhere as well.
Can I freeze coconut lime dream bombs?
Yes, these bombs freeze exceptionally well for up to 3 months. To freeze, arrange them in a single layer on a parchment-lined tray and freeze for 1 hour until solid. Then transfer to a freezer-safe container with wax paper between layers to prevent sticking. When you’re ready to enjoy them, thaw in the refrigerator for 2-3 hours — never at room temperature or in the microwave, as the white chocolate coating will sweat and lose its gloss. For the best results, freeze the bombs before adding the white chocolate gloss. The day before serving, thaw them in the fridge, then dip in fresh melted white chocolate for a perfectly glossy finish that looks freshly made.
Why did my white chocolate coating crack or bloom?
White chocolate coating can crack or bloom (develop white streaks) for a few common reasons. Cracking usually happens when the coating is too thick or the truffle center is too cold — the chocolate contracts faster than the center. To prevent this, let your chilled truffles sit at room temperature for 2 minutes before dipping, and make sure your white chocolate is thinned with enough coconut oil (1 teaspoon per 1/3 cup). Blooming occurs when moisture or temperature fluctuations affect the cocoa butter. Always use a completely dry bowl, avoid overheating the chocolate, and store finished bombs in a stable refrigerator temperature. If your coating cracks, a second thin layer dipped quickly can seal it — a trick I learned in pastry school.
Share Your Version!
I absolutely love hearing how these Tropical Coconut Lime Dream Bombs turn out in your kitchen. Nothing makes me happier than seeing your photos and reading your twists on the recipe. Drop a star rating and a comment below — tell me if you tried the classic version or one of the variations, and how it went. Did you add a special spice from your own family tradition? Did you go for the dark chocolate gloss? I want to hear every detail!
Tag me on Instagram or Pinterest @leosfoods when you share your creation — I feature my favorites in my stories every month. And if you have a question I didn’t answer here, ask away in the comments. I read every single one and I’ll get back to you with the same warmth I’d share over a cup of mint tea in my kitchen. Now go make some magic, and remember: the best recipes are the ones you make your own.
From my NYC kitchen to yours — I hope this recipe brings as much warmth to your table as it does to mine. — Stella 🧡
Love This Recipe? Save It to Pinterest!
If you enjoyed this Tropical Coconut Lime Dream Bombs recipe, don’t let it get lost in your browser tabs! 😄 Pin it now so you can find it again anytime — and explore hundreds more tried-and-tested recipes waiting for you on my Pinterest boards.
👉 Follow Stella on Pinterest @stellarecipeblog
📌 Pin this recipe · 🔁 Re-pin your favorites · 💬 Tag me when you make it — I love seeing your creations!
💖 Made this recipe? Share the love!
⭐ Leave a rating & comment — your feedback helps me create more recipes you’ll love! 📸 Tag @leosfoods on Instagram or Pinterest for a chance to be featured.
Tropical Coconut Lime Dream Bombs with Gloss Finish
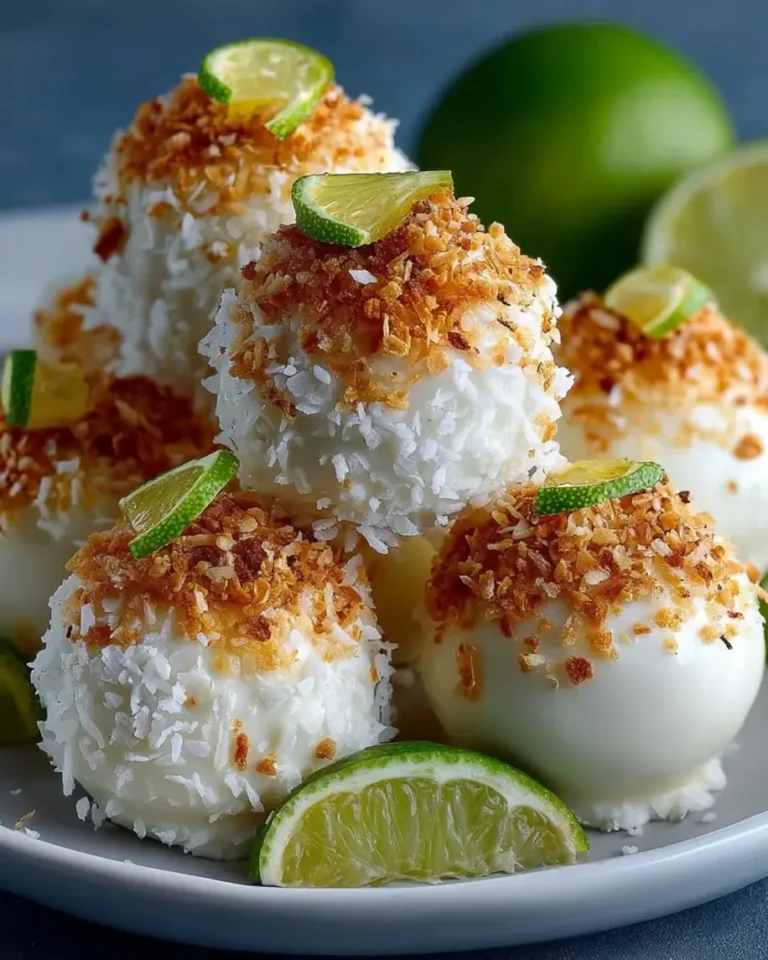
Tropical Coconut Lime Dream Bombs with Gloss Finish are bite-sized no-bake treats with a creamy coconut-lime center, a shredded coconut coating, and a glossy white chocolate finish.
- Yield: 10 1x
Ingredients
- For the Coconut Cream Center:
- 8 oz (225 g) cream cheese, softened
- 1/2 cup coconut cream
- 1/4 cup powdered sugar
- 1 tsp vanilla extract
- For the Lime Layer:
- 2 tbsp lime juice
- 1 tbsp lime zest
- 2 tbsp sweetened condensed milk
- For the Coconut Coating:
- 1 1/2 cups shredded coconut (fine, unsweetened)
- 2 tbsp coconut oil, melted
- For the Gloss Finish:
- 1/3 cup white chocolate, melted
- 1 tsp coconut oil
- For Garnish (optional):
- Lime zest curls
- Toasted coconut flakes
Instructions
- 1. In a bowl, beat cream cheese, coconut cream, powdered sugar, and vanilla until smooth and fluffy.
- 2. Stir in lime juice, lime zest, and sweetened condensed milk until fully incorporated.
- 3. Chill the mixture for 25–30 minutes until firm enough to shape.
- 4. Scoop and roll into small bite-sized balls.
- 5. Roll each ball in shredded coconut mixed with melted coconut oil.
- 6. Place on a tray and chill for 20 minutes to set.
- 7. Dip or drizzle each bomb with melted white chocolate mixed with coconut oil for a glossy finish.
- 8. Chill again until the coating is fully set.
- 9. Garnish with lime zest curls and toasted coconut flakes if desired.
- 10. Serve chilled for best texture and flavor contrast.
Nutrition
- Calories: 240
- Sugar: 15 g
- Fat: 18 g
- Carbohydrates: 18 g
- Protein: 3 g
Tried This Recipe? Leave a Comment!
Did you make this recipe? I’d love to hear how it turned out! Please leave a comment and a rating below. Your feedback helps other home cooks and supports cheerychop.com!
For more delicious inspiration, follow me on Pinterest!