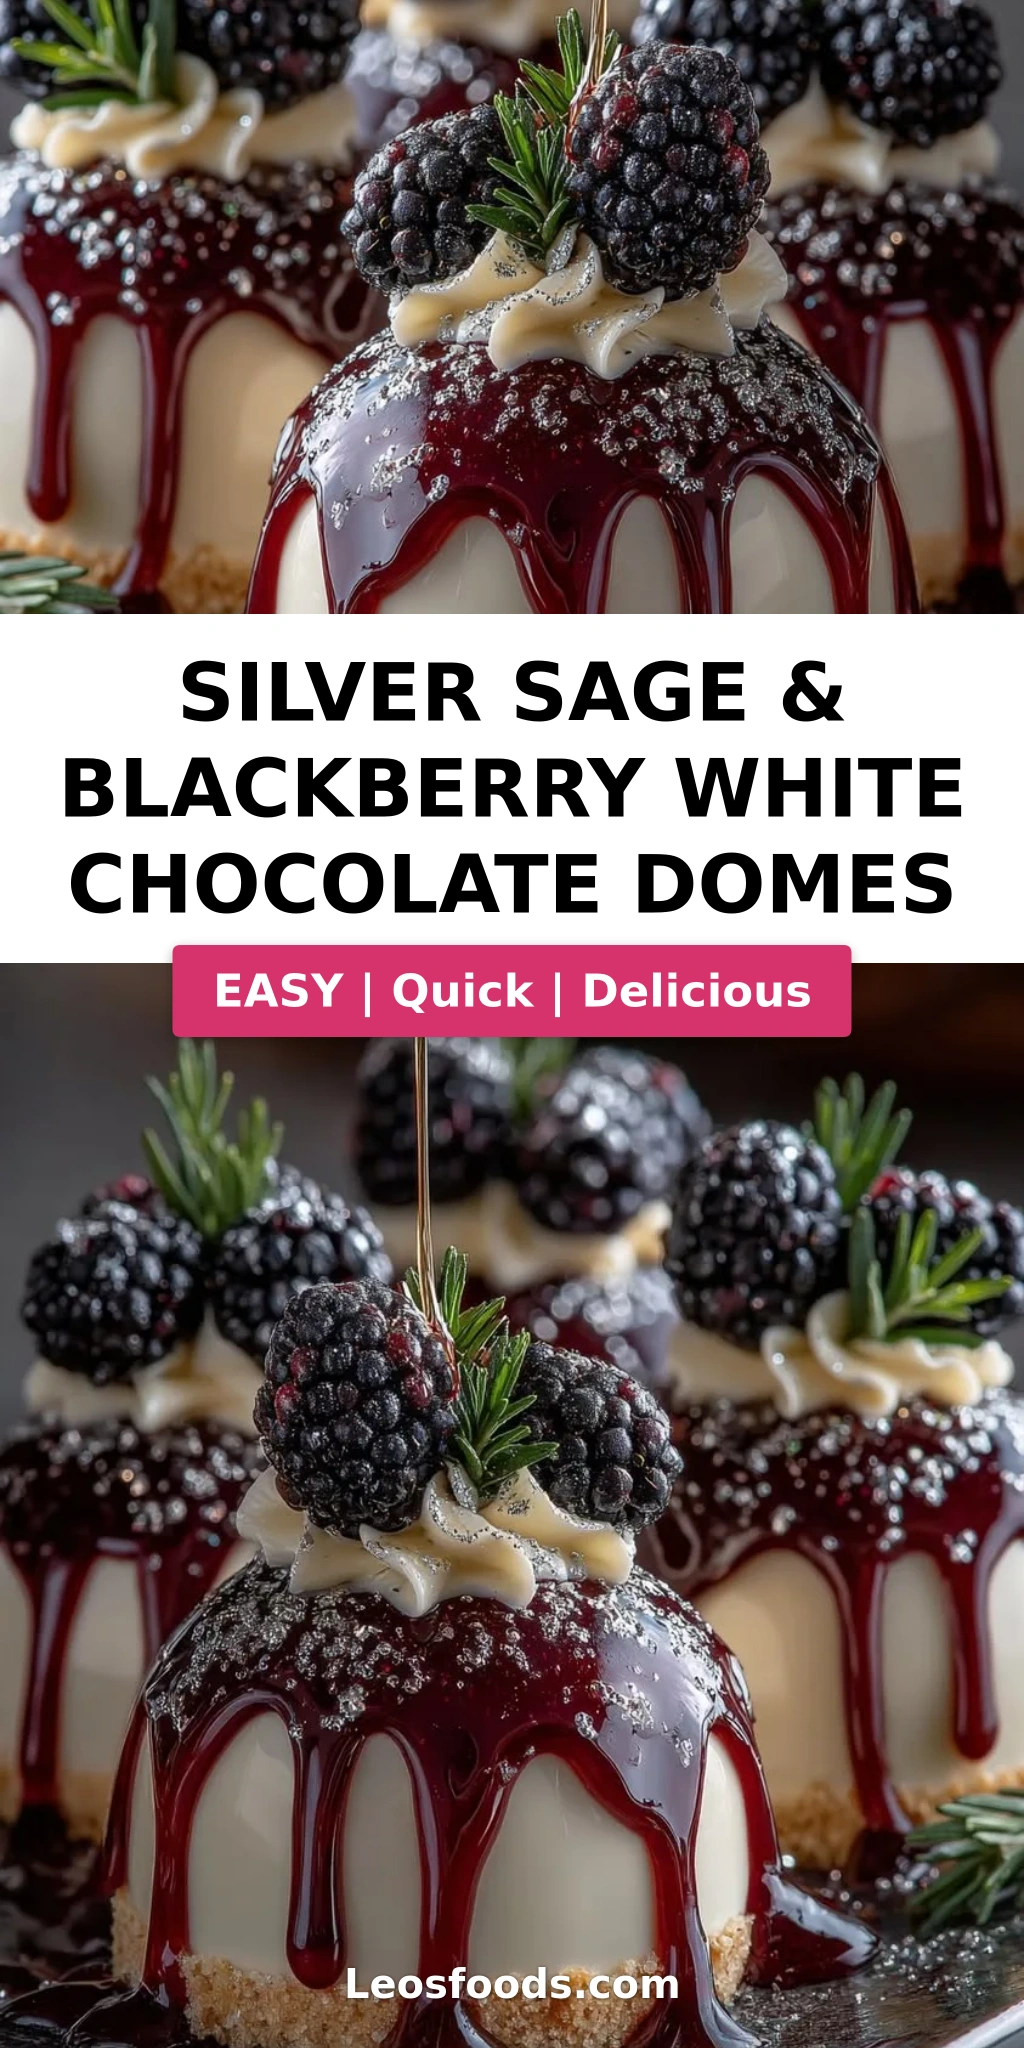
Gourmet Silver Sage & Blackberry White Chocolate Domes
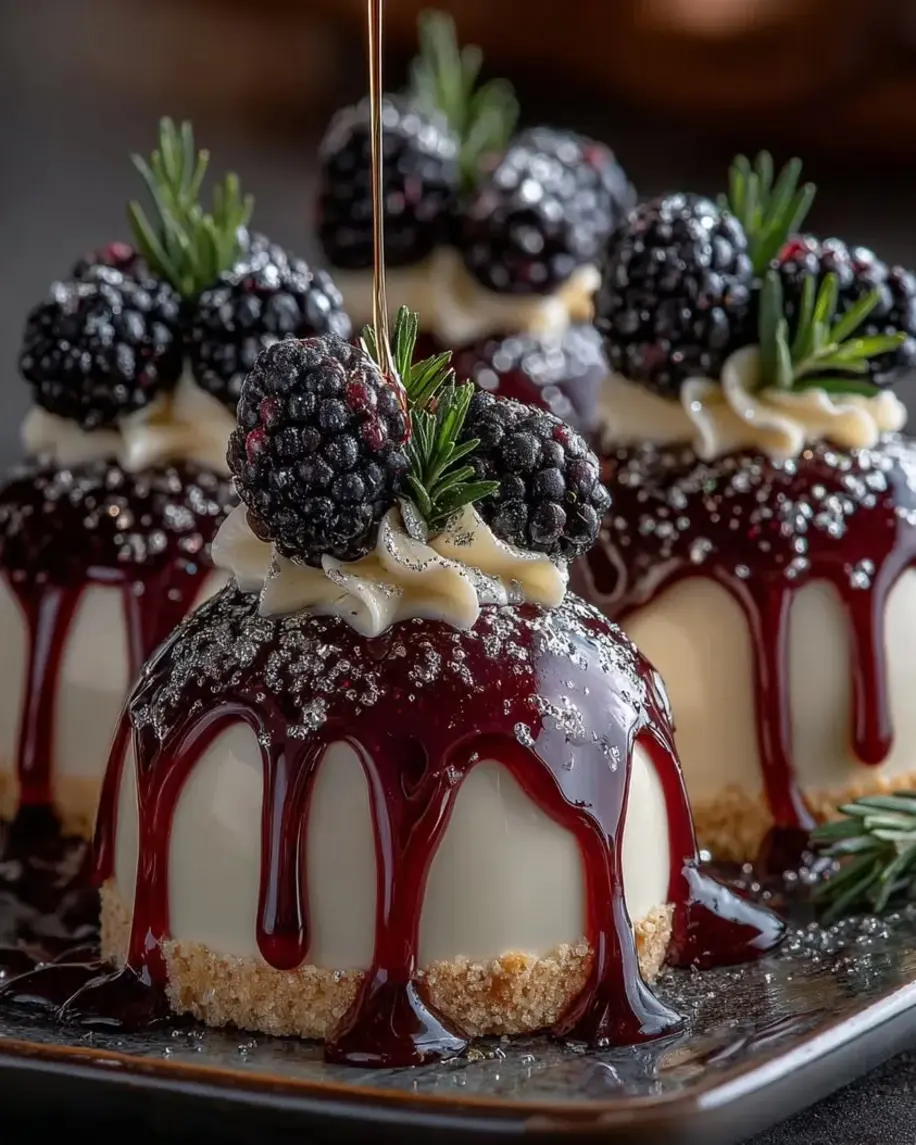
Table of Contents
Silver Sage & Blackberry White Chocolate Domes – Elegant Silver-Toned Domes with Sage White Chocolate Mousse & Blackberry Filling
Let me take you back to a rainy afternoon in my mother’s kitchen in Morocco, where the scent of fresh sage from her garden mingled with the sweetness of honey-drenched pastries. Years later, during my pastry training in Paris, I learned to pair elegant white chocolate with unexpected herbal notes — and this silver sage blackberry white chocolate domes recipe was born. It’s a dessert that bridges two worlds: the bold, earthy warmth of North African home cooking and the refined precision of French pâtisserie. Every time I make these domes in my NYC kitchen, I think of that woman — my mother — showing me how a simple herb can elevate a dish into something truly unforgettable.
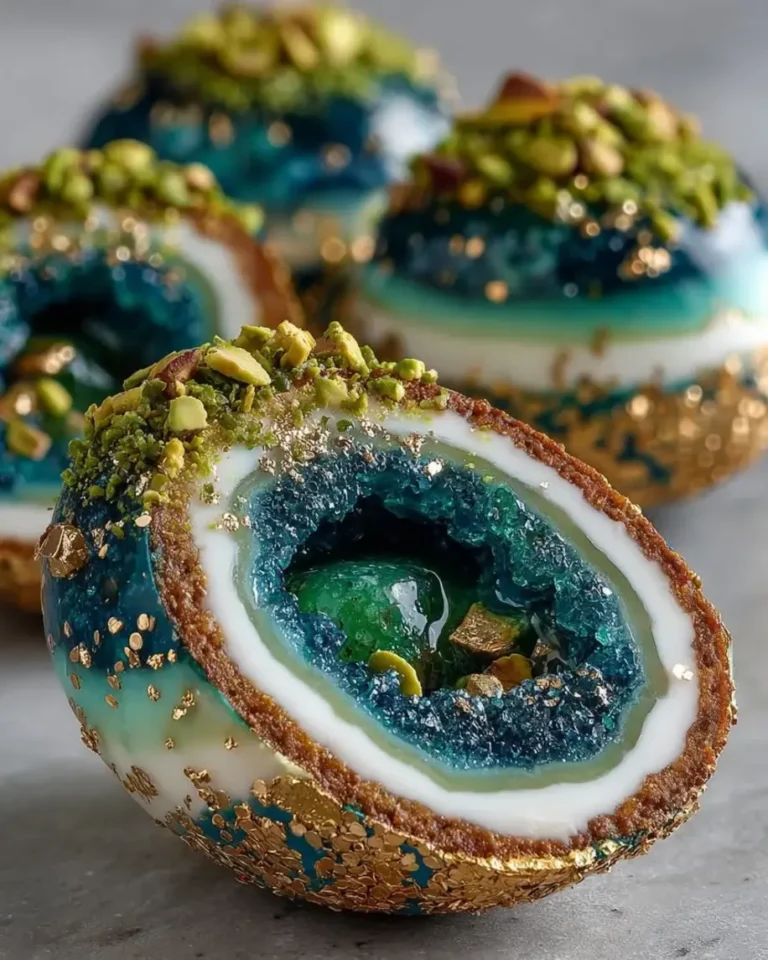
Imagine cracking through a shimmering silver-toned white chocolate shell to reveal a cloud-like sage white chocolate mousse, with a hidden pocket of tart blackberry compote at its heart. The sage is subtle — just a whisper of herbaceous warmth that plays against the sweet white chocolate and the bright, jammy blackberries. The biscuit base adds a buttery crunch that grounds each bite. Finished with a dusting of edible silver luster dust and a scattering of fresh blackberries and sage leaves, these domes are as stunning to look at as they are to eat. They’re the kind of dessert that stops conversation and starts whispers: “Where did you get this recipe?”
What sets this gourmet dome dessert recipe apart from others you’ll find online is the careful balance of flavors and textures — and the techniques I’ve honed over two decades in professional kitchens. I’m not just throwing ingredients together; I’m showing you how to temper the chocolate shell so it’s crisp and glossy, how to fold the mousse so it’s light but stable, and how to build each dome so it unmolds perfectly every time. 💡 Stella’s Pro Tip: Don’t skip the second layer of white chocolate in the molds — it’s the secret to a shell that holds its shape and gives that satisfying snap when you bite into it. And a common mistake? Rushing the freeze time. These domes need at least 3 hours in the freezer to set properly. Patience pays off in layers, I promise.
Why This Silver Sage & Blackberry White Chocolate Domes Recipe Is the Best
The Flavor Secret
This isn’t just another white chocolate dessert. The sage brings an aromatic, slightly peppery note that cuts through the sweetness of the white chocolate, while the blackberry filling adds a bright tartness that makes every bite complex and satisfying. I learned this flavor combination during my time in Paris, where we often used fresh herbs in pastry to create unexpected contrasts. The silver luster dust isn’t just for show — it adds a subtle metallic minerality that ties the whole flavor profile together.
Perfected Texture
Getting the mousse right took me years to perfect. The key is folding the whipped cream into the cream cheese and white chocolate mixture gently but thoroughly — you want a mousse that’s airy yet stable enough to hold its shape inside the shell. The biscuit base provides a crunchy counterpoint, and the chocolate shell shatters beautifully when you tap it with your spoon. Every layer has a purpose, and every texture is intentional.
Foolproof & Fast
Despite the elegant presentation, this recipe is designed for home cooks who want to impress without spending days in the kitchen. The components come together in about an hour of active work, and the freezer does the rest. I’ve broken down each step so it’s easy to follow, with visual cues and troubleshooting tips throughout. Whether you’re a confident baker or trying your first dome dessert, you’ll get beautiful, delicious results.
Silver Sage Blackberry White Chocolate Domes Recipe Ingredients
I source my blackberries from the Union Square Greenmarket in the summer, but good-quality frozen berries work beautifully year-round. The sage I grow on my fire escape — there’s something special about using herbs you’ve nurtured yourself. For the white chocolate, I recommend a high-quality brand like Valrhona or Guittard — it melts more smoothly and tastes richer than supermarket white chocolate chips.
Ingredients List
- For the Blackberry Filling:
- 1 1/2 cups fresh blackberries
- 2 tbsp granulated sugar
- 1 tsp lemon juice
- 1 tsp cornstarch mixed with 1 tbsp water
- For the Sage White Chocolate Mousse:
- 8 oz (225 g) cream cheese, softened
- 6 oz (170 g) white chocolate, melted and cooled
- 1 cup heavy whipping cream, chilled
- 1/3 cup powdered sugar
- 1 tsp finely chopped fresh sage
- 1 tsp vanilla extract
- For the Biscuit Base:
- 1 cup vanilla cookie crumbs
- 3 tbsp unsalted butter, melted
- For the Silver Shell:
- 10 oz (280 g) white chocolate, melted
- 1 tsp coconut oil
- 1 tsp edible silver luster dust
- 2 tbsp coarse sparkling sugar
- For Garnish (optional):
- Fresh blackberries
- Small sage leaves
- White chocolate curls
Ingredient Spotlight
Fresh Sage: The star herb in this sage white chocolate dessert. Look for leaves that are bright green, firm, and fragrant — not limp or yellow. The flavor is earthy, slightly peppery, and pairs beautifully with white chocolate. If you can’t find fresh sage, dried sage won’t work here; try fresh rosemary or thyme as a substitute, but use half the amount as they’re more pungent.
White Chocolate: Not all white chocolate is created equal. For this recipe, you want a cocoa butter content of at least 30% — that’s what gives the shell its glossy snap and the mousse its silky texture. I use Valrhona Ivoire or Guittard Choc-Au-Lait White. Avoid “white melting wafers” or candy coating — they contain oils that affect both flavor and texture.
Edible Silver Luster Dust: This is what gives the domes their signature shimmer. It’s available at baking supply stores or online. Make sure you buy edible luster dust, not craft glitter — they’re very different! A little goes a long way; I use about 1 teaspoon for the whole batch. You can substitute with edible gold luster dust or pearl dust for a different look.
| Original Ingredient | Best Substitution | Flavor / Texture Impact |
|---|---|---|
| Fresh blackberries | Frozen blackberries (unsweetened) | Slightly softer texture; may need 1–2 extra minutes of cooking |
| Fresh sage | Fresh rosemary or thyme (use half the amount) | More pungent, pine-like flavor; reduces sweetness slightly |
| White chocolate (for shell) | Good-quality white chocolate bars (not chips) | Smoother melt, better snap, richer flavor |
| Vanilla cookie crumbs | Graham cracker crumbs or shortbread crumbs | Slightly different sweetness; still provides a crisp base |
| Edible silver luster dust | Edible gold luster dust or pearl dust | Changes the color but maintains the shimmer effect |
How to Make Silver Sage & Blackberry White Chocolate Domes — Step-by-Step
Trust me, I know these domes look fancy — but I’ve broken everything down so you can make them at home with confidence. Follow each step, and don’t skip the little visual cues I share along the way. You’ve got this!
Step 1: Prepare the Biscuit Base
Mix 1 cup of vanilla cookie crumbs with 3 tablespoons of melted unsalted butter until the mixture looks like wet sand and holds together when pressed. Press a thin, even layer into the bottom of each silicone dome mold — about 1/8 inch thick. Chill the molds in the refrigerator for 15 minutes to set the base. This gives the domes a sturdy foundation that won’t crumble when you unmold them.
💡 Stella’s Pro Tip: Use the back of a small spoon or a flat-bottomed measuring cup to press the crumbs evenly. Too thick, and the base will overwhelm the mousse; too thin, and it won’t hold together.
Step 2: Make the Blackberry Filling
In a small saucepan, combine 1 1/2 cups fresh blackberries, 2 tablespoons granulated sugar, and 1 teaspoon lemon juice. Cook over medium heat for 4–5 minutes, stirring occasionally, until the berries soften and release their juices. Stir in the cornstarch slurry (1 tsp cornstarch mixed with 1 tbsp water) and continue cooking for 1–2 minutes until the mixture thickens into a glossy compote. Remove from heat and let cool completely — the filling needs to be at room temperature or cooler before you assemble the domes.
⚠️ Common Mistake to Avoid: Don’t skip the cornstarch slurry. Without it, the blackberry filling will be too runny and will bleed into the mousse, making the layers muddy instead of distinct.
Step 3: Make the Sage White Chocolate Mousse
In a large bowl, beat 8 oz softened cream cheese, 1/3 cup powdered sugar, 1 teaspoon vanilla extract, and 6 oz of cooled melted white chocolate until smooth and fluffy. In a separate chilled bowl, whip 1 cup of heavy whipping cream to soft peaks — the cream should hold its shape but still be soft and billowy. Gently fold the whipped cream into the cream cheese mixture, then fold in 1 teaspoon of finely chopped fresh sage. Work slowly and deliberately; you want to incorporate everything without deflating the mousse.
💡 Stella’s Pro Tip: Chill your bowl and beaters in the freezer for 10 minutes before whipping the cream. It makes a noticeable difference in how quickly and stiffly the cream whips, especially in a warm kitchen.
Step 4: Create the Silver Chocolate Shells
Melt 10 oz of white chocolate with 1 teaspoon of coconut oil and 1 teaspoon of edible silver luster dust. Stir until completely smooth and glossy. Using a small pastry brush, brush a thin, even layer of the silver chocolate inside each dome mold, making sure to coat the entire surface. Chill the molds in the refrigerator for 10 minutes until the chocolate is set, then apply a second layer. This double-layer technique ensures the shells are thick enough to hold their shape during unmolding and give that satisfying snap when you bite into them.
⚠️ Common Mistake to Avoid: Don’t brush the chocolate too thickly in one layer. It will pool at the bottom of the mold and create an uneven shell. Two thin layers are much better than one thick layer.
Step 5: Assemble the Domes
Fill each chocolate-lined shell halfway with the sage white chocolate mousse. Use a small spoon or piping bag for precision. Drop a spoonful of the cooled blackberry filling into the center of each dome — about 1 to 2 teaspoons per dome, depending on the size of your molds. Cover the filling with more mousse, filling the shells to the very top. Use a small offset spatula or the back of a spoon to smooth the tops flat, flush with the rim of the mold. The biscuit base will go on last, so the top needs to be completely level.
💡 Stella’s Pro Tip: If the mousse starts to soften as you work, pop the assembled domes in the freezer for 10 minutes before adding the biscuit base. This keeps the layers from shifting.
Step 6: Freeze and Finish
Place the assembled domes in the freezer for at least 3 hours — overnight is even better. Once fully frozen, carefully unmold each dome by gently flexing the silicone mold. Place the domes on a wire rack set over a baking sheet. Sprinkle immediately with coarse sparkling sugar and a light dusting of edible silver luster dust for that stunning metallic sheen. Garnish each dome with a fresh blackberry, a small sage leaf, and white chocolate curls if desired. Return the finished domes to the refrigerator for at least 30 minutes to temper the shell slightly before serving. Serve chilled but not frozen solid — the mousse should be creamy, not icy.
⚠️ Common Mistake to Avoid: Don’t unmold the domes directly from the freezer and serve them immediately. The shell will be too hard and the mousse will be icy. A 30-minute rest in the fridge is essential for the perfect texture.
| Step | Action | Duration | Key Visual Cue |
|---|---|---|---|
| 1 | Biscuit Base | 15 mins chill | Crumbs hold together like wet sand |
| 2 | Blackberry Filling | 6–7 mins cook + cool | Glossy, thick compote |
| 3 | Sage Mousse | 10–12 mins | Light, fluffy, holds soft peaks |
| 4 | Silver Chocolate Shells | 20 mins (2 coats + chill) | Glossy, even, no streaks |
| 5 | Assembly | 15–20 mins | Tops level, filling centered |
| 6 | Freeze & Finish | 3 hrs freeze + 30 mins fridge | Domes release cleanly from molds |
Serving & Presentation
These blackberry white chocolate mousse domes are made for special occasions — birthday dinners, anniversary celebrations, or a holiday gathering where you want to pull out all the stops. I like to serve them on a chilled white plate with a few fresh blackberries and a sprig of sage arranged artfully alongside. The silver sheen catches the light beautifully, so don’t be shy about placing them under a warm glow at the table.
For a truly memorable dessert course, pair each dome with a small glass of late-harvest Riesling or a sparkling Moscato — the sweetness of the wine echoes the white chocolate while the acidity cuts through the richness of the mousse. If you’re serving coffee, a smooth, medium-roast pour-over with floral notes complements the sage beautifully.
I learned the art of plating from my time in Paris, where every dessert was treated like a piece of sculpture. A light dusting of extra silver luster dust on the plate (just a pinch, tapped through a small sieve) adds a magical, starry effect. And always, always serve these domes slightly chilled — cold enough to hold their shape but warm enough on the palate that the flavors fully bloom.
| Pairing Type | Suggestions | Why It Works |
|---|---|---|
| Beverage | Late-harvest Riesling, sparkling Moscato, floral pour-over coffee | Echoes sweetness, acidity cuts richness, floral notes complement sage |
| Garnish | Fresh blackberries, small sage leaves, white chocolate curls, silver dust | Adds color, freshness, texture, and visual drama |
| Side | Light lemon sorbet, fresh berry salad, shortbread cookie | Cleanses palate, adds brightness, contrasts textures |
| Sauce | Warm blackberry coulis, crème anglaise, honey drizzle | Enhances berry flavor, adds creaminess, brings sweetness |
Make-Ahead, Storage & Reheating
One of the best things about this gourmet dome dessert recipe is how well it works for make-ahead entertaining. In my busy NYC life, I often prepare the components a day or two in advance and assemble the domes the morning of a dinner party. The domes freeze beautifully, so you can make them up to two weeks ahead and simply unmold and garnish when you’re ready to serve. Here’s my tested storage guide:
| Method | Container | Duration | Reheating Tip |
|---|---|---|---|
| Refrigerator | Airtight container, single layer | Up to 3 days | Serve chilled — no reheating needed |
| Freezer | Freezer-safe container, layered with parchment | Up to 2 weeks | Thaw in fridge 30 mins before serving |
| Make-Ahead | Assembled in molds, wrapped tightly | Up to 3 days in advance | Freeze in molds, unmold day of serving |
For the best texture, I always recommend freezing the domes in their molds and unmolding the day you plan to serve them. If you’ve already unmolded them, store them in a single layer in an airtight container in the freezer with a sheet of parchment between layers. When you’re ready to serve, transfer the domes to the refrigerator for 30 minutes — this brings the mousse to that perfectly creamy, scoopable consistency while keeping the shell delightfully crisp.
A word on reheating: these domes are meant to be served cold, so there’s no traditional reheating. But if you want to serve them with a warm sauce — like a blackberry coulis or a caramel drizzle — heat the sauce separately and spoon it around the dome on the plate. The contrast between the cold, creamy dome and the warm sauce is absolutely divine.
Variations & Easy Swaps
Over the years, I’ve played with this recipe in countless ways — sometimes craving a different fruit, other times adapting for friends with dietary restrictions. Here are my favorite variations that still capture the spirit of the original.
| Variation | Key Change | Best For | Difficulty Impact |
|---|---|---|---|
| Raspberry & Rosemary | Replace blackberries with raspberries, sage with rosemary | Holiday gatherings, winter parties | Same difficulty |
| Gluten-Free | Use gluten-free vanilla cookie crumbs for the base | Gluten-sensitive guests | Same difficulty |
| Dairy-Free | Use dairy-free cream cheese, coconut cream, and dairy-free white chocolate | Dairy-free / vegan diets | Slightly more challenging |
Raspberry & Rosemary Variation
This is my go-to winter holiday version. Swap the blackberries for raspberries and the fresh sage for finely chopped fresh rosemary. The rosemary adds a piney, almost woodsy note that pairs wonderfully with white chocolate — a trick I picked up from a pastry chef in Paris who used rosemary in her Christmas bûche de Noël. The raspberry filling stays bright and tart, cutting through the richness of the mousse. Follow the exact same proportions and technique.
Gluten-Free Version
Making these domes gluten-free is incredibly simple because the only gluten-containing component is the biscuit base. Swap the vanilla cookie crumbs for your favorite gluten-free vanilla cookie crumbs — I use Schär or Goodie Girl brand. The texture is slightly more delicate, so press the base firmly into the molds and chill it well before adding the mousse. Everything else remains exactly the same, and no one at your table will know the difference.
Dairy-Free Version
For a dairy-free adaptation, I’ve tested this with great success using Miyoko’s cream cheese (cashew-based), full-fat coconut cream whipped to stiff peaks (chill the can overnight first), and a dairy-free white chocolate like Enjoy Life or Pascha. The texture of the mousse will be slightly softer, so I recommend freezing the domes for at least 4 hours before unmolding, and handle them gently. The flavor is still beautifully balanced — the coconut adds a subtle tropical note that actually complements the sage and blackberry surprisingly well.
What is the best way to achieve a smooth, glossy mirror glaze for the white chocolate domes?
For a smooth, glossy finish on these silver sage blackberry white chocolate domes, the key is tempering the white chocolate properly and applying it in two thin layers rather than one thick one. Melt the white chocolate with coconut oil and silver luster dust gently — I use a double boiler or short bursts in the microwave at 50% power, stirring every 15 seconds. The coconut oil helps the chocolate flow smoothly and gives it a beautiful sheen. Brush the first layer thinly into the molds and chill until fully set (about 10 minutes), then apply a second layer. This creates a shell that’s both glossy and sturdy. If you want an extra-glossy finish, you can polish the outside of the dome very gently with a soft, lint-free cloth after unmolding.
Can I substitute fresh blackberries with frozen ones for the filling or gel?
Absolutely — frozen blackberries work beautifully in this recipe. I use frozen berries all the time, especially in winter when fresh berries aren’t at their peak. Use unsweetened frozen blackberries and add them directly to the saucepan without thawing (thawing first can make them mushy). You may need to cook them for 1–2 minutes longer to evaporate the extra moisture. The cornstarch slurry will help thicken the filling regardless. One note: frozen berries may break down a bit more than fresh ones, so the compote will be slightly smoother — but the flavor will be just as bright and delicious. No need to adjust the sugar or lemon juice amounts.
How far in advance can I prepare and assemble Silver Sage & Blackberry White Chocolate Domes?
This is one of the best make-ahead desserts in my repertoire! You can assemble the domes completely in their molds up to 3 days before serving and store them in the freezer. For best results, freeze the assembled domes in the molds, then unmold them the day you plan to serve. You can also prep the individual components ahead: the blackberry filling can be made 5 days in advance and stored in the fridge, the biscuit base crumbs can be mixed and stored in an airtight container for up to a week, and the silver chocolate shells can be prepped in the molds up to a week ahead (just keep them in a cool, dry place). The mousse is best made fresh on assembly day, but you can make it 1 day ahead and keep it refrigerated in a piping bag, then pipe it into the shells when ready.
What can I use instead of silver sage leaves if I can’t find them for garnish?
If you can’t find fresh sage leaves for garnish, don’t worry — you have several beautiful options. Small fresh mint leaves are my favorite substitute; they add a similar freshness and bright green color. Lemon thyme sprigs also work wonderfully, with tiny leaves that look delicate and elegant. For a non-herb option, try small edible flowers like violets, pansies, or borage blossoms — they add a pop of color and a touch of whimsy. You can also skip the herb garnish entirely and instead add a few extra white chocolate curls or a cluster of fresh blackberries. The key is to keep the garnish small and refined so it complements the domes without overwhelming them.
Why did my white chocolate shells crack when I unmolded them?
Cracked shells are almost always caused by one of three things. First, the chocolate layer might be too thin — make sure you apply two coats and let each set fully before adding the next. Second, the domes might not be frozen enough; they need a minimum of 3 hours in the freezer so the mousse is solid and the shell releases cleanly from the silicone mold. Third, you might be unmolding too aggressively. Gently flex the silicone mold in one direction, then the other, and the dome should pop out on its own. If it sticks, let it sit at room temperature for 30 seconds and try again. Never use a knife or tool to pry it out — that will almost always crack the shell.
Can I use dark or milk chocolate instead of white chocolate for the shells?
You can, but the flavor profile will change significantly. White chocolate’s sweetness and mild flavor allow the sage and blackberry to shine. If you use milk chocolate, the mousse will taste more like a classic chocolate dessert, and the sage will be less prominent. Dark chocolate will be even more assertive — I’d recommend omitting the sage in that case and pairing the dark chocolate with just the blackberry filling. For the shell, you can substitute with any good-quality chocolate, but you won’t get the same silver-toned effect unless you use white chocolate as the base for the luster dust. The metallic finish is most striking against the pale white chocolate background.
How do I prevent the blackberry filling from bleeding into the white chocolate mousse?
This is a great question and something I struggled with in my early attempts. The key is twofold. First, make sure the blackberry compote is completely cool — even chilled — before you spoon it into the mousse. Warm filling will melt the mousse and create a messy, muddy layer. Second, don’t overspoon the filling. Use just 1 to 2 teaspoons per dome, and place it in the center of the mousse, then cover it completely with more mousse. Think of it like a hidden treasure in the middle. If you’re still worried about bleeding, you can freeze the blackberry filling in small dollops on a parchment-lined tray before adding it to the domes — frozen filling is much less likely to bleed into the surrounding mousse.
What size silicone dome molds should I use for this recipe?
For this recipe, I recommend using 3-inch (about 7.5 cm) half-sphere silicone dome molds. This size yields individual servings that are generous without being overwhelming — perfect for a dinner party or special occasion. If you use smaller molds (like 2-inch), reduce the filling amounts slightly and check for doneness a little earlier. Larger molds (4-inch) will need more filling and a longer freeze time, about 4–5 hours. The number of servings will vary based on the mold size: with 3-inch molds, this recipe makes exactly 8 domes. Always use silicone molds for this recipe — they’re flexible and release the domes much more easily than rigid metal or plastic molds.
Can I make these domes without edible silver luster dust?
Absolutely — the luster dust is purely decorative. If you don’t have it or prefer not to use it, your domes will still be stunning. The white chocolate shell itself has a beautiful natural gloss, and you can sprinkle the domes with coarse sparkling sugar for a frosted look. You can also use edible gold luster dust for a warm, gilded effect, or pearl dust for a soft, luminous sheen. If you want the silver look but don’t have luster dust, you can add a tiny drop of silver food coloring (oil-based) to the melted white chocolate — but go very lightly, as a little goes a long way. The flavor won’t be affected either way; it’s purely a visual choice.
What should I do if my mousse is too soft or runny?
A runny mousse is usually a sign that the cream cheese wasn’t fully softened before mixing, or the whipped cream wasn’t whipped to stiff enough peaks. Here’s how to fix it: First, make sure your cream cheese is at true room temperature — leave it out for at least 1 hour before starting. Second, whip the heavy cream to firm peaks (not just soft peaks) — it should hold its shape clearly when you lift the whisk. If the mousse is already runny after mixing, you can try chilling it in the refrigerator for 20–30 minutes; this will firm it up enough to pipe into the shells. If it’s still too soft, fold in 2–3 tablespoons of mascarpone cheese or an additional 2 ounces of melted and cooled white chocolate. In a pinch, you can also freeze the mousse briefly in the piping bag before filling the shells.
Share Your Version!
I absolutely love hearing from you — there’s nothing that makes my day quite like seeing a photo of these silver sage blackberry white chocolate domes made in your own kitchen. Did you try the raspberry rosemary variation? Did your family go quiet when they took that first bite and hit the hidden blackberry filling? Drop a comment below and let me know how it went — I read every single one and answer as many as I can.
If you’re on Instagram or Pinterest, tag your photos with @leosfoods and #LeosKitchen — I feature my favorites in my stories. And if you have a question I didn’t answer here, just ask. From my NYC kitchen to yours — I hope this recipe brings as much warmth to your table as it does to mine. — Stella 🧡
⭐️ ⭐️ ⭐️ ⭐️ ⭐️
Did you make this recipe? I’d love to know! Tap a star rating below and leave a comment — your feedback helps other home cooks discover this recipe and helps me create even better content for you.
📸 Share a photo on Instagram · 📌 Pin it to Pinterest · 💬 Tag @leosfoods
Love This Recipe? Save It to Pinterest!
If you enjoyed this Silver Sage & Blackberry White Chocolate Domes recipe, don’t let it get lost in your browser tabs! 😄 Pin it now so you can find it again anytime — and explore hundreds more tried-and-tested recipes waiting for you on my Pinterest boards.
👉 Follow Stella on Pinterest @stellarecipeblog
📌 Pin this recipe · 🔁 Re-pin your favorites · 💬 Tag me when you make it — I love seeing your creations!

Silver Sage & Blackberry White Chocolate Domes
Elegant individual silver-toned domes with a crisp biscuit base, sage white chocolate mousse, and a tart blackberry filling, finished with edible silver luster dust.
- Yield: 8 1x
Ingredients
- For the Blackberry Filling:
- 1 1/2 cups fresh blackberries
- 2 tbsp granulated sugar
- 1 tsp lemon juice
- 1 tsp cornstarch mixed with 1 tbsp water
- For the Sage White Chocolate Mousse:
- 8 oz (225 g) cream cheese, softened
- 6 oz (170 g) white chocolate, melted and cooled
- 1 cup heavy whipping cream, chilled
- 1/3 cup powdered sugar
- 1 tsp finely chopped fresh sage
- 1 tsp vanilla extract
- For the Biscuit Base:
- 1 cup vanilla cookie crumbs
- 3 tbsp unsalted butter, melted
- For the Silver Shell:
- 10 oz (280 g) white chocolate, melted
- 1 tsp coconut oil
- 1 tsp edible silver luster dust
- 2 tbsp coarse sparkling sugar
- For Garnish (optional):
- Fresh blackberries
- Small sage leaves
- White chocolate curls
Instructions
- Mix vanilla cookie crumbs with melted butter until evenly combined.
- Press into silicone dome molds to form a thin base layer and chill for 15 minutes.
- In a small saucepan, cook blackberries, sugar, and lemon juice for 4–5 minutes until softened and juicy.
- Stir in cornstarch slurry and cook until thickened into a glossy compote. Cool completely.
- Beat cream cheese, powdered sugar, vanilla extract, and cooled melted white chocolate until smooth.
- Whip heavy cream to soft peaks and gently fold into the mousse along with finely chopped sage.
- Brush melted white chocolate mixed with coconut oil and silver luster dust into dome molds. Chill until set, then apply a second layer.
- Fill each shell halfway with sage white chocolate mousse.
- Add a spoonful of blackberry filling into the center.
- Cover with more mousse and smooth the tops.
- Freeze for at least 3 hours until fully set.
- Unmold carefully and place on a rack.
- Sprinkle with coarse sugar and silver dust for a metallic sheen.
- Garnish with fresh blackberries, sage leaves, and white chocolate curls if desired.
- Chill briefly before serving.
- Method: Dessert
Nutrition
- Calories: 325
- Sugar: 22 g
- Fat: 23 g
- Carbohydrates: 27 g
- Protein: 4 g
Tried This Recipe? Leave a Comment!
Did you make this recipe? I’d love to hear how it turned out! Please leave a comment and a rating below. Your feedback helps other home cooks and supports cheerychop.com!
For more delicious inspiration, follow me on Pinterest!