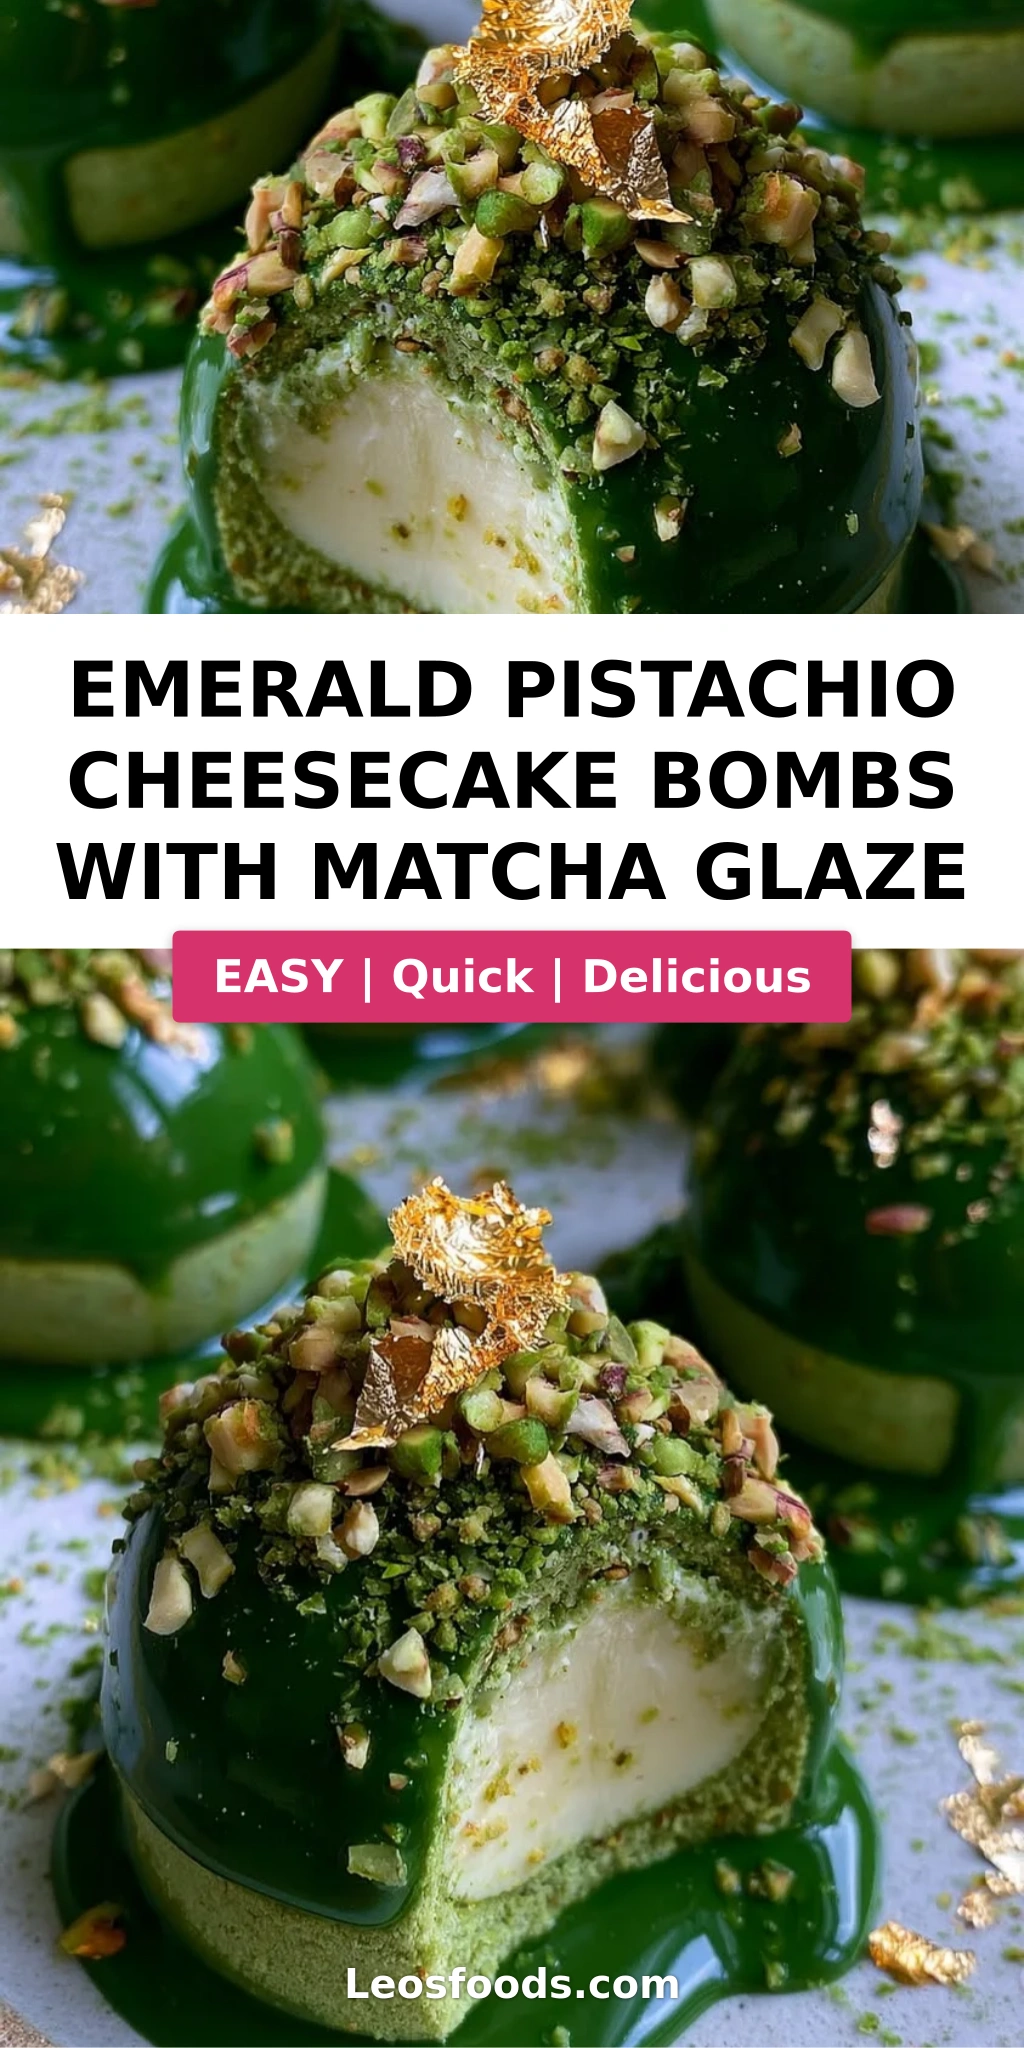
Emerald Pistachio Cheesecake Bombs with Matcha Glaze
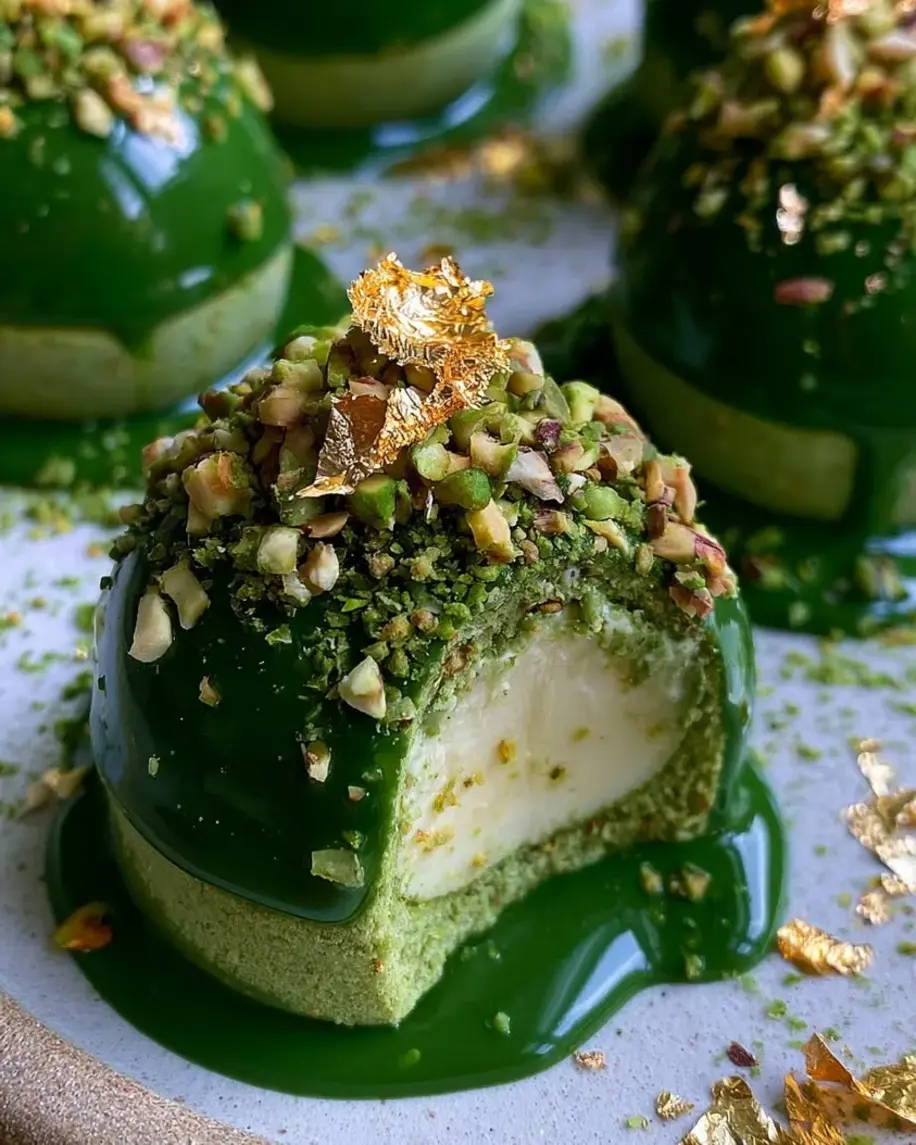
Table of Contents
Emerald Pistachio Cheesecake Bombs with Matcha Glaze – No-Bake Truffles with a Hidden Cream Center
I still remember the first time I tasted pistachio and matcha together — it was at a tiny patisserie in the Marais district of Paris, tucked between a fromagerie and a vintage bookstore. The pastry chef had layered a pistachio cream inside a delicate matcha sponge, and I stood there on the cobblestone sidewalk, utterly stopped by the flavor. That moment stayed with me, and years later, here in my New York City kitchen, I knew I had to capture it in a no-bake form that anyone could make at home. These pistachio cheesecake bombs recipe bites are my love letter to that memory — rich, creamy, and wrapped in a glossy matcha glaze that shimmers like emerald silk. The hidden pistachio cream center is the surprise that makes every bite unforgettable.
Imagine biting through a smooth, cool shell of white chocolate matcha glaze into a cloud of pistachio cheesecake — only to discover a luscious, silky pistachio cream core waiting in the center. The texture is pure indulgence: the glaze cracks ever so slightly under your teeth, the cheesecake layer is airy and mousse-like, and the center is almost like a pistachio buttercream dream. The matcha brings a gentle, earthy bitterness that balances the sweetness of the white chocolate and the rich nuttiness of the pistachio. A whisper of vanilla rounds everything out. These are the kind of pistachio cheesecake truffles that feel fancy enough for a dinner party but are secretly simple to pull together.
What sets my version apart is the double-pistachio approach — pistachio paste in both the cheesecake base and the center cream — and the technique I learned in pastry school for achieving a flawless, clump-free matcha glaze every time. No heating the matcha directly, no bitter green streaks. Just a velvet-smooth coating that stays glossy even after chilling. I’ve also added a tiny amount of gelatin to the glaze for that satisfying, just-set bite that holds its shape on the spoon. Whether you are new to no-bake desserts or a seasoned home baker, these easy no-bake cheesecake balls are a showstopper that comes together with minimal fuss. Let me show you how.
Why This Emerald Pistachio Cheesecake Bombs Recipe Is the Best
The Flavor Secret: Most cheesecake truffles rely on pistachio extract or chopped nuts, which give a muted, one-note flavor. I use high-quality pistachio paste — the kind that tastes like straight-up ground pistachios with nothing hiding in the background — in both the cheesecake layer and the cream center. This double hit of pistachio creates a深度 of flavor that tastes almost like pistachio milk. Growing up in Morocco, my mother would make pistachio milk with fresh nuts and a touch of orange blossom water, and that nutty richness has stayed with me. This recipe honors that memory with every creamy, nut-packed spoonful.
Perfected Texture: The trick to a no-bake cheesecake bomb that isn’t too dense or too soft is the gelatin. I bloom it in cold water, then melt it gently and fold it into the cream cheese mixture. This gives the bombs a light, mousse-like structure that holds its shape beautifully even at room temperature for a short while. The pistachio cream center, stabilized with mascarpone, stays soft and luscious — a dreamy contrast to the firmer cheesecake shell. My Paris training taught me that texture is everything in pastry, and this recipe delivers that professional mouthfeel at home.
Foolproof & Fast: No oven, no water bath, no tempering chocolate. This pistachio cheesecake bombs recipe uses silicone sphere molds and a simple freeze-and-glaze method that works every time. The matcha glaze is made by whisking matcha powder into a warm white chocolate and condensed milk base — a technique I developed to avoid clumps entirely. Even if you have never made a truffle or a bomb before, the step-by-step visuals and pro tips will guide you to a gorgeous result on your first try. It’s the kind of recipe that makes you look like a pastry chef without any of the stress.
Pistachio Cheesecake Bombs Recipe Ingredients
I source my pistachio paste from a little Middle Eastern market on Atlantic Avenue in Brooklyn — the same place I go for rose water and dried limes. The matcha I use is culinary-grade from a Japanese tea shop in the East Village. Good ingredients matter here because there are so few of them, and each one shines through. Here is everything you will need.
Ingredients List
- For the Emerald Pistachio Cheesecake Bombs:
- 8 oz cream cheese, softened
- 1 cup heavy cream
- 1/3 cup powdered sugar
- 3 tbsp pistachio paste
- 1 tsp vanilla extract
- 2 tsp unflavored gelatin
- 2 tbsp cold water
- Green food coloring, as needed
- For the Pistachio Cream Center:
- 1/2 cup mascarpone cheese
- 2 tbsp pistachio paste
- 1 tbsp powdered sugar
- 2 tbsp heavy cream
- For the Matcha Glaze:
- 1 cup white chocolate, finely chopped
- 1/2 cup sweetened condensed milk
- 2 tsp unflavored gelatin
- 2 tbsp cold water
- 1/4 cup warm water
- 2 tsp matcha powder
- For Garnish (optional):
- Chopped pistachios
- Edible gold flakes
Ingredient Spotlight
Pistachio Paste: This is the heart of the recipe. Look for a paste made from 100% pistachios with no added sugar or oil — brands like Sicilian pistachio paste or the one from Zingerman’s are excellent. It provides deep, toasty nut flavor and a beautiful pale green color. If you can only find pistachio butter, that works too; just taste it first to make sure it isn’t overly sweetened. Store it in the fridge after opening to keep the oils fresh.
Matcha Powder: Use culinary-grade matcha for baking, not the premium ceremonial grade (save that for drinking). Culinary matcha has a bolder, more robust flavor that stands up to the white chocolate and condensed milk. Look for a vibrant green color — dull, brownish-green matcha is old and will taste bitter. I love the brand Ippodo Tea for their reliable quality. Sift the matcha before whisking to prevent clumps in the glaze.
White Chocolate: Finely chop a good-quality white chocolate bar — not chips, which often contain stabilizers that prevent smooth melting. Brands like Valrhona Ivoire or Guittard are my go-tos. The white chocolate provides the sweetness and structure for the glaze, so its flavor really matters. A smooth, creamy white chocolate will give you a glossy, elegant finish that hardens with a clean snap.
Mascarpone: This Italian cream cheese is richer and silkier than American cream cheese, with a higher fat content that makes the pistachio cream center extra luscious. If you cannot find mascarpone, you can substitute an equal amount of full-fat cream cheese blended with 1 tablespoon of heavy cream. The texture will be slightly firmer but still delicious.
| Original Ingredient | Best Substitution | Flavor / Texture Impact |
|---|---|---|
| Pistachio paste | Pistachio butter (no added sugar) or homemade pistachio paste | Slightly less intense pistachio flavor; may need extra pinch of salt |
| Mascarpone | Full-fat cream cheese + 1 tbsp heavy cream | Center will be slightly firmer and tangier, less silky |
| Matcha powder (culinary) | Macha powder (premium) or finely ground green tea leaves (not recommended) | Premium matcha is milder; ground tea leaves will be gritty and bitter |
| White chocolate (bar) | High-quality white chocolate chips (e.g., Guittard) | May need 1 tsp coconut oil to thin; glaze slightly less glossy |
| Heavy cream | Full-fat coconut cream (chilled) | Dairy-free option; adds slight coconut flavor, still whips to soft peaks |
How to Make Emerald Pistachio Cheesecake Bombs — Step-by-Step
I have broken this down into clear, manageable steps so you can follow along without any surprises. The key is to work ahead — the bombs need a solid freeze before glazing, so plan accordingly. Trust me, the wait is worth it.
Step 1: Bloom the Gelatin
In a small bowl, sprinkle 2 teaspoons of unflavored gelatin over 2 tablespoons of cold water. Stir gently and let it sit for 5 minutes until it becomes a firm, jiggly mass. This is called blooming, and it ensures the gelatin dissolves evenly without lumps.
💡 Stella’s Pro Tip: Use cold water, not warm, for blooming. Warm water will dissolve the gelatin too quickly and can cause it to form clumps or lose its setting power. Think of it like rehydrating dried fruit — slow and steady wins the race.
Step 2: Make the Cheesecake Base
In a large bowl, beat 8 oz softened cream cheese, 1/3 cup powdered sugar, 3 tablespoons pistachio paste, and 1 teaspoon vanilla extract until completely smooth and fluffy. Scrape down the sides and bottom of the bowl to make sure there are no lumps. The mixture should be a pale, soft green and smell wonderfully nutty.
⚠️ Common Mistake to Avoid: Do not over-beat the cream cheese once it is smooth. Over-beating incorporates too much air, which can cause cracks in the bombs as they freeze. Mix just until homogeneous.
Step 3: Melt and Add Gelatin
Gently melt the bloomed gelatin in a small saucepan over low heat, stirring constantly, or microwave it in 5-second bursts until it is liquid. Do not let it boil. Immediately stir the melted gelatin into the cream cheese mixture until fully incorporated. The mixture will thicken slightly.
💡 Stella’s Pro Tip: If the gelatin seizes into strings or clumps when you add it, your cream cheese mixture was too cold. Let it sit at room temperature for 10 minutes before stirring. Gelatin needs a warm environment to disperse evenly.
Step 4: Add Food Coloring
Add a small amount of green food coloring — gel or paste works best — and mix until you achieve a vibrant emerald shade. The pistachio paste will give a soft green, but the food coloring takes it to that jewel-toned, dramatic emerald that makes these bombs so visually stunning.
Step 5: Whip and Fold Cream
In a separate bowl, whip 1 cup heavy cream to soft peaks — when you lift the whisk, the cream should gently droop but not hold a stiff peak. Fold the whipped cream into the cheesecake mixture in three additions, using a rubber spatula and a gentle hand. The batter will become light, airy, and mousse-like.
⚠️ Common Mistake to Avoid: Do not over-whip the cream to stiff peaks, or the final bombs will be dense and buttery. Soft peaks create that cloud-like texture that makes these truffles so elegant. Stop as soon as the cream looks billowy and holds a gentle shape.
Step 6: Make the Pistachio Cream Center
In a small bowl, combine 1/2 cup mascarpone cheese, 2 tablespoons pistachio paste, 1 tablespoon powdered sugar, and 2 tablespoons heavy cream. Stir until smooth and creamy. This center should be thicker than the cheesecake mixture so it holds its shape as a distinct layer. Set aside at room temperature.
💡 Stella’s Pro Tip: For an extra-luxurious center, use a piping bag fitted with a small round tip to pipe the cream into the center of each bomb. This keeps the filling neatly contained and prevents it from bleeding into the cheesecake layer.
Step 7: Fill the Molds
Spoon or pipe the pistachio cheesecake mixture into silicone sphere molds, filling each cavity about halfway. Tap the mold gently on the counter to release air bubbles. Add a small spoonful (about 1 teaspoon) of the pistachio cream center into the middle of each cavity. Cover with the remaining cheesecake mixture, smoothing the tops with a small offset spatula.
⚠️ Common Mistake to Avoid: Do not overfill the molds — leave about 1/8 inch of space at the top. Overfilled molds will bulge and create uneven spheres. A slight dome on top is fine because it will settle during freezing.
Step 8: Freeze Solid
Place the filled molds on a baking sheet and freeze for at least 5 hours, or preferably overnight. The bombs must be completely frozen through before glazing — they should be rock-solid and release cleanly from the silicone mold. If they are even slightly soft in the center, they will crack or fall apart when you unmold them.
💡 Stella’s Pro Tip: Freeze the molds flat on a baking sheet so they stay level. If your freezer has an ice maker or uneven surface, the bombs can develop a flat side. Level freezing ensures perfectly round spheres.
Step 9: Prepare the Matcha Glaze
Bloom 2 teaspoons gelatin in 2 tablespoons cold water for 5 minutes. In a small saucepan, heat 1/2 cup sweetened condensed milk and 1/4 cup warm water over low heat until steaming — do not boil. Add the bloomed gelatin and stir until dissolved. Pour this hot mixture over 1 cup finely chopped white chocolate in a heatproof bowl. Let it sit for 1 minute, then stir until smooth. Whisk in 2 teaspoons sifted matcha powder until fully incorporated and glossy. Let the glaze cool to a pourable consistency — about 90°F, or warm to the touch but not hot.
⚠️ Common Mistake to Avoid: Do not add matcha powder to hot liquid directly — it will clump and turn bitter. Always sift the matcha into the warm glaze and whisk gently. Clumps can be strained out, but it is better to prevent them with sifting.
Step 10: Unmold and Glaze
Remove the frozen bombs from the molds and place them on a wire rack set over a baking sheet lined with parchment paper. Working quickly, pour the matcha glaze evenly over each bomb, letting the excess drip off. Use a small spoon to help coat any bare spots. The glaze will set almost instantly on the frozen surface.
💡 Stella’s Pro Tip: If the glaze thickens too much while you work, gently rewarm it over a bowl of warm water — never microwave it directly, as white chocolate can seize. Stir in a few drops of warm water to thin it back to a pourable consistency.
Step 11: Garnish and Set
Immediately after glazing, sprinkle with chopped pistachios and edible gold flakes if using. The glaze will set in about 2–3 minutes on the frozen bombs. Transfer the glazed bombs to a parchment-lined tray and refrigerate for at least 30 minutes to fully set the glaze before serving. Serve chilled.
⚠️ Common Mistake to Avoid: Do not skip the refrigeration step after glazing — the bombs need time for the glaze to fully set and adhere to the cheesecake. Serving them too soon can cause the glaze to slide off as the bomb warms.
| Step | Action | Duration | Key Visual Cue |
|---|---|---|---|
| 1 | Bloom gelatin for cheesecake | 5 mins | Gelatin is firm and jiggly, no dry powder |
| 2 | Beat cream cheese base | 3 mins | Smooth, pale green, no lumps |
| 3 | Melt and add gelatin | 30 sec | Gelatin is liquid, stirs in smoothly |
| 4 | Add food coloring | 30 sec | Vibrant emerald green |
| 5 | Whip and fold cream | 4 mins | Soft peaks, light and airy batter |
| 6 | Make pistachio cream center | 2 mins | Smooth, thick, pastel green |
| 7 | Fill molds | 10 mins | Even layers, no air pockets |
| 8 | Freeze | 5+ hrs | Rock-solid, release cleanly |
| 9 | Make matcha glaze | 10 mins | Glossy, smooth, no clumps |
| 10 | Unmold and glaze | 5 mins | Even green coating, glossy finish |
| 11 | Garnish and set | 30 mins fridge | Glaze is firm, garnishes adhere |
Serving & Presentation
These emerald beauties deserve a stunning presentation. I love serving them on a simple white platter — the contrast between the bright green glaze and the white ceramic is striking. For a touch of drama, arrange the bombs on a bed of crushed pistachios or edible flowers like violas or borage blossoms. A light dusting of matcha powder over the top adds an earthy, sophisticated finish that whispers “pastry shop window.”
In my NYC apartment, I often serve these alongside small cups of Moroccan mint tea — the sweetness of the bombs plays beautifully against the fresh, herbal tea. For a dinner party, plate two bombs per person with a dollop of whipped cream and a few fresh berries. The berries add a bright acidity that cuts through the richness. If you are feeling especially indulgent, a drizzle of warm white chocolate sauce over the top takes these from gorgeous to unforgettable.
These matcha glaze dessert bites are best enjoyed straight from the fridge — cold, creamy, and firm. Let them sit at room temperature for no more than 10 minutes before serving, or the glaze may begin to soften. I also love bringing them to potlucks and holiday gatherings; they travel well when packed in a single layer in a chilled container. Just be prepared for everyone to ask for the recipe before they even finish their first bite.
| Pairing Type | Suggestions | Why It Works |
|---|---|---|
| Side Dish | Fresh berries, sliced mango, poached pears | Bright acidity cuts the richness of the cheesecake and glaze |
| Sauce / Dip | Warm white chocolate sauce, raspberry coulis, caramel | Adds extra indulgence; fruit coulis provides tart contrast |
| Beverage | Moroccan mint tea, espresso, cold brew, sparkling wine | The bitterness of tea/coffee balances the sweetness; wine adds celebration |
| Garnish | Chopped pistachios, edible gold flakes, matcha dust, rose petals | Adds visual contrast, texture, and a touch of elegance |
Make-Ahead, Storage & Reheating
One of the best things about this pistachio cheesecake bombs recipe is how well it fits into a busy schedule. I often make the bombs through step 8 (freezing) up to a week ahead, then glaze them the morning of a party. The glaze itself can be made a day in advance and gently rewarmed. Here is everything you need to know about storing and prepping ahead.
| Method | Container | Duration | Reheating Tip |
|---|---|---|---|
| Refrigerator | Airtight container, single layer, parchment between layers | Up to 5 days | Serve straight from fridge; no reheating needed |
| Freezer | Airtight freezer container, parchment between layers | Up to 2 months | Thaw in fridge 2 hours before serving; do not microwave |
| Make-Ahead | Molds in freezer, then glaze day of | Up to 1 week unfrozen | Glaze straight from frozen; add 1–2 mins extra set time |
If you are storing glazed bombs in the fridge, place them in a single layer in an airtight container with a sheet of parchment paper between layers if stacking. The glaze may soften slightly after a few days, but the flavor remains perfect. For the freezer, I recommend freezing unglazed bombs and glazing them fresh the day you plan to serve — the glaze stays much glossier and more vibrant that way. If you must freeze glazed bombs, place them on a baking sheet in the freezer for 1 hour until the glaze is hard, then transfer to a container. Thaw in the refrigerator for 2 hours before serving. Never microwave these — the cheesecake will weep and the glaze will turn sticky and dull.
Variations & Easy Swaps
One of the joys of this recipe is how adaptable it is. Whether you are catering to dietary needs or just craving a new flavor twist, these variations have been tested in my kitchen and are guaranteed to deliver. Here is a quick overview, followed by detailed instructions.
| Variation | Key Change | Best For | Difficulty Impact |
|---|---|---|---|
| Vegan & Dairy-Free | Cashew cream + coconut cream + vegan white choc | Dairy-free eaters, plant-based diets | Medium — requires extra prep |
| Nut-Free Alternative | Sunflower seed butter + coconut cream center | Nut allergies, school-safe treats | Easy — simple swap |
| White Chocolate Matcha Drizzle | Skip the full glaze, use a thin drizzle instead | Quick prep, less sweet finish | Easy — fewer steps |
Vegan & Dairy-Free Version
For a fully dairy-free version, replace the cream cheese with a thick cashew cream (soak 1 cup cashews, blend with 1/4 cup water and 1 tbsp lemon juice until silky). Use chilled full-fat coconut cream in place of heavy cream, and a vegan cream cheese alternative. For the mascarpone center, blend soaked cashews with coconut cream, pistachio paste, and a touch of maple syrup. Use a high-quality vegan white chocolate for the glaze. The texture will be slightly softer than the original, so freeze the bombs for at least 6 hours before glazing. This version is a hit at my NYC brunch gatherings with friends who follow plant-based diets.
Nut-Free Alternative
If you need to avoid nuts entirely, substitute the pistachio paste with sunflower seed butter (the kind made from roasted seeds). The color will be more brown than green, so you may want to add a drop of green food coloring to restore the emerald hue. For the center, use a sunflower seed butter cream made with coconut cream and a pinch of salt. The flavor is distinctly different — toasty and earthy — but genuinely delicious in its own right. Omit the chopped pistachio garnish and use toasted sunflower seeds or shredded coconut instead. Always check that your white chocolate is nut-free if allergies are a concern.
White Chocolate Matcha Drizzle
For a lighter, less sweet version, skip the full matcha glaze and instead drizzle the frozen bombs with a thin white chocolate matcha drizzle. Melt 1/2 cup white chocolate with 1 tablespoon coconut oil, then whisk in 1 teaspoon sifted matcha powder. Drizzle over the frozen bombs using a spoon or piping bag. This version has a thinner, more delicate coating that doesn’t set as hard — it stays slightly creamy, like a white chocolate shell. It is quicker to prepare and perfect for a weeknight treat when you want the flavor without the full glazing process. I often make this version for myself on a Sunday afternoon with a cup of coffee.
How do you make the matcha glaze for Emerald Pistachio Cheesecake Bombs smooth and clump-free?
The key to a silky, clump-free matcha glaze lies in two steps: sifting and temperature control. First, always sift your matcha powder through a fine-mesh sieve into a small bowl before adding it to the glaze — this breaks up any tiny clumps that form during storage. Second, never whisk matcha directly into a hot liquid. Heat the condensed milk and water mixture until it is steaming but not boiling, then pour it over the chopped white chocolate and let it sit for a minute before stirring. Once the white chocolate is fully melted and smooth, whisk in the sifted matcha gently. The residual warmth of the glaze is enough to dissolve the matcha without causing bitterness or clumping. If you see any small lumps after whisking, strain the entire glaze through a fine-mesh sieve before pouring. This technique comes straight from my pastry training in Paris, and it has never failed me.
Can I use cream cheese substitutes in Emerald Pistachio Cheesecake Bombs for a dairy-free version?
Yes, absolutely. For a dairy-free version, you have several excellent options. The best substitute I have tested is a thick cashew cream — soak 1 cup of raw cashews in water overnight, drain, and blend with 1/4 cup water and 1 tablespoon of lemon juice until completely smooth and silky. This mimics the tanginess and richness of cream cheese beautifully. You can also use a store-bought vegan cream cheese, but look for one that is thick and not overly aerated (Miyoko’s or Kite Hill work well). For the whipped cream component, use chilled full-fat coconut cream — scoop the solid white part from a can of coconut milk that has been refrigerated overnight, and whip it to soft peaks just like heavy cream. The flavor will have a subtle coconut note that pairs surprisingly well with pistachio and matcha. Note that dairy-free versions are slightly softer, so freeze the bombs for at least 6 hours before glazing to ensure they hold their shape.
How long do you need to chill Emerald Pistachio Cheesecake Bombs before serving?
These bombs need two separate chilling stages. First, after assembling them in the silicone molds, freeze them for a minimum of 5 hours — overnight is even better. They must be completely frozen solid before you unmold them, or they will lose their shape and be difficult to glaze. Once glazed, transfer them to the refrigerator and chill for at least 30 minutes to allow the glaze to fully set. When you are ready to serve, take them straight from the fridge. They are best enjoyed cold and firm. If they sit at room temperature for longer than 15 minutes, the glaze may begin to soften and the cheesecake will lose its mousse-like structure. For parties, I recommend glazing them the morning of the event and keeping them refrigerated until serving time. This schedule ensures they are perfectly chilled and the glaze is beautifully glossy.
What can I use instead of pistachios in Emerald Pistachio Cheesecake Bombs if I have a nut allergy?
If you have a tree nut allergy, sunflower seed butter is your best substitute for pistachio paste. Look for a roasted sunflower seed butter (like SunButter) that has a deep, toasty flavor. The color will be brownish rather than green, so I recommend adding a few drops of green food coloring to restore the emerald hue. For the pistachio cream center, use a sunflower seed butter cream made by blending 1/4 cup sunflower seed butter with 2 tablespoons coconut cream and 1 tablespoon maple syrup. The flavor is different — earthier and more savory — but it creates a delicious and completely nut-free treat. You can also use pumpkin seed butter for a greener color, though the flavor is more pronounced. For the garnish, swap chopped pistachios for toasted sunflower seeds, shredded coconut, or even a sprinkle of flaky sea salt. Always double-check that your white chocolate and other ingredients are processed in a nut-free facility if allergies are severe.
Can I make these Emerald Pistachio Cheesecake Bombs without gelatin?
Yes, you can make these without gelatin, though the texture will be noticeably different. Gelatin provides the light, mousse-like structure that holds the bombs together and allows them to be glazed without falling apart. Without it, the bombs will be denser and more like a traditional cream cheese truffle. To replace the gelatin, you have a couple of options. For a vegetarian version, use 1 teaspoon of agar-agar powder dissolved in 2 tablespoons of water, heated until fully dissolved, and stirred into the cream cheese mixture. Agar sets more firmly than gelatin, so the bombs will be slightly firmer and less creamy. For a simpler approach, you can omit the gelatin entirely and increase the heavy cream to 1 1/4 cups, whipping it to stiff peaks instead of soft peaks. The resulting bombs will be softer and more fudge-like in texture. Freeze them for at least 6 hours before glazing, and handle them gently as they will be more delicate. They are still delicious — just different.
What is the best way to get perfectly round Emerald Pistachio Cheesecake Bombs?
The secret to perfectly round bombs is using a high-quality silicone sphere mold with cavities that are at least 1.5 inches in diameter. Silicone is essential because it allows the frozen bombs to pop out cleanly without sticking. Before filling the molds, make sure they are clean and completely dry. When piping the cheesecake mixture into each cavity, tap the mold gently on the counter a few times to release any trapped air bubbles — air pockets create uneven surfaces. After filling, smooth the tops with a small offset spatula so the bottoms of the bombs (which become the tops when unmolded) are flat and even. Freeze the mold on a completely level surface; if your freezer has an uneven rack, place a small cutting board or baking sheet under the mold. Once frozen solid, flex the silicone mold gently from the edges to release each bomb. If any bombs have a small flat spot from the mold, you can gently roll them between your palms for a few seconds to round them out before glazing — but work quickly so they stay frozen.
Can I use store-bought pistachio paste for this recipe?
Absolutely, and I often do. High-quality store-bought pistachio paste is a fantastic shortcut that delivers consistent results. Look for brands that list only pistachios (and perhaps a small amount of oil) as ingredients — avoid pastes with added sugar, corn syrup, or artificial flavorings. Some excellent brands available in the US are Oliviers & Co. Sicilian Pistachio Paste, Zingerman’s, and Rustichella d’Abruzzo. These are typically found in specialty food stores or online. The paste should be thick, spreadable, and a deep, vibrant green. If your store-bought paste seems too thick or stiff, warm it gently in a bowl set over warm water (or microwave it in 5-second bursts) and stir until it loosens up before measuring. This makes it much easier to incorporate into the cream cheese and mascarpone. Homemade pistachio paste works beautifully too — just grind shelled pistachios in a food processor until they form a smooth paste, which takes about 5-8 minutes and requires patience to avoid turning it into pistachio butter.
Why did my matcha glaze turn out bitter or brownish?
A bitter or brownish matcha glaze is usually the result of one of three issues. The most common culprit is the matcha powder itself — if it is old or has been stored improperly (exposed to heat, light, or air), it will lose its vibrant green color and develop a bitter, astringent taste. Always store matcha powder in an airtight container in a cool, dark place or the refrigerator, and use it within six months of opening. The second cause is overheating. Matcha should never be added to boiling liquid or heated directly — the heat degrades both the color and flavor. In this recipe, you whisk the matcha into a warm glaze that is below 120°F (warm to the touch but not hot). The third cause is using too much matcha or the wrong grade. Stick to culinary-grade matcha and measure precisely — 2 teaspoons is the sweet spot for this amount of glaze. If your glaze turns brownish despite following all these tips, the white chocolate may have been overheated or seized, which can happen if it comes into contact with even a drop of water. Start fresh with new white chocolate and matcha, and you should get a brilliant green, perfectly balanced glaze.
Can I freeze Emerald Pistachio Cheesecake Bombs after glazing?
Yes, you can freeze these bombs after glazing, but there are a few important steps to follow for the best results. First, after glazing and garnishing, place the bombs on a baking sheet lined with parchment paper and freeze them uncovered for 1 to 2 hours, or until the glaze is completely hard and firm to the touch. This initial freeze sets the glaze so it won’t stick to the container. Once the glaze is hard, transfer the bombs to an airtight freezer container, placing them in a single layer with a sheet of parchment paper between each layer if you need to stack them. They will keep in the freezer for up to 2 months. When you are ready to serve, transfer the desired number of bombs to a plate and thaw them in the refrigerator for 2 to 3 hours — do not thaw them at room temperature, as the glaze may sweat and become sticky. The texture of the cheesecake will be slightly denser after freezing and thawing, but the flavor remains excellent. For the glossiest presentation, I recommend glazing fresh the day before serving rather than freezing glazed bombs.
What size silicone mold should I use for these pistachio cheesecake bombs?
For this recipe, I recommend using a silicone sphere mold with cavities that measure 1.5 to 1.75 inches in diameter. This size yields bombs that are large enough to have a satisfying presence on the plate but small enough to be eaten in two or three bites — perfect for a dessert course or a party platter. A common size for these molds is 1.5 inches, which holds about 1 to 1.5 tablespoons of filling per cavity. If you use smaller molds (1 inch), reduce the amount of pistachio cream center to about 1/2 teaspoon per bomb and reduce the freezing time to 4 hours. For larger molds (2 inches), increase the filling amount and freeze for at least 6 hours. The most important thing is that the mold is made of flexible, food-grade silicone — this ensures the frozen bombs release cleanly without cracking. I have used the same set of silicone sphere molds from a French pastry supply company for years, and they are available on Amazon as well. Avoid rigid plastic or metal molds, as the bombs will not release from those without breaking.
Share Your Version!
I absolutely love seeing how these Emerald Pistachio Cheesecake Bombs turn out in your kitchen. The combination of the pistachio cream center and the matcha glaze is such a special one, and I know every batch will have its own beautiful personality. After you make them, please come back and leave a star rating and a comment below — tell me how they turned out, what variation you tried, or any questions you have about the process. I read every single comment and I always try to respond within a day or two.
If you share a photo on Instagram or Pinterest, tag me @leosfoods so I can see your creation and share it with our community. I am especially curious — did you try the vegan version, or did you add your own twist with a different glaze? Let me know in the comments! And if you have a friend who loves matcha or pistachio desserts, send them this recipe — good food is meant to be shared.
From my NYC kitchen to yours — I hope this recipe brings as much warmth to your table as it does to mine. — Stella 🧡
Love This Recipe? Save It to Pinterest!
If you enjoyed this Emerald Pistachio Cheesecake Bombs with Matcha Glaze recipe, don’t let it get lost in your browser tabs! 😄 Pin it now so you can find it again anytime — and explore hundreds more tried-and-tested recipes waiting for you on my Pinterest boards.
👉 Follow Stella on Pinterest @stellarecipeblog
📌 Pin this recipe · 🔁 Re-pin your favorites · 💬 Tag me when you make it — I love seeing your creations!
⭐ Tried This Recipe? Let Me Know!
I would love to hear how your Emerald Pistachio Cheesecake Bombs turned out! Drop a star rating, leave a comment, or tag me in your photos. Your feedback helps me create better recipes for you.
💬 Share your experience below — every comment makes my day! 🧡

Emerald Pistachio Cheesecake Bombs with Matcha Glaze
Emerald Pistachio Cheesecake Bombs with Matcha Glaze are decadent, no-bake cheesecake bites with a pistachio cream center and a glossy matcha coating.
- Yield: 8 1x
Ingredients
- For the Emerald Pistachio Cheesecake Bombs:
- 8 oz cream cheese, softened
- 1 cup heavy cream
- 1/3 cup powdered sugar
- 3 tbsp pistachio paste
- 1 tsp vanilla extract
- 2 tsp unflavored gelatin
- 2 tbsp cold water
- Green food coloring, as needed
- For the Pistachio Cream Center:
- 1/2 cup mascarpone cheese
- 2 tbsp pistachio paste
- 1 tbsp powdered sugar
- 2 tbsp heavy cream
- For the Matcha Glaze:
- 1 cup white chocolate, finely chopped
- 1/2 cup sweetened condensed milk
- 2 tsp unflavored gelatin
- 2 tbsp cold water
- 1/4 cup warm water
- 2 tsp matcha powder
- For Garnish (optional):
- Chopped pistachios
- Edible gold flakes
Instructions
- 1. Mix gelatin and cold water in a small bowl and let bloom for 5 minutes.
- 2. Beat cream cheese, powdered sugar, pistachio paste, and vanilla extract until smooth.
- 3. Melt the bloomed gelatin and stir into the cheesecake mixture.
- 4. Add a small amount of green food coloring for a vibrant emerald color.
- 5. Whip heavy cream to soft peaks and gently fold into the mixture.
- 6. Combine mascarpone cheese, pistachio paste, powdered sugar, and heavy cream until smooth.
- 7. Fill silicone sphere molds halfway with the pistachio cheesecake mixture.
- 8. Add a spoonful of pistachio cream center into each mold.
- 9. Cover with the remaining cheesecake mixture and smooth the tops.
- 10. Freeze for at least 5 hours or until completely firm.
- 11. Bloom gelatin for the glaze.
- 12. Heat condensed milk and warm water, then stir in gelatin until dissolved.
- 13. Pour over white chocolate and mix until smooth.
- 14. Whisk in matcha powder until fully incorporated and glossy.
- 15. Allow glaze to cool to a pourable consistency.
- 16. Unmold frozen bombs and place on a wire rack.
- 17. Pour the matcha glaze evenly over each bomb.
- 18. Garnish with chopped pistachios and edible gold flakes.
- 19. Serve chilled.
Nutrition
- Calories: 390
- Sugar: 23 g
- Fat: 29 g
- Carbohydrates: 28 g
- Protein: 6 g
Tried This Recipe? Leave a Comment!
Did you make this recipe? I’d love to hear how it turned out! Please leave a comment and a rating below. Your feedback helps other home cooks and supports cheerychop.com!
For more delicious inspiration, follow me on Pinterest!