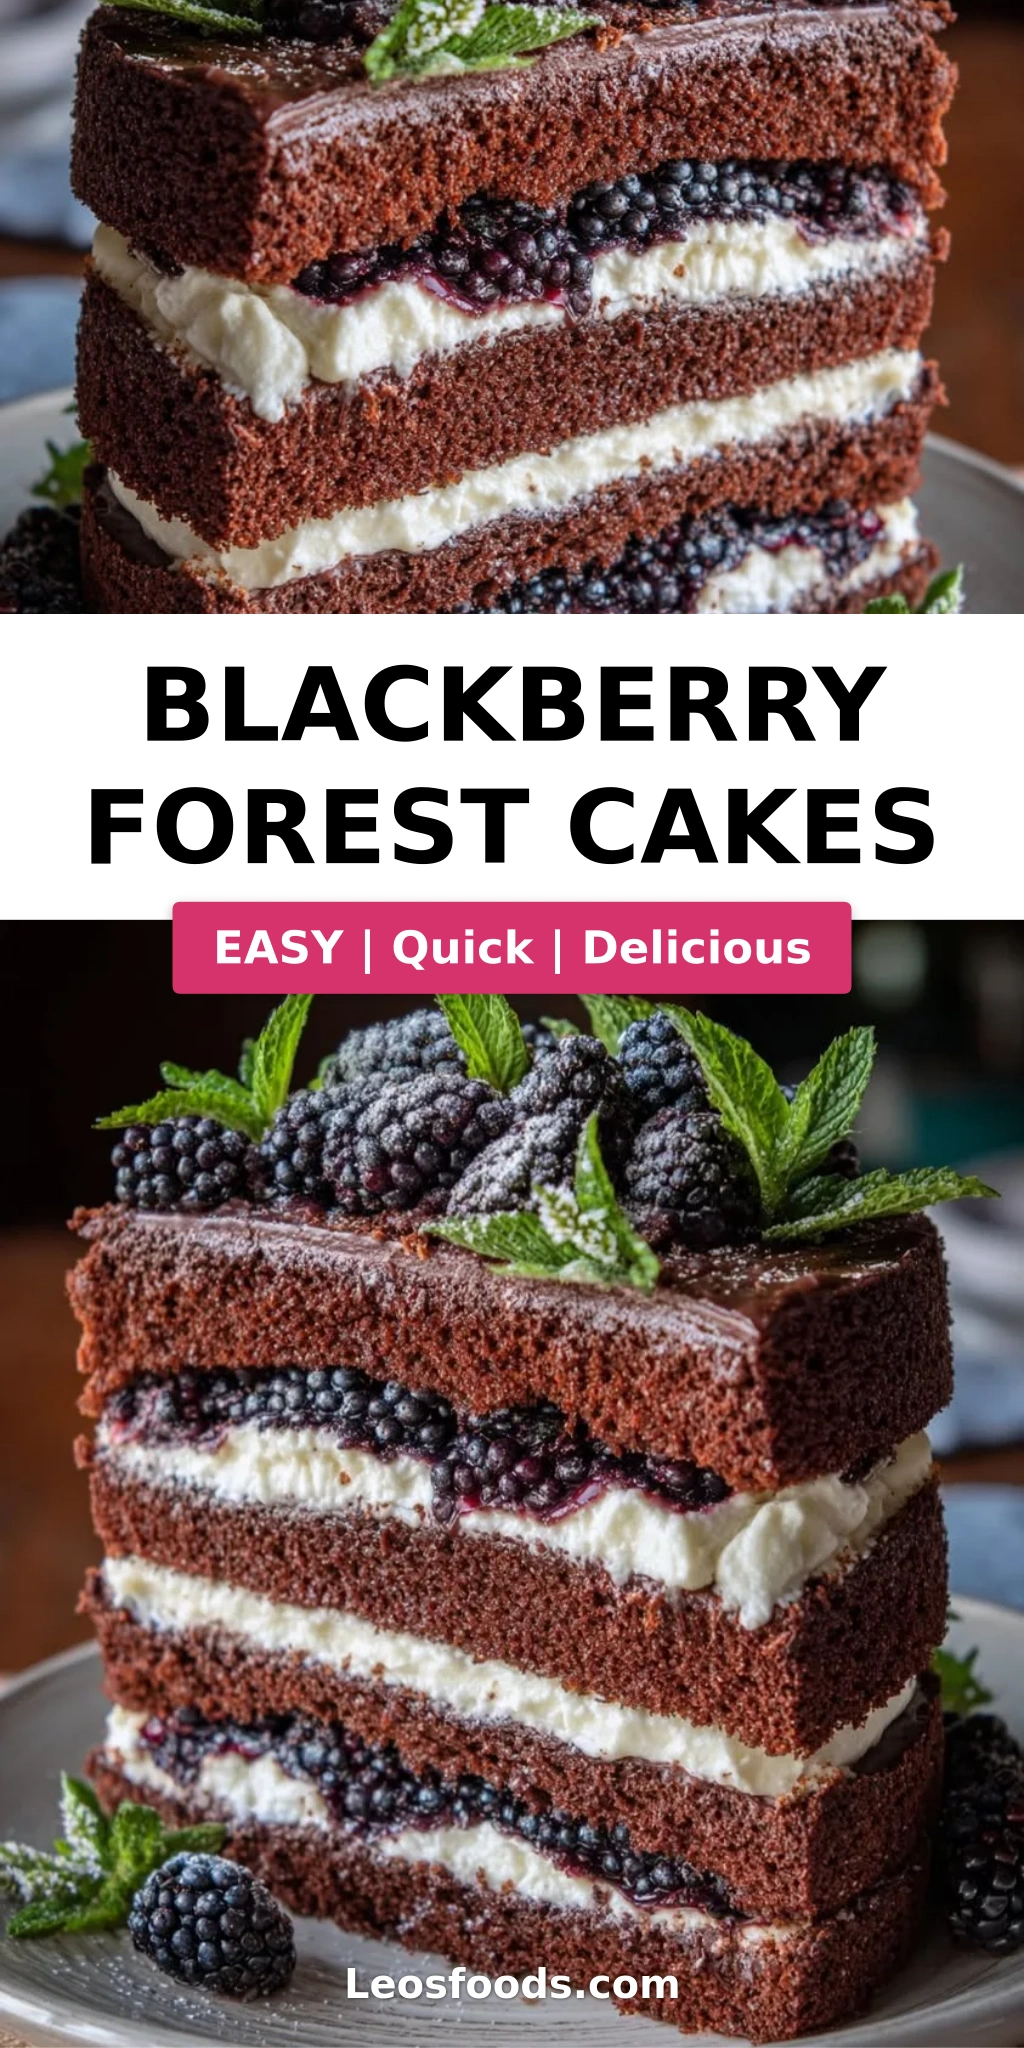
Blackberry Forest Cakes – A Berry Lover’s Dream Recipe
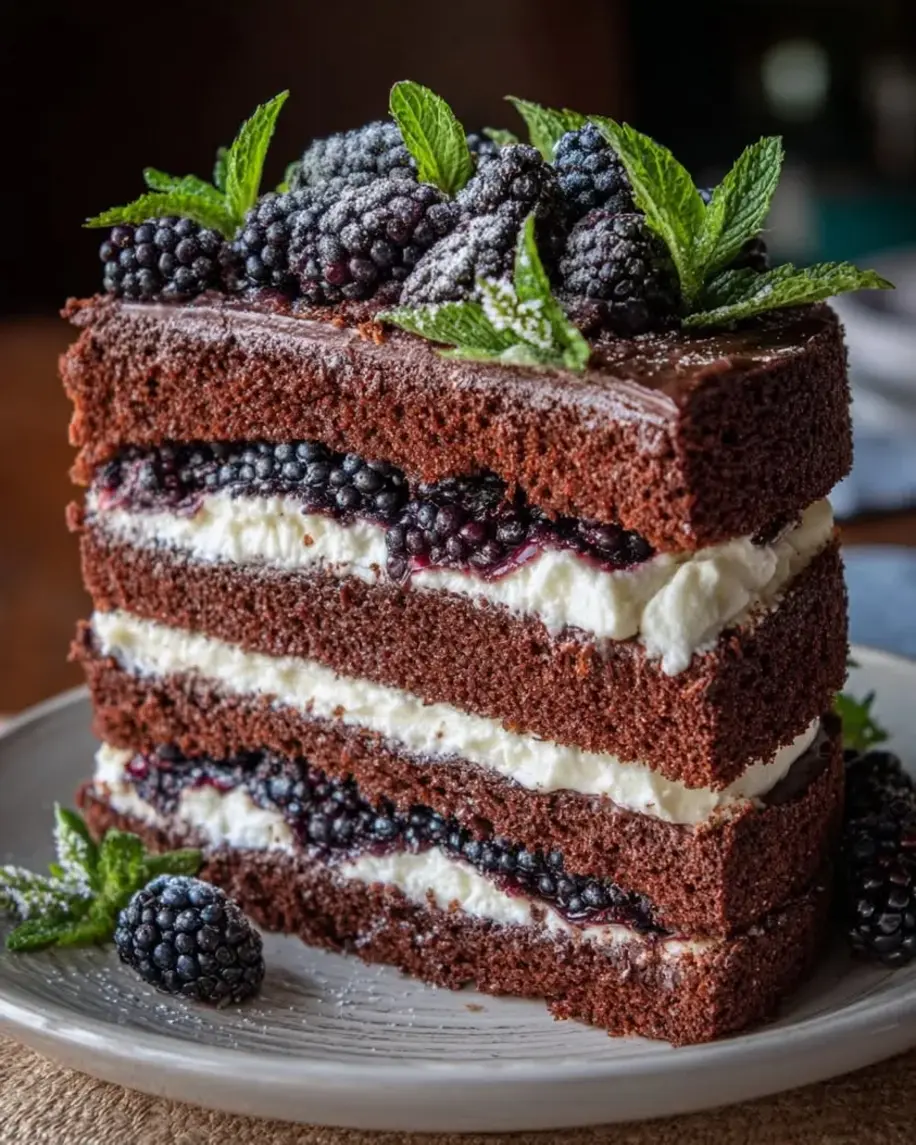
Table of Contents
Blackberry Forest Cakes – A Berry Lover’s Twist on a Classic
I still remember the first time I tasted a Black Forest Cake — I was a young pastry student in Paris, standing in the kitchen of a small patisserie in the 6th arrondissement. The cherries, the chocolate, the cream — it was a masterpiece. But when I moved to New York City and started cooking professionally, I found myself drawn to the tart, jammy richness of blackberries instead. That’s how this blackberry forest cake recipe was born: a tribute to the classic, but with a distinctly bold, berry-forward personality. My mother, back in Morocco, always said the best desserts are the ones that tell a story — and this one tells mine.
Picture this: three layers of deeply chocolatey sponge, each one light and tender, separated by a generous spread of homemade blackberry filling that strikes the perfect balance between sweet and tart. Then comes the vanilla whipped cream — airy, not too sweet, almost cloud-like — and finally, a glossy dark chocolate ganache that drapes over the whole creation like a silken robe. Every slice reveals those gorgeous dark purple swirls of fruit against the pale cream and deep chocolate. It’s the kind of cake that makes people stop mid-sentence and just say, “Wow.”
What sets my blackberry chocolate cake apart from the rest? I combine a French-trained pastry technique with a Moroccan home cook’s intuition for balancing flavors. The blackberry filling is cooked just long enough to concentrate its natural pectin, so it stays thick and spreadable — never watery. The ganache is made with a specific dark chocolate that I source from a small importer in Brooklyn whose beans come from a single origin in Madagascar. And the whipped cream? A touch of vanilla bean paste rather than extract makes all the difference. I’ll show you every trick I’ve learned so your cake turns out bakery-perfect on the very first try.
Why This Blackberry Forest Cakes Recipe Is the Best
The Flavor Secret — Most blackberry cakes rely on jam straight from a jar, which can be cloyingly sweet and one-dimensional. I simmer fresh blackberries with a touch of lemon juice and a whisper of cornstarch to create a filling that tastes bright, fruity, and sophisticated. It’s the same technique I learned in Paris for making fruit compotes for tarte Tatin — slow cooking to concentrate flavor without losing freshness. The tanginess of the blackberries cuts through the richness of the chocolate ganache in a way that cherries simply can’t match.
Perfected Texture — The chocolate sponge uses a combination of granulated and brown sugar, plus hot water added at the end of mixing. That hot water trick? I picked it up from a pastry chef I worked with in NYC who swore it was the key to an impossibly moist, tender crumb. The brown sugar adds a subtle molasses note that deepens the chocolate flavor, while the hot water ensures the cocoa powder dissolves completely — no dry patches, no grainy texture. Every layer bakes up with a slight dome that’s easy to level.
Foolproof & Fast — Despite its impressive layered look, this homemade blackberry cake comes together with straightforward techniques. The components can be prepped in stages — the filling and ganache both keep beautifully in the fridge — and the final assembly takes just 15 minutes. Even if you’ve never stacked a layer cake before, my step-by-step instructions with visual cues will guide you through. I’ve tested this recipe on absolute beginners in my cooking classes, and every single person walked out with a cake they were proud of.
Blackberry Forest Cake Recipe Ingredients
Every Saturday morning in late summer, I make my way to the Union Square Greenmarket and search for the plumpest, most fragrant blackberries I can find. The ones from a small farm in New Jersey are my favorite — they’re almost wine-like in their depth. For this blackberry forest cake recipe, ingredient quality matters because each component shines on its own. Here’s exactly what you’ll need to gather before we begin.
Ingredients List
- For the Chocolate Sponge Layers:
- 1 1/2 cups all-purpose flour
- 3/4 cup unsweetened cocoa powder
- 1 cup granulated sugar
- 1/2 cup brown sugar, packed
- 1 1/2 tsp baking powder
- 1/2 tsp baking soda
- 1/2 tsp salt
- 2 large eggs, at room temperature
- 3/4 cup whole milk
- 1/2 cup vegetable oil
- 1 tsp vanilla extract
- 3/4 cup hot water (not boiling, just hot from the tap)
- For the Blackberry Filling:
- 2 1/2 cups fresh blackberries
- 1/3 cup granulated sugar
- 1 tbsp fresh lemon juice
- 2 tsp cornstarch
- 2 tbsp water
- For the Vanilla Whipped Cream:
- 2 cups heavy cream, cold
- 1/3 cup powdered sugar
- 1 tsp vanilla bean paste or vanilla extract
- For the Chocolate Ganache:
- 1 cup dark chocolate (70% cacao), finely chopped
- 1/2 cup heavy cream
- For Garnish (optional):
- Fresh blackberries
- Chocolate shavings
- Mint leaves
Ingredient Spotlight
Let me walk you through the ingredients that truly make this blackberry chocolate cake sing. I’ve tested dozens of substitutions over the years, and I want you to feel confident making smart swaps when needed without sacrificing flavor or texture.
| Original Ingredient | Best Substitution | Flavor / Texture Impact |
|---|---|---|
| Fresh blackberries | Frozen blackberries (thawed, not drained) | Slightly juicier filling; cook 2-3 extra mins to thicken |
| Dark chocolate (70%) | Semi-sweet chocolate (55-60%) | Sweeter ganache, less bitter contrast with berries |
| Whole milk | Buttermilk or oat milk | Buttermilk adds tangy tenderness; oat milk keeps it dairy-free, slightly less rich |
| Vanilla bean paste | Pure vanilla extract (same amount) | Paste gives specks and deeper floral note; extract works perfectly |
How to Make Blackberry Forest Cakes — Step-by-Step
I’ve broken this down into manageable steps that even a first-time baker can follow with confidence. Take your time, read each step before you start, and remember — every great layer cake is built one component at a time.
Step 1: Make the Chocolate Sponge
Preheat your oven to 350°F. Grease two 9-inch round cake pans and line the bottoms with parchment paper. In a large bowl, whisk together the flour, cocoa powder, granulated sugar, brown sugar, baking powder, baking soda, and salt. In a separate bowl, whisk the eggs, milk, vegetable oil, and vanilla extract until smooth. Pour the wet ingredients into the dry and whisk until just combined — no streaks of flour. Then pour in the hot water and whisk gently until the batter is smooth and thin. Divide the batter evenly between the two pans. Bake for 28–32 minutes, until a toothpick inserted in the center comes out clean. Cool in the pans for 10 minutes, then turn out onto wire racks to cool completely.
💡 Stella’s Pro Tip: For perfectly level cake layers, fold a clean kitchen towel and place it under one side of the cake pan while it cools — it helps the dome settle flat as it firms up.
Step 2: Prepare the Blackberry Filling
In a medium saucepan, combine the fresh blackberries, granulated sugar, and lemon juice. Cook over medium heat, stirring occasionally, until the berries break down and release their juices — about 6–8 minutes. In a small bowl, stir the cornstarch with 2 tablespoons of water to form a smooth slurry. Pour the slurry into the simmering berries and stir constantly for 1–2 minutes, until the mixture thickens and turns glossy. Remove from heat and let cool completely. The filling will continue to thicken as it cools.
⚠️ Common Mistake to Avoid: Do not rush the cooling! Adding warm filling to the cake will melt the whipped cream and make the layers slide apart. Let the blackberry filling come to room temperature, then refrigerate it for at least 30 minutes before assembly.
Step 3: Whip the Vanilla Cream
Chill a large metal or glass bowl and beaters in the freezer for 10 minutes. Pour the cold heavy cream into the chilled bowl, add the powdered sugar and vanilla bean paste, and beat on medium-high speed until soft peaks form — about 3–4 minutes. You’re looking for peaks that hold their shape but still droop slightly at the tips. Do not overbeat or the cream will become grainy and turn into butter. Cover and refrigerate until ready to use.
💡 Stella’s Pro Tip: For the most stable whipped cream that won’t weep after 24 hours, add 1 tablespoon of nonfat dry milk powder to the cream before whipping. It’s a trick from my Paris pastry days that makes all the difference.
Step 4: Make the Chocolate Ganache
Place the finely chopped dark chocolate in a heatproof bowl. In a small saucepan, warm the heavy cream over medium heat until it just begins to steam — tiny bubbles around the edge, but no rolling boil. Pour the hot cream over the chocolate and let it sit undisturbed for 2 minutes. Then gently stir in concentric circles, starting from the center and working outward, until the mixture is completely smooth and glossy. Let the ganache cool at room temperature for 15–20 minutes, until it thickens to a pourable consistency but is not yet set.
⚠️ Common Mistake to Avoid: If your ganache seizes and turns grainy, you may have overheated the cream or gotten a drop of water in the chocolate. To salvage it, whisk in 1 tablespoon of warm water at a time until it comes back together, then whisk vigorously to restore emulsion.
Step 5: Assemble the Cake
Once the cake layers are completely cool, use a long serrated knife to level the tops if they domed. Place one layer on your serving plate or cake stand. Spread half of the cooled blackberry filling evenly across the top, leaving a 1/2-inch border around the edge. Spoon about one-third of the whipped cream over the blackberry filling and spread it gently to the edges. Place the second cake layer on top, pressing lightly. Repeat with the remaining blackberry filling and another third of the whipped cream. If you’re making a third layer (by splitting one of the layers), repeat once more. Use the last of the whipped cream to crumb-coat the entire cake — a thin layer that seals in the crumbs — and refrigerate for 20 minutes.
💡 Stella’s Pro Tip: For clean, bakery-style slices, chill the assembled cake for a full 30 minutes before pouring the ganache. This sets the cream and filling so your layers stay perfectly aligned when you cut.
Step 6: Pour the Ganache and Decorate
Place the chilled cake on a wire rack set over a baking sheet. Pour the cooled ganache over the center of the cake, letting it flow naturally over the top and drip down the sides. Use an offset spatula to gently guide it to the edges if needed. Let the ganache set at room temperature for about 15 minutes. Then decorate with fresh blackberries, chocolate shavings, and mint leaves as desired. Refrigerate for at least 30 minutes before serving to allow everything to firm up beautifully.
⚠️ Common Mistake to Avoid: Resist the urge to spread the ganache with a spatula once it’s on the cake — let it drip naturally. Over-manipulating the ganache creates a messy, streaky finish instead of that glossy, professional look.
| Step | Action | Duration | Key Visual Cue |
|---|---|---|---|
| 1 | Bake chocolate sponge | 28-32 mins | Toothpick comes out clean; center springs back |
| 2 | Cook blackberry filling | 8-10 mins | Berries broken down; mixture coats spoon thickly |
| 3 | Whip vanilla cream | 3-4 mins | Soft peaks form; cream holds shape briefly |
| 4 | Make ganache | 5 mins + 20 mins cooling | Smooth, glossy, ribbons off spoon |
| 5 | Assemble layers | 15 mins + 20 mins chill | Layers are level; cream is firm to touch |
| 6 | Pour ganache & decorate | 10 mins + 30 mins set | Ganache drips evenly; garnish stays fresh |
Serving & Presentation
When I serve this blackberry cream cake at my dinner parties in Brooklyn, I like to bring it to the table whole — the dramatic ganache drips and jewel-like blackberries on top always earn a round of applause. For clean, picture-perfect slices, use a long sharp knife dipped in hot water and wiped dry between each cut. Serve each slice with an extra spoonful of whipped cream on the side and a few fresh blackberries for brightness. The contrast of the dark chocolate, the purple-black berries, and the white cream is absolutely stunning on a plate.
In Morocco, my mother would serve something like this with a pot of mint tea on the side — the herbaceous notes of fresh mint cut through the richness beautifully. In my NYC kitchen, I’ve discovered that a scoop of vanilla bean ice cream or a dollop of crème fraîche-laced whipped cream takes this cake to another level entirely. For a truly indulgent dessert experience, pair it with a late-harvest Zinfandel or a strong espresso.
| Pairing Type | Suggestions | Why It Works |
|---|---|---|
| Side Dish | Fresh berries, light shortbread cookies | Adds texture and bright fruit contrast |
| Sauce / Dip | Crème anglaise, caramel sauce, berry coulis | Enhances the creamy and fruity layers |
| Beverage | Espresso, port wine, cold brew coffee | Bitter notes balance sweetness of cake |
| Garnish | Mint leaves, edible flowers, gold leaf | Adds visual contrast and freshness |
Make-Ahead, Storage & Reheating
Between my busy recipe development schedule and my love for hosting Sunday suppers, I’ve learned exactly how to prep this homemade blackberry cake ahead of time without sacrificing quality. The components are incredibly forgiving — you can spread the work over two days and still serve a cake that tastes freshly made.
| Method | Container | Duration | Reheating Tip |
|---|---|---|---|
| Refrigerator | Airtight cake carrier | Up to 3 days | Serve chilled or let sit 15 mins at room temp |
| Freezer | Plastic wrap + foil, in pieces or whole | Up to 2 months | Thaw in fridge overnight; do not microwave |
| Make-Ahead | Component storage | Filling: 5 days; Sponge: 2 days; Cream: day of | Assemble day of serving for best texture |
The blackberry filling keeps beautifully in the fridge for up to 5 days — I often make it on a Wednesday for a weekend cake. The chocolate sponge layers can be baked, cooled, wrapped tightly in plastic wrap, and stored at room temperature for 2 days or frozen for up to 2 months. I always recommend making the whipped cream the same day you assemble the cake for the best volume and texture. When you’re ready to serve, the cake is best enjoyed chilled — the cream and ganache hold their structure beautifully. If you prefer a softer texture, let individual slices sit at room temperature for 10 minutes before serving.
Variations & Easy Swaps
| Variation | Key Change | Best For | Difficulty Impact |
|---|---|---|---|
| Spiced Blackberry Forest Cake | Add 1 tsp cinnamon + 1/4 tsp cardamom to sponge | Fall baking, holiday gatherings | No added difficulty |
| Gluten-Free Version | Substitute gluten-free 1:1 flour blend for all-purpose | Celiac guests, GF diets | Slightly more delicate crumb; handle gently |
| Dairy-Free Blackberry Forest Cake | Use coconut cream + oat milk + dairy-free chocolate | Vegan or lactose-intolerant friends | Medium; requires careful ganache technique |
Spiced Blackberry Forest Cake
This variation is inspired by the warm spice blends my mother would use in Moroccan pastries — cinnamon and cardamom that smell like home. Simply whisk 1 teaspoon of ground cinnamon and 1/4 teaspoon of ground cardamom into the dry ingredients for the chocolate sponge. The spices don’t overwhelm the blackberries; instead, they create a warmth that makes the fruit taste even deeper and more complex. I love serving this version with a dollop of mascarpone whipped cream and a dusting of cinnamon on top.
Gluten-Free Version
I tested this with three different gluten-free flour blends before landing on the perfect one. Use a high-quality cup-for-cup gluten-free flour blend that contains xanthan gum — I love King Arthur’s Measure for Measure. The crumb will be slightly more tender and delicate, so handle the cake layers gently when stacking. Bake for the same time and temperature, but let the layers cool completely in the pans before turning out, as they’re more fragile when warm. The blackberry filling and ganache are naturally gluten-free, so this variation is actually quite simple to execute.
Dairy-Free Version
For a dairy-free blackberry chocolate cake, substitute the whole milk with oat milk or unsweetened almond milk. The whipped cream can be replaced with chilled full-fat coconut cream whipped with powdered sugar — it’s luscious and holds up beautifully. For the ganache, use a high-quality dairy-free dark chocolate and substitute the heavy cream with full-fat coconut cream (the thick part from a refrigerated can). The final cake will have a subtle coconut nuance that pairs surprisingly well with blackberries. I’ve served this version to dairy-loving friends who didn’t even notice the difference!
What is the difference between a Blackberry Forest Cake and a classic Black Forest Cake?
The main difference lies in the fruit and the flavor profile. A classic Black Forest Cake, which originated in Germany, uses cherries — typically sour cherries or a cherry compote — layered with chocolate sponge, vanilla or cherry-infused whipped cream, and chocolate shavings. A Blackberry Forest Cake, like this blackberry forest cake recipe, swaps the cherries for fresh or frozen blackberries, which have a tarter, more complex flavor with hints of wine and earthiness. The blackberry filling is cooked with lemon juice and sugar to create a jammy, tangy spread that cuts through the richness of the chocolate and cream in a different way. Visually, Black Forest Cake often features cherry red accents, while the Blackberry Forest Cake shows deep purple-black streaks from the berries. Nutritionally, blackberries are higher in fiber and vitamin C than cherries, making this a slightly lighter yet equally decadent option.
Can I use frozen blackberries instead of fresh for Blackberry Forest Cakes?
Absolutely — frozen blackberries work beautifully in this blackberry forest cake recipe, and I often rely on them when fresh berries are out of season. The key is to thaw them fully before cooking and not to drain off any of the juices that collect in the bowl, because those juices are packed with flavor and natural pectin. When you cook the filling, it may take an extra 2–3 minutes to thicken since frozen berries release more liquid. I recommend adding an additional 1/2 teaspoon of cornstarch dissolved in 1 teaspoon of water if the filling seems too runny after the initial cooking time. The texture and taste will be nearly identical to fresh, and honestly, in a deep winter month, frozen blackberries from a good brand can be even more reliably sweet than pale supermarket fresh ones.
How do I keep the blackberry filling from making the cake layers soggy?
This is one of the most common concerns I hear when I teach this blackberry chocolate cake in my classes, and the solution is all about technique. First, cook the blackberry filling until it’s thick enough to coat the back of a spoon — the cornstarch activates and creates a gel structure that won’t soak into the sponge. Second, let the filling cool completely before assembling; warm filling will soften the cake layers and cause the cream to melt. Third, spread a thin layer of whipped cream on the cake layer before adding the blackberry filling — the fat in the cream acts as a barrier that prevents moisture migration. Finally, don’t over-apply the filling; about 1/3 cup per layer between two 9-inch rounds is plenty. If you follow these steps, your cake will stay perfectly structured for up to three days in the fridge.
What is the best way to decorate a Blackberry Forest Cake for a special occasion?
For a show-stopping presentation that feels both elegant and approachable, I recommend a three-tier decoration strategy. Start by pouring the chocolate ganache over the top and letting it drip naturally — this creates that dramatic, professional look without requiring any piping skills. Next, arrange fresh blackberries in a tight cluster on the center of the cake, then scatter a few individual berries around the base. Finally, add chocolate shavings by running a vegetable peeler along a block of dark chocolate at room temperature; the curls will catch the light beautifully. For an extra touch that I learned from a florist in the flower district here in NYC, place a few small mint leaves or edible violas among the berries. It’s effortless but looks like it came from a high-end bakery. If you’re celebrating something truly special, a light dusting of edible gold dust on the blackberries adds a magical shimmer.
Can I make Blackberry Forest Cakes into cupcakes instead of a layered cake?
Yes, this blackberry forest cake recipe converts beautifully into cupcakes — I’ve done it for plenty of birthday parties and baby showers. Simply prepare the chocolate sponge batter as directed and divide it among 24 lined cupcake tins, filling each about two-thirds full. Bake at 350°F for 18–22 minutes until a toothpick comes out clean. Once cooled, use a small paring knife or a cupcake corer to remove a cone-shaped plug from the center of each cupcake. Fill the cavity with the blackberry filling, then pipe or dollop the vanilla whipped cream on top. Drizzle with cooled ganache and garnish with a small blackberry and a mint leaf. The assembly is actually easier than the full cake since there’s no stacking involved, and the individual portions make them perfect for parties.
How far in advance can I assemble a Blackberry Forest Cake?
I recommend assembling the cake no more than 24 hours before you plan to serve it for the best texture and presentation. The chocolate sponge, blackberry filling, and ganache can all be made 2–3 days in advance and stored separately in the fridge. The whipped cream should be made the same day you assemble, as it will start to deflate and weep after about 24 hours in the fridge. If you assemble the cake a day ahead, the flavors actually meld together beautifully — the blackberry filling seeps ever so slightly into the sponge, and the ganache sets into a fudge-like layer that slices cleanly. Just be sure to keep the cake refrigerated in an airtight cake carrier to prevent it from absorbing any fridge odors. Before serving, let it sit at room temperature for 15–20 minutes to take the chill off the cream and ganache for the best flavor.
What type of chocolate is best for the ganache in a Blackberry Forest Cake?
For this blackberry cream cake, I strongly recommend using a dark chocolate with a cacao percentage between 65% and 72%. This range provides enough bitterness to balance the sweetness of the cream and the tartness of the blackberries without being overwhelmingly intense. I personally use a 70% dark chocolate from a small Brooklyn-based bean-to-bar maker — it has fruity undertones that echo the blackberries beautifully. If you prefer a sweeter ganache, a 55–60% semi-sweet chocolate works well, but the overall cake will be noticeably sweeter. Avoid milk chocolate (too sweet and the ganache won’t set as firmly) or anything above 75% (too bitter and the ganache can seize more easily). Always chop the chocolate finely so it melts evenly with the hot cream — this is the single most important step for a silky-smooth ganache.
Can I use a different fruit instead of blackberries in this cake?
Absolutely — this recipe is wonderfully adaptable, and I encourage you to experiment with whatever fruit is at its peak at your local farmers market. Raspberries are the most direct substitute, with a similar tart-sweet balance and a gorgeous red color. Blueberries create a milder, sweeter filling with a beautiful deep violet hue. Chopped strawberries work too, though they tend to be juicier, so add an extra teaspoon of cornstarch to the filling mixture. For a more exotic twist, try a mix of blackberries and sliced figs in late summer — the fig seeds add a lovely subtle crunch. Whatever fruit you choose, maintain the same weight as the blackberries in the recipe (about 2 1/2 cups) and adjust the sugar based on the fruit’s natural sweetness. The technique for the filling remains exactly the same.
Is this Blackberry Forest Cake recipe suitable for beginner bakers?
Yes, I designed this blackberry forest cake recipe with confident beginners in mind. While it’s a layered cake with multiple components, each individual part is quite simple to execute. The chocolate sponge uses a straightforward “mix wet into dry” method that doesn’t require creaming butter or whipping eggs — the hot water does much of the work to create a tender crumb. The blackberry filling is essentially a fruit compote thickened with cornstarch, so there’s no risk of curdling or splitting. The whipped cream is just cream, sugar, and vanilla beaten until soft peaks form. And the ganache is nearly foolproof as long as you don’t overheat the cream. If you’ve made a few simple cakes before and you’re ready to level up to a layer cake, this is the perfect next step. Read through all the instructions first, prep your ingredients, and give yourself plenty of time — you’ll impress yourself with the results.
How should I store leftover Blackberry Forest Cake?
Leftover homemade blackberry cake should be stored in an airtight container or a cake carrier with a tight-fitting lid in the refrigerator. Because of the whipped cream and fresh fruit, the cake cannot sit out at room temperature for more than 2 hours. Properly stored, the cake will maintain excellent flavor and texture for up to 3 days. The ganache may firm up a bit in the fridge, but that’s actually desirable — it creates a fudge-like layer that many people love. If you prefer a softer ganache, let individual slices sit at room temperature for 10 minutes before serving. I do not recommend freezing slices of the fully assembled cake, as the cream and fresh fruit will become watery upon thawing. However, you can freeze un-iced cake layers (wrapped tightly in plastic and foil) for up to 2 months and assemble fresh when you’re ready to serve.
Share Your Version!
There’s something deeply satisfying about pulling a homemade layer cake out of the fridge and watching people’s faces light up when you set it on the table. This blackberry forest cake recipe has become my go-to for birthdays, dinner parties, and those quiet Sunday afternoons when I want to bake something that feels like a hug. I’d love to hear how yours turns out — every kitchen brings its own personality to a recipe, and your version will be uniquely yours. Did you try the spiced variation? Did you top it with extra berries? Did you add a little Moroccan flair with orange blossom water in the cream? Drop a comment below and let me know how it went.
If you share a photo on Instagram or Pinterest, tag me @leosfoods so I can see your beautiful creation — I love scrolling through my feed and spotting that gorgeous ganache drip and those jewel-black berries. And before you go, take a second to save this recipe to your Pinterest boards so you can find it next time a chocolate-and-berry craving strikes. From my NYC kitchen to yours — I hope this recipe brings as much warmth to your table as it does to mine. — Stella 🧡
Love This Recipe? Save It to Pinterest!
If you enjoyed this Blackberry Forest Cakes recipe, don’t let it get lost in your browser tabs! 😄 Pin it now so you can find it again anytime — and explore hundreds more tried-and-tested recipes waiting for you on my Pinterest boards.
👉 Follow Stella on Pinterest @stellarecipeblog
📌 Pin this recipe · 🔁 Re-pin your favorites · 💬 Tag me when you make it — I love seeing your creations!

Blackberry Forest Cakes
A decadent layered chocolate cake with a tangy blackberry filling, vanilla whipped cream, and a rich chocolate ganache.
- Yield: 10 1x
Ingredients
- For the Chocolate Sponge Layers:
- 1 1/2 cups all-purpose flour
- 3/4 cup unsweetened cocoa powder
- 1 cup granulated sugar
- 1/2 cup brown sugar
- 1 1/2 tsp baking powder
- 1/2 tsp baking soda
- 1/2 tsp salt
- 2 large eggs
- 3/4 cup whole milk
- 1/2 cup vegetable oil
- 1 tsp vanilla extract
- 3/4 cup hot water
- For the Blackberry Filling:
- 2 1/2 cups fresh blackberries
- 1/3 cup granulated sugar
- 1 tbsp lemon juice
- 2 tsp cornstarch
- 2 tbsp water
- For the Vanilla Whipped Cream:
- 2 cups heavy cream
- 1/3 cup powdered sugar
- 1 tsp vanilla extract
- For the Chocolate Ganache:
- 1 cup dark chocolate, chopped
- 1/2 cup heavy cream
- For Garnish (optional):
- Fresh blackberries
- Chocolate shavings
- Mint leaves
Instructions
- Preheat oven and prepare cake pans. Mix dry sponge ingredients in one bowl and wet ingredients in another, then combine and whisk until smooth. Stir in hot water to create a thin batter. Bake until set, then cool completely.
- Cook blackberries, sugar, and lemon juice in a saucepan until softened. Mix cornstarch with water, add to the berries, and simmer until thickened. Cool fully.
- Whip heavy cream, powdered sugar, and vanilla until soft peaks form. Keep chilled.
- Heat cream and pour over chopped dark chocolate to make a smooth ganache. Stir until glossy and slightly cooled.
- Slice cake layers evenly. Spread blackberry filling between layers, followed by whipped cream. Stack and repeat.
- Coat the assembled cake with chocolate ganache, allowing it to drip naturally down the sides.
- Chill until set, then decorate with blackberries, chocolate shavings, and mint leaves.
Nutrition
- Calories: 420
- Sugar: 35g
- Fat: 20g
- Carbohydrates: 52g
- Protein: 6g
Tried This Recipe? Leave a Comment!
Did you make this recipe? I’d love to hear how it turned out! Please leave a comment and a rating below. Your feedback helps other home cooks and supports cheerychop.com!
For more delicious inspiration, follow me on Pinterest!