Easy No-Bake Peach Vanilla Moon Slices Recipe
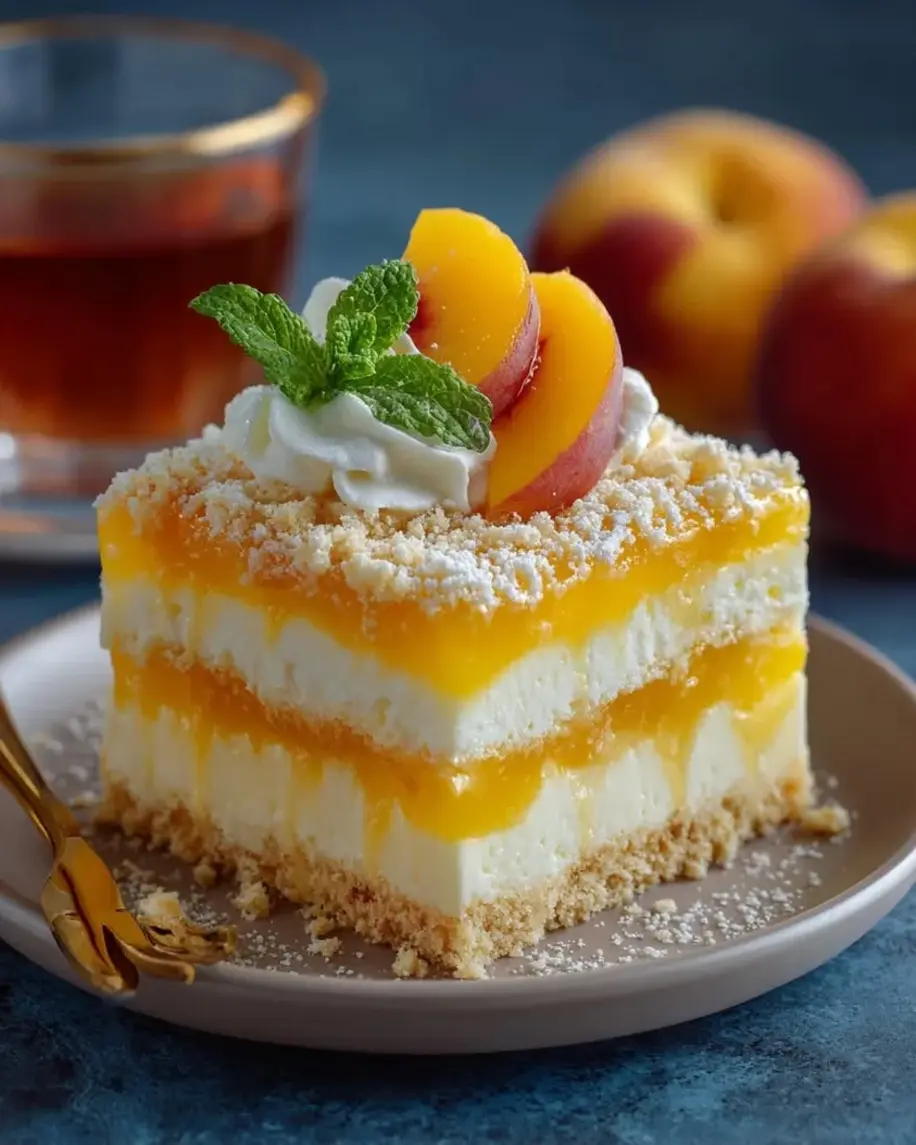
Table of Contents
Peach Vanilla Moon Slices – A No-Bake Crescent Dessert That Steals the Show
Every summer, when peaches hit their peak at the Union Square Greenmarket here in New York City, I start dreaming up ways to celebrate them without breaking a sweat in the kitchen. These peach vanilla moon slices recipe were born on one of those sweltering July afternoons when my oven was the last place I wanted to be. I wanted something elegant — a dessert that looked like it came from a Parisian pâtisserie — but that any home cook could pull off with zero baking. This no-bake peach cream cheese dessert layers a buttery vanilla wafer crust, a silky peach filling, a luscious vanilla cream, and a glossy peach glaze, all cut into charming crescent slices that catch the light like little moons on a plate.
The first time I made these easy peach gelatin dessert bars for a backyard gathering here in Brooklyn, a friend who is a pastry chef at Daniel asked me for the recipe before the plate even made it to the sink. That’s when I knew this one was special. The layers are distinct yet harmonious: the crunch of the wafer base gives way to a tender, almost cloud-like peach layer, followed by the richest vanilla cream you can imagine — thanks to a trick I learned in pastry school in Paris — and finally the shimmering glaze. Each bite tastes like summer turned into something dreamy and refined.
Growing up in Morocco, my mother taught me that the best desserts don’t have to be complicated — they just need to be made with attention and love. And that Parisian training taught me that gelatin is one of the most forgiving yet precise tools a home cook can master. With this vanilla wafer peach dessert, I’m bringing together the best of both worlds: the warm, fruit-forward soul of North African home cooking and the delicate finesse of French pastry. Let me show you just how easy — and rewarding — this no-bake beauty really is.
Why This Peach Vanilla Moon Slices Recipe Is the Best
The Flavor Secret. The real magic in this peach vanilla moon slices recipe is the way the vanilla bean paste echoes the floral notes of ripe peaches while the cream cheese layer adds just enough tang to keep every bite balanced. I use vanilla bean paste here — the same kind I buy in bulk from a spice shop in the West Village — because the tiny specks make the cream layer look as though it’s studded with stars. It’s a small detail that makes a huge impression when you serve these at a dinner party or holiday table.
Perfected Texture. The technique of blooming gelatin separately for each layer is the Parisian-trained secret that ensures every slice holds its shape without being rubbery. I learned this the hard way in a pastry kitchen near the Seine: gelatin needs to be softened in cold water first, then gently dissolved into a warm base — never added directly to a hot liquid or it will clump. Here, each layer is set just enough so you get clean, photogenic slices that still melt softly on the tongue.
Foolproof & Fast. Even if you’ve never worked with gelatin before, this easy peach gelatin dessert recipe walks you through every bloom, stir, and set. No oven required, no temperamental egg whites, no candy thermometer. You just need a little patience while the layers chill — and the reward is a stunning, make-ahead dessert that serves nine generously. It’s the kind of recipe that makes you look like a professional baker with almost no effort at all.
Peach Vanilla Moon Slices Recipe Ingredients
I source my peaches from the Red Jacket Orchards stand at the Grand Army Plaza Greenmarket — they’re the ones with the deep orange blush and that intoxicating perfume. For the vanilla bean paste, I order from a small-batch producer in Vermont, and the cream cheese I always use is full-fat Philadelphia — it really matters here for the silkiest texture. Every ingredient in this vanilla wafer peach dessert is chosen to make the layers shine, and most are pantry staples you can find at any well-stocked grocery store.
Ingredients List
- For the Peach Layer: 3 cups ripe peaches, peeled and diced; 1/4 cup granulated sugar; 1 tbsp lemon juice; 2 tsp gelatin powder; 3 tbsp cold water; 1 tsp vanilla extract
- For the Vanilla Cream Layer: 1 1/2 cups heavy cream; 8 oz cream cheese, softened; 1/3 cup powdered sugar; 1 tbsp vanilla bean paste; 2 tsp gelatin powder; 3 tbsp cold water
- For the Biscuit Base: 2 cups vanilla wafer cookies, crushed; 1/2 cup unsalted butter, melted; 2 tbsp brown sugar
- For the Peach Glaze: 1 cup peach puree; 2 tbsp honey; 1 tsp gelatin powder; 2 tbsp cold water; 1 tsp lemon zest
- For Garnish (optional): Thin peach slices; Vanilla bean specks; Fresh mint leaves
Ingredient Spotlight
Peaches. Ripe but firm peaches give you the best of both worlds: enough natural sweetness and pectin to help the layer set, and a texture that won’t turn mushy after blending. If your peaches are on the softer side, reduce the warm time to just a few minutes. Look for peaches that yield slightly at the stem but still feel heavy for their size.
Vanilla Bean Paste. Unlike extract, vanilla bean paste is a thick syrup packed with those iconic black specks. It infuses the cream layer with a deeper, more floral vanilla flavor and makes the finished dessert look stunning. If you don’t have paste on hand, use one whole vanilla bean split and scraped, or 1 1/2 teaspoons of high-quality vanilla extract — though you’ll lose the specks.
Gelatin Powder. I use Knox gelatin — the classic orange box you’ll find in any baking aisle. It’s reliable, affordable, and easy to bloom. The key is to dissolve it in cold water first (no hot water, or the gelatin will seize) and then whisk it into a warm liquid so it disperses evenly. This step is the backbone of the entire dessert.
Vanilla Wafer Cookies. Nilla wafers are my go-to for the crust — they have that nostalgic vanilla flavor and just the right level of sweetness. You can substitute with graham crackers or shortbread cookies, though the flavor profile will shift slightly. If you use graham crackers, reduce the butter to 1/3 cup since they are less absorbent.
| Original Ingredient | Best Substitution | Flavor / Texture Impact |
|---|---|---|
| Fresh peaches | Frozen peaches (thawed, drained) | Slightly softer texture; drain excess liquid to avoid weeping |
| Vanilla bean paste | 1 vanilla bean or 1 1/2 tsp vanilla extract | Less visual flair; flavor still lovely but less floral depth |
| Nilla wafers | Graham crackers or shortbread | More buttery or honey-toned crust; reduce butter slightly |
| Heavy cream | Full-fat coconut cream (chilled) | Slightly softer set with a hint of coconut; dairy-free option |
How to Make Peach Vanilla Moon Slices — Step-by-Step
I promise — this no-bake peach cream cheese dessert comes together with far less fuss than it looks. The layers build on each other as they chill, and each step is forgiving enough for a beginner. Work with me here, and you’ll be slicing into these gorgeous moons in just a few hours.
Step 1: Make the Crust
Mix the crushed vanilla wafer cookies with melted butter and brown sugar until every crumb is moistened. Press the mixture firmly into the bottom of a lined 8×8-inch square pan — use the flat bottom of a measuring cup to really pack it down. Refrigerate for at least 15 minutes while you prepare the peach layer. This crust is the foundation of your vanilla wafer peach dessert, so don’t skimp on the pressing.
💡 Stella’s Pro Tip: Line your pan with parchment paper leaving a 2-inch overhang on two sides — this will let you lift the entire dessert out for clean, effortless slicing later.
Step 2: Make the Peach Layer
In a small bowl, sprinkle the gelatin over cold water and let it sit for 5 minutes to bloom. Meanwhile, in a saucepan over medium heat, warm the diced peaches, sugar, and lemon juice until the peaches soften and release their juices — about 3 minutes. Lightly blend with an immersion blender or mash with a potato masher for a rustic texture. Remove from heat, stir in the vanilla and the bloomed gelatin until fully dissolved. Let cool slightly, then spread evenly over the chilled crust. Refrigerate until partially set — about 30 minutes.
⚠️ Common Mistake to Avoid: Don’t add the bloomed gelatin directly to the hot peaches without stirring constantly — it can form lumps. Whisk it in slowly and thoroughly for a smooth, silky layer.
Step 3: Make the Vanilla Cream Layer
Bloom the second portion of gelatin in cold water for 5 minutes. In a large bowl, whip together the heavy cream, softened cream cheese, powdered sugar, and vanilla bean paste until the mixture is smooth, fluffy, and holds stiff peaks. In a small saucepan, warm 2 tablespoons of the cream mixture gently and dissolve the bloomed gelatin into it, then fold that back into the whipped cream mixture until completely uniform. Spread gently over the partially set peach layer and smooth the top with an offset spatula. Chill for at least 45 minutes until firm.
💡 Stella’s Pro Tip: For the silkiest cream layer, make sure your cream cheese is truly at room temperature — let it sit on the counter for at least an hour. Cold cream cheese will leave tiny lumps that won’t whip smooth.
Step 4: Make the Peach Glaze
Bloom the third portion of gelatin in cold water. In a small saucepan, warm the peach puree with honey and lemon zest until just steaming — about 2 minutes. Remove from heat, stir in the bloomed gelatin until completely dissolved, and let cool to room temperature. Once the vanilla cream layer is fully set, pour the glaze over the top and tilt the pan gently to cover evenly. Refrigerate the whole dessert for at least 4 hours, or overnight for the cleanest slices.
⚠️ Common Mistake to Avoid: Pouring the glaze while it’s too warm will melt the cream layer beneath — always cool the glaze until it feels just barely warm to the touch before pouring.
Step 5: Slice and Garnish
When the dessert is fully set, use the parchment overhang to lift it out of the pan onto a cutting board. For crescent moons, use a 2-inch round cookie cutter or a sharp knife to cut half-circles — or simply cut into neat squares if you prefer. Garnish with thin peach slices, a few vanilla bean specks scattered on top, and fresh mint leaves for a pop of color. Serve chilled.
💡 Stella’s Pro Tip: Dip your knife in hot water and wipe it dry between each cut — this gives you those immaculate, photo-ready edges every single time.
| Step | Action | Duration | Key Visual Cue |
|---|---|---|---|
| 1 | Press crust into pan | 15 min chill | Firm, compacted layer |
| 2 | Cook + spread peach layer | 30 min partial set | Jiggly but not liquid |
| 3 | Whip + spread cream layer | 45 min firm set | Smooth, no wobble |
| 4 | Pour glaze | 4+ hrs final set | Glossy, firm to touch |
| 5 | Slice + garnish | 5 minutes | Clean, defined layers |
Serving & Presentation
I love serving these peach vanilla moon slices recipe bars on a wide white platter — the pale peach and cream layers pop beautifully against the white ceramic. Arrange the crescent slices pointing outward like a sunburst, with a few extra peach slices and mint leaves tucked between them for a centerpiece effect. The vanilla bean specks in the cream layer catch the light and make the whole presentation feel like something from a fancy tea salon.
For a touch of North African warmth, I sometimes dust the plate with a whisper of ground cinnamon or cardamom before arranging the slices — it’s a trick my mother used when she served fruit desserts at our family table in Marrakech. The spice mingles with the peach glaze and makes the whole room smell absolutely irresistible. In Paris, we would have served this with a tiny silver spoon and a cup of jasmine tea; here in NYC, it’s a hit at potlucks, birthday parties, and Sunday brunches alike.
These slices also work beautifully as an individual dessert — place one crescent on each plate with a dollop of whipped cream or a scoop of vanilla bean ice cream on the side. The cold, creamy contrast is pure summer bliss.
| Pairing Type | Suggestions | Why It Works |
|---|---|---|
| Side Dish | Fresh berries, mint salad | Bright acidity cuts the richness |
| Sauce / Dip | Whipped cream, honey drizzle | Adds creaminess and extra sweetness |
| Beverage | Iced tea, sparkling lemonade, jasmine tea | Refreshing contrast to the rich layers |
| Garnish | Thin peach fans, mint, vanilla specks | Reinforces the peach-vanilla story |
Make-Ahead, Storage & Reheating
This is my go-to make-ahead dessert for busy NYC weeks. I almost always prepare it the day before I plan to serve it — the overnight rest in the fridge allows all three layers to fully settle and makes slicing even easier. When I’m hosting a dinner party or a summer rooftop gathering, I love knowing I can cross dessert off my list with zero last-minute stress.
| Method | Container | Duration | Reheating Tip |
|---|---|---|---|
| Refrigerator | Airtight container | Up to 5 days | Serve cold — no reheating needed |
| Freezer | Wrap in plastic + foil | Up to 2 months | Thaw overnight in fridge; do not microwave |
| Make-Ahead | Assembled in pan, covered | 1 day in advance | Add garnish just before serving |
If you do have leftovers, simply cover the pan with plastic wrap or transfer individual slices to an airtight container. The crust may soften a little over time, but the flavor actually deepens — the peach and vanilla mingle beautifully overnight. This dessert is not meant to be reheated; always serve it cold straight from the fridge. For the best texture, let the slices sit at room temperature for 5 to 10 minutes before serving — it takes the chill off just enough.
Variations & Easy Swaps
This peach vanilla moon slices recipe is wonderfully adaptable. Whether you’re working with what’s in season or need to accommodate a dietary preference, these variations have all been tested in my own NYC kitchen.
| Variation | Key Change | Best For | Difficulty Impact |
|---|---|---|---|
| Nectarine or Apricot | Replace peaches with nectarines or apricots | Summer stone fruit swaps | No change |
| Gluten-Free | Use gluten-free vanilla wafers or shortbread | Celiac or GF preference | No change |
| Dairy-Free | Use coconut cream + dairy-free cream cheese | Dairy-free or vegan | Slightly softer set |
Nectarine or Apricot Swap
When perfectly ripe peaches aren’t available, nectarines (no need to peel!) or apricots make a beautiful substitute. Apricots will give a slightly tarter, more concentrated flavor — add an extra tablespoon of honey to the glaze if you prefer a sweeter finish. The texture of the layer remains identical because the fruit’s natural pectin and moisture content are very close to peaches. This variation reminds me of the apricot tarts my mother used to make with fruit from the souk in Marrakech.
Gluten-Free Crust Option
Replace the vanilla wafer cookies with high-quality gluten-free vanilla sandwich cookies or gluten-free shortbread. I’ve tested this with Schär’s gluten-free shortbread cookies and the crust holds together beautifully. The texture is slightly more delicate than the original, so press the crumb mixture extra firmly and chill for at least 20 minutes before adding the peach layer. Your gluten-free guests won’t feel like they’re missing out on anything — this version is just as indulgent.
Dairy-Free and Vegan Adaptation
For a dairy-free version, replace the heavy cream with full-fat coconut cream (chilled overnight and scooped from the top of the can) and use a dairy-free cream cheese alternative like Miyoko’s or Kite Hill. The gelatin remains as is to ensure proper setting, so this adaptation keeps the structure intact but replaces the dairy. The coconut flavor is subtle and actually pairs beautifully with peach and vanilla. I tested this variation for a friend’s dairy-free baby shower and it was the first tray emptied.
What is a Peach Vanilla Moon Slice and how is it different from a traditional peach dessert?
A Peach Vanilla Moon Slice is a layered no-bake dessert that combines a vanilla wafer crust, a lightly set peach filling, a velvety vanilla cream layer, and a glossy peach glaze — all cut into crescent-shaped slices that resemble little moons. What sets it apart from a traditional peach dessert like a peach cobbler or peach pie is that it requires zero baking and no oven time. The texture is much more refined: each layer is distinct yet soft, with the cream layer providing a luxurious mouthfeel that you don’t get from a baked fruit dessert. The crescent shape also makes it a visual showstopper for parties and special occasions, while traditional peach desserts are usually rustic and casual.
Can I use canned or frozen peaches instead of fresh ones for Peach Vanilla Moon Slices?
Yes, you can use either canned or frozen peaches, though fresh peaches give the best flavor and texture. If using frozen peaches, thaw them completely at room temperature, then drain off any excess liquid before warming them with sugar and lemon juice. You may need to cook them a minute or two longer to evaporate the extra moisture so the peach layer sets properly. If using canned peaches (packed in juice, not syrup), drain them well and reduce the sugar in the recipe by 1 to 2 tablespoons since canned peaches are often sweeter. The texture of the final dessert will be slightly softer with canned or frozen peaches, but the flavor will still be delicious.
How do you slice peaches for Peach Vanilla Moon Slices to get the perfect crescent shape?
To get the signature crescent moon shape, you’ll slice the fully set dessert into half-circles using a 2-inch round cookie cutter or a sharp knife. For the garnish peach slices that go on top, use a very sharp paring knife to cut thin, even slices from a fresh peach — about 1/8-inch thick. Place a few of these slices on top of each crescent just before serving to echo the moon theme. If you don’t have a round cutter, simply cut the dessert into squares and then cut each square diagonally into triangles — they won’t be true crescents but will still look lovely. For the cleanest cuts, dip your knife in hot water and wipe it dry between each slice.
What is the best way to store leftover Peach Vanilla Moon Slices to keep them fresh?
The best way to store leftover Peach Vanilla Moon Slices is to place them in an airtight container in the refrigerator, where they will stay fresh for up to 5 days. Cover the container tightly — or wrap the pan with plastic wrap if you’re storing the entire dessert — to prevent the dessert from absorbing other odors in the fridge. Do not leave the dessert at room temperature for more than 2 hours, as the dairy and fruit layers are perishable. If you’d like to freeze the slices, wrap each one individually in plastic wrap, then place them in a freezer-safe bag or container for up to 2 months. Thaw overnight in the refrigerator before serving, and never microwave this dessert — it is meant to be enjoyed cold.
Can I make Peach Vanilla Moon Slices without gelatin?
Yes, you can substitute agar-agar powder for gelatin in this recipe, though the texture will be slightly different. Agar-agar sets more firmly at room temperature and gives a firmer, more brittle set compared to the soft, silky set of gelatin. To substitute, use the same amount of agar-agar powder as gelatin (2 teaspoons per layer), but dissolve it in the warm liquid and bring it to a gentle boil for 1 to 2 minutes to activate its setting properties. Agar-agar does not need to bloom in cold water — just whisk it directly into the warm liquid. Note that the cream layer may be less creamy with agar-agar, so this substitution works best for the peach and glaze layers if you want to keep the cream layer gelatin-based.
How far in advance can I make Peach Vanilla Moon Slices for a party?
You can make Peach Vanilla Moon Slices up to 2 days in advance for a party. In fact, making them a day ahead is ideal because the overnight rest in the refrigerator allows the layers to fully settle and makes slicing much easier and cleaner. Simply prepare the dessert as directed, cover the pan tightly with plastic wrap, and refrigerate for up to 48 hours before serving. Add any fresh garnishes — like the thin peach slices and mint leaves — just before serving to keep them looking bright and fresh. If you need to freeze the dessert, it can be made up to 2 months ahead and thawed overnight in the fridge before serving.
Why did my peach layer not set properly?
If your peach layer didn’t set properly, the most common cause is that the gelatin wasn’t fully dissolved or the ratio of liquid to gelatin was off. Make sure you bloom the gelatin in cold water for a full 5 minutes before adding it to the warm peach mixture — this step is essential for the gelatin to hydrate properly. Also, ensure that the warm peach mixture is not too hot (above 140°F) when you add the gelatin, as high heat can weaken its setting power. Another possibility is that your peaches released more liquid than expected, diluting the gelatin concentration. If this happens, you can save the dessert by dissolving an additional 1 teaspoon of gelatin in 2 tablespoons of warm water and swirling it into the peach layer before it fully sets.
What can I substitute for vanilla bean paste in this recipe?
If you don’t have vanilla bean paste, you can substitute it with one whole vanilla bean (split lengthwise and the seeds scraped into the cream mixture) or with 1 1/2 teaspoons of high-quality vanilla extract. Using a vanilla bean will give you those beautiful specks that make the cream look starry and elegant — just steep the scraped pod in the warm cream for 10 minutes before whipping, then remove it. Vanilla extract won’t give you the specks but will still deliver a lovely flavor. I recommend using pure vanilla extract rather than imitation for the best depth. If you’re using vanilla extract, add it after you’ve dissolved the gelatin into the warmed cream mixture so the alcohol doesn’t interfere with the gelatin’s set.
What size pan should I use for Peach Vanilla Moon Slices?
I recommend using an 8×8-inch square baking pan for this recipe. This size gives you a nice height for the layers so you get a good proportion of crust, peach filling, cream, and glaze in each slice. A 9×9-inch pan will also work, but your layers will be slightly thinner and you may need to reduce the gelatin by about 1/4 teaspoon per layer to avoid an overly firm texture. If you use a 9×13-inch pan, the layers will be quite thin and the dessert will be harder to cut into crescent shapes — I would stick with the 8×8 for the best visual and textural result. Line the pan with parchment paper with overhanging sides for easy lifting.
Is this recipe suitable for kids to help with?
Absolutely! This Peach Vanilla Moon Slices recipe is a wonderful one to make with kids because there’s no oven or stove top work beyond warming the peaches and puree (which an adult should handle). Kids can help crush the vanilla wafer cookies in a zip-top bag using a rolling pin — a fun and satisfying task for little hands. They can also stir the crust mixture, press it into the pan, and help arrange the garnish slices on top. The gelatin blooming step is like a mini science experiment that kids find fascinating. Just be sure to supervise the warm steps and keep the gelatin and sharp knives out of reach for younger children. The crescent shape is also kid-friendly and makes the dessert feel playful and special.
Share Your Version!
Now it’s your turn to bring these peach vanilla moon slices recipe bars to life in your own kitchen. I’d love to see how your moon slices turn out — whether you keep them classic with fresh peaches and vanilla bean paste, or you try one of the variations like the dairy-free coconut version or the gluten-free crust. Drop a comment below and let me know how they came out, or tag me in your photos on Instagram or Pinterest. Your questions and kitchen stories are what make this community so special, and I read every single one.
From my NYC kitchen to yours — I hope this recipe brings as much warmth to your table as it does to mine. — Stella 🧡
Love This Recipe? Save It to Pinterest!
If you enjoyed this Peach Vanilla Moon Slices recipe, don’t let it get lost in your browser tabs! 😄 Pin it now so you can find it again anytime — and explore hundreds more tried-and-tested recipes waiting for you on my Pinterest boards.
👉 Follow Stella on Pinterest @stellarecipeblog
📌 Pin this recipe · 🔁 Re-pin your favorites · 💬 Tag me when you make it — I love seeing your creations!

Peach Vanilla Moon Slices
A layered no-bake dessert featuring a vanilla wafer crust, peach filling, vanilla cream, and a peach glaze, cut into crescent-shaped slices.
- Total Time: 4 hours 30 minutes
- Yield: 9 1x
Ingredients
- For the Peach Layer:
- 3 cups ripe peaches, peeled and diced
- 1/4 cup granulated sugar
- 1 tbsp lemon juice
- 2 tsp gelatin powder
- 3 tbsp cold water
- 1 tsp vanilla extract
- For the Vanilla Cream Layer:
- 1 1/2 cups heavy cream
- 8 oz cream cheese, softened
- 1/3 cup powdered sugar
- 1 tbsp vanilla bean paste
- 2 tsp gelatin powder
- 3 tbsp cold water
- For the Biscuit Base:
- 2 cups vanilla wafer cookies, crushed
- 1/2 cup unsalted butter, melted
- 2 tbsp brown sugar
- For the Peach Glaze:
- 1 cup peach puree
- 2 tbsp honey
- 1 tsp gelatin powder
- 2 tbsp cold water
- 1 tsp lemon zest
- For Garnish (optional):
- Thin peach slices
- Vanilla bean specks
- Fresh mint leaves
Instructions
- Mix crushed vanilla wafers with melted butter and brown sugar. Press firmly into a lined square pan and chill until firm.
- Bloom gelatin in cold water for the peach layer. Warm the peaches with sugar and lemon juice until softened, then blend lightly. Stir in vanilla and dissolved gelatin. Spread over the chilled base and refrigerate until partially set.
- Bloom gelatin for the cream layer. Whip heavy cream, cream cheese, powdered sugar, and vanilla bean paste until smooth and fluffy. Fold in dissolved gelatin and spread evenly over the peach layer. Chill until firm.
- Bloom gelatin for the glaze. Warm peach puree with honey and lemon zest, then stir in gelatin until dissolved. Cool slightly and pour over the cream layer.
- Refrigerate for at least 4 hours, or until completely set.
- Slice into neat squares or crescent-shaped portions and garnish with peach slices, vanilla bean specks, and mint before serving.
Notes
For best results, use ripe but firm peaches. The dessert can be made a day ahead and stored in the refrigerator.
- Prep Time: 30 minutes
- Cook Time: 0 minutes
- Method: Dessert
- Cuisine: American
Nutrition
- Calories: 340
- Sugar: 22g
- Fat: 23g
- Carbohydrates: 31g
- Protein: 4g

Tried This Recipe? Leave a Comment!
Did you make this recipe? I’d love to hear how it turned out! Please leave a comment and a rating below. Your feedback helps other home cooks and supports cheerychop.com!
For more delicious inspiration, follow me on Pinterest!