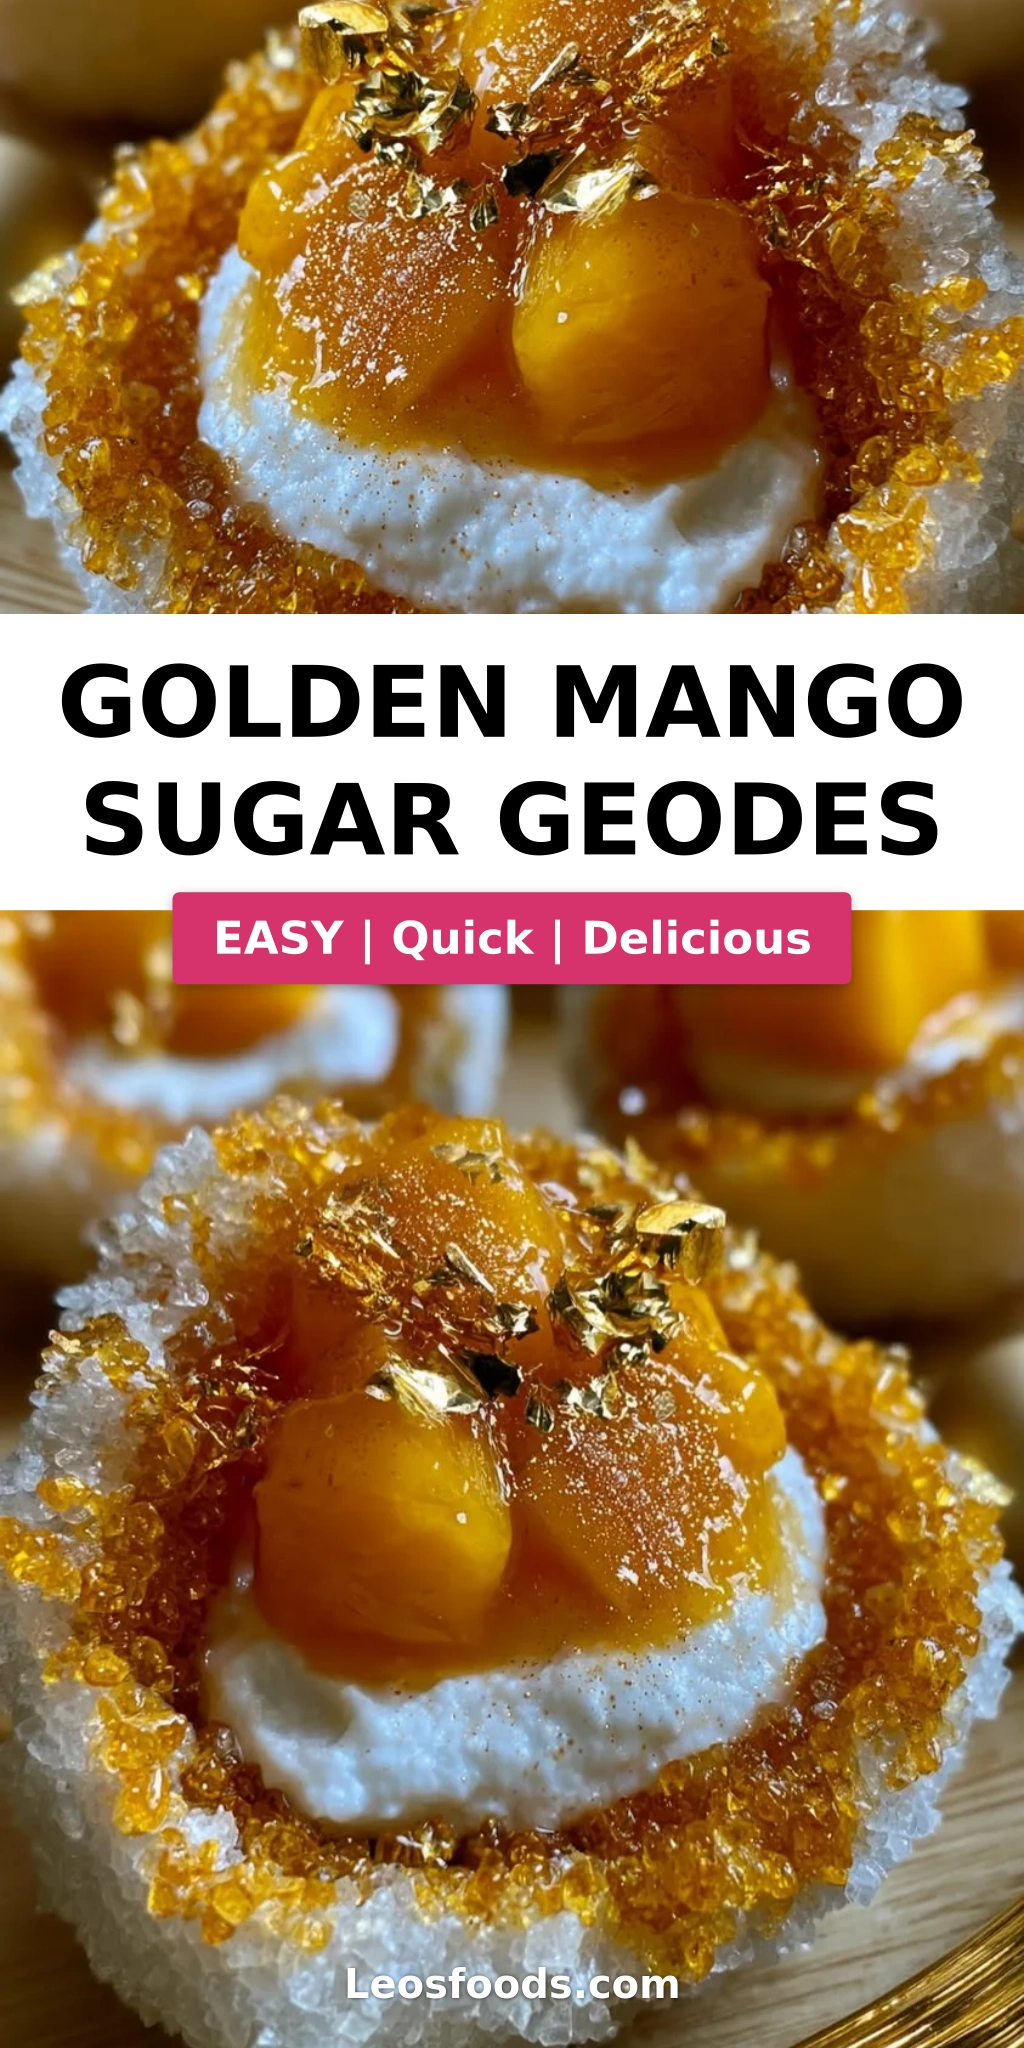
Make Stunning Golden Mango Sugar Geodes at Home

“`html
Table of Contents
Golden Mango Sugar Geodes – A Glittering Dessert Masterpiece
I still remember the first time I saw a sugar geode — it was at a pastry shop window in the Marais district of Paris, and the way the light caught those golden crystals stopped me mid-stride. I stood there for a full five minutes, pressed against the glass, imagining how something so beautiful could possibly be edible. That moment planted a seed that would follow me from Parisian patisseries back to my mother’s kitchen in Morocco, where mangoes were always the star of summer. This mango sugar geodes recipe is my love letter to both worlds — the precision of French technique and the warm, sun-drenched flavors of North Africa. These golden sugar crystal candies are part dessert, part edible art, and entirely unforgettable.
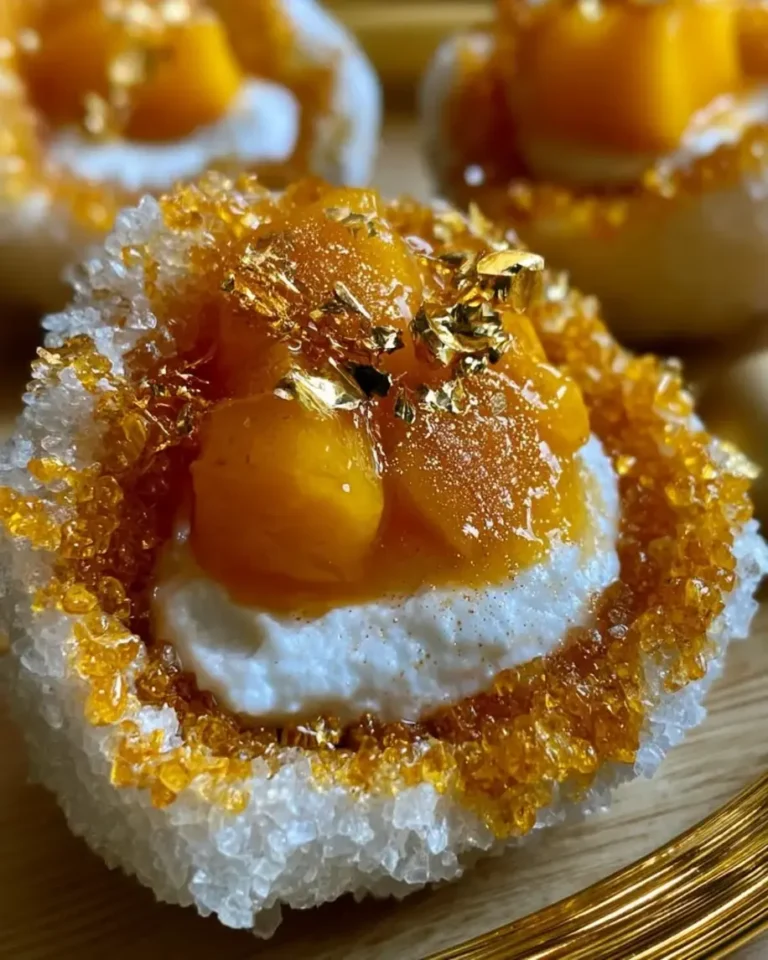
Picture this: a tender, jewel-like mango jelly center, wrapped in a whisper of creamy coconut, then encased in a dazzling shell of golden sugar crystals that catch the light like a thousand tiny diamonds. The first bite gives you that satisfying crunch of the sugar coating, followed by the soft, silky mango-coconut interior that practically melts on your tongue. The mango flavor is bright and tropical — not too sweet, with a subtle tang from the lemon juice that keeps each bite bright. The coconut cream layer adds a luscious richness that balances the acidity of the fruit. This homemade geode candy is the kind of dessert that makes people gasp when you set it on the table, and I mean that literally — I’ve seen it happen at dinner parties from Brooklyn to the Upper East Side.
What makes this mango coconut dessert truly special is the way the three distinct components come together to create something greater than the sum of their parts. The mango jelly centers require a gentle touch with gelatin — a technique I honed during my patisserie training in Paris — and the golden sugar coating is where you get to play artist. I’ve tested this recipe at least a dozen times to get the crystal effect just right, and I’m finally ready to share all my secrets. 💡 Stella’s Pro Tip: The key to that spectacular geode look is in how you cut the jelly — irregular, rough-edged nugget shapes catch the sugar coating more dramatically than perfect squares. One common mistake I see home cooks make is skipping the bloom step with the gelatin, which leads to a rubbery texture. We’ll cover all of that in the steps ahead.
Why This Golden Mango Sugar Geodes Recipe Is the Best
The Flavor Secret: Most sugar geode recipes rely on artificial fruit flavorings, but I insist on real mango puree made from ripe, fragrant mangoes. I source mine from the fruit vendors at the Union Square Greenmarket in Manhattan when Alphonso mangoes are in season, but any sweet, fully ripe mango will work. The natural pectin in the fruit works alongside the gelatin to create a jelly that tastes intensely of real mango — not candy, not juice, but the pure essence of the fruit itself. This is the same approach I learned from my mother, who never used shortcuts when it came to fruit desserts in our kitchen in Casablanca.
Perfected Texture: Achieving that perfect three-texture harmony — crisp sugar shell, creamy coconut middle, and tender mango jelly — took me weeks of testing in my NYC apartment kitchen. The trick is in the partial setting of the mango layers before adding the coconut cream. If you pour the coconut layer onto fully set mango jelly, the layers won’t bond properly. But if the mango is only partially set, the two layers marry together seamlessly. That’s a technique I adapted from a classic French entremets method, and it makes all the difference in this golden sugar crystal candy.
Foolproof & Fast: While the total time stretches to 4.5 hours (mostly passive chilling), the active prep time is only about 45 minutes. I’ve designed this mango jelly dessert so that even a beginner can achieve stunning results on the first try. The sugar coating process is forgiving and almost meditative — brushing each nugget with syrup and pressing it into the sparkling sugar mix. I’ve included visual cues at every step so you know exactly what to look for, whether you’re a seasoned baker or making your first homemade geode candy.
Mango Sugar Geodes Recipe Ingredients
When I’m developing a recipe like this one, I always start by thinking about where each ingredient comes from. The mangoes I pick up from the little Indian grocery on Lexington Avenue, the coconut cream I found at a specialty shop in SoHo, and the gold luster dust that a pastry chef friend brought me from a supplier in Paris. Each ingredient has a story, and together they tell the story of this dessert. Here’s everything you’ll need to create these stunning golden mango sugar geodes.
Ingredients List
- For the Mango Jelly Centers: 3 cups ripe mango puree (from about 4 large mangoes)
- 1/3 cup granulated sugar
- 1 tbsp lemon juice
- 2 tbsp gelatin powder
- 1/2 cup cold water (for blooming gelatin)
- 1 tsp vanilla extract
- For the Coconut Cream Layer: 8 oz cream cheese, softened to room temperature
- 1/3 cup powdered sugar
- 1/4 cup coconut cream (the thick part from a can of full-fat coconut milk)
- 1 tsp vanilla extract
- For the Golden Sugar Crystal Coating: 2 cups coarse sanding sugar
- 1/4 cup water
- 2 tbsp light corn syrup
- Gold luster dust (as needed, about 1–2 tsp)
- 1 tsp edible pearl shimmer dust
- For Garnish (optional): Fresh mango cubes and edible gold flakes
Ingredient Spotlight
Mango Puree: The heart of this mango sugar geodes recipe. Use Alphonso or Ataulfo mangoes for the sweetest, most aromatic puree. Avoid fibrous mango varieties like Tommy Atkins. If fresh mangoes aren’t in season, high-quality frozen mango puree (unsweetened) works beautifully — just thaw and use as directed.
Gelatin Powder: This is what gives the mango jelly centers their tender, melt-in-your-mouth texture. I use Knox brand unflavored gelatin powder, which is widely available in US grocery stores. Never substitute with agar-agar or pectin without adjusting the recipe, as the setting properties are completely different. 💡 Stella’s Pro Tip: Always bloom gelatin in cold water — never warm — and let it sit undisturbed for a full 5 minutes to ensure even hydration.
Coconut Cream: This is the thick, creamy layer that rises to the top of a can of full-fat coconut milk when refrigerated. Scoop it off the top, leaving the watery liquid behind. For a dairy-free version of this mango coconut dessert, use dairy-free cream cheese and this coconut cream as the base for the middle layer.
Coarse Sanding Sugar: This creates the geode crystal effect. White sanding sugar is the canvas, and the gold luster dust transforms it into something magical. You can find sanding sugar at craft stores or online — look for a coarse grind, not the fine decorating sugar. Mixing in the edible pearl shimmer dust adds that subtle iridescence that makes these homemade geode candies look like actual gemstones.
Gold Luster Dust: This is what turns the sugar coating from white to golden. A little goes a long way — you’re looking for a pale champagne gold color, not a heavy metallic coating. Use a small whisk or your fingers to mix it evenly into the sanding sugar before coating the nuggets.
| Original Ingredient | Best Substitution | Flavor / Texture Impact |
|---|---|---|
| Mango puree (fresh) | Unsweetened frozen mango puree, thawed | Slightly less bright flavor; add 1 tbsp extra lemon juice |
| Cream cheese | Dairy-free cream cheese (e.g., Kite Hill or Miyoko’s) | Slightly less tangy; coconut cream layer will be a bit softer |
| Coarse sanding sugar | Demerara sugar or turbinado sugar, crushed slightly | Larger crystals, slightly more amber color; less uniform coating |
| Gold luster dust | Turmeric + a pinch of mica powder (for natural color) | Warm yellow-gold hue; less sparkle, more matte finish |
How to Make Golden Mango Sugar Geodes — Step-by-Step
Making these golden mango sugar geodes is a labor of love, but I promise every step is rewarding. Think of it as a three-act play: first the mango jelly, then the coconut cream layer, and finally the dazzling sugar coating. Let’s walk through each step together.
Step 1: Prepare the Mango Jelly Base
In a medium saucepan over medium heat, combine 3 cups of mango puree, 1/3 cup granulated sugar, and 1 tablespoon of lemon juice. Stir occasionally as the mixture warms through — about 4 to 5 minutes. You want it hot but not boiling, just until the sugar has fully dissolved and the puree is steaming. In a small bowl, sprinkle 2 tablespoons of gelatin powder over 1/2 cup of cold water. Let it bloom undisturbed for 5 minutes. The gelatin will absorb the water and become a firm, jiggly mass. Stir this bloomed gelatin into the warm mango mixture until it’s completely dissolved — no streaks or granules should remain. Remove from the heat and stir in 1 teaspoon of vanilla extract. Allow the mixture to cool for about 10 minutes at room temperature, stirring occasionally.
💡 Stella’s Pro Tip: If you see any foam or bubbles on the surface of the mango mixture, skim them off with a spoon before pouring. This ensures a perfectly smooth, jewel-clear jelly surface.
Step 2: Make the Coconut Cream Layer
While the mango mixture cools, make the coconut cream layer. In a stand mixer fitted with the paddle attachment (or a large bowl with a hand mixer), beat 8 ounces of softened cream cheese on medium speed until smooth and fluffy — about 2 minutes. Add 1/3 cup of powdered sugar, 1/4 cup of coconut cream, and 1 teaspoon of vanilla extract. Beat on medium-high until the mixture is completely smooth, light, and airy — about 3 minutes. Scrape down the sides of the bowl at least once to ensure everything is evenly incorporated. Taste it — it should be rich, creamy, and faintly tropical with a pleasant tang from the cream cheese.
⚠️ Common Mistake to Avoid: Using cold cream cheese will give you a lumpy coconut cream layer. Always let your cream cheese sit at room temperature for at least 30 minutes before beating.
Step 3: Layer and Chill
Line an 8-inch square baking pan with parchment paper, leaving some overhang on two sides for easy removal. Pour half of the slightly cooled mango mixture (about 1.5 cups) into the prepared pan and spread it evenly. Place the pan in the refrigerator for 20 to 25 minutes, until the mango layer is partially set — it should be firm to the touch but still slightly tacky, not fully solidified. This partial setting is crucial for the layers to bond. Gently spread the coconut cream mixture over the partially set mango layer in an even layer. Then pour the remaining mango mixture over the coconut cream layer, spreading it gently to cover completely. Return the pan to the refrigerator and chill for at least 4 hours, or overnight, until the entire block is firm and set.
💡 Stella’s Pro Tip: To check if the jelly is set, gently press the surface with your fingertip — it should spring back slightly and feel firm, not wobbly. If it jiggles like Jell-O, give it another 30 minutes.
Step 4: Cut into Geode Nuggets
Once the block is fully set, use the parchment overhang to lift it out of the pan and onto a cutting board. Using a sharp knife, cut the block into irregular, jagged nugget shapes — think rough gemstone pieces rather than perfect cubes. Aim for pieces about 1.5 to 2 inches in size. The irregular edges create more surface area for the sugar coating to cling to, which enhances the geode effect. If the knife sticks, wipe it clean between cuts. Place the cut nuggets on a parchment-lined baking sheet and return them to the refrigerator while you prepare the sugar coating.
⚠️ Common Mistake to Avoid: Cutting the nuggets too small — they’ll be harder to coat and may fall apart. Geode nuggets should be substantial, like chunks of a crystal.
Step 5: Create the Golden Sugar Coating
In a small saucepan, combine 1/4 cup of water and 2 tablespoons of light corn syrup. Warm over low heat just until the mixture is blended and slightly warm — about 2 minutes. Do not let it boil. Remove from heat and set aside. In a medium bowl, combine 2 cups of coarse sanding sugar with gold luster dust and 1 teaspoon of edible pearl shimmer dust. Use your fingers or a small whisk to mix the dust evenly throughout the sugar, creating a uniform pale gold color.
💡 Stella’s Pro Tip: Start with 1 teaspoon of gold luster dust and add more if you want a deeper gold. Remember, the sugar crystals will catch the light naturally, so you don’t need to oversaturate the color.
Step 6: Coat the Nuggets
Working with one nugget at a time, lightly brush the surface with the warm corn syrup mixture using a pastry brush. You want a thin, even coating — not dripping wet, but evenly glistening. Immediately roll the nugget in the gold sanding sugar mixture, pressing gently to help the crystals adhere. Use your fingers to press additional sugar onto any bare spots. Place the coated nugget on a clean parchment-lined baking sheet. Repeat with all remaining nuggets. Allow the sugar coating to set for 15 minutes at room temperature — the coating will dry and harden slightly, creating that signature crunchy shell.
⚠️ Common Mistake to Avoid: Brushing on too much syrup — it will make the sugar coating soggy and clumpy. A light, even brush is all you need.
Step 7: Garnish and Arrange
Arrange the coated golden mango sugar geodes on a serving platter, leaving a little space between each nugget so the sparkling effect stands out. Garnish with fresh mango cubes and a sprinkling of edible gold flakes for an extra touch of luxury. Serve immediately at room temperature. The contrast between the crunchy sugar shell and the soft, chilled interior is absolutely spectacular.
💡 Stella’s Pro Tip: For a dramatic presentation, arrange the nuggets on a black or dark-colored platter — the gold crystals will pop beautifully against a dark background.
| Step | Action | Duration | Key Visual Cue |
|---|---|---|---|
| 1 | Cook mango puree, bloom gelatin, combine | 10 mins | Steaming, sugar dissolved, gelatin fully incorporated |
| 2 | Beat cream cheese, sugar, coconut cream | 5 mins | Smooth, fluffy, no lumps |
| 3 | Layer and refrigerate | 4+ hours | Firm, springy to the touch, not jiggly |
| 4 | Cut into irregular nuggets | 5 mins | Rough, jagged edges, 1.5–2 inch pieces |
| 5 | Make syrup, mix sugar with luster dust | 5 mins | Pale gold, evenly distributed color |
| 6 | Brush, coat, press sugar, set | 20 mins | Fully coated, sparkling, no bare spots |
| 7 | Garnish and serve | 5 mins | Brilliant gold crystals, fresh mango accents |
Serving & Presentation
These golden mango sugar geodes are a showstopper for any occasion — birthday parties, holiday gatherings, or a fancy weekend dessert at home. I love serving them on a sleek black slate board or a mirrored tray to maximize the reflective sparkle of the sugar crystals. Arrange the nuggets in a loose cluster, as if they’ve just been unearthed from a treasure chest. The irregular shapes and sizes create visual interest, and the gold flakes catch the light with every movement.
For a truly memorable dessert spread, pair these geodes with a dollop of lightly sweetened whipped cream or a scoop of coconut ice cream. The cool, creamy accompaniment balances the crunch of the sugar coating and the bright mango flavor. I also love offering a small dish of extra gold luster dust on the side so guests can add their own sparkle — it’s a playful touch that always gets a smile. In the summer, I’ll serve these alongside fresh tropical fruit — mango slices, passionfruit halves, and dragon fruit — for a stunning dessert board that feels like a trip to a tropical paradise. This mango coconut dessert is versatile enough for both elegant dinner parties and casual family gatherings.
One of my favorite ways to present these is in individual mini bowls or small glass jars, with a few nuggets nested on a bed of crushed pistachios or toasted coconut flakes. The green against the gold is absolutely gorgeous. You can also thread smaller nuggets onto skewers with fresh mango chunks for a fun, portable dessert option at parties. However you choose to serve them, these homemade geode candies are guaranteed to be the centerpiece of your table. 🥂
| Pairing Type | Suggestions | Why It Works |
|---|---|---|
| Side Dish | Fresh mango cubes, passionfruit halves, dragon fruit slices | Reinforces the tropical theme; fresh fruit cuts the sweetness |
| Sauce / Dip | Coconut whipped cream, passionfruit coulis, salted caramel | Adds creaminess or tangy contrast to the sweet sugar shell |
| Beverage | Sparkling rosé, mango lassi, coconut water with lime | Light, fruity drinks complement without overwhelming |
| Garnish | Edible gold flakes, fresh mint sprigs, toasted coconut flakes | Adds visual height, freshness, and luxury |
Make-Ahead, Storage & Reheating
One of the best things about this mango sugar geodes recipe is how well it works for advance prep — a lifesaver when I’m juggling my NYC food blog schedule and hosting friends on the weekend. I almost always make the mango jelly block a day ahead and keep it in the fridge, then cut and coat the nuggets the morning of my event. The sugar coating is best done within a few hours of serving to maintain maximum crunch, but even that can be finessed. Here’s my complete guide to storing, making ahead, and refreshing these golden sugar crystal candies.
| Method | Container | Duration | Reheating Tip |
|---|---|---|---|
| Refrigerator | Airtight container, parchment between layers | Up to 5 days | Serve chilled or at room temp — do not microwave |
| Freezer | Freezer-safe container, wax paper between layers | Up to 2 months | Thaw in fridge overnight; re-coat with fresh sugar if needed |
| Make-Ahead | Uncut jelly block wrapped in plastic | Up to 3 days in advance | Cut and coat on serving day for freshest crunch |
A few notes from my experience: If you’re storing coated nuggets in the refrigerator, the sugar coating will soften slightly over time — that’s natural. To restore the crunch, I recommend placing them on a baking sheet in a 200°F oven for 5 to 7 minutes, then letting them cool completely before serving. This dries out the sugar coating and brings back that satisfying snap. Never microwave these — the jelly centers will melt and the sugar coating will become sticky and sad. For the best texture and visual impact, coat the nuggets no more than 4 to 6 hours before serving. And if you’re transporting them, pack them in a single layer in a sturdy container with parchment between each layer — the sugar coating is delicate and can crack under pressure.
💡 Stella’s Pro Tip: If the sugar coating starts to look dull after a day in the fridge, give each nugget a quick brush with a tiny bit more corn syrup and a light dusting of fresh gold sanding sugar. It’s like giving them a mini makeover — they’ll sparkle like new!
Variations & Easy Swaps
This mango sugar geodes recipe is wonderfully adaptable. Over the years, I’ve played with different fruit bases, alternative coatings, and even savory spins (though that one stays in my private notebook for now!). Here are three of my favorite variations that keep the geode magic alive while changing up the flavors. Whether you’re catering to dietary needs or just want to experiment, these swaps are all tested and approved in my NYC kitchen.
| Variation | Key Change | Best For | Difficulty Impact |
|---|---|---|---|
| Passionfruit & Coconut | Replace mango puree with passionfruit pulp (strained) | Tropical tartness lovers, summer parties | Same — strain seeds for smooth jelly |
| Berry Geodes (Dairy-Free) | Use mixed berry puree + dairy-free cream cheese + coconut cream | Dairy-free diets, Valentine’s Day, berry season | Same — berry seeds may need straining |
| Rose & Pistachio (Moroccan Twist) | Add rose water to jelly + pistachio dust to coating | Elegant Middle Eastern-inspired desserts | Slightly harder — rose water strength varies |
Passionfruit & Coconut Geodes
This variation is for when you want that extra tangy punch that passionfruit brings. Replace the 3 cups of mango puree with 2 cups of strained passionfruit pulp (about 8–10 fresh passionfruits) plus 1/2 cup of water to reach the right volume. The passionfruit seeds should be strained out through a fine-mesh sieve to keep the jelly smooth. The coconut cream layer stays the same, and the golden sugar coating gets an extra sparkle with a pinch of edible glitter. The flavor is brighter and more complex — the passionfruit’s acidity cuts through the sweetness beautifully. I like to garnish these with a tiny slice of fresh passionfruit on top for a visual cue of the flavor within. This version is always a hit at my summertime rooftop gatherings in Brooklyn.
Berry Geodes (Dairy-Free)
For a dairy-free option that doesn’t compromise on flavor, use a high-quality dairy-free cream cheese (I recommend Miyoko’s or Kite Hill) and full-fat coconut cream for the middle layer. For the fruit jelly, use 3 cups of mixed berry puree (frozen is fine — just thaw and blend) and strain out the seeds. Reduce the sugar to 1/4 cup since berries are naturally sweet. The color will be a gorgeous ruby red rather than golden, so I use a combination of gold and pink luster dust for a rose-gold geode effect. This variation is perfect for Valentine’s Day, Galentine’s, or any celebration where you want a stunning dairy-free dessert that looks and tastes indulgent. 💡 Stella’s Pro Tip: Serve these with a side of coconut whipped cream for an extra layer of dairy-free decadence.
Rose & Pistachio (Moroccan Twist) Geodes
This variation is a nod to my Moroccan heritage and the rosewater-scented desserts my mother used to make for special occasions. Add 1 tablespoon of food-grade rose water to the mango jelly mixture along with the vanilla extract. The floral notes pair beautifully with the mango and coconut. For the coating, substitute half of the sanding sugar with finely crushed pistachios (unsalted, shelled) and add the gold luster dust as usual. The pistachio gives the coating a subtle green tint and a nutty crunch that complements the floral fruit jelly. Garnish with dried rose petals and a light dusting of gold flakes. This version feels incredibly luxurious and is always a conversation starter — it’s my go-to for dinner parties when I want to share a piece of my heritage. The rose water can vary in intensity, so start with 1 tablespoon and taste before adding more.
What is the best way to crush the sugar to make the geode crystal effect?
For the most realistic geode crystal effect, you don’t actually need to crush the sugar yourself — you can buy coarse sanding sugar which already has the perfect crystal size. Look for “coarse sanding sugar” or “decorating sugar” at craft stores or online. The crystals should be about 1–2 mm in size, which gives that beautiful sparkling geode texture. If all you have is granulated sugar, you can pulse it in a food processor a few times to create a coarser texture, but be careful not to over-process it into powder. I’ve found that mixing regular sanding sugar with a small amount of crushed rock candy creates an even more dramatic crystal effect. The key is to have varying crystal sizes — some small, some large — which mimics the natural variation in a real geode.
What type of mango flavoring or extract works best for golden mango sugar geodes?
I always recommend using real, ripe mango puree as the base for your mango jelly centers rather than artificial flavorings. The natural sweetness and complexity of fresh mangoes can’t be replicated by extracts. However, if you want to boost the mango flavor, look for a high-quality natural mango extract or mango oil — a few drops added to the cooled mango mixture can intensify the tropical aroma. I’ve tested several brands and find that “LorAnn Natural Mango Flavor” works well without tasting artificial. Avoid using mango syrup or juice concentrates, as they add extra sugar and can throw off the gelatin ratio. For the brightest, most authentic mango flavor in this mango coconut dessert, use Alphonso mangoes when they’re in season — their floral, honeyed notes are unbeatable.
How long does it take for the sugar geode shell to fully harden?
The sugar coating on these golden mango sugar geodes begins to set almost immediately, but for a fully hardened shell that holds its shape and provides a satisfying crunch, I recommend waiting at least 15 to 20 minutes after coating. During this time, the corn syrup mixture dries and the sugar crystals adhere firmly to the surface. The coating will be slightly tacky at first but will dry to a crisp finish. If you’re planning to serve the geodes later in the day, you can coat them up to 4 to 6 hours in advance and store them at room temperature in a single layer — just cover them loosely with parchment paper, not plastic wrap, which would trap moisture and soften the coating. For the absolute crunchiest texture, coat them within 2 hours of serving and avoid refrigerating after coating if possible.
Can I use food coloring instead of freeze-dried mango powder to color the sugar?
Yes, you can absolutely use food coloring to tint the sugar coating if you don’t have freeze-dried mango powder. In fact, I often use a combination of gold gel food coloring and pearl dust to achieve the shimmering geode effect. The easiest method is to add a tiny drop of yellow or gold gel food coloring to the corn syrup mixture before brushing it onto the nuggets — this tints the adhesive layer, and then the sanding sugar sticks to it, creating a uniform color. Alternatively, you can mix a small amount of powdered food coloring with the sanding sugar before coating. I prefer gel or powdered colors over liquid drops, as liquid can dissolve the sugar crystals and make them clump. For that golden hue, mix a tiny bit of yellow and orange gel color, or use a dedicated gold food coloring. 💡 Stella’s Pro Tip: Add a pinch of edible shimmer dust to the colored sugar for that geode-like sparkle.
Can I make mango sugar geodes without gelatin?
Yes, you can make a vegetarian version of these golden mango sugar geodes by substituting the gelatin with agar-agar powder or a high-quality pectin. For agar-agar, use 1 tablespoon of powder in place of the 2 tablespoons of gelatin, but the technique is different — agar needs to be brought to a full boil (212°F) to activate its setting properties, while gelatin simply needs to be bloomed in cold water and dissolved in warm liquid. The texture with agar will be firmer and more gel-like, similar to a firm Jell-O, rather than the tender, melt-in-your-mouth texture that gelatin provides. I recommend testing a small batch first to see if you prefer the texture. Pectin-based jellies tend to be softer and more delicate, so they can be trickier to cut into clean geode shapes. If you’re making this mango coconut dessert for a vegan friend, agar-agar is your best bet — just be prepared for a slightly different mouthfeel.
How do I store leftover golden mango sugar geodes?
Leftover geodes should be stored in an airtight container in the refrigerator, with parchment paper between layers to prevent the sugar coating from sticking. They will keep for up to 5 days, but the sugar coating will soften over time due to the moisture in the fridge. To restore the crunch, I recommend placing them on a baking sheet in a 200°F oven for 5 to 7 minutes, then letting them cool completely before serving. This gentle heat dries out the sugar coating without melting the jelly interior. Do not store them in plastic wrap or a sealed bag without parchment, as the condensation will ruin the crystal effect. If you’ve already cut the nuggets but haven’t coated them yet, you can store the uncoated nuggets in the fridge for up to 3 days before coating and serving. For longer storage, freeze the uncoated nuggets for up to 2 months, then thaw in the fridge and coat fresh on the day you plan to serve them.
Can I use frozen mangoes for the puree in this homemade geode candy recipe?
Absolutely! Frozen mangoes are an excellent option for this mango sugar geodes recipe, especially when fresh mangoes are out of season. Look for bags of frozen mango chunks labeled “sweetened” or “unsweetened” — I recommend unsweetened so you can control the sugar level yourself. Thaw the mango chunks completely, then drain off any excess liquid before blending into a puree. The thawing and draining step is important because frozen fruit releases water, and too much liquid can dilute the flavor and affect the gelatin setting. After pureeing, measure out 3 cups as directed. I’ve tested this frozen mango approach multiple times during New York winters, and it works beautifully — the mango flavor remains bright and tropical. You may need to add an extra tablespoon of sugar if the frozen mangoes are less sweet than fresh ones. 💡 Stella’s Pro Tip: Add a pinch of ground cardamom to the mango puree when using frozen mangoes — it enhances the fruit’s natural sweetness and adds a lovely warmth.
Why did my mango jelly turn out rubbery instead of tender?
Rubbery mango jelly is usually a sign that the gelatin was either overheated or used in excess. In this mango jelly dessert, gelatin should be bloomed in cold water and then dissolved in warm (not boiling) liquid. If the mango mixture is too hot when you add the gelatin — above 140°F or so — the gelatin proteins begin to break down and lose their ability to form a tender gel. Instead, they form a tough, rubbery network. Another common cause is using too much gelatin powder. I’ve carefully calibrated this recipe to use 2 tablespoons of gelatin powder for 3 cups of mango puree, which yields a tender, silky set. If you’re measuring by volume, make sure you’re using proper measuring spoons and not packing the powder. Finally, the chilling time matters — at least 4 hours is essential for the gelatin to fully set. If you’re in a hurry and refrigerate for only 2 hours, the jelly will be soft and difficult to cut cleanly.
Can I make these golden sugar crystal candies in different colors?
Yes! Once you master the basic technique, you can create geodes in virtually any color by changing the fruit puree and the luster dust. For pink geodes, use raspberry or strawberry puree with pink shimmer dust. For purple, try blueberry or blackberry puree with a violet pearl dust. For a rainbow effect, make multiple batches with different fruit purees and arrange them together on a platter — it’s stunning for children’s birthday parties or pride celebrations. The key is to match the luster dust to the fruit color: gold for mango, rose gold for berries, silver for blueberry, and bronze for peach. You can also experiment with the coating — try mixing sanding sugar with colored sugar crystals for a more vibrant look. Just remember that the fruit puree must be smooth and strained for a clean jelly, and the gelatin ratio stays the same regardless of the fruit you choose. 💡 Stella’s Pro Tip: For the most dramatic color contrast, use a dark-colored serving platter — the geodes will truly pop.
How do I get the geode nuggets to look uneven and natural like real crystals?
The secret to natural-looking geode nuggets is in the cutting technique. Instead of using a ruler or trying to make perfect squares, use a sharp chef’s knife to cut the chilled jelly block into rough, irregular shapes. I like to make one diagonal cut, then a few uneven vertical and horizontal cuts, creating pieces that vary in size and shape — some triangular, some almost rhomboid, some chunky. The uneven edges and jagged corners are what catch the sugar coating and create that crystalline, geode-like appearance. After cutting, I often gently break a few of the larger pieces in half with my hands to create even more natural-looking fractures. Another trick is to chill the cut nuggets for an additional 30 minutes before coating — they firm up again and hold their shape better during the brushing and rolling process. Remember, real geodes are imperfect and asymmetrical, so lean into the irregularity. 💡 Stella’s Pro Tip: Save the smallest broken pieces and coat them too — they make delightful bite-sized treasures for kids or for snacking while you arrange the platter.
Share Your Version!
I absolutely love seeing how this mango sugar geodes recipe turns out in your kitchen. Every time someone tries it and puts their own spin on the colors, the garnishes, or the plating, it makes me so happy. Have you tried the passionfruit variation? Did you go all out with edible gold flakes? Maybe you figured out a brilliant shortcut I haven’t even thought of — if so, I want to hear about it! Leave a star rating and a comment below to let me and the whole leosfoods community know how it went for you. Your feedback helps other home cooks decide if this golden sugar crystal candy is right for their next special occasion.
And please, share a photo of your golden mango sugar geodes on Instagram or Pinterest and tag me @stellarecipeblog — I personally reply to every single tag I see. There’s nothing I love more than scrolling through my feed and seeing those sparkling, golden creations pop up. Pin this recipe to your “Desserts That Wow” board, save it for your next dinner party, or just keep it handy for when you need a little edible magic in your day. From my NYC kitchen to yours — I hope this recipe brings as much warmth to your table as it does to mine. — Stella 🧡
Love This Recipe? Save It to Pinterest!
If you enjoyed this Golden Mango Sugar Geodes recipe, don’t let it get lost in your browser tabs! 😄 Pin it now so you can find it again anytime — and explore hundreds more tried-and-tested recipes waiting for you on my Pinterest boards.
👉 Follow Stella on Pinterest @stellarecipeblog
📌 Pin this recipe · 🔁 Re-pin your favorites · 💬 Tag me when you make it — I love seeing your creations!
✨ Tag @stellarecipeblog on Instagram when you make these Golden Mango Sugar Geodes — I feature my favorite recreations every week! 🧡
“`
Print
Golden Mango Sugar Geodes
A stunning dessert featuring mango jelly centers, a creamy coconut layer, and a sparkling golden sugar crystal coating.
- Total Time: 4 hours 30 minutes (including chilling)
- Yield: 12 1x
Ingredients
- For the Mango Jelly Centers:
- 3 cups ripe mango puree
- 1/3 cup granulated sugar
- 1 tbsp lemon juice
- 2 tbsp gelatin powder
- 1/2 cup cold water
- 1 tsp vanilla extract
- For the Coconut Cream Layer:
- 8 oz cream cheese, softened
- 1/3 cup powdered sugar
- 1/4 cup coconut cream
- 1 tsp vanilla extract
- For the Golden Sugar Crystal Coating:
- 2 cups coarse sanding sugar
- 1/4 cup water
- 2 tbsp light corn syrup
- Gold luster dust, as needed
- 1 tsp edible pearl shimmer dust
- For Garnish (optional):
- Fresh mango cubes
- Edible gold flakes
Instructions
- Cook mango puree, granulated sugar, and lemon juice in a saucepan over medium heat until warmed through.
- Bloom gelatin in cold water for 5 minutes, then stir into the mango mixture until completely dissolved. Add vanilla extract and allow to cool slightly.
- Beat cream cheese, powdered sugar, coconut cream, and vanilla until smooth and fluffy.
- Pour half of the mango mixture into a parchment-lined square pan and chill until partially set.
- Spread the coconut cream layer evenly over the mango layer, then cover with the remaining mango mixture.
- Refrigerate for at least 4 hours until firm, then cut into irregular geode-like nugget shapes.
- In a saucepan, combine water and corn syrup and heat just until blended. Lightly brush the surface of each mango nugget with the syrup mixture.
- Mix sanding sugar with gold luster dust and pearl shimmer dust, then press onto the coated nuggets to create a sparkling crystal effect.
- Allow the sugar coating to set for 15 minutes before arranging on a serving platter.
- Garnish with fresh mango cubes and edible gold flakes before serving.
- Method: Dessert
Nutrition
- Calories: 225
- Sugar: 34g
- Fat: 8g
- Carbohydrates: 38g
- Protein: 2g
Tried This Recipe? Leave a Comment!
Did you make this recipe? I’d love to hear how it turned out! Please leave a comment and a rating below. Your feedback helps other home cooks and supports cheerychop.com!
For more delicious inspiration, follow me on Pinterest!