Golden Pineapple Coconut Dream Bombs with Mirror Finish
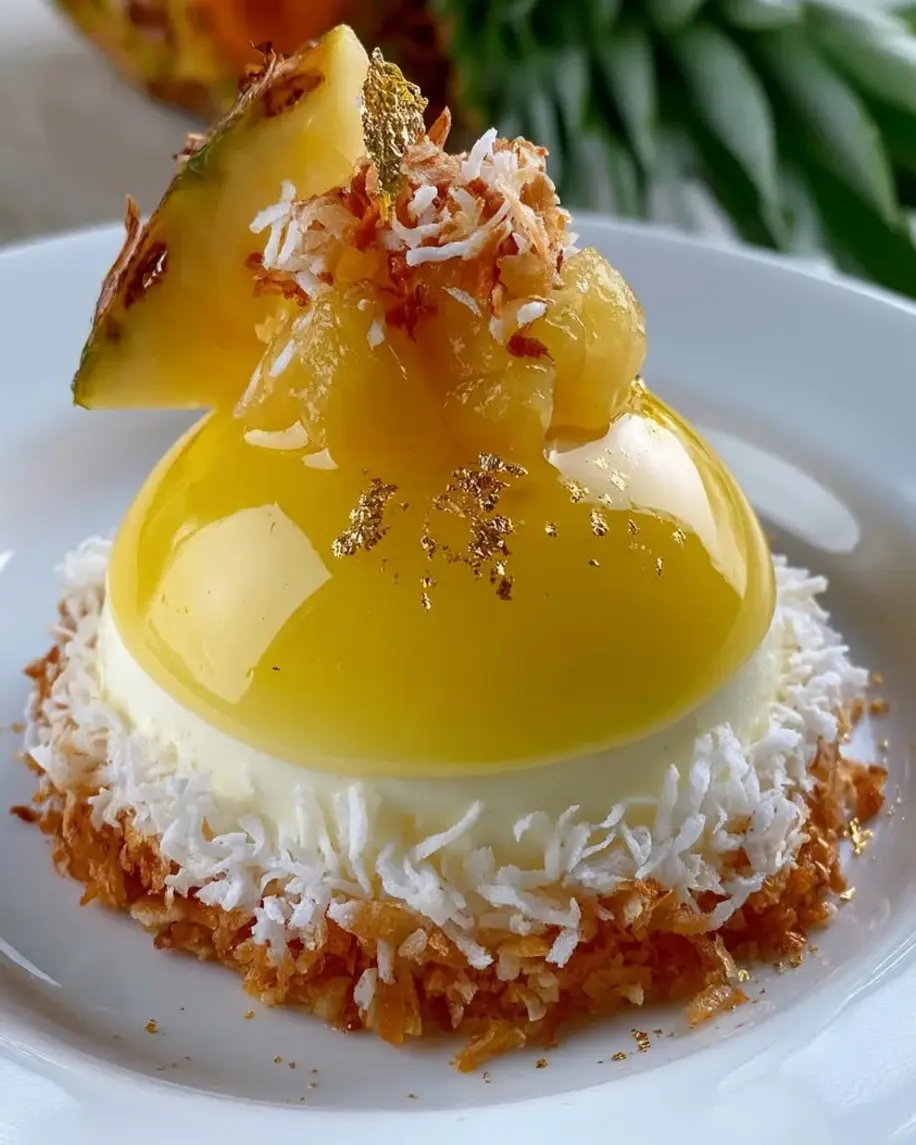
Table of Contents
Golden Pineapple Coconut Dream Bombs with Mirror Finish – A Tropical Showstopper
I still remember the first time I made these Golden Pineapple Coconut Dream Bombs with Mirror Finish — it was a humid July afternoon in my little NYC kitchen, and I was desperately craving the bright, sun-drenched flavors of my childhood in Morocco. My mother used to make a simple coconut and pineapple pudding that we’d eat on the terrace, watching the sun dip below the Atlas Mountains. But here in New York, I wanted something more — something that combined those tropical memories with the polished French pastry techniques I learned in Paris. This golden pineapple coconut dream bombs recipe is the result of that longing: a dessert that tastes like sunshine and looks like a jewel.
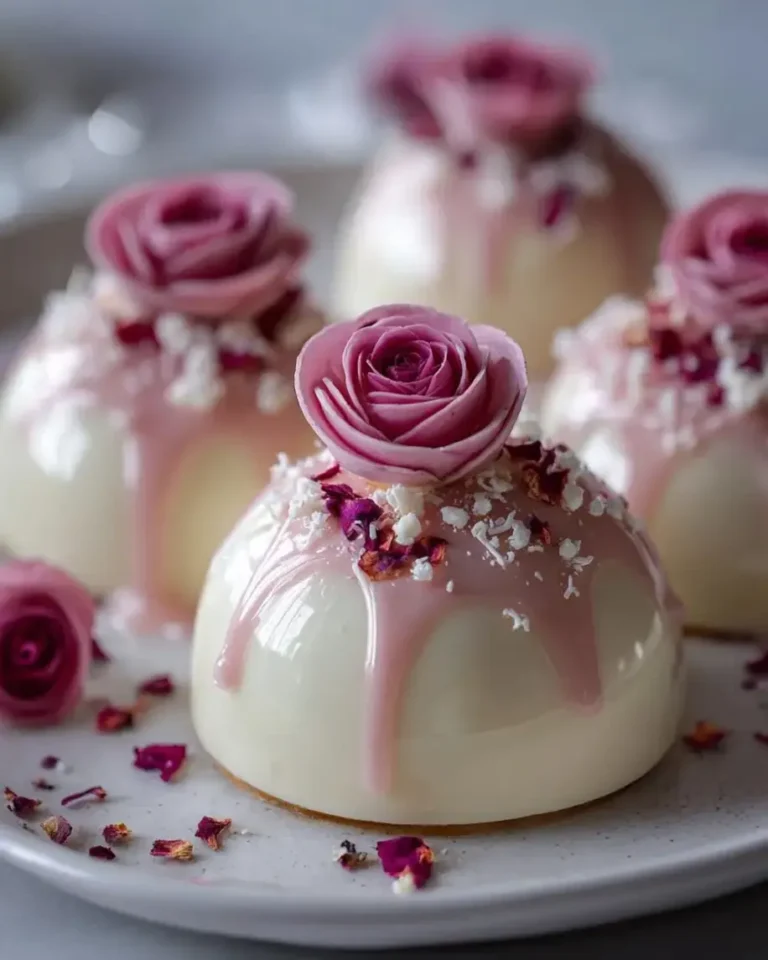
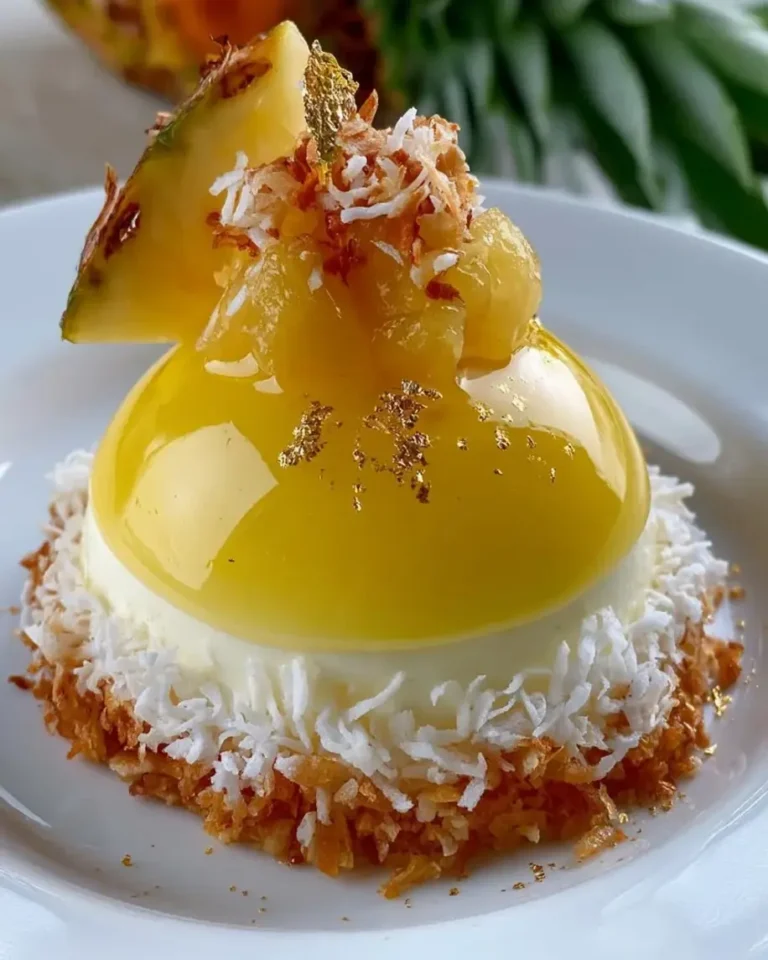
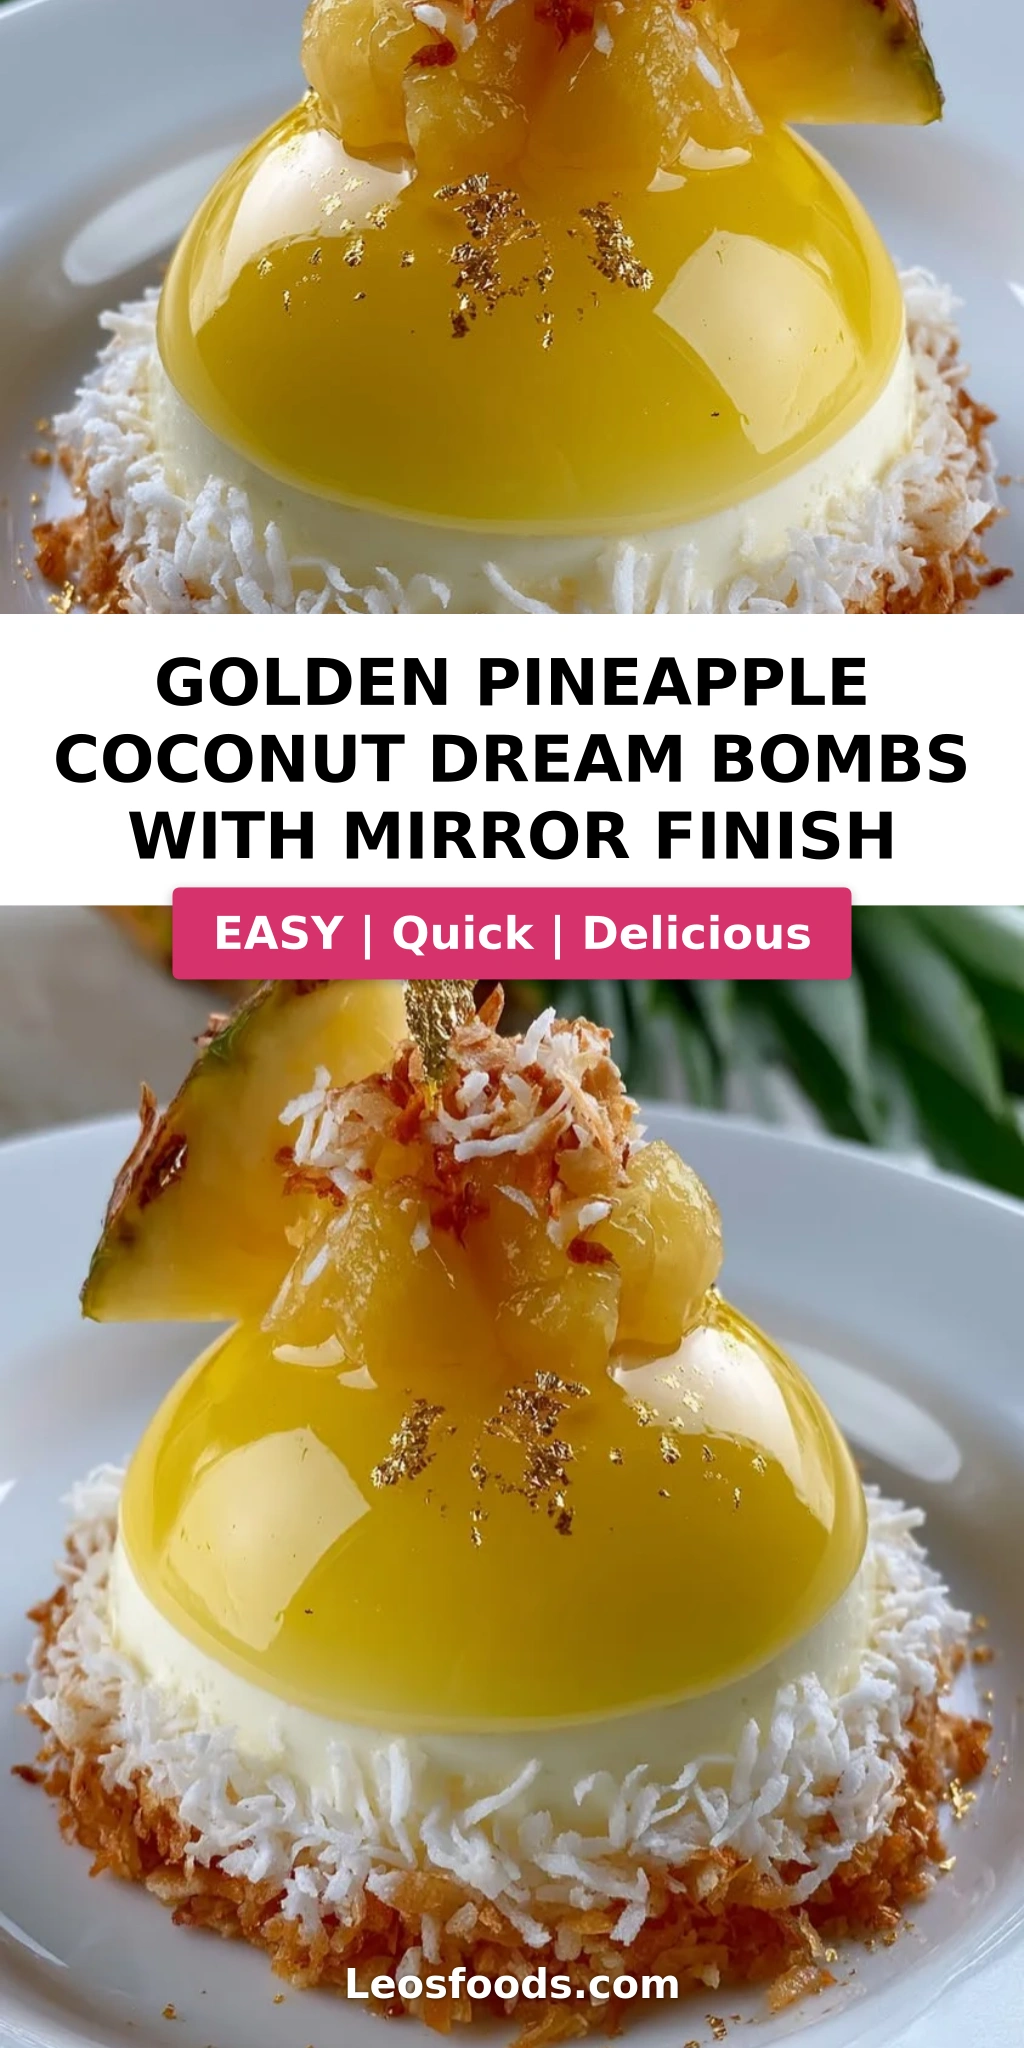
The first bite hits you with a mirror-smooth, golden glaze that shatters gently as your fork sinks into the creamy coconut filling below. Then comes the burst of tangy pineapple — cooked down with honey and lime until it’s jammy and bright — tucked right in the center like a hidden treasure. The toasted coconut crunch coating adds a whisper of salt and caramelized warmth that keeps you reaching for just one more bite. It’s the kind of dessert that makes people close their eyes when they taste it. I’ve served these at dinner parties from Brooklyn to the Upper East Side, and every single time, someone asks for the recipe before the plate is even empty.
What sets this version apart is the way I’ve balanced the French mirror glaze technique with the unfussy warmth of North African home cooking. The glaze isn’t just for looks — it seals in moisture and adds a delicate sweetness that complements the coconut and pineapple rather than overpowering them. I’ve tested this recipe more times than I can count, tweaking the gelatin ratio, the temperature of the glaze, and the texture of the filling so that it works for home cooks, not just pastry chefs. 💡 Stella’s Pro Tip: The secret to a flawless mirror finish is making sure your frozen domes are totally smooth and your glaze is exactly 95°F — too warm and it runs off, too cool and it clumps. Trust me on this one.
Why This Golden Pineapple Coconut Dream Bombs Recipe Is the Best
The Flavor Secret: Most pineapple coconut desserts rely on artificial flavorings or canned syrups that taste flat. I use fresh pineapple cooked down with honey and lime — a trick I picked up from a pastry chef in Paris who insisted that fruit should always be coaxed into sweetness, not drowned in sugar. The honey adds a floral depth that pairs beautifully with the rich coconut cream filling. This golden pineapple coconut dream bombs recipe lets each ingredient shine without competing.
Perfected Texture: The filling is a study in contrasts — silky cream cheese whipped with heavy cream, folded with shredded coconut for a subtle chew, and stabilized with just enough gelatin to hold its shape when frozen. The mirror glaze is thin enough to pour like liquid gold but sets to a firm, shiny shell that cracks beautifully when you bite into it. Getting that texture right took me nine test batches. Nine. But now I’m sharing every trick so you nail it on your first try.
Foolproof & Fast: Despite the impressive look, this recipe is designed for a home kitchen. You don’t need a torch, a stand mixer with a special attachment, or any equipment beyond a silicone mold and a whisk. The active work is about 45 minutes — the rest is just freezer time doing the heavy lifting. I’ve taught this recipe to friends who had never made a mirror glaze before, and every single one of them pulled it off. If you can make a cream cheese frosting, you can make these dream bombs.
Golden Pineapple Coconut Dream Bombs Ingredients
Shopping for ingredients in New York City is one of my favorite rituals. I pick up fresh pineapples at the Union Square Greenmarket — the ones from Costa Rica are usually the sweetest this time of year — and grab my coconut from a little specialty shop in Astoria that imports directly from the Caribbean. But everything on this list is easy to find at any well-stocked grocery store. Here’s exactly what you’ll need to make this golden pineapple coconut dream bombs recipe shine.
Ingredients List
- For the Coconut Cream Filling:
- 1 1/2 cups heavy cream
- 8 oz cream cheese, softened
- 1/2 cup powdered sugar
- 1 tsp vanilla extract
- 1 cup shredded sweetened coconut
- 1 tbsp gelatin powder
- 3 tbsp warm water
- For the Pineapple Core:
- 1 1/2 cups pineapple, finely chopped
- 2 tbsp honey
- 1 tbsp lime juice
- 1 tsp cornstarch
- 1 tbsp water
- For the Golden Mirror Glaze:
- 1 cup white chocolate, melted
- 1/2 cup sweetened condensed milk
- 2 tbsp water
- 1 tbsp gelatin powder
- 1/2 tsp turmeric or gold coloring
- For the Coconut Crunch Coating:
- 1 cup toasted shredded coconut
- 1 tbsp melted butter
- 1 tbsp brown sugar
- Pinch of salt
- For Garnish (optional):
- Toasted coconut flakes
- Pineapple wedges
- Edible gold dust
Ingredient Spotlight
Pineapple: Fresh pineapple is non-negotiable here. It has a bright acidity and natural sweetness that canned pineapple just can’t match. Look for one that smells fragrant at the stem end and gives slightly when you press it. If fresh isn’t available, frozen pineapple chunks work well — just thaw and drain them thoroughly before chopping.
Coconut (shredded sweetened): This provides both texture and sweetness to the filling. I tested unsweetened coconut and found it made the filling taste a bit flat — the sweetened version gives that classic tropical flavor. For the crunch coating, I use untoasted shredded coconut and toast it myself so I can control the color and flavor.
White chocolate: Use a good-quality white chocolate for the mirror glaze — one that contains cocoa butter, not just palm oil. Ghirardelli or Callebaut are my go-tos. Cheap white chocolate can seize or turn grainy when melted, which will ruin the smoothness of your mirror finish.
Gelatin powder: This is the unsung hero of both the filling and the glaze. I use Knox gelatin — it’s widely available and reliable. Blooming it in cold or warm water (depending on the step) is crucial for a smooth, lump-free result. Never skip this step or you’ll end up with a gritty texture.
Turmeric: For the golden color, you can use either turmeric or a professional gold oil-based food coloring. Turmeric gives a warm, natural yellow that’s beautiful and subtle. If you want a more vibrant, shiny gold, use a gel or powder coloring designed for mirror glazes.
| Original Ingredient | Best Substitution | Flavor / Texture Impact |
|---|---|---|
| Fresh pineapple | Frozen pineapple (thawed & drained) | Slightly less bright, but still good. Add extra lime juice. |
| Heavy cream | Full-fat coconut cream (chilled) | More coconut flavor, slightly less stable. Whip to soft peaks only. |
| White chocolate | White candy melts or cocoa butter | Candy melts are sweeter and less creamy. Cocoa butter is pure fat — use 3/4 cup. |
| Powdered sugar | Granulated sugar (blitzed in blender) | Works in a pinch, but may be slightly gritty. Sift thoroughly. |
| Shredded sweetened coconut | Unsweetened coconut + 2 tbsp extra powdered sugar | Less sweet, more coconut-forward. Texture remains similar. |
How to Make Golden Pineapple Coconut Dream Bombs — Step-by-Step
I know this recipe looks ambitious, but I promise — if you take it step by step, you’ll be amazed at what you can create. Let’s break it down together, just like I would if you were standing next to me in my NYC kitchen.
Step 1: Bloom the Gelatin
Sprinkle 1 tablespoon of gelatin powder over 3 tablespoons of warm water in a small bowl. Stir gently and let it sit for 5-7 minutes until it becomes a firm, jelly-like mass. This process, called blooming, hydrates the gelatin so it dissolves smoothly into your filling without clumps.
💡 Stella’s Pro Tip: Use warm water — not hot — for blooming. Hot water can weaken the gelatin’s setting power. The water should feel like a warm bath, not a hot cup of tea.
Step 2: Cook the Pineapple Core
In a small saucepan, combine 1 1/2 cups finely chopped pineapple, 2 tablespoons honey, 1 tablespoon lime juice, and a pinch of salt. In a tiny bowl, whisk 1 teaspoon cornstarch with 1 tablespoon water to make a slurry, then stir it into the pineapple mixture. Cook over medium heat, stirring frequently, until the pineapple softens and the mixture thickens to a jam-like consistency — about 6-8 minutes. Remove from heat and let it cool completely.
⚠️ Common Mistake to Avoid: Don’t rush the cooling! If the pineapple core is even slightly warm when you add it to the filling, it can melt the cream and ruin the texture. Let it sit at room temperature for 30 minutes, then pop it in the fridge if needed.
Step 3: Make the Coconut Cream Filling
In a large bowl, beat 8 oz softened cream cheese, 1/2 cup powdered sugar, and 1 teaspoon vanilla extract with an electric mixer until smooth and fluffy — about 2 minutes. In a separate bowl, whip 1 1/2 cups heavy cream to soft peaks (the cream should hold a gentle curl when you lift the whisk). Gently fold the whipped cream into the cream cheese mixture in three additions, using a rubber spatula. Fold in 1 cup shredded sweetened coconut and the bloomed gelatin (warm the gelatin gently for 5 seconds in the microwave if it has firmed up too much).
💡 Stella’s Pro Tip: Fold — don’t stir! Stirring deflates the air you’ve whipped into the cream, and that air is what makes the filling light and mousse-like. Use a figure-eight motion with your spatula and stop as soon as you don’t see any streaks.
Step 4: Fill and Assemble the Molds
Spoon the coconut cream mixture into a piping bag (or a zip-top bag with the corner snipped off). Fill silicone half-sphere molds (about 3 inches in diameter) halfway with the mixture. Tap the molds gently on the counter to release air bubbles. Place a small spoonful — about 1 heaping teaspoon — of the cooled pineapple core into the center of each mold, pressing it down slightly. Pipe additional coconut cream mixture on top to completely cover the pineapple and fill the mold to the top. Smooth the tops with an offset spatula. Freeze for at least 3 hours, or overnight for best results.
⚠️ Common Mistake to Avoid: Don’t skimp on the freezing time. The domes need to be solidly frozen — not just firm — so they hold their shape when you unmold them and pour the glaze over. If they’re too soft, the glaze will pool and the dome will collapse.
Step 5: Make the Golden Mirror Glaze
Bloom 1 tablespoon gelatin powder in 2 tablespoons cold water for 5 minutes. In a heatproof bowl, combine 1 cup melted white chocolate, 1/2 cup sweetened condensed milk, and 2 tablespoons water. Microwave in 15-second bursts, stirring between each, until smooth and warm. Stir in the bloomed gelatin and 1/2 teaspoon turmeric or gold coloring until fully incorporated and the color is even. Use an immersion blender for a perfectly smooth, air-bubble-free glaze — this is the secret to that mirror shine.
💡 Stella’s Pro Tip: The ideal temperature for pouring mirror glaze is 95°F — it should feel warm but not hot on your wrist, like a comfortable bath. If it’s too thick, warm it gently; if it’s too thin, let it cool for a few minutes. A digital thermometer is your best friend here.
Step 6: Glaze the Frozen Domes
Remove the frozen domes from the molds and place them on a wire rack set over a baking sheet. Pour the warm mirror glaze evenly over each dome, starting from the top and letting it flow down the sides. Work quickly — the glaze sets fast on the frozen domes. Once all domes are glazed, use a small offset spatula to clean up any drips around the base. Let the glazed domes sit at room temperature for 10-15 minutes to allow the glaze to set completely.
⚠️ Common Mistake to Avoid: Don’t pour the glaze too slowly or in multiple layers — the first layer will start to set before the second layer goes on, leaving you with a bumpy, uneven finish. One smooth, confident pour is all it takes.
Step 7: Add the Coconut Crunch Coating
In a small skillet over medium heat, combine 1 cup toasted shredded coconut, 1 tablespoon melted butter, 1 tablespoon brown sugar, and a pinch of salt. Stir constantly for 2-3 minutes until the coconut is golden and fragrant. Transfer to a plate to cool. Once the glaze has set on the domes, gently roll the bottom edges or sides of each dome in the coconut crunch mixture, pressing lightly so it adheres. This adds a beautiful textured contrast to the smooth glaze.
💡 Stella’s Pro Tip: Don’t skip the pinch of salt in the crunch coating — it balances the sweetness of the glaze and the filling, and makes the coconut flavor pop. I use flaky sea salt like Maldon for the best texture.
Step 8: Garnish and Serve
Transfer the finished dream bombs to a serving platter. Garnish with a few toasted coconut flakes, a small pineapple wedge, and a light dusting of edible gold dust if you’re feeling fancy. Serve immediately, or keep refrigerated for up to 24 hours. The mirror glaze stays shiny and beautiful even after refrigeration — one of the many reasons I love this technique.
| Step | Action | Duration | Key Visual Cue |
|---|---|---|---|
| 1 | Bloom gelatin for filling | 5-7 mins | Firm, jelly-like mass |
| 2 | Cook pineapple core | 6-8 mins + cooling | Jam-like, thick, translucent |
| 3 | Whip cream cheese mixture | 3-4 mins | Smooth, fluffy, no lumps |
| 4 | Whip cream & fold | 5-6 mins | Soft peaks, no streaks |
| 5 | Fill molds & freeze | 3 hrs min | Solid, firm to the touch |
| 6 | Prepare mirror glaze | 8-10 mins | Smooth, glossy, 95°F |
| 7 | Pour glaze over domes | 2-3 mins | Even, shiny coverage |
| 8 | Apply crunch coating | 3-4 mins | Golden, fragrant, adhered |
Serving & Presentation
These golden pineapple coconut dream bombs are showstoppers on any table. I love serving them on a simple white platter — the golden mirror glaze pops beautifully against a neutral background. For dinner parties in my NYC apartment, I often place each dome on a small round of parchment with a tiny pineapple wedge and a sprinkle of toasted coconut flakes. A light dusting of edible gold dust just before serving adds that wow factor that makes guests pull out their phones.
The contrast between the smooth, shiny glaze and the crunchy coconut coating is what makes these so visually striking. I think of them as little jewels — each one is unique, with the glaze catching the light differently. If you’re serving these at a party, arrange them on a mirrored tray or a slate board for maximum impact. And don’t forget to tell everyone about the hidden pineapple core inside — it’s always a delightful surprise.
| Pairing Type | Suggestions | Why It Works |
|---|---|---|
| Side Dish | Grilled pineapple slices, coconut rice pudding | Reinforces the tropical theme without competing |
| Sauce / Dip | Passion fruit coulis, caramel drizzle, mango puree | Adds acidity or caramel depth to balance sweetness |
| Beverage | Sparkling rosé, coconut rum cocktail, jasmine iced tea | Light, fruity, or floral notes complement without overwhelming |
| Garnish | Toasted coconut flakes, pineapple wedges, edible gold dust | Adds visual contrast and textural variety |
Make-Ahead, Storage & Reheating
Living in New York City means I’m always juggling a dozen things at once, so I’ve designed this recipe to be incredibly make-ahead friendly. You can prepare the domes through Step 4 (filling and freezing) up to a week in advance — just keep them tightly wrapped in the freezer. The mirror glaze can be made a day ahead and stored in the fridge; gently reheat it to 95°F before using. This makes party hosting so much less stressful.
| Method | Container | Duration | Reheating Tip |
|---|---|---|---|
| Refrigerator | Airtight container, single layer | Up to 3 days | Serve cold — no reheating needed |
| Freezer | Wrap each dome in plastic, then foil | Up to 2 months | Thaw in fridge overnight, glaze after thawing |
| Make-Ahead | Freeze unglazed domes in silicone mold | Up to 1 week before | Glaze day-of serving for freshest shine |
One thing I’ve learned from all my years testing: never store glazed domes in the refrigerator uncovered — the glaze can absorb moisture and lose its brilliant shine. Always use an airtight container. And if you’re freezing unglazed domes, make sure they’re fully frozen before wrapping, otherwise they’ll lose their shape. When you’re ready to serve, glaze them straight from the freezer for that perfect mirror finish.
Variations & Easy Swaps
| Variation | Key Change | Best For | Difficulty Impact |
|---|---|---|---|
| Mango-Passion Fruit Dream Bombs | Replace pineapple with mango, add passion fruit pulp to glaze | Summer entertaining, tropical brunch | Same — requires one extra puree step |
| Dairy-Free / Vegan | Use coconut cream, vegan cream cheese, and dairy-free white chocolate | Dairy-sensitive guests, plant-based diets | Medium — texture may be slightly less stable |
| Spiced Chai Coconut Bombs | Add 1 tsp chai spice to filling, use cardamom in glaze | Fall & winter holidays, tea lovers | Same — just adds a spice blend |
Mango-Passion Fruit Dream Bombs
This is my go-to variation when I find gorgeous Alphonso mangoes at the market. Swap the pineapple core for a mango-passion fruit compote: cook 1 1/2 cups diced mango with 2 tablespoons honey and the pulp of 2 passion fruits. The passion fruit seeds add a pleasant crunch and the acidity cuts through the richness of the coconut filling beautifully. For the glaze, replace the turmeric with a few drops of orange food coloring and stir in 2 tablespoons of passion fruit pulp for a tangy twist.
Dairy-Free / Vegan Dream Bombs
I developed this version for a friend who’s vegan, and it’s become a favorite in its own right. Use full-fat coconut cream (chilled overnight, then whipped) instead of heavy cream, and a good-quality vegan cream cheese (Miyoko’s is my favorite). For the glaze, look for a dairy-free white chocolate made with cocoa butter and rice milk. The texture is slightly less stable than the original, so I recommend adding an extra 1/2 teaspoon of agar-agar to the filling for structure. The coconut flavor is even more pronounced, which I absolutely love.
Spiced Chai Coconut Bombs
This variation came to me on a cold December morning when I was craving the chai I used to drink from a street vendor in Marrakech. Add 1 teaspoon of chai spice blend (cinnamon, cardamom, ginger, cloves, and black pepper) to the cream cheese mixture before whipping. For the pineapple core, cook the pineapple with a cinnamon stick and a star anise pod — the warm spices transform the tropical filling into something deeply cozy. Finish with a dusting of ground cardamom on top of the glaze instead of gold dust.
What is the best way to achieve a smooth mirror finish on these pineapple coconut dream bombs?
The key to a flawless mirror finish is threefold: temperature, technique, and patience. First, make sure your frozen domes are completely smooth — any bumps or cracks in the frozen filling will show through the glaze. Second, your glaze must be exactly 95°F; use a digital thermometer for accuracy. If it’s too warm, it will run off the dome and pool at the base; too cool, and it will thicken before it can self-level. Third, use an immersion blender to eliminate air bubbles from the glaze before pouring. Pour the glaze in one confident motion over the center of each dome, letting it cascade evenly down the sides. Don’t go back to touch it — the first pour is the one that sets the finish.
Can I use fresh pineapple instead of canned pineapple in this recipe?
Absolutely — I actually strongly recommend fresh pineapple for this recipe. Fresh pineapple has a bright, tangy flavor and a firm texture that holds up beautifully when cooked. Canned pineapple is often too soft and can be overly sweet or syrupy. When selecting fresh pineapple, look for one that feels heavy for its size, has a fragrant scent at the stem end, and gives slightly when you press the skin. Peel, core, and finely chop it — you need 1 1/2 cups. If fresh isn’t available, frozen pineapple chunks (thawed and drained) are a good second choice. Just avoid canned pineapple in heavy syrup, as it will make the filling too sweet.
How long do these golden pineapple coconut dream bombs need to chill before they set properly?
The filled molds need to freeze for a minimum of 3 hours — but overnight is truly best. The gelatin in the filling needs time to fully set, and the domes need to be solidly frozen so they hold their shape during the glazing process. If you try to unmold them too early, they can be soft and may collapse or crack. I recommend filling the molds in the evening, freezing them overnight, and glazing them the next day. Once glazed, the domes only need about 10-15 minutes at room temperature for the glaze to set before serving. If you’re in a rush, 3 hours in the freezer is the absolute minimum — just make sure your freezer is set to 0°F or lower.
What type of coconut works best for the filling to keep the texture creamy and not gritty?
For the creamiest texture, use finely shredded sweetened coconut — the kind that’s almost powdery in texture. This blends seamlessly into the cream cheese and whipped cream mixture without adding any unpleasant chewiness or grit. I recommend the Baker’s Angel Flake brand or any supermarket store brand labeled “finely shredded.” Avoid desiccated coconut, which has a much drier, coarser texture that can feel sandy in the filling. For the crunch coating on the outside, you can use regular shredded coconut (toasted) — the slightly larger pieces create a lovely textural contrast against the smooth glaze and creamy filling. Toast it yourself in a dry skillet for the freshest flavor.
Can I make these dream bombs without gelatin for a vegetarian version?
Yes, you can substitute agar-agar powder for the gelatin, but the texture will be slightly different. Agar-agar sets firmer and at a higher temperature than gelatin, so you’ll need to work quickly. Use 1 teaspoon of agar-agar powder in place of 1 tablespoon of gelatin for the filling, and 1/2 teaspoon for the glaze. Bloom the agar-agar in cold water for 5 minutes, then bring it to a boil (agar-agar needs to boil to activate) and simmer for 2 minutes before adding it to your mixture. The finished texture will be a bit more delicate and less creamy than the gelatin version, but it’s still delicious. Note that the glaze may not be quite as shiny with agar-agar.
Why did my mirror glaze crack or turn cloudy after setting?
Cracked or cloudy mirror glaze is usually a temperature issue. If the glaze is too cold when you pour it (below 90°F), it can thicken unevenly and develop a cloudy appearance. If the frozen domes are not cold enough — if they’ve started to thaw on the surface — the glaze can melt the dome slightly, creating a wrinkled or cracked finish. Always make sure your domes are straight from the freezer and your glaze is at exactly 95°F. Another cause of cloudiness is air bubbles — always use an immersion blender to smooth out the glaze, and let it rest for 2 minutes after blending so any remaining bubbles rise to the surface. Finally, condensation can cause cloudiness, so glaze your domes in a dry, cool room.
Can I use a different fruit instead of pineapple for the center filling?
Absolutely — this recipe is very adaptable. Mango, passion fruit, guava, or even a berry compote all work beautifully in place of pineapple. If you’re using a fruit with higher water content, like berries, cook it down a bit longer to concentrate the flavor and thicken the texture. Add 1/2 teaspoon more cornstarch if the fruit seems very juicy. I’ve also made a version with roasted stone fruit — peaches or nectarines — that was incredible. Just keep the total amount of fruit the same (1 1/2 cups) and adjust the sweetener to taste. The lime juice in the original recipe can be swapped for lemon or even orange juice depending on the fruit you choose.
How should I store leftover golden pineapple coconut dream bombs?
Store leftover glazed dream bombs in an airtight container in the refrigerator for up to 3 days. Place them in a single layer so the glaze doesn’t get scratched or smudged. The mirror glaze will remain shiny and beautiful for at least 24 hours — after that, it may start to dull slightly due to moisture in the fridge, but the flavor will still be excellent. If you need to store them longer, freeze the unglazed domes for up to 2 months (wrap each one individually in plastic wrap, then foil). Glaze them straight from the freezer when you’re ready to serve. I do not recommend freezing glazed domes — the glaze can crack and lose its shine when thawed.
Can I use a different type of chocolate for the mirror glaze?
You can, but the results will vary. White chocolate gives the clearest, most vibrant color and the sweetest flavor — it’s the classic choice for mirror glazes because it allows the color (whether turmeric, food coloring, or cocoa butter) to show through brilliantly. Milk chocolate will give you a warm, caramel-like color with a richer flavor that pairs well with coconut. Dark chocolate can be used for a more sophisticated, less sweet version — use 70% dark chocolate and reduce the sweetened condensed milk to 1/4 cup to balance the bitterness. Keep in mind that darker chocolates are thicker when melted, so you may need to add an extra tablespoon of water to achieve the right pouring consistency.
What silicone mold size is best for these dessert bombs?
I recommend using half-sphere silicone molds that are 3 inches in diameter — this gives you a generous individual serving that’s about the size of a large truffle or a small cupcake. Each dome will yield about 4-5 ounces of filling, which is the perfect portion for this rich dessert. If you use smaller molds (2 inches), reduce the freezing time to 2 hours and decrease the pineapple core filling to 1/2 teaspoon per dome. The recipe as written yields 8 domes using 3-inch molds. Make sure your molds are high-quality silicone — cheap ones can be flimsy and difficult to unmold without breaking the domes. I use Silikomart brand molds, which are widely available online.
Share Your Version!
There’s something so special about watching a recipe come to life in someone else’s kitchen. I would genuinely love to see your take on these golden pineapple coconut dream bombs — whether you followed the recipe exactly or put your own spin on them. Did you try the mango variation? Add a little extra turmeric for a deeper gold? Tell me all about it in the comments below — I read every single one, and I often pop in with answers to questions.
If you’re on Pinterest or Instagram, snap a photo of your beautiful glazed domes and tag me @leosfoods — I feature my favorites in my stories! And if you have a question that I haven’t covered in this post, just ask below. I’ve been making these for years and I love sharing everything I’ve learned. From my NYC kitchen to yours — I hope this recipe brings as much warmth to your table as it does to mine. — Stella 🧡
Which variation are you most excited to try — the mango-passion fruit, the dairy-free, or the spiced chai? Tell me in the comments! 🍍🥥✨
Love This Recipe? Save It to Pinterest!
If you enjoyed this Golden Pineapple Coconut Dream Bombs recipe, don’t let it get lost in your browser tabs! 😄 Pin it now so you can find it again anytime — and explore hundreds more tried-and-tested recipes waiting for you on my Pinterest boards.
👉 Follow Stella on Pinterest @stellarecipeblog
📌 Pin this recipe · 🔁 Re-pin your favorites · 💬 Tag me when you make it — I love seeing your creations!
Golden Pineapple Coconut Dream Bombs with Mirror Finish
Golden Pineapple Coconut Dream Bombs with Mirror Finish
- Yield: 8 1x
Ingredients
- For the Coconut Cream Filling:
- 1 1/2 cups heavy cream
- 8 oz cream cheese, softened
- 1/2 cup powdered sugar
- 1 tsp vanilla extract
- 1 cup shredded sweetened coconut
- 1 tbsp gelatin powder
- 3 tbsp warm water
- For the Pineapple Core:
- 1 1/2 cups pineapple, finely chopped
- 2 tbsp honey
- 1 tbsp lime juice
- 1 tsp cornstarch
- 1 tbsp water
- For the Golden Mirror Glaze:
- 1 cup white chocolate, melted
- 1/2 cup sweetened condensed milk
- 2 tbsp water
- 1 tbsp gelatin powder
- 1/2 tsp turmeric or gold coloring
- For the Coconut Crunch Coating:
- 1 cup toasted shredded coconut
- 1 tbsp melted butter
- 1 tbsp brown sugar
- Pinch of salt
- For Garnish (optional):
- Toasted coconut flakes
- Pineapple wedges
- Edible gold dust
Instructions
- Bloom gelatin in warm water and let dissolve completely.
- Cook pineapple, honey, lime juice, cornstarch, and water until thickened; cool completely.
- Whip cream cheese, powdered sugar, and vanilla until smooth.
- In a separate bowl, whip heavy cream to soft peaks and fold into cream cheese mixture.
- Stir in shredded coconut and dissolved gelatin.
- Fill silicone molds halfway with coconut cream mixture.
- Add a small spoon of pineapple core into the center.
- Cover with more coconut cream mixture and freeze until firm.
- Mix melted white chocolate, condensed milk, water, gelatin, and gold coloring until smooth for glaze.
- Unmold frozen domes and pour mirror glaze evenly over them.
- Mix toasted coconut, butter, brown sugar, and salt; press lightly onto base or sides for crunch.
- Let set for 10–15 minutes before serving.
- Garnish with toasted coconut, pineapple wedges, and edible gold dust.
Nutrition
- Calories: 430
- Sugar: 33 g
- Fat: 28 g
- Carbohydrates: 39 g
- Protein: 5 g
Tried This Recipe? Leave a Comment!
Did you make this recipe? I’d love to hear how it turned out! Please leave a comment and a rating below. Your feedback helps other home cooks and supports cheerychop.com!
For more delicious inspiration, follow me on Pinterest!