Stunning Emerald Pistachio White Chocolate Geodes Recipe
“`html
Table of Contents
Emerald Pistachio White Chocolate Geodes – A Stunning Crystal Geode Dessert
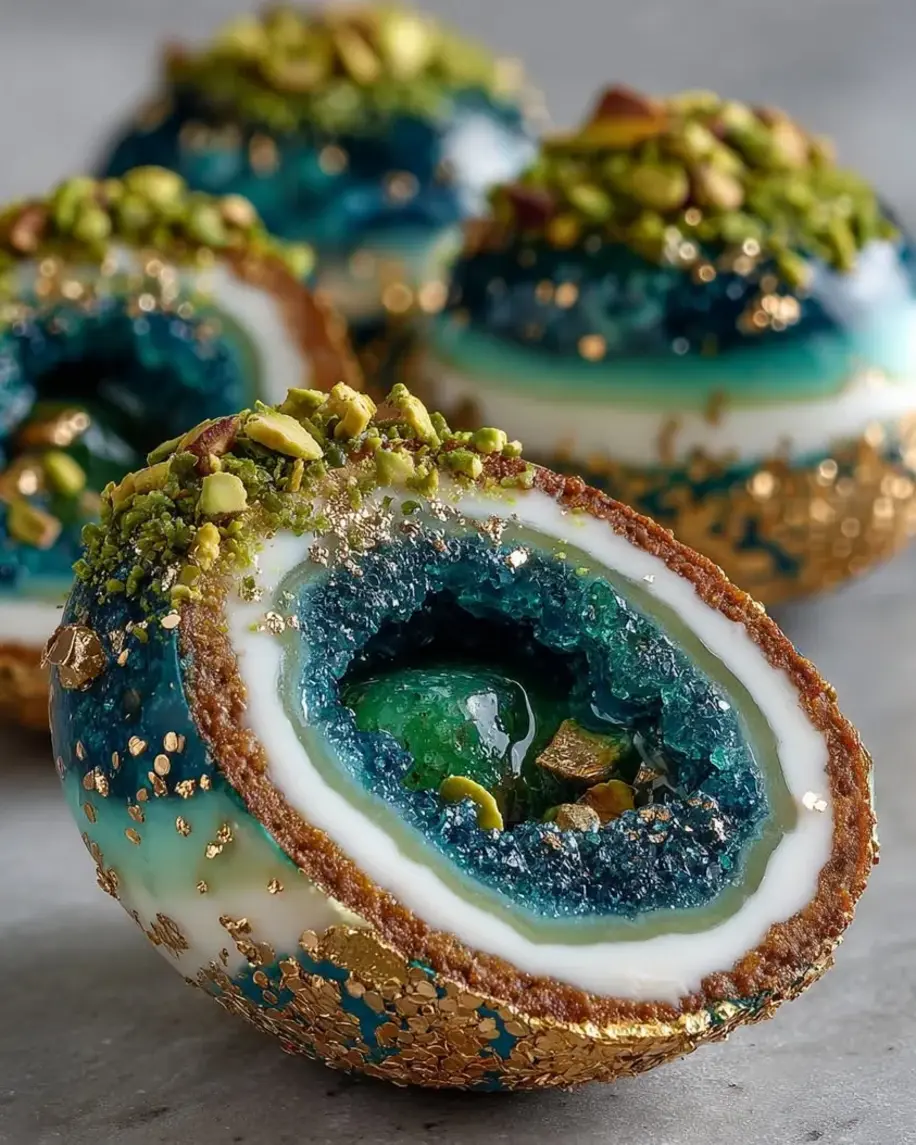
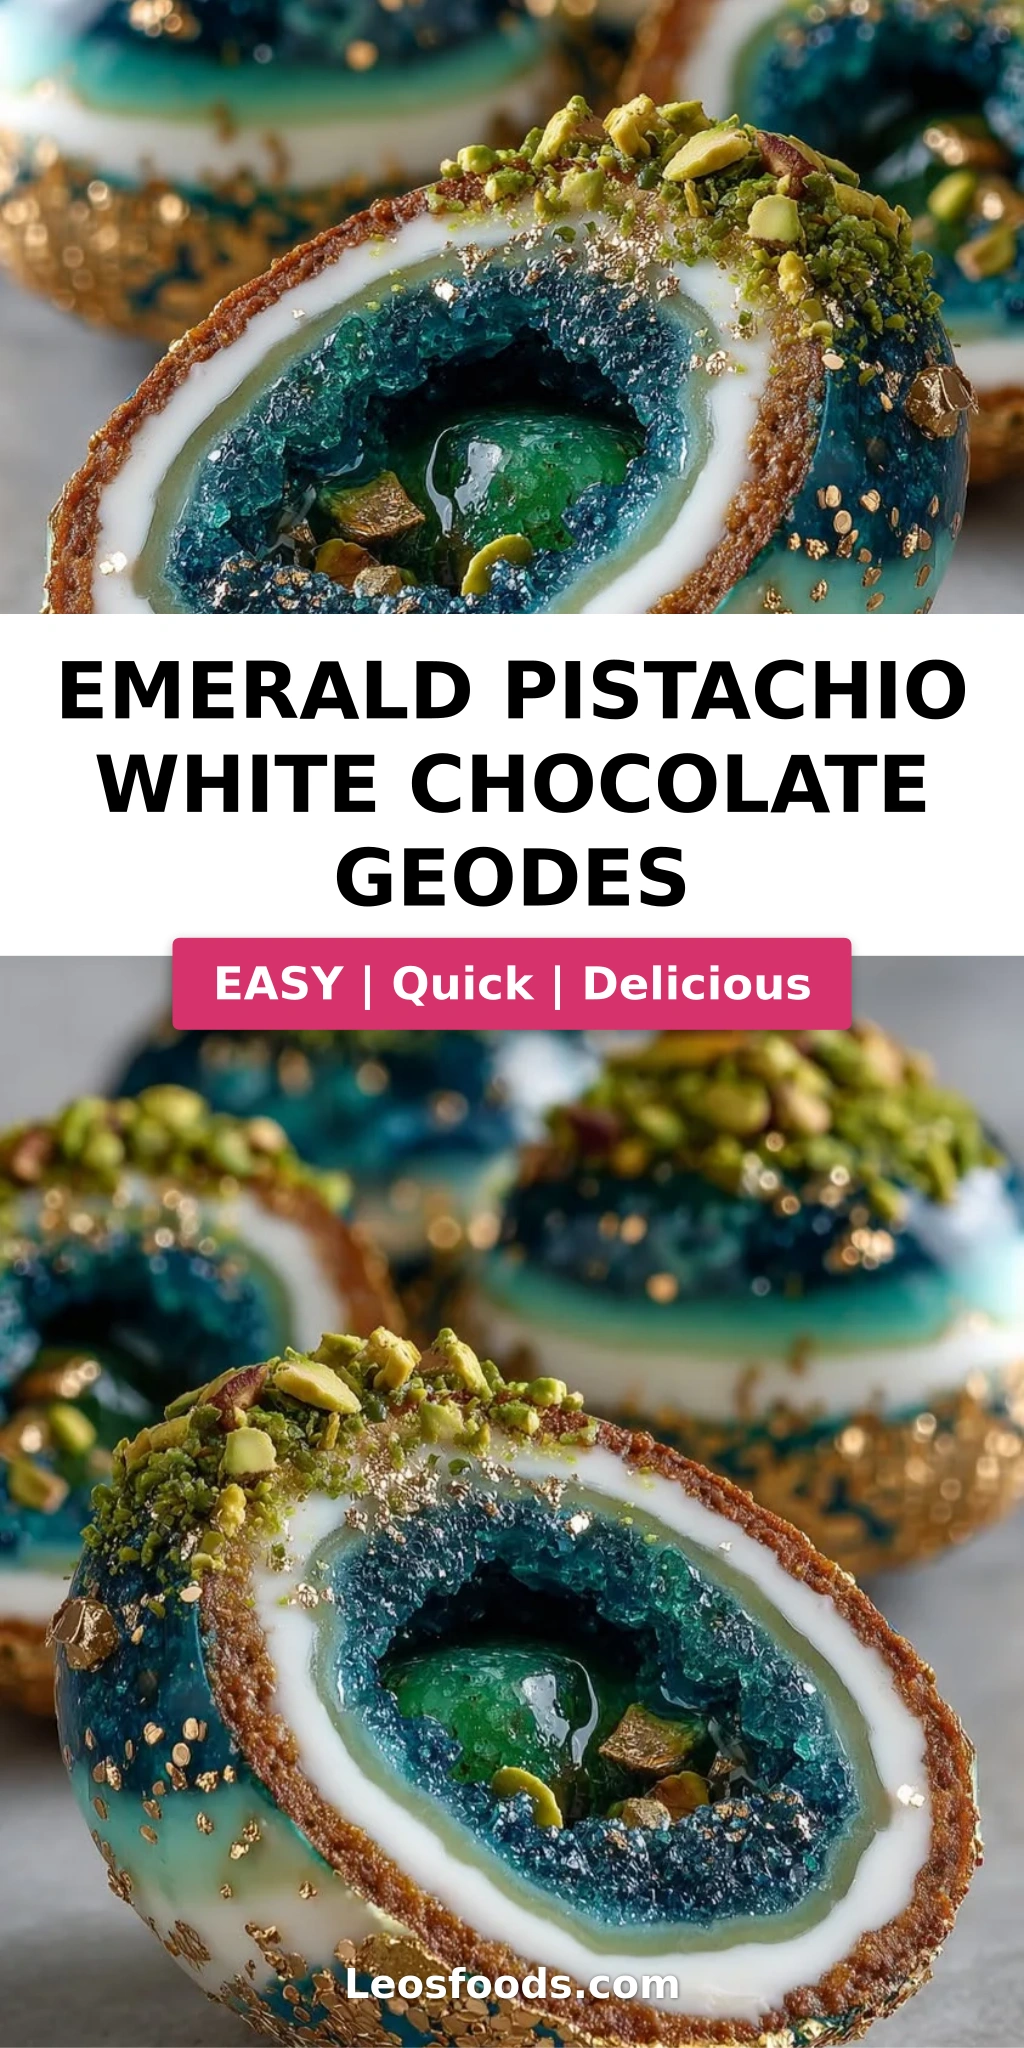
I still remember the first time I saw a geode dessert — it was at a tiny patisserie near the Marché des Enfants Rouges in Paris during my culinary school days. I stood there, nose pressed to the glass, utterly mesmerized by the way those sugar crystals caught the light. Years later, here in my NYC kitchen, I knew I had to create my own version. These Emerald Pistachio White Chocolate Geodes are the result of that obsession — a dazzling geode cake meets crystal geode dessert that looks like it was plucked straight from a Moroccan mine. The pistachio white chocolate shell, the creamy mascarpone center, and that glossy emerald glaze with real rock candy crystals — it’s a showstopper that tastes every bit as incredible as it looks. Trust me, when you bring this to the table, people will actually gasp.
Let me paint you a picture: crack open that pistachio white chocolate shell and you’re met with the most luscious, cloud-like mascarpone cream center. The pistachio white chocolate recipe I developed has just the right balance of nutty richness and sweet creaminess, thanks to a generous hit of pistachio paste that I source from a little Italian market in Greenwich Village. The emerald glaze pools like liquid jade, and those crushed green rock candy crystals catch the light like actual gemstones. Every bite is a contrast of smooth, crunchy, creamy, and crisp — a texture journey that takes you from the Atlas Mountains to the streets of Paris to a NYC dinner party all in one forkful.
Now, I’ll be real with you: this is an advanced recipe. It involves gelatin work, mold work, and a freezer. But I’ve taught this technique to home cooks in my Brooklyn workshops, and I promise you can absolutely nail it. My version skips the complicated tempering steps that some pastry chefs insist on — instead, I use a clever gelatin-stabilized glaze that sets beautifully every time. 💡 Stella’s Pro Tip: The key to that mirror-like emerald shine is letting your glaze cool to exactly 90°F before pouring — too hot and it’ll be runny, too cool and it’ll lump. I’ll walk you through every single step. Let’s make something magical together.
Why This Emerald Pistachio White Chocolate Geodes Recipe Is the Best
The Flavor Secret: Most geode desserts rely on artificial flavors and cheap candy melts. Not mine. I start with real pistachio paste — the kind made from Sicilian pistachios with that deep, almost savory green flavor — and pair it with premium white chocolate that has real cocoa butter. That combination creates a shell that tastes like a high-end French confection, not a sugary gimmick. My training at Le Cordon Bleu taught me that the best desserts start with impeccable ingredients, and this edible crystal recipe is no exception.
Perfected Texture: The pistachio shell needs to be firm enough to hold its shape but tender enough to crack with a spoon. After about twelve test batches (my taste testers were very patient), I landed on a precise ratio of white chocolate to heavy cream to gelatin that gives you that perfect snap-then-melt experience. The mascarpone center is stabilized with whipped cream and vanilla bean paste for a texture that’s light as air but sturdy enough to hold the dome shape. Every layer is engineered for both structure and pleasure.
Foolproof & Fast: I know the word “geode” sounds intimidating, but I’ve broken this down into manageable steps that any confident home cook can handle. The glaze is my greatest pride — it uses sweetened condensed milk and gelatin for a foolproof shine that doesn’t require a candy thermometer. And because the geodes are frozen before glazing, you get a flawless, drip-free finish every single time. No pastry degree required.
Emerald Pistachio White Chocolate Geodes Ingredients
I get my pistachio paste from a small import shop on Arthur Avenue in the Bronx — it’s worth seeking out the real stuff. For the white chocolate, I use Valrhona Ivoire 35% because it melts like silk and has a clean, creamy flavor that lets the pistachio shine. And the green rock candy crystals? I find them at a spice shop in Chelsea Market, but you can also crush your own using a heavy skillet and a zip-top bag.
Ingredients List
For the Pistachio White Chocolate Geodes:
- 1 cup white chocolate, finely chopped
- 3/4 cup heavy cream
- 1/2 cup pistachio paste
- 1/4 cup granulated sugar
- 1 tsp vanilla extract
- 2 tsp gelatin powder
- 2 tbsp cold water
- Pinch of salt
For the Cream Center:
- 1 cup mascarpone cheese
- 1/2 cup heavy whipping cream
- 3 tbsp powdered sugar
- 1 tsp vanilla bean paste
For the Emerald Crystal Glaze:
- 1 cup white chocolate, finely chopped
- 1/2 cup sweetened condensed milk
- 1/4 cup water
- 1 tbsp gelatin powder
- 3 tbsp cold water
- 1/2 tsp edible pearl luster dust
- Green food coloring, as needed
- 1 tbsp crushed green rock candy crystals
For Garnish (optional):
- 2 tbsp finely chopped pistachios
- Edible gold flakes
- White chocolate shards
Ingredient Spotlight
Pistachio Paste: This is the heart of your geode. Look for a paste made with 100% pistachios — no added oils or sugars. It should be thick, fragrant, and a deep forest green. I love the brand “Reeves” which I order online, but any Sicilian pistachio paste from a specialty store works beautifully. If you absolutely can’t find it, you can make your own by blitzing shelled pistachios with a bit of neutral oil until smooth, but the texture won’t be quite as refined.
White Chocolate: Please, please use a good-quality white chocolate that contains real cocoa butter. The cheap baking chips often contain palm oil and other fats that seize when melted and never achieve that silky mouthfeel. Valrhona Ivoire or Callebaut are my go-tos. You’ll find them at Whole Foods or specialty baking shops. The flavor difference is night and day in this edible crystal recipe.
Mascarpone Cheese: This Italian cream cheese has a higher fat content than American cream cheese, which gives the center that impossibly lush texture. I buy mine at Eataly in the Flatiron district, but any supermarket carries it now. Make sure it’s at room temperature before whipping, or your cream center will be lumpy. If you can’t find mascarpone, you can substitute with equal parts cream cheese blended with a splash of heavy cream.
Green Rock Candy Crystals: These are the magic that makes your geode look like a real mineral formation. You can buy them at specialty baking shops or online. To crush them, place them in a zip-top bag and bash gently with a rolling pin — you want a mix of fine dust and small chunks for the most realistic crystal geode dessert effect. If you can’t find green rock candy, you can use crushed green Jolly Ranchers in a pinch, though they melt faster.
| Original Ingredient | Best Substitution | Flavor / Texture Impact |
|---|---|---|
| White chocolate | High-quality white chocolate chips (e.g., Ghirardelli) | Slightly less smooth melt; still good flavor |
| Pistachio paste | Homemade pistachio paste (blended pistachios + oil) | Coarser texture; less intense color |
| Mascarpone cheese | Cream cheese + 2 tbsp heavy cream, softened | Tangier flavor; slightly less airy |
| Gelatin powder | Agar agar (use 1 tsp, follow package directions) | Firmer set; vegetarian-friendly |
| Green rock candy | Crushed green Jolly Ranchers | More translucent; melts faster on contact with moisture |
How to Make Emerald Pistachio White Chocolate Geodes — Step-by-Step
Don’t be nervous — I’ve taught this recipe to home cooks who had never worked with gelatin before, and they crushed it. Just read through each step before you start, and you’ll be fine. The trick is patience: let each layer set properly before moving to the next, and you’ll be rewarded with the most stunning geode cake your friends have ever seen.
Step 1: Bloom the Gelatin
Sprinkle the 2 teaspoons of gelatin powder over the 2 tablespoons of cold water in a small bowl. Let it sit undisturbed for 5 minutes — it will absorb the water and become a firm, jiggly mass. This is called “blooming,” and it’s essential for helping the gelatin dissolve smoothly into warm liquids without forming lumps.
💡 Stella’s Pro Tip: Always use cold water for blooming, never warm. Hot water will cause the gelatin to clump and won’t give you that silky-smooth texture you need for the geode shell.
Step 2: Make the Pistachio Base
In a medium saucepan, combine the heavy cream, pistachio paste, granulated sugar, vanilla extract, and a pinch of salt. Heat over medium-low, whisking frequently, until the mixture is smooth and warm — about 3 to 4 minutes. You’re looking for steam rising from the surface, not a boil. Remove from heat and stir in the bloomed gelatin until it’s completely dissolved and the mixture is perfectly smooth.
Step 3: Add the White Chocolate
Add the finely chopped white chocolate to the warm pistachio cream and whisk continuously until the chocolate is fully melted and the mixture is silky and uniform in color. This should take about 2 minutes. The heat from the cream will gently melt the chocolate without overheating it. Set aside to cool slightly while you prepare the molds.
⚠️ Common Mistake to Avoid: If the mixture is too hot when you add the white chocolate, it can separate and become grainy. Always remove the cream from heat before adding the chocolate — gentle melting is the key to a glossy, stable shell.
Step 4: Mold the Shells
Pour a thin layer of the pistachio white chocolate mixture into geode-shaped silicone molds, using a small offset spatula to coat the sides evenly. You want a shell that’s about 1/4-inch thick all around. Place the molds on a baking sheet and chill in the refrigerator for 15 minutes, or until the shells are partially set but still slightly tacky to the touch.
Step 5: Make the Cream Center
While the shells are setting, make the cream center. In a large bowl, combine the mascarpone cheese, heavy whipping cream, powdered sugar, and vanilla bean paste. Using a hand mixer or a stand mixer fitted with the whisk attachment, whip on medium speed until the mixture is light, fluffy, and holds soft peaks — about 3 to 4 minutes. Be careful not to overwhip, or the mascarpone can separate.
💡 Stella’s Pro Tip: Make sure your mascarpone is at room temperature before whipping. Cold mascarpone won’t incorporate evenly and will leave you with a lumpy, gritty texture. Let it sit out for about 20 minutes before you start.
Step 6: Fill and Top
Spoon or pipe the mascarpone cream into each partially set shell, filling them almost to the top but leaving a small border of about 1/4 inch around the edges. Then pour the remaining pistachio white chocolate mixture over the cream center, spreading it evenly to seal the geodes completely. Place the filled molds in the freezer for at least 4 hours, or overnight, until completely firm.
⚠️ Common Mistake to Avoid: Don’t skip the freezing step — the geodes need to be fully frozen to hold their shape when you unmold and glaze them. If they’re even slightly soft, they’ll collapse under the weight of the glaze.
Step 7: Make the Emerald Glaze
About 10 minutes before you’re ready to glaze, bloom the 1 tablespoon of gelatin in 3 tablespoons of cold water. In a small saucepan, heat the sweetened condensed milk and 1/4 cup water until steaming — again, no boiling. Remove from heat and stir in the bloomed gelatin until dissolved. Pour this warm mixture over the chopped white chocolate and whisk until smooth and fully melted. Add the edible pearl luster dust and enough green food coloring to achieve a deep, glossy emerald shade. Let the glaze cool until it’s slightly thickened but still pourable — about 90°F on an instant-read thermometer.
Step 8: Unmold and Glaze
Remove the frozen geodes from the freezer and carefully pop them out of the silicone molds. Place each geode on a wire rack set over a baking sheet to catch the drips. Pour the emerald glaze evenly over each geode, starting at the top and letting it flow down the sides. Work quickly — the cold surface of the frozen geode will help the glaze set rapidly.
💡 Stella’s Pro Tip: For the most dramatic crystal geode dessert effect, immediately sprinkle the crushed green rock candy crystals onto the wet glaze in clusters, as if crystals are naturally forming on the surface. Don’t cover the entire geode — leave some areas smooth and glossy for contrast.
Step 9: Set and Garnish
Allow the glazed geodes to set at room temperature for about 10 minutes, until the glaze is firm to the touch. Carefully transfer each geode to a serving plate using a thin metal spatula. Finish with a sprinkle of finely chopped pistachios, a few edible gold flakes, and some white chocolate shards arranged around the base to look like broken crystal pieces.
⚠️ Common Mistake to Avoid: Don’t refrigerate the geodes immediately after glazing — the condensation can make the glaze weep and lose its shine. Let them set at room temperature first, then refrigerate only after the glaze is fully firm.
| Step | Action | Duration | Key Visual Cue |
|---|---|---|---|
| 1 | Bloom gelatin | 5 mins | Firm, jiggly mass |
| 2 | Make pistachio base | 4 mins | Steaming, smooth, no lumps |
| 3 | Add white chocolate | 2 mins | Silky, uniform pale green |
| 4 | Mold shells | 15 mins chill | Partially set, slightly tacky |
| 5 | Make cream center | 4 mins | Soft peaks, light and fluffy |
| 6 | Fill and top | 5 mins | Sealed, smooth top layer |
| 7 | Freeze | 4+ hours | Rock-hard, unmolds cleanly |
| 8 | Make glaze | 10 mins | Glossy, emerald, 90°F |
| 9 | Unmold and glaze | 5 mins | Even coverage, crystal clusters |
| 10 | Set and garnish | 10 mins | Glaze firm, garnishes adhered |
Serving & Presentation
These Emerald Pistachio White Chocolate Geodes are designed to be the centerpiece of your dessert table. I love serving them on a dark slate board or a mirrored tray — the contrast makes the emerald glaze and gold flakes pop like crazy. Place each geode with a small, sturdy spoon so guests can crack the shell themselves and reveal the creamy center inside. It’s a moment of pure theater at the table.
For a Moroccan-inspired touch, I sometimes arrange a few dried figs and Medjool dates around the plate, along with a dusting of crushed pistachios. The sweetness of the fruit plays beautifully against the rich pistachio and mascarpone. And if you really want to channel my NYC dinner party energy, serve these with a side of lightly whipped cream infused with orange blossom water — just a drop or two, the way my mother used to do for special occasions back home in Morocco.
These geodes are best served chilled, straight from the refrigerator. The shell should be firm but not hard, and the cream center should be cold and luscious. If you’re serving them at a party, I recommend plating them no more than 30 minutes ahead and keeping them refrigerated until the last possible moment. The wow factor is absolutely worth the precision.
| Pairing Type | Suggestions | Why It Works |
|---|---|---|
| Side Dish | Fresh berries, dried figs, candied orange peel | Bright acidity cuts the richness |
| Sauce / Dip | Orange blossom whipped cream, raspberry coulis | Floral or tart contrast enhances the pistachio |
| Beverage | Espresso, mint tea, late-harvest Riesling | Coffee and tea balance sweetness; wine echoes honey notes |
| Garnish | Edible gold flakes, crushed pistachios, white chocolate shards | Adds luxury texture and visual drama |
Make-Ahead, Storage & Reheating
One of the best things about this geode cake is how well it works for entertaining. I often make the geodes through Step 6 (fully frozen in the molds) up to a week ahead of time. Then, on the day of my party, I simply make the glaze, unmold, and finish. It takes the stress out of hosting and lets me enjoy my own dinner party — which, let’s be honest, is something I’ve learned to prioritize after years of trying to do it all at once.
| Method | Container | Duration | Reheating Tip |
|---|---|---|---|
| Refrigerator | Airtight container, layered with parchment | Up to 4 days | Serve chilled directly from fridge |
| Freezer | Wrapped individually in plastic wrap, then foil | Up to 1 month | Thaw overnight in fridge before glazing |
| Make-Ahead | Freeze unglazed geodes in silicone molds | Up to 1 week | Glaze directly from frozen — no thawing needed |
If you’re storing glazed geodes in the refrigerator, place them on a tray and cover loosely with plastic wrap — don’t seal them tightly, or condensation will form and dull the glaze. To reheat? You don’t! These are served cold. But if you want to refresh the shine on a glaze that’s been sitting for a day, you can gently warm the surface with a kitchen torch held about 6 inches away, rotating constantly until the glaze just begins to glisten again.
Variations & Easy Swaps
| Variation | Key Change | Best For | Difficulty Impact |
|---|---|---|---|
| Rose & Raspberry Geode | Replace pistachio paste with raspberry puree; add rose water | Valentine’s Day, romantic dinners | Same difficulty |
| Dairy-Free Version | Use coconut cream + dairy-free white chocolate + vegan cream cheese | Dairy-free guests, vegan-friendly | Harder — texture adjustments needed |
| Saffron & Honey Geode | Add saffron threads to cream; use honey instead of sugar | Moroccan-inspired twist, special occasions | Same difficulty |
Rose & Raspberry Geode
This variation is pure romance. Swap the pistachio paste for 1/2 cup of seedless raspberry puree (cook down fresh raspberries with a tablespoon of sugar and strain them) and add 1 teaspoon of rose water to the cream center. Use pink food coloring instead of green, and top with freeze-dried raspberry powder for a velvet-matte finish. It’s the version I made for a friend’s engagement party in Brooklyn, and people literally cried.
Dairy-Free Version
I tested this for a reader who has a dairy allergy, and I was honestly surprised by how well it worked. Use full-fat coconut cream in place of heavy cream, a high-quality dairy-free white chocolate (the brand “Milkless” is excellent), and a vegan cream cheese for the center. The texture is a bit lighter and less luscious, but the flavor is still gorgeous. Add 1 extra teaspoon of gelatin to compensate for the lower fat content, which helps the shell set firmly.
Saffron & Honey Geode
This one takes me straight back to my mother’s kitchen in Morocco. Steep a generous pinch of saffron threads in 2 tablespoons of warm water for 10 minutes, then add that liquid to the pistachio base in place of the vanilla extract. Replace the granulated sugar in the cream center with 3 tablespoons of honey — use a mild one like orange blossom or acacia. The saffron gives the glaze a warm, amber undertone that pairs beautifully with the green. It’s like a sunset in dessert form.
Frequently Asked Questions
Can I use a different type of chocolate instead of white chocolate for the geode crust?
Yes, absolutely — though the results will be different in both flavor and appearance. Dark chocolate (at least 60% cacao) will give you a richer, less sweet shell with a beautiful deep brown color. Milk chocolate will be creamier and sweeter, closer to a caramelized tone. However, if you swap the chocolate, I recommend adjusting the sugar in the recipe: reduce it by about 2 tablespoons for dark chocolate and by 1 tablespoon for milk chocolate. Also, note that the emerald green glaze will look dramatically different over a dark chocolate base — it will read as a deep forest green rather than a bright jewel tone. If you’re going for that bright, gem-like crystal geode dessert look, stick with white chocolate. But if you’re open to a moodier, more dramatic presentation, dark chocolate is stunning.
How do I create the crystallized pistachio effect on the outside of the geode?
The crystallized effect comes from two things: the glossy emerald glaze and the crushed green rock candy crystals sprinkled onto the wet glaze. For the most realistic geode cake look, don’t just scatter the crystals randomly — group them in clusters along one side of each geode, as if they’re naturally forming in a vein. I like to press a few larger pieces gently into the glaze so they stick out at different angles, then dust the surrounding area with the finer powder. If you want even more texture, you can also mix some of the crushed crystals into the glaze before pouring — they’ll sink and create an internal sparkle effect. One thing I learned from my pastry chef days in Paris: less is more. Natural geodes have empty spaces, so leave some areas of smooth glaze visible.
What is the best way to crack the geode shell so it looks natural when served?
This is one of my favorite parts of serving these Emerald Pistachio White Chocolate Geodes! The shell is designed to be cracked open at the table with a small, sturdy spoon. Give each guest a spoon and let them tap firmly near the top edge — the shell should break cleanly into a few large shards, revealing the creamy center inside. If you want to pre-crack them for a more dramatic presentation, you can gently tap each geode with the back of a knife in one or two places before serving, then arrange the fallen shards artfully around the base. Just be careful not to crack them too much, or the structure will collapse. For the most natural look, I recommend cracking them in the kitchen right before plating — that way you control exactly where the breaks happen and can arrange the pieces beautifully.
How far in advance can I make Emerald Pistachio White Chocolate Geodes for a party?
You can absolutely make these ahead — in fact, I recommend it! The unfilled, unglazed shells can be frozen in their molds for up to 1 week. The fully assembled geodes (through Step 6, frozen solid) can also be stored for up to 1 week in the freezer, tightly wrapped in plastic. The glaze should be made fresh on the day you plan to serve — it’s quick, only about 10 minutes. So my recommended timeline for a party is: make and freeze the geodes up to a week ahead, then on party day, make the glaze, unmold, glaze, and garnish. They need about 10 minutes to set at room temperature after glazing, then they’re ready. This is honestly the most stress-free way to serve a showstopping geode cake at a dinner party — and it means you get to actually enjoy your own party.
Can I make this recipe without gelatin?
Yes, you can substitute the gelatin with agar agar powder, which is a plant-based alternative derived from seaweed. Use 1 teaspoon of agar agar powder for every 2 teaspoons of gelatin called for in the recipe. However, the behavior is different: agar agar sets at room temperature and has a firmer, more brittle texture than gelatin. For the geode shell, this means the crust will be a bit snappier, which actually works quite well. For the glaze, agar agar will give a firmer set that holds its shape beautifully but might be slightly less glossy. The most important difference is that agar agar must be boiled for about 2 minutes to activate — you can’t just bloom it in cold water like gelatin. Follow the package directions carefully, and I recommend doing a test batch with just the glaze first so you can see how it behaves before committing to the full recipe.
What if I don’t have geode-shaped silicone molds?
No worries — you can still make this recipe using any small, dome-shaped silicone mold. Look for hemisphere molds (half-sphere) at baking supply stores or online. A standard 2.5-inch hemisphere mold will give you a beautiful dome shape that looks like a geode when glazed and cracked. You can also use small bundtlette pans or even well-greased glass bowls in a pinch — just make sure you can unmold them cleanly. If using glass, line the bowls with plastic wrap so the frozen geodes release easily. The shape doesn’t have to be perfect; in fact, irregular shapes look even more like natural crystal geode dessert formations. I’ve made these in mini loaf pans before, and they turned out looking like geode chunks — very cool and rustic.
How do I store leftover Emerald Pistachio White Chocolate Geodes?
Leftover geodes should be stored in an airtight container in the refrigerator for up to 4 days. The glaze will stay glossy as long as it’s not exposed to moisture — so avoid covering them tightly with plastic wrap that could trap condensation. I like to place them on a parchment-lined tray and cover them loosely with a clean kitchen towel, then put the tray in the fridge. If the glaze does lose its shine after a day or two, you can revive it with a very gentle pass from a kitchen torch (6 inches away, rotating constantly) or by brushing on a thin layer of warmed neutral glaze (you can save a small portion of the glaze in the fridge and reheat it gently). The flavor actually deepens over a day or two as the pistachio and mascarpone meld together.
Can I use a different food coloring for the glaze?
Absolutely — the emerald green is iconic for this edible crystal recipe, but you can absolutely customize the color. For a sapphire geode, use royal blue food coloring and blue rock candy crystals. For an amethyst geode, use purple coloring and crushed purple candy. For a ruby geode, use deep red and red crystals. I also love making a rainbow set for parties — each geode a different color. The technique is exactly the same; just swap the food coloring and the rock candy color. One thing to keep in mind: the pearl luster dust will subtly shift any color you use, giving it a luminous, gem-like quality. If you want a matte finish instead, skip the luster dust. And if you’re looking for natural coloring, you can use matcha powder for green or beet powder for pink — but the colors will be more muted and earthy.
Why did my glaze turn out cloudy instead of glossy?
Cloudy glaze is usually caused by one of three things: overheating the white chocolate, adding the food coloring too late, or pouring the glaze too cold. When white chocolate gets too hot (above 110°F), the cocoa butter can separate and cause a dull, streaky finish. Always remove the cream mixture from heat before adding the white chocolate, and stir gently. Second, add your food coloring while the glaze is still warm and fluid — if you wait until it’s starting to set, the color won’t incorporate evenly and can look streaky. Third, the glaze should be poured at around 90°F — if it’s too cool, it will thicken and lose its self-leveling ability, resulting in a bumpy, cloudy surface. An instant-read thermometer is your best friend here. Also, make sure you’re using a high-quality white chocolate with real cocoa butter — cheap white chips contain oils that won’t give you that mirror finish.
Can I use store-bought pistachio cream instead of pistachio paste?
You can, but there’s an important difference. Pistachio cream (like Nutella but with pistachio) usually contains sugar, oil, and sometimes milk solids, which will change the texture and sweetness of your geode shell. If you use pistachio cream, reduce the granulated sugar in the recipe by 2 tablespoons and expect a slightly softer, less stable shell. The flavor will still be delicious, but it won’t have that intense, pure pistachio taste that pistachio paste gives you. If you have a choice, seek out real pistachio paste — it’s thicker, darker green, and has no added sugar. I find it at specialty Italian markets or online. If you’re in NYC, head to Eataly or Buon Italia in Chelsea Market. That said, in a pinch, pistachio cream will work — just know that your pistachio white chocolate recipe will be a bit sweeter and less structurally firm.
Share Your Version!
I absolutely love seeing your creations — it’s the best part of running this blog. If you make these Emerald Pistachio White Chocolate Geodes, snap a photo before you crack them open and tag me on Instagram or Pinterest. Leave a star rating and comment below to let me know how they turned out and which variation you tried. Did you add saffron like my mother would have? Did you go for the dairy-free version for a friend with allergies? I want to hear it all. Your questions and feedback help me create better recipes for this community, so don’t be shy!
And here’s a challenge for you: try making two different colored geodes for your next party — emerald green and amethyst purple, for example — and arrange them on one platter. The contrast is absolutely stunning, and your guests will think you’re a professional pastry chef. From my NYC kitchen to yours — I hope this recipe brings as much warmth to your table as it does to mine. — Stella 🧡
🎉 Did you make this recipe?
I’d love to hear from you! Drop a star rating below, leave a comment with your experience, and tag @leosfoods on social media when you share your beautiful Emerald Pistachio White Chocolate Geodes. Your feedback helps me create more recipes you’ll love!
Love This Recipe? Save It to Pinterest!
If you enjoyed this Emerald Pistachio White Chocolate Geodes recipe, don’t let it get lost in your browser tabs! 😄 Pin it now so you can find it again anytime — and explore hundreds more tried-and-tested recipes waiting for you on my Pinterest boards.
👉 Follow Stella on Pinterest @stellarecipeblog
📌 Pin this recipe · 🔁 Re-pin your favorites · 💬 Tag me when you make it — I love seeing your creations!
“`
Print
Emerald Pistachio White Chocolate Geodes
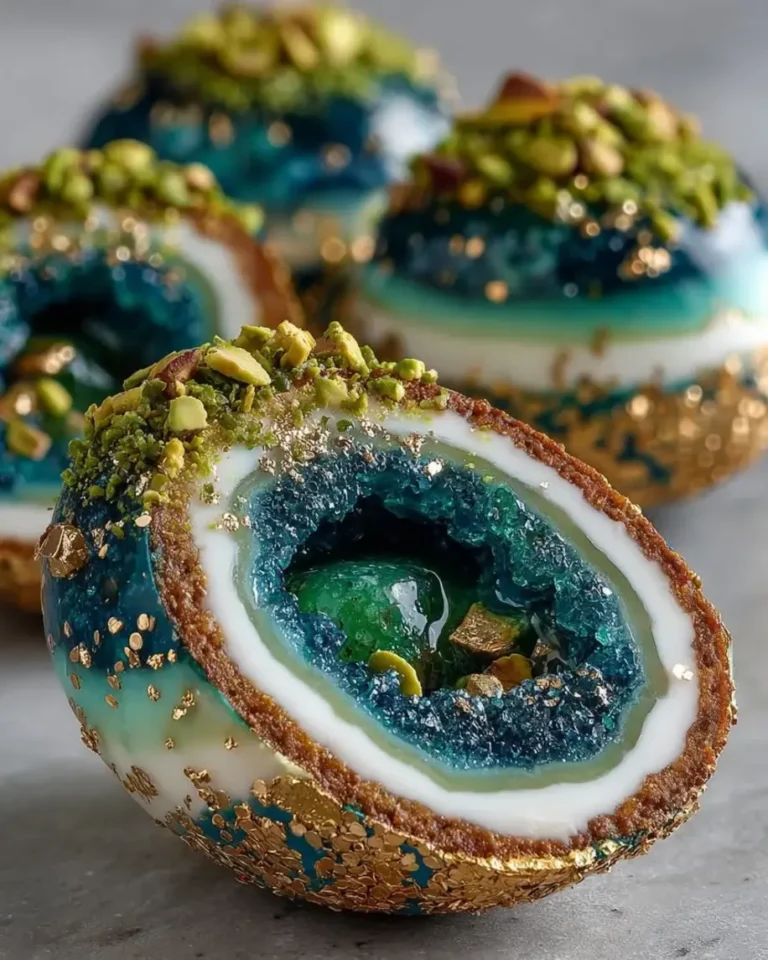
Emerald Pistachio White Chocolate Geodes are a stunning dessert featuring a pistachio white chocolate shell, a creamy mascarpone center, and a glossy emerald glaze with rock candy crystals.
- Yield: 6 1x
Ingredients
- For the Pistachio White Chocolate Geodes:
- 1 cup white chocolate, finely chopped
- 3/4 cup heavy cream
- 1/2 cup pistachio paste
- 1/4 cup granulated sugar
- 1 tsp vanilla extract
- 2 tsp gelatin powder
- 2 tbsp cold water
- Pinch of salt
- For the Cream Center:
- 1 cup mascarpone cheese
- 1/2 cup heavy whipping cream
- 3 tbsp powdered sugar
- 1 tsp vanilla bean paste
- For the Emerald Crystal Glaze:
- 1 cup white chocolate, finely chopped
- 1/2 cup sweetened condensed milk
- 1/4 cup water
- 1 tbsp gelatin powder
- 3 tbsp cold water
- 1/2 tsp edible pearl luster dust
- Green food coloring, as needed
- 1 tbsp crushed green rock candy crystals
- For Garnish (optional):
- 2 tbsp finely chopped pistachios
- Edible gold flakes
- White chocolate shards
Instructions
- Bloom gelatin in cold water for 5 minutes.
- Heat heavy cream, pistachio paste, sugar, vanilla extract, and salt until smooth and warm.
- Remove from heat and stir in bloomed gelatin until completely dissolved.
- Add white chocolate and whisk until silky and fully melted.
- Pour a thin layer of the pistachio mixture into geode-shaped silicone molds, coating the sides evenly.
- Chill until partially set.
- Whip mascarpone, heavy cream, powdered sugar, and vanilla bean paste until light and fluffy.
- Fill each mold with the cream center, leaving a small border around the edges.
- Cover with the remaining pistachio mixture and freeze for at least 4 hours until completely firm.
- For the glaze, bloom gelatin in cold water for 5 minutes.
- Heat sweetened condensed milk and water until steaming. Remove from heat and stir in gelatin until dissolved.
- Pour over white chocolate and whisk until smooth.
- Add pearl luster dust and green food coloring until a glossy emerald color forms.
- Allow glaze to cool until slightly thickened but still pourable.
- Unmold the frozen geodes and place on a wire rack.
- Pour the emerald glaze evenly over each geode.
- Immediately sprinkle crushed green rock candy onto selected areas to create a crystal geode effect.
- Allow the glaze to set before transferring to serving plates.
- Finish with chopped pistachios, edible gold flakes, and white chocolate shards.
- Serve chilled.
Nutrition
- Calories: 465
- Sugar: 29g
- Fat: 34g
- Carbohydrates: 35g
- Protein: 7g
Tried This Recipe? Leave a Comment!
Did you make this recipe? I’d love to hear how it turned out! Please leave a comment and a rating below. Your feedback helps other home cooks and supports cheerychop.com!
For more delicious inspiration, follow me on Pinterest!