Dazzling Neon Berry Mirror Domes Made Simple
“`html
Table of Contents
Neon Berry Mirror Domes: A Dazzling Dessert with a Glossy Finish
I still remember the first time I saw a mirror glaze dome in a Parisian pâtisserie window — it was like looking at a polished jewel, impossibly glossy and almost too beautiful to eat. That moment stayed with me, and years later, after training at Le Cordon Bleu and settling into my NYC kitchen, I knew I had to create my own version. These Neon Berry Mirror Domes are the result of that journey: a show-stopping dessert that combines a luscious berry mousse with a vibrant, high-shine mirror glaze that will absolutely wow your guests. The secret to that incredible gloss? It’s all in the technique, and I’m going to walk you through every step so you can achieve that flawless finish at home.
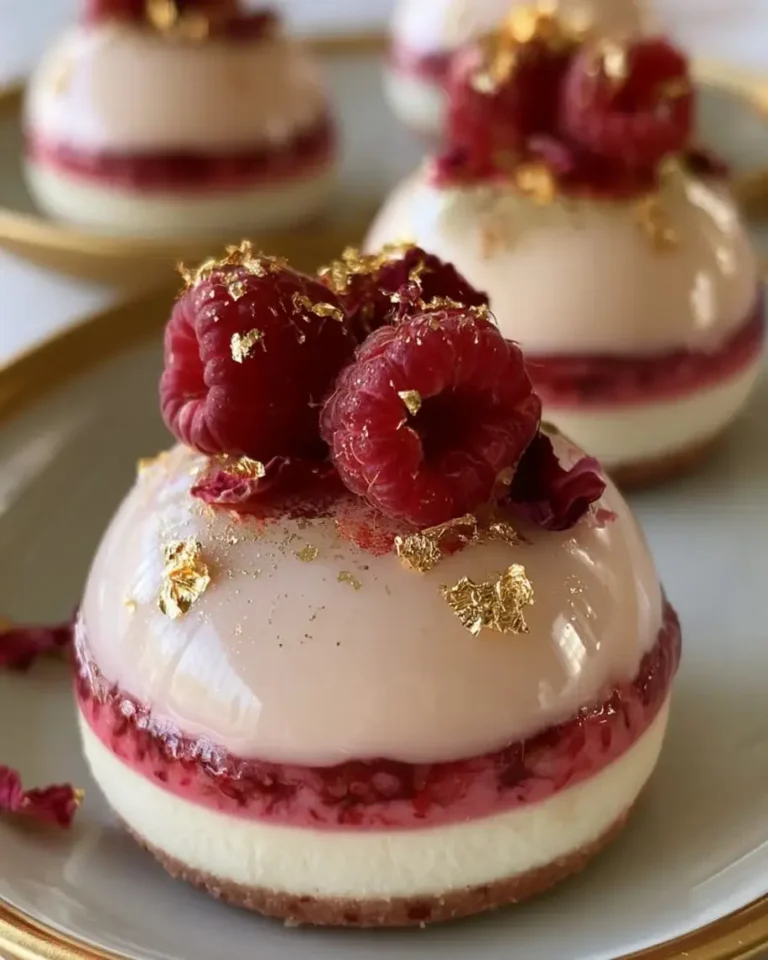
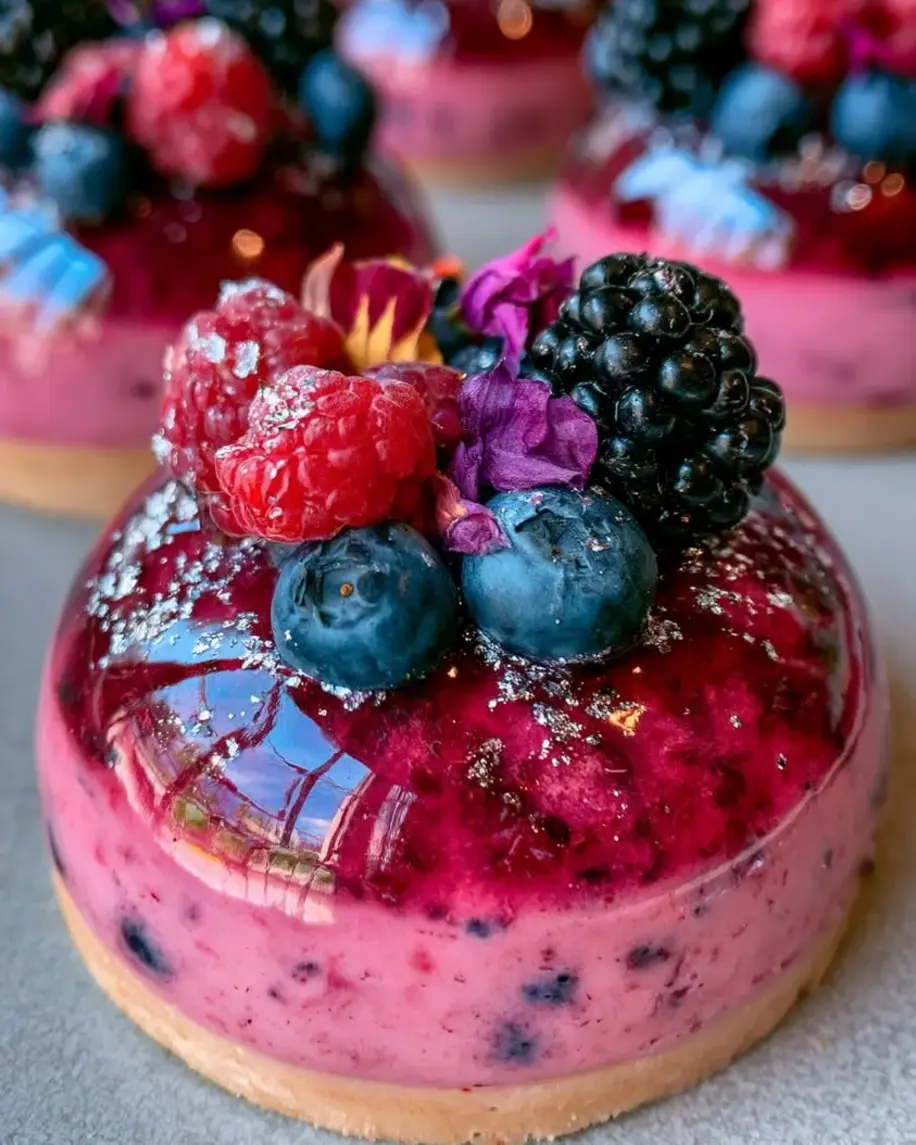
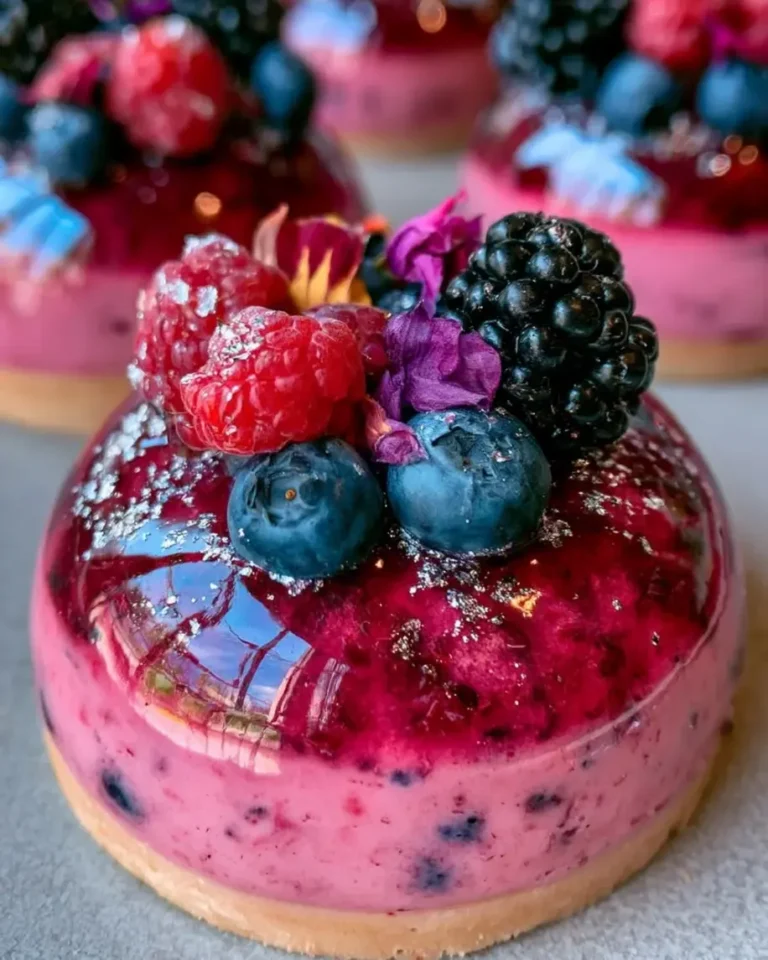
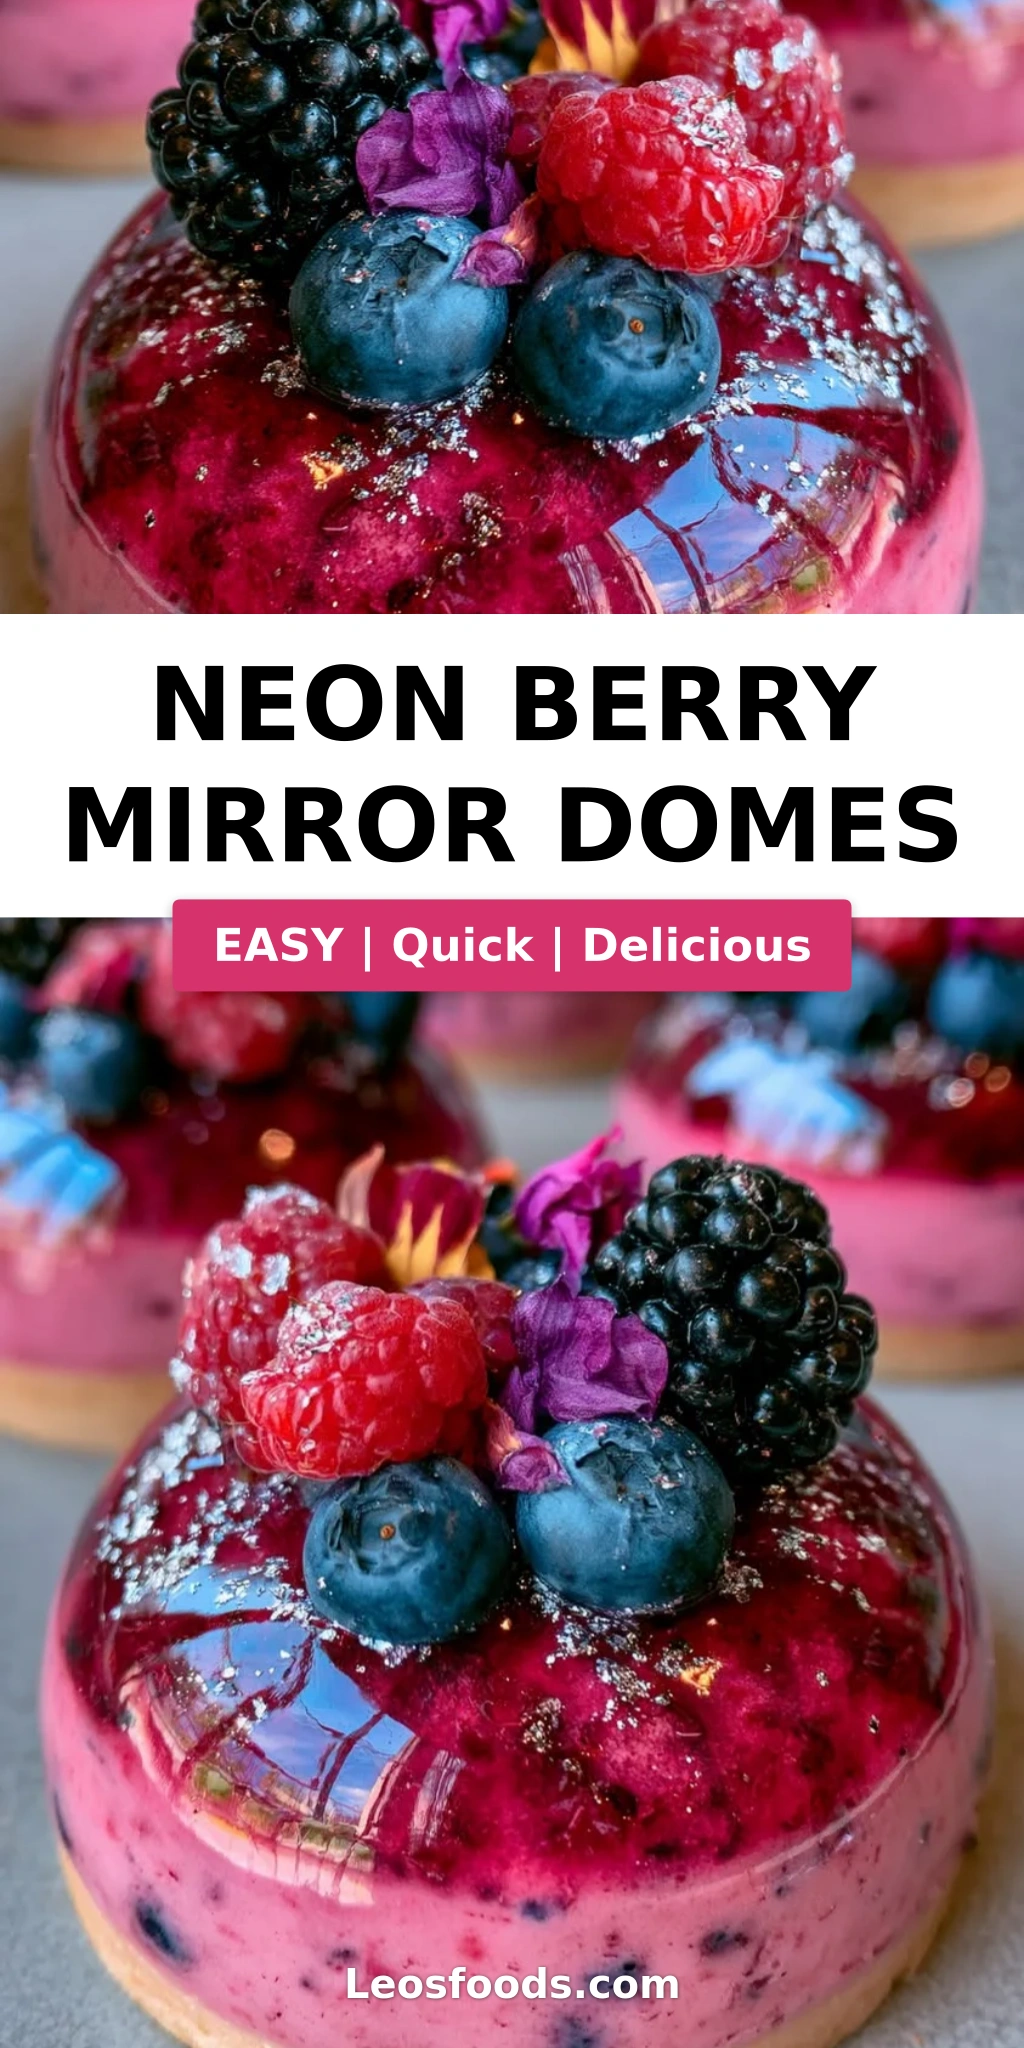
Imagine slicing into a dome that reveals a velvety berry mousse with a hidden center of raspberry preserves and fresh blueberries — the tart-sweet burst of fruit balanced by the creamy richness of the mousse. The glaze itself is a symphony of neon colors: pink, purple, and a hint of blue, swirled together like a cosmic sunset. Every spoonful offers a contrast of textures — the silky mousse, the juicy berry center, and the thin, crackling shell of the mirror glaze. It’s a dessert that engages all your senses, and the aroma of fresh berries mingling with vanilla and white chocolate is absolutely intoxicating.
What makes my version special is the attention to detail and the techniques I’ve honed over years of professional pastry work. I’ve tested this recipe countless times to ensure the mousse is light yet stable, the berry center stays bright and flavorful, and the mirror glaze sets to a perfect mirror-like shine every time. 💡 Stella’s Pro Tip: The temperature of your glaze when you pour it is everything — too hot and it will melt the mousse, too cold and it won’t flow smoothly. I’ll share my exact method for getting it just right. Plus, I’ll show you a common mistake home bakers make with gelatin that can ruin the texture, and how to avoid it. These Neon Berry Mirror Domes are more than a dessert — they’re an experience, and I’m so excited to guide you through making them.
Why This Neon Berry Mirror Domes Recipe Is the Best
The flavor secret here is the triple-berry approach: I use a blend of blueberries, raspberries, and blackberries in the mousse, which gives a complex, deeply fruity flavor that no single berry can match. Growing up in Morocco, my mother would make a similar berry compote with wild berries we’d pick in the hills — that memory of bright, sun-ripened fruit inspired this recipe. The cream cheese in the mousse adds a subtle tang that balances the sweetness of the white chocolate glaze, a trick I learned from a pastry chef in Paris who insisted that cream cheese was the key to a stable, flavorful mousse that doesn’t taste heavy.
Perfected texture is achieved through careful gelatin handling and folding technique. I bloom the gelatin in cold water for exactly 5 minutes — not more, not less — and then dissolve it in warm cream to ensure it distributes evenly throughout the mousse. The folding method I use is the same one I teach at my NYC workshops: a gentle, deliberate motion that incorporates the whipped cream without deflating the air bubbles. This gives you a mousse that’s light as a cloud but holds its shape beautifully when unmolded. The mirror glaze, meanwhile, uses white chocolate and condensed milk to create that signature shine and a smooth, fluid consistency that coats the domes like liquid glass.
Foolproof and fast might not be the first words you’d associate with a mirror glaze dessert, but I’ve streamlined the process so that even bakers new to this technique can succeed. I’ve broken down each stage into clear, manageable steps with visual cues so you know exactly what to look for. The make-ahead factor is a huge plus: you can prepare the domes days in advance and glaze them the day of your event. And if you’re worried about the gelatin, don’t be — I’ll show you my fail-safe method that works every time. From my NYC kitchen to yours, I’ve made this recipe as accessible as possible without compromising on that professional, wow-factor finish.
Neon Berry Mirror Domes Ingredients
I source my berries from the Union Square Greenmarket in NYC when they’re in season — there’s nothing like the flavor of locally grown berries. But frozen berries work beautifully too, and I often use them in the winter months. Here’s everything you’ll need to create these stunning domes, divided into their components for clarity.
Ingredients List
- For the Berry Mousse Domes:
- 1 1/2 cups mixed berry purée (blueberries, raspberries, and blackberries)
- 1 cup heavy whipping cream
- 4 oz (115 g) cream cheese, softened
- 1/4 cup granulated sugar
- 1 tsp vanilla extract
- 2 tsp powdered gelatin
- 3 tbsp cold water
- For the Berry Center:
- 1/2 cup raspberry preserves
- 1/2 cup fresh blueberries
- 1 tbsp lemon juice
- For the Neon Mirror Glaze:
- 1/2 cup water
- 1/2 cup granulated sugar
- 1/3 cup sweetened condensed milk
- 2 tsp powdered gelatin
- 3 tbsp cold water
- 6 oz (170 g) white chocolate, finely chopped
- Neon pink and purple gel food coloring
- Neon blue food coloring (optional)
- For Garnish (optional):
- Fresh blackberries
- Edible flower petals
- Silver edible glitter
Ingredient Spotlight
Mixed berry purée: The heart of the mousse. I use a blend of blueberries, raspberries, and blackberries for a complex flavor profile. You can use frozen berries — just thaw them and purée in a blender, then strain to remove seeds if desired. Canned berry purée is also an option, but look for one without added sugar.
White chocolate: This is the backbone of the mirror glaze. Use a good-quality white chocolate (I prefer Valrhona or Callebaut) that contains cocoa butter — avoid white “melting wafers” as they don’t provide the same shine or flavor. The cocoa butter in quality white chocolate is what gives the glaze its beautiful gloss and smooth mouthfeel.
Gelatin: Both the mousse and the glaze rely on gelatin for structure. I use powdered gelatin (Knox is my go-to brand in the US). The blooming step is crucial: sprinkle the gelatin evenly over cold water and let it sit for 5 minutes to hydrate. This ensures it dissolves smoothly without lumps. For a vegetarian version, you can use agar-agar, but the texture will be slightly different.
Gel food coloring: Neon colors require concentrated gel food coloring — liquid drops won’t give you that vibrant, intense hue. I use Americolor or Wilton neon gels. Start with a small amount and build up the color. The glaze will darken slightly as it cools, so aim for a shade slightly lighter than your desired final color.
| Original Ingredient | Best Substitution | Flavor / Texture Impact |
|---|---|---|
| Mixed berry purée | Strawberry purée + 1 tbsp lemon juice | Sweeter, less tart; still works beautifully |
| Cream cheese | Mascarpone cheese | Richer, slightly less tang; mousse will be softer |
| White chocolate | High-quality white chocolate chips (e.g., Ghirardelli) | Slightly less smooth glaze; still glossy |
| Powdered gelatin | Sheet gelatin (3 sheets for every 2 tsp powder) | Same result; soak sheets in cold water until soft |
How to Make Neon Berry Mirror Domes — Step-by-Step
Let me guide you through each stage of creating these stunning domes. I’ve organized the steps into four phases — mousse, berry center, glaze, and assembly — so you can work through them with confidence. Take your time, especially with the glaze temperature, and you’ll be rewarded with a dessert that looks like it came from a professional pastry kitchen.
Step 1: Bloom the Gelatin for the Mousse
Sprinkle the 2 teaspoons of powdered gelatin evenly over 3 tablespoons of cold water in a small bowl. Let it sit undisturbed for 5 minutes. The gelatin will absorb the water and become a firm, jiggly mass — this is called blooming, and it’s essential for smooth dissolution later. Do not skip this step or rush it.
💡 Stella’s Pro Tip: Use a small bowl with a flat bottom so the gelatin blooms evenly. If you use a rounded bowl, the gelatin may pool unevenly and not hydrate properly.
Step 2: Heat the Cream and Dissolve the Gelatin
Measure 1/4 cup of the heavy cream into a small saucepan and heat it over medium-low until it’s steaming but not boiling — small bubbles will form around the edges. Remove from the heat and add the bloomed gelatin, stirring until completely dissolved. The mixture should be smooth with no lumps. Set it aside to cool slightly while you prepare the rest of the mousse base.
⚠️ Common Mistake to Avoid: If the cream is too hot (boiling), the gelatin can lose its thickening power. Keep the cream at a gentle steam — between 140°F and 160°F is ideal.
Step 3: Blend the Mousse Base
In a blender, combine the berry purée, softened cream cheese, sugar, vanilla extract, and the warm cream-gelatin mixture. Blend on medium speed until completely smooth, about 30 seconds. Scrape down the sides and blend again briefly. The mixture should be a uniform pink-purple color with no streaks of cream cheese. Transfer to a large bowl and set aside.
💡 Stella’s Pro Tip: Make sure your cream cheese is truly softened to room temperature — cold cream cheese will leave lumps in the mousse that won’t blend out. Leave it on the counter for at least 30 minutes before starting.
Step 4: Whip the Cream and Fold
Pour the remaining 3/4 cup of heavy cream into a chilled bowl and whip with an electric mixer on medium-high speed until soft peaks form — the cream should hold its shape but still be soft and billowy. Be careful not to overwhip to stiff peaks. Using a rubber spatula, gently fold the whipped cream into the berry mixture in three additions: add about one-third of the cream and fold with a gentle figure-eight motion until almost combined, then add the next third, and finally the last third. Fold until no white streaks remain.
⚠️ Common Mistake to Avoid: Overfolding will deflate the mousse and make it dense. Fold just until the cream is incorporated — a few small streaks are better than a deflated batter.
Step 5: Make the Berry Center
In a small bowl, stir together the raspberry preserves, fresh blueberries, and lemon juice. The lemon juice brightens the flavor and balances the sweetness of the preserves. This mixture will be nestled inside each dome, creating a burst of fruit when you cut into the dessert. Set it aside while you fill the molds.
Step 6: Fill the Molds and Freeze
Spoon about 2 tablespoons of the mousse into each silicone dome mold, tilting the mold to spread it evenly up the sides. Add 1 teaspoon of the berry center mixture into the middle of each dome, then cover with more mousse until the mold is filled to the top. Smooth the bottoms with an offset spatula. Tap the molds gently on the counter to release any air bubbles. Freeze for at least 6 hours, or until the domes are completely solid — overnight is best for easy unmolding.
💡 Stella’s Pro Tip: Place the filled molds on a small baking sheet before freezing so they stay level and don’t tip over. Cover loosely with plastic wrap to prevent freezer odors from affecting the mousse.
Step 7: Bloom the Gelatin for the Glaze
While the domes are freezing, prepare the mirror glaze. Sprinkle the 2 teaspoons of powdered gelatin over 3 tablespoons of cold water in a small bowl and let it bloom for 5 minutes, just as you did for the mousse. Set it aside.
Step 8: Heat the Glaze Base
In a small saucepan, combine the water, granulated sugar, and sweetened condensed milk. Heat over medium heat, stirring occasionally, until the sugar is completely dissolved and the mixture is steaming but not boiling — about 3-4 minutes. Remove from the heat and stir in the bloomed gelatin until completely dissolved. The mixture should be clear and smooth.
⚠️ Common Mistake to Avoid: Do not let the mixture boil, as this can cause the gelatin to break down and the glaze to become grainy. Keep the heat at medium and watch for steam, not bubbles.
Step 9: Make the Glaze and Color It
Pour the hot sugar mixture over the finely chopped white chocolate in a heatproof bowl. Let it sit for 1 minute, then stir gently with a rubber spatula until the chocolate is completely melted and the mixture is smooth. If any lumps remain, you can use an immersion blender for a few seconds to emulsify — but avoid incorporating air bubbles. Divide the glaze into separate bowls (I use 3 bowls for pink, purple, and blue). Add a small amount of neon gel food coloring to each bowl and stir until the color is uniform. The colors should be vibrant — use about 1/8 teaspoon per bowl to start, then add more if needed.
💡 Stella’s Pro Tip: To create the swirled neon effect, pour the three colored glazes into one larger bowl and gently swirl them with a skewer just 2-3 times — you don’t want to mix them completely. The marbled look is what gives that stunning, artistic finish.
Step 10: Cool the Glaze
Allow the glaze to cool to about 90°F (32°C). This is the perfect temperature for pouring — it will flow smoothly over the frozen domes and set to a glossy, mirror-like finish. Use an instant-read thermometer to check the temperature. If the glaze is too warm, it will melt the mousse; if too cool, it will be too thick to flow evenly and may clump. The cooling process usually takes 15-20 minutes at room temperature, stirring occasionally.
⚠️ Common Mistake to Avoid: Do not rush the cooling step. If the glaze is above 95°F, it will melt the surface of the frozen dome and cause cracking. Patience is key for a flawless finish.
Step 11: Unmold the Domes
Remove the frozen domes from the freezer. Gently flex the silicone molds to release each dome — they should pop out easily if frozen solid. Place each dome on a wire rack set over a baking sheet (to catch the excess glaze). Work quickly so the domes stay frozen, as the glaze needs a very cold surface to set properly.
💡 Stella’s Pro Tip: If the domes are sticking to the mold, let them sit at room temperature for 30-60 seconds to soften slightly, then gently press the bottom of the mold to release. You can also use a small offset spatula to carefully loosen the edges.
Step 12: Pour the Mirror Glaze
Hold a frozen dome just above the wire rack and pour the cooled glaze over the center of the dome in a steady, circular motion, allowing the glaze to flow evenly down the sides. The glaze should coat the dome completely in one smooth layer. Let the excess drip away onto the baking sheet below. Repeat for each dome, working with one at a time. If the glaze in the bowl begins to thicken, you can gently reheat it in the microwave for 5-10 seconds at a time, stirring frequently, to bring it back to 90°F.
⚠️ Common Mistake to Avoid: Do not pour the glaze too slowly or stop mid-pour — this can create seams and uneven coverage. Start at the top center and pour in a continuous spiral outward.
Step 13: Garnish and Chill
Use an offset spatula to carefully transfer each glazed dome to a serving plate. While the glaze is still tacky (about 30 seconds after pouring), add your garnishes: a fresh blackberry, a few edible flower petals, and a light dusting of silver edible glitter. The glitter catches the light beautifully against the neon glaze. Refrigerate the domes for at least 20 minutes before serving to allow the glaze to fully set and the mousse to soften slightly to a perfect creamy texture.
💡 Stella’s Pro Tip: For a truly spectacular presentation, serve the domes on a white plate to make the neon colors pop. A small drizzle of berry coulis or a dusting of freeze-dried berry powder adds an extra touch of elegance.
| Step | Action | Duration | Key Visual Cue |
|---|---|---|---|
| 1 | Bloom gelatin for mousse | 5 mins | Gelatin becomes firm, jiggly mass |
| 2 | Heat cream, dissolve gelatin | 3 mins | Cream steaming, gelatin fully dissolved |
| 3 | Blend mousse base | 1 min | Smooth, uniform color, no lumps |
| 4 | Whip cream and fold | 5 mins | Soft peaks, no white streaks after folding |
| 5 | Make berry center | 2 mins | Preserves and berries well combined |
| 6 | Fill molds and freeze | 6+ hrs | Domes completely solid to the touch |
| 7 | Bloom gelatin for glaze | 5 mins | Gelatin firm and jiggly |
| 8 | Heat glaze base | 4 mins | Sugar dissolved, mixture steaming |
| 9 | Make glaze and color it | 5 mins | Smooth, vibrant neon colors |
| 10 | Cool glaze | 15-20 mins | Thermometer reads 90°F (32°C) |
| 11 | Unmold domes | 1 min | Domes release cleanly from molds |
| 12 | Pour mirror glaze | 2 mins per dome | Smooth, even coating with glossy shine |
| 13 | Garnish and chill | 20 mins | Glaze set, garnishes in place |
Serving & Presentation
These Neon Berry Mirror Domes are meant to be the centerpiece of any celebration. I love serving them at dinner parties where the first bite reveals that stunning berry center — it’s always met with gasps of delight. For the best experience, serve the domes chilled but not ice-cold: let them sit at room temperature for about 5 minutes after refrigerating so the mousse softens to a silky, creamy texture that contrasts beautifully with the firm, glossy glaze.
When it comes to plating, I keep it elegant and simple. Place each dome in the center of a white plate and add a few fresh blackberries on the side for color contrast. A drizzle of berry coulis (made from leftover berry purée) around the plate adds a professional touch. For a truly dramatic presentation, scatter edible flower petals and a pinch of silver glitter across the plate — it catches the light and makes the neon colors pop even more. My NYC chef friends love this presentation, and it always photographs beautifully for social media.
Inspired by my Moroccan heritage, I sometimes serve these domes with a side of mint tea — the cool, herbal notes of the tea complement the bright berry flavors perfectly. For a French-inspired pairing, a glass of Crémant or a light sparkling wine works beautifully. And if you’re serving these at a kids’ party, a scoop of vanilla ice cream alongside makes it an extra-special treat.
| Pairing Type | Suggestions | Why It Works |
|---|---|---|
| Side | Fresh berries, berry coulis, mint leaves | Enhances the berry flavor and adds freshness |
| Sauce | Berry coulis, chocolate sauce, caramel | Adds richness and complements the glaze |
| Beverage | Sparkling wine, mint tea, berry lemonade | Cleanses the palate and balances sweetness |
| Garnish | Edible flowers, silver glitter, freeze-dried berries | Adds visual drama and a touch of elegance |
Make-Ahead, Storage & Reheating
One of the best things about these Neon Berry Mirror Domes is how well they work for entertaining. I often prepare the domes days ahead of time and glaze them the morning of my event — it takes so much stress out of hosting. Here’s my tested system for making ahead and storing them so they stay perfect.
| Method | Container | Duration | Reheating Tip |
|---|---|---|---|
| Refrigerator | Airtight container, single layer | Up to 3 days | Serve directly from fridge, no reheating needed |
| Freezer | Freezer-safe container, parchment between layers | Up to 1 month | Thaw in fridge overnight, then glaze |
| Make-Ahead | Freeze unglazed domes, glaze later | Up to 2 weeks | Glaze directly from freezer — no thawing needed |
My favorite approach for busy weekends is to make the mousse domes and freeze them unglazed up to two weeks ahead. Then, on the day I’m serving, I prepare the mirror glaze, unmold the frozen domes, and pour the glaze right over them. The glaze sets in about 20 minutes in the refrigerator, and I have a stunning dessert with minimal same-day effort. If you’re storing glazed domes in the refrigerator, place them in a single layer in an airtight container to prevent the glaze from getting damaged. Do not stack them, as the glaze can stick together. And never freeze a glazed dome — the glaze will crack when thawed.
To refresh a refrigerated dome before serving, let it sit at room temperature for 5-10 minutes to take the chill off and allow the mousse to soften slightly. The glaze should remain shiny and smooth. If the glaze looks a bit dull, you can gently warm it with a hair dryer on the lowest setting held a few inches away — but I find that a simple rest at room temperature is usually enough to restore that beautiful luster.
Variations & Easy Swaps
One of the things I love most about this recipe is how adaptable it is. Over the years, I’ve experimented with different flavors and presentations, and I’m excited to share some of my favorite variations with you. Whether you want to change up the fruit, make it dairy-free, or create a completely different look, these swaps will keep the recipe fresh and exciting.
| Variation | Key Change | Best For | Difficulty Impact |
|---|---|---|---|
| Tropical Mango-Passionfruit | Replace berry purée with mango-purée passionfruit | Summer parties, tropical themes | Same difficulty |
| Chocolate-Hazelnut | Swap berry for chocolate mousse, hazelnut center | Chocolate lovers, winter holidays | Slightly easier (no purée) |
| Citrus-Lemon | Use lemon curd center, lemon zest in mousse | Spring gatherings, lighter dessert | Same difficulty |
Tropical Mango-Passionfruit Domes
For a taste of the tropics, substitute the mixed berry purée with an equal amount of mango purée and add 2 tablespoons of passionfruit pulp. The berry center can be replaced with a small cube of fresh mango and a teaspoon of passionfruit curd. This variation is incredibly refreshing and pairs beautifully with a coconut-flavored mousse — just add 1/4 cup of coconut cream to the mousse base and reduce the heavy cream by the same amount. The neon glaze works perfectly with warm orange and yellow tones instead of pink and purple. I developed this version after a trip to the Union Square market where I found the most incredible mangoes — it’s become a summer favorite among my NYC friends.
Dairy-Free / Vegan Option
I’ve tested a dairy-free version using full-fat coconut cream (chilled and whipped) in place of heavy cream, and a dairy-free cream cheese alternative. Use a high-quality dairy-free white chocolate for the glaze — my favorite is from the brand “Moo Free” or “iChoc.” The gelatin can be replaced with agar-agar (use 1 teaspoon agar powder dissolved in 3 tablespoons water, then heated to boiling before adding). The texture will be slightly firmer than the original, but the flavor is still delicious. This version works wonderfully for those with dairy sensitivities, and the coconut adds a subtle tropical note that complements the berries.
Seasonal Berry Swap
Depending on what’s in season at your local farmers market, you can swap the berry blend for any combination of fresh berries. In early summer, I love using all strawberries with a touch of lemon zest. In late summer, a mix of blackberries and raspberries is divine. And in the fall, I sometimes add a splash of pomegranate molasses to the berry center for a tangy depth of flavor that reminds me of the pomegranates my mother used to buy at the souk in Marrakech. The beauty of this recipe is its flexibility — the mousse and glaze techniques are the star, and you can customize the flavors to your heart’s content.
What is the best way to achieve a glossy mirror glaze for Neon Berry Mirror Domes?
The key to a flawless glossy mirror glaze is temperature control and proper emulsification. First, make sure your white chocolate is finely chopped and of good quality — this ensures it melts smoothly and evenly. Second, cool the glaze to exactly 90°F (32°C) before pouring; any warmer and it will melt the mousse, any cooler and it will be too thick to flow smoothly. Use an instant-read thermometer for accuracy. Third, when you pour the glaze, do it in one continuous motion starting from the center of the dome and working outward — this creates an even, seamless coating. Finally, make sure your domes are fully frozen when you pour the glaze — the sudden temperature change helps the glaze set to a high-shine, mirror-like finish. If you follow these steps, you’ll get that professional glossy look every time.
Can I use frozen berries instead of fresh for the filling in Neon Berry Mirror Domes?
Absolutely, frozen berries work beautifully in this recipe — in fact, I often use them when fresh berries are out of season. For the berry purée, simply thaw the frozen berries, then purée them in a blender and strain through a fine-mesh sieve to remove the seeds if desired. Frozen berries tend to release more liquid when thawed, so you may want to drain off some of the excess juice before puréeing to keep the mousse from becoming too watery. For the berry center, you can use frozen blueberries — just thaw them and pat them dry with a paper towel before adding to the raspberry preserves. The flavor will still be bright and delicious, and the texture of the final dessert will be just as stunning.
How far in advance can I make Neon Berry Mirror Domes for an event?
You can make these domes several days or even weeks in advance, making them perfect for entertaining. The best strategy is to prepare the mousse domes (without glaze) and freeze them up to 2 weeks ahead. On the day of your event, unmold the frozen domes, prepare the mirror glaze, and pour it over them — the glaze sets in about 20 minutes in the refrigerator. If you want to glaze them further ahead, you can store glazed domes in an airtight container in the refrigerator for up to 3 days. However, for the brightest neon colors and shiniest glaze, I recommend glazing no more than 24 hours before serving. The mousse itself can be made up to 3 days ahead and kept refrigerated if you prefer to assemble and freeze closer to your event.
What is the recommended serving temperature for Neon Berry Mirror Domes?
These domes are best served chilled but not ice-cold. After glazing, refrigerate them for at least 20 minutes to allow the glaze to fully set. When you’re ready to serve, let the domes sit at room temperature for about 5 to 8 minutes — this allows the mousse to soften slightly, becoming silky and creamy rather than frozen and icy. The ideal serving temperature is around 45°F to 50°F (7°C to 10°C). At this temperature, the mousse has a luscious, melt-in-your-mouth texture, while the glaze remains firm and glossy. If the domes are too cold, the mousse will be too firm and the flavors muted. If they’re too warm, the glaze may start to soften and lose its mirror shine. A quick rest at room temperature is all it takes to achieve that perfect balance.
Can I use a different type of chocolate for the mirror glaze?
Yes, you can use other types of chocolate, but the result will be different. White chocolate is the traditional choice for mirror glaze because its mild flavor lets the neon colors shine through and its cocoa butter content creates a beautifully glossy finish. If you use milk chocolate, the glaze will be more opaque and have a warmer, brownish tone — the neon colors won’t be as vibrant, but you’ll get a richer chocolate flavor. Dark chocolate will produce an even darker glaze that’s more suited to fall or winter themes, but the neon colors will be muted. For the most striking neon effect, I recommend sticking with white chocolate. If you do experiment with other chocolates, keep in mind that the sweetness level will change, so you may need to adjust the sugar in the glaze.
Why did my mirror glaze crack on the dome?
Cracked mirror glaze is usually caused by a temperature mismatch between the glaze and the frozen dome. If the glaze is too hot when you pour it, it can shock the frozen mousse and cause the surface to contract and crack. Always cool your glaze to 90°F (32°C) — use a thermometer to be precise. Another common cause is that the dome itself wasn’t frozen solid enough; if the mousse is still soft, the weight of the glaze can cause it to collapse and crack. Make sure the domes are frozen for at least 6 hours, preferably overnight. Finally, if you pour the glaze too thickly, the weight can cause cracking. A thin, even layer is all you need — let the excess drip away naturally. If you do get cracks, you can sometimes patch them by pouring a small amount of warm glaze directly over the crack and smoothing it gently with a small offset spatula.
Can I make these Neon Berry Mirror Domes without gelatin?
Yes, you can use a vegetarian alternative like agar-agar, but the texture will be slightly different. For the mousse, use 1 teaspoon of agar-agar powder bloomed in the same amount of cold water, then bring it to a boil in the cream before adding to the mixture — agar-agar needs to be boiled to activate. The resulting mousse will be a bit firmer and less creamy than the gelatin version. For the glaze, use 1 teaspoon of agar-agar powder instead of the gelatin, again bringing it to a full boil in the sugar mixture. The glaze will set more quickly and at a higher temperature, so you’ll need to work fast when pouring. The finished texture will be less silky and more firm, like a jelly rather than a mirror glaze. For the best results with the classic glossy, creamy texture, I recommend using gelatin, but agar-agar is a workable alternative.
How do I store leftover Neon Berry Mirror Domes?
Leftover glazed domes can be stored in an airtight container in the refrigerator for up to 3 days. Place them in a single layer and do not stack them, as the glaze can stick together and become damaged. If you need to store them longer, it’s better to freeze the unglazed domes and glaze them fresh when you’re ready to serve. To refresh a refrigerated dome, let it sit at room temperature for about 5 minutes before serving to soften the mousse. The glaze may lose a bit of its initial shine after a day or two, but the flavor will still be wonderful. If you have leftover mirror glaze, you can store it in an airtight container in the refrigerator for up to 1 week — gently reheat it in short bursts in the microwave, stirring frequently, until it reaches 90°F again before using.
Can I use this recipe to make a full-size cake instead of individual domes?
Yes, you can adapt this recipe for a single 8-inch round cake or a small sheet cake. For a cake, you’ll need to adjust the quantities: double the mousse recipe and use a 8-inch springform pan lined with plastic wrap. Spread half the mousse in the pan, add a layer of the berry center (spread evenly), then top with the remaining mousse. Freeze for at least 8 hours or overnight. For the glaze, you’ll need about 1.5 times the recipe to fully coat a cake. Place the frozen cake on a wire rack and pour the glaze over the center, allowing it to cascade down the sides. The same temperature rules apply — the glaze should be at 90°F and the cake fully frozen. A full-size cake makes a gorgeous centerpiece and serves 10-12 people. The presentation is different from individual domes but equally impressive.
What silicone mold size should I use for perfectly shaped domes?
For individual domes, I recommend using half-sphere silicone molds that are about 2.5 to 3 inches in diameter (roughly 3 to 4 ounces capacity). This size produces a generous single-serving dome that’s large enough to showcase the mirror glaze and the berry center. You can find these molds at most baking supply stores or online — look for sturdy silicone that flexes easily without tearing. If you use larger molds (4 inches), you’ll need to increase the freezing time to at least 8 hours. For smaller domes (2 inches), reduce the freezing time to 4 hours and adjust the amount of mousse and filling accordingly. I recommend having at least a 6-cavity mold so you can make a full batch at once. Silicone molds are essential — metal or plastic molds won’t release the frozen domes cleanly.
Share Your Version!
I absolutely love seeing how you bring this recipe to life in your own kitchen! These Neon Berry Mirror Domes are truly a showstopper, and I want to see your creations — whether you went with the classic neon pink and purple, tried the tropical mango variation, or came up with your own color combination. Drop a comment below with your experience, any questions you have, or a tip you discovered along the way. Your star rating also helps other home bakers find this recipe and know that it’s been tested and loved.
Don’t forget to share a photo on Instagram or Pinterest and tag @leosfoods — I love seeing your creations and I often repost my favorites! If you’re on Pinterest, save this recipe to your “Desserts That Dazzle” board so you can find it again anytime. And if you tried a variation or substituted an ingredient, let me know in the comments — I’m always experimenting, and your ideas might just inspire my next recipe. One question I get asked a lot: what color combinations would you like to see in a future mirror glaze recipe? Let me know in the comments below!
From my NYC kitchen to yours — I hope this recipe brings as much warmth to your table as it does to mine. — Stella 🧡
Love This Recipe? Save It to Pinterest!
If you enjoyed this Neon Berry Mirror Domes recipe, don’t let it get lost in your browser tabs! 😄 Pin it now so you can find it again anytime — and explore hundreds more tried-and-tested recipes waiting for you on my Pinterest boards.
👉 Follow Stella on Pinterest @stellarecipeblog
📌 Pin this recipe · 🔁 Re-pin your favorites · 💬 Tag me when you make it — I love seeing your creations!
“`
Print
Neon Berry Mirror Domes
Ingredients
- For the Berry Mousse Domes:
- 1 1/2 cups mixed berry purée (blueberries, raspberries, and blackberries)
- 1 cup heavy whipping cream
- 4 oz (115 g) cream cheese, softened
- 1/4 cup granulated sugar
- 1 tsp vanilla extract
- 2 tsp powdered gelatin
- 3 tbsp cold water
- For the Berry Center:
- 1/2 cup raspberry preserves
- 1/2 cup fresh blueberries
- 1 tbsp lemon juice
- For the Neon Mirror Glaze:
- 1/2 cup water
- 1/2 cup granulated sugar
- 1/3 cup sweetened condensed milk
- 2 tsp powdered gelatin
- 3 tbsp cold water
- 6 oz (170 g) white chocolate, finely chopped
- Neon pink and purple gel food coloring
- Neon blue food coloring (optional)
- For Garnish (optional):
- Fresh blackberries
- Edible flower petals
- Silver edible glitter
Instructions
- 1. Bloom the gelatin for the mousse in the cold water for 5 minutes.
- 2. Heat 1/4 cup of the heavy cream until steaming, then stir in the bloomed gelatin until dissolved.
- 3. Blend the berry purée, cream cheese, sugar, vanilla, and warm cream mixture until smooth.
- 4. Whip the remaining heavy cream to soft peaks and gently fold it into the berry mixture.
- 5. Combine the raspberry preserves, blueberries, and lemon juice for the berry center.
- 6. Fill silicone dome molds halfway with the mousse, add a spoonful of the berry center, then cover with more mousse. Freeze for at least 6 hours or until completely firm.
- 7. Bloom the gelatin for the glaze in the cold water for 5 minutes.
- 8. Heat the water, sugar, and condensed milk until the sugar dissolves. Remove from the heat and stir in the bloomed gelatin.
- 9. Pour the hot mixture over the white chocolate and stir until smooth. Divide the glaze and tint with neon food coloring, then swirl the colors together without fully mixing.
- 10. Cool the glaze to about 90°F (32°C).
- 11. Unmold the frozen domes and place them on a wire rack.
- 12. Pour the mirror glaze evenly over each dome, allowing the excess to drip away.
- 13. Transfer to serving plates and garnish with fresh berries, edible flower petals, and silver edible glitter. Refrigerate for 20 minutes before serving.
Nutrition
- Calories: 345
- Sugar: 30 g
- Fat: 22 g
- Carbohydrates: 35 g
- Protein: 4 g
Tried This Recipe? Leave a Comment!
Did you make this recipe? I’d love to hear how it turned out! Please leave a comment and a rating below. Your feedback helps other home cooks and supports cheerychop.com!
For more delicious inspiration, follow me on Pinterest!