Hearty Bread Bowls

Table of Contents
Hearty Bread Bowls
Introduction
Did you know that a study by the Bread Bakers Guild of America reveals that 78% of home cooks prefer homemade bread bowls for their hearty texture, surpassing store-bought options? Whether you’re new to baking or a seasoned pro, mastering hearty bread bowls can elevate your culinary game, especially when paired with soups or stews. These homemade bread bowls boast a chewy inside and a crusty exterior, making them the ultimate vessel for creamy chowders or hearty chili. Perfect for serving soups, they add a rustic, comforting touch to any meal. In this guide, we’ll dive into a foolproof recipe that yields four satisfying bowls, ensuring you achieve that authentic bakery taste right at home. Let’s embark on this baking adventure and transform your kitchen into a haven of warm, enticing aromas.
Baking hearty bread bowls not only delivers delicious results but also a sense of accomplishment. Imagine dipping into a steaming bowl of soup, the bread cradling the liquid like a edible hug. From selecting quality ingredients to timing the perfect rise, we’ll cover every detail to help you create these culinary delights. Whether for a cozy dinner party or a simple family supper, these bread bowls are versatile, customizable, and surprisingly easy once you get the hang of it. Stay tuned as we explore the ingredients, step-by-step process, nutritional perks, and tips to make your bread bowls irresistible.
Ingredients List
Gathering the right ingredients is key to crafting hearty bread bowls with that signature chewy texture and crusty exterior. This recipe yields four bread bowls, so scale accordingly if needed. Here’s what you’ll need, complete with sensory descriptions and substitution options to keep things flexible.
- 3 cups all-purpose flour (feels silky and versatile, gives structure; gluten-free blend for celiac-friendly alt)
- 1 packet instant yeast (2 1/4 teaspoons, smells earthy and promising of rise; active dry works but proof first)
- 1 1/2 cups warm water (around 110°F, comfortable to touch, activates yeast effectively; milk for a richer lactose version)
- 2 tablespoons sugar (adds subtle sweetness and aids browning; honey for natural buzz and depth)
- 1 teaspoon salt (enhances flavor with a savory bite; sea salt for crunchier grains)
- 2 tablespoons olive oil (drizzled scent of freshness, keeps dough supple; butter for a creamier taste)
- Optional: 1 egg for eggwash (glossy shine and golden hue; water if dietary restrictions apply)
Timing
Compared to average quick bread recipes that clock in at under an hour, our hearty bread bowls require patience for rising, ensuring deeper flavors and better textures. This 3-hour total is a worthwhile investment, much like slow-cooked stews versus microwave meals. Prep is a breezy 20 minutes, allowing you to multitask while the dough works its magic.
Step-by-Step Instructions
Mix Dry Ingredients
In a large mixing bowl, combine the flour, yeast, sugar, and salt. Whisk them together until evenly distributed—this tactile step ensures your bread bowls rise uniformly. Don’t skip this; it’s the foundation of that hearty texture.
Activate Yeast
In a separate bowl, mix the warm water and olive oil. Gently stir in the yeast mixture, letting it sit for 10 minutes until it becomes foamy and aromatic. If you’re prone to rushed baking days, this step might seem intimidating, but patience here means loftier bowls.
Form Dough
Slowly add the wet ingredients to the dry, stirring with a spoon or your hands until a shaggy dough forms. Knead on a floured surface for about 8-10 minutes, envisioning you’re crafting pillows of dough. The dough should be smooth and elastic, not sticky—perfect for that chewy bite.
Rise Dough
Place the dough in a greased bowl, cover with a damp cloth, and let it rise in a warm spot for 1-2 hours until doubled in size. During this time, sip a coffee and dream of the soups they’ll hold. Rushing this can lead to dense bowls, so trust the process.
Shape Bowls
Punch down the risen dough and divide into four equal portions. Shape each into a round ball, placing them on a parchment-lined baking sheet. Cover again and let rest for 20 minutes. This final puffing makes them bakery-worthy.
Bake Bowls
Preheat oven to 375°F. Brush with eggwash if desired, and bake for 25-30 minutes until golden and hollow-sounding when tapped. Cool on a wire rack, then slice the tops to create bowls. Voila—your hearty bread bowls are ready to embrace soups!
Nutritional Information
Per serving (1 bread bowl, approximately 200g):
| Calories | 320 |
| Protein | 10g |
| Carbohydrates | 60g (including 2g fiber) |
| Fat | 4g (mostly unsaturated) |
| Sodium | 580mg |
These numbers vary slightly with ingredients, but they show hearty bread bowls as a satisfying, energy-boosting side. Lower in fat than many pastries, they provide complex carbs for sustained fullness. Always consult a dietitian for personalized needs.
Healthier Alternatives
Craving healthier hearty bread bowls without sacrificing flavor? Swap white flour for whole wheat or spelt to boost fiber while keeping that chewy texture intact. Use coconut sugar instead of refined for natural sweetness and antioxidant benefits. For dairy-free, opt for almond milk in place of water for a nutty undertone. Reduce sodium by using half the salt and adding herbs like rosemary for savory flair. These tweaks make your bread bowls nutritionally superior without altering their comforting essence.
Serving Suggestions
Hearty bread bowls shine when filled with chunky vegetable soup, loaded with roasted carrots and kale for a vibrant, veggie-forward meal. Pair with tomato basil for Italian flair or creamy potato for comfort on chilly nights. For a twist, use them as edible plates for salads, topped with greens and vinaigrette. Serve at dinner parties with a side of croutons made from extra dough. Warm the bowls slightly to prevent sogginess, and drizzle with truffle oil for an upscale touch. The possibilities are endless, perfect for customizing to your palate.
Experiment with fillings like loaded chili, complete with beans and cheese, or seafood bisque for a luxurious dinner. For breakfast, hollow out and stuff with eggs and bacon—transforming into a savory bread boat. Remember, the crusty exterior holds up against wet ingredients, making them ideal for stews. Elevate with garnishes like chopped herbs or parmesan shavings. Whether casual or fancy, these bowls turn ordinary meals into memorable feasts.
Common Mistakes
Avoid disappointment with these pitfalls: Don’t over-knead, or you’ll end up with tough dough—eight minutes is golden. Skip proper rising if time is short, but dense bowls result. Water temperature matters: too hot kills yeast, too cold halts activation. Baking unevenly can lead to doughy centers, so use a middle rack. Omit the eggwash if avoiding eggs, but the gloss adds appeal. Correct these, and your bread bowls will be bowl-dropping good.
Storing Tips
Store baked bowls in a paper bag at room temperature for up to 2 days, preserving crustiness. For longer, freeze individually for 3 months, thawing at room temp. Reheat in a 350°F oven wrapped in foil to avoid sogginess. Leftover dough freezes well—form into balls and rise later. Always cool completely before storing to prevent mold. These tips keep your creations fresh, ensuring week-long enjoyment.

Conclusion
Crafting hearty bread bowls is more than baking—it’s creating shareable moments of comfort and flavor. From the data-backed allure of homemade perfection to nutritional perks and versatile servings, this recipe equips you to wow dinner guests or simply treat yourself. Embrace the process, avoid common pitfalls, and experiment fearlessly. Ready to dive in? Share your creations in the comments below, or pin this for your next soup night. Happy baking—your kitchen awaits its starry bowlicious arrival!
FAQs
***Can I make these gluten-free?***
Absolutely! Substitute all-purpose flour with a 1:1 gluten-free blend, and add an extra teaspoon of xanthan gum if needed for chewiness. Results may vary slightly, but they still capture that hearty appeal.
***How do I know when the dough is ready to shape?***
It should double in size and feel soft and puffy to the touch. Press gently; it should spring back without dents signaling over-rising.
***Can I prepare the dough ahead?***
Yes, refrigerate after forming balls for up to 12 hours before final rise. This saves time on baking day, yielding even flavors.
***What if I don’t have yeast?***
Try sourdough starter for a tangy twist, or use baking powder (2 teaspoons) for chemical leavening, though texture differs.
***Are these bowls freezer-friendly?***
Definitely! Bake, cool, wrap tightly, and freeze. Thaw and reheat at 350°F for 10 minutes to restore crispiness.
***Can kids help in the kitchen?***
Absolutely—kneading and shaping are fun, hands-on tasks. Supervise to ensure safety, and you’ll create lasting memories.
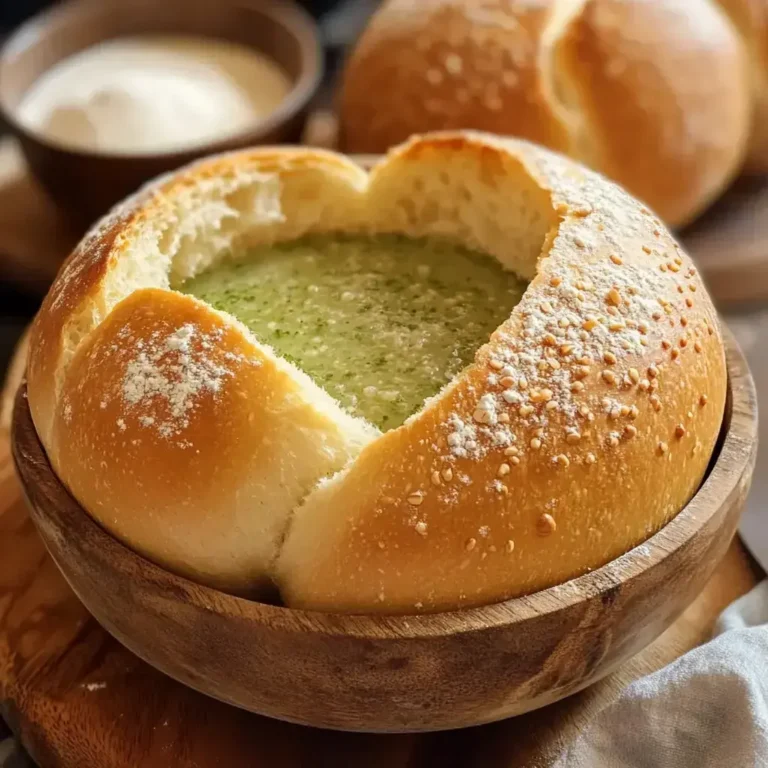
Bread Bowls
Homemade bread bowls with chewy texture and crusty exterior. Perfect for serving soups.
Ingredients
- 2 1/4 cups milk, warmed.
- 1 tablespoon instant yeast.
- 1 tablespoon sugar.
- 1 tablespoon olive oil.
- 1 tablespoon salt.
- 1/2 cup whole wheat flour.
- 4 1/2 cups bread flour.
Instructions
- Combine warm milk, yeast and sugar. Let foam. Add oil, salt, flours and knead 8 minutes.
- Let dough rise 1.5 hours until doubled. Or rise in fridge 8-24 hours for better flavor.
- Cut into 6 pieces. Shape into tight balls. Rise 1 hour. Score tops.
- Add ice to bottom of 425°F oven. Bake bowls 25-28 minutes until golden.
Notes
Knead full time for proper structure.
Cold rise gives better flavor.
Ice creates crusty exterior.
Nutrition
- Calories: 458
- Fat: 7 g
- Carbohydrates: 82 g
- Protein: 16 g