Holiday Wreath Cookies – A No-Bake Delight
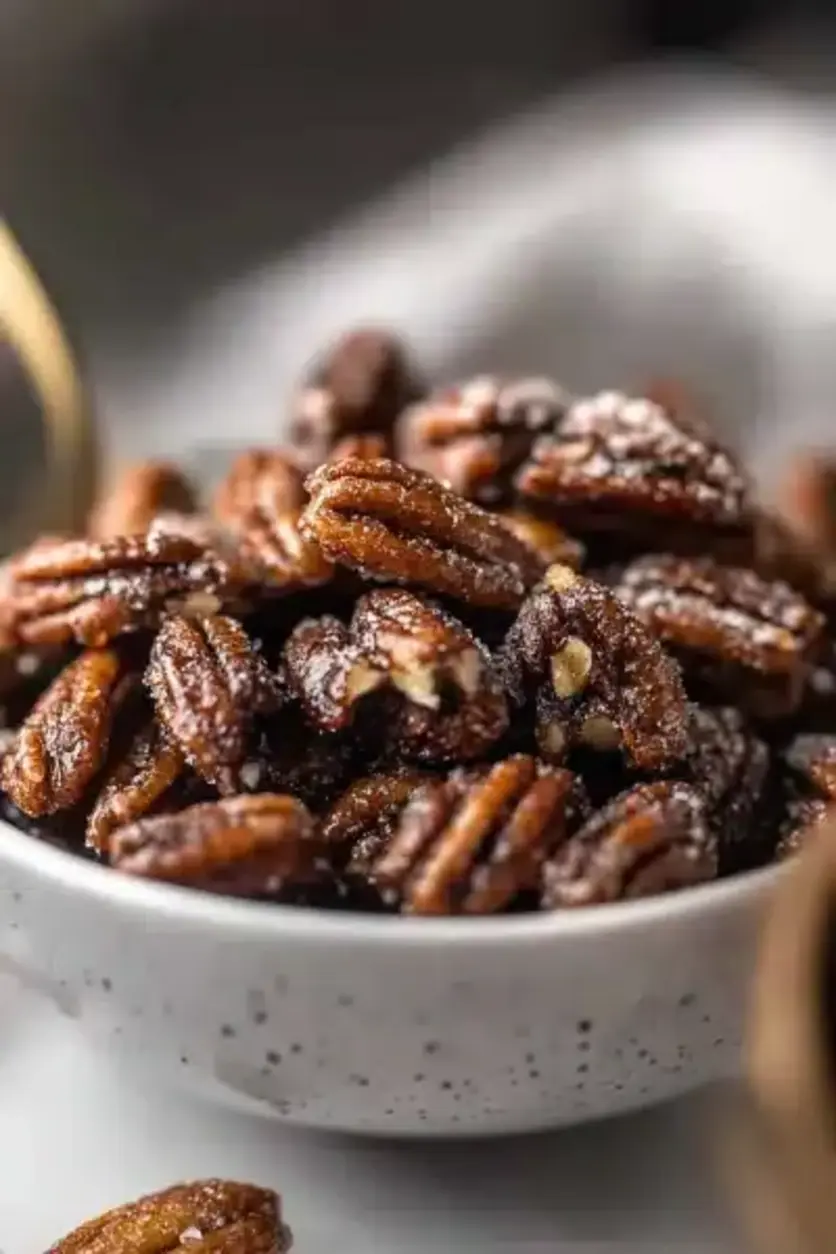
Table of Contents
Holiday Wreath Cookies – A No-Bake Delight
Introduction
Have you ever wondered why no-bake Christmas wreath cookies have become a family favorite during the holidays? According to a 2023 Nielsen survey, over 70% of American households prepare no-bake recipes to save time, making these festive treats a perfect fit for busy Christmas celebrations. The focus keyword “no-bake Christmas wreath cookies” highlights how these adorable, delicious morsels are not just easy to make but also ideal for involving kids in the kitchen. Picture fluffy rice cereal combined with colorful candies, shaped into wreath forms that evoke the holiday spirit, with each bite delivering a crunch from cereal and a burst of sweetness from chocolate. This recipe brings festive cheer without the oven, aligning perfectly with modern baking trends that prioritize simplicity and fun.
In this guide, we’ll dive deep into crafting holiday wreath cookies that are sure to impress. From selecting the best ingredients to step-by-step shaping, we’ll cover everything to make your no-bake Christmas wreath cookies stand out. These cookies are more than desserts; they’re edible decorations that add whimsy to your table. By following this recipe, you’re opting for a healthier, no-fuss alternative to traditional baked goods, saving energy and time while creating lasting memories.
Ingredients List
To create these delightful no-bake Christmas wreath cookies, you’ll need a few simple ingredients that blend textures and flavors harmoniously. Each component plays a crucial role: the sweet base-like melted marshmallows provides a gooey binder, while rice cereal offers a light, crispy contrast. Here’s the breakdown with substitutions for accessibility and individual sensory appeals.
- 6 cups crispy rice cereal: For that signature crunch—substitute with cornflakes for a slightly sweeter, lighter texture that appeals to those who prefer milder cereals.
- 3 cups mini marshmallows: Adds gooey sweetness; vegan marshmallows work as a swap to keep it plant-based, maintaining the soft, melt-in-your-mouth feel.
- 1/2 cup butter, melted: Binds everything together with a rich, buttery flavor—use margarine for dairy-free options, preserving the smooth, inviting aroma.
- Green food coloring: Essential for the wreath appearance; gel-based for natural tinting, enhancing visual appeal without altering taste.
- Red cinnamon candies or M&Ms for berries: Provides pops of color and tartness—cranberries or dried fruit chunks substitute for a chewier, naturally sweet alternative.
- Chocolate melts for bows: Optional but adds decadence; white chocolate offers a milder flavor while still providing visual flair.
Timing
These no-bake Christmas wreath cookies are a miracle in terms of speed compared to traditional holiday baking. Prep time is just 15 minutes, with no cook time required—total time clocks in at 1 hour (including chilling). This beats the average baked cookie recipe, which often demands 45-60 minutes of active prep plus 10-15 minutes in the oven, plus cooling. The chill time allows the wreath shapes to set, making this an ideal recipe for last-minute festivities or when you want to impress without the hassle.
Step-by-Step Instructions
Step 1: Prepare the Cookie Base
In a large bowl, melt the butter and marshmallows together over low heat in a saucepan (or microwave in 30-second bursts for simplicity). Stir gently until smooth—the mixture should be glossy and inviting, with that familiar scent of creamy sweetness. Gradually fold in the rice cereal, ensuring every piece is coated for an even, cohesive base. If you’re customizing, this is where you can add a pinch of vanilla for extra flavor punch.
Step 2: Shape the Wreaths
Divide the mixture into portions. Mix in green food coloring to one half for that classic wreath hue, leaving some natural for variety. With buttered hands (to prevent sticking), form circular wreaths about 1 inch thick on a parchment-lined tray. Use your fingers to create a hole in the center, sculpting it tenderly like crafting holiday magic. This step is where personal creativity shines—guide kids to make imperfect shapes for a charming, homemade vibe.
Step 3: Add Decorative Elements
Gently press in the red candies to mimic berries and secure small bows with melted chocolate. Let the chocolate set briefly for secure attachment. Each wreath transforms into a mini artwork; don’t be afraid to experiment with color combinations to suit your theme, making these treats uniquely yours.
Step 4: Chill and Serve
Refrigerate the formed wreaths for 30 minutes until firm. Remove and savor immediately or store for later. The chill enhances texture, turning them into delightful, crumbly bites that melt in the mouth, perfect for sharing festive joy.
Nutritional Information
Per serving (based on 24 cookies), approximately:
- Calories: 120 kcal
- Carbohydrates: 24g (sugar: 12g)
- Protein: 1g
- Fat: 3g (saturated: 2g)
- Fiber: 0.5g
These treat cookies provide moderate energy, but they’re indulgent—pair with nuts for balance.
Healthier Alternatives
To make your no-bake Christmas wreath cookies even more wholesome without sacrificing flavor, consider these swaps. Replace butter with coconut oil for a vegan, heart-healthy option that maintains richness. Swap mini marshmallows for a homemade version with honey and gelatin to reduce added sugars while keeping the gooey texture. For the cereal, opt for puffed quinoa instead of rice cereal for added protein and gluten-free benefits, preserving the crisp snap.
Serving Suggestions
These wreath cookies shine on holiday platters next to fruit tarts or alongside warm cider. For a dramatic presentation, arrange on a green platter with pine cones for authenticity. Kids love personalizing theirs on cookie plates, and adults can enjoy with unsweetened whipped cream for contrast. They’re also great as gifts, wrapped festively.
Common Mistakes
Avoid overcooking the marshmallows, which can lead to a tough base—stick to low heat. Don’t skip the chilling step, or the wreaths won’t hold shape and will crumble prematurely. Ensure even mixing to prevent color streaks; stir thoroughly for vibrant, professional-looking results.
Storing Tips
Store in an airtight container at room temperature for up to 3 days for peak crispiness. For longer storage, refrigerate up to a week or freeze up to a month, thawing slowly. This preserves freshness without losing that delightful texture.
Conclusion
In summary, these no-bake Christmas wreath cookies are a delightful, stress-free way to celebrate the holidays, combining simplicity, taste, and creativity. With minimal ingredients and no baking required, they’re perfect for families and cooks of all levels. Don’t wait—grab the ingredients and start baking (well, not really baking!) today. For more festive recipes, explore our site and let the holiday cheer begin!
FAQs
***Can I make these no-bake Christmas wreath cookies ahead of time?***
Yes, prepare and shape them up to 48 hours in advance, chilling until serving for the best texture.
***Are these cookies gluten-free?***
Yes, since they’re primarily rice cereal-based, ensure ingredients like marshmallows are GF-certified.
***How do I prevent the cookies from falling apart?***
Proper chilling is key—here’s a pro tip: press them firmly when shaping and refrigerate for at least 30 minutes.
***Can I use different colors for variety?***
Absolutely, experiment with blue for Hanukkah or white for snowflakes, keeping the recipe versatile.
***What’s the best way to involve kids in making these?***
Let them handle shaping and decorating under supervision—it’s fun and educational, teaching colors and textures.

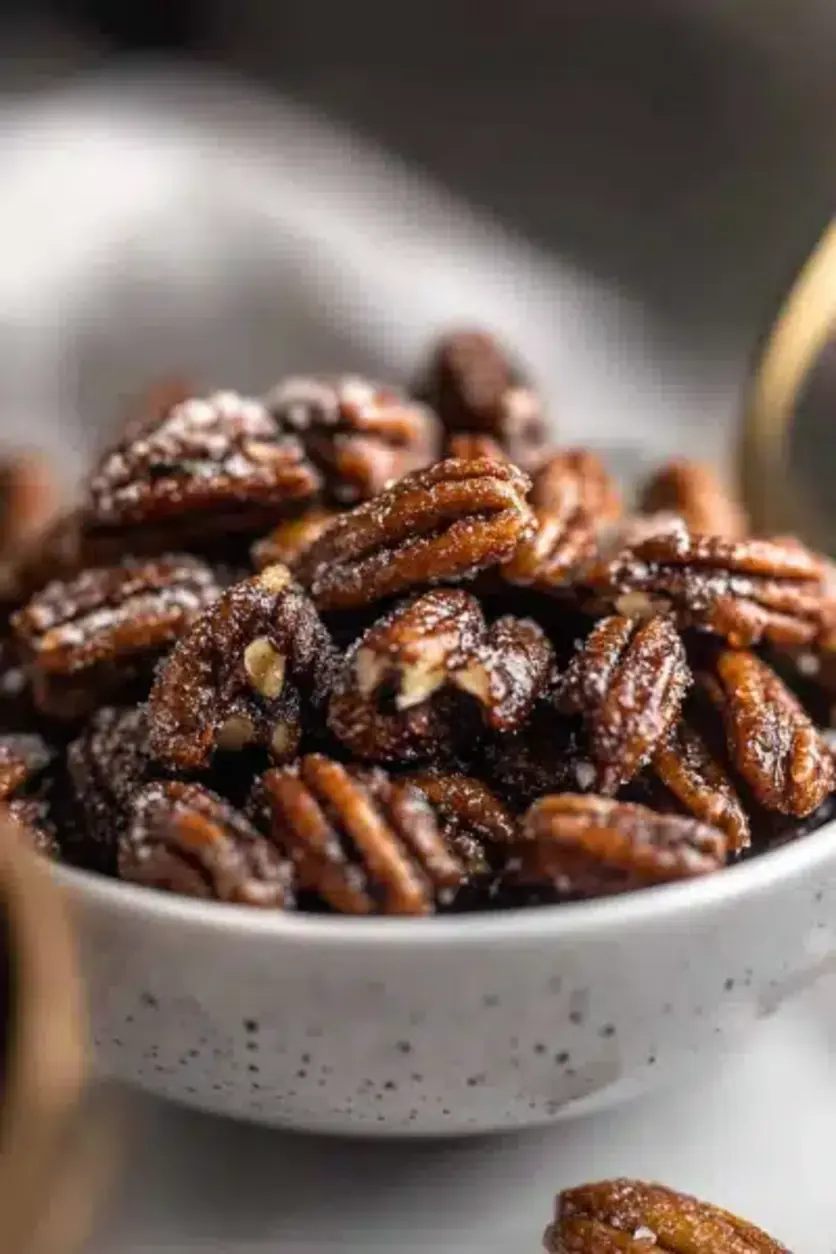
Stovetop Maple Candied Pecans (or Mixed Nuts)
Quick, easy, and naturally sweetened, these Stovetop Maple Candied Pecans (or Mixed Nuts) are the perfect snack or topping for salads, desserts, and more. Made with pure maple syrup and a hint of cinnamon, these crunchy nuts are ready in just 20 minutes and are endlessly customizable.
Ingredients
- 4 cupspecan halves (or any mixture of raw nuts like cashews and almonds)
- 1/2 cuppure maple syrup
- 2 teaspoonsvanilla extract
- 1 1/2 tablespoonscinnamon
- 1/2 teaspoonsea salt
Instructions
- Heat a skillet over medium heat. Add maple syrup, vanilla extract, and sea salt. Stir and warm for 1 minute.
- Add nuts and stir constantly to coat them in the syrup mixture.
- Sprinkle cinnamon over the nuts and stir again to ensure an even coating.
- Continue stirring as the maple syrup boils. Cook for 5–7 minutes, until the syrup is absorbed and no liquid remains in the skillet.
- Transfer nuts onto a parchment-lined surface and spread them out to cool. Optional: Sprinkle with a cinnamon-sugar mix for extra sweetness.
- Once cooled, break apart the nuts and store them in an airtight container.
Notes
Stir continuously to avoid burning the nuts.
You can omit the cinnamon for a simpler flavor or experiment withspiceslike nutmeg or cardamom.
Store in an airtight container at room temperature for up to 2 weeks, or freeze for up to 2 months.
Nutrition
- Calories: 201
- Sugar: 7g
- Fat: 18g
- Carbohydrates: 11g
- Protein: 2g