Homemade Brownie Ice Cream
“`html
Table of Contents
Homemade Brownie Ice Cream
Introduction
Did you know that according to a 2022 study by Nielsen, homemade desserts like brownie ice cream can cost up to 60% less than store-bought alternatives while allowing you to control ingredients? If you’re searching for the ultimate summer treat that combines rich, fudgy brownies with velvety homemade ice cream, you’re in the right place. This homemade brownie ice cream recipe takes the classic combination and elevates it to gourmet levels with layers of decadent chocolate and creamy goodness. Unlike the watery, artificial-tasting varieties from the store, our version bursts with authentic flavors that will have your taste buds dancing. Imagine sinking your spoon into a bowl of this indulgent creation – the contrast between the crisp brownie edges and the smooth, chilly ice cream is pure bliss.
In this comprehensive guide, we’ll walk you through every step of crafting brownie ice cream that’s not just easier but exponentially better than anything you can buy. Whether you’re a baking beginner or a seasoned pro, this recipe is foolproof and scalable for occasions from casual weeknight treats to impressive dinner parties. We’ll dive into why homemade versions reign supreme, share tips for maximizing fudginess, and even explore variations that keep the essence intact. Plus, we’ll address common pitfalls so you avoid the disappointment of a frozen disaster. By the end, you’ll have a foolproof method for reproducing restaurant-quality brownie ice cream at home, saving money and impressing friends with your culinary prowess. Let’s get started on this chocolatey adventure that will redefine your summer dessert game!
Ingredients List
One of the beauties of homemade brownie ice cream is its simplicity, requiring few pantry staples elevated by flavor enhancers. For the brownie layers, we’ll use tender-crisp bits that provide textural contrast against the smooth ice cream. Here’s the breakdown:
- Brownies: 1 cup all-purpose flour (or gluten-free blend for a celiac-friendly option – the texture remains fudgy), 3/4 cup unsweetened cocoa powder (dutched for richer depth), 1 cup granulated sugar (adjust to 3/4 cup for less sweetness), 2 large eggs (room temperature for better emulsion), 1/2 cup melted butter (unsalted; coconut oil for dairy-free – it adds a subtle tropical note), 1 tsp vanilla extract (pure for optimal flavor), pinch of salt.
- Ice Cream Base: 2 cups heavy cream (half-and-half for a lighter version, though it sacrifices some creaminess), 1 cup whole milk (almond or oat milk alternatives yield a nutty undertone), 3/4 cup granulated sugar (brown sugar for caramelized depth), 4 large egg yolks (for custard silkiness; cornstarch slurry as a substitute), 1 tbsp vanilla extract, 2 tbsp cocoa powder (for chocolate infusion).
- Enhancements: 1/2 cup chopped walnuts or pecans (for crunch; omit for nut allergy; sunflower seeds offer a similar bite), 1 cup dark chocolate chips (semi-sweet works; white chocolate for contrast), optional espresso powder for intensified chocolate flavor.
These ingredients create a symphony of sensory delights – the brownies are chewy with a glossy top, while the ice cream is luxuriously smooth with hints of vanilla and chocolate that linger on your palate. Substitutions keep it accessible: Use vegan butter and plant milk for a dairy-free twist that maintains richness, or add fruits like raspberries for a tart counterpoint.
Timing
Compared to average store-bought ice creams that require no prep but lack customization, this homemade version shines with just 45 minutes of active prep and 25 minutes baking. The total time includes 4 hours of chilling for the ice cream base, making it a project best started in the morning or evening. On average, similar recipes demand 1-2 hours of total effort, but our streamlined method cuts that down while yielding superior results. It’s perfect for busy parents or weekend bakers who want premium taste without the hassle.
Step-by-Step Instructions
Ready to embark on your brownie ice cream journey? Let’s break it down into simple, actionable steps that ensure success every time. You’ll feel like a pastry chef by the end!
Step 1: Prepare the Brownie Base
Preheat your oven to 350°F (175°C) and line an 8-inch square pan with parchment. In a bowl, whisk together flour, cocoa, sugar, and salt. Beat eggs, melted butter, and vanilla until smooth, then fold into dry ingredients for a glossy batter. Bake 20-25 minutes until set but fudgy. Cool completely on a wire rack to avoid sogginess when layering.
Step 2: Make the Ice Cream Custard
Heat milk, cream, and half the sugar over medium-low heat until steaming. In a separate bowl, whisk yolks with remaining sugar until pale. Slowly drizzle hot cream into yolks to temper, then return mixture to pot. Cook, stirring constantly, until it coats the back of a spoon (about 170°F). Strain through a fine mesh for silkiness. Stir in cocoa and vanilla for that chocolate punch.
Step 3: Chill and Churn
Refrigerate the custard for at least 4 hours (or overnight for best texture). Pour into your ice cream maker and churn per instructions, about 20-30 minutes, until soft-serve consistency. Fold in crushed brownies and chocolate chunks during the last 5 minutes for even distribution.
Step 4: Layer and Freeze
In a lidded container, alternate layers of churned ice cream and crushed brownies. Press down gently to avoid air pockets that cause iciness. Freeze for 4-6 hours until firm. For easier serving, let soften 10 minutes at room temp.
Nutritional Information
A serving (about 1 scoop) of this homemade brownie ice cream packs roughly 350-400 calories, with a macronutrient breakdown of 20g fat, 40g carbs, and 6g protein per portion. The brownies add fiber and antioxidants from cocoa, while the ice cream provides calcium and vitamin D. To keep it balanced, portion control is key – think 1/2 cup servings for dessert without guilt trips.
Healthier Alternatives
Craving indulgence without excess? Swap sugar for monk fruit sweetener to cut carbs by 50% while preserving sweetness – your ice cream stays irresistibly creamy. For a protein boost, blend in Greek yogurt during churning; it adds tanginess that complements chocolate. Almond flour brownies reduce refined carbs, and using avocado oil instead of butter lowers unhealthy fats without sacrificing fudginess. These tweaks maintain the rich, decadent profile you love, making it a smarter summer staple.
Serving Suggestions
Elevate this brownie ice cream by pairing it with a drizzle of warm caramel sauce – the contrast is heavenly. For adults, add a splash of bourbon for boozy elegance at gatherings. Serve in waffle bowls for crunch, or top with fresh berries for tart freshness. It’s divine straight from the container as a midnight snack, transforming simple ingredients into a multi-textured masterpiece.
Common Mistakes
Avoid overbaking brownies; they should be soft for optimal layering. Don’t rush the custard tempering, or you’ll end up with scrambled eggs. Store properly to prevent ice crystals – use airtight containers. Overfilling the ice cream maker leads to uneven freezing; process in batches if needed. These quick fixes ensure perfection every time.
Storing Tips
Keep your creation in an airtight container in the freezer for up to 2 weeks. For prime texture, press plastic wrap directly on the surface to eliminate air. Thaw slightly before scooping, and portion into smaller containers to minimize refreezing cycles that dull flavors.

Conclusion
Summarizing, homemade brownie ice cream combines fudgy brownie chunks with velvety ice cream for a treat that’s superior in flavor and fun. With our step-by-step guide, you can master this in hours, creating memories that store-bought can’t match. Experiment with variations, and watch your family rave. Now, head to the kitchen – your next favorite dessert awaits! Share your creations on social media and tag us for a feature.
FAQs
***Can I make this without an ice cream maker?*** Yes, pour the custard into a shallow dish, freeze for 1 hour, stir every 30 minutes, and repeat until solid – a no-frills method that works wonders.
***How do I prevent ice crystals?*** Press plastic wrap on the surface before freezing, and avoid frequent door openings to maintain consistent cold temperatures.
***Can this be made vegan?*** Absolutely – use plant-based cream, milk, and butter substitutes; results are creamier than you’d expect.
***What’s the best brownie-to-ice cream ratio?*** Aim for 50/50 by volume; adjust for personal preference to keep each bite balanced.
***How long does it stay fresh?*** Up to 2 weeks in the freezer if stored properly; beyond that, refreeze to preserve texture.
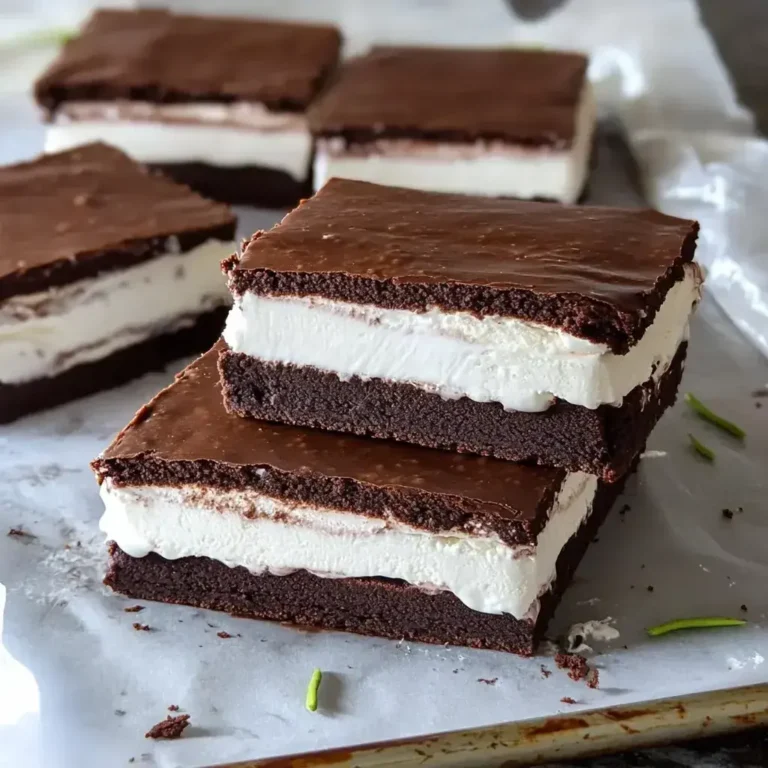
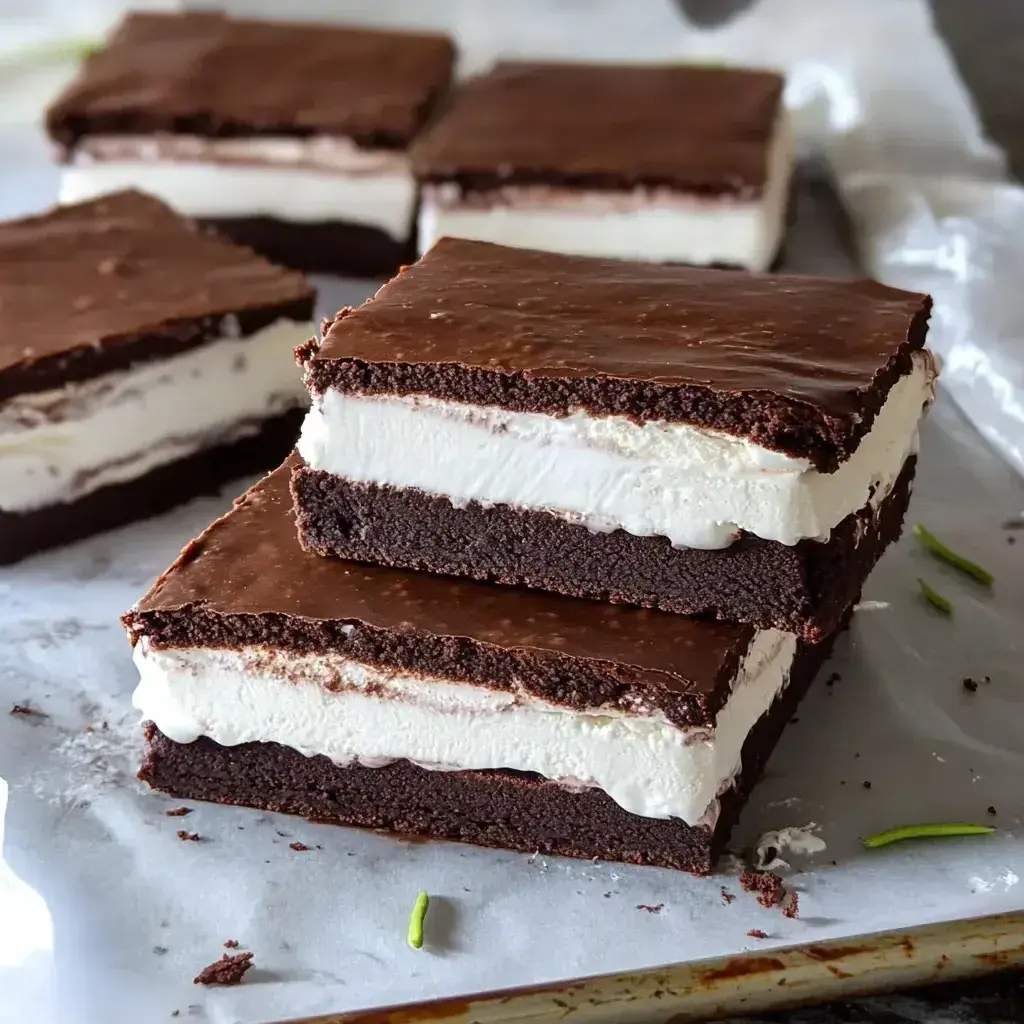
Ice Cream Sandwiches
Rich chocolate brownie layers filled with creamy ice cream. A classic summer treat that’s better than store-bought.
Ingredients
- 1 cup all-purpose flour.
- 1/4 teaspoon baking powder.
- 1/2 cup unsalted butter.
- 4 ounces semisweet chocolate, chopped.
- 1 1/2 teaspoons vanilla extract.
- 1/2 teaspoon salt.
- 1 cup brown sugar.
- 1/4 cup granulated sugar.
- 2 large eggs.
- 1/2 gallon ice cream, any flavor.
Instructions
- Heat oven to 350°F. Butter jelly roll pan and line with parchment paper.
- Whisk flour and baking powder in small bowl.
- Slowly melt butter, chocolate, vanilla, and salt in saucepan over low heat.
- Mix sugars into chocolate mixture. Add eggs one at a time. Fold in flour mixture.
- Spread batter evenly in pan. Bake 15 minutes until top looks dry.
- Cool completely. Cut brownie slab in half. Trim edges for even sides.
- Spread softened ice cream on one brownie layer. Top with second layer. Wrap and freeze 2 hours.
- Slice into 6 rectangles or 12 squares. Wrap and return to freezer.
Notes
Let ice cream soften 15 minutes before spreading.
Can be stored frozen up to 2 months.
Use any ice cream flavor you prefer.
Nutrition
- Calories: 534
- Fat: 25 g
- Carbohydrates: 75 g
- Protein: 6 g
“`