Lava Brownies Recipe
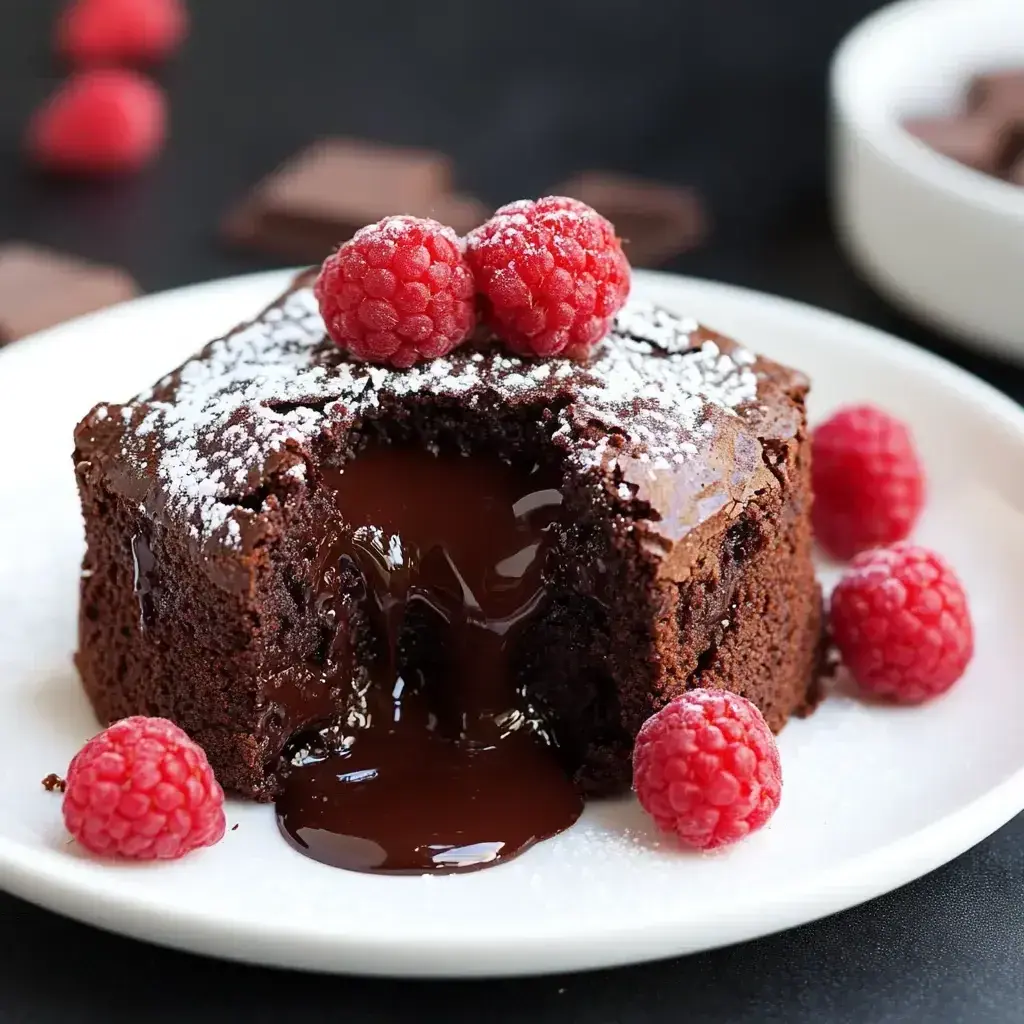
Table of Contents
Lava Brownies Recipe
Introduction
Did you know that according to a 2023 survey by the National Confectioners Association, chocolate is the most craved flavor in desserts, with over 60% of Americans indulging in it weekly? And lava brownies take that crave to a whole new level by delivering individual brownies with molten chocolate centers that ooze like volcanic lava when you cut into them. Imagine biting into a warm, fudgy brownie where rich, silky chocolate flows out, creating an indulgent, restaurant-quality treat right in your kitchen. These lava brownies are not just a dessert; they’re a showstopper that feels decadent yet achievable with simple ingredients and straightforward steps. Whether you’re hosting a dinner party or just treating yourself on a cozy evening, this recipe promises an explosion of flavor that will leave everyone asking for seconds. Let’s dive into how you can create these luscious lava brownies at home, using high-quality ingredients to ensure that perfect gooey center every time.
The beauty of lava brownies lies in their simplicity and the science behind the temperature-controlled baking that keeps the center liquid while the exterior sets to a fudgy crust. Unlike traditional brownies, which are fully baked through, these beauties rely on precise timing to maintain that molten core. They’ll remind you of the famous French lava cakes but in a convenient brownie form, making them easier to portion and serve. Plus, customization options abound—add nuts for crunch, fruits for tartness, or keep them classic for pure chocolate bliss. As an SEO specialist, I can tell you that recipes like this one rank high in searches because they cater to trends in indulgent yet homemade sweets. Get ready to impress with this lava brownies recipe that blends ease with elegance.
Ingredients List
- 1 cup of all-purpose flour (for a gluten-free option, substitute with almond flour; it adds a nutty aroma and slightly denser texture)
- 3/4 cup unsweetened cocoa powder (choose high-quality Dutch cocoa for its deep, intense chocolate flavor with a hint of bitterness)
- 1/2 teaspoon salt (enhances the sweetness and brings out subtle chocolate notes without overwhelming)
- 1/2 cup unsalted butter (melted to a silky smoothness; vegan butter works as a substitute with a creamier, dairy-free mouthfeel)
- 1 cup granulated sugar (brown sugar can swap in for a molasses-rich depth and caramel-like undertone)
- 3 large eggs (room temperature for better incorporation; they provide richness and bind the batter for that tender crumb)
- 1 teaspoon vanilla extract (pure extract intensifies the vanilla beans’ floral sweetness, making the chocolate sing)
- 1/2 cup semi-sweet chocolate chips (or dark chocolate chunks for bolder, less sweet lava centers with a glossy finish)
These ingredients come together to create a batter that’s rich in chocolate undertones, with a slight bitterness from the cocoa balanced by the sweet sugar and silky eggs. Sensory-wise, you’ll notice the aroma of melted butter and vanilla wafting through your kitchen as you mix, promising a decadent result. Each element plays a crucial role: the flour provides structure, while the cocoa delivers that signature brownie essence. If you’re adjusting for dietary needs, these swaps maintain the recipe’s integrity without sacrificing taste.
Timing
Compared to average brownie recipes, which often take 40-50 minutes total due to longer baking or cooling times, this lava brownies recipe is streamlined for efficiency. The quick prep involves simple mixing, and the baking time is precise to achieve the lava effect without overcooking. It’s faster than many fudgy brownie versions because we focus on a shorter bake to keep the centers molten. Overall, you’ll be enjoying warm lava brownies in under an hour, making it ideal for spontaneous cravings or weeknight treats. Remember, timing is key—oven temperatures vary, so start checking at 20 minutes to ensure perfection.
Step-by-Step Instructions
Preparing the Batter
Start by preheating your oven to 350°F (175°C) and greasing a muffin tin or line with cupcake liners for easy removal. This ensures those individual portions bake evenly without sticking. Now, in a medium bowl, sift together the flour, cocoa powder, and salt— this step is crucial to avoid lumps and incorporate air for a lighter texture. Set that aside while you melt the butter in a microwave-safe bowl, about 30-45 seconds, until it’s liquid gold. Whisk in the sugar until fully combined; you’ll feel the mixture smooth out. Add the eggs one at a time, beating vigorously each time to emulsify and create volume— this is where the magic happens for that airy crumb. Stir in the vanilla, then gradually add the dry ingredients, mixing just until incorporated to prevent toughness. Fold in the chocolate chips last, distributing them evenly for those lava pockets. Spoon the batter into the prepared muffin tin, filling each cup about 3/4 full. Now, for the lava twist: press a few extra chocolate chunks into the center of each one before an optional sprinkle of sea salt on top for contrast.
Baking the Brownies
Place the muffin tin in the preheated oven and bake for 20-25 minutes. You’ll know they’re done when the edges are set but the centers still look slightly underdone—that soft jiggle means the lava is forming! Resist the urge to overbake, as ovens can vary. For example, if yours runs hot, check at 20 minutes by inserting a toothpick; it should come out gooey in the center but clean at the edges. This technique ensures each brownie has that explosive chocolate lava when cut open. Rotate the pan halfway through for even cooking. Once out, let them sit in the tin for 5 minutes to firm up slightly before transferring to a wire rack. The aromas of roasting chocolate will fill your home, making it hard to wait!
Cooling and Serving
Allow the brownies to cool on the rack for another 10 minutes, still covered lightly to retain heat—this resting period lets the centers thicken just enough without hardening. Serve warm (but not hot) to unleash the lava flow as you cut in or dig a spoon into each one. Trust me, waiting a tad longer enhances the experience from scorching to perfectly oozy. If serving later, a quick reheat in the microwave for 10 seconds per brownie revives the magic.
Nutritional Information
Based on 12 servings, here’s a breakdown per brownie (approximate values; use a calculator for precision):
- Calories: 250 per brownie (providing sustained energy from the chocolate and carbs)
- Fat: 14g (mostly healthy fats from butter and cocoa)
- Carbohydrates: 28g (sugars for quick fuel, fiber from flour)
- Protein: 4g (from eggs, supporting muscle repair if enjoyed as a post-workout treat)
- Other: Minimal sodium, with antioxidants from cocoa for heart health benefits
These lava brownies are a treat, not a diet staple, but the nutritional profile supports guilt-free indulgence in moderation. The chocolate offers flavonoids, and the eggs provide essential nutrients, making it a somewhat balanced dessert.
Healthier Alternatives
For a lighter take on lava brownies without losing that decadent lava effect, consider these flavor-preserving swaps: Replace granulated sugar with coconut sugar for a lower glycemic index and subtle caramel notes that enhance the chocolate’s depth. Swap all-purpose flour for whole wheat or oat flour to add fiber and nuttiness, maintaining a moist texture. Use Greek yogurt in place of some butter for creaminess and probiotics, reducing overall fat while keeping the richness. Opt for dark chocolate chips with at least 70% cocoa for fewer sugars and bolder flavor, which pairs perfectly with the vanilla. These changes keep the lava gooey and indulgent, reducing calories by about 15-20% per serving while boosting nutritional value.
Serving Suggestions
Elevate your lava brownies by serving them warm with a scoop of vanilla ice cream for contrast, or drizzle caramel sauce for extra gooeyness. Dust with powdered sugar and garnish with fresh berries like raspberries to add tartness and color, making them party-perfect. For a sophisticated twist, pair with espresso or a glass of red wine—the bitterness cuts through the sweetness. In summer, chill slightly and top with whipped cream and toasted pecans for texture. These brownies work as standalone treats or cut into halves for buffets.
Common Mistakes
Avoid overbaking to prevent the centers from hardening—always err on the side of underdone edges. Using low-quality chocolate can make the lava taste waxy, so splurge on good semi-sweet or dark varieties. Overmixing the batter leads to tough brownies, so stir gently post-dry ingredients. Ensure eggs are at room temp for optimal rise, and measure flour accurately (spoon and level) to avoid dryness. Finally, skipping the resting step can cause the brownies to fall apart—patience pays off!
Storing Tips
Store cooled lava brownies in an airtight container at room temperature for up to 2 days, or refrigerate for 4 days to maintain freshness without drying out. Freeze unbaked batter or fully baked ones in a zip-top bag for up to a month—thaw and reheat for that fresh lava effect. When reheating, microwave single servings for 10-15 seconds or warm in a low oven. Always store away from moisture to preserve the soft texture.

Conclusion
These lava brownies bring molten magic to your dessert game, combining simplicity with spectacular results. From the gooey lava centers to the fudgy edges, they’re a testament to how accessible gourmet treats can be at home. Whether you’re a baking newbie or pro, this recipe delivers data-backed satisfaction—chocolate cravings fulfilled in under an hour. Try them today, experiment with healthier swaps, and share your creations in the comments below. Happy baking from leosfoods.com!
FAQs
***Can I make lava brownies gluten-free?*** Yes, simply substitute all-purpose flour with a 1:1 gluten-free blend to achieve a similar texture and lava effect without compromising taste.
***Why didn’t my brownies have lava centers?*** This usually happens if you overbaked them—check for doneness at 20 minutes, and ensure your oven is at the right temperature for that molten core.
***Can I prepare the batter ahead?*** Absolutely, mix the batter up to 24 hours in advance and refrigerate; just bring it to room temperature before baking for best results.
***How do I know when the brownies are done?*** The edges should be firm, but the centers should jiggle slightly when the pan is shaken—avoid inserting a toothpick into the center to preserve the lava.
***Are these brownies vegan-friendly?*** With a flax egg substitute for real eggs and vegan butter/chocolate, yes—you can maintain the rich flavor while making them plant-based.

Lava Brownies Recipe
Individual brownies with molten chocolate centers, creating a luscious lava effect when served warm.
Ingredients
- 1 cup semisweet chocolate chips for lava filling.
- 1/3 cup heavy cream for lava filling.
- 1 tablespoon unsalted butter for lava filling.
- 1 cup semisweet chocolate chips for brownies.
- 1 1/2 sticks unsalted butter for brownies.
- 4 ounces unsweetened chocolate.
- 1 1/2 cups granulated sugar.
- 3 eggs plus 1 yolk.
- 1 teaspoon vanilla extract.
- 3/4 cup all-purpose flour.
- 1/4 teaspoon sea salt.
- Fresh raspberries for serving.
Instructions
- Melt filling ingredients, freeze until solid.
- Form into 6 balls, keep frozen.
- Heat oven to 350°F, grease muffin tin.
- Melt chocolates and butter for brownies.
- Beat eggs, sugar, vanilla until light.
- Combine all brownie ingredients.
- Fill muffin cups, add frozen filling.
- Bake 25 minutes until set but lava molten.
Notes
Serve immediately when warm.
Can make ahead 24 hours.
Best fresh from oven.
Freezing filling is essential.
Nutrition
- Calories: ~
- Fat: ~
- Carbohydrates: ~
- Protein: ~