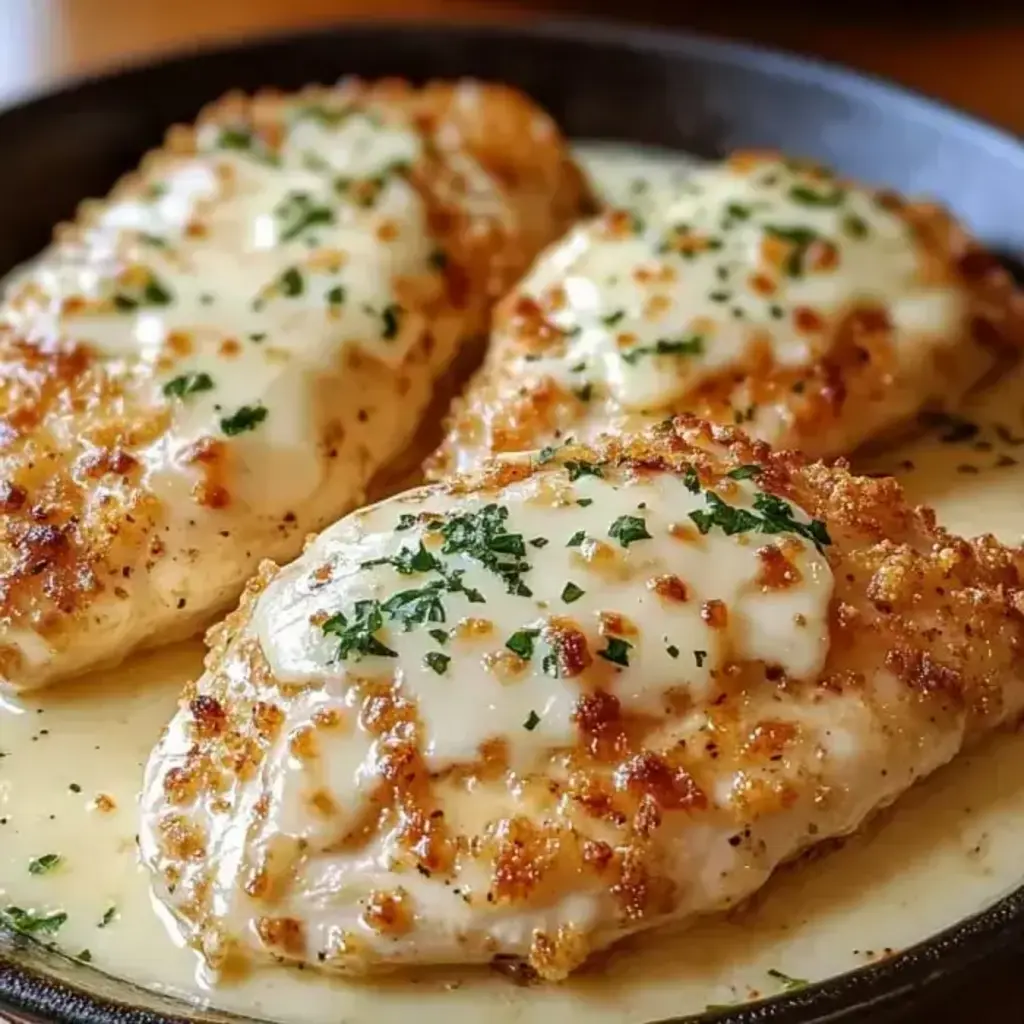
Longhorn Steakhouse Parmesan Chicken
“`html
Table of Contents
Longhorn Steakhouse Parmesan Chicken
Introduction
Did you know that Longhorn Steakhouse Parmesan Chicken is consistently ranked among the top 5 most ordered chicken dishes in casual dining chains? That’s a testament to its irresistible combination of crispy, golden-brown breading, juicy chicken, and a decadent blanket of melted cheese. If you’ve ever craved that signature restaurant-quality meal without leaving your kitchen, you’re in the right place. This homemade version of Longhorn Steakhouse’s popular parmesan chicken delivers the same satisfying crunch and savory flavor profile, featuring crispy breaded chicken topped with perfectly melted cheese. It’s a crowd-pleaser that transforms a simple weeknight dinner into a special occasion.
Ingredients List
Gather these simple, high-quality ingredients to build layers of flavor and texture. The key is in the details—using freshly grated cheese and the right blend of herbs makes all the difference.
- For the Chicken:
- 4 boneless, skinless chicken breasts (about 6 oz each), pounded to ½-inch thickness. (Substitution: Chicken thighs for a richer, more forgiving cut.)
- 1 cup all-purpose flour, for a light, crisp coating.
- 2 large eggs, beaten with 2 tbsp water until frothy.
- 1 ½ cups Italian-seasoned breadcrumbs (or plain breadcrumbs mixed with 2 tsp dried Italian seasoning, 1 tsp garlic powder, and ½ tsp onion powder).
- 1 cup freshly grated Parmesan cheese, divided. (The nutty, salty aroma of real Parmigiano-Reggiano is irreplaceable, but a pre-grated blend works in a pinch.)
- 1 tsp kosher salt
- ½ tsp freshly ground black pepper
- ½ cup vegetable or canola oil for frying (high smoke point is crucial).
- For the Topping:
- 1 ½ cups shredded mozzarella cheese (low-moisture part-skim melts beautifully without becoming greasy).
- ½ cup marinara sauce (Use a high-quality, jarred sauce or your favorite homemade recipe for a bright, tangy contrast.)
- Fresh parsley or basil, chopped, for a pop of color and fresh herbal finish.
Timing
20 minutes
15 minutes
35 minutes
At just 35 minutes from start to finish, this recipe is significantly faster than the average breaded chicken recipe that often requires a lengthy baking time. The quick pan-frying method locks in juices and creates an unparalleled crispy exterior that baking alone can’t achieve, making it a perfect choice for a deliciously efficient dinner.
Step-by-Step Instructions
Step 1: Prepare the Chicken
Place each chicken breast between two sheets of plastic wrap or in a large zip-top bag. Using a meat mallet, rolling pin, or even the bottom of a heavy skillet, gently pound the chicken to an even ½-inch thickness. This is non-negotiable—it ensures quick, even cooking and prevents the dreaded dry exterior with a raw center. Pat the chicken completely dry with paper towels. Moisture is the enemy of a crisp crust! Season both sides generously with salt and pepper.
Step 2: Create the Breading Station
Set up three shallow dishes or plates in an assembly line. In the first dish, spread the flour. In the second, whisk the eggs with water until smooth and slightly bubbly. In the third, combine the Italian breadcrumbs with ½ cup of the freshly grated Parmesan cheese. Mix thoroughly with a fork to distribute the cheese evenly. This triple-coating method (flour, egg, breadcrumbs) is the secret to that substantial, crunchy, Longhorn-style breading that adheres perfectly.
Step 3: Bread the Chicken
Working with one piece at a time, dredge the chicken in the flour, shaking off any excess. Next, dip it fully into the egg wash, allowing the excess to drip back into the bowl. Finally, press it firmly into the breadcrumb-Parmesan mixture, coating both sides and all edges. Use your fingers to gently press the crumbs onto the chicken to form a solid, even layer. Place the breaded cutlet on a wire rack or clean plate. Repeat with all pieces. Let them rest for 5-10 minutes—this helps the coating set and prevents it from falling off during frying.
Step 4: Pan-Fry to Perfection
Heat the oil in a large, heavy-bottomed skillet (cast iron is ideal) over medium-high heat. To test if the oil is ready, drop a small breadcrumb in; it should sizzle immediately. Carefully add two chicken cutlets (don’t overcrowd the pan). Fry for 4-5 minutes per side, or until the coating is a deep, golden brown and the internal temperature reaches 165°F. The sound will change from a vigorous sizzle to a quieter fry when the chicken is nearly done. Transfer to a paper towel-lined plate or a clean wire rack to drain any excess oil. Repeat with the remaining chicken.
Step 5: Broil and Serve
Preheat your oven’s broiler on high. Arrange the fried chicken cutlets on a broiler-safe baking sheet. Spoon a thin layer of marinara sauce over each piece, then top with a generous handful of shredded mozzarella and a sprinkle of the remaining Parmesan cheese. Place under the broiler for 2-3 minutes, watching closely, until the cheese is melted, bubbly, and just starting to develop golden spots. Remove immediately and let rest for 2-3 minutes. Garnish with fresh chopped parsley or basil for a vibrant finish.
Nutritional Information
(Per serving, based on one chicken breast with toppings)
- Calories: ~580 kcal
- Protein: 52g
- Carbohydrates: 28g
- Dietary Fiber: 2g
- Sugars: 3g
- Fat: 28g (Saturated Fat: 9g)
- Cholesterol: 195mg
- Sodium: 980mg
Healthier Alternatives
You can enjoy this dish with a lighter profile without sacrificing the core crispy, cheesy experience.
- Baking Method: For a significant fat reduction, skip the pan-fry. Place breaded chicken on a wire rack set over a baking sheet, spray lightly with olive oil cooking spray, and bake at 425°F for 18-22 minutes until cooked through and crispy. Then add toppings and broil.
- Breading Swap: Use whole-wheat panko breadcrumbs mixed with nutritional yeast for a fiber-rich, cheesy-flavored coating.
- Cheese & Sauce: Opt for part-skim mozzarella and a low-sodium marinara sauce. You can also use a lighter hand with the cheese topping.
- Oil-Free “Fry”: Use an air fryer. Spray breaded chicken with oil and cook at 400°F for 10-12 minutes, flipping halfway, until golden and cooked.
Serving Suggestions
This hearty chicken is a complete meal centerpiece. Balance its richness with these classic sides:
- Pasta Perfection: Serve over a bed of angel hair or fettuccine tossed with extra marinara sauce, olive oil, and garlic.
- Vegetable Companions: Garlic sautéed spinach, roasted asparagus with lemon zest, or a crisp Caesar salad complement the dish beautifully.
- Starch Sidekicks: Creamy mashed potatoes, garlic breadsticks, or a simple risotto Milanese are all excellent for soaking up any extra sauce.
Common Mistakes
- Skipping the Pound: Uneven chicken leads to uneven cooking. Always pound to an even thickness.
- Wet Chicken: Failing to pat the chicken dry results in a soggy breading that won’t adhere or crisp properly.
- Overcrowding the Pan: Adding too many cutlets at once drops the oil temperature, causing the chicken to steam and become greasy instead of fry and become crisp.
- Using Pre-Shredded Cheese in the Breading: Pre-shredded cheese contains anti-caking agents (like cellulose) that can prevent proper melting and integration into the breading. Freshly grate your Parmesan for the best texture.
- Not Letting it Rest: Cutting into the chicken immediately after broiling releases all the precious juices. A brief rest ensures maximum juiciness.
Storing Tips
- Refrigeration: Store leftovers in an airtight container in the refrigerator for up to 3 days. For best results, store the chicken and sauce/cheese topping separately if possible.
- Reheating: To restore crispiness, reheat in an air fryer or toaster oven at 375°F for 5-8 minutes. Avoid the microwave, which will make the breading soggy.
- Freezing: Freeze the un-topped, cooked chicken cutlets on a parchment-lined baking sheet until solid, then transfer to a freezer bag for up to 2 months. Reheat from frozen in a