Dairy Free Butter Chicken
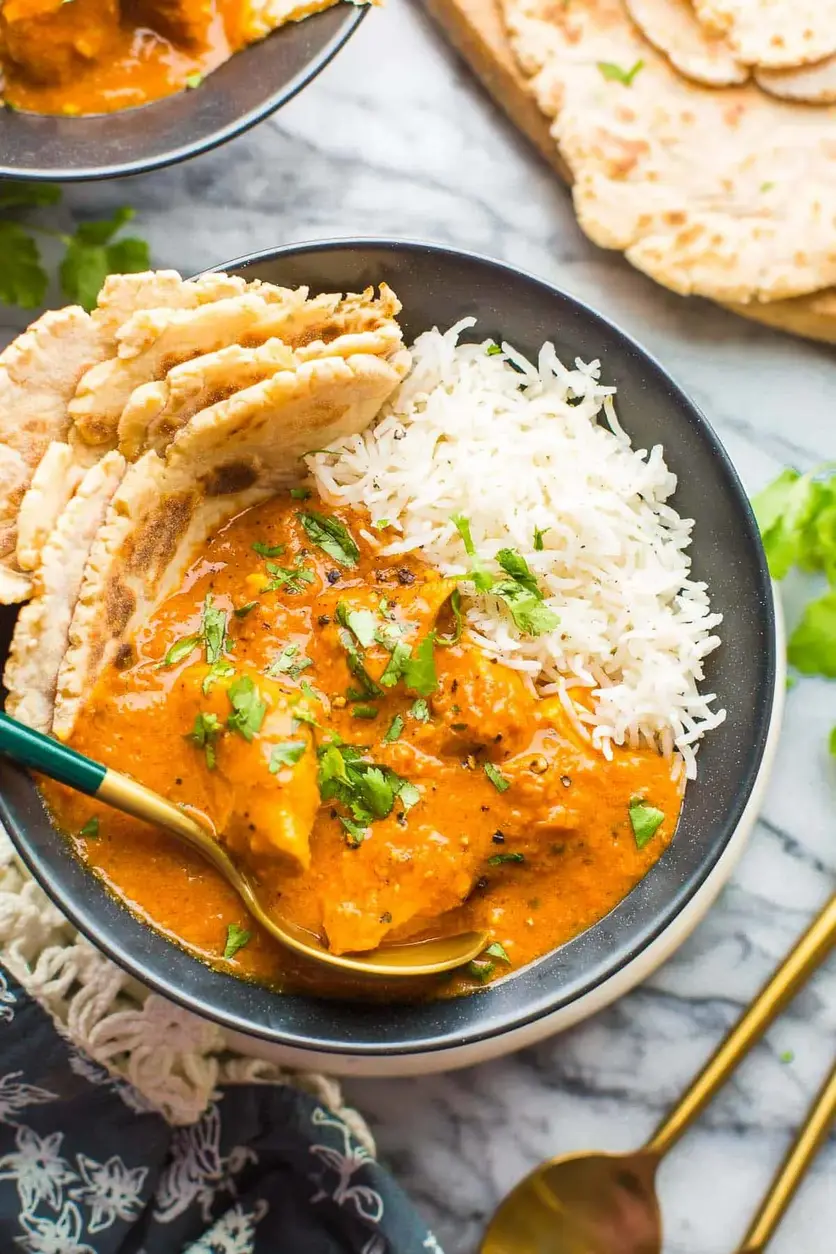
Table of Contents
Dairy Free Butter Chicken – A Creamy Allergy-Friendly Comfort Food
I still remember the first time I tasted butter chicken. It was at a tiny, bustling restaurant in Paris near my culinary school, and the creamy, spiced tomato sauce was so comforting I immediately started dreaming of making it at home. But when I moved to New York City and started cooking for friends, I quickly realized that many of my favorite recipes needed a dairy-free twist. That’s how this Dairy Free Butter Chicken was born. Using luscious coconut milk instead of heavy cream and yogurt, this version is just as velvety and satisfying, but it’s safe for those with dairy allergies, and it fits perfectly into a Paleo or Whole30 lifestyle. This recipe is a true game-changer—rich, extra saucy, and packed with the same warm spices that make the original so beloved.
Imagine lifting the lid off a pot to a cloud of fragrant steam: the deep aroma of garam masala, cumin, and coriander mingling with sweet, caramelized onions and tangy tomato paste. The sauce, a deep reddish-brown, clings to every piece of tender chicken, its surface glistening with a silky sheen from the coconut oil. When you take a bite, the first thing you notice is the creamy, almost luxurious mouthfeel of the coconut milk—it coats your tongue and softens the gentle heat from the chili. Then comes the complex, slightly sweet and savory flavor of the spices, balanced by a hit of fresh lemon juice. The chicken is perfectly cooked, juicy and flavorful from the marinade. It’s the kind of dish that makes you close your eyes and just *enjoy* for a moment.
What sets my version apart is my training in French sauce work, which taught me how to build layers of flavor without relying on dairy. I use a technique of browning the chicken in batches to develop a deep fond, which becomes the base of the sauce. Then, I simmer the sauce for a full 15 minutes before blending it to a silky smooth finish. This extra step ensures the sauce is perfectly emulsified and has a restaurant-quality texture. I’ll also share my trick for using fenugreek leaves, which add that classic, slightly sweet, and nutty note you know from traditional butter chicken. If you’ve ever struggled with a thin or watery dairy-free sauce, my pro tip for achieving a thick, luscious consistency will be your new best friend. Let’s get started!
Why This Dairy Free Butter Chicken Recipe Is the Best
The Flavor Secret: The secret is in the double use of spices and the browning technique. I marinate the chicken first, then add a fresh round of spices to the sautéed onions. This creates a two-layer flavor that is both deep and fresh. My Moroccan roots taught me to never skimp on aromatic cooking, and my Parisian training taught me how to build a sauce that tastes like it’s been simmering for hours, even in under an hour. The result is a Dairy Free Butter Chicken that is unbelievably complex and satisfying.
Perfected Texture: The key to a velvety, dairy-free sauce is all in the blending. After simmering the sauce to concentrate its flavors, I blend it until silky smooth. This technique, straight from classic French cuisine, emulsifies the coconut milk and tomato paste into a single, unctuous sauce. Many people skip this step, but it’s what makes the sauce feel like it has heavy cream in it. It’s a game-changer for any dairy-free curry.
Foolproof & Fast: This recipe is designed to be approachable for any home cook. The steps are clearly laid out, from the simple marinade to the easy blending process. I’ve tested it in my own NYC kitchen countless times, and I can promise you that even if you’re a beginner, you will get a perfect, rich sauce every time. Because we use skinless chicken pieces, it cooks quickly, and the whole dish comes together in a little over an hour—perfect for a satisfying weeknight dinner.
Dairy Free Butter Chicken Ingredients
When I make this Dairy Free Butter Chicken, I love sourcing my spices from the Kalustyan’s market in Manhattan—the smell alone is inspiring! Growing up in Morocco, we used many of these same warm spices in our tagines, so they feel like home to me. For the coconut milk, I always reach for a good-quality can—the kind where the cream and water are separate. It makes all the difference in the sauce.
Ingredients List
For the Marinade:
- ½ cup full fat coconut milk, coconut cream, or coconut yogurt (114g)
- 1 tbsp fresh lemon juice (15 ml)
- 1 tbsp ginger, minced
- 1 ½ tbsp minced garlic
- 2 tsp garam masala
- ½ tsp black pepper
- 1 tsp turmeric
- ½ tsp salt
- 2 lbs boneless, skinless chicken breasts and/or thighs, cut into bite-sized pieces (900g)
For the Sauce:
- 4 tbsp coconut oil, divided (60g)
- 1 onion, finely diced
- 5 garlic cloves, minced
- 4 tsp freshly grated ginger
- 1 chili, stemmed, seeded and minced (see notes for type)
- 1 tbsp garam masala
- 1 tsp ground coriander
- ½ tsp ground cumin
- ½ tsp black pepper
- 1 ½ cups water (360ml)
- ½ cup tomato paste (64g)
- 1 tbsp sugar
- 1 tsp salt
- ½ tsp dried fenugreek or kasoori methi (see notes)
- 1 cup unsweetened full fat coconut milk or coconut cream from a can (228g)
Ingredient Spotlight
Coconut Milk: This is the heart of the dairy-free sauce. Full-fat coconut milk from a can is non-negotiable here. It provides the necessary creaminess and richness that will mimic the heavy cream of traditional recipes. I recommend brands like Native Forest or Aroy-D, which have a high fat content and no added guar gum. If you use a light or carton version, your sauce will be thin and watery.
Garam Masala: This is your flavor foundation. A good garam masala blend is a mix of warm spices like cinnamon, cloves, cardamom, and black pepper. I urge you to buy a high-quality, freshly ground blend from a reputable spice shop or make your own. Pre-bottled blends from supermarkets are often flat and dusty. A good garam masala is the single ingredient that will elevate your dish from good to extraordinary.
Tomato Paste: This concentrated form of tomato provides a deep, savory umami base. Tomato paste is crucial because it has a much lower water content than diced tomatoes, which means you can build a rich sauce faster. I like to sauté the paste with the spices to “bloom” them and remove any raw, tinny flavor. This French technique, called a réduction, creates a much more complex flavor profile.
Fenugreek Leaves (Kasoori Methi): This is the secret ingredient that imparts the quintessential butter chicken flavor. These dried leaves have a slightly sweet, nutty, and mildly bitter flavor that is completely unique. They are a non-negotiable component of authentic Indian butter chicken. You can find them in Indian grocery stores or online. If you absolutely cannot find them, you can omit them, but the dish will lack that signature “something” that makes it special.
| Original Ingredient | Best Substitution | Flavor / Texture Impact |
|---|---|---|
| Full-Fat Coconut Milk | Cashew cream (soaked & blended cashews) | Slightly nuttier flavor, equally creamy. Best for nut-allergy free swaps. |
| Garam Masala | Homemade: 1 tsp cumin, 1 tsp coriander, ½ tsp cinnamon, ½ tsp cardamom | Closer to a curry powder; lacks the floral notes of a true garam masala. |
| Fenugreek Leaves | Maple syrup (½ tsp) + pinch of celery seed | Mimics sweetness and slight bitterness; won’t replicate the exact flavor. |
How to Make Dairy Free Butter Chicken — Step-by-Step
Don’t worry—this recipe looks more involved than it is. Follow these steps, and you’ll have a stunning, creamy curry in no time. I’ve broken it down into easy-to-follow stages.
Step 1: Marinate the Chicken
In a large mixing bowl, whisk together the ½ cup of coconut milk, lemon juice, ginger, garlic, garam masala, black pepper, turmeric, and salt until you have a smooth, fragrant paste. Add the bite-sized chicken pieces and toss them until every piece is completely coated. Cover the bowl and set it aside to marinate for at least 30 minutes at room temperature. You can also do this a day ahead and keep it in the fridge for convenience.
💡 Stella’s Pro Tip: The acid in the lemon juice helps tenderize the chicken, while the coconut milk acts as a carrier for the spices. Don’t skip the marinating time—it’s what infuses the chicken with flavor from the inside out.
Step 2: Brown the Chicken
In a large, heavy-bottomed pot or Dutch oven, warm 2 tablespoons of coconut oil over medium-high heat. Once the oil is shimmering (flick a drop of water in—if it sizzles, it’s ready), add the chicken pieces in 2-3 batches. Don’t overcrowd the pan—you want a nice sear, not steamed chicken. Cook for about 3 minutes per side until golden brown, then remove the chicken with a slotted spoon and set aside on a plate. The chicken will finish cooking in the sauce later.
⚠️ Common Mistake to Avoid: Overcrowding the pan! This is the number one mistake in every home kitchen. If you pile the chicken in, it will release moisture and steam instead of browning, and you won’t get that deep, caramelized flavor on the surface of the meat.
Step 3: Cook the Aromatics
Add the remaining 2 tablespoons of coconut oil to the same pot. Reduce the heat to medium and add the finely diced onion. Cook for about 5-7 minutes, stirring frequently, until the onions are translucent and starting to turn golden at the edges. Stir in the garlic, ginger, and minced chili, and cook for another 30-60 seconds until incredibly fragrant.
💡 Stella’s Pro Tip: Use a wooden spoon to scrape up all those browned bits from the bottom of the pot (called the fond) after you remove the chicken. That’s pure flavor that will dissolve into your sauce.
Step 4: Build the Sauce Base
Turn the heat down to medium-low. Add the tomato paste, garam masala, ground coriander, cumin, and black pepper to the pot. Cook, stirring constantly, for about 2-3 minutes. This process “blooms” the spices in the fat, making their flavors more aromatic and complex. If the pan looks too dry at any point, add 1-2 tablespoons of water to prevent the tomato paste from burning.
⚠️ Common Mistake to Avoid: Adding the spices and tomato paste on high heat. Always reduce the heat to medium-low for this step. High heat will burn the spices and tomato paste, making your sauce bitter. Be patient and let them cook gently.
Step 5: Simmer and Thicken
Stir in the water, sugar, and salt, scraping up any remaining fond from the bottom of the pot. Bring the mixture to a gentle simmer over medium heat. Let it cook, uncovered, for at least 15 minutes. You will see the sauce thicken and darken into a lovely reddish-brown color. This is where the flavor concentrates.
💡 Stella’s Pro Tip: The simmering time is non-negotiable. A short simmer will give you a thin, pale sauce. A long, gentle simmer is what develops the deep color and rich flavor. Don’t rush it!
Step 6: Blend to Silkiness
Remove the pot from the heat. Transfer the sauce to a blender or food processor. Safety first: do not fill your blender more than halfway. If you need to, work in batches. You can also use an immersion blender directly in the pot (or transfer the sauce to a heat-safe bowl to blend). Blend the sauce until it is completely smooth and velvety, then pour it back into your pot.
💡 Stella’s Pro Tip: For an even silkier sauce, strain it through a fine-mesh sieve after blending. This will remove any tiny fiber bits from the onion or chili, giving you a perfectly smooth, restaurant-quality sauce.
Step 7: Finish the Dish
Stir in the remaining 1 cup of full-fat coconut milk or cream until it is fully incorporated into the sauce. Now, return the browned chicken pieces to the pot, along with any juices that collected on the plate. Stir to coat the chicken in the sauce. Let the curry simmer over a medium-low heat for a final 10 minutes, until the chicken is cooked through and tender. Just before serving, stir in the dried fenugreek leaves (kasoori methi).
💡 Stella’s Pro Tip: Rubbing the dried fenugreek leaves between your palms before adding them to the pot releases their essential oils and aroma. This is a small step that makes a big difference in the final flavor!
| Step | Action | Duration | Key Visual Cue |
|---|---|---|---|
| 1 | Marinate chicken | 30 min to 24 hrs | Chicken fully coated in thick paste |
| 2 | Brown chicken in batches | 6-8 min per batch | Deep golden brown crust on chicken |
| 3 | Sauté aromatics | 6-8 min | Onions translucent, garlic fragrant |
| 4 | Cook spice paste | 2-3 min | Paste darkens & smells deeply aromatic |
| 5 | Simmer sauce | 15 min | Sauce thickens, turns deep reddish-brown |
| 6 | Blend sauce until smooth | 1-2 min | Sauce is completely silky and uniform |
| 7 | Finish with coconut cream & chicken | 10 min | Sauce is thick, creamy, chicken is tender |
Serving & Presentation
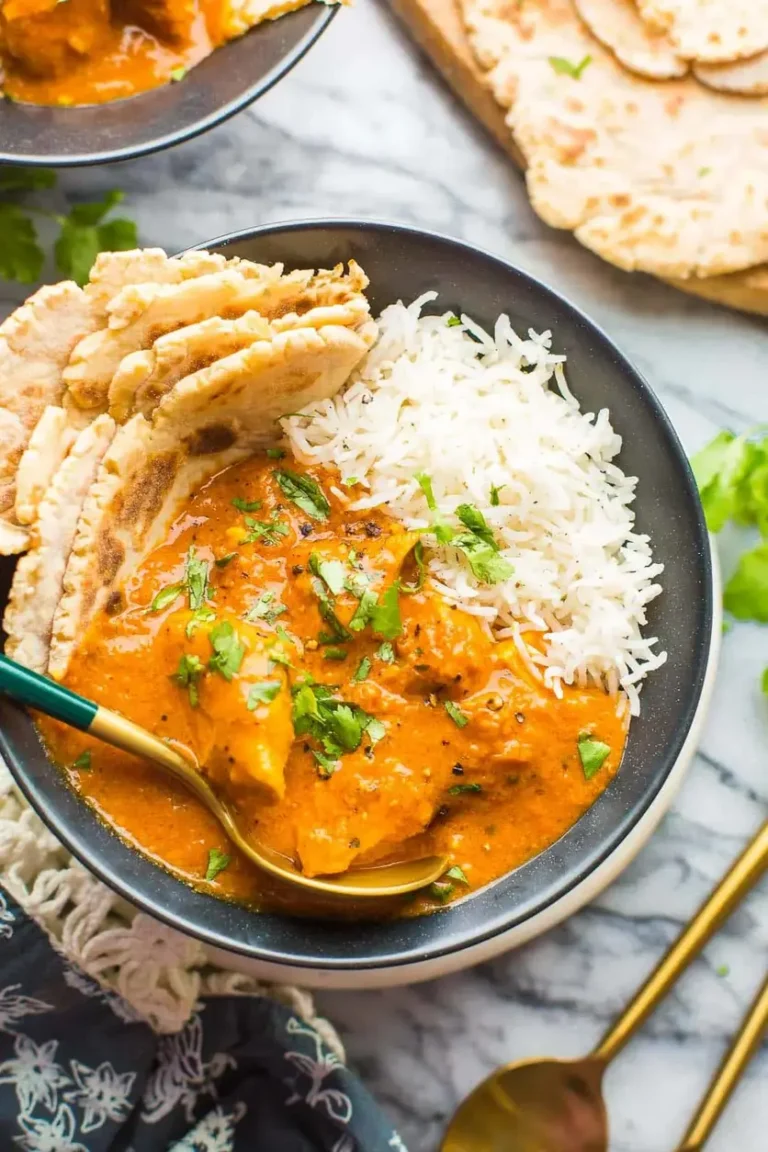
To serve this beautiful Dairy Free Butter Chicken, I love to spoon it over a bed of fluffy basmati rice. The long, slender grains are perfect for catching the creamy, golden sauce. For a lower-carb option, serve it over steamed cauliflower rice. A generous sprinkle of fresh cilantro (or coriander leaves) is a must—it adds a pop of color and a fresh, herbaceous note that cuts through the richness.
This dish is wonderful with warm naan bread for dipping, or alongside a simple cucumber and onion salad with a squeeze of lime. For a truly special presentation, I sometimes drizzle a little extra coconut cream on top and sprinkle with toasted sesame seeds or a pinch of chili flakes. It reminds me of the vibrant, colorful restaurants in Jackson Heights, Queens, where a meal feels like a celebration.
Dairy Free Butter Chicken
Rich, creamy and extra saucy this Dairy Free Butter Chicken is a must make! Coconut milk replace the heavy cream and yoghurt make for a more allergy friendly dish thats just as delicious and satisfying as the original. | Paleo + Whole30 Friendly
Ingredients
- ½ cup full fat coconut milk, coconut cream or coconut yoghurt (114g) -see notes*
- 1 tbsp fresh lemon juice (15 ml)
- 1 tbsp ginger, minced
- 1 ½ tbsp minced garlic
- 2 tsp garam masala
- ½ tsp black pepper
- 1 tsp turmeric
- ½ tsp salt
- 2 lbs boneless, skinless chicken breasts and/or thighs cut into bite-sized pieces (900g)
- 4 tbsp coconut oil, divided (60g)
- 1 onion, finely diced
- 5 garlic cloves, minced
- 4 tsp freshly grated ginger
- 1 chili, stemmed, seeded and minced (see notes for type)
- 1 tbsp garam masala
- 1 tsp ground coriander
- ½ tsp ground cumin
- ½ tsp black pepper
- 1 ½ cups water (360ml)
- ½ cup tomato paste (64g)
- 1 tbsp sugar
- 1 tsp salt
- ½ tsp dried fenugreek or kasoori methi (see notes)
- 1 cup unsweetened full fat coconut milk or coconut cream from a can (228g)
Instructions
- In a large mixing bowl: mix together the marinade ingredients: coconut milk, lemon juices, garlic, ginger and spices until combined.
- Add the chicken pieces to the marinade and mix until fully coated in the marinade. Set aside and let marinate and least 30 minutes. This can also be done 24 hours in advance.
- In a large pot or skillet, add 2 tablespoons of coconut oil and warm over a medium-high heat. When the oil is hot enough (it sizzles if you flick a few drops of water on it) begin adding the chicken pieces to the pot/skillet. Do this is 2-3 batches so you don't over crowd the pan. Cook the chicken pieces about 3 minutes on each side to brown, then remove from the pot and set aside for the time. The chicken will finish cooking in the sauce in a later step.
- Add the remaining oil to the same pot along with the onions. Cook about 5-7 minutes over a medium until the onions start to turn translucent. Add the garlic, ginger and chili pepper. Cook for about 1 minute until fragrant.
- Turn the heat down to a medium-low. Add the tomato paste, garam masala, ground coriander, cumin, black pepper. Cook about 2-3 seconds, stirring the whole time. If the pan/pot looks too dry at any point, add 1-2 tablespoons of water.
- Stir in the water, sugar and salt. Let simmer over a medium heat for at least 15 minutes until the sauce thickens and deepens into a reddish-brown color.
- Remove the pot/pan from the heat. In a blender or food process: Transfer the sauce to a blender or food processor. Make sure not to fill up your blending container more than halfway full. Do this in batches if needed. Blend the sauce until smooth then pour it back into the pot/pan. With an immersion blender: Pour the sauce into a medium-sized heat safe bowl and blend with a handheld blender until smooth. Once smooth, pour it back into the original pan.
- Stir in the remaining coconut milk/cream until combined then add the chicken pieces to the sauce. Mix and let simmer over a medium-low heat a final 10 minutes. Stir in the dried fenugreek or kasoori methi if using.
- Serve topped with fresh cilantro along with a side of rice/cauliflower rice and enjoy.
- Keep leftovers stored in an airtight container in the fridge up to five days.