Peanut Butter Blossom Bars
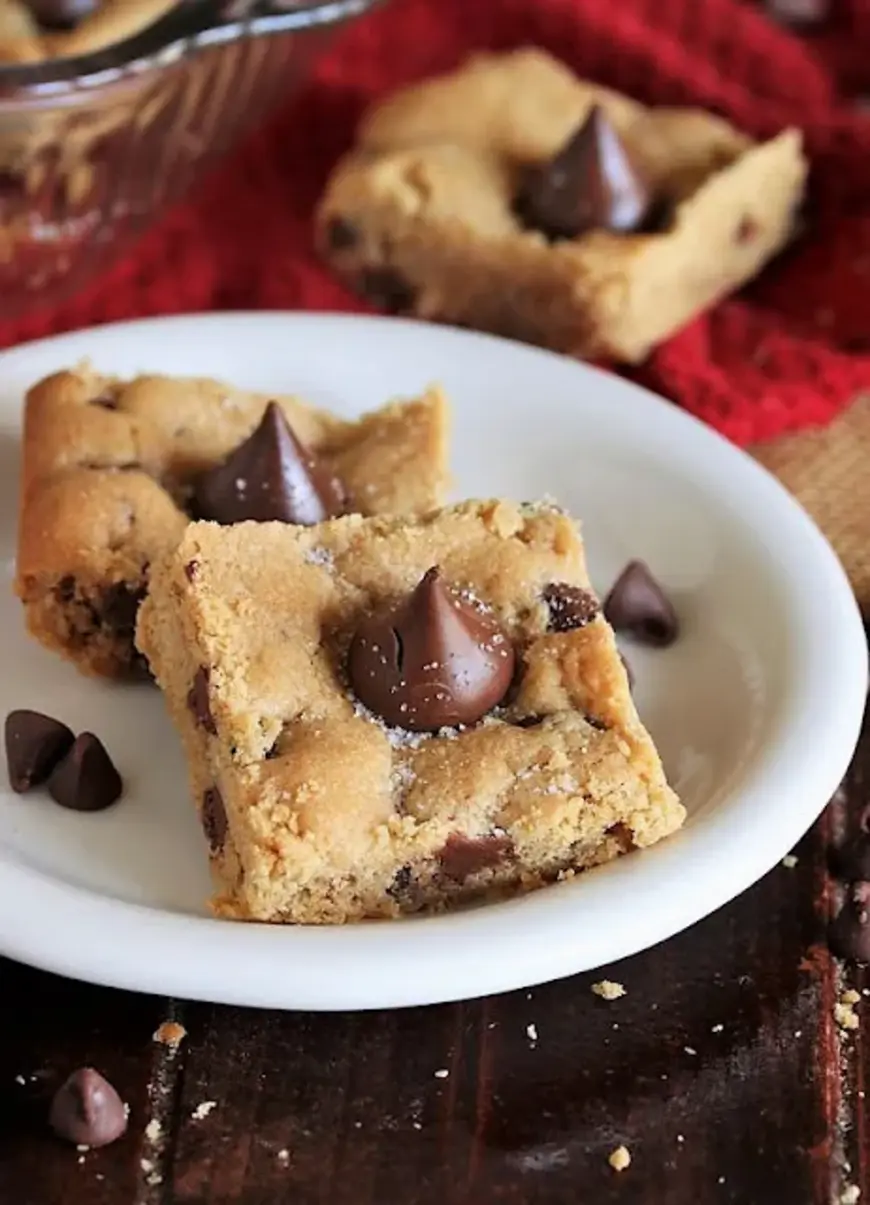
Table of Contents
Peanut Butter Blossom Bars Bar-Style Transformation – A Nostalgic Twist on a Classic Cookie
Growing up in a bustling Moroccan kitchen, I learned that memories are often mixed with the scent of spices and the sweetness of family favorites. When a bag of peanut butter and a box of Hershey’s Kisses appear on a late‑night NYC errands list, I think of my childhood trips to the farmers market in Marrakech, where I’d pick the freshest dates and almonds. That curiosity led me to reinvent Peanut Butter Blossom cookies into a bar that’s just as indulgent but far easier to roll out the dough.
Imagine a buttery base that melts against your tongue, a creamy peanut butter core that offers a satisfying peanut whisper, and Hershey’s Kisses perched like tiny, glossy moons that brighten the white sugar coating. The style of baking in a 9×13 pan gives the bars a gentle, even rise while the slight caramelization on the edges sings the note of toasted almond butter. The aroma itself is a nostalgic whisper of home, a glowing memory of the Moroccan spice market and the Parisian patisserie I passed through on my culinary training days.
What makes this version special is that it turns the cookie’s classic concentric ring of chocolate into a smooth, cohesive base that still lets the Hershey’s Kisses shine through after the bake. I’ll reveal a pro tip on how to keep the Kisses from melting into a wall of chocolate, a common mistake that many try but fail to avoid. You’ll see how I use the right amount of sparkling sugar and the correct timing to keep the iconic shape intact, ensuring each bite is like a memory on a chewy canvas.
Why This Peanut Butter Blossom Bars Recipe Is the Best
The flavor secret sits at the heart of my childhood kitchen: the contrast between salty butter, sweet sugar, and the buttery peanut base—an edible rendition of the Moroccan tagine’s sweet‑savory balance. Adding Hershey’s Kisses after baking preserves the original cookie’s enjoyment while simplifying the shape and portioning.
The texture is perfected by pre‑mixing butter and sugars, then softly folding in the flour, a technique I learned in a Parisian boulangerie to keep dough airy. The result is a chewy bar that rises like a croissant, yet retains the crisp snap of caramelized edges.
The method is foolproof because it accommodates busy New Yorkers who may only have a half‑hour to prep. With one simple butter‑sugar blend and a single baking step, even a novice can produce dessert-level bars that impress friends at the office or family at the end of a long day.
Peanut Butter Blossom Bars Ingredients
I usually source the butter and peanut butter from the boutique lactose‑free store in mid‑town, a vendor who prides themselves on hand‑picked, locally sourced products. I pick the vanilla‑infused brown sugar from a street‑corner shop in Brooklyn that carries the same block‑front almond bagels I loved in Marrakesh’s market stalls. Those choices give the bars an unmistakable, extraordinary flavor depth.
Ingredients List
- 1/2 cup unsalted butter, softened
- 1/2 cup granulated sugar
- 1/2 cup brown sugar
- 1/2 cup creamy peanut butter
- 1 large egg
- 1 1/2 cups all‑purpose flour
- 3/4 teaspoon baking soda
- 1/2 teaspoon baking powder
- 1/8 teaspoon salt
- 2/3 cup milk chocolate chips
- 24 Hershey’s Kisses, unwrapped
- 3 teaspoons white sparkling sugar or granulated sugar (served on top)
Ingredient Spotlight
Unsalted Butter: It’s the backbone of the dough. Look for a firm, room‑temperature butter in U.S. grocery stores or a local artisanal brand for a richer flavor. If you can’t find unsalted, replace it with salted butter and reduce the added salt by 1/8 teaspoon.
Peanut Butter: I always choose a creamy, no‑salt version to fully control flavor. In many U.S. markets you find “best‑before” dates that recommend earlier use for freshness. Swap for almond butter for a subtle nutty twist while keeping the texture similar.
Hershey’s Kisses: These should be left unwrapped, kept cold until use. If you’re vegan, use plant‑based chocolate kisses; flavor and melt pattern remain similar.
| Original Ingredient | Best Substitution | Flavor / Texture Impact |
|---|---|---|
| Unsalted Butter | Salted Butter minus 1/8 tsp salt | Slightly salty, but fine in balance. |
| Creamy Peanut Butter | Almond Butter | Nutty, slightly less sweet, same density. |
| Hershey’s Kisses | Plant‑based Chocolate Kisses | Identical melt; dairy‑free. |
How to Make Peanut Butter Blossom Bars — Step-by-Step
I’ll walk you through each part, ensuring your dough doesn’t crumble and that every Kiss stays perfectly in place.
Step 1: Prepare Ingredients
Gather all items: softened butter, sugars, peanut butter, egg, all‑purpose flour, baking soda, baking powder, salt, chocolate chips, Hershey’s Kisses, and the sparkling sugar. Measure accurately to keep the dough’s density just right.
💡 Stella’s Pro Tip: Cool the nuts and chocolate chips in the fridge before mixing to lighten the dough and prevent clumping.
Step 2: Mix Egg and Butter
In a large mixing bowl, combine the softened butter, 1/2 cup granulated sugar, 1/2 cup brown sugar, creamy peanut butter, and the egg. Use an electric mixer on medium speed until the mixture is light and fluffy, about 2 minutes. The batter should be thick but spreadable.
⚠️ Common Mistake to Avoid: Mixing the batter at a high speed for too long turns the butter into butterfat, causing separation. Keep it medium and stop at 2 minutes.
Step 3: Incorporate Flour
By hand, stir in the flour, baking soda, baking powder, and salt until just combined. The goal is to avoid overworking the dough; a handful of bits is fine. Fold gently to ensure even distribution of leavening.
💡 Stella’s Pro Tip: Use salt to bring out the sweetness of the peanut butter, making each bite more balanced.
Step 4: Add Chocolate Chips
Fold in the 2/3 cup of milk chocolate chips, allowing them to partially melt into the dough for a glossy sheen without burning. This layer will surface to sip over each bar.
⚠️ Common Mistake to Avoid: Stirring too vigorously smears the chocolate too far, causing a uniform texture instead of chocolate bursts.
Step 5: Press Dough
Press the dough evenly into the bottom of a greased 9×13‑inch pan. Transfer the pan to the refrigerator to chill for 10 minutes—this firming phase helps the dough support the Kisses after baking.
💡 Stella’s Pro Tip: Tap the pan lightly on the counter to eliminate air pockets that would create uneven thickness.
Step 6: Bake Bars
Bake in a preheated 350°F oven for 22–24 minutes or until they’re puffed and golden brown around the edges. While baking, sprinkle 2 teaspoons of the sparkling sugar over the surface to create a subtle, shimmering rim.
⚠️ Common Mistake to Avoid: Turning on the heat too quickly before the dough is inserted can cause uneven rising.
Step 7: Apply Hershey’s Kisses
Immediately after removing the pan from heat, press unwrapped Hershey’s Kisses into the upholstery in a 4×6 grid. Don’t touch the Kisses again until the bars cool fully; the heat will melt them enough to cling while preserving their shape.
💡 Stella’s Pro Tip: Use a lightly dampened pastry brush to spray a tiny mist of water before attaching Kisses to keep them from sliding.
Step 8: Cool & Cut
Let the bars cool completely at room temperature for at least 30 minutes. Once set, cut into squares, each crowned with a Kiss that rests perfectly in the center.
⚠️ Common Mistake to Avoid: Cutting while still warm often smushes chocolate and loses the iconic ring.
| Step | Action | Duration | Key Visual Cue |
|---|---|---|---|
| 1 | Prepare ingredients & measure | 5 min | All items in reach |
| 2 | Mix butter & sugars | 2 min | Light & fluffy |
| 3 | Add dry ingredients | 1 min | Just combined |
| 4 | Add chocolate chips | 30 sec | Chocolate visible |
| 5 | Press dough & chill | 10 min | Even surface |
| 6 | Bake | 22–24 min | Golden edges |
| 7 | Apply Kisses | 5 min | Chocolate glistens |
| 8 | Cool & cut | ≥30 min | Bars set |
Serving & Presentation
Plate the bars on a plain wooden board or a neutral marble slab. Sprinkle a dusting of shaved sea salt on top to reflect the tactile history of the Moroccan saffron‑laden flatbread I made long ago. A drizzle of honey or a splash of espresso‑infused milk in a small ramekin pairs wonderfully, capturing the subtle bitterness of coffee that often echoes in airport cafés.
For an outdoor brunch, serve the bars on a charcuterie board with toasted almonds, dried apricots, and a darker chocolate reserve. The contrast between sweet, buttery, and nutty flavors pairs well with a crisp white wine such as Sauvignon Blanc, a drink I often order on a rainy Sunday afternoon while watching the city lights behind the Empire State Building.
| Pairing Type | Suggestions | Why It Works |
|---|---|---|
| Side Dish | Toasted almond slivers | Texture, nutty contrast |
| Sauce / Dip | Dark chocolate ganache | Richness complements peanut butter |
| Beverage | Espresso martini or cold brew | Bitterness balances sweetness |
| Garnish | Sea salt flakes | Elevates flavor profile |
Make-Ahead, Storage & Reheating
During photo shoots or plant‑based batch cooking, I love to prep the dough ahead. Preparations can be done up to 48 hours before, then baked just before serving. The bars keep wonderfully in the fridge for up to 7 days, and they freeze solid for up to 2 months.
| Method | Container | Duration | Reheating Tip |
|---|---|---|---|
| Refrigerator | Airtight plastic bag | Up to 7 days | Reheat 2 mins at 350°F |
| Freezer | Heavy‑duty freezer bag | Up to 2 months | Thaw 1 hour, then 3 mins baking |
| Make‑Ahead | Foil‑wrapped | Up to 1 day in advance | Assemble Kisses before serving |
I’ve learned that letting bars cool before reheating preserves the crisp edges, so keep your fridge temperature steady at 37°F to maintain their integrity. The first reheating round adds a slightly caramelized crust that reminds me of the warm hearth in my grandmothers kitchen.
Variations & Easy Swaps
| Variation | Key Change | Best For | Difficulty Impact |
|---|---|---|---|
| Tahini‑Infused Bars | Add 2 tbsp tahini to the dough for a Middle‑East twist | Vegetarians & Muslims | Slightly harder (extra mixing) |
| Gluten‑Free Swaps | Use almond flour + xanthan gum | Gluten‑sensitive | Moderate (replace all flour) |
| Seasonal Sweet‑Chili Bars | Blend 1 tsp chili powder into batter | Fall gathering | Slightly advanced (spice handling) |
Tahini‑Infused Bars
Blending a touch of tahini into the peanut butter base gives a nutty, slightly salty hit that echoes the almond‑spiced tagine my mother would prepare. The texture stays similar, but the flavor profile changes, providing a perfect easterly twist for those craving new aromatic undertones.
Gluten‑Free Swaps
Replace all‑purpose flour with an equal cup of almond flour and add 1/4 teaspoon xanthan gum to maintain structure. The bars become slightly denser, yet retain the creamy mouthfeel and keep Hershey’s Kisses shining proudly on top.
Seasonal Sweet‑Chili Bars
Turn up the heat by whisking a pinch of smoked chili powder into the batter. It gives the bars an inviting warmth that pairs wonderfully with a splash of bourbon or a bold, spiced wine during the cool New York evenings.
How long do Peanut Butter Blossom Bars keep after baking?
Once fully cooled, the bars stay fresh in an airtight container at room temperature for about a week. If you want them longer, refrigerating them will extend freshness to roughly a week, while freezing them keeps them pleasantly crisp for up to six months. For best flavor, keep them wrapped in a parchment‑lined bag so they don’t absorb odors.
Can I use dark chocolate chips instead of milk chocolates?
Absolutely! Swapping 2/3 cup of milk chocolate chips for an equal portion of dark chocolate gives a more intense, less sweet bite. It slightly reduces the sweetness from the Kisses, offering a pleasing depth. Just note that dark chips are less buttery, so the overall sweetness balance shifts toward a richer profile.
Do I need to chill the dough before baking?
It’s optional but highly recommended. Chilling the dough for ten minutes firms it up, preventing run‑off of the chocolate chips and keeping the Kisses in place. If you skip the chill, the dough may spread unevenly, resulting in a flatter bar or uneven layers of chocolate.
What’s the best way to store leftover bars?
Wrap each stick in parchment and stack them in a single layer, then place them in an airtight container. Store in the refrigerator for up to one week. For longer storage, freeze the wrapped bars; thaw and heat them in the oven for a few minutes until they’re crispy again. The chocolate will stay intact if the bars are kept cool.
Is there a gluten‑free option?
The recipe can easily become gluten‑free by swapping all‑purpose flour for 1 cup of almond flour and adding 1/4 teaspoon of xanthan gum. The dough will stick together slightly more, but the final bars retain their rich peanut butter flavor and chocolate kiss that stays intact atop the whole.
Can I use almond butter instead of peanut butter?
Almond butter is a great alternative and brings a milder nutty tone. It’s thick and creamy, so you’ll get similar wetness and a slightly lower chocolate heat relative to peanut butter. The final texture remains chewy, and the Hershey’s Kisses still attach due to the butter’s fat content.
Is it possible to reheat the bars?
Yes, reheating is optional but recommended if you’re reheating a cold bar. Preheat the oven to 350°F, place the bars on a sheet pan, and bake for 3–5 minutes, or until the chocolate refests a glossy sheen. Avoid microwaving, as it can splash melted chocolate. This method brings back the crispness of the edges.
If I want a spicy twist, what should I add?
A pinch of chili powder (¼ teaspoon) or a splash of sriracha blended into the batter yields a subtle heat that complements the chocolate’s sweetness. The heat stays mellow once baked, reinforcing the buttery base. Experiment by varying the amount to find the ideal balance for your palette.
Can I use sugar substitutes?
Using sugar replacements is possible, but you’ll need to consider the cocoa fat. For instance, using coconut sugar keeps a near‑natural sweetness, though it can add a slight caramel hint. Alternatively, a 1:1 maple syrup substitution for the granulated part will reduce overall sweetness, so adjust accordingly. Use a 1.5:1 ratio of maple to sugar to preserve moisture.
How do I keep the Hershey’s Kisses from melting?
Apply the Kisses immediately after baking, while the bars are still slightly warm, but carry them back to room temperature without touching them. Keep them chilled in the fridge until ready to serve, or pre‑place them on parchment-lined trays before baking. The trick lies in balancing heat and time, which I call the “kiss‑pause” technique.
Share Your Version!
If a little of this recipe brightened your day, star the post and leave a comment below. Posts that celebrate the right mix of tradition and flare tend to spark amazing conversations. Tag me on Instagram or Pinterest @leosfoods so I can see your creative take on the Peanut Butter Blossom Bars.
What playful addition would you suggest for these bars? Would you try a sprinkle of za’atar or a swirl of mango puree? Share your ideas and let’s keep the conversation going!
From my NYC kitchen to yours — I hope this recipe brings as much warmth to your table as it does to mine. — Stella 🧡
Love This Recipe? Save It to Pinterest!
If you enjoyed this Peanut Butter Blossom Bars recipe, don’t let it get lost in your browser tabs! 😄 Pin it now so you can find it again anytime — and explore hundreds more tried-and-tested recipes waiting for you on my Pinterest boards.
👉 Follow Stella on Pinterest @chefrecipes2
📌 Pin this recipe · 🔁 Re-pin your favorites · 💬 Tag me when you make it — I love seeing your creations!
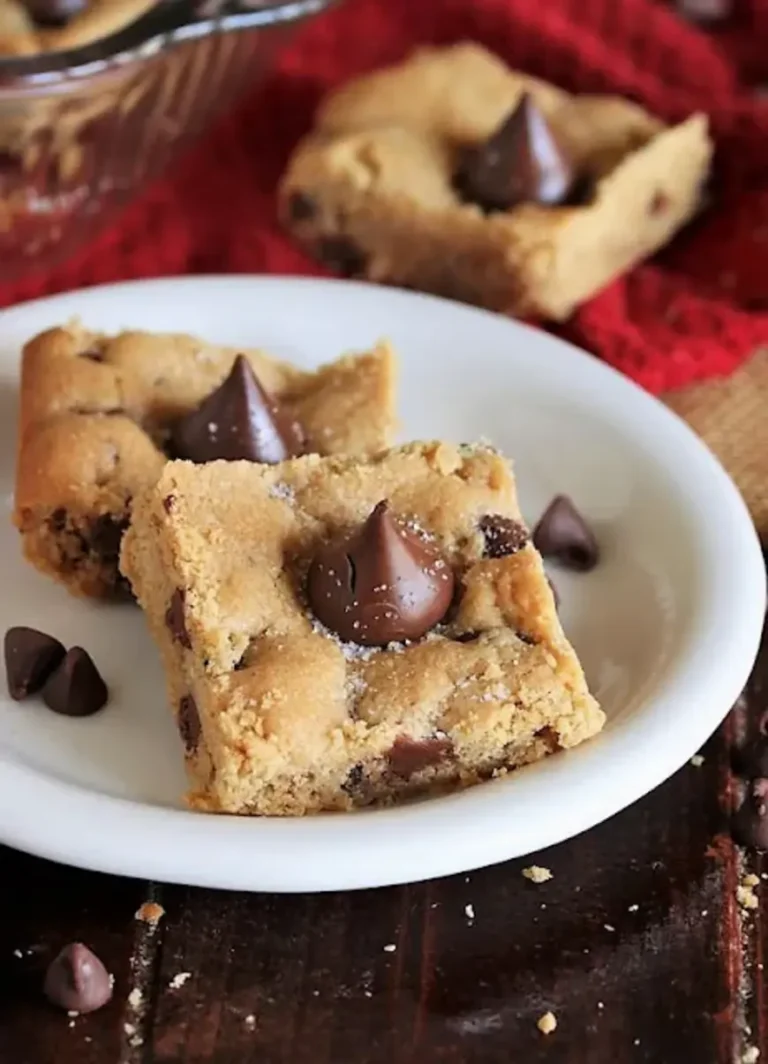
Peanut Butter Blossom Bars
We all know and love iconic Peanut Butter Blossom cookies — but why not enjoy this classic treat in easy bar form? Just like their classic cookie inspiration, Peanut Butter Blossom Bars are rich in peanut butter flavor with that signature Hershey’s Kiss perched deliciously on top. And they’re super easy to make, too.
Ingredients
- 1/2 c. unsalted butter, softened
- 1/2 c. granulated sugar
- 1/2 c. brown sugar
- 1/2 c. creamy peanut butter
- 1 egg
- 1 1/2 c. all-purpose flour
- 3/4 tsp. baking soda
- 1/2 tsp. baking powder
- 1/8 tsp. salt
- 2/3 c. milk chocolate chips
- 24 Hershey's Kisses, unwrapped
- 3 tsp. white sparkling sugar OR granulated sugar
Instructions
- In large mixing bowl, combine the butter, 1/2 cup granulated sugar, brown sugar, peanut butter, and egg. Beat with an electric mixer on medium speed until well mixed.
- By hand, stir in flour, baking soda, baking powder, and salt until just combined and a dough forms. Stir in milk chocolate chips.
- Press dough into the bottom of a greased 9×13-inch baking pan. Sprinkle evenly with 2 teaspoons of the white sparkling sugar (or granulated sugar).
- Bake at 350x for 22-24 minutes, or until puffed up all over and golden brown.
- Remove from oven and immediately top with unwrapped Hershey's Kisses in a 4 rows by 6 rows pattern. Sprinkle with remaining teaspoon of the white sparkling sugar (or granulated sugar).
- Cool completely. Cut into squares with one of the Hershey's Kisses in the center of each bar.
- Store in an airtight container.
- The dough will be a stiff, almost crumbly dough.
- After placing the Hershey's Kisses on the baked bars, don't touch the Kisses again until the bars are completely cooled. The Kisses do melt (and glisten) from the heat of the baked bars, but do keep their shape. If you touch the Kisses at this point, they will smush and their shape will warp.