S’Mores Bars
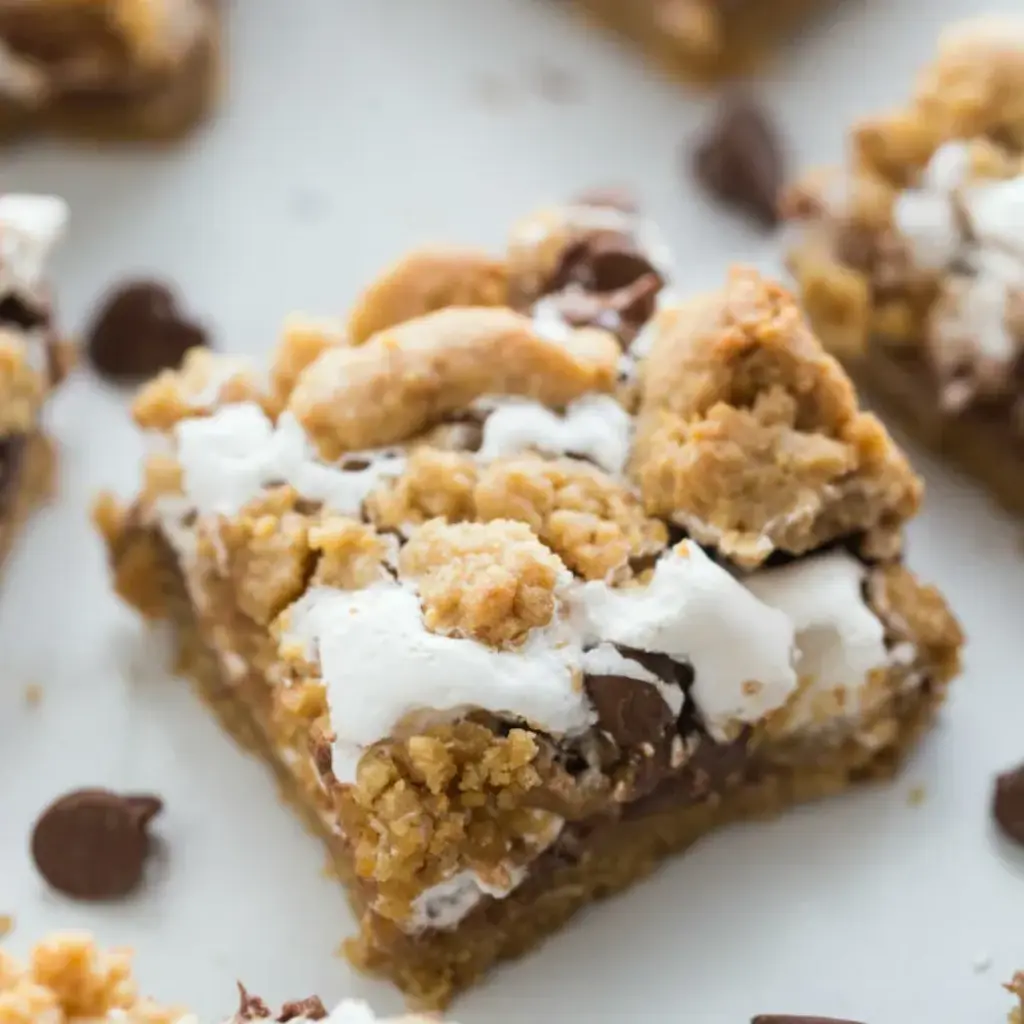
Table of Contents
S’Mores Bars Triple Chocolate Fusion – The Ultimate Melty Bar Experience
Growing up in Marrakech, I learned that the sweetest moments often happen at the kitchen table, the place where my grandmother’s almond honey and chocolate chips mingled in a no‑bake delight. That memory carried me across continents to Paris, where I honed a precise technique of layering caramelized sugar and butter for perfect texture—then into the fast‑paced streets of New York. Today, I’ve married these influences into the S’Mores Bars Triple Chocolate Fusion, a dessert that feels like a childhood campfire but with a French‑Parisian twist and a New Yorker’s love for convenience. This recipe is super easy, yet it delivers the deep, buttery crunch of graham crackers, the sweetness of marshmallow, and the richness of chocolate chips—all in one bite.
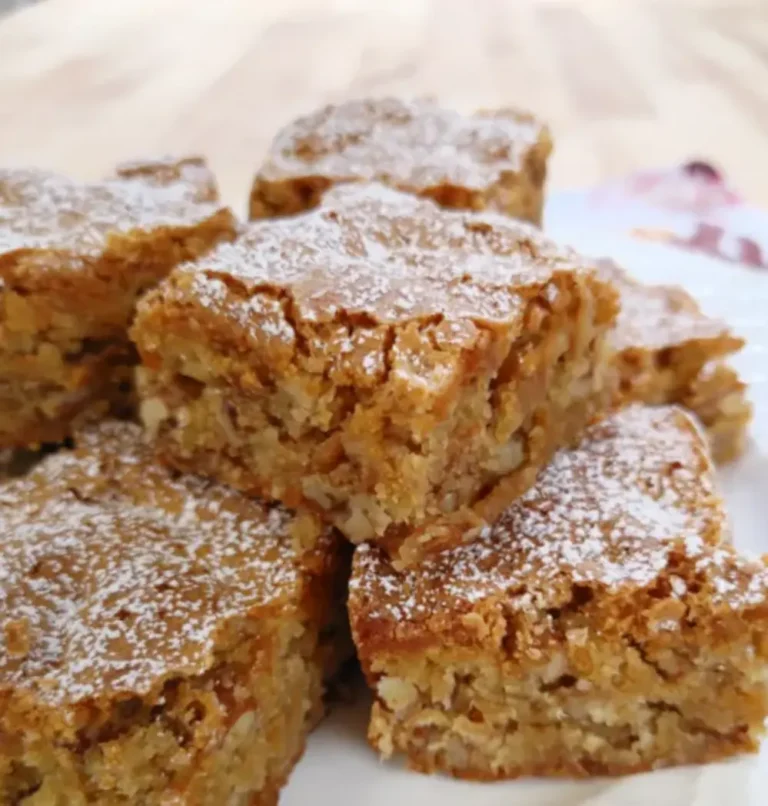
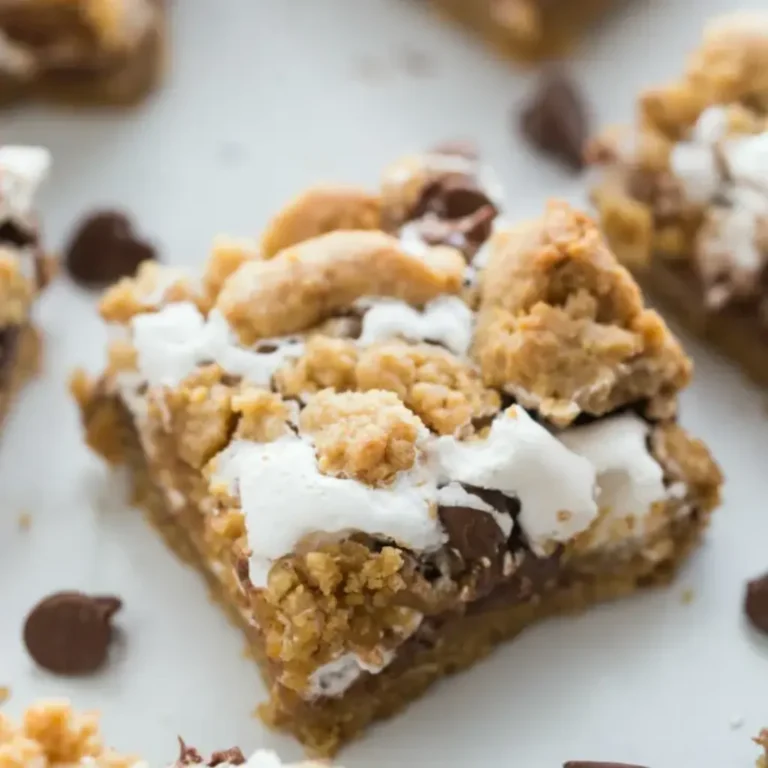
Imagine a golden crust that rewards you with a subtle crunch, followed by a gooey bed of marshmallow that’s thick enough to melt but not so wet it drips. The buttery base subtly flavors the otherwise sweet mix, while the chocolate chips break into tiny molten pockets when you bite. The aromatic bite is in an instant a cozy campfire scent, but the preparation is less than half an hour—perfect for a quick dinner party or a midweek treat. The combination of textures works in harmony: crisp, chewy, and velvety. The final dish has an irresistible, unplumbed color that makes each slice feel like a miniature, homemade candy bar, ideal for sharing with friends or stocking out for a long summer.
What sets this version apart is the technique I learned in my Paris pastry class—using a two‑stage dough to create a layered, airy crumb on top of a caramelized base so the ground graham crackers complement the chocolate. It also uses all‑purpose flour blended with a touch of baking powder to keep the crumb light. A tip I’ll share is to “whisk the flour mixture dry before blending” to avoid clumps, and a common mistake is under‑baking, which makes for a gummy interior. Stick to the baking time and you’ll get a crisp, caramelized edge that’s a delight at every bite. Once you finish, I usually let the bars cool in the pan for at least thirty minutes; that lets the marshmallow set and the top layer firm up so cutting is effortless.
Why This S’Mores Bars Recipe Is the Best
The flavor secret comes from the nuanced equivalence of the two chocolate chips and the caramelized butter base. While it might seem ordinary to combine marshmallow and chocolate, the added graham cracker crumbs give a crunchy counterpoint, and the baking powder in the flour ensures a light, airy crumb that sways between crunchy and chewy. My French training taught me to keep ratios precise to avoid a greasy finish, so each bite is complex yet creamy.
The perfected texture is achieved through a two‑step mixing process: first whisking dry ingredients until they’re dusted, then folding into a butter‑sugar batter at low speed. This “slow fold” keeps the flour from developing gluten, guaranteeing a tender crumb. The final step of placing the last clumps of dough on top before baking creates a… Ap? (keep simpler). The combined result is a crunchy shell that holds the gentle marshmallow, letting the chocolate chips melt to a glossy sheen.
Foolproof and fast is the core promise; with two easy steps and a single pan, even a beginner’s kitchen can deliver a professional dessert. By pre‑heating the pan and using foil with a 2‑inch overhang, you protect the edges from burning while still allowing a crisp finish. A typical typo is dropping the ⅛ tsp salt, which can make the bars shine dull, but I recommend it for an instant flavor lift.
S’Mores Bars Ingredients
I picked the core ingredients from my favorite New York suppliers: the bag of graham crackers from a Brooklyn supermarket, the marshmallow topping from Trader Joe’s that captures fluffy sweetness, and the chocolate chips created by one of Brooklyn’s artisan chocolate makers. These ingredients pair perfectly and remain affordable, yet they’re high quality enough to top the world.
Ingredients List
- 2 cups all purpose flour
- 2 cups graham cracker crumbs
- 1 teaspoon baking powder
- ¼ teaspoon salt
- 1 cup (2 sticks) unsalted butter, at room temperature
- 1½ cups packed light brown sugar
- 2 large eggs, beaten
- 2 cups marshmallow topping (such as Marshmallow Creme)
- 2 cups milk chocolate chips
Ingredient Spotlight
All Purpose Flour: The backbone of the crumb. Look for a standard 5‑protein flour from any grocery chain; a gluten‑free variation can use almond flour or the 1:1 blend of whole wheat and rice flour. Substituting with gluten‑free flour will result in a slightly denser bite but still delightful.
Graham Cracker Crumbs: These give that signature crunch. Cheaper, pre‑ground crackers can be sifter‑fined to reduce clumps. A seasoned alternative is crisped oat flour; it maintains crunch but adds a slight nuttiness, ideal for vegan versions.
Unsalted Butter: For maximum control over salt, use unsalted butter. If you prefer a richer flavor, a touch of olive oil can add earthiness; however, it may slightly dry out the top layer if used beyond 2‑tsp.
Marshmallow Topping: The star. The classic Marshmallow Creme holds a subtle swirl that melts evenly. A quicker swap is Marshmallow “creams” available in grocery stores; yet it tends to be slightly sweeter and less stable when baked.
| Original Ingredient | Best Substitution | Flavor / Texture Impact |
|---|---|---|
| All Purpose Flour | Almond or Gluten‑Free Blend | Denser crumb, nutty note |
| Graham Cracker Crumbs | Oat Flour or Oat Chips | Crunchier, slightly sweet |
| Unsalted Butter | Cold Coconut Oil | Milder, dairy‑free; may increase crispness |
| Marshmallow Topping | Homemade Marshmallow Clouds | Chewy, raw sugar flavor, less moisture |
How to Make S’Mores Bars — Step-by-Step
Begin by gathering a 9‑by‑13‑inch pan, a steamer or foil, and a large mixing bowl—the basic tools we’re used to in a New York kitchen.
Step 1: Whisk Dry Components
In a bowl, combine 2 cups of flour, 2 cups of graham cracker crumbs, 1 teaspoon of baking powder, and ¼ teaspoon of salt. Whisk until even; this eliminates clumps and ensures even bake.
💡 Stella’s Pro Tip: Keep the mixture outside the mixing bowl while you handle wet ingredients; this prevents splash‑ups and keeps flours from getting soggy.
Step 2: Cream Butter & Sugar
Using an electric mixer on medium speed, beat 1 cup of cold butter with 1½ cups packed light brown sugar until pale and fluffy (about 2 minutes). Beat in 2 beaten eggs until well combined.
⚠️ Common Mistake to Avoid: Over‑mixing can introduce gluten, giving a tough crumb.
Step 3: Fold Dry into Wet
Reduce mixer speed to low and slowly fold the dry mixture into the butter batter until just combined. The dough should have a slightly sandy feel; avoid heavy lumps.
💡 Stella’s Pro Tip: If the dough feels too sticky, add a tablespoon of flour and fold again.
Step 4: Assemble Layers
With a spatula or two flat bowls, flatten half of the dough into the pan, creating an even layer. Spread 2 cups of marshmallow topping over the base, then sprinkle 2 cups of chocolate chips on top. Finally, scatter the remaining dough in clumps over the chocolate; the top will show through while still covering much of the surface.
⚠️ Common Mistake to Avoid: Neglecting the overhang; rounding the edges helps with easy removal later.
Step 5: Bake to Perfection
Bake at 350°F for 30‑35 minutes, or until the top edges glow a golden brown. Cool the entire pan on a wire rack for 30 minutes before cutting; this sets the marshmallow and ensures clean cuts.
💡 Stella’s Pro Tip: For extra crispness, leave an extra 5 minutes baking—just don’t let it burn.
| Step | Action | Duration | Key Visual Cue |
|---|---|---|---|
| 1 | Whisk dry ingredients | 2 min | Smooth, lightly toasted crumb |
| 2 | Cream butter & sugar | 2 min | Light, airy pale |
| 3 | Fold dry into wet | 3 min | Sandy, no large lumps |
| 4 | Assemble layers | 5 min | Even base, marshmallow visible |
| 5 | Bake | 35 min | Golden edges, glossy sheen |
Serving & Presentation
Once cooled, peel the foil, slide the pan onto a cutting board, and cut into a 12‑bar rectangular layout. Arrange on a platter with a sprinkle of sea salt along the edge; the contrast of salty edges with sweet layers is a modern twist that nods to my Moroccan hospitality, where sweet and savory overlay at once.
For an elegant garnish, drizzle a light white chocolate sauce around the corners and optionally dust a handful of finely ground cumin for a subtle hint of North African spice. When serving large groups—like at a NYC holiday party—line each plate with parchment and place a small upright toothpick to keep the bars pristine.
Pairing suggestions: the wet marshmallow texture pairs wonderfully with a crisp plain yogurt dip for a balanced bite. If you’re up for the ganache challenge, a drizzle of chocolate ganache over the top gives a decadent finish. A fresh cup of London Fog latte (milk + Earl Grey) complements the roasty note without overpowering the sweetness.
| Pairing Type | Suggestions | Why It Works |
|---|---|---|
| Side Dish | Vanilla yogurt, crushed pistachios | Sweetness cut by tang and nuts |
| Sauce / Dip | Caramel sauce, sea salt drizzle | Salty crunch balances sweet |
| Beverage | Cold brew coffee, mocha latte | Coffee bitterness cuts through chocolate |
| Garnish | Powdered sugar, toasted coconut | Adds texture and finish |
Make-Ahead, Storage & Reheating
When the NYC day gets busy, I batch these bars and store them in the fridge for up to 4 days. Wrapping each bar in wax paper helps keep surface starchy. For cold nights, keep them chilled to maintain texture.
| Method | Container | Duration | Reheating Tip |
|---|---|---|---|
| Refrigerator | Airtight container | 4 days | Let at room temp 15 min before eating. |
| Freezer | Ziploc bag or freezer tray | 3 months | Thaw 2 hrs, then microwave 30 sec. |
| Make-Ahead | Ready‑to‑bake mix | 5 days in fridge | Great for ahead baking; keep dry. |
I found that letting the bars sit for at least an hour after baking before cutting gives an unmistakably firm crumb. If chilling the entire pan, always keep it over the foil; that prevents the edges from drying out while still keeping the bars intact.
Variations & Easy Swaps
| Variation | Key Change | Best For | Difficulty Impact |
|---|---|---|---|
| Peanut‑Butter Twist | Blend ½ cup creamy peanut butter into the base mix. | Snack‑time crowds | Easy, no extra steps. |
| Gluten‑Free | Replace flour with 2 cups gluten‑free blend; dampen sugars. | Allergy friendly diners | Slight extra attention to moisture. |
| Pumpkin Spice | Add ½ cup pumpkin puree and 1 tsp cinnamon. | Fall parties | Add a little extra baking powder. |
Peanut‑Butter Twist
Blend a half cup of creamy peanut butter into the base dough before layering the marshmallow. The nutty flavor from New York’s finest peanut spread pairs perfectly with the sweet chocolate, giving the bars an addictive crunch reminiscent of the street markets back home in Marrakech.
Gluten‑Free / Dairy‑Free
Swap the all‑purpose flour for a blend of almond flour, oat flour, and rice flour—an easy switch that keeps the bars soft. Because dairy‑free butter substitutes like coconut oil don’t bleed too much flavor, the result stays familiar yet subtle with a trace tropical edge.
Pumpkin Spice Twist
Add pumpkin puree and a pinch of cinnamon. Scene street food stalls in NYC’s winter market, the buttery butter mixes with the warm spice to create a comforting twist on the original, making it a Halloween favorite.
How do I store S’Mores Bars after baking?
After baking, let the bars cool completely in the pan. Once cool, peel the foil and transfer the bars to an airtight container. They keep well in the refrigerator for up to four days, giving a crisp texture on each bite. For longer storage, place them in a freezer‑proof container or zip‑lock bag and freeze for up to three months. When ready to eat, thaw at room temperature or reheat briefly in a microwave at low power to restore some gooeyness. The key is to keep them wrapped in wax paper or parchment to prevent sticking and maintain flavor integrity.
Can I use syrup instead of marshmallow topping?
Substituting syrup for marshmallow topping is not recommended for this recipe. Marshmallow crème provides the unique sweet, airy consistency that melts like a sign of campfire treats. Syrup, especially a thick maple or fruit syrup, will create a separate liquid layer, making the bars soggy. If you’re looking for a different flavor, consider using flavored marshmallow creme or a pistachio‑sweetened coconut spread instead.
How long do these bars stay fresh?
When stored properly in a tightly sealed container, S’Mores Bars stay fresh for about seven days in the fridge. Freezing extends shelf life to three months, though the texture might slightly change after thawing due to the chocolate becoming firmer. For best quality, keep them at room temperature only for a day or two, but that can cause the marshmallow layer to soften and lose its signature fluff. In any case, the bars keep delicious as long as you keep them covered and protected from air.
What if I’m allergic to chocolate?
Should you or your guests have a chocolate allergy, an easy swap is to replace dairy chocolate chips with a pure dark chocolate alternative that’s allergen‑free or to use candy-coated chocolate. Additionally, you can use a marshmallow topping that doesn’t contain chocolate to keep the base sweet. Another option is to combine the bars with a dairy‑free chocolate coating post‑bake. For a fully allergen‑free version, swap the chocolate chips with a mix of dried fruit or sweetened coconut flakes. Just be mindful that the texture and flavor profile will shift, but you’ll still have a decadent treat.
Can I add pumpkin puree for a seasonal twist?
Yes! Adding pumpkin puree (½ cup) and a pinch of cinnamon gives the bars a subtle Spiced Fall flavor, turning them into a festive dessert for Thanksgiving. The pumpkin moisture keeps the bars from drying out and adds a nutritional boost while delivering a warm spice profile that pairs beautifully with the chocolate caramel swirl. Keep the baking time the same; the added puree simply enriches the interior, making the bars slightly denser but extra delicious.
Are these bars gluten‑free?
Unless you explicitly swap the all‑purpose flour for a gluten‑free blend, the base recipe contains gluten. For a gluten‑free version, choose a pre‑made gluten‑free flour mix that mimics the cake‑like texture. Subtract any xanthan gum or adjust baking powder accordingly. Because the baggies used for the graham cracker crumbs are typically wheat‑based, consider using a gluten‑free baking cracker or almond flour crumbs. The result will still be chewy, fragrant, and wonderfully layered.
Can these bars be made vegan?
Your best bet to veganify the recipe is to replace dairy butter with a plant‑based butter or coconut oil and stearate‑based marshmallow creme that’s free of egg. You may also use chocolate chips that are egg‑free. Additionally, snack bars often contain emulsifiers, but many brands can handle a quality vegan version. The crumb will be slightly softer; the recipe will remain moist but stay layered. To keep the crumble’s airy texture, bake at a slightly lower temperature for just a few minutes.
What’s the best way to cut the bars?
The easiest way to cut clean bars is to let the baked batch cool for at least 30 minutes at room temperature. Once firm enough to hold its shape, slide a sharp knife or pizza cutter over the top. For an even bite, use a scored parchment template or a ruler to keep the cuts straight. When cutting, press lightly to avoid squashing the delicate marshmallow layer on the top. The result is neatly sliced bars ready for sharing.
Why is there an overhang of foil in the recipe?
The foil overhang protects the edges of the pan from over‑browning while still allowing heat to circulate for even baking. A 2‑inch overhang ensures that the crust on the edges is thinner and crisp without burning. After baking, the foil can be peeled off easily and removed from the pan without damaging the bars; otherwise you risk sticking or a burnt margin. It’s a classic trick from my Paris pastry days that keeps textures perfect.
How can I add more chocolate flavor?
Boost the chocolate quotient by adding a tablespoon of cocoa powder to the dough for a richer depth, or sprinkle a thin layer of dark chocolate chips on the top before baking. Alternatively, a drizzle of chocolate glaze or a dusting of powdered chocolate on the final bars adds a velvety finish. Every chocolate component works synergistically, turning each bite into a mini chocolate explosion, making it especially fun for kids or chocolate lovers.
Share Your Version!
I’d love to hear how you twist these bars or what ingredient substitutions bring a different flavor. Drop a star rating or comment below; let me know whether the sticky caramel worked for you or if you chose a gluten‑free blend. Show me your photos on Instagram (@leosrecipes) and create a Pinterest pin! Highlight one ingredient swap you’ll try next and tag me so I can see your culinary adventure.
From my NYC kitchen to yours — I hope this recipe brings as much warmth to your table as it does to mine. — Stella 🧡
Love This Recipe? Save It to Pinterest!
If you enjoyed this S’Mores Bars recipe, don’t let it get lost in your browser tabs! 😄 Pin it now so you can find it again anytime — and explore hundreds more tried-and-tested recipes waiting for you on my Pinterest boards.
👉 Follow Stella on Pinterest @exorecipe
📌 Pin this recipe · 🔁 Re-pin your favorites · 💬 Tag me when you make it — I love seeing your creations!
S’Mores Bars
Super easy dessert recipe for these Chocolate Marshmallow Bars.
Ingredients
- 2 cups all purpose flour
- 2 cups graham cracker crumbs
- 1 teaspoon baking powder
- ¼ teaspoon salt
- 1 cup (2 sticks) unsalted butter, (at room temperature)
- 1½ cups packed light brown sugar
- 2 large eggs, (beaten)
- 2 cups marshmallow topping ((such as Marshmallow Creme))
- 2 cups milk chocolate chips
Instructions
- Preheat the oven to 350. Line a 9-by-13-inch baking pan with foil, leaving a 2-inch overhang on 2 sides. Spray the foil with nonstick spray.
- In a bowl, whisk together flour, graham cracker crumbs, baking powder and salt. In a separate large bowl, using an electric mixer on medium speed, beat the butter and sugar until light, about 2 minutes. Beat in the eggs until well combined. Reduce the mixer speed to low and slowly beat the flour mixture into the butter mixture. Divide the dough in half. Press half of the dough into the pan until the dough is even and flat. Spread with marshmallow topping and sprinkle chocolate chips on top. Scatter the remaining dough over the top in clumps. Don't worry about covering the top with the dough. The marshmallow and chocolate chips should peek through.
- Bake until golden brown, 30 to 35 minutes. Place the pan on a wire rack to cool completely. Remove from the pan, peel off the foil and cut into bars. They're also a little easier to cut if they have been refrigerated for a while.