6-Ingredient Peanut Butter Pie with Easy Oreo Crust
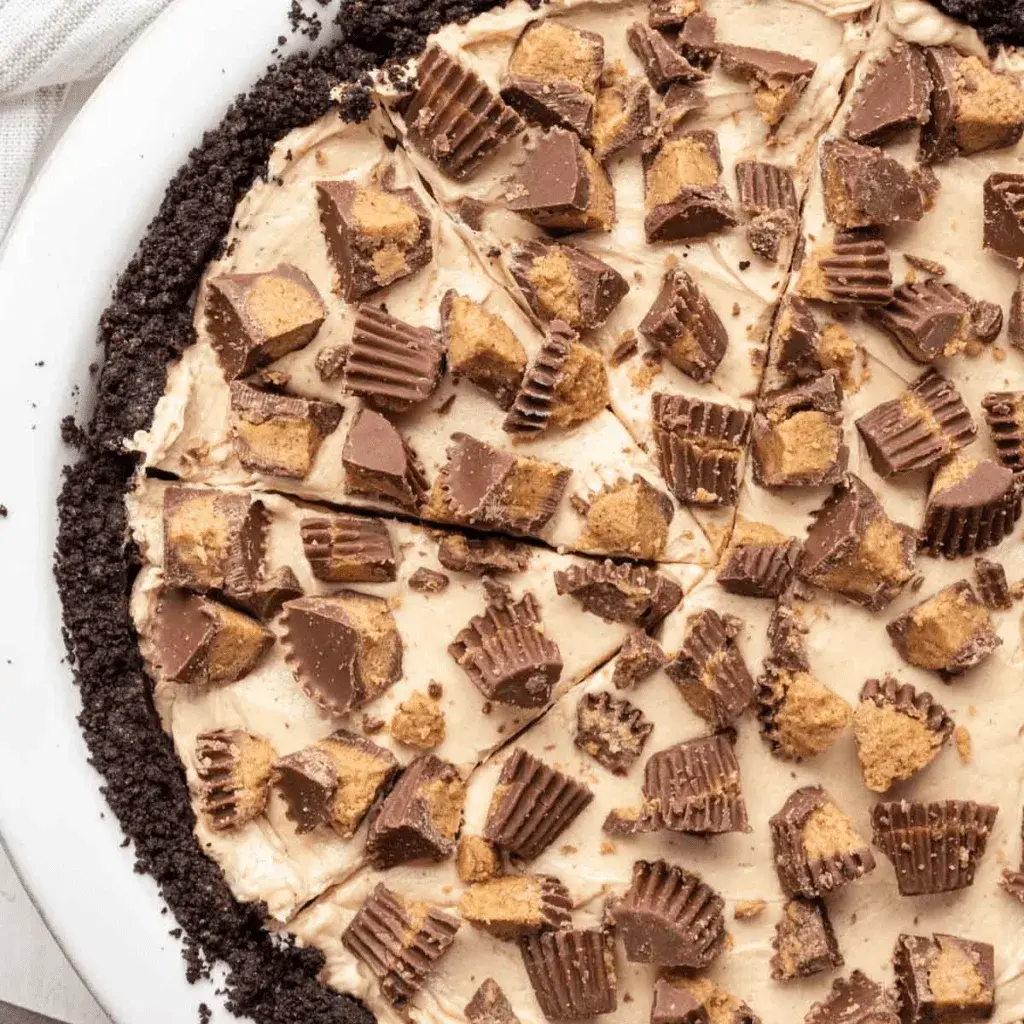
Table of Contents
6-Ingredient Peanut Butter Pie with Easy Oreo Crust – The Perfect No-Fuss Dessert
Growing up in a small Moroccan kitchen, my mother taught me that the best desserts come from simple, honest ingredients. She would press leftover cookie crumbs into a pan for a last-minute tart, and the entire neighborhood would rave. This 6-ingredient peanut butter pie with easy Oreo crust carries that same spirit: it’s quick, unfussy, and absolutely spectacular. After years of training in Paris and now cooking in my New York City apartment, I’ve come back to this recipe again and again — because sometimes the simplest things are the most brilliant.
Imagine a thick, buttery Oreo crust that shatters with a gentle fork press, giving way to a creamy, rich peanut butter filling that’s simultaneously light and luscious. The cold filling melts on your tongue, while the crunch of crushed Oreo pieces and chunks of Reese’s cups add playful texture. A drizzle of chocolate or caramel ties it all together. This pie is a symphony of sweet, salty, creamy, and crunchy — all from just six core ingredients.
As a professionally trained chef, I’ve made countless variations of peanut butter pie — but this version is the one I come home to. The secret? Using room-temperature cream cheese and letting the crust cool completely before filling. A common mistake is rushing the cooling process; that leads to a soggy crust. Today I’ll share my tested method, plus a few Stella-approved shortcuts that make this pie foolproof for any home cook.
Why This 6-Ingredient Peanut Butter Pie Recipe Is the Best
The Flavor Secret – Most peanut butter pies use pudding mix or sweetened condensed milk that can overwhelm the natural peanut taste. My filling relies on real creamy peanut butter (the kind you’d spread on toast) balanced with just enough powdered sugar and Cool Whip to create a velvety, not-too-sweet result. It’s the same trick I learned in a pâtisserie in Lyon: let the star ingredient shine.
Perfected Texture – The key is beating the cream cheese and peanut butter until completely smooth before adding the powdered sugar. This prevents lumps and ensures a silky filling. I also insist on a fully baked, cooled Oreo crust — the brief 10-minute bake sets the crumbs and butter into a firm, crumbly crust that contrasts beautifully with the creamy filling.
Foolproof & Fast – With just 30 minutes of active prep, this pie is ideal for beginners and busy schedules. There’s no whisking over a double boiler, no finicky meringue — simply mix, press, and chill. Over 40 five-star votes from my readers confirm: if you can stir, you can make this pie.
6-Ingredient Peanut Butter Pie Ingredients
I pick up my ingredients from the Union Square Greenmarket in NYC and a local bodega for the Oreos. The beauty of this recipe is that everything is pantry-friendly. Let’s look at what you need.
Ingredients List
- 30 Oreo cookies (crushed) – about 3 cups of crumbs
- 5 tablespoons unsalted butter, melted
- 8 oz cream cheese, softened to room temperature
- 1 cup creamy peanut butter (no-stir kind works best)
- ¾ cup powdered sugar
- 8 oz Cool Whip (or stabilized whipped cream)
- Optional toppings: Reese’s cups, Reese’s pieces, crushed Oreos, chocolate/caramel/peanut butter drizzle
Ingredient Spotlight
Oreo cookies are the star of the crust. The chocolate cookie and cream filling together create a deep cocoa flavor and buttery texture. You can use a food processor, blender, or even a sealed plastic bag and a rolling pin to crush them. For a gluten-free version, substitute gluten-free chocolate sandwich cookies (e.g., Glutino or Kinnikinnick). The texture will be slightly more delicate, so press firmly.
Cream cheese must be at room temperature — cold cream cheese creates lumps that can’t be beaten smooth. Leave it on the counter for 30 minutes before starting. If you’re short on time, cut it into cubes and microwave on low power in 10-second bursts until softened but not warm. Avoid using fat-free cream cheese; the filling won’t set as firmly.
Creamy peanut butter (like Jif or Skippy) gives the best consistency. Natural peanut butter that separates may cause an oily or grainy texture. If you love natural PB, stir it thoroughly and expect a slightly less silky result — still delicious but not as smooth.
Cool Whip keeps the pie light and fluffy while stabilizing it for slicing. You can substitute an equal amount of homemade stabilized whipped cream: whip 1½ cups heavy cream with ½ cup powdered sugar and 2 teaspoons cornstarch until stiff peaks form. The texture will be creamier but a bit more perishable.
| Original Ingredient | Best Substitution | Flavor / Texture Impact |
|---|---|---|
| Oreo cookies | Gluten-free chocolate sandwich cookies (Glutino) | Crumblier crust, still delicious |
| Unsalted butter | Salted butter (reduce added salt) | Slightly saltier crust, enhances chocolate |
| Cream cheese | Neufchâtel cheese (lower fat) | Slightly less rich, still creamy |
| Creamy peanut butter | Chunky peanut butter | Adds texture, may not be as smooth |
| Powdered sugar | Granulated sugar (not recommended) | Grainy texture, filling won’t set properly |
| Cool Whip | Homemade stabilized whipped cream | Lighter, less shelf-stable, creamier taste |
How to Make 6-Ingredient Peanut Butter Pie — Step-by-Step
Follow these steps exactly, and you’ll have a pie that looks like it came from a bakery — but with only 30 minutes of active work. Let’s do this!
Step 1: Prepare the Oreo Crust
Preheat your oven to 350°F. Coat a 9-inch pie pan with nonstick spray. Pulse the whole Oreo cookies (cream and all) in a food processor until you have fine crumbs. You can also place them in a sealed ziplock bag and crush with a rolling pin. In a bowl, combine the crumbs with the melted butter, stirring until every crumb is moistened.
💡 Stella’s Pro Tip: Don’t over-process the Oreos — you want some tiny crumb bits, not a paste. A few small chunks add pleasant texture.
Step 2: Bake and Cool the Crust
Press the crumb mixture firmly into the bottom and up the sides of the pie pan. Use a measuring cup to press it flat. Bake for 8-10 minutes. The crust will look set and smell deeply chocolatey. Place on a wire rack to cool completely — this is crucial. Do not skip cooling; a warm crust will melt your filling.
⚠️ Common Mistake to Avoid: Pressing the crumbs too loosely. If the crust isn’t packed tightly, it will crumble when you slice the pie. Use firm, even pressure.
Step 3: Make the Peanut Butter Filling
In a large bowl, beat the softened cream cheese and creamy peanut butter with an electric mixer on medium speed until smooth and completely combined — about 2 minutes. (The mixture will be thick, that’s perfect.) Add the powdered sugar and beat until incorporated. Finally, gently fold in the Cool Whip using a spatula until no white streaks remain. Do not overmix; you want a light, airy filling.
💡 Stella’s Pro Tip: For the fluffiest pie, fold the Cool Whip by hand. An electric mixer can deflate it.
Step 4: Fill and Top
Spoon the peanut butter filling into the completely cooled crust. Spread it into an even layer. Now add your toppings: chopped Reese’s cups, a sprinkle of Reese’s pieces, a handful of crushed Oreos, and a drizzle of chocolate or caramel sauce. Get creative!
⚠️ Common Mistake to Avoid: Adding toppings before chilling. The weight can sink into the soft filling. Instead, add toppings immediately after spreading — the filling will support them as it chills.
Step 5: Chill and Serve
Place the pie in the freezer for at least 3 hours, or in the refrigerator for 5 hours. The pie must be firm to slice cleanly. Serve it cold — straight from the fridge is perfect. For the cleanest slices, dip your knife in hot water and wipe dry between cuts.
💡 Stella’s Pro Tip: If you’re in a hurry, freeze for 2 hours then check — it may be firm enough. But 3 hours gives the best texture.
| Step | Action | Duration | Key Visual Cue |
|---|---|---|---|
| 1 | Crush Oreos, mix with butter | 5 minutes | Even, damp crumbs |
| 2 | Press into pan, bake | 10 minutes | Firm, fragrant crust |
| 3 | Beat cream cheese + PB, add sugar, fold Cool Whip | 8 minutes | Smooth, thick, no lumps |
| 4 | Fill crust, add toppings | 5 minutes | Even filling, toppings visible |
| 5 | Freeze or refrigerate | 3+ hours (freezer) / 5+ hours (fridge) | Firm to the touch, holds shape when sliced |
Serving & Presentation
This peanut butter pie is a showstopper as is, but a few thoughtful touches make it even more memorable. I love to serve it on a chilled ceramic plate, with a dollop of extra whipped cream and a light dusting of cocoa powder. The contrast of dark chocolate and golden peanut butter is beautiful. For gatherings, arrange the pie on a rustic wooden board with a side of fresh berries — the tartness cuts through the richness beautifully.
Growing up in Morocco, we often ended meals with a simple fruit plate. In Paris, I learned the art of garnishing with precision. Here in NYC, I’ve embraced the “more is more” philosophy — so don’t be shy with the chocolate drizzle and crushed peanut butter cups. A pinch of flaky sea salt (like Maldon) on top takes the flavor to another level. Pair it with a cold glass of milk, a strong iced coffee, or even a scoop of vanilla bean ice cream on the side.
| Pairing Type | Suggestions | Why It Works |
|---|---|---|
| Side Dish | Fresh strawberries, raspberries, a small green salad with vinaigrette | Bright acidity balances the rich, sweet peanut butter |
| Sauce / Dip | Warm chocolate fudge, salted caramel, extra peanut butter drizzle | Adds another layer of indulgence |
| Beverage | Cold whole milk, iced latte, dark roast coffee, espresso martini | Creamy drinks complement, coffee cuts the sweetness |
| Garnish | Flaky salt, cocoa powder, chopped peanuts, whipped cream, mint sprig | Adds visual pop and contrasting textures |
Make-Ahead, Storage & Reheating
As a busy NYC food blogger, I often make this pie a day ahead of time. It actually tastes better after 24 hours in the fridge — the flavors meld and the crust softens just a touch. Here’s how to store it properly so it stays perfect.
| Method | Container | Duration | Reheating Tip |
|---|---|---|---|
| Refrigerator | Covered loosely with foil or plastic wrap | Up to 5 days | Serve straight from fridge — no reheating needed |
| Freezer | Wrap tightly in plastic wrap, then foil, or use an airtight freezer container | Up to 3 months | Thaw in fridge overnight before serving. Do not microwave. |
| Make-Ahead | Assemble pie without toppings, cover, refrigerate | Up to 2 days in advance | Add toppings just before serving for maximum crunch |
If you’ve frozen the whole pie, let it thaw overnight in the refrigerator. The texture remains silky and the crust stays firm. For individual slices, I sometimes let them sit at room temperature for 10 minutes before serving — that softens the filling slightly for an even creamier bite. Never reheat this pie in the microwave; it will turn into a puddle. It’s designed to be enjoyed cold!
Variations & Easy Swaps
| Variation | Key Change | Best For | Difficulty Impact |
|---|---|---|---|
| Chocolate Peanut Butter Swirl | Add 2 tbsp cocoa powder to filling, swirl in melted chocolate | Chocolate lovers | Easy, just extra step |
| Gluten-Free | Use gluten-free chocolate sandwich cookies for crust | Celiac or gluten-sensitive guests | Same effort, different cookie |
| Nut-Free Peanut-Free | Use sunflower seed butter or WowButter instead of PB, and omit peanut toppings | School-safe dessert | Easy, slight flavor change |
Chocolate Peanut Butter Swirl
Inspired by the layered pastries I learned in Paris, this variation is pure decadence. After mixing the filling, fold in 2 tablespoons of unsweetened cocoa powder. Then, melt ½ cup of semi-sweet chocolate chips and swirl it gently into the filling before spreading. The result is a marbled effect that tastes like a Reese’s peanut butter cup in pie form.
Gluten-Free / Dairy-Free
For my gluten-free friends, swap the Oreos with a gluten-free chocolate sandwich cookie brand (I like Partake or Glutino). The crust will be a bit more crumbly — use an extra tablespoon of melted butter if needed. For dairy-free, use a plant-based cream cheese (like Kite Hill or Violife) and a coconut-based whipped topping. The flavor is still excellent, though the filling is slightly less rich.
Seasonal Flavor Twist – Pumpkin Peanut Butter Pie
Every fall at the Union Square market, I grab fresh pumpkin purée and turn this pie into a seasonal hit. Reduce the peanut butter to ½ cup and add ½ cup pumpkin purée, plus 1 teaspoon pumpkin pie spice. Omit the Cool Whip and fold in 1 cup of cold, stabilized whipped cream instead. The result is a spiced, velvety pie that’s perfect for Thanksgiving. It’s a nod to my Moroccan love of warm spices (cinnamon, nutmeg) combined with my New York autumn traditions.
Can I use natural peanut butter in this pie?
Yes, you can use natural peanut butter, but it will change the texture slightly. Natural peanut butter tends to be oilier and less stable, which can make the filling a bit softer and potentially greasy. If you use natural peanut butter, stir it thoroughly to incorporate any separated oil, and be aware that the filling may not set as firmly as when using a processed peanut butter like Jif or Skippy. I recommend sticking with creamy, no-stir peanut butter for the best consistency.
Can I freeze this peanut butter pie?
Absolutely! This pie freezes beautifully for up to 3 months. The key is to wrap it very tightly — first in plastic wrap, then in aluminum foil, or place it in an airtight freezer container. Freeze it without any fresh toppings (like whipped cream or berries) as they don’t thaw well. When you’re ready to serve, thaw the pie overnight in the refrigerator. The texture remains silky and the crust stays wonderfully crumbly.
How do I make the Oreo crust without a food processor?
No food processor? No problem! Place the Oreos in a large, sealable plastic bag and use a rolling pin, a heavy skillet, or even a wine bottle to crush them into fine crumbs. This method is a bit more labor-intensive, but it works perfectly. Just be sure to crush thoroughly — you want a uniform crumb, not large chunks. Then mix with melted butter and press into the pan as directed. It’s a great arm workout!
Can I substitute Cool Whip with homemade whipped cream?
Yes, you can substitute homemade stabilized whipped cream. To make it, whip 1½ cups cold heavy cream with ½ cup powdered sugar and 2 teaspoons cornstarch (or 1 teaspoon instant clear gel) until stiff peaks form. The cornstarch helps stabilize the cream so it holds its shape. The flavor will be even better — lighter and less sweet than Cool Whip. However, the pie will be a bit less stable at room temperature, so keep it chilled until serving.
Why did my crust turn out soggy?
A soggy crust usually happens when the crust isn’t baked long enough or when it’s filled while still warm. Make sure you bake the crust for the full 8–10 minutes until it’s firm and fragrant. Then let it cool completely on a wire rack — this can take 20–30 minutes. If you want extra insurance, you can brush the inside of the baked crust with a thin layer of melted white chocolate or egg white before filling, which creates a moisture barrier.
How many calories are in this peanut butter pie?
One slice of this 6-ingredient peanut butter pie (based on 8 servings) contains approximately 694 calories, 47g fat, 59g carbs, 15g protein, and 39g sugar. This is a rich, indulgent dessert — perfect for special occasions. If you’re looking to lighten it, you can use reduced-fat cream cheese and a sugar-free whipped topping, but the texture and flavor will change. I think every now and then, a full-fledged slice of this pie is totally worth it!
Can I use a different cookie for the crust?
Absolutely! While Oreos give that classic chocolate flavor, you can substitute any crunchy cookie. Try chocolate graham crackers, vanilla wafers, shortbread cookies (like Lorna Doone), or even Biscoff cookies for a spiced twist. Adjust the butter amount slightly — you want the crumbs to feel like wet sand when pressed. Keep in mind that the sweetness and texture will vary, so you may need to experiment. My personal favorite twist is using Biscoff for a gingerbread-like crust.
How do I prevent the filling from sticking to the knife when slicing?
This is a common issue with creamy pies. Here’s my trick: Dip your chef’s knife in hot water, wipe it dry with a clean cloth, then slice. The heat helps slide through the filling without dragging. Wipe the blade clean between each cut and dip again if needed. Also, make sure the pie is well-chilled — at least 3 hours in the freezer or 5 hours in the fridge. A fully set pie cuts much cleaner.
Can I add a layer of chocolate ganache on top?
Yes, and it’s amazing! For a simple ganache, heat ½ cup heavy cream until just simmering, then pour over ½ cup semi-sweet chocolate chips. Let sit for 2 minutes, then stir until smooth. Let the ganache cool slightly (but still pourable), then pour over the chilled pie. Spread gently and return to the fridge for 30 minutes to set. This adds a decadent chocolate shell that complements the peanut butter perfectly.
Is this pie suitable for a 9-inch or 10-inch pie pan?
This recipe is designed for a standard 9-inch pie pan. If you use a 10-inch pan, the crust will be thinner and the filling layer shorter — you might have a slightly less dramatic pie but it will still taste great. For a 10-inch pan, I recommend increasing the crust ingredients by half (45 Oreos and 7.5 tablespoons butter) and the filling by about a quarter (10 oz cream cheese, 1.25 cups peanut butter, etc.). A 9-inch pan gives the perfect ratio of crust to filling.
Love This Recipe? Save It to Pinterest!
If you enjoyed this 6-Ingredient Peanut Butter Pie with Easy Oreo Crust recipe, don’t let it get lost in your browser tabs! 😄 Pin it now so you can find it again anytime — and explore hundreds more tried-and-tested recipes waiting for you on my Pinterest boards.
👉 Follow Stella on Pinterest @exorecipe
📌 Pin this recipe · 🔁 Re-pin your favorites · 💬 Tag me when you make it — I love seeing your creations!
6-Ingredient Peanut Butter Pie with Easy Oreo Crust
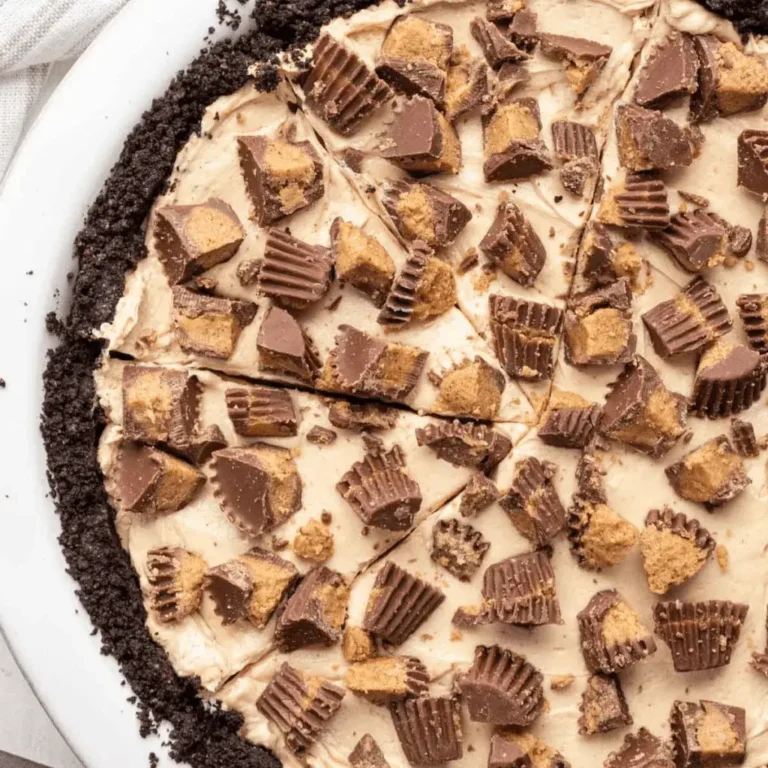
With over 40 5-star votes, this homemade peanut butter pie will be the star of your next gathering! It’s made with a thick, buttery oreo crust, a rich and decadent peanut butter filling, and topped with chopped peanut butter cups. This pie only takes about 30 minutes to prep and you need 6 simple ingredients to make it!
Ingredients
- 30 oreos (crushed )
- 5 tbsp butter (melted )
- 8 oz cream cheese (softened to room temperature)
- 1 cup creamy peanut butter
- ¾ cup powdered sugar
- 8 oz cool whip
- Reese's cups
- Reese's pieces
- crushed oreos
- chocolate, caramel, or peanut butter drizzle
Instructions
- Preheat oven to 350°. Coat a pie pan with non-stick spray and set aside.
- Pulse cookies in a food processor (other options include using a blender or crushing cookies by hand in a plastic bag). Pour melted butter into the cookie crumbs and stir until coated.
- Press crumbs evenly into the bottom and up the sides of the pie plate, making sure to pack it tightly. Bake for 8-10 minutes. Set on a wire rack to cool completely.
- With an electric mixer, beat the peanut butter and cream cheese until smooth (this mixture will be thick). Add in the powdered sugar and mix, followed by the cool whip.
- When your crust is completely cooled, fill it with the peanut butter mixture and spread into an even layer. Then finish it with peanut butter cups on top (or other toppings).
- Chill in the freezer for at least 3 hours or fridge for 5 hours before serving. This pie is best served cold.