Blush Rose Vanilla Silk Domes with Golden Pearl Finish
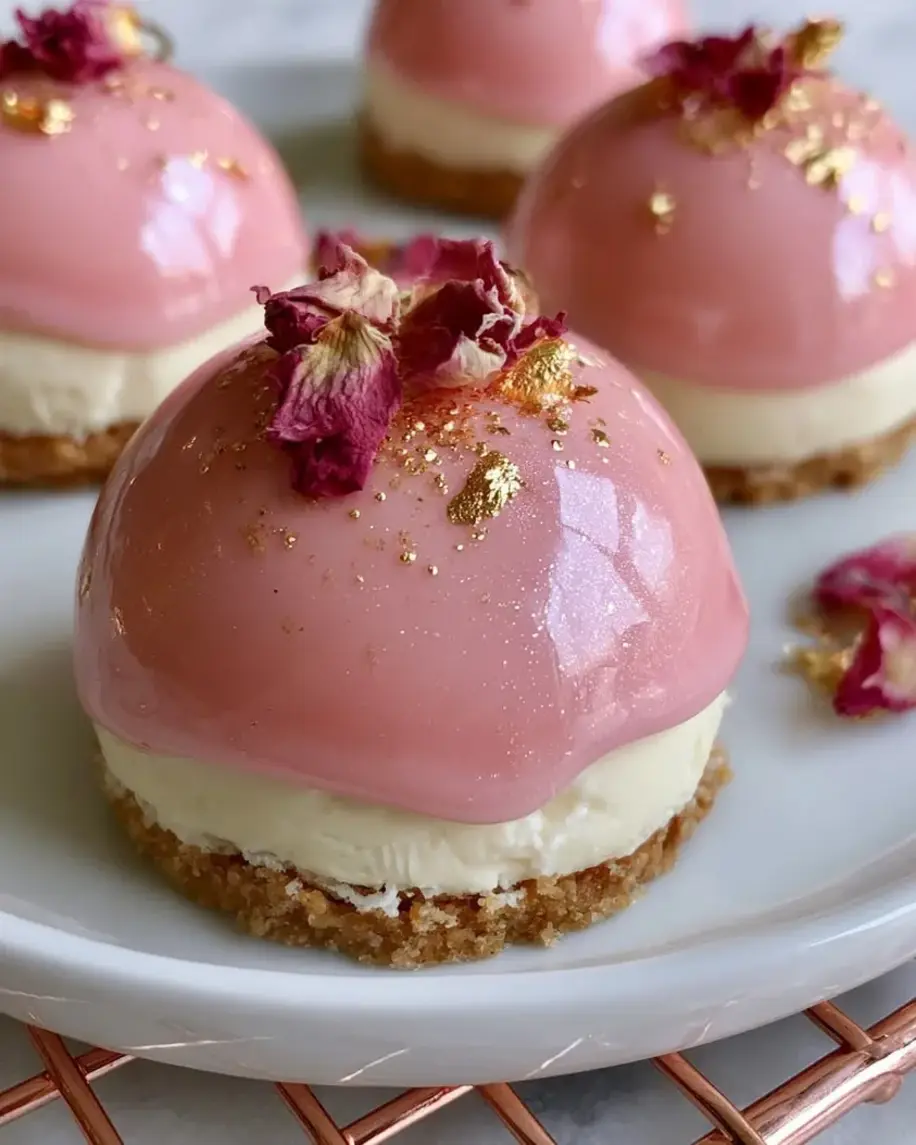
Table of Contents
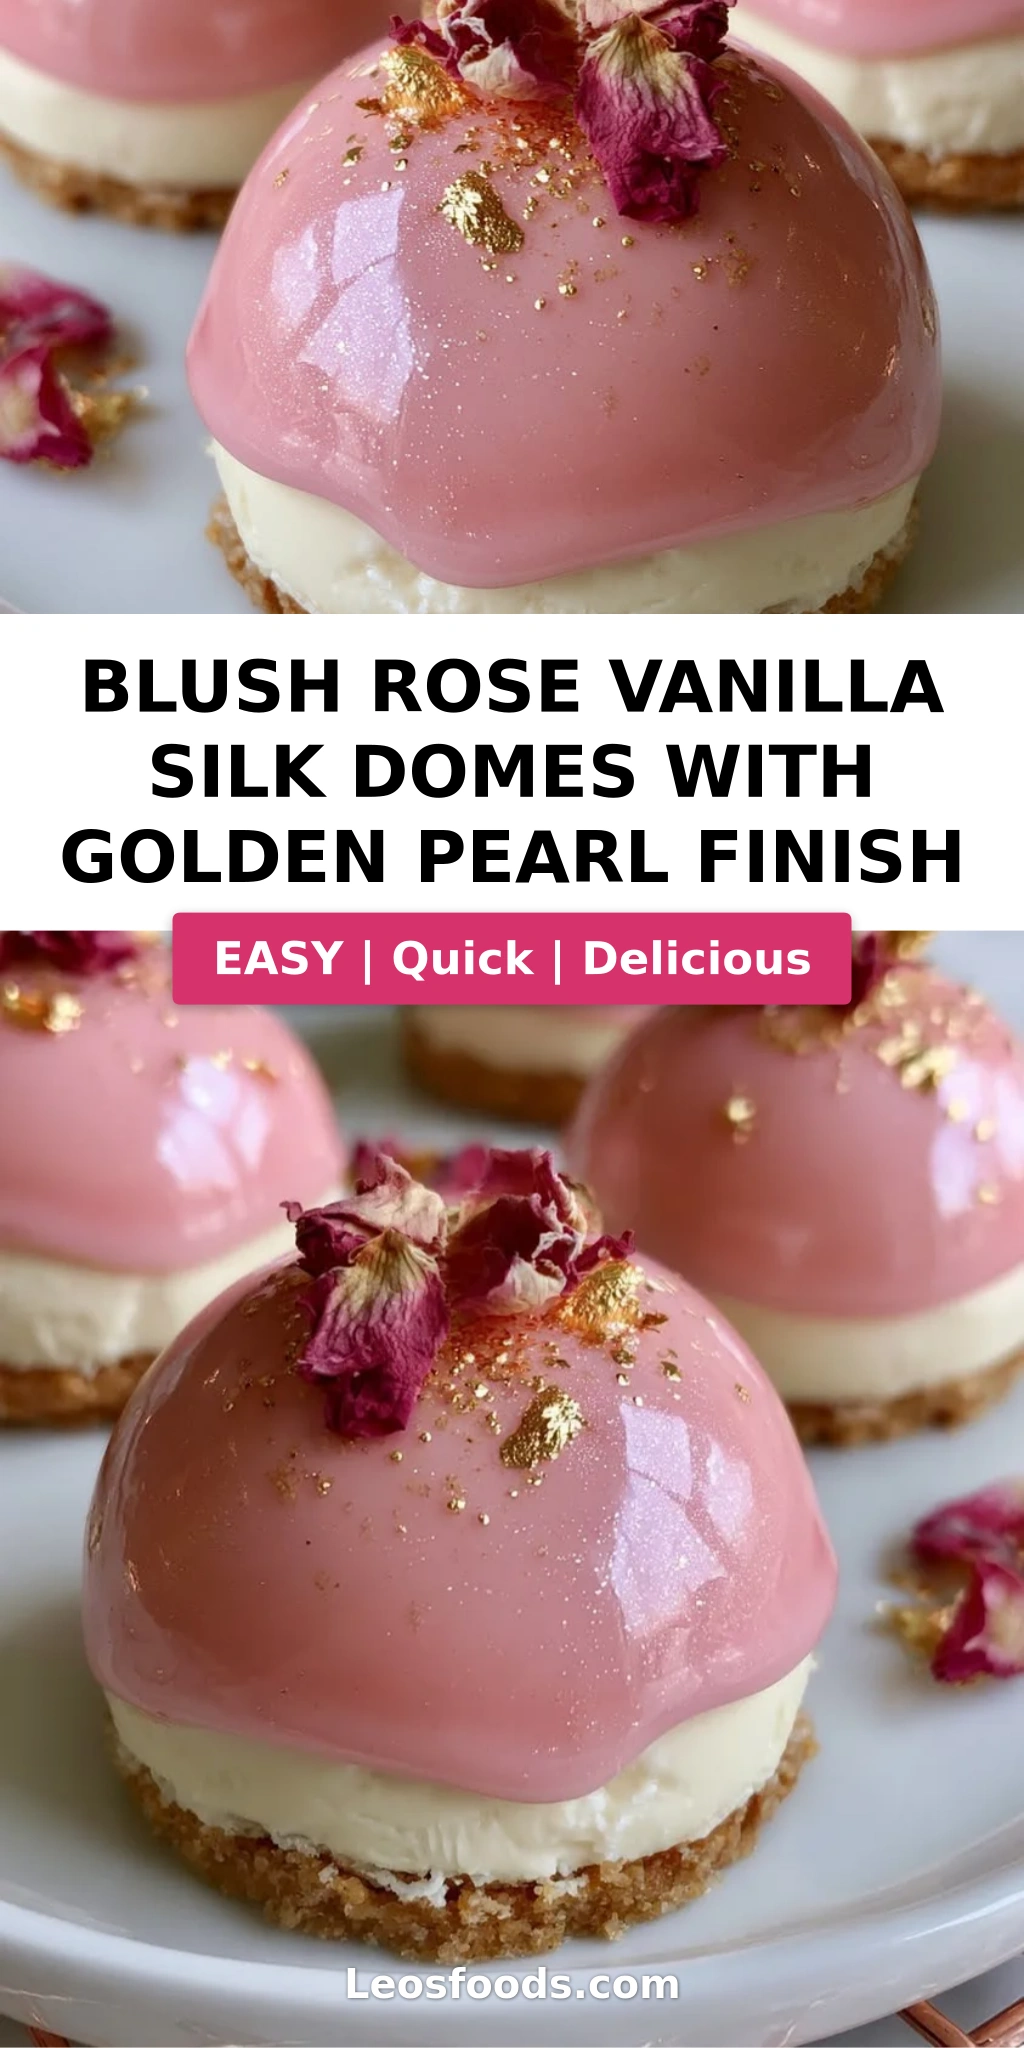
Blush Rose Vanilla Silk Domes with Golden Pearl Finish — Elegant No-Bake Dessert with a Stunning Golden Glow
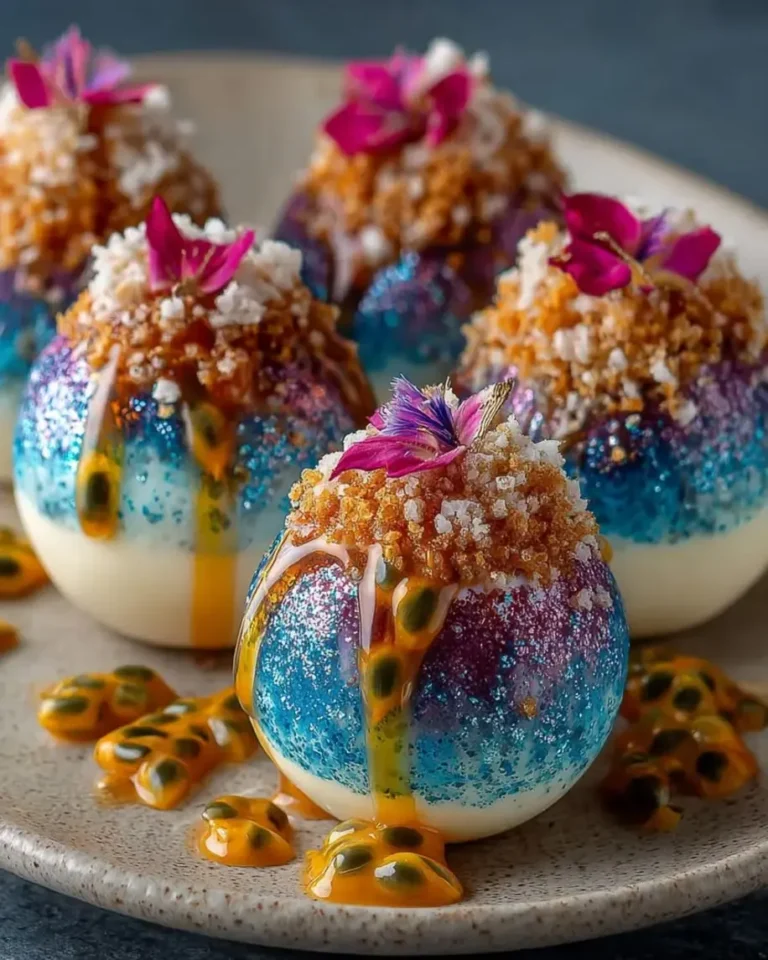
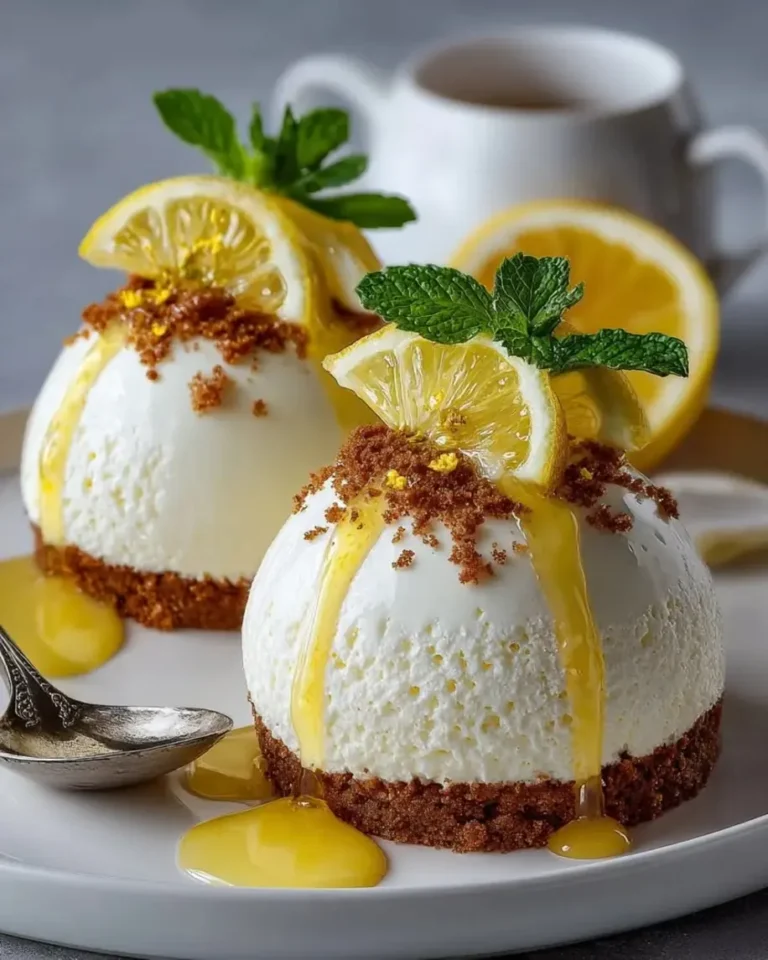
I still remember the first time I tasted rose and vanilla together in a Parisian pâtisserie tucked away on a quiet street in the 6th arrondissement. The dome sat on a tiny porcelain plate, pale pink and glowing under the soft light, and the first spoonful stopped me mid-conversation. That ethereal combination of floral rose, creamy vanilla, and a whisper of something golden and shimmering has stayed with me ever since. This blush rose vanilla silk domes recipe is my tribute to that moment — a dessert that looks like it belongs in a glass case but comes together in your own kitchen without any baking required. The golden pearl finish dessert technique gives each dome a luminous, almost celestial glow that makes every serving feel like a celebration.
Imagine slicing into a smooth, blush-pink dome and finding a silky, cloud-like vanilla cream interior with a subtle hint of rose that lingers on your palate. The biscuit base adds a buttery crunch that contrasts beautifully with the velvety mousse, while the glossy rose glaze and golden pearl finish catch the light like morning dew on a petal. The rose water I use here is the same kind my mother would drizzle into Moroccan tea — floral but never perfumey, delicate but unmistakably present. Each bite is a balance of textures and flavors: crisp, creamy, silky, and sparkling.
What sets my blush rose vanilla silk domes recipe apart is the technique I developed during my time at Le Cordon Bleu in Paris, where I learned that the magic of a great mousse lies in the folding — gentle, patient, and knowing exactly when to stop. I’ve also streamlined the process for home cooks, using a no-bake biscuit base that eliminates the need for an oven and a gelatin-stabilized vanilla silk that sets perfectly in the freezer. One common mistake I see is over-whipping the cream, which can make the filling grainy instead of silky. I’ll show you how to nail that soft peak stage every time, and share my favorite trick for getting the glaze to drip just right.
Why This Blush Rose Vanilla Silk Domes Recipe Is the Best
The flavor secret here comes straight from my Moroccan kitchen memories combined with French pastry precision. The rose water I use is not the synthetic kind — I source a food-grade Moroccan rose water that my mother would have recognized, with a soft floral note that doesn’t overpower the vanilla. The vanilla silk itself is built on a cream cheese base that adds a slight tangy complexity, balancing the sweetness of the white chocolate glaze. This is not just a sweet dessert; it’s a layered flavor experience that unfolds with every bite.
The texture is where my Paris training really comes through. The vanilla silk is stabilized with gelatin that’s been bloomed in cold water and then gently melted into the cream cheese mixture, creating a structure that holds its shape beautifully in the dome mold while remaining incredibly light on the tongue. The key is whipping the heavy cream to soft peaks only — under-whipped and the mousse won’t set firmly enough; over-whipped and it turns buttery. I’ve tested this exact ratio of cream to cream cheese to gelatin more than a dozen times to ensure that every dome unmolds cleanly and slices like a dream.
What makes this recipe truly foolproof is the no-bake approach and the make-ahead convenience. The biscuit base presses into the mold in under two minutes with no rolling or chilling required beforehand. The domes can live in the freezer for up to two weeks fully assembled and glazed, making them the perfect stress-free dessert for dinner parties, birthdays, or holiday gatherings. Even if you have zero pastry experience, the step-by-step visual cues I share will guide you to a result that looks like it came from a high-end patisserie.
Blush Rose Vanilla Silk Domes Recipe Ingredients
I pick up my cream cheese from the farmers market at Union Square in Manhattan, where the local dairy farmers sell a brand that’s extra creamy and tangy. The rose water I bring back from trips to my family in Morocco, but I’ve also found a good-quality alternative at Middle Eastern grocery stores here in NYC. For the edible pearl shimmer powder, I recommend looking at baking supply stores or online — a little goes a long way, and I’ll tell you exactly how to apply it for that gorgeous golden pearl finish.
Ingredients List
- For the Vanilla Silk Domes: 8 oz (225 g) cream cheese, softened; 1/2 cup granulated sugar; 1 tsp vanilla extract; 1 tsp rose water; 1 cup heavy whipping cream; 2 tsp unflavored gelatin; 2 tbsp cold water
- For the Biscuit Base: 1 cup digestive biscuit crumbs; 3 tbsp unsalted butter, melted; 1 tbsp granulated sugar
- For the Blush Rose Glaze: 1 cup white chocolate, finely chopped; 1/3 cup heavy cream; 1 tbsp rose syrup; 1/4 tsp pink food coloring
- For the Golden Pearl Finish: 1 tbsp edible pearl shimmer powder; 1 tbsp warm water
- For Garnish (optional): Dried rose petals; edible gold flakes
Ingredient Spotlight
Cream Cheese: This is the backbone of the vanilla silk, providing richness and a slight tang that balances the sweetness. Look for full-fat block-style cream cheese, not the spreadable kind in a tub, which has added water and stabilizers that can affect the set. Philadelphia cream cheese is my go-to for consistent results. If you need a dairy-free alternative, I’ve had good success with Kite Hill brand almond-based cream cheese, though the texture will be slightly less firm.
Rose Water: Not all rose waters are created equal. Culinary-grade rose water should smell floral but not like perfume. If it smells like soap, it’s likely a body product or low-quality extract. I use Cortas brand, which is widely available in Middle Eastern markets and online. A good substitution is orange blossom water, which has a similar floral profile with a slightly sweeter, citrusy note.
White Chocolate: For the blush glaze, use a high-quality white chocolate that contains real cocoa butter (at least 20–25%). Chips often have stabilizers that prevent smooth melting, so I recommend chopping a bar. Valrhona Ivoire or Ghirardelli white chocolate bars are excellent choices. For a dairy-free version, use a plant-based white chocolate from brands like Pascha or Enjoy Life.
Digestive Biscuits: These British-style biscuits have a slight whole-wheat flavor and a crumbly texture that makes a perfect no-bake base. In the US, you can find them in the international aisle of most grocery stores (McVitie’s is the classic brand). Graham crackers are the best substitute — use the same amount, and the flavor will be slightly sweeter and less malty but still delicious.
Edible Pearl Shimmer Powder: This is the magic behind the golden pearl finish. It’s a fine, food-grade luster dust that comes in pearl, gold, or champagne shades. I use a brand called The Sugar Art for reliable color payoff. Mix it with warm water (not alcohol, which can cause streaking) and brush it on with a soft pastry brush. One tablespoon is plenty for eight domes, and you can find it at baking supply stores or on Amazon.
| Original Ingredient | Best Substitution | Flavor / Texture Impact |
|---|---|---|
| Cream Cheese | Mascarpone or dairy-free cream cheese | Mascarpone yields a richer, less tangy mousse; dairy-free gives a slightly softer set |
| Rose Water | Orange blossom water or vanilla extract | Orange blossom adds citrusy floral notes; vanilla gives a sweeter, non-floral profile |
| White Chocolate | Dairy-free white chocolate (e.g., Pascha) | Slightly less creamy but still glossy; add 1 tsp coconut oil for smoothness |
| Digestive Biscuits | Graham crackers or shortbread cookies | Graham crackers are sweeter and lighter; shortbread is buttery and richer |
| Edible Pearl Shimmer | Edible gold dust or silver luster dust | Gold dust gives a warmer glow; silver luster yields a cooler, icier shimmer |
How to Make Blush Rose Vanilla Silk Domes — Step-by-Step
Trust me when I say that if you can fold whipped cream into cream cheese, you can make these domes look like they belong in a French pastry case. I’ll walk you through each step with the exact visual cues I use in my own kitchen.
Step 1: Prepare the Biscuit Base
In a medium mixing bowl, combine 1 cup of digestive biscuit crumbs with 3 tablespoons of melted unsalted butter and 1 tablespoon of granulated sugar. Stir with a fork until every crumb is evenly moistened and the mixture holds together when pressed between your fingers. Divide the mixture evenly among 8 silicone dome molds (each about 2.5 inches in diameter). Use the back of a small spoon or a rounded measuring spoon to press the crumbs firmly into a thin, even layer across the bottom of each mold cavity. Set the molds aside on a small baking sheet that fits in your freezer.
💡 Stella’s Pro Tip: For a cleaner, more uniform base, use the flat bottom of a shot glass to press the crumbs into the mold. This gives you a perfectly level surface and even thickness every time.
Step 2: Bloom the Gelatin
In a small bowl, sprinkle 2 teaspoons of unflavored gelatin powder over 2 tablespoons of cold water. Do not stir — just let it sit undisturbed for 5 minutes. The gelatin will absorb the water and turn into a firm, jiggly mass. This process, called blooming, ensures the gelatin dissolves evenly into the cream cheese mixture without forming lumps. After 5 minutes, microwave the bloomed gelatin for 10 to 15 seconds, or until it becomes a clear, liquid state. Set it aside to cool slightly while you prepare the cream cheese mixture.
⚠️ Common Mistake to Avoid: If the gelatin is too hot when you add it to the cream cheese, it can seize and form hard little beads. Let it cool for about one minute until it’s warm but not hot to the touch — just above body temperature.
Step 3: Make the Vanilla Silk Filling
In a large mixing bowl, beat 8 ounces of softened cream cheese together with 1/2 cup of granulated sugar, 1 teaspoon of vanilla extract, and 1 teaspoon of rose water using an electric hand mixer on medium speed. Beat for about 2 minutes until the mixture is completely smooth, light, and free of any lumps. With the mixer running on low, slowly pour in the melted gelatin and mix until fully incorporated, about 20 seconds. Scrape down the sides and bottom of the bowl with a spatula to ensure everything is evenly combined.
💡 Stella’s Pro Tip: Make sure your cream cheese is truly at room temperature — cold cream cheese will give you a lumpy filling. Leave it on the counter for at least 45 minutes before starting. If you’re short on time, cut it into small cubes and let it sit for 20 minutes.
Step 4: Whip and Fold the Cream
In a separate bowl, pour 1 cup of cold heavy whipping cream. Using clean beaters, whip the cream on medium-high speed until it reaches soft peaks — meaning the cream holds a shape when the beaters are lifted but the peaks gently droop to one side. This usually takes about 2 to 3 minutes. Be careful not to over-whip; if the cream looks curdled or grainy, you’ve gone too far. Gently fold one-third of the whipped cream into the cream cheese mixture using a rubber spatula, using broad figure-eight strokes to lighten the batter. Then fold in the remaining cream in two more additions, folding just until no white streaks remain.
⚠️ Common Mistake to Avoid: Over-folding will deflate the mousse and make it dense rather than silky. Stop as soon as the mixture looks homogeneous — a few tiny streaks are fine and will disappear during freezing.
Step 5: Fill and Freeze the Domes
Spoon or pipe the vanilla silk filling into the prepared dome molds on top of the biscuit base, filling each cavity to the very top. Use the back of a spoon or an offset spatula to smooth the tops so they’re level with the rim of the mold. Place the baking sheet with the filled molds into the freezer and freeze for at least 4 hours, or until the domes are completely solid to the touch. Freezing overnight is even better and gives you a cleaner unmolding experience the next day.
💡 Stella’s Pro Tip: To get perfectly smooth, dome-shaped tops, let the molds sit in the freezer for 30 minutes, then go back and smooth the tops again with a warm offset spatula. The slight initial set makes it easier to level them without disturbing the biscuit base.
Step 6: Make the Blush Rose Glaze
Place 1 cup of finely chopped white chocolate in a medium heatproof bowl. In a small saucepan, warm 1/3 cup of heavy cream over medium heat until it just begins to steam — do not let it boil. Pour the hot cream over the white chocolate and let it sit undisturbed for 2 minutes. Gently stir in a circular motion, starting from the center and working outward, until the mixture is completely smooth and glossy. Stir in 1 tablespoon of rose syrup and 1/4 teaspoon of pink food coloring, mixing until the color is evenly distributed and the glaze has a soft blush tone. Let the glaze cool for 5 to 7 minutes, stirring occasionally, until it thickens slightly to a pourable consistency.
⚠️ Common Mistake to Avoid: If the glaze is too thin, it will run off the domes completely. If it’s too thick, it won’t coat evenly. The perfect consistency is like warm honey — it should coat the back of a spoon and slowly drip off in a steady ribbon.
Step 7: Glaze the Domes
Remove the frozen domes from the freezer. Gently unmold each dome by flexing the silicone mold and carefully peeling it away from the edges. Place the domes on a wire rack set over a baking sheet or parchment paper to catch drips. Working one at a time, hold a dome gently between your fingers and pour the blush rose glaze over the top, letting it cascade down the sides in smooth, even drips. Use an offset spatula if needed to encourage the glaze to flow evenly. Return the glazed domes to the freezer for 10 minutes to set the glaze.
💡 Stella’s Pro Tip: If the glaze starts to thicken as you work, warm it in the microwave for 5-second intervals, stirring in between, until it flows again. Work quickly but carefully — the domes are fragile right after unmolding.
Step 8: Apply the Golden Pearl Finish
In a small bowl, mix 1 tablespoon of edible pearl shimmer powder with 1 tablespoon of warm water. Stir until the powder is completely dissolved and the liquid looks like liquid pearl. Using a soft, clean pastry brush, lightly brush the pearl mixture over the surface of each glazed dome. You want a thin, even coat — the shimmer will catch the light and give each dome a luminous golden pearl finish. Work gently so you don’t disturb the glaze underneath. If you want a more intense shimmer, let the first coat dry for about 30 seconds and then apply a second thin layer.
⚠️ Common Mistake to Avoid: Less is more with the shimmer powder. Brushing on too much can create a cakey, uneven layer. Dip your brush in the mixture, then tap off the excess before applying to the dome.
Step 9: Garnish and Chill
While the pearl finish is still slightly tacky, gently press a few dried rose petals and a small pinch of edible gold flakes onto the top of each dome for a luxurious, garden-inspired finish. Transfer the finished domes to a serving plate or platter and chill in the refrigerator for at least 20 minutes before serving. This brief chill allows the dome to soften slightly from its frozen state to a creamy, mousse-like texture that’s perfect for slicing.
💡 Stella’s Pro Tip: For a truly stunning presentation, serve each dome on a small dessert plate with a light dusting of extra edible gold flakes and a single dried rose petal arranged artfully to one side. It takes seconds but makes the dessert look like it’s from a three-Michelin-star kitchen.
| Step | Action | Duration | Key Visual Cue |
|---|---|---|---|
| 1 | Prepare biscuit base | 5 mins | Crumbs hold together when pressed |
| 2 | Bloom gelatin | 5 mins | Gelatin turns firm and jiggly |
| 3 | Make vanilla silk filling | 5 mins | Smooth, lump-free cream cheese base |
| 4 | Whip and fold cream | 5 mins | Soft peaks that gently droop |
| 5 | Fill and freeze domes | 4 hours | Domes are solid to the touch |
| 6 | Make blush rose glaze | 10 mins | Glossy, blush-toned, ribbon-like drip |
| 7 | Glaze the domes | 5 mins | Even coverage with gentle drips |
| 8 | Apply golden pearl finish | 5 mins | Luminous, even shimmer coat |
| 9 | Garnish and chill | 20 mins | Domes are creamy and sliceable |
Serving & Presentation
When I serve these blush rose vanilla silk domes at dinner parties in my Brooklyn apartment, I like to set each dome on a simple white dessert plate and add a small quenelle of lightly sweetened crème fraîche on the side — the tanginess cuts through the sweetness beautifully, just like the way my mother would serve rose-flavored sweets with a dollop of labneh back in Morocco. A few fresh raspberries or sliced strawberries arranged around the plate add a pop of bright red that complements the blush tones of the glaze.
The golden pearl finish really comes alive under soft, warm lighting — I always tell my guests to wait a moment before digging in, just to admire the way the shimmer catches the candlelight. If you’re serving these at a wedding shower, anniversary, or Valentine’s Day dinner, the presentation alone will earn you applause before anyone even takes a bite. For a more casual setting, the domes are just as stunning on a simple wooden board with a light dusting of powdered sugar and a few edible flowers scattered around.
| Pairing Type | Suggestions | Why It Works |
|---|---|---|
| Side Dish | Fresh berries, crème fraîche, mint leaves | Berries add acidity and color; crème fraîche balances sweetness |
| Sauce / Dip | Raspberry coulis, honey drizzle, white chocolate sauce | Fruit coulis cuts richness; honey echoes floral notes |
| Beverage | Earl Grey tea, sparkling rosé, Moroccan mint tea | Floral tea complements rose; rosé adds a festive sparkle |
| Garnish | Dried rose petals, edible gold flakes, pistachio crumbs | Rose petals reinforce the flavor; gold adds luxury; pistachio adds crunch |
Make-Ahead, Storage & Reheating
In my NYC world of back-to-back recipe testing and food styling gigs, make-ahead desserts are a lifesaver. These blush rose vanilla silk domes are one of my most requested recipes precisely because they can be prepared in stages and pulled out of the freezer at a moment’s notice — no last-minute baking or stress required. I often make a double batch on a Sunday afternoon and have them ready for the entire week ahead.
| Method | Container | Duration | Reheating Tip |
|---|---|---|---|
| Refrigerator | Airtight container, single layer | Up to 4 days | Serve straight from fridge; no reheating needed |
| Freezer | Freezer-safe container, parchment between layers | Up to 3 months | Thaw in fridge 2 hours before serving; do not microwave |
| Make-Ahead | Assemble in mold, freeze unglazed | Up to 2 weeks before glazing | Glaze and finish the day you plan to serve for best shine |
The domes actually taste best when they’ve had at least a full day in the fridge after glazing — the flavors of rose and vanilla meld together beautifully, and the texture becomes even creamier. If you’ve frozen them, transfer the domes to the refrigerator about 3 to 4 hours before serving. I do not recommend microwaving the domes to soften them, as the glaze can become sticky and the mousse can separate. Patience is rewarded here: a slow thaw in the fridge yields the perfect silky, sliceable texture.
Variations & Easy Swaps
| Variation | Key Change | Best For | Difficulty Impact |
|---|---|---|---|
| Chocolate Rose Domes | Add 2 tbsp cocoa powder to vanilla silk | Chocolate lovers, Valentine’s Day | Easy — no extra steps |
| Gluten-Free Version | Use gluten-free graham crackers or cookies | Gluten-sensitive guests | Easy — swap in equal amount |
| Citrus & Rose Twist | Add 1 tsp orange blossom water + zest of 1 orange | Spring brunch, bridal showers | Easy — add with the rose water |
Chocolate Rose Domes
For a deeper, more indulgent version, sift 2 tablespoons of unsweetened cocoa powder into the cream cheese mixture along with the sugar. The cocoa pairs beautifully with the rose water — a combination I first encountered in a Parisian chocolatier in the Marais district. The flavor is like a dark chocolate truffle with a floral whisper at the end. You can also swap the white chocolate glaze for a dark chocolate ganache (1/2 cup dark chocolate + 1/3 cup heavy cream) for a more dramatic, bittersweet finish.
Gluten-Free Version
Making these domes gluten-free is as simple as swapping the digestive biscuits for gluten-free graham crackers or gluten-free shortbread cookies. I’ve tested this with Schar brand graham-style crackers and also with homemade almond-flour shortbread, and both work beautifully. The texture of the base will be slightly more delicate, so be extra gentle when pressing the crumbs into the molds. Everything else in the recipe is naturally gluten-free, so you only need to adjust the base.
Citrus & Rose Twist
On weekends when I’m browsing the Union Square farmers market and see beautiful citrus, I like to add a bright note to these domes by incorporating orange blossom water and fresh orange zest. Add 1 teaspoon of orange blossom water along with the rose water, and fold in the finely grated zest of one orange. The citrus cuts through the richness of the cream cheese and adds a sunny, uplifting quality that feels perfect for spring brunches or baby showers. Garnish with a thin slice of candied orange instead of rose petals for a stunning visual contrast.
Frequently Asked Questions
What is a blush rose vanilla silk dome and how is it different from a regular mousse cake?
A blush rose vanilla silk dome is a single-serving dessert shaped like a dome, featuring a silky, mousse-like vanilla filling infused with rose water and a blush-pink glaze. Unlike a regular mousse cake, which is typically baked or set in a large pan and sliced, these domes are portioned individually from the start, frozen in silicone molds, and then glazed individually. The texture is lighter and more ethereal than a traditional mousse cake because the filling is stabilized with gelatin rather than eggs, and the no-bake biscuit base adds a crunchy contrast that you don’t usually get in a mousse cake. The golden pearl finish is another unique element that gives these domes a shimmering, high-end appearance that a standard mousse cake doesn’t have.
Can I substitute the vanilla silk filling with a different flavor for these rose domes?
Absolutely! The vanilla silk filling is a versatile base that welcomes flavor adaptations. You can replace the vanilla extract and rose water with an equal amount of other extracts or flavorings. Try almond extract for a nutty, marzipan-like note, or orange extract for a citrusy twist. If you want a chocolate version, sift 2 tablespoons of cocoa powder into the cream cheese mixture. For a fruity variation, swirl in 3 tablespoons of raspberry puree or passion fruit pulp after folding in the whipped cream. Keep in mind that if you add a liquid puree, you may need to increase the gelatin slightly (add an extra 1/2 teaspoon) to maintain the set. Also, if you remove the rose water, the domes will no longer have that signature floral note, so you might want to adjust the glaze accordingly — for example, use a citrus glaze instead of rose glaze.
How do I achieve the golden pearl finish on the outside of the domes?
The golden pearl finish is surprisingly easy to achieve with the right technique. After your blush rose glaze has set in the freezer for about 10 minutes, mix 1 tablespoon of edible pearl shimmer powder with 1 tablespoon of warm water until completely dissolved. Use a soft, clean pastry brush to apply a thin, even layer of the pearl mixture onto each glazed dome. The key is to use a light hand — too much shimmer can look cakey and uneven. Let the first coat dry for about 30 seconds, then apply a second thin layer if you want extra luminosity. The pearl finish works best when the glaze underneath is smooth and free of streaks, so make sure your glaze is at the right consistency (like warm honey) before pouring. The result is a soft, luminous sheen that catches the light beautifully without looking artificial.
How far in advance can I prepare blush rose vanilla silk domes for a special event?
You can prepare these domes several days in advance, which makes them ideal for entertaining. For the best texture and flavor, I recommend assembling and freezing the unglazed domes up to 2 weeks ahead. The day before your event, glaze the domes, apply the golden pearl finish, and let them thaw in the refrigerator overnight. The domes will keep beautifully in the refrigerator for up to 4 days after glazing. If you need to prepare even further ahead, freeze the fully assembled and glazed domes for up to 3 months in an airtight container with parchment paper between layers. Thaw them in the refrigerator for about 3 to 4 hours before serving. I don’t recommend glazing more than 2 days in advance, as the glaze can start to lose its shine and become slightly tacky over time.
Can I use a different type of mold for these domes?
Yes, you can use a variety of molds, though silicone dome molds work best because they are flexible and allow for easy unmolding without damaging the delicate mousse. If you don’t have dome-shaped molds, you can use any small, round silicone mold — even mini bundt pans or silicone muffin cups will work, though the shape will be different. The key is that the mold needs to be flexible enough to peel away from the frozen mousse. If you use rigid metal or plastic molds, line them with plastic wrap first so you can lift the domes out after freezing. Keep in mind that the size of the mold will affect the serving size and the amount of glaze needed. For standard 2.5-inch dome molds, this recipe yields 8 domes. If your molds are smaller, you’ll get more portions; if larger, fewer.
Why did my glaze crack or not set properly?
Glaze cracking usually happens for one of two reasons: the glaze was too thick when poured, or the domes were too cold or too warm. If the glaze is too thick, it hardens quickly on contact with the frozen dome and can form cracks as the dome expands slightly during thawing. If the glaze is too thin, it will run off completely and leave bare spots. The ideal glaze consistency is like warm honey — it should coat the back of a spoon and drip off in a steady, smooth ribbon. Also, make sure your domes are completely frozen (at least 4 hours) before glazing. If they’re not solid enough, the warmth of the glaze can soften the mousse and cause the dome to collapse. If your glaze still cracks, you can gently reheat the cracks with a warm spatula or apply a second thin layer of glaze on top once the first layer has set.
Can I make these domes without gelatin?
Yes, you can make a gelatin-free version, though the texture will be different — more like a soft mousse than a firm, sliceable dome. To replace the gelatin, you have a couple of options. You can increase the amount of cream cheese to 12 ounces and reduce the heavy cream to 3/4 cup — the extra cream cheese provides structure on its own, but the dome will be denser and less silky. Alternatively, you can use agar-agar, a plant-based gelatin substitute, at a ratio of 1 teaspoon agar powder to 2 tablespoons water, bloomed and dissolved the same way as gelatin. Agar sets more firmly and at room temperature, so the texture will be slightly more jellied. If you use agar, be sure to bring the mixture to a gentle boil to activate the setting properties. I’ve tested both methods, and while they work, the original gelatin version gives the most authentic, silky dome texture.
What’s the best way to unmold the domes without damaging them?
Unmolding these domes is easy if you follow a few simple steps. First, make sure the domes are fully frozen — at least 4 hours, ideally overnight. Remove the baking sheet from the freezer and let it sit at room temperature for about 2 minutes. This brief rest slightly softens the outer edge of the silicone mold, making it more flexible. Gently flex the sides of each mold cavity, pressing the silicone away from the frozen dome. Place your thumb on the bottom of the mold (the flat side) and gently push upward while peeling the silicone away with your other hand. The dome should release cleanly. If it sticks, let it sit for another minute and try again — don’t yank or pull, as this can crack the dome. Once unmolded, place the domes on a wire rack and work quickly to glaze them before they soften too much. If a dome does crack, you can patch it with a small amount of extra glaze applied with a small spatula.
Share Your Version!
I absolutely love seeing how each of you puts your own spin on my recipes — whether you’re adding a splash of citrus, swapping in dark chocolate, or presenting these domes on a beautiful platter for a wedding shower. If you make this blush rose vanilla silk domes recipe, I’d be over the moon if you’d leave a star rating and a comment below telling me how it went. Was the golden pearl finish as magical as you hoped? Did your guests gasp when you brought the domes to the table? I want to hear every detail!
Snap a photo of your beautiful creation and share it on Instagram or Pinterest with the hashtag #StellaBakesNYC — I’m always scrolling through tags and love to repost my favorites. If you have a specific question about adapting this recipe for a different occasion or dietary need, drop it in the comments and I’ll personally respond within a day or two. Your feedback and creativity are what make this little corner of the internet so special, and I’m truly grateful to have you here in my kitchen.
From my NYC kitchen to yours — I hope this recipe brings as much warmth to your table as it does to mine. — Stella 🧡
📸 Made this recipe? Tag me @stellarecipeblog on Instagram or Pinterest — I’d love to feature your creation! ⭐ Drop a star rating and comment below to let me know how it turned out. 💬 What’s your favorite way to customize these domes? I read every single comment!
Love This Recipe? Save It to Pinterest!
If you enjoyed this Blush Rose Vanilla Silk Domes with Golden Pearl Finish recipe, don’t let it get lost in your browser tabs! 😄 Pin it now so you can find it again anytime — and explore hundreds more tried-and-tested recipes waiting for you on my Pinterest boards.
👉 Follow Stella on Pinterest @stellarecipeblog
📌 Pin this recipe · 🔁 Re-pin your favorites · 💬 Tag me when you make it — I love seeing your creations!
Blush Rose Vanilla Silk Domes with Golden Pearl Finish
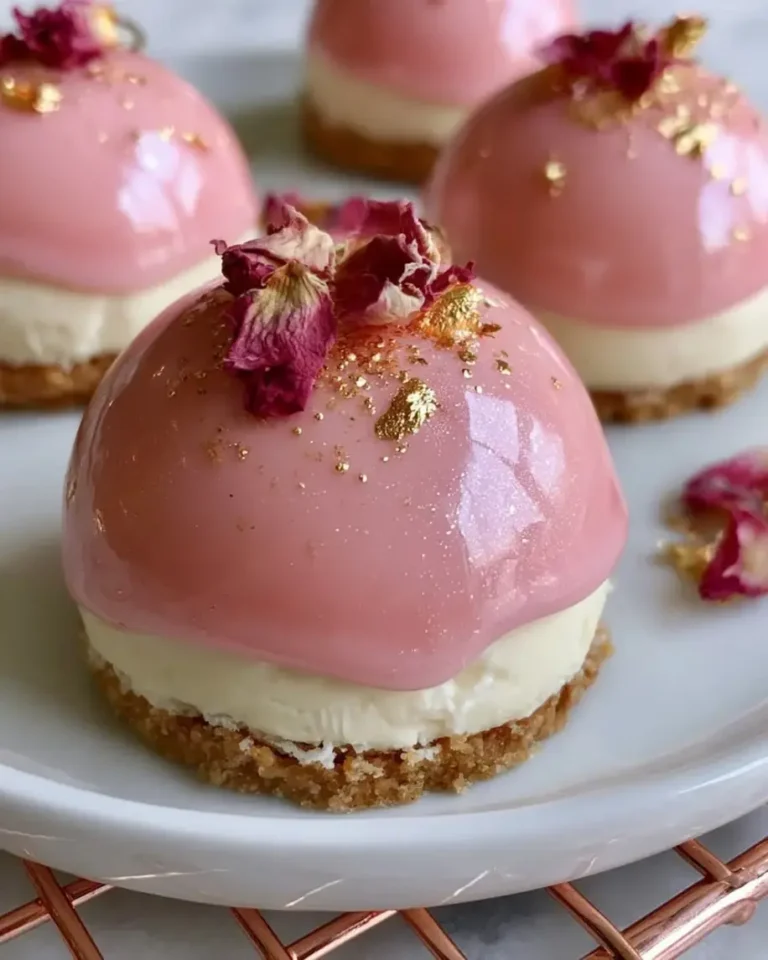
Elegant rose-scented vanilla silk domes with a blush glaze and golden pearl finish.
- Total Time: 4 hours 20 minutes (includes freezing and chilling)
- Yield: 8 1x
Ingredients
- For the Vanilla Silk Domes:
- 8 oz (225 g) cream cheese, softened
- 1/2 cup granulated sugar
- 1 tsp vanilla extract
- 1 tsp rose water
- 1 cup heavy whipping cream
- 2 tsp unflavored gelatin
- 2 tbsp cold water
- For the Biscuit Base:
- 1 cup digestive biscuit crumbs
- 3 tbsp unsalted butter, melted
- 1 tbsp granulated sugar
- For the Blush Rose Glaze:
- 1 cup white chocolate, finely chopped
- 1/3 cup heavy cream
- 1 tbsp rose syrup
- 1/4 tsp pink food coloring
- For the Golden Pearl Finish:
- 1 tbsp edible pearl shimmer powder
- 1 tbsp warm water
- For Garnish (optional):
- Dried rose petals
- Edible gold flakes
Instructions
- Combine biscuit crumbs, melted butter, and sugar in a bowl.
- Press the mixture into silicone dome molds to form a thin base layer.
- Bloom gelatin in cold water for 5 minutes.
- Beat cream cheese, sugar, vanilla extract, and rose water until smooth.
- Melt bloomed gelatin and mix into the cream cheese mixture.
- Whip heavy cream to soft peaks and fold into the mixture until silky.
- Fill molds over the biscuit base and freeze for at least 4 hours until firm.
- Heat heavy cream and pour over white chocolate to create a smooth glaze.
- Stir in rose syrup and pink food coloring until glossy and blush-toned.
- Remove frozen domes and place on a wire rack.
- Pour blush rose glaze evenly over each dome.
- Mix pearl shimmer powder with warm water and lightly brush over set glaze for a golden pearl finish.
- Garnish with dried rose petals and edible gold flakes.
- Chill for 20 minutes before serving.
Nutrition
- Calories: 405
- Sugar: 25 g
- Fat: 29 g
- Carbohydrates: 32 g
- Protein: 6 g
Tried This Recipe? Leave a Comment!
Did you make this recipe? I’d love to hear how it turned out! Please leave a comment and a rating below. Your feedback helps other home cooks and supports cheerychop.com!
For more delicious inspiration, follow me on Pinterest!