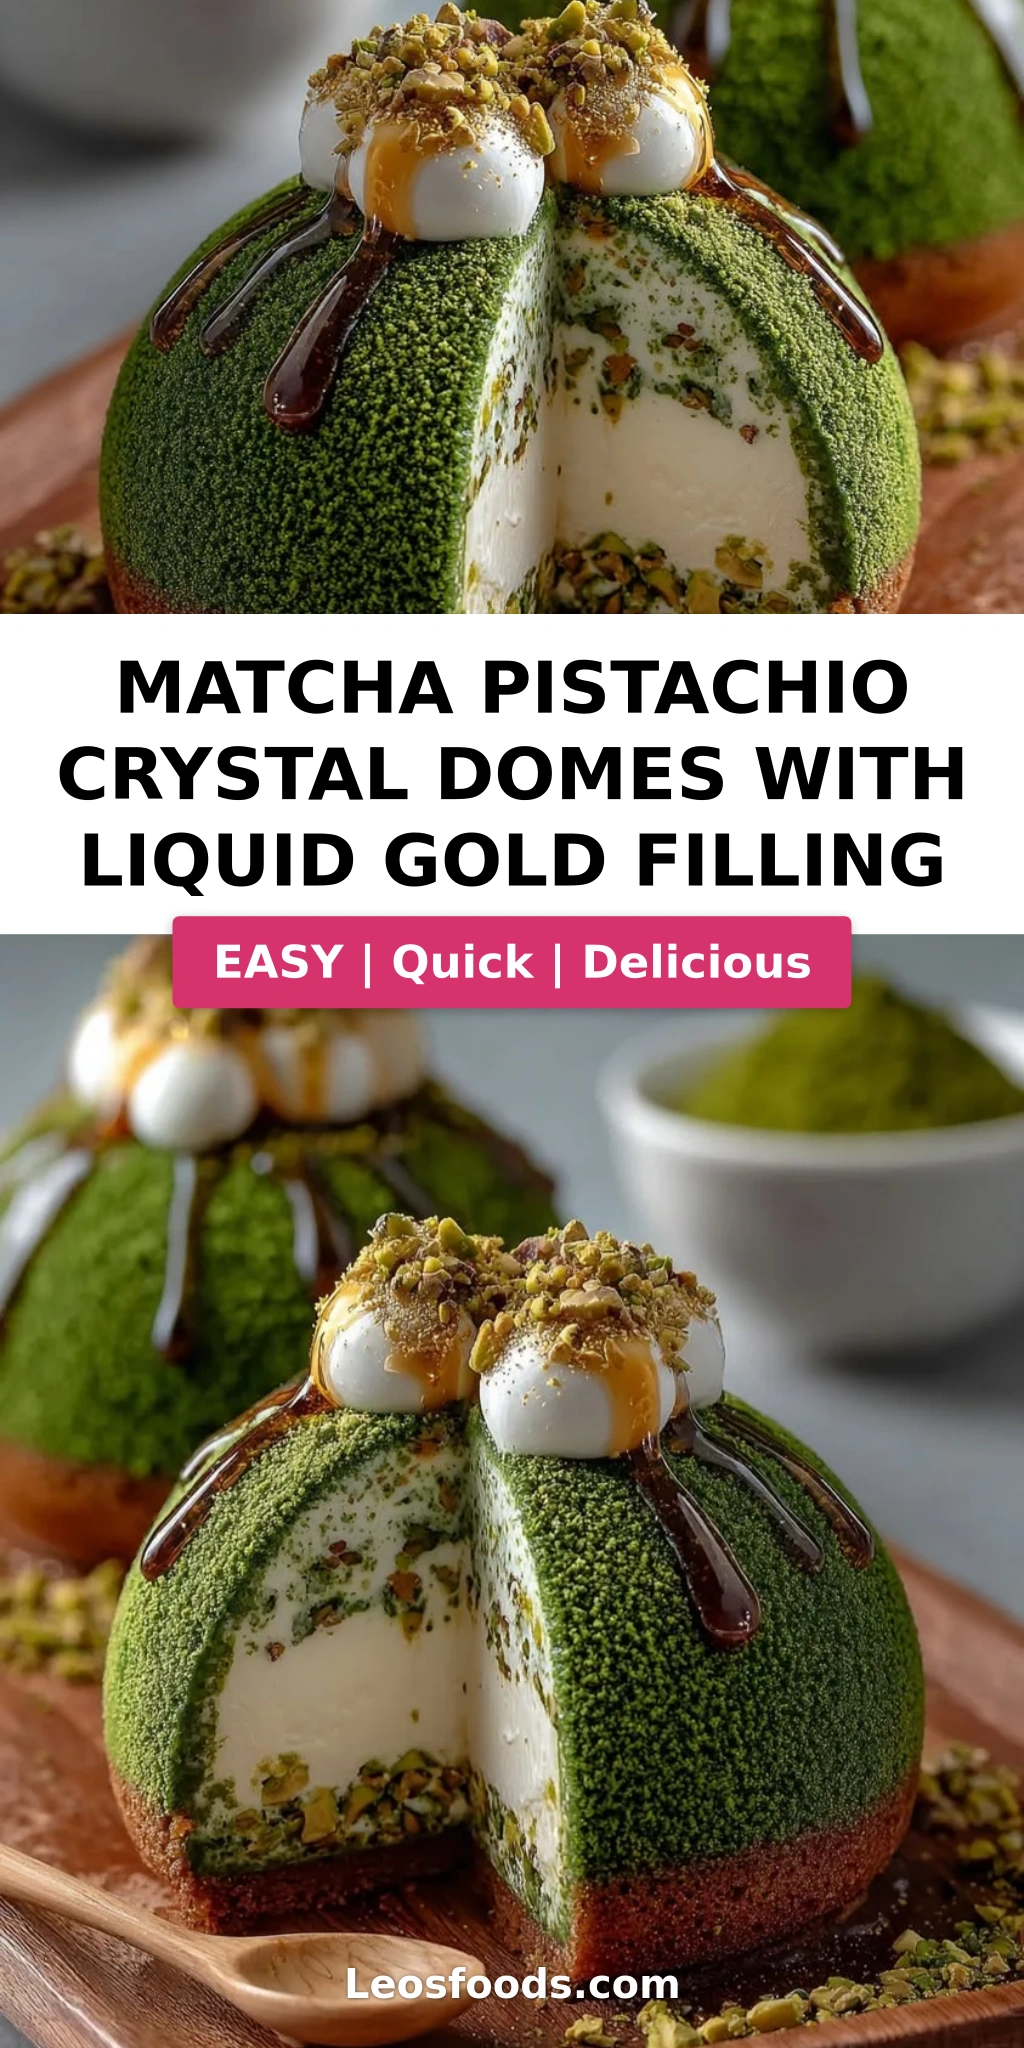
Matcha Pistachio Crystal Domes with Liquid Gold Filling

Table of Contents
Matcha Pistachio Crystal Domes with Liquid Gold Filling – Stella’s Best Recipe
I still remember the first time I made these matcha pistachio crystal domes for a dinner party in my tiny NYC apartment. The moment I unmolded those glossy, emerald-green domes and drizzled the crystal mirror glaze over them, my guests actually gasped. This matcha pistachio crystal domes recipe is the culmination of everything I love about dessert: the earthy bitterness of matcha, the rich nuttiness of pistachio, and that stunning liquid gold filling that flows out like treasure when you break through the shell. That hidden golden center is the unique angle that turns a beautiful dessert into an unforgettable experience — a little Moroccan gold inspiration meets French pastry precision, right here in my New York kitchen.
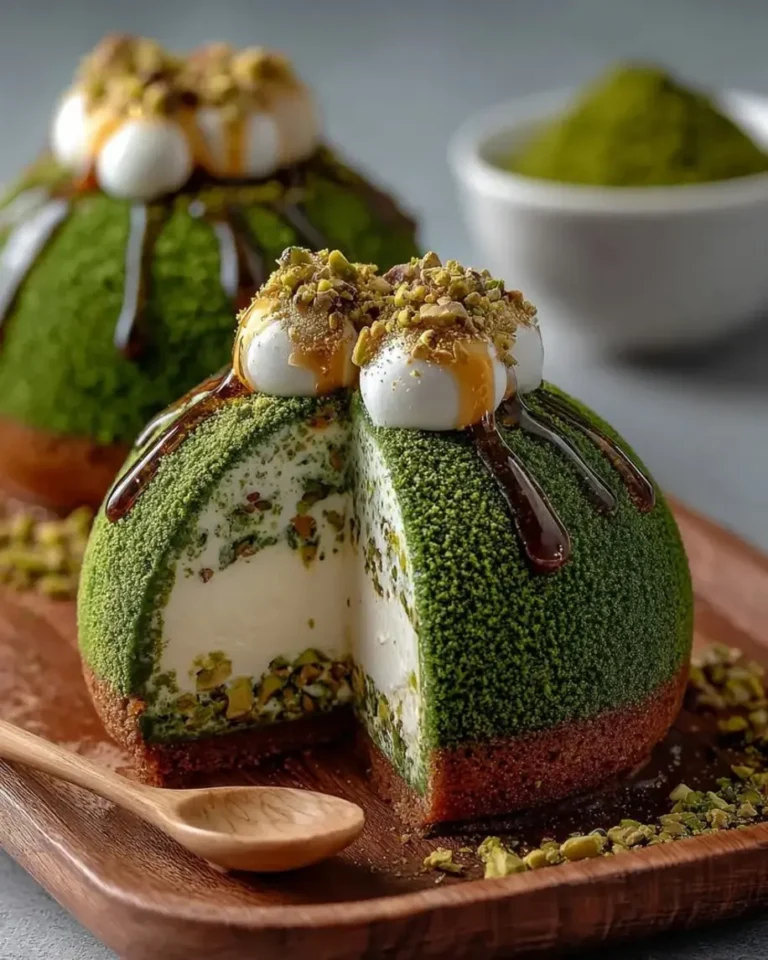
Imagine slicing into a perfectly smooth crystal mirror glaze dome — the spoon meets resistance for just a moment before it cracks through the glossy shell, revealing a creamy matcha pistachio interior. And then, slowly, a river of liquid gold honey-white chocolate filling begins to pool on the plate, catching the light like molten jewelry. The flavors are a symphony: the grassy, slightly sweet notes of ceremonial-grade matcha, the deep toasted richness of pistachio paste, and the warm, caramelized honey that carries the gold filling. Every bite is a contrast of cool, creamy mousse and silky warm gold, with a texture that feels both indulgent and ethereal. This is the kind of dessert that stops conversation and starts memories.
What sets this pistachio matcha dome dessert apart from others you’ll find online is the technique. I spent weeks in my NYC kitchen perfecting the crystal mirror glaze — testing temperatures, ratios, and setting times to achieve that flawless, crack-free shine. The liquid gold filling is my own twist, inspired by the gold-leaf-dusted pastries I discovered in the spice markets of Marrakech. And the matcha pistachio base? That’s pure Parisian pâtisserie training meeting Moroccan hospitality. 💡 Stella’s Pro Tip: The key to a dome that releases cleanly from the mold is patience — freeze it for the full 5 hours, and don’t rush the unmolding. ⚠️ Common Mistake to Avoid: Overheating the gelatin for the glaze will cause it to lose its shine, so never let it boil.
Why This Matcha Pistachio Crystal Domes Recipe Is the Best
The Flavor Secret. Most matcha desserts miss the mark because they use culinary-grade matcha, which turns muddy and bitter. I insist on ceremonial-grade matcha for this recipe — it brings a vibrant emerald color and a smooth, slightly sweet grassiness that pairs perfectly with the rich pistachio paste. My years training in Paris taught me that balance is everything: the matcha and pistachio are both bold, so the cream cheese base tempers them with a gentle tang, while the liquid gold filling adds a layer of honeyed sweetness that ties it all together. This is the same flavor philosophy I learned at my mother’s table in Morocco — sweet, savory, bitter, and rich, all in harmony.
Perfected Texture. Achieving that ethereal mousse texture — light, airy, yet stable enough to hold a hidden liquid center — requires a precise folding technique. I whip the heavy cream to soft peaks only, then fold it into the matcha-cream cheese mixture with a gentle hand. The gelatin provides just enough structure to keep the dome intact during unmolding and glazing, but the final texture should be pillowy, not rubbery. 💡 Stella’s Pro Tip: To test if your mousse is ready for the mold, lift a spoonful and let it drop — it should fall in a soft ribbon that slowly disappears back into the bowl.
Foolproof & Fast. Despite its show-stopping appearance, this matcha pistachio crystal domes recipe is surprisingly beginner-friendly. The components are simple: a no-bake mousse, a three-ingredient gold filling, and a mirror glaze that comes together in minutes. I’ve broken down each step with visual cues and timing tips so you can make it with confidence. The active prep time is only about 45 minutes — the rest is freezer time, which means you can make these a day ahead and impress your guests without stress. From my NYC kitchen to yours, I promise this is a dessert you can master.
Matcha Pistachio Crystal Domes Recipe Ingredients
I source my matcha from a small tea shop in the East Village, where the owner remembers my mother’s name and always saves me the newest harvest. The pistachio paste I order from a Sicilian import company that ships directly to my door in Brooklyn. And the edible gold — well, that I found at a specialty baking shop in Chelsea Market that feels like Aladdin’s cave. Every ingredient in this matcha pistachio crystal domes recipe has a story, and each one plays a vital role in creating that unforgettable dome experience.
Ingredients List
- For the Matcha Pistachio Crystal Domes: 8 oz cream cheese, softened; 1 cup heavy cream; 1/3 cup powdered sugar; 2 tbsp pistachio paste; 2 tsp matcha powder (ceremonial grade); 1 tsp vanilla extract; 2 tsp unflavored gelatin; 2 tbsp cold water
- For the Liquid Gold Filling: 1/4 cup honey; 2 tbsp sweetened condensed milk; 1 tbsp white chocolate, melted; 1/2 tsp edible gold luster dust
- For the Crystal Mirror Glaze: 1 cup white chocolate, finely chopped; 1/2 cup sweetened condensed milk; 2 tsp unflavored gelatin; 2 tbsp cold water; 1/4 cup warm water; 1 tsp clear edible shimmer dust
- For Garnish (optional): Chopped pistachios; Edible gold flakes
Ingredient Spotlight
Matcha Powder. The heart of this dessert. Ceremonial-grade matcha is bright green with a smooth, vegetal flavor — never bitter. I recommend brands like Ippodo or Encha. If you only have culinary-grade, add an extra teaspoon and sift twice to avoid clumps. Pistachio Paste. This is the soul of the nutty flavor. Look for 100% pure pistachio paste with no added sugar or oils. My favorite is from Sicilian brand Loison. In a pinch, you can grind shelled pistachios in a food processor until smooth, but the texture will be slightly grainier. Edible Gold Luster Dust. This is what makes the filling truly golden. It’s available at specialty baking stores or online. Do not use non-toxic gold powder meant for crafts — it must say “edible” on the label. The dust dissolves completely into the honey mixture, leaving no gritty texture. White Chocolate for the Glaze. Use a high-quality white chocolate like Valrhona or Guittard. Chips work but chopped bar chocolate melts more evenly. Avoid white coating chocolate (candy melts) — they contain palm oil and won’t give you that perfect glossy shine.
| Original Ingredient | Best Substitution | Flavor / Texture Impact |
|---|---|---|
| Matcha powder (ceremonial) | Culinary-grade matcha (use 1 extra tsp) | Slightly more bitter, less vibrant green |
| Pistachio paste | Homemade ground pistachios + 1 tsp oil | Grainier texture, less intense color |
| Edible gold luster dust | Edible gold leaf (crushed) or yellow shimmer dust | Gold leaf gives flecks; shimmer dust is less metallic |
| White chocolate (glaze) | High-quality white chocolate chips | Slightly less smooth, but still glossy |
| Unflavored gelatin | Agar-agar (1 tsp + 1 tbsp water, boil 2 mins) | Firmer set, less silky; vegetarian-friendly |
How to Make Matcha Pistachio Crystal Domes — Step-by-Step
Trust me when I say this: the first time you unmold one of these domes and pour that shimmering glaze over it, you will feel like a pastry chef in a three-Michelin-star kitchen. Let me guide you through each step with the precision I learned in Paris and the warmth of my mother’s Moroccan kitchen.
Step 1: Bloom the Gelatin
In a small bowl, combine 2 teaspoons of unflavored gelatin with 2 tablespoons of cold water. Stir gently and let it sit for 5 minutes until it becomes firm and sponge-like. This process, called blooming, activates the gelatin so it dissolves smoothly into your mixture without forming lumps. 💡 Stella’s Pro Tip: Use ice-cold water for blooming — room-temperature water can partially dissolve the gelatin and ruin the set.
Step 2: Make the Matcha Pistachio Base
In a large mixing bowl, beat the softened cream cheese with powdered sugar, pistachio paste, matcha powder, and vanilla extract until the mixture is completely smooth and uniform in color. Scrape down the sides of the bowl at least twice. The color should be a soft, even sage green. ⚠️ Common Mistake to Avoid: If your cream cheese is too cold, it will create lumps. Let it sit on the counter for 30 minutes before starting.
Step 3: Melt and Incorporate Gelatin
Microwave the bloomed gelatin in 10-second bursts until it becomes liquid (about 20–30 seconds total). Do not let it boil. Pour the warm liquid gelatin into the matcha mixture while stirring continuously. Mix until fully incorporated — you should see no streaks of clear gelatin. 💡 Stella’s Pro Tip: Have your cream cheese mixture at room temperature so the gelatin doesn’t seize when added.
Step 4: Whip and Fold the Cream
In a separate chilled bowl, whip the heavy cream to soft peaks — when you lift the whisk, the cream should form a gentle curl that flops over, not a stiff spike. Gently fold one-third of the whipped cream into the matcha mixture to lighten it, then fold in the remaining cream with slow, deliberate strokes until no white streaks remain. ⚠️ Common Mistake to Avoid: Over-folding will deflate the mousse and make it dense. Stop as soon as it looks uniform.
Step 5: Make the Liquid Gold Filling
Combine the honey, sweetened condensed milk, melted white chocolate, and edible gold luster dust in a small bowl. Stir until the gold dust is completely dissolved and the mixture is smooth, glossy, and brilliantly golden. Spoon small portions (about 1 teaspoon each) into a mini silicone mold or onto a parchment-lined tray in small dollops. Freeze for at least 30 minutes until semi-firm but not rock-hard. 💡 Stella’s Pro Tip: The gold filling should be the consistency of thick honey — if it’s too runny, add a little more melted white chocolate.
Step 6: Assemble the Domes
Fill your dome silicone molds halfway with the matcha pistachio mousse. Place a frozen gold filling portion in the center of each mold, pressing it gently into the mousse. Cover with the remaining mousse, smoothing the tops with an offset spatula. Tap the mold gently on the counter to release any air bubbles. ⚠️ Common Mistake to Avoid: If the gold filling is not frozen enough, it will sink to the bottom of the dome. It should be semi-firm but still pliable.
Step 7: Freeze the Domes
Place the filled mold in the freezer for at least 5 hours, or overnight if you’re planning ahead. The domes must be completely frozen solid to unmold cleanly and hold their shape under the glaze. 💡 Stella’s Pro Tip: Place the mold on a flat, level surface in the freezer to ensure the tops are even.
Step 8: Make the Crystal Mirror Glaze
Bloom 2 teaspoons of gelatin in 2 tablespoons of cold water for 5 minutes. In a small saucepan, heat the condensed milk and warm water over low heat until warm (not hot). Remove from heat and stir in the bloomed gelatin until completely dissolved. Pour this liquid over the finely chopped white chocolate in a bowl. Let it sit for 2 minutes, then stir gently until the chocolate is fully melted and the glaze is smooth. Stir in the clear edible shimmer dust. ⚠️ Common Mistake to Avoid: If the mixture is too hot, the white chocolate will separate and the glaze will look greasy. Keep the liquid warm, not hot.
Step 9: Glaze and Garnish
Allow the glaze to cool to about 90°F (32°C) — it should be slightly warm to the touch but not hot. Unmold the frozen domes and place them on a wire rack set over a baking sheet. Pour the glaze evenly over each dome, making sure to cover the entire surface. The excess glaze will drip onto the sheet. Immediately garnish with chopped pistachios and edible gold flakes before the glaze sets. 💡 Stella’s Pro Tip: Work quickly — the glaze sets in about 30 seconds. Have your garnishes ready before you start pouring.
Step 10: Chill and Serve
Transfer the glazed domes to the refrigerator and chill for at least 30 minutes to allow the glaze to set completely. Serve cold, directly from the fridge. The contrast between the cool, creamy dome and the liquid gold center that warms on your tongue is pure magic. ⚠️ Common Mistake to Avoid: Do not re-freeze after glazing — the condensation will ruin the mirror finish.
| Step | Action | Duration | Key Visual Cue |
|---|---|---|---|
| 1 | Bloom gelatin | 5 mins | Firm, sponge-like texture |
| 2 | Make matcha base | 5 mins | Smooth, uniform sage green |
| 3 | Incorporate melted gelatin | 1 min | No streaks of clear gelatin |
| 4 | Whip and fold cream | 5 mins | Soft peaks; no white streaks |
| 5 | Make liquid gold filling | 5 mins+30 mins freeze | Smooth, glossy golden paste |
| 6 | Assemble domes | 10 mins | Gold center hidden; smooth tops |
| 7 | Freeze domes | 5 hrs+ | Frozen solid, release cleanly |
| 8 | Make mirror glaze | 10 mins | Smooth, glossy, no separation |
| 9 | Glaze and garnish | 5 mins | Full coverage; garnishes stick |
| 10 | Chill and serve | 30 mins | Glaze set; dome cold and firm |
Serving & Presentation
The moment of truth arrives when you bring these domes to the table. I like to serve each dome on a small white plate with a drizzle of extra liquid gold filling (reserve a little before freezing) and a dusting of matcha powder for contrast. A tiny pinch of flaky sea salt on the side elevates the flavors beautifully — a trick I learned from a pastry chef friend in Paris. The dome should be served cold, directly from the refrigerator, so the mousse is firm and the glaze is shiny and intact.
For a truly dramatic presentation, I sometimes place a dome in the center of a plate and pour a warm honey-gold sauce (using the same liquid gold recipe, warmed slightly) around it just before serving. The contrast between the cold dome and the warm golden pool is spectacular. Garnish with a few extra chopped pistachios scattered around the plate and a light sprinkle of edible gold flakes. In my NYC dinner parties, these domes are always the star of the show — guests pull out their phones before they even pick up their forks.
| Pairing Type | Suggestions | Why It Works |
|---|---|---|
| Side Dish | Fresh berries (raspberries or sliced strawberries); a tiny green salad with mint | The acidity cuts through the richness; mint echoes the green notes |
| Sauce / Dip | Extra liquid gold filling (warmed); chocolate ganache; caramel sauce | Extra gold enhances the surprise; chocolate adds depth; caramel adds warmth |
| Beverage | Matcha latte; chamomile tea; sparkling sake; espresso | Matcha reinforces the flavor; chamomile is calming; sake is celebratory; espresso contrasts |
| Garnish | Chopped pistachios; edible gold flakes; matcha dust; flaky sea salt; fresh mint sprig | Adds crunch, color, and visual height; salt balances sweetness |
Make-Ahead, Storage & Reheating
These domes are a busy cook’s best friend. I often prepare the mousse and gold filling on a Saturday morning, assemble and freeze the domes, then glaze them the day before a dinner party. The glaze holds its shine beautifully in the fridge for up to 24 hours. In my NYC life, where time is always precious, being able to do the heavy lifting ahead makes this recipe a lifesaver.
| Method | Container | Duration | Reheating Tip |
|---|---|---|---|
| Refrigerator | Covered container, single layer | Up to 3 days | Serve chilled directly from fridge |
| Freezer | Individually wrapped in plastic, then foil | Up to 2 months | Thaw in fridge 4 hrs before glazing |
| Make-Ahead | Mousse and gold filling stored separately | Assemble 1 day ahead | Glaze on the day of serving |
If you’re storing glazed domes in the refrigerator, place them in a single layer in an airtight container with a lid that doesn’t touch the tops. If you’re freezing unglazed domes, wrap each one individually in plastic wrap and then in aluminum foil — they’ll keep beautifully for up to two months. To serve from frozen, transfer to the refrigerator 4–6 hours before glazing, then glaze and chill as directed. ⚠️ Common Mistake to Avoid: Never microwave these domes to thaw — the mousse will melt and the texture will be ruined. Always thaw in the fridge.
Variations & Easy Swaps
| Variation | Key Change | Best For | Difficulty Impact |
|---|---|---|---|
| Rose & Pistachio | Add 1 tsp rose water to mousse; replace matcha with more pistachio paste | Valentine’s Day, romantic dinners | Same |
| Chocolate Matcha | Add 2 tbsp cocoa powder to mousse; use dark chocolate in glaze | Chocolate lovers, deeper flavor | Same |
| Vegan / Dairy-Free | Use cashew cream + coconut cream; vegan cream cheese; agar-agar for gelatin | Dairy-free guests, plant-based diet | More challenging |
Rose & Pistachio Domes
This variation is inspired by the rose-scented pastries I grew up with in Morocco. Simply replace the matcha powder with an extra tablespoon of pistachio paste and add 1 teaspoon of rose water to the cream cheese mixture. The flavor is floral, nutty, and utterly romantic. I love serving these for Valentine’s Day or bridal showers — the pink-and-green palette is stunning. Garnish with dried rose petals and crushed pistachios for a finish that looks like a garden in full bloom.
Chocolate Matcha Version
For those who believe everything is better with chocolate, this variation adds 2 tablespoons of unsweetened cocoa powder to the mousse base, sifted together with the matcha to avoid lumps. Replace the white chocolate in the glaze with dark chocolate (70% cacao) for a deeply complex, bittersweet shell. The liquid gold filling stays the same — the contrast between dark chocolate, matcha, and honey gold is absolutely decadent. This version was born during a snowy NYC weekend when I was craving something intensely rich.
Vegan / Dairy-Free Domes
I developed this version for a friend with dairy allergies, and it turned out so well I now make it regularly. Use vegan cream cheese, full-fat coconut cream (chilled and whipped to soft peaks) instead of heavy cream, and a 1:1 mixture of cashew cream and coconut milk in place of the condensed milk. Replace the gelatin with agar-agar (use 1 teaspoon agar powder bloomed in 1 tablespoon water, then boiled for 2 minutes). The texture is slightly firmer and less silky, but the flavor is still incredible. 💡 Stella’s Pro Tip: Chill the coconut cream cans overnight before whipping for the best volume.
How do you make the liquid gold filling for matcha pistachio crystal domes?
The liquid gold filling is surprisingly simple to make. Combine 1/4 cup of honey, 2 tablespoons of sweetened condensed milk, 1 tablespoon of melted white chocolate, and 1/2 teaspoon of edible gold luster dust in a small bowl. Stir until the gold dust is completely dissolved and the mixture is smooth, glossy, and uniformly golden. The consistency should be like thick honey — pourable but not watery. Once prepared, spoon small portions into a mini silicone mold or onto a parchment-lined tray and freeze for at least 30 minutes until semi-firm. This filling remains liquid at room temperature but stays stable when frozen, creating that magical golden flow when diners break into the dome.
What is the best substitute for gelatin in matcha pistachio crystal domes?
The best substitute for gelatin in this recipe is agar-agar, a plant-based setting agent derived from seaweed. Use 1 teaspoon of agar-agar powder for every 2 teaspoons of gelatin called for in the recipe. Bloom it in 1 tablespoon of cold water for 5 minutes, then bring it to a gentle boil for 2 minutes (this is essential — agar-agar needs to be boiled to activate). Allow it to cool slightly before incorporating. Note that agar-agar sets at room temperature and produces a firmer, slightly more brittle texture compared to gelatin’s creamy, silky set. The domes will hold their shape well, but the mousse will be a touch less luscious. For the glaze, agar-agar works beautifully as well, giving a similarly glossy finish.
Can you prepare matcha pistachio crystal domes ahead of time and how do you store them?
Absolutely — these domes are perfect for make-ahead preparation. You can prepare the mousse and gold filling, assemble the domes in silicone molds, and freeze them for up to 2 months. Once frozen solid, unmold and glaze them on the day you plan to serve. Glazed domes can be stored in the refrigerator in a single layer in an airtight container for up to 3 days. However, for the best visual impact — that flawless crystal mirror shine — I recommend glazing no more than 24 hours before serving. The glaze can absorb moisture from the fridge over time, which may dull its sparkle. If you’re freezing unglazed domes, wrap each one individually in plastic wrap and then aluminum foil to prevent freezer burn.
What type of matcha powder is best for achieving the right color and flavor in crystal domes?
For the vibrant emerald color and smooth, slightly sweet flavor that defines a great matcha dessert, I strongly recommend using ceremonial-grade matcha. This grade is made from the youngest tea leaves, stone-ground to a fine powder, and has a bright green hue with no bitterness. Brands like Ippodo, Encha, and Jade Leaf are excellent choices available in the US. Culinary-grade matcha can be used in a pinch — it’s more affordable and still flavorful — but it tends to be duller in color (olive-green rather than bright emerald) and has a more astringent, bitter edge. If using culinary-grade, add an extra teaspoon to the recipe and sift it twice to prevent clumps. Either way, always sift your matcha before mixing to ensure a smooth, lump-free mousse.
Why did my crystal mirror glaze crack or look dull?
A cracked or dull mirror glaze is usually caused by one of three issues. First, the glaze temperature was wrong — it should be around 90°F (32°C) when poured, slightly warm to the touch but not hot. If it’s too hot, the white chocolate can separate and the glaze will look greasy; if it’s too cool, it will set too quickly and crack as the dome expands slightly. Second, the domes themselves need to be frozen solid — any softness in the mousse will cause the glaze to crack as the dome settles. Third, condensation is the enemy of shine. After glazing, place the domes in the refrigerator immediately, not at room temperature. If you see water droplets forming on the glaze, gently blot them with a paper towel before serving. A thin layer of clear cocoa butter brushed on after glazing can also restore shine.
Can I make these domes without a silicone dome mold?
Yes, you can absolutely make these domes without a dedicated silicone dome mold. Flexible silicone muffin cups or half-sphere silicone molds work perfectly. If you don’t have either, you can use a regular muffin tin lined with plastic wrap — press the wrap firmly into each cup to create a smooth surface, then fill with mousse and freeze. For a more rustic presentation, you can even shape the mousse by hand: freeze the mousse in a shallow pan, then use a cookie cutter or a round cutter to punch out circles, and shape them gently with your hands into dome forms. The key is to work quickly while the mousse is still cold and firm. Your domes may be less perfectly shaped, but the flavor will be every bit as spectacular.
How do I prevent the liquid gold filling from sinking to the bottom of the dome?
This is one of the most common questions I get, and the answer is all about temperature and timing. The liquid gold filling must be frozen until semi-firm before you place it into the mousse — about 30 minutes in the freezer. It should be solid enough to hold its shape but not rock-hard. When you assemble the domes, fill the mold halfway with mousse, then gently nestle the frozen gold portion into the center, pressing it slightly so it’s surrounded by mousse. Immediately cover with the remaining mousse and smooth the top. The cold temperature of the gold filling will help it stay suspended in the mousse as you freeze the whole dome. If your mousse is too warm or thin, it won’t hold the gold in place. Make sure your mousse is thick and creamy before filling the molds.
What can I use instead of edible gold luster dust for the filling?
If you can’t find edible gold luster dust, you have several excellent alternatives. Edible gold leaf is the most dramatic substitute — simply crush a sheet or two into small flakes and stir them into the honey mixture. The flakes will catch the light beautifully, though the liquid won’t be uniformly golden. Yellow edible shimmer dust (often labeled “sunlight” or “golden shimmer”) is another great option and behaves similarly to luster dust. For a non-metallic golden color, you can use a tiny pinch of turmeric mixed with a drop of yellow food coloring — this gives a warm golden hue without any shimmer. Avoid any product that doesn’t say “edible” on the label, as craft-grade powders can contain harmful metals. The flavor of the filling will remain delicious with any of these swaps.
How do I achieve a perfectly smooth mirror glaze without bubbles?
A bubble-free mirror glaze requires a gentle touch and a couple of key techniques. First, when you combine the warm condensed milk mixture with the white chocolate, stir slowly and deliberately — vigorous stirring incorporates air. Use a spatula rather than a whisk, and stir in one direction. Second, after the glaze is smooth, strain it through a fine-mesh sieve into a clean bowl to catch any undissolved bits of gelatin or chocolate. Third, let the glaze cool undisturbed to 90°F — don’t stir it as it cools. If bubbles do form on the surface as the glaze sits, you can gently pass a kitchen torch over them or pop them with a toothpick. When pouring the glaze over the frozen domes, pour it in a steady stream starting at the top and letting it flow down naturally — don’t spread it with a spatula, which can create streaks.
Can I use a different nut butter instead of pistachio paste?
Absolutely, though the flavor profile will shift. Almond paste or almond butter is the most natural substitute — it has a similar sweetness and richness, and it pairs beautifully with matcha. Use the same amount (2 tablespoons) and look for pure almond paste without added sugar if possible. Macadamia nut butter is another luxurious option that brings a buttery, tropical richness. Cashew paste works well too, with a mild sweetness that lets the matcha shine. Avoid peanut butter, which has an assertive flavor that can overpower the delicate matcha and gold filling. Whatever substitute you choose, make sure it’s smooth and not chunky, and consider adding a drop of green food coloring if you want to maintain the emerald aesthetic. The texture of the mousse will be similar with any nut paste.
Share Your Version!
I absolutely love seeing how you make this recipe your own. Whether you stick with the classic matcha pistachio combination or try one of the variations, your kitchen creations inspire me every single day. Leave a star rating and a comment below to let me know how your domes turned out — did the liquid gold filling flow? Did your guests gasp when they saw that mirror glaze shine? I read every comment and I answer as many as I can, so don’t be shy.
Take a photo of your Matcha Pistachio Crystal Domes and share it on Instagram or Pinterest. Tag me @leosfoods so I can see your beautiful work and maybe even feature it in my stories. The question I always love to hear is: what moment did you choose to serve these domes, and what was the reaction? Whether it was a birthday, a holiday, or just a Tuesday night that deserved something extraordinary, I want to hear about it. From my NYC kitchen to yours — I hope this recipe brings as much warmth to your table as it does to mine. — Stella 🧡
Love This Recipe? Save It to Pinterest!
If you enjoyed this Matcha Pistachio Crystal Domes with Liquid Gold Filling recipe, don’t let it get lost in your browser tabs! 😄 Pin it now so you can find it again anytime — and explore hundreds more tried-and-tested recipes waiting for you on my Pinterest boards.
👉 Follow Stella on Pinterest @stellarecipeblog
📌 Pin this recipe · 🔁 Re-pin your favorites · 💬 Tag me when you make it — I love seeing your creations!
Matcha Pistachio Crystal Domes with Liquid Gold Filling
- Yield: 8 1x
Ingredients
- For the Matcha Pistachio Crystal Domes:
- 8 oz cream cheese, softened
- 1 cup heavy cream
- 1/3 cup powdered sugar
- 2 tbsp pistachio paste
- 2 tsp matcha powder
- 1 tsp vanilla extract
- 2 tsp unflavored gelatin
- 2 tbsp cold water
- For the Liquid Gold Filling:
- 1/4 cup honey
- 2 tbsp sweetened condensed milk
- 1 tbsp white chocolate, melted
- 1/2 tsp edible gold luster dust
- For the Crystal Mirror Glaze:
- 1 cup white chocolate, finely chopped
- 1/2 cup sweetened condensed milk
- 2 tsp unflavored gelatin
- 2 tbsp cold water
- 1/4 cup warm water
- 1 tsp clear edible shimmer dust
- For Garnish (optional):
- Chopped pistachios
- Edible gold flakes
Instructions
- 1. Mix gelatin and cold water in a small bowl and let bloom for 5 minutes.
- 2. Beat cream cheese, powdered sugar, pistachio paste, matcha powder, and vanilla extract until smooth.
- 3. Melt the bloomed gelatin and stir into the matcha mixture.
- 4. Whip heavy cream to soft peaks and gently fold into the mixture.
- 5. Combine honey, sweetened condensed milk, melted white chocolate, and gold luster dust until smooth.
- 6. Spoon small portions of the liquid gold filling into silicone molds and freeze until semi-firm.
- 7. Fill dome molds halfway with the matcha pistachio mixture.
- 8. Place a frozen gold filling portion in the center of each mold.
- 9. Cover with the remaining mixture and smooth the tops.
- 10. Freeze for at least 5 hours or until completely firm.
- 11. Bloom gelatin for the glaze.
- 12. Heat condensed milk and warm water, then stir in gelatin until dissolved.
- 13. Pour over white chocolate and mix until smooth and glossy.
- 14. Stir in clear shimmer dust and allow glaze to cool slightly.
- 15. Unmold frozen domes and place on a wire rack.
- 16. Pour the crystal mirror glaze evenly over each dome.
- 17. Garnish with chopped pistachios and edible gold flakes.
- 18. Serve chilled.
Nutrition
- Calories: 385
- Sugar: 25 g
- Fat: 28 g
- Carbohydrates: 30 g
- Protein: 6 g
Tried This Recipe? Leave a Comment!
Did you make this recipe? I’d love to hear how it turned out! Please leave a comment and a rating below. Your feedback helps other home cooks and supports cheerychop.com!
For more delicious inspiration, follow me on Pinterest!