Glossy Crystal Peach Vanilla Prism Bombs
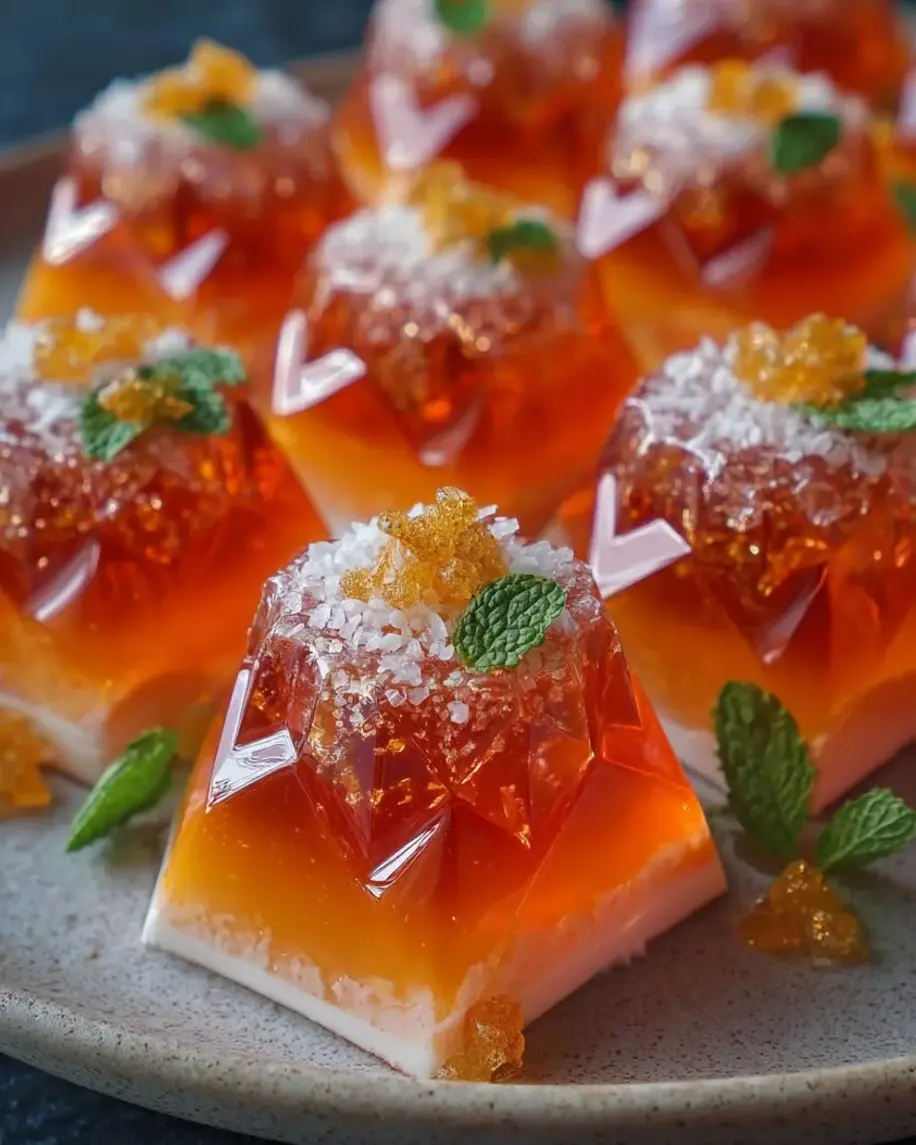
Table of Contents
Crystal Peach Vanilla Prism Bombs with Shiny Shell – The Ultimate Shiny Shell Dessert
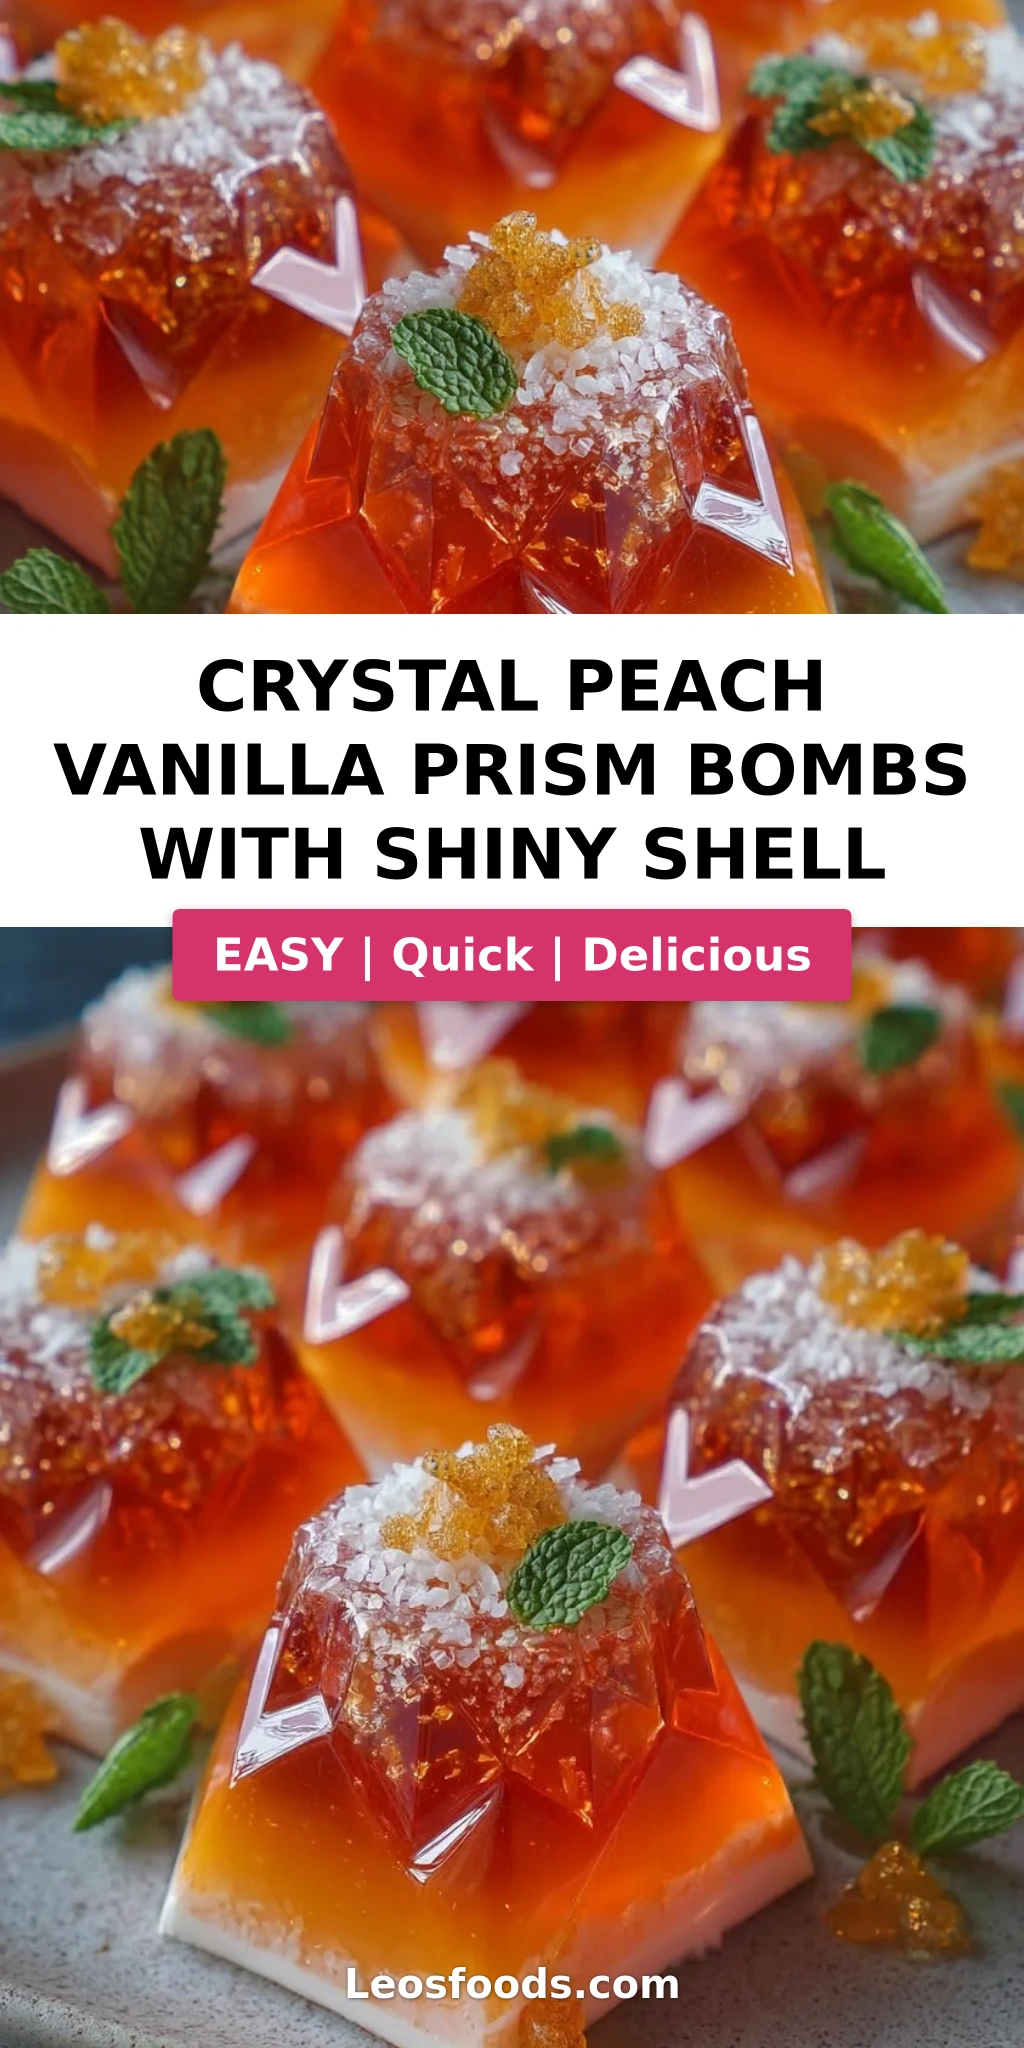
Growing up in my mother’s kitchen in Morocco, I learned that the best desserts are the ones that feel like a little bit of magic on your plate. When I moved to Paris to train at Le Cordon Bleu, I discovered the precision of French pastry—and that’s where the idea for these crystal peach vanilla prism bombs was born. After years of testing and tweaking in my tiny NYC kitchen, I’m thrilled to share this glossy, show-stopping dessert that looks like it came from a high-end patisserie, but is totally doable at home. The secret? A shiny shell glaze that gives each prism bomb a mirror-like finish, paired with a luscious peach mascarpone dessert filling that’s pure summer in every bite.
Imagine cracking through that shiny shell to reveal a silky peach-infused gelée, then a cloudlike mascarpone vanilla cream core—each spoonful is a textural journey. The peach flavor is bright and natural, thanks to real peach puree, while the coconut milk adds a subtle tropical note that reminds me of the Moroccan markets where fresh coconuts were sold right off the cart. That hint of lemon juice keeps everything balanced, and the vanilla (I always use Madagascar bourbon) rounds out the sweetness. The prism bomb glaze is the star: it sets to a brilliant, crackable shell that shatters like stained glass.
I’ve designed this peach vanilla recipe to guide you through every step, from blooming gelatin to achieving the perfect pour. One common mistake home cooks make is overheating the glaze—it’ll lose its shine. My pro tip today will save you from that. Whether you’re hosting a dinner party or just want to impress your family, these prism bombs are surprisingly manageable. Stick with me, and you’ll be making crystal-clear, jewel-like desserts that your friends will beg you to recreate.
Why This Crystal Peach Vanilla Prism Bombs Recipe Is the Best
The Flavor Secret: Most recipes rely on artificial extracts, but I insist on real peach puree—it gives a fresh, natural sweetness that no bottle can match. Growing up in Morocco, we used fresh fruit in everything, and that philosophy stuck. Combined with coconut milk and a touch of lemon, this peach vanilla recipe tastes like a sun-ripened orchard in a bite. The mascarpone cream adds a tangy richness that’s pure indulgence.
Perfected Texture: Thanks to my French training, I’ve nailed the gelatin ratios so the shell is firm but not rubbery, and the glaze stays brilliantly glossy. The prism bomb glaze requires careful temperature control—too hot and it becomes thin and dull; too cool and it sets before you can pour. I’ll show you the exact visual cue: the glaze should coat the back of a spoon like thick honey.
Foolproof & Fast: Don’t be intimidated by the word “prism”—the technique is straightforward once you break it down. I’ve simplified the steps without compromising on results. Even if you’re a beginner, the silicone mold does half the work, and the make-ahead options (you can prep everything a day in advance) make it perfect for busy schedules. This is a shiny shell dessert that delivers professional look with home-kitchen ease.
Crystal Peach Vanilla Prism Bombs Ingredients
When I’m shopping for these at the Union Square Greenmarket, I look for the ripest freestone peaches—the ones that smell like summer. For the coconut milk, I always reach for full-fat canned varieties (Chaokoh or Thai Kitchen are my go-tos) because they lend a creamy body that lighter milks just can’t. And the mascarpone? I’ll drive two extra stops for the imported Italian kind—it makes a world of difference.
Ingredients List
For the Peach Prism Shells:
- 2 cups peach puree (from about 4 ripe peaches, peeled and blended)
- 1 cup full-fat coconut milk
- 1/3 cup granulated sugar
- 2 tsp gelatin powder
- 2 tbsp cold water (for blooming)
- 1 tsp vanilla extract
- 1 tbsp lemon juice
- Pinch of salt
For the Vanilla Cream Core:
- 1 cup mascarpone cheese, softened
- 1/2 cup heavy whipping cream, cold
- 3 tbsp powdered sugar
- 1 tsp vanilla extract
For the Shiny Crystal Shell Glaze:
- 1 cup granulated sugar
- 1/2 cup water
- 1/2 cup light corn syrup
- 1 tbsp gelatin powder
- 3 tbsp cold water (for blooming)
- 1 tsp vanilla extract
- 1 tbsp coconut oil (or refined coconut oil for neutral flavor)
For Garnish (optional):
- 1 tbsp white chocolate shavings
- 1 tsp crushed freeze-dried peaches
- Fresh mint leaves
Ingredient Spotlight
Peach Puree: Fresh peaches are ideal, but frozen thawed peaches work if you drain excess liquid. The puree provides the base flavor and natural pectin that helps the shell set. If peaches aren’t in season, you can substitute high-quality canned peach puree (no added sugar). The flavor will be slightly less bright, but still lovely.
Gelatin Powder: Always use unflavored gelatin (Knox is my reliable brand). Blooming it in cold water for exactly 5 minutes is crucial—too long and it becomes too firm; too short and it won’t dissolve fully. Never use hot water, as that can weaken the gelatin. This is the backbone of your shiny shell dessert.
Coconut Oil: In the glaze, coconut oil adds a mirror-like sheen and keeps the glaze flexible enough to crack without shattering everywhere. Refined coconut oil has no coconut taste, so the peach and vanilla stay front and center. If you don’t have it, you can substitute a neutral oil like grapeseed, but the shine won’t be quite as brilliant.
Mascarpone: This Italian cream cheese is what gives the filling its luxurious silkiness. Don’t substitute cream cheese—it’s too tangy and firm. For a lighter option you can use half mascarpone and half chilled heavy cream, but the texture will be less voluptuous.
| Original Ingredient | Best Substitution | Flavor / Texture Impact |
|---|---|---|
| Peach puree | Canned peach puree (no sugar added) | Less bright, but still delicious; adjust sweetener |
| Coconut milk (full-fat) | Heavy cream + 1 tbsp coconut extract | Richer but not dairy-free; loses subtle coconut note |
| Mascarpone | 1 cup heavy cream + 1 tbsp lemon juice (whipped stiff) | Lighter, less creamy; not as stable for filling |
| Light corn syrup | Glucose syrup or honey (clear) | Honey changes flavor and may darken glaze |
How to Make Crystal Peach Vanilla Prism Bombs — Step-by-Step
I’ve broken this down into manageable chunks so you can make these beautiful crystal peach vanilla prism bombs without any stress. Take your time—the results are absolutely worth it.
Step 1: Bloom the Gelatin
Sprinkle the 2 teaspoons of gelatin powder over 2 tablespoons of cold water in a small bowl. Let it sit undisturbed for 5 minutes. You’ll see the powder absorb the water and form a firm, jiggly mass. This is called blooming, and it’s essential for even dissolution.
💡 Stella’s Pro Tip: Use ice-cold water to bloom—warm water can weaken the gelatin and cause your shell to be soft instead of firm.
Step 2: Make the Peach Shell Layers
In a medium saucepan, combine the peach puree, coconut milk, sugar, salt, lemon juice, and vanilla extract. Heat over medium, stirring occasionally, until the mixture is warm and smooth (about 3–4 minutes). Do not boil. Remove from heat and add the bloomed gelatin, whisking until fully dissolved.
⚠️ Common Mistake to Avoid: If the mixture boils, the gelatin will start to break down and the shell won’t set properly. Keep it at a gentle simmer—you want to see steam but no bubbles.
Step 3: Coat the Prism Molds
Pour a thin layer of the peach mixture into each cavity of silicone prism molds (about 1/8 inch thick). Use a small brush to coat the sides evenly. Tap the mold gently to release any air bubbles. Place in the refrigerator for 15–20 minutes until partially set—the layer should be firm but still tacky.
💡 Stella’s Pro Tip: If you don’t have prism molds, you can use any small dome-shaped silicone mold. The key is uniform thickness so the shell doesn’t crack.
Step 4: Make the Vanilla Cream Core
In a chilled mixing bowl, combine the mascarpone, heavy cream, powdered sugar, and vanilla extract. Using a hand mixer or stand mixer fitted with the whisk attachment, whip on medium speed until the mixture becomes light, fluffy, and holds a soft peak. Be careful not to over-whip—you want it smooth, not grainy.
⚠️ Common Mistake to Avoid: Over-whipping the cream will cause it to separate into butter. Stop as soon as you see soft, billowy peaks that gently hold their shape.
Step 5: Fill and Seal
Transfer the vanilla cream to a piping bag (or use a zip-top bag with a corner snipped). Pipe the cream into each partially set peach shell, filling about 2/3 full. Leave a small gap at the top. Spoon or pipe the remaining peach mixture over the cream to seal each bomb. Smooth the top with an offset spatula. Return to the refrigerator for at least 3–4 hours, or until fully firm.
💡 Stella’s Pro Tip: For best results, let the bombs set overnight. They’ll be easier to unmold and the flavors will meld beautifully.
Step 6: Prepare the Shiny Crystal Shell Glaze
Bloom the 1 tablespoon gelatin in 3 tablespoons cold water for 5 minutes. In a small saucepan, combine the sugar, water, and corn syrup. Heat over medium, stirring, until the sugar dissolves and the mixture becomes clear (do not boil). Remove from heat and add the bloomed gelatin, vanilla, and coconut oil. Stir gently until fully incorporated and glossy.
⚠️ Common Mistake to Avoid: Stirring too vigorously can incorporate air bubbles, which will ruin the mirror-like finish. Use a gentle folding motion with a rubber spatula.
Step 7: Glaze the Bombs
Let the glaze cool for about 10–15 minutes until it thickens to the consistency of thick honey—it should coat the back of a spoon. Unmold the frozen prism bombs by gently flexing the silicone mold. Place each bomb on a wire rack set over a baking sheet. Using a ladle or measuring cup, pour the glaze evenly over each piece, making sure to cover all sides.
💡 Stella’s Pro Tip: Work quickly! The glaze sets as it cools. If it becomes too thick, reheat gently over a double boiler for a few seconds. Never microwave—it can destroy the gelatin.
Step 8: Garnish and Serve
Let the excess glaze drip off (about 30 seconds). While the glaze is still tacky, sprinkle white chocolate shavings and crushed freeze-dried peaches on top. Add a tiny fresh mint leaf for color. Transfer to serving plates and keep chilled until ready to serve. These should be served cold—the glaze remains shiny and the interior stays cool and creamy.
⚠️ Common Mistake to Avoid: Don’t let the garnishes sit on the glaze for too long before serving—they can soften and sink. Garnish just before plating.
| Step | Action | Duration | Key Visual Cue |
|---|---|---|---|
| 1 | Bloom gelatin | 5 min | Firm, jiggly mass |
| 2 | Heat peach mixture | 3–4 min | Steam rising, not bubbling |
| 3 | Coat molds & chill | 15–20 min | Tacky surface, not liquid |
| 4 | Whip cream core | 2–3 min | Soft peaks that hold shape |
| 5 | Fill and seal | 5 min | Smooth top, no gaps |
| 6 | Set bombs | 3–4 hrs | Firm to the touch |
| 7 | Prepare glaze | 10 min + cooling | Clear, glossy, thick honey consistency |
| 8 | Glaze & garnish | 5 min | Mirror finish, excess drips stop |
Serving & Presentation
These prism bombs are meant to be the centerpiece of a dessert table. I love serving them on a white marble platter—the glossy shells catch the light like jewels. For a touch of my Moroccan heritage, I sometimes dust the plate with a pinch of ground pistachio and arrange a few dried rose petals around each bomb. The contrast of pink and gold is stunning.
When it comes to temperature, serve these straight from the fridge. The cold shell will crack audibly when you tap it with a spoon—that’s the sign of a perfect shiny shell dessert. Pair them with a light dessert wine like a Moscato d’Asti or a sparkling peach bellini. For coffee lovers, a double espresso works wonderfully because the bitterness balances the sweetness.
If you’re feeling extra fancy, add a dollop of unsweetened whipped cream on the side and a few fresh raspberries. I learned this garnish trick at a pastry shop in the Marais district in Paris—the slight tartness of the berries cuts through the richness of the mascarpone core.
| Pairing Type | Suggestions | Why It Works |
|---|---|---|
| Side Dish | Fresh raspberries, strawberry coulis | Acidity cuts the sweetness |
| Sauce / Dip | Passion fruit curd, salted caramel | Adds tropical tang or salty contrast |
| Beverage | Prosecco, iced green tea, espresso | Cleanses palate; bubbles are celebratory |
| Garnish | Edible flowers, gold leaf, mint | Elevates visual drama |
Make-Ahead, Storage & Reheating
Living in NYC, I know how precious time is. The beauty of these crystal peach vanilla prism bombs is that you can almost entirely make them ahead. I often prep the peach shells and cream core on a Sunday, then glaze them on the day I serve. Here’s exactly how to store everything for the best results.
| Method | Container | Duration | Reheating Tip |
|---|---|---|---|
| Refrigerator | Airtight container, separated by parchment | Up to 3 days (unglazed) / 1 day (glazed) | No reheating – serve cold |
| Freezer | Freezer-safe container, wax paper between layers | Up to 1 month (unglazed only) | Thaw in fridge overnight; glaze after thawing |
| Make-Ahead | Assemble bombs (without glaze) and chill | Up to 2 days in advance | Glaze the day of serving for best shine |
If you’ve already glazed the bombs, do NOT freeze them—the glaze will become brittle and crack. Instead, keep them in the fridge for no more than 24 hours. The glaze may weep slightly (it’s gelatin-based), so place them on a paper towel-lined tray. Before serving, gently blot any moisture with a clean paper towel. I find that the flavor actually deepens after a day in the fridge, as the peach and vanilla marry.
For unglazed bombs, you can freeze them solid, then vacuum-seal if you have the equipment. When ready to serve, thaw in the refrigerator overnight, then glaze and garnish. This is my trick for busy holiday entertaining—I’ll make three batches at once!
Variations & Easy Swaps
One of the joys of this peach vanilla recipe is how easily it adapts to other flavors. Over the years, I’ve played around with different fruit purees and spices. Here are three favorite variations that still use the same prism bomb technique.
| Variation | Key Change | Best For | Difficulty Impact |
|---|---|---|---|
| Mango Passion | Swap peach puree for mango puree + 2 tbsp passion fruit pulp | Tropical lovers | Same (easy) |
| Dairy-Free Coconut | Replace mascarpone with coconut cream + 1 tbsp coconut butter | Vegan/DF guests | Slightly harder (stabilizing coconut cream) |
| Spiced Chai | Add 1 tsp chai spice blend (cinnamon, cardamom, ginger) to peach shell | Fall/winter entertaining | Same (easy) |
Variation 1: Mango Passion
When I visit the Indian markets on Lexington Avenue, I stock up on Alphonso mangoes. For this version, replace the 2 cups peach puree with 2 cups mango puree (from ripe mangoes). Add 2 tablespoons passion fruit pulp (fresh or frozen) to the mango mixture—the tart seeds balance the sweetness. The glaze remains the same, and the yellow-orange shell looks like liquid sunshine. This is my go-to for summer bridal showers.
Variation 2: Dairy-Free Coconut
To make these bombs dairy-free, swap the mascarpone for 1 cup canned coconut cream (chilled overnight, then whipped) plus 1 tablespoon coconut butter to stabilize. The texture will be slightly lighter and more icy, but still luscious. Use a bit of coconut extract instead of vanilla in the cream core if you want to double down on the coconut theme. Be aware that the shell mixture already contains coconut milk, so this variation is fully coconut-forward.
Variation 3: Spiced Chai
One cold December afternoon in NYC, I added a teaspoon of my homemade chai spice blend (cinnamon, cardamom, ginger, cloves, black pepper) to the peach shell mixture. The warmth of the spices pairs beautifully with the peach and vanilla. For an extra kick, infuse the coconut milk with a cinnamon stick while heating, then discard the stick. This version is a showstopper at holiday dinners—the aromatic spices make the dessert feel cozy and sophisticated.
How do you make the shiny shell for Crystal Peach Vanilla Prism Bombs without it cracking?
The key to a crack-free shiny shell is temperature control. After you pour the glaze, it needs to set at a consistent cool temperature—not too cold (which makes it brittle) and not too warm (which prevents setting). I recommend glazing the bombs on a wire rack at room temperature (about 70°F) and letting the excess drip off for 30 seconds before chilling. Also, make sure your base layer (the peach shell) is fully firm before glazing. Another tip: don’t let the glaze get too thick before pouring; it should be like warm honey. If it becomes too thick, reheat it gently in a double boiler. Finally, use refined coconut oil in the glaze—it adds flexibility that prevents cracking when the dessert is cut.
What can I use as a substitute for peach flavoring in these crystal bombs?
If you can’t find fresh peaches or prefer a different fruit, the best substitutes are mango, apricot, or nectarine puree—all have a similar acidity and sweetness level that works with the gelatin shell. For a stronger flavor without puree, you can use 1½ cups of peach nectar (like the kind from a carton) combined with ½ cup of coconut milk, but reduce the sugar slightly because nectar is already sweet. I personally love using mango puree from frozen mango chunks—just thaw and blend. Avoid using artificial peach extract; it often tastes medicinal and can leave a chemical aftertaste. The shine and texture remain the same with any fruit puree that has a similar water content.
How long do Crystal Peach Vanilla Prism Bombs need to set before the shell becomes shiny?
The shine comes from the glaze setting properly, not from the peach shell itself. After pouring the glaze, you’ll see a mirror-like finish almost immediately, but it needs about 5–10 minutes at room temperature to firm up slightly and become stable to the touch. For the best results, I then chill the glazed bombs in the refrigerator for at least 30 minutes before serving. This allows the gelatin in the glaze to fully set without becoming brittle. If you want an extra glossy finish, you can apply a second coat of glaze after the first sets for 10 minutes—just make sure the first layer is tacky, not fully hardened. Remember, the interior peach shell needs a full 3–4 hours (or overnight) to set before glazing; otherwise, the weight of the glaze can distort the shell.
Can I use fresh peach puree instead of extract in this recipe for a stronger flavor?
Absolutely—and I highly recommend it! In fact, fresh peach puree gives you a much more authentic, vibrant flavor than any extract could. To make puree, simply peel and pit ripe peaches, then blend them until smooth. You’ll need about 2 cups, which usually takes 4 medium peaches. Strain the puree through a fine-mesh sieve if you want a perfectly smooth shell (I do this to avoid any stringy bits). The natural sugar in the peaches means you might need slightly less added sugar—taste your mixture and adjust. One tip: if your peaches are very watery (common with not fully ripe fruit), you can simmer the puree for 10 minutes to reduce and concentrate the flavor before adding it to the shell base. This extra step makes the peach taste incredibly intense.
Why did my shiny shell glaze turn cloudy instead of clear?
A cloudy glaze usually happens for one of three reasons. First, you may have incorporated too many air bubbles while stirring—always use a gentle folding motion with a rubber spatula, never a whisk. Second, the gelatin may not have dissolved completely; make sure you bloom it in cold water for the full 5 minutes and that the syrup mixture is fully clear and hot before adding the bloomed gelatin. Third, the temperature of your bombs might be too cold when you pour the glaze—if the bombs are straight from the freezer, the cold causes the glaze to seize and turn hazy. I let my bombs sit at room temperature for 2–3 minutes before glazing so they’re cold but not icy. If your glaze is already cloudy, you can reheat it gently (do not boil) and try again on fresh bombs.
Can I make these crystal peach prism bombs without a silicone prism mold?
Yes, you can! If you don’t have a prism-shaped silicone mold, use any small dome-shaped silicone mold or even rounded ice cube trays. The shape will be different, but the technique remains exactly the same. The key is that the mold must be flexible so you can unmold the bombs easily without damaging the shell. Avoid rigid metal or glass molds—the gelatin will stick and the shell may crack. I also recommend lining any non-silicone mold with a very thin layer of neutral oil before pouring the peach layer, but silicone is by far the easiest. You can find affordable silicone prism molds online or at specialty baking stores. For a truly unique look, try using hemisphere molds to create half-sphere “bombs” that you can serve two per person.
How should I store leftover crystal peach vanilla prism bombs?
Leftover glazed bombs should be stored in an airtight container in the refrigerator for up to 2 days. Place them on a paper towel to absorb any condensation that might form—condensation can dull the shine. Do not freeze glazed bombs, as the glaze will crack and become dull. If you have unglazed bombs, they can be frozen for up to a month; wrap each bomb individually in plastic wrap and store in a freezer-safe container. When you’re ready to serve, thaw them in the refrigerator overnight, then glaze them fresh. The cream core will stay creamy after thawing, though the texture may be slightly looser. I always recommend glazing the same day as serving for the most stunning presentation.
What is the best way to get a mirror-shine on the shell glaze?
The mirror-shine comes from three golden rules: temperature, smoothness, and patience. First, the glaze must be liquid enough to self-level but thick enough to stay on the bomb—the ideal temperature is about 90°F (just warm to the touch). Second, ensure your bomb surface is completely smooth; any bumps or air pockets in the peach shell will show through. I always tap the mold after pouring the initial shell layer to release bubbles. Third, after glazing, let the bombs sit undisturbed for at least 10 minutes before moving them; this allows the glaze to flow and settle into a flawless finish. Using a few drops of coconut oil in the glaze also helps create that glass-like effect. Never touch the glaze once it’s poured—fingerprints ruin the mirror.
Can I use a different fruit juice instead of peach puree for a child-friendly version?
Yes, and kids love this! You can replace the peach puree with 100% fruit juice like apple, white grape, or even strawberry juice (made by blending strawberries and straining). However, juice has more water and less natural pectin than puree, so you may need to add an extra 1/2 teaspoon of gelatin to ensure the shell sets firmly. Also, reduce the added sugar since juice is already sweet. I’ve made a “rainbow” version for birthday parties by dividing the juice mixture into three bowls and coloring each with natural food dye (beet root for pink, turmeric for yellow, spinach for green). Pour each color in layers, letting each set slightly before adding the next. Kids go wild for the layered effect—and the shiny shell remains the same.
Why did my vanilla cream core become runny and not hold its shape?
A runny cream core usually means the mascarpone was too soft or the cream was under-whipped. Mascarpone should be softened but still cold—if it sits at room temperature too long, it becomes oily and won’t hold structure. Another common cause is using cream with less than 35% milk fat; heavy whipping cream (36%+) is best. When whipping, start on low speed to avoid splashing, then increase to medium-high. Stop at soft peaks—they should gently hold their shape but still be silky. If you over-whip, you’ll see the mixture turn grainy as butter begins to form. In that case, you can fold in a tablespoon of chilled cream to bring it back, but it’s tricky. For a more stable core, you can add 1 tablespoon of instant vanilla pudding mix (dry) while whipping. That little trick is my backup plan for humid NYC days.
Share Your Version!
I can’t wait to see how your crystal peach vanilla prism bombs turn out! Leave a star rating and tell me in the comments—did you try mango passion? Did the shine come out perfectly? I read every comment and love hearing your kitchen stories. Also, snap a photo of your creation and tag me on Instagram @leosfoods or on Pinterest. It makes my day when I see someone’s first bite!
So here’s my question for you: What’s your favorite summer fruit? I’m always looking for new flavor combos to try in this prism bomb technique. Maybe strawberry-basil or blueberry-lavender? Let me know in the comments below.
From my NYC kitchen to yours — I hope this recipe brings as much warmth to your table as it does to mine. — Stella 🧡
Love This Recipe? Save It to Pinterest!
If you enjoyed this Crystal Peach Vanilla Prism Bombs with Shiny Shell recipe, don’t let it get lost in your browser tabs! 😄 Pin it now so you can find it again anytime — and explore hundreds more tried-and-tested recipes waiting for you on my Pinterest boards.
👉 Follow Stella on Pinterest @stellarecipeblog
📌 Pin this recipe · 🔁 Re-pin your favorites · 💬 Tag me when you make it — I love seeing your creations!
💬 Loved this recipe? Drop a comment below!
Have a question about the glaze? I’ll answer every single one. ⭐ Rate it 5 stars if it wowed you!
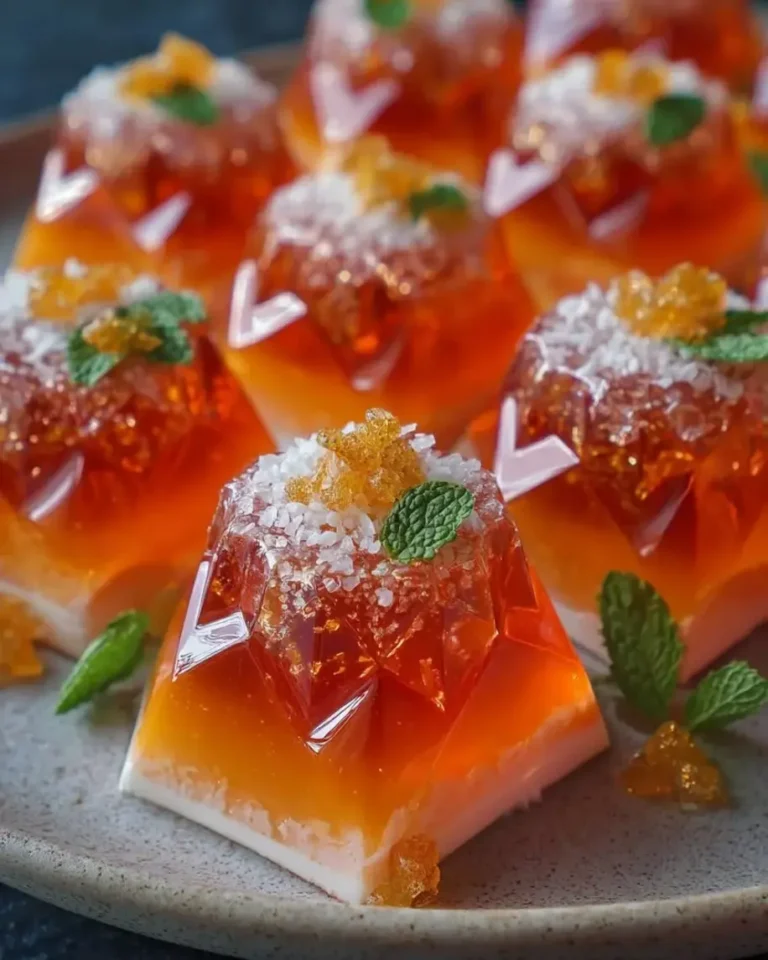
Crystal Peach Vanilla Prism Bombs with Shiny Shell
Crystal Peach Vanilla Prism Bombs with Shiny Shell
- Yield: 6 1x
Ingredients
- For the Peach Prism Shells:
- 2 cups peach puree
- 1 cup coconut milk
- 1/3 cup granulated sugar
- 2 tsp gelatin powder
- 2 tbsp cold water
- 1 tsp vanilla extract
- 1 tbsp lemon juice
- Pinch of salt
- For the Vanilla Cream Core:
- 1 cup mascarpone cheese
- 1/2 cup heavy whipping cream
- 3 tbsp powdered sugar
- 1 tsp vanilla extract
- For the Shiny Crystal Shell Glaze:
- 1 cup granulated sugar
- 1/2 cup water
- 1/2 cup light corn syrup
- 1 tbsp gelatin powder
- 3 tbsp cold water
- 1 tsp vanilla extract
- 1 tbsp coconut oil
- For Garnish (optional):
- 1 tbsp white chocolate shavings
- 1 tsp crushed freeze-dried peaches
- Fresh mint leaves
Instructions
- Bloom gelatin in cold water for 5 minutes.
- Heat peach puree, coconut milk, sugar, salt, lemon juice, and vanilla extract until warm and smooth. Stir in bloomed gelatin until fully dissolved.
- Pour a thin layer of the peach mixture into silicone prism molds, coating the sides evenly. Chill until partially set.
- Whip mascarpone, heavy cream, powdered sugar, and vanilla extract until light, fluffy, and stable.
- Fill each shell with the vanilla cream core, leaving a small gap at the top.
- Seal with remaining peach mixture and refrigerate until fully firm.
- Bloom gelatin for the glaze in cold water for 5 minutes.
- Heat sugar, water, and corn syrup until clear and fully dissolved. Remove from heat and stir in gelatin, vanilla extract, and coconut oil until glossy.
- Allow glaze to cool slightly until thick but pourable.
- Unmold frozen prism bombs and place on a wire rack. Pour the shiny glaze evenly over each piece.
- Let excess drip off and set before serving.
- Finish with white chocolate shavings, freeze-dried peach crumbs, and fresh mint leaves.
- Serve chilled.
Nutrition
- Calories: 360
- Sugar: 27g
- Fat: 23g
- Carbohydrates: 34g
- Protein: 5g
Tried This Recipe? Leave a Comment!
Did you make this recipe? I’d love to hear how it turned out! Please leave a comment and a rating below. Your feedback helps other home cooks and supports cheerychop.com!
For more delicious inspiration, follow me on Pinterest!