Showstopping Rose Gold Raspberry Cream Bombs
“`html
Table of Contents
Rose Gold Raspberry Cream Bombs with Mirror Drip Shell – A Stunning Celebration Dessert
I still remember the first time I saw a mirror glaze dessert in a Parisian pâtisserie window — a perfect dome of shimmering rose gold that caught the afternoon light like a jewel. I was fresh out of culinary school, still wide-eyed and determined to master every technique my French chefs had taught me. That moment planted a seed that would eventually bloom into these rose gold raspberry cream bombs with mirror drip shell — a dessert that marries the precision of French mirror glaze artistry with the bright, sun-soaked flavors of the Moroccan raspberries I grew up picking in my mother’s garden. Every time I make these, I feel like I’m bridging two worlds: the structured elegance of Paris and the warm, generous spirit of North African hospitality.
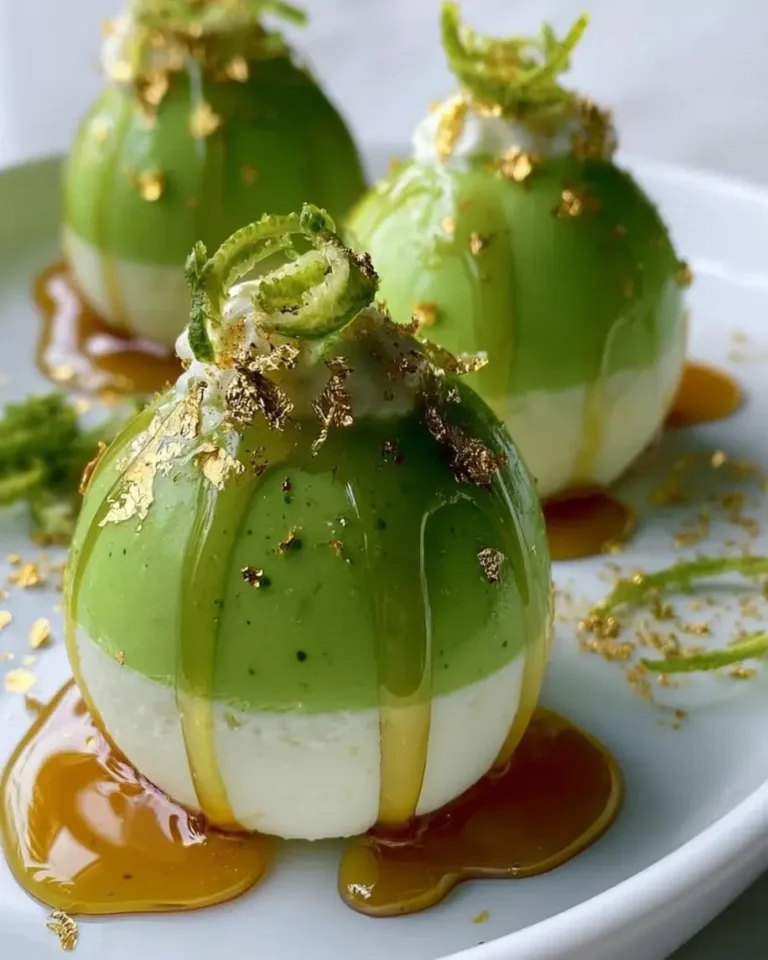
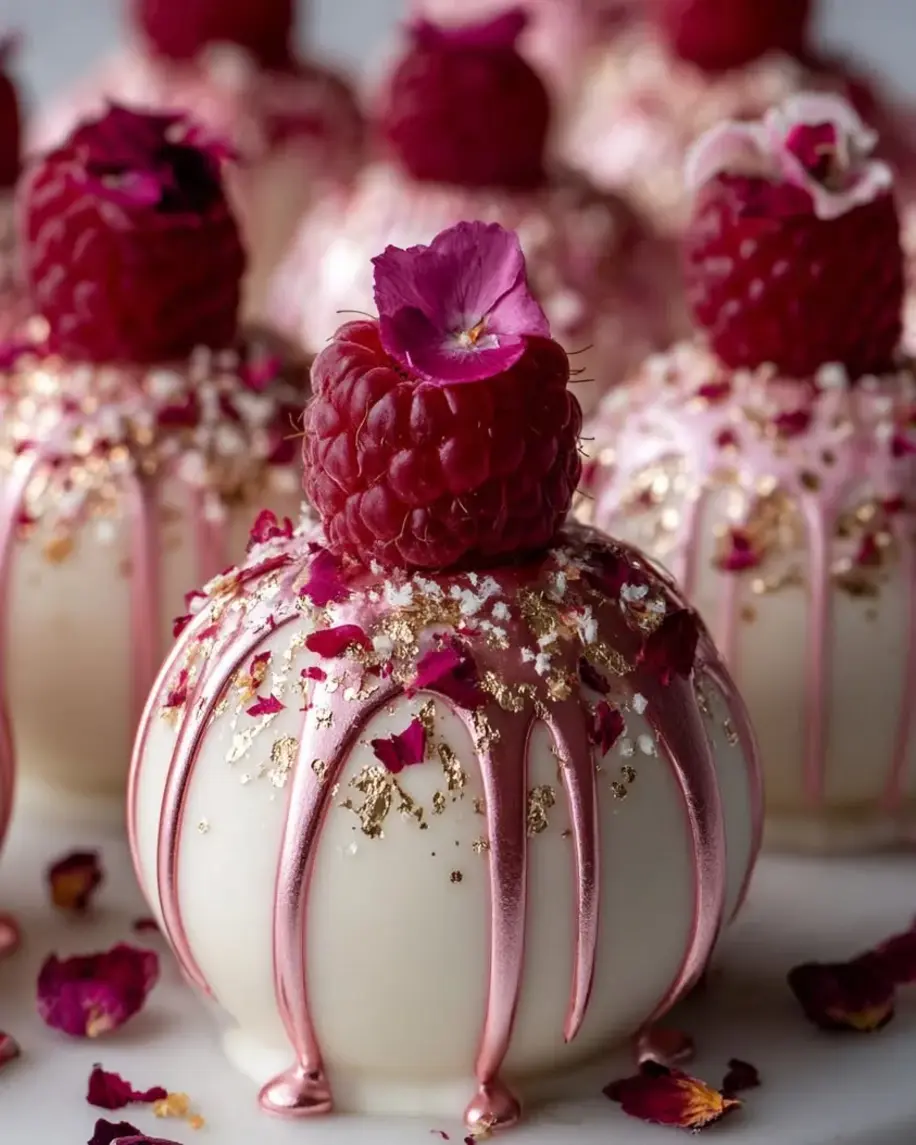
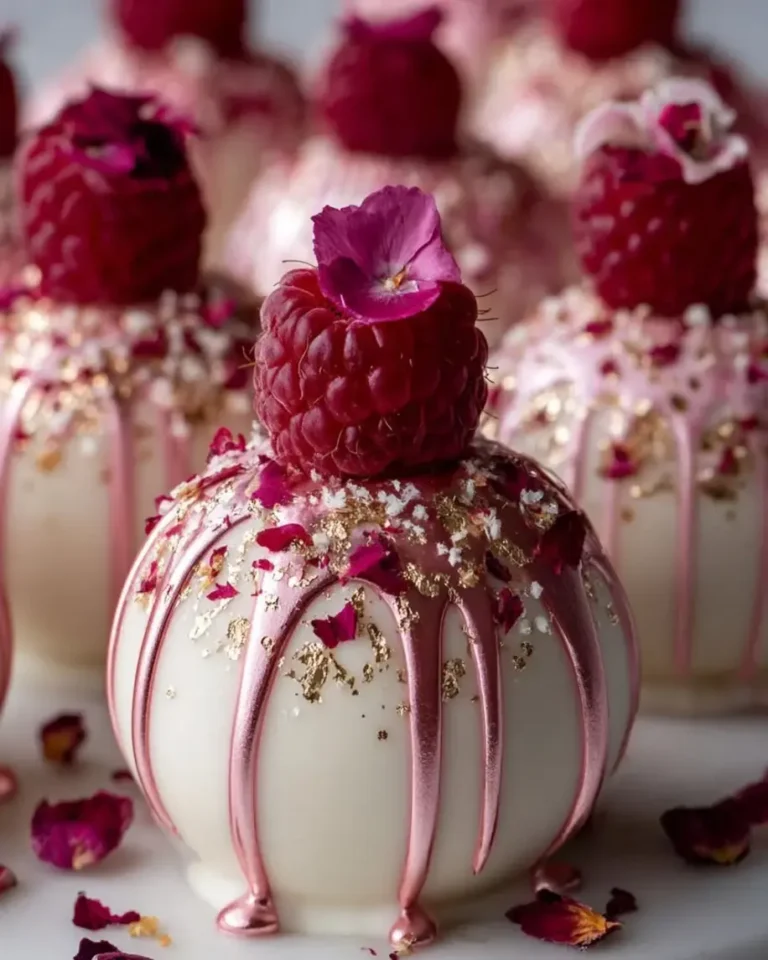
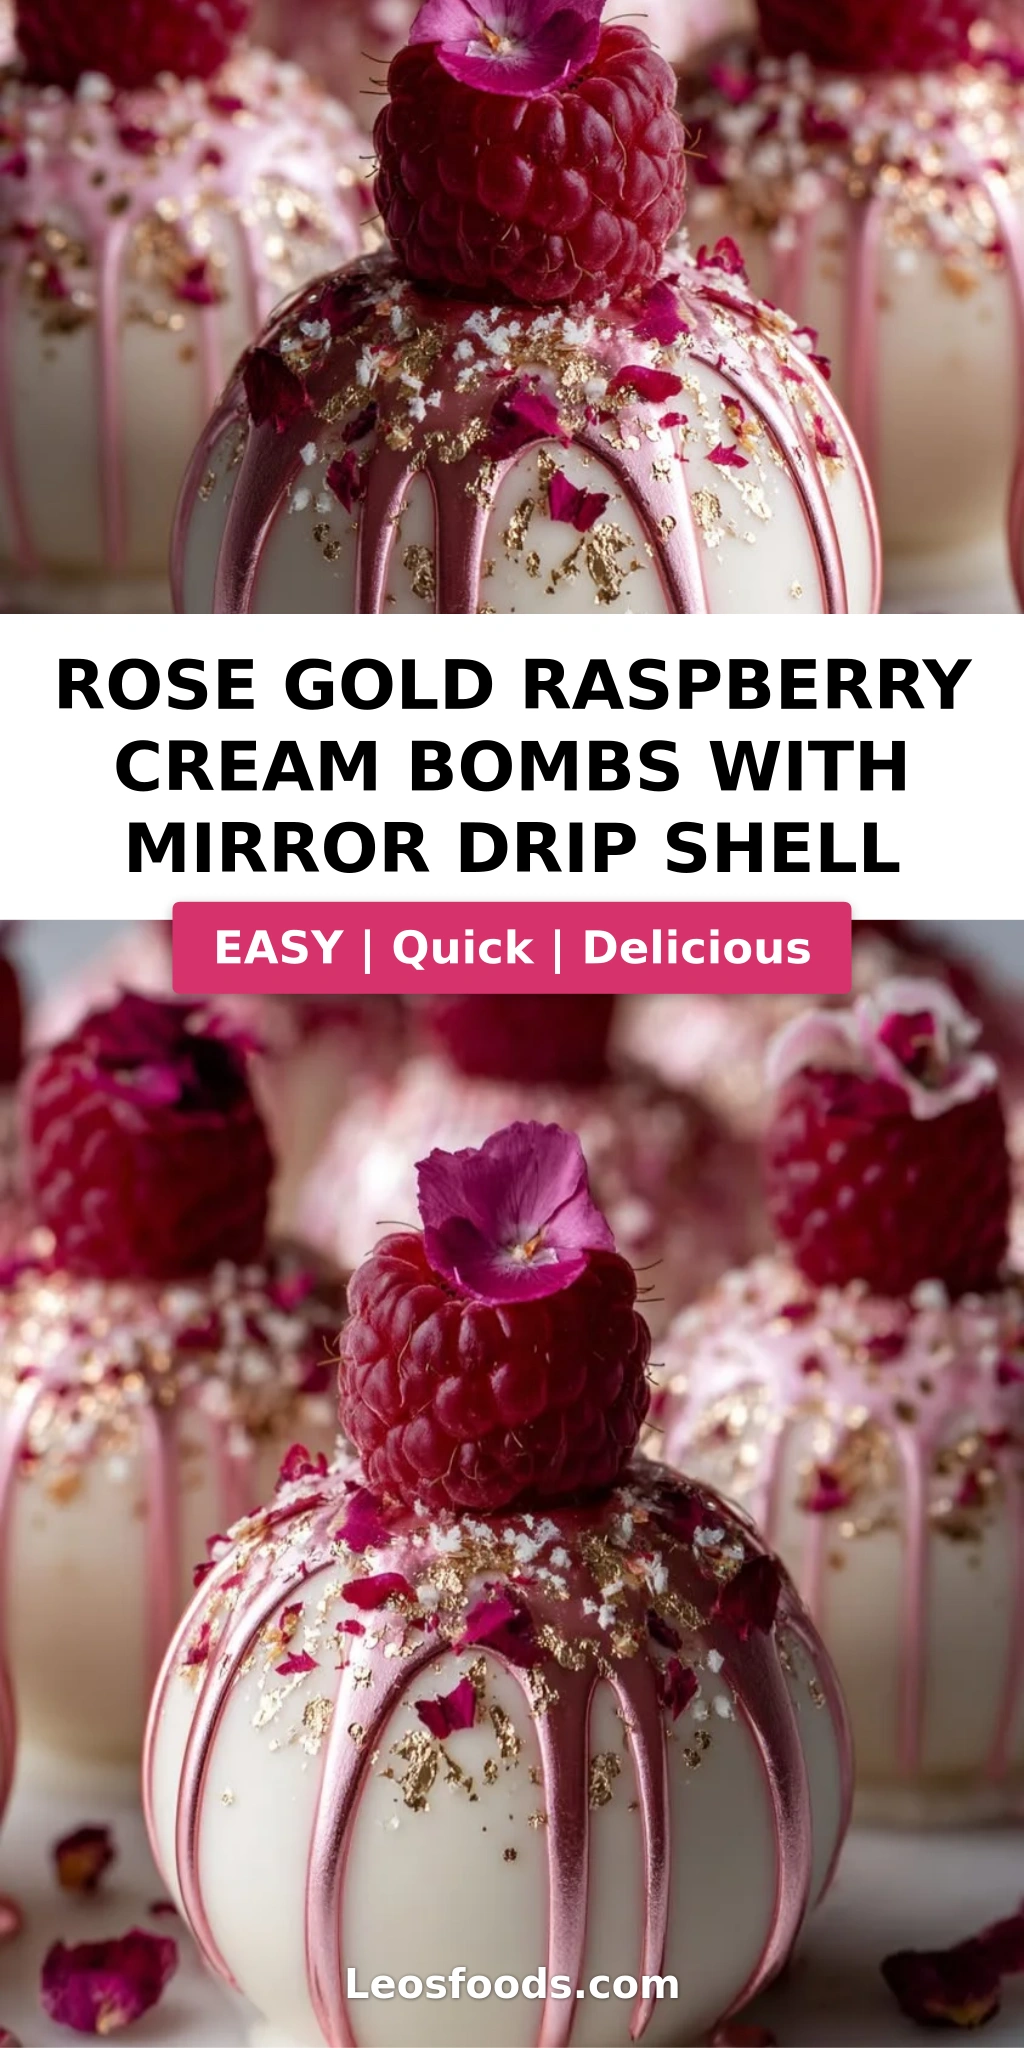
When you cut into one of these rose gold raspberry cream bombs, the first thing you’ll notice is the crackle of that glossy mirror drip shell — a thin, sweet lacquer that gives way to a tender raspberry shell beneath. Inside, a cloudlike mascarpone cream filling waits, barely sweet, with just a whisper of vanilla to let the raspberry shine. The entire experience is a study in contrasts: cold and creamy, tart and sweet, rustic fruit and haute couture presentation. The edible gold luster dust in the glaze catches the light with every angle, making each bomb feel like a tiny, edible sculpture. It’s the kind of dessert that stops conversation when you bring it to the table — and then starts it again with every blissful bite.
What sets my version apart is the technique I developed during my years working in NYC pastry kitchens: a two-stage gelatin process that gives the mirror drip shell its signature shine without the dreaded air bubbles or streaks. I’ve tested this recipe more times than I can count — through humid summers and dry winters — to make sure it works in any home kitchen. In this post, I’ll walk you through every single step, from blooming gelatin to that final dusting of gold flakes. I’ll also share my biggest secret for avoiding a runny glaze (it’s all in the temperature), and the one common mistake that can turn your mirror drip shell into a sticky mess. By the end, you’ll have all the tools you need to create your own showstopping rose gold raspberry cream bombs at home.
Why This Rose Gold Raspberry Cream Bombs Recipe Is the Best
The flavor secret behind these rose gold raspberry cream bombs lies in the way I balance the raspberry puree with a touch of coconut milk and lemon juice. Growing up in Morocco, my mother taught me that a squeeze of citrus is the key to making any fruit filling sing — it brightens the raspberry without overwhelming its natural sweetness. I’ve carried that lesson into this recipe, using just enough lemon to lift the fruit while keeping the coconut milk silky and neutral. The result is a raspberry shell that tastes intensely fruity without being cloying, the perfect counterpoint to the rich mascarpone cream hiding inside.
The texture of these cream bombs is where my French training really comes into play. The mirror drip shell needs to be thin enough to crackle when you bite into it, but sturdy enough to hold its shape on the frozen bomb. I achieve this by controlling the ratio of white chocolate to condensed milk and gelatin — a formula I fine-tuned over dozens of test batches in my tiny NYC kitchen. The raspberry shell itself is set with just enough gelatin to stay firm at refrigerator temperature, but soft enough to melt gently on your tongue. Every layer has been engineered for a specific mouthfeel, from the brittle glaze to the velvety cream.
What makes this recipe truly foolproof is the make-ahead structure. Unlike many mirror glaze desserts that require last-minute assembly, these rose gold raspberry cream bombs can be fully prepared and frozen up to two weeks in advance. The glaze is poured directly onto frozen bombs, so there’s no rushing, no stress, and no worrying about the filling melting before you’re done. I’ve taught this recipe to absolute beginners in my NYC cooking workshops, and the success rate is remarkably high — partly because the technique is forgiving, and partly because I’ve written every step with the home cook in mind. If you can bloom gelatin and stir a saucepan, you can make these bombs.
Rose Gold Raspberry Cream Bombs Ingredients
Every trip I take to the Union Square Greenmarket in NYC inspires me to think about ingredients differently. When I’m making these rose gold raspberry cream bombs, I reach for frozen raspberries more often than fresh — they’re picked at peak ripeness and flash-frozen, which means they deliver more consistent flavor and color year-round. The coconut milk I use is the full-fat kind from a can, not the refrigerated carton; it gives the raspberry shell a lushness that light coconut milk just can’t match. And the mascarpone? I always buy it from a small Italian deli in Brooklyn that imports directly from Lombardy. But don’t worry — supermarket mascarpone works beautifully too.
Ingredients List
- For the Raspberry Shells:
- 2 cups raspberry puree (from fresh or frozen raspberries)
- 1/2 cup full-fat coconut milk
- 1/3 cup granulated sugar
- 2 tsp gelatin powder
- 2 tbsp cold water (for blooming gelatin)
- 1 tsp lemon juice
- Pinch of salt
- For the Cream Filling:
- 1 cup mascarpone cheese, softened
- 1/2 cup heavy whipping cream
- 3 tbsp powdered sugar
- 1 tsp vanilla extract
- For the Mirror Drip Shell:
- 1 cup white chocolate, finely chopped
- 1/2 cup sweetened condensed milk
- 1/4 cup water
- 1 tbsp gelatin powder
- 3 tbsp cold water (for blooming gelatin)
- 1 tsp vanilla extract
- A few drops pink food coloring (gel or liquid)
- 1/2 tsp edible gold luster dust
- For Garnish (optional):
- 2 tbsp freeze-dried raspberries, crushed
- 1 tbsp edible rose petals
- Edible gold flakes
Ingredient Spotlight
Raspberry Puree: This is the backbone of your shell. I recommend frozen raspberries thawed and blended, then strained to remove seeds. Frozen berries are actually more reliable than fresh because they’re picked at peak ripeness. If you must use fresh, buy them at the height of summer and blend them immediately. A good substitution is high-quality raspberry preserves (seedless) mixed with a splash of water — but you’ll need to reduce the sugar slightly since preserves are already sweetened. The flavor will be a bit more cooked and jammy, which works beautifully in a pinch.
White Chocolate for the Mirror Drip Shell: Use a good-quality white chocolate that contains cocoa butter — not white confectionery coating or candy melts. Callebaut, Valrhona, or Guittard are my go-to brands in NYC. The cocoa butter is essential for that glossy, snappy finish. If you can’t find good white chocolate, white chocolate chips work in a pinch, but they may contain stabilizers that affect the shine. Avoid “white morsels” labeled as baking chips; they often lack cocoa butter and will leave your mirror drip shell looking streaky and dull.
Gelatin: I use powdered gelatin from the grocery store — Knox brand is reliable and widely available. The key is blooming it in cold water for exactly 5 minutes before using. Too little time and the gelatin won’t dissolve properly; too long and it can become rubbery. For a vegetarian version, you can substitute agar agar, but the texture will be different — firmer and less melt-in-the-mouth. I’ve tested this with agar agar and it works, but the mirror drip shell won’t have quite the same silky feel.
Edible Gold Luster Dust: This is what gives the rose gold raspberry cream bombs their signature shimmer. You can find it at cake supply stores, specialty baking shops, or online. Make sure it’s labeled “edible” and “food-safe.” The luster dust dissolves into the glaze and creates that mirror-like sheen. If you don’t have gold luster dust, a combination of pink food coloring and a pinch of pearlescent white mica powder can give a similar holographic effect — though it won’t be quite as warm and luxurious.
| Original Ingredient | Best Substitution | Flavor / Texture Impact |
|---|---|---|
| Raspberry puree | Seedless raspberry preserves + water | More jammy flavor, slightly less bright acidity; reduce sugar by 1 tbsp |
| Full-fat coconut milk | Heavy cream (dairy) | Richer, more traditional creaminess; no coconut flavor |
| Mascarpone cheese | Cream cheese + 1 tbsp heavy cream | Slightly tangier, firmer filling; whip well to avoid lumps |
| White chocolate (cocoa butter based) | White chocolate chips (high quality) | Slightly less glossy mirror; may need a touch more condensed milk |
| Edible gold luster dust | Pearlescent white mica + pink food coloring | Subtler shimmer, less warm gold tone; still beautiful |
How to Make Rose Gold Raspberry Cream Bombs — Step-by-Step
Trust me when I say this: if you can make Jell-O from a box, you can make these rose gold raspberry cream bombs. The technique looks fancy, but it’s really just a series of simple steps done in the right order. Take your time, read through each step before you begin, and you’ll be rewarded with a dessert that looks like it came from a five-star pastry kitchen.
Step 1: Bloom the Gelatin
In a small bowl, sprinkle 2 teaspoons of gelatin powder over 2 tablespoons of cold water. Stir gently with a fork to break up any clumps, then let it sit undisturbed for exactly 5 minutes. The gelatin will absorb the water and turn into a firm, jiggly mass — that’s what you want. While you wait, gather your other ingredients for the raspberry shell so everything is within arm’s reach.
💡 Stella’s Pro Tip: Always use cold water — never warm or hot — to bloom gelatin. Warm water will partially dissolve the gelatin and ruin its setting power. If your kitchen is very warm (above 75°F), use ice-cold water to keep the bloom firm.
Step 2: Make the Raspberry Shell Base
In a medium saucepan, combine 2 cups raspberry puree, 1/2 cup coconut milk, 1/3 cup granulated sugar, a pinch of salt, and 1 teaspoon lemon juice. Warm over medium heat, stirring occasionally, until the mixture is steaming and the sugar has fully dissolved — about 4 to 5 minutes. Do not let it boil. Remove from heat, then add the bloomed gelatin and stir until every speck has dissolved. The mixture should look smooth and slightly thickened.
⚠️ Common Mistake to Avoid: Adding the gelatin to boiling liquid will destroy its setting power and leave you with a runny shell. Always take the pan off the heat first, then stir in the gelatin gently but thoroughly.
Step 3: Coat the Molds
Pour a thin layer of the raspberry mixture into 6 silicone dome molds (about 3 inches wide). Use a small offset spatula or the back of a spoon to spread it evenly up the sides, creating a uniform coating. Tap the molds gently on the counter to release any air bubbles. Place the molds in the refrigerator for 20 to 25 minutes, until the raspberry layer is partially set but still slightly tacky to the touch.
💡 Stella’s Pro Tip: For an even coating, tilt each mold in a circular motion after pouring the raspberry mixture — just like swirling wine in a glass. This helps the liquid climb the walls evenly and prevents thin spots that could break when unmolding.
Step 4: Whip the Cream Filling
In a large mixing bowl, combine 1 cup softened mascarpone cheese, 1/2 cup heavy whipping cream, 3 tablespoons powdered sugar, and 1 teaspoon vanilla extract. Use a hand mixer or stand mixer with the whisk attachment to whip on medium speed until soft peaks form — about 2 to 3 minutes. The filling should be light, airy, and spreadable, but not stiff. Stop as soon as it holds its shape gently.
⚠️ Common Mistake to Avoid: Over-whipping the mascarpone can cause it to separate and turn grainy. Since mascarpone is higher in fat than cream, it can go from perfect to broken very quickly. Whip on medium speed and stop the moment you see soft, billowy peaks.
Step 5: Fill and Seal
Spoon or pipe the cream filling into the center of each partially set raspberry shell, filling it about three-quarters full. Leave a small border (about 1/4 inch) around the edges — this will help the top layer of raspberry mixture adhere and seal the bomb. Gently pour the remaining raspberry mixture over the filling, covering it completely. Use a small spatula to level the top flush with the rim of the mold.
💡 Stella’s Pro Tip: If the remaining raspberry mixture has thickened too much to pour, warm it very gently over low heat for 10 to 15 seconds, stirring constantly. Do not microwave it — direct heat can create hot spots that damage the gelatin.
Step 6: Freeze Solid
Place the filled molds on a small baking sheet and freeze for at least 4 hours, or overnight. The bombs must be completely frozen solid before you attempt to unmold and glaze them — a partially frozen bomb will collapse when you pour the mirror drip shell over it. If you’re planning ahead, you can freeze them for up to 2 weeks at this stage, tightly covered with plastic wrap.
⚠️ Common Mistake to Avoid: Rushing the freezing time is the number one reason mirror glaze fails. The bomb needs to be frozen all the way through — not just the edges. A 4-hour minimum is non-negotiable; overnight is even better.
Step 7: Prepare the Mirror Glaze
Bloom 1 tablespoon of gelatin powder in 3 tablespoons of cold water for 5 minutes. In a small saucepan, heat 1/2 cup sweetened condensed milk and 1/4 cup water until steaming — do not boil. Remove from heat and add the bloomed gelatin, stirring until fully dissolved. Pour this hot mixture over 1 cup finely chopped white chocolate in a heatproof bowl. Let it sit for 2 minutes, then stir gently until smooth. Add 1 teaspoon vanilla extract, a few drops of pink food coloring, and 1/2 teaspoon edible gold luster dust. Stir until the glaze is uniformly rose gold and glossy.
💡 Stella’s Pro Tip: The ideal temperature for pouring a mirror drip shell is 90 to 95°F. If the glaze is too warm, it will run off the frozen bomb and leave a thin, patchy layer; if it’s too cool, it will clump and won’t self-level. Use an instant-read thermometer for accuracy — this is one of those rare cases where precision really matters.
Step 8: Glaze the Bombs
Unmold the frozen bombs by gently flexing the silicone molds. Place each bomb on a wire rack set over a baking sheet (to catch drips). Working quickly, pour the mirror glaze over each bomb in a steady stream, starting from the top and letting it cascade down the sides. The glaze will set almost instantly on contact with the frozen surface. Let the excess drip off for about 20 to 30 seconds before transferring each bomb to a serving plate.
⚠️ Common Mistake to Avoid: If the glaze pools at the base of the bomb and doesn’t drip, it’s too cool. Warm it very slightly (a few seconds over a water bath) and try again. If the glaze runs off completely and leaves bare spots, it’s too warm — let it cool for a minute and re-test on a spoonful of frozen raspberry puree.
Step 9: Garnish and Serve
While the mirror drip shell is still slightly tacky, sprinkle each bomb with crushed freeze-dried raspberries, a few edible rose petals, and a pinch of edible gold flakes. Work quickly — the glaze sets fast. Transfer the finished bombs to the refrigerator and let them thaw gently for about 20 to 30 minutes before serving. This allows the interior to soften to a luscious, creamy consistency while the glaze stays snappy.
💡 Stella’s Pro Tip: For the most dramatic presentation, serve these rose gold raspberry cream bombs on a mirrored tray or a dark slate plate. The reflection will double the shimmer of the mirror drip shell and make the gold flakes pop like tiny stars.
| Step | Action | Duration | Key Visual Cue |
|---|---|---|---|
| 1 | Bloom gelatin for shell | 5 mins | Gelatin becomes firm, jiggly mass |
| 2 | Make raspberry shell base | 5 mins | Steaming, sugar dissolved, smooth |
| 3 | Coat molds | 20-25 mins | Partially set, slightly tacky |
| 4 | Whip cream filling | 3 mins | Soft peaks, light and fluffy |
| 5 | Fill and seal bombs | 5 mins | Filling flush with rim |
| 6 | Freeze solid | 4+ hours | Rock hard, unmolds cleanly |
| 7 | Prepare mirror glaze | 10 mins | Smooth, rose gold, 90-95°F |
| 8 | Glaze the bombs | 2-3 mins | Glaze drips naturally, sets quickly |
| 9 | Garnish and serve | 30 mins thaw | Glossy, garnished, center creamy |
Serving & Presentation
I learned one invaluable lesson about presentation during my time in Paris: the plate is the frame for your art. When I serve these rose gold raspberry cream bombs, I like to keep the setting minimal so the bombs themselves are the stars. A simple white porcelain plate or a dark slate board creates the perfect contrast for that shimmering rose gold mirror drip shell. I’ll often place a small dollop of leftover mascarpone cream on the plate and sweep it with the back of a spoon for a modern, elegant smear. Then I’ll nestle the bomb right in the center of that sweep, letting the mirror glaze catch the light from every angle.
For garnishes, I lean into the rose gold theme with a light hand. A sprinkle of crushed freeze-dried raspberries adds a pop of deep red and a whisper of tartness that cuts through the sweet glaze. Edible rose petals — which I buy from a spice shop in NYC’s East Village — add a delicate, romantic touch that feels special without being overwhelming. And of course, a few edible gold flakes scattered on top and around the plate make the whole presentation feel like a celebration. If I’m serving these at a dinner party, I’ll sometimes add a tiny sprig of fresh mint for a hint of green that contrasts beautifully with the pink and gold.
When it comes to pairings, these bombs are surprisingly versatile. I love serving them with a chilled glass of sparkling rosé — the bubbles and acidity cut through the richness of the mascarpone cream. For a non-alcoholic option, a tart hibiscus iced tea or a sparkling lemonade with a splash of raspberry syrup works beautifully. If you’re serving these as part of a larger dessert spread, pair them with dark chocolate truffles or a simple almond biscotti for textural contrast. In my NYC cooking classes, I always tell students: these bombs are the diva of the dessert table — give them space to shine, and they’ll steal the show every time.
| Pairing Type | Suggestions | Why It Works |
|---|---|---|
| Side Dish | Dark chocolate truffles, almond biscotti, fresh berries | Adds texture and contrasting bitterness |
| Sauce / Dip | Extra mirror glaze drizzle, raspberry coulis, melted dark chocolate | Enhances the raspberry and chocolate notes |
| Beverage | Sparkling rosé, hibiscus iced tea, sparkling lemonade | Acidity and bubbles cut the richness |
| Garnish | Crushed freeze-dried raspberries, edible rose petals, gold flakes, mint | Adds color, texture, and elegance |
Make-Ahead, Storage & Reheating
As a busy NYC food blogger and mom, I’m a huge advocate for make-ahead desserts. These rose gold raspberry cream bombs are actually designed to be prepared in stages, which makes them ideal for entertaining. I often prepare the bombs up to the freezing stage (Step 6) a full week before a dinner party. Then, on the day of the event, I simply make the mirror glaze, pour it over the frozen bombs, garnish, and serve. The entire glazing process takes less than 15 minutes, which means I can spend more time with my guests and less time in the kitchen.
| Method | Container | Duration | Reheating Tip |
|---|---|---|---|
| Refrigerator | Covered container, single layer | 2 days (once glazed) | Serve cold; do not reheat |
| Freezer | Airtight container, parchment between layers | 2 weeks (unglazed) | Glaze directly from frozen; thaw 20 min before serving |
| Make-Ahead | Silicone molds in freezer, then unmold and store | Up to 1 week | Glaze day of serving for best shine |
If you have leftover glazed bombs, store them in the refrigerator in a single layer in a covered container. The mirror drip shell will stay glossy for up to 2 days, though the freeze-dried raspberry garnish may soften slightly. To restore the crunch, you can add a fresh sprinkle of crushed freeze-dried raspberries just before serving. I do not recommend freezing the bombs once they’ve been glazed — the mirror drip shell can crack or become sticky when thawed a second time. If you know you won’t eat all six in one go, it’s better to freeze them unglazed and glaze only what you need.
Variations & Easy Swaps
One of the things I love most about this recipe is how adaptable it is. Over the years, I’ve developed several variations that let you play with flavors and dietary needs without losing the magic of that mirror drip shell. Whether you’re craving chocolate, need a dairy-free option, or want to try a citrus twist, there’s a version here for you. Each variation has been tested in my NYC kitchen, so you can swap with confidence.
| Variation | Key Change | Best For | Difficulty Impact |
|---|---|---|---|
| Chocolate-Raspberry | Replace white chocolate with dark chocolate in glaze; add cocoa powder to shell | Chocolate lovers, holiday tables | Same difficulty |
| Dairy-Free / Vegan | Use coconut cream instead of mascarpone; vegan white chocolate; agar agar | Dairy-free guests, plant-based diets | Slightly more advanced |
| Citrus Blush | Replace raspberry with blood orange or pink grapefruit puree | Winter celebrations, brunch | Same difficulty |
Chocolate-Raspberry Version
For a deeper, more decadent twist, substitute the white chocolate in the mirror drip shell with high-quality dark chocolate (70% cacao). The result is a rich, bittersweet glaze that contrasts beautifully with the tart raspberry shell. I also like to add 1 tablespoon of unsweetened cocoa powder to the raspberry shell mixture for a subtle chocolate undertone that ties everything together. This version is especially stunning during the winter holidays — the dark ruby mirror glaze with gold flakes looks like edible jewelry. A sprinkle of sea salt on top takes it to another level entirely.
Dairy-Free / Vegan Version
I developed this version for a friend’s dairy-free wedding, and it turned out to be one of my proudest kitchen victories. Replace the mascarpone with chilled coconut cream (the solid top from a can of full-fat coconut milk) whipped with powdered sugar and vanilla. For the mirror drip shell, use a high-quality vegan white chocolate and replace the gelatin with agar agar (use 1 teaspoon agar agar powder bloomed in 3 tablespoons cold water, then dissolved in the hot condensed milk mixture). The texture is slightly less creamy but still lush and satisfying. This version is also naturally gluten-free, which makes it a wonderful option for guests with multiple dietary restrictions.
Citrus Blush Version
During the winter months, when blood oranges appear at the Union Square Greenmarket, I love swapping the raspberry puree for blood orange or pink grapefruit juice. The citrus version is brighter and less sweet, with a beautiful natural pink-orange color that works beautifully with the rose gold glaze. I add an extra tablespoon of sugar to the shell to balance the citrus acidity, and I use a touch of orange blossom water in the cream filling for a floral note that whispers of my Moroccan roots. This variation is perfect for brunch or a New Year’s Eve celebration — it feels fresh, festive, and utterly elegant.
What is the best way to achieve a smooth mirror glaze for the drip shell on these rose gold raspberry cream bombs?
The key to a perfectly smooth mirror glaze lies in three things: temperature, straining, and patience. First, make sure your white chocolate is very finely chopped so it melts evenly when you pour the hot condensed milk mixture over it. Stir gently in one direction to avoid incorporating air bubbles — air bubbles are the enemy of a mirror finish. Second, strain the finished glaze through a fine-mesh sieve before using it; this catches any undissolved bits of gelatin or chocolate that could create streaks. Third — and this is the part most home cooks overlook — let the glaze cool to exactly 90–95°F before pouring. Too warm and it will run off the frozen bomb; too cool and it will clump. Use an instant-read thermometer for accuracy. Finally, make sure your frozen bombs are completely smooth and free of frost before glazing. Any bumps or ice crystals will show through the glaze.
Can I substitute fresh raspberries with frozen ones for the raspberry cream filling?
Absolutely — and honestly, I often prefer frozen raspberries for this recipe. Frozen raspberries are picked at peak ripeness and flash-frozen, which means they have a more consistent flavor and color than fresh raspberries that may have traveled long distances. To use frozen raspberries, simply thaw them completely in a bowl (about 2 hours at room temperature or overnight in the refrigerator), then blend them into a puree and strain out the seeds. One important note: frozen berries release more liquid than fresh, so you may end up with slightly more puree than the recipe calls for. Measure 2 cups of puree after straining, and if you have extra, save it for a sauce or a smoothie. There’s no need to adjust the sugar or gelatin when using frozen berries — the recipe is designed to work with both.
How far in advance can I prepare rose gold raspberry cream bombs before serving?
You can prepare these bombs several days in advance, and I actually encourage it! The unglazed frozen bombs can be stored in an airtight container in the freezer for up to 2 weeks. This makes them a fantastic make-ahead dessert for dinner parties or holidays. On the day you plan to serve them, simply prepare the mirror glaze, unmold the bombs, and glaze them directly from the freezer. The glaze will set in about 30 seconds to 1 minute. Once glazed, store the bombs in the refrigerator for up to 2 hours before serving — any longer and the glaze may begin to soften or absorb moisture from the fridge. If you need to hold them longer, keep them in the freezer unglazed and glaze just before serving. This staged approach is exactly how I manage dessert for my own dinner parties in NYC.
What type of raspberry cream filling works best to prevent the mirror drip shell from becoming runny?
The key to a stable mirror drip shell is a filling that is firm when frozen and doesn’t melt too quickly at room temperature. A mascarpone-based cream filling — like the one in this recipe — is ideal because mascarpone has a high fat content and low moisture, which means it freezes solid without becoming icy. Cream cheese-based fillings also work well, though they have a slightly tangier flavor. What you want to avoid is any filling that contains a lot of fruit juice, water, or alcohol, as these liquids can seep out during freezing and create a layer of frost on the surface of the bomb. That frost will prevent the mirror glaze from adhering properly, leading to a runny or patchy finish. If you want to experiment with different fillings, stick to high-fat dairy components and keep the liquid content low.
Can I make the mirror drip shell without gelatin for a vegetarian version?
Yes, you can substitute gelatin with agar agar powder to make the mirror drip shell vegetarian-friendly. Use 1 teaspoon of agar agar powder bloomed in 3 tablespoons of cold water for 5 minutes, then dissolve it in the hot condensed milk mixture just as you would with gelatin. Keep in mind that agar agar sets at room temperature and has a firmer, less melt-in-the-mouth texture than gelatin. The mirror glaze will still be glossy and beautiful, but it may feel slightly less silky on the tongue. I recommend testing the agar agar version on a small batch first to see if you like the texture. Also note that agar agar is more sensitive to acidity, so if you’re using a citrus-based shell, you may need to increase the agar by about 1/4 teaspoon to compensate.
Why did my mirror glaze crack when I poured it over the frozen bombs?
Cracking usually happens when there’s a significant temperature difference between the frozen bomb and the mirror glaze, or when the bomb has surface moisture. First, make sure your frozen bombs are completely smooth and free of frost or ice crystals before glazing. If you see any frost, gently wipe the surface with a dry paper towel. Second, ensure your glaze is at the correct temperature — 90 to 95°F. If the glaze is too cold (below 85°F), it will set too quickly on contact and crack as the bomb continues to expand slightly during thawing. If the glaze is too hot (above 100°F), it can shock the frozen shell and cause thermal cracking. Finally, make sure your bombs are fully frozen through — at least 4 hours, preferably overnight. Partially frozen bombs have a softer interior that can shift during glazing and cause the shell to crack.
How do I get the rose gold color right without it looking muddy?
Getting that perfect rose gold hue is all about layering color. Start with a few drops of pink food coloring — I prefer gel-based colors because they’re more concentrated and won’t water down the glaze. Stir it in completely, then add the edible gold luster dust. The gold dust should be 1/2 teaspoon for the full recipe; any more and the color can turn muddy or grayish. The key is to add the gold dust after the pink color is fully incorporated, so you can see the base tone before adding the shimmer. If the color looks too pink, add a tiny pinch more gold dust; if it looks too golden, add another drop of pink. Test the color by drizzling a small amount of glaze onto a white plate — the true shade will show more clearly than it does in the bowl. Remember that the glaze will lighten slightly as it sets, so aim for a shade that’s slightly more saturated than your ideal.
Can I use a different fruit instead of raspberry for the shell?
Absolutely! This recipe is wonderfully adaptable to other fruits. Strawberry, mango, passion fruit, or blackberry purees all work beautifully. The key is to maintain the same liquid-to-gelatin ratio — 2 cups of fruit puree to 2 teaspoons of gelatin. If you’re using a fruit that’s very acidic (like passion fruit or lemon), you may need to increase the sugar by 1 to 2 tablespoons to balance the tartness. For fruits with lower pectin content (like mango or peach), the shell may be slightly softer, so you might want to add an extra 1/2 teaspoon of gelatin. I also recommend straining any puree to remove seeds or fibers that could affect the smoothness of the shell. Each fruit will give the bombs a different personality — mango feels tropical and sunny, blackberry feels deep and mysterious, and passion fruit feels bright and sophisticated.
How do I prevent the mirror glaze from dripping off the bottom of the bombs?
A little drip at the base is actually part of the charm of a mirror drip shell — it creates that elegant, organic look that makes the bombs feel handcrafted. However, if you want to minimize dripping, there are a few tricks. First, make sure your glaze is at the correct temperature (90–95°F) and has the right consistency — it should be thick enough to coat the back of a spoon but thin enough to flow smoothly. If it’s too thin, let it cool and thicken slightly. Second, pour the glaze in a steady stream starting from the top center of each bomb, letting it cascade evenly over the sides. Don’t pour too much at once — a controlled pour gives you more precision. Third, place the wire rack close to the serving plate so the drips are short. If you find the drips are too long, you can trim them with a small scissors once the glaze has set for about 30 seconds.
What silicone mold size works best for these cream bombs?
I recommend using half-sphere silicone molds that are approximately 3 inches in diameter and about 1.5 inches deep. This size yields a single-serving bomb that’s substantial enough to be satisfying without being overwhelming. The 3-inch size also works perfectly with the amount of mirror glaze you’ll make — you’ll have just enough to coat 6 bombs with a thin, even layer. If you use larger molds (4 inches or more), you may need to increase the glaze recipe by half to ensure full coverage. For smaller molds (2 inches), you’ll get more servings but the assembly will be more fiddly. Whatever size you choose, make sure your silicone molds are flexible and non-stick — cheap, stiff molds can tear the delicate raspberry shell when you try to unmold them. I buy my molds from a baking supply shop in NYC’s Chelsea Market, but high-quality silicone molds are widely available online.
Share Your Version!
There’s something truly magical about watching a dessert come together in your own kitchen — especially one as showstopping as these rose gold raspberry cream bombs. I’ve spent years perfecting this recipe, and every time I make it, I’m reminded of why I fell in love with pastry: the way a few simple ingredients can transform into something that looks and tastes like pure celebration. Now it’s your turn to bring that magic to your table. I genuinely want to hear how your bombs turn out — whether they come out looking like they belong in a Parisian pâtisserie window or whether you learn something new along the way.
If you make these rose gold raspberry cream bombs, please leave a star rating and a comment below telling me how it went. What did you love? What did you learn? Did you try one of the variations, or create your own twist? I read every single comment, and your feedback helps me create better recipes for this community. You can also tag @leosfoods on Instagram or Pinterest when you share your creation — I love scrolling through your photos and seeing the beautiful things you’re making. And if you have a question that I didn’t answer in the FAQ above, drop it in the comments and I’ll get back to you within 24 hours. From my NYC kitchen to yours — I hope this recipe brings as much warmth to your table as it does to mine. — Stella 🧡
Love This Recipe? Save It to Pinterest!
If you enjoyed this Rose Gold Raspberry Cream Bombs with Mirror Drip Shell recipe, don’t let it get lost in your browser tabs! 😄 Pin it now so you can find it again anytime — and explore hundreds more tried-and-tested recipes waiting for you on my Pinterest boards.
👉 Follow Stella on Pinterest @stellarecipeblog
📌 Pin this recipe · 🔁 Re-pin your favorites · 💬 Tag me when you make it — I love seeing your creations!
⭐️ Made this recipe? I’d love to hear from you!
Leave a star rating below, share a photo on Instagram and tag @leosfoods, or pin this recipe to your Pinterest board. Your support helps me keep creating delicious recipes for this community!
💬 Question for you: What celebration are you planning to make these rose gold raspberry cream bombs for? Tell me in the comments — I’d love to know!
“`
Print
Rose Gold Raspberry Cream Bombs with Mirror Drip Shell
Elegant raspberry cream bombs with a rose gold mirror glaze, perfect for special occasions.
- Yield: 6 1x
Ingredients
- For the Raspberry Shells:
- 2 cups raspberry puree
- 1/2 cup coconut milk
- 1/3 cup granulated sugar
- 2 tsp gelatin powder
- 2 tbsp cold water
- 1 tsp lemon juice
- Pinch of salt
- For the Cream Filling:
- 1 cup mascarpone cheese
- 1/2 cup heavy whipping cream
- 3 tbsp powdered sugar
- 1 tsp vanilla extract
- For the Mirror Drip Shell:
- 1 cup white chocolate, finely chopped
- 1/2 cup sweetened condensed milk
- 1/4 cup water
- 1 tbsp gelatin powder
- 3 tbsp cold water
- 1 tsp vanilla extract
- A few drops pink food coloring
- 1/2 tsp edible gold luster dust
- For Garnish (optional):
- 2 tbsp freeze-dried raspberries, crushed
- 1 tbsp edible rose petals
- Edible gold flakes
Instructions
- Bloom gelatin in cold water for 5 minutes.
- Heat raspberry puree, coconut milk, sugar, salt, and lemon juice until warm and smooth. Remove from heat and stir in bloomed gelatin until fully dissolved.
- Pour a thin layer of the raspberry mixture into silicone molds, coating the sides evenly. Chill until partially set.
- Whip mascarpone, heavy cream, powdered sugar, and vanilla extract until light and fluffy.
- Fill the center of each shell with the cream filling, leaving a small border around the edges.
- Cover with remaining raspberry mixture and freeze for at least 4 hours until fully firm.
- For the mirror drip shell, bloom gelatin in cold water for 5 minutes.
- Heat sweetened condensed milk and water until steaming. Remove from heat and stir in gelatin until dissolved.
- Pour over white chocolate and mix until smooth. Add vanilla extract, pink food coloring, and edible gold luster dust until a rose gold sheen forms.
- Allow glaze to cool until glossy but pourable.
- Unmold frozen bombs and place on a wire rack. Pour mirror glaze evenly over each bomb, allowing it to drip naturally.
- Let excess set before transferring to serving plates.
- Finish with crushed freeze-dried raspberries, rose petals, and edible gold flakes.
- Serve chilled.
Nutrition
- Calories: 420
- Sugar: 33g
- Fat: 28g
- Carbohydrates: 39g
- Protein: 6g
Tried This Recipe? Leave a Comment!
Did you make this recipe? I’d love to hear how it turned out! Please leave a comment and a rating below. Your feedback helps other home cooks and supports cheerychop.com!
For more delicious inspiration, follow me on Pinterest!