Diamond Raspberry Cheesecake Bombs with Crystal Glaze
“`html
Table of Contents
Diamond Raspberry Cheesecake Bombs with Crystal Glaze – A Show-Stopping Dessert That Shines
I still remember the first time I saw a dessert that looked like a jewel — it was in a tiny patisserie window in the Marais district of Paris, and the pastry chef had coated a dome-shaped cheesecake in a glaze so luminous it caught the afternoon light like a gemstone. I stood there for a full five minutes, utterly transfixed. That moment planted a seed that would bloom decades later, right here in my New York City kitchen, as I developed my own version of these diamond raspberry cheesecake bombs with crystal glaze. This is not just another raspberry cheesecake bombs recipe — it is a dessert that marries my French pastry training with the bold, berry-forward flavors I grew up loving in my mother’s Moroccan kitchen. The combination of a buttery graham cracker base, a silky raspberry cream cheese filling, and a glossy, mirror-like crystal glaze makes these little bombs truly unforgettable.
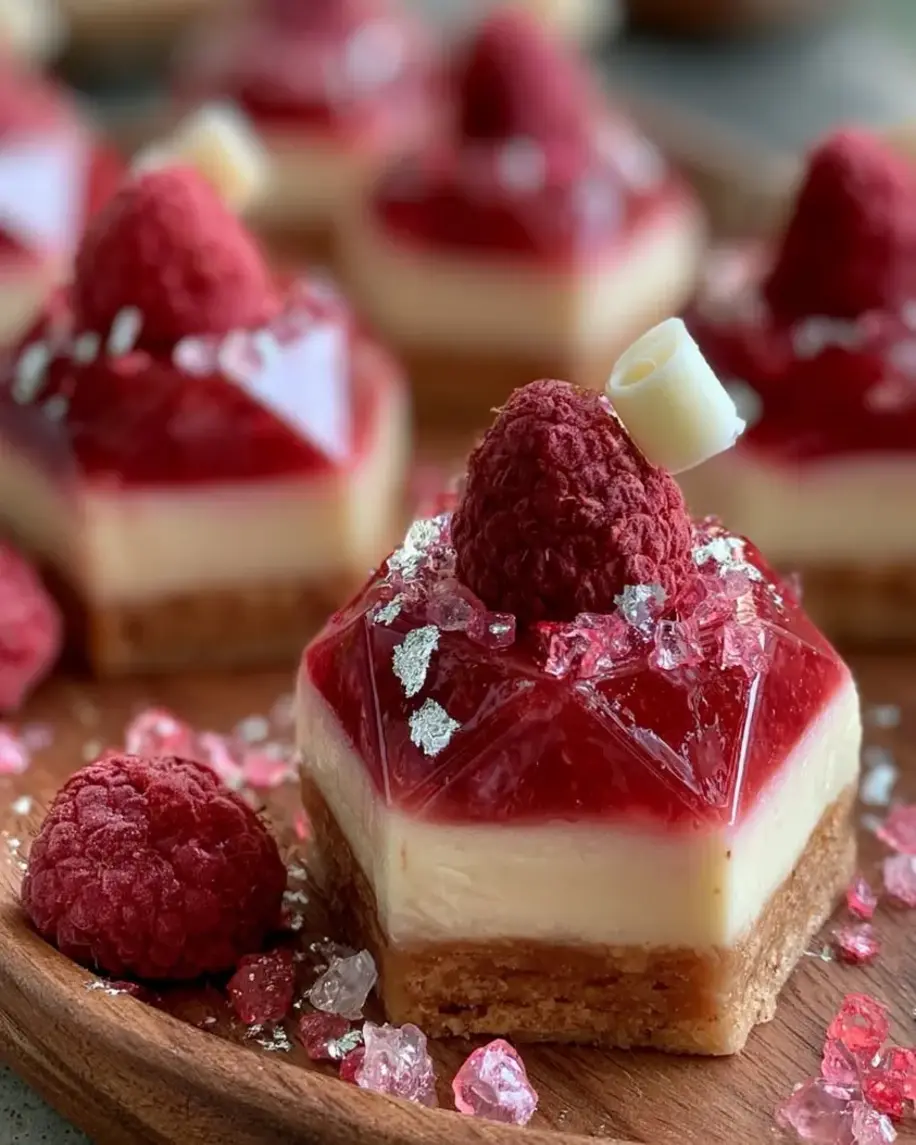
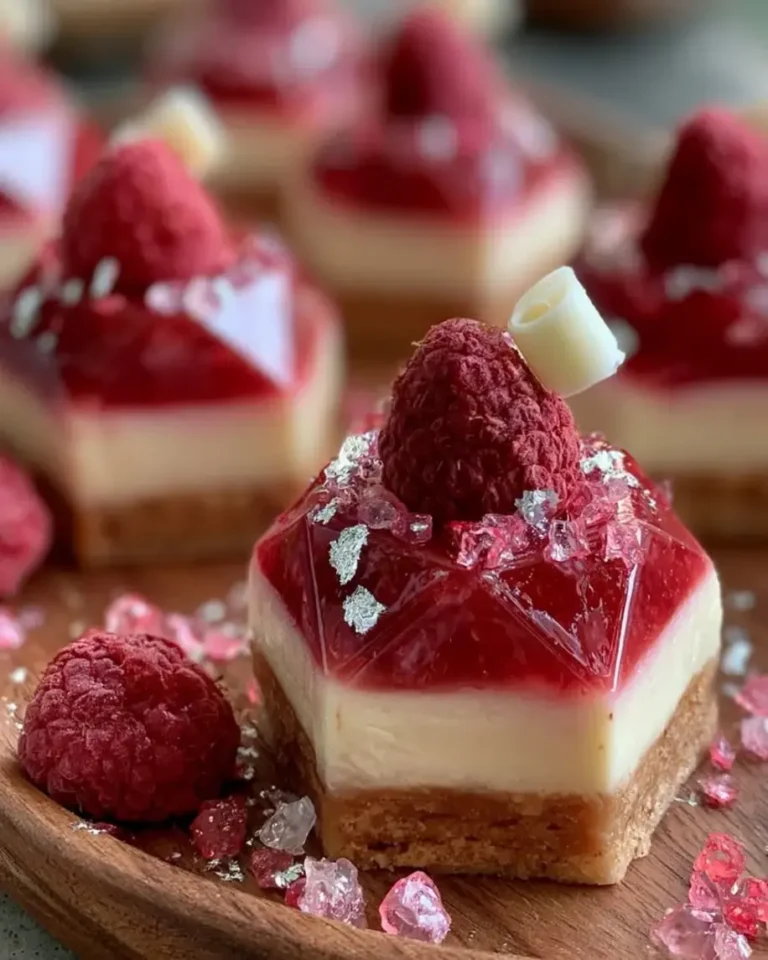
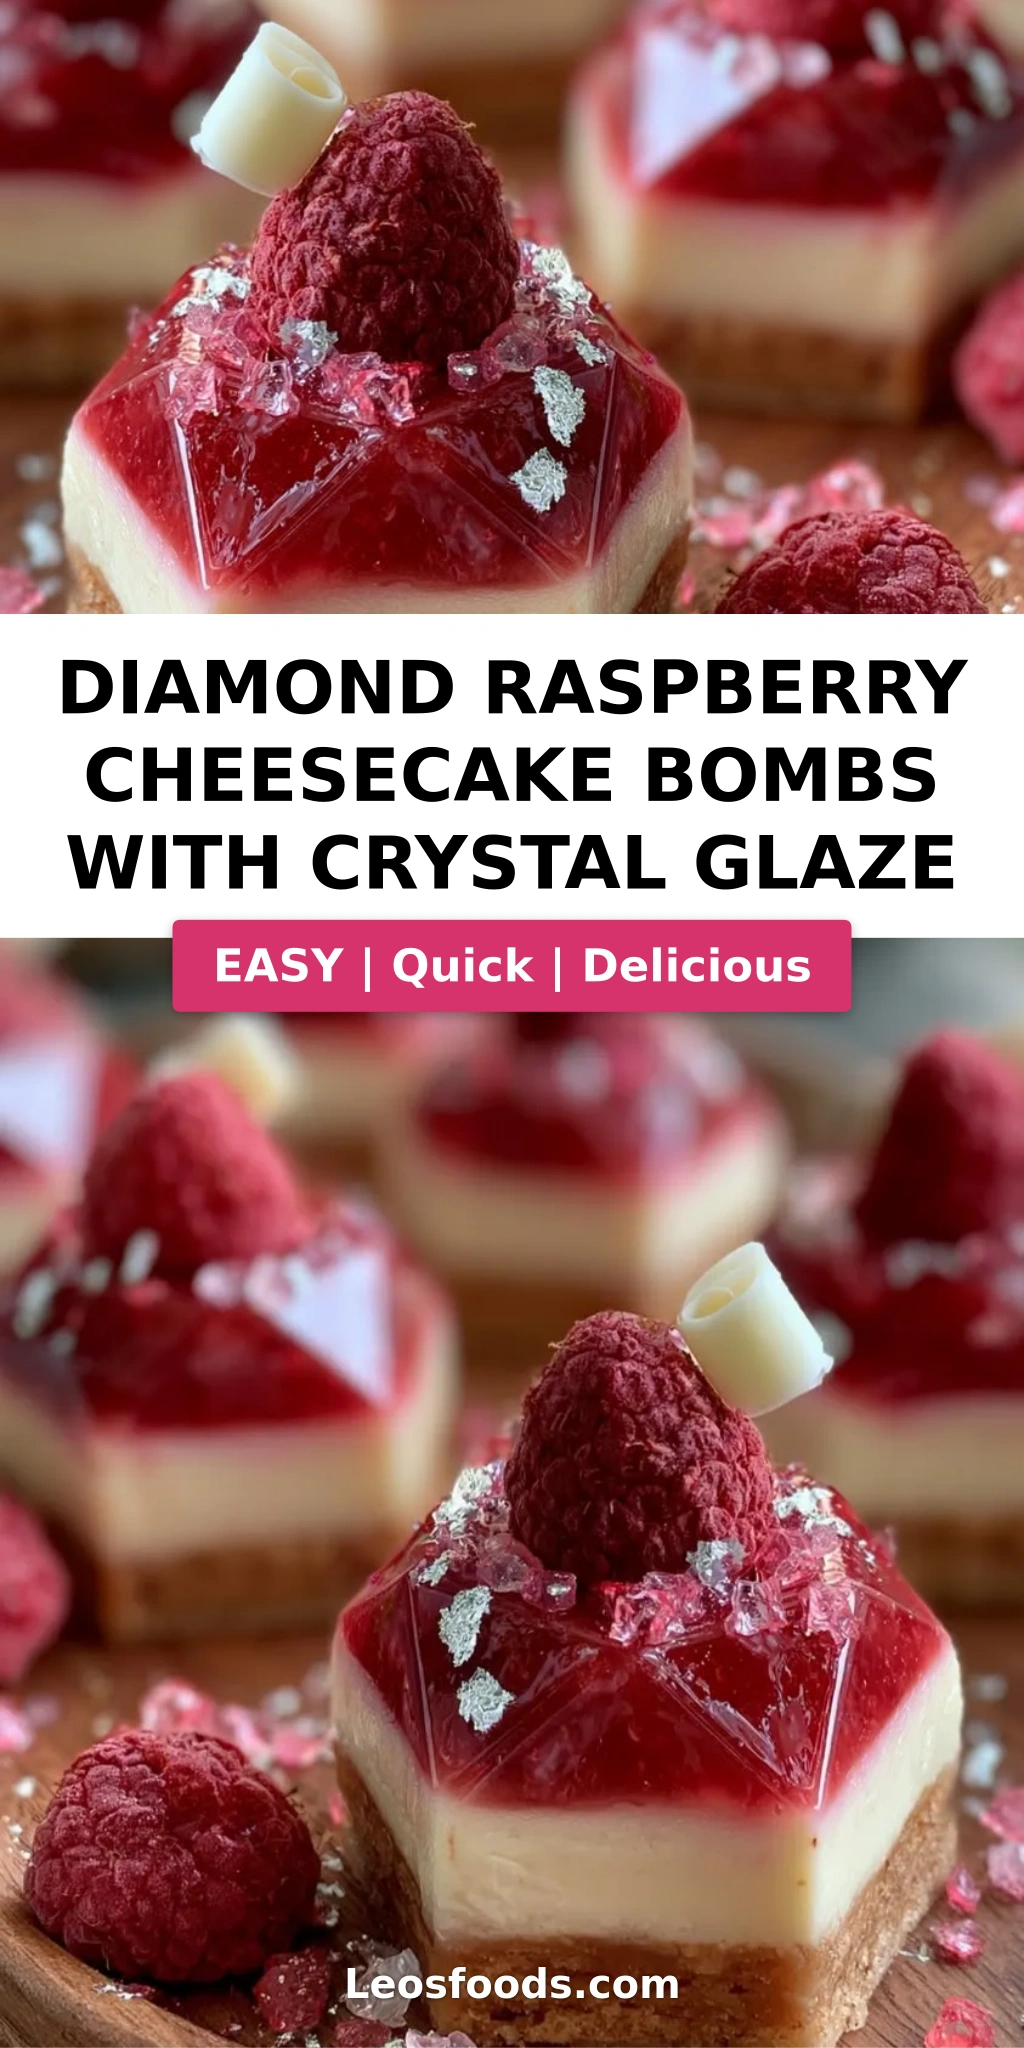
When you bite into one of these diamond raspberry cheesecake bombs, the first thing you notice is the crack of the crystal glaze — thin, delicate, and shiny as stained glass. Then comes the cream cheese filling: light, airy, and laced with tart raspberry puree that cuts through the richness like a bright note in a symphony. The graham cracker base adds a whisper of cinnamon and a sandy, buttery crunch that anchors each bite. The edible pearl luster dust in the glaze catches the light from every angle, giving each bomb the appearance of a faceted jewel. It is the kind of dessert that makes people stop mid-conversation and just stare — and then they reach for another one.
What sets my version apart from other raspberry cream cheese bombs you will find online is the technique. I trained in classic French pastry in Paris, and I bring that precision to every step — from the way I bloom the gelatin for a perfectly stable mousse, to the temperature control required for a crystal glaze that stays glossy for hours. I have tested this recipe a dozen times to eliminate the common pitfalls: a grainy glaze, a weepy cheesecake center, a base that crumbles apart. In this post, I will walk you through every detail so you can recreate these diamond raspberry cheesecake bombs at home with confidence. 💡 Stella’s Pro Tip: The secret to that mirror-like finish is letting the glaze cool to exactly 95°F before pouring — too hot and it runs off, too cool and it sets before you can coat the bomb evenly.
Why This Diamond Raspberry Cheesecake Bombs Recipe Is the Best
The Flavor Secret: I use a combination of cream cheese and mascarpone for the filling — a trick I learned from a pastry chef in Lyon. The mascarpone adds a velvety richness without making the mixture too dense, while the cream cheese provides that classic tang. The raspberry puree is reduced slightly to concentrate its flavor, so you get a bold fruit presence in every bite. This is not a timid dessert — it is a celebration of raspberries in their most glamorous form.
Perfected Texture: The texture of a cheesecake bomb lives or dies by its gelatin ratio. Too much and you get a rubbery, unappetizing chew. Too little and the bombs won’t hold their shape when unmolded. I have calibrated the gelatin in this recipe to give you a filling that is firm enough to unmold cleanly but still melts on the tongue like a cloud. The crystal glaze, meanwhile, is thin enough to drip elegantly but sets with enough structure to stay intact when you cut into it.
Foolproof & Fast: Despite the elegant result, this recipe is surprisingly approachable for a home baker. The active prep time is only about 30 minutes, and the freezer does most of the heavy lifting. You do not need a stand mixer — a hand mixer and a few bowls are perfectly sufficient. I have designed the steps to be forgiving: if your glaze thickens too much while you are working, a gentle rewarm in a double bath brings it right back. This diamond raspberry cheesecake bombs recipe is one of the most popular on my blog because it delivers a professional-level result without requiring a pastry degree.
Raspberry Cheesecake Bombs Recipe Ingredients
I source most of my ingredients from the Union Square Greenmarket in Manhattan and a small Italian grocery in Brooklyn that carries excellent mascarpone. There is something grounding about selecting fresh raspberries in the summer market and imagining the same fruit growing wild in the Atlas Mountains of Morocco. For this recipe, quality matters — especially the cream cheese and the white chocolate for the glaze. Here is everything you will need.
Ingredients List
- For the Raspberry Cheesecake Bombs: 12 oz cream cheese, softened
- 1/2 cup mascarpone cheese
- 1/2 cup heavy cream
- 1 cup raspberry puree (from fresh or frozen raspberries)
- 1/3 cup granulated sugar
- 1 tsp vanilla extract
- 2 tsp gelatin powder
- 2 tbsp cold water (for blooming gelatin)
- 1 tbsp lemon juice
- Pinch of salt
- For the Biscuit Base: 1 cup graham cracker crumbs
- 3 tbsp melted butter
- 1 tbsp granulated sugar
- 1/2 tsp cinnamon
- For the Crystal Glaze: 1 cup white chocolate, finely chopped
- 1/2 cup sweetened condensed milk
- 1/4 cup water
- 1 tbsp gelatin powder
- 3 tbsp cold water (for blooming)
- 2 tbsp raspberry puree
- 1/2 tsp edible pearl luster dust
- A few drops pink food coloring
- For Garnish (optional): 2 tbsp crushed freeze-dried raspberries
- 1 tbsp white chocolate curls
- Edible silver flakes
Ingredient Spotlight
Cream cheese is the backbone of this raspberry cream cheese bombs recipe. I recommend using full-fat block cream cheese — not the spreadable kind in a tub, which contains too much water and can make the filling loose. Philadelphia brand is reliable, but any full-fat block cream cheese will work. Let it come to room temperature for about an hour before you start; cold cream cheese will leave lumps in your filling that are nearly impossible to beat out.
Mascarpone adds a luxurious silkiness that cream cheese alone cannot achieve. It is an Italian cream cheese with a higher fat content and a delicate, slightly sweet flavor. I buy mine from a dairy in Vermont that ships to NYC markets, but any good-quality mascarpone from the supermarket works. If you cannot find it, you can substitute an equal amount of full-fat cream cheese mixed with 1 tablespoon of heavy cream — the texture will be slightly less velvety but still delicious.
Edible pearl luster dust is what gives the crystal glaze its diamond-like shimmer. It is available at most baking supply stores and online. Do not skip it — it is the ingredient that transforms the glaze from a simple pink coating into something that truly sparkles. A little goes a long way; just 1/2 teaspoon is enough for the entire batch of glaze. Make sure you buy food-grade luster dust, not craft glitter, which is not safe to eat.
| Original Ingredient | Best Substitution | Flavor / Texture Impact |
|---|---|---|
| Cream cheese | Full-fat Greek yogurt + 2 tbsp cornstarch | Less rich, tangier, slightly looser texture |
| Mascarpone | Cream cheese + 1 tbsp heavy cream | Less velvety, still rich, slightly tangier |
| White chocolate | White candy melts (no cocoa butter) | Less creamy, more sugary, similar gloss |
| Raspberry puree | Strawberry puree or passion fruit puree | Different fruit profile, adjust sugar to taste |
| Edible pearl luster dust | Superfine edible glitter (silver or pink) | More sparkle, less mirror finish |
How to Make Diamond Raspberry Cheesecake Bombs — Step-by-Step
I have broken down the process into clear, manageable steps. Read through each one before you begin — this is a recipe where a little planning goes a long way. Trust the process, and do not rush the freezing time; it is the key to clean unmolding and a perfect glaze application.
Step 1: Bloom the Gelatin for the Filling
In a small bowl, sprinkle 2 teaspoons of gelatin powder over 2 tablespoons of cold water. Do not stir — just let it sit for 5 minutes. The gelatin will absorb the water and form a firm, jiggly mass. This process, called blooming, ensures the gelatin dissolves evenly into the cheesecake mixture without creating lumps. Set it aside while you prepare the other components.
💡 Stella’s Pro Tip: Use cold water — never warm or hot — for blooming. Hot water can kill the gelatin’s setting power, and your cheesecake bombs will not hold their shape.
Step 2: Make the Biscuit Base
In a mixing bowl, combine 1 cup of graham cracker crumbs, 3 tablespoons of melted butter, 1 tablespoon of granulated sugar, and 1/2 teaspoon of cinnamon. Stir with a fork until every crumb is moistened and the mixture looks like wet sand. Press about 1 tablespoon of the mixture firmly into the bottom of each cavity of a diamond-shaped silicone mold. Use the back of a small spoon or your thumb to compact it evenly. This base will freeze solid and provide a sturdy anchor for the cheesecake layer above.
⚠️ Common Mistake to Avoid: Do not press the crumbs too thin — if the base layer is less than 1/4 inch thick, it may crumble when you unmold the bombs. Aim for an even, compact layer.
Step 3: Make the Cheesecake Filling
In a large bowl, beat 12 oz of softened cream cheese, 1/2 cup of mascarpone, 1/2 cup of heavy cream, 1 cup of raspberry puree, 1/3 cup of sugar, 1 teaspoon of vanilla extract, 1 tablespoon of lemon juice, and a pinch of salt. Use a hand mixer on medium speed and beat for 2–3 minutes until the mixture is completely smooth, pale pink, and fluffy. Stop to scrape down the sides and bottom of the bowl once or twice to ensure everything is incorporated.
💡 Stella’s Pro Tip: If your raspberry puree is very cold, let it sit at room temperature for 10 minutes before adding it. A cold puree can seize the cream cheese and create a grainy texture.
Step 4: Dissolve the Gelatin into the Filling
Scoop about 1/4 cup of the cheesecake mixture into a small microwave-safe bowl. Add the bloomed gelatin and microwave for 10–15 seconds until warm but not hot. Whisk until the gelatin is completely dissolved and smooth. Pour this warm mixture back into the main bowl of cheesecake filling and beat on low speed for 30 seconds until fully incorporated. The gelatin must be evenly distributed for the bombs to set properly.
⚠️ Common Mistake to Avoid: Do not microwave the gelatin directly — it can overheat and lose its setting ability. Always warm it inside a small portion of the cheesecake mixture.
Step 5: Fill the Molds
Spoon or pipe the cheesecake mixture into the diamond-shaped silicone molds on top of the biscuit base. Fill each cavity to the top and use an offset spatula or the back of a knife to smooth the surface flat. Tap the mold gently on the counter a few times to release any air bubbles trapped in the filling.
💡 Stella’s Pro Tip: For the smoothest tops, use a piping bag with a large round tip to fill the molds. It minimizes air pockets and gives you more control over the amount in each cavity.
Step 6: Freeze Until Firm
Place the filled mold on a flat tray and transfer it to the freezer. Freeze for at least 4 hours — overnight is even better. The bombs must be completely frozen solid before unmolding, or they will lose their shape. This is the most important waiting period in the entire recipe, so do not rush it.
⚠️ Common Mistake to Avoid: If you try to unmold the bombs after only 2 hours, the center will still be soft and the bombs will collapse or crack. Give them the full 4 hours minimum.
Step 7: Prepare the Crystal Glaze
While the bombs are freezing, make the glaze. First, bloom 1 tablespoon of gelatin in 3 tablespoons of cold water for 5 minutes. In a small saucepan, heat 1/2 cup of sweetened condensed milk and 1/4 cup of water until steaming — do not let it boil. Remove from heat and stir in the bloomed gelatin until completely dissolved. Pour this hot liquid over 1 cup of finely chopped white chocolate in a bowl. Let it sit for 1 minute, then whisk until smooth and glossy. Add 2 tablespoons of raspberry puree, 1/2 teaspoon of edible pearl luster dust, and a few drops of pink food coloring. Whisk until the glaze is a uniform, shimmering pink.
💡 Stella’s Pro Tip: Chop the white chocolate very finely — the smaller the pieces, the quicker and more evenly they melt. If the glaze looks streaky after whisking, use an immersion blender for 10 seconds to smooth it out.
Step 8: Cool the Glaze to the Right Temperature
Let the glaze cool at room temperature, stirring occasionally, until it reaches about 95°F. It should be slightly thickened but still pourable — think the consistency of warm honey. If the glaze gets too thick, you can rewarm it gently over a double boiler for a few seconds. Test the consistency by lifting the whisk: the glaze should fall in a ribbon that disappears back into the surface within 3 seconds.
⚠️ Common Mistake to Avoid: If the glaze is too hot (above 105°F), it will melt the frozen cheesecake bombs on contact and create a messy, uneven coating. Always check the temperature before pouring.
Step 9: Unmold and Glaze
Remove the cheesecake bombs from the freezer. Gently flex the silicone mold to loosen each bomb and pop them out. Place the frozen bombs on a wire rack set over a baking sheet to catch drips. Working quickly, pour the crystal glaze evenly over each bomb, allowing the excess to drip away. Use a small offset spatula to guide the glaze down the sides if needed. The glaze will set in about 20–30 seconds on contact with the frozen surface.
💡 Stella’s Pro Tip: Work with one bomb at a time, and keep the remaining bombs in the freezer until you are ready to glaze them. This prevents them from thawing and sweating, which can cause the glaze to slide off.
Step 10: Chill and Garnish
Transfer the glazed bombs to a serving plate and refrigerate for 15 minutes to allow the glaze to set completely and the cheesecake filling to soften to a mousse-like consistency. Just before serving, garnish with crushed freeze-dried raspberries, white chocolate curls, and a sprinkle of edible silver flakes. The contrast of the pink glaze, white chocolate, and silver sparkle is absolutely stunning.
⚠️ Common Mistake to Avoid: Do not skip the 15-minute refrigeration step. If you serve the bombs straight from the glazing step, the filling will be too hard and the glaze may crack when you bite into it.
| Step | Action | Duration | Key Visual Cue |
|---|---|---|---|
| 1 | Bloom gelatin for filling | 5 mins | Gelatin becomes firm, jiggly mass |
| 2 | Make biscuit base | 5 mins | Mixture resembles wet sand |
| 3 | Make cheesecake filling | 3 mins | Smooth, pale pink, fluffy |
| 4 | Dissolve gelatin into filling | 1 min | No visible gelatin streaks |
| 5 | Fill molds | 5 mins | Smooth, level tops |
| 6 | Freeze | 4+ hours | Rock solid, no give when pressed |
| 7 | Prepare crystal glaze | 10 mins | Smooth, glossy, pink |
| 8 | Cool glaze | 10–15 mins | 95°F, ribbons off whisk |
| 9 | Unmold and glaze | 5 mins | Even coating, shiny surface |
| 10 | Chill and garnish | 15 mins | Glaze set, filling softened |
Serving & Presentation
These diamond raspberry cheesecake bombs are designed to be the centerpiece of any dessert table. I like to serve them on a mirrored acrylic platter or a slate board that reflects the glaze’s sparkle. Arrange them in a neat row or a circular pattern, and scatter a few extra freeze-dried raspberries and silver flakes around the plate for drama. For a dinner party, I sometimes place each bomb on a tiny pool of raspberry coulis or a dollop of whipped cream stabilized with a touch of mascarpone.
In my NYC apartment, I have served these at birthday dinners, holiday gatherings, and even as a showstopping finale to a Moroccan-themed dinner party — paired with mint tea, of course. The combination of the cool, creamy cheesecake and the sweet-tart raspberry flavor is universally beloved. If you are serving a crowd, you can cut each bomb in half to show off the cross-section: the biscuit base, the creamy pink filling, and the glossy glaze create a beautiful layered effect.
For a truly special presentation, dust the serving plate with a tiny pinch of edible pearl luster dust before placing the bombs on it. The sparkle will catch the light and make the whole dessert look like it belongs in a jewelry case. This is a recipe that rewards attention to detail — every element contributes to the final, breathtaking result.
| Pairing Type | Suggestions | Why It Works |
|---|---|---|
| Side Dish | Fresh berries, raspberry coulis, mint leaves | Adds freshness and color contrast |
| Sauce / Dip | White chocolate ganache, salted caramel | Enhances richness with a salty-sweet balance |
| Beverage | Sparkling rosé, Moroccan mint tea, espresso | Acidity cuts richness; tea adds aromatic warmth |
| Garnish | Freeze-dried raspberries, white chocolate curls, silver flakes | Adds texture, visual sparkle, and flavor pop |
Make-Ahead, Storage & Reheating
One of the best things about this recipe is how well it fits into a busy schedule. I often make the cheesecake bombs and freeze them on a Friday evening, then glaze them on Saturday afternoon before a dinner party. The bombs themselves can be stored frozen for up to a month, which makes them a fantastic dessert to have on standby for unexpected guests or a last-minute celebration.
| Method | Container | Duration | Reheating Tip |
|---|---|---|---|
| Refrigerator | Airtight container, single layer | Up to 3 days | Serve chilled — no reheating needed |
| Freezer | Freezer-safe container, parchment between layers | Up to 1 month | Thaw in fridge for 30 mins before serving |
| Make-Ahead | In mold, covered with plastic wrap | Up to 1 week in freezer | Glaze on the day of serving for best shine |
If you have leftovers (which is rare in my kitchen!), store them in an airtight container in the refrigerator for up to three days. The glaze may lose some of its mirror shine over time, but the flavor remains delicious. For the best texture, let the bombs sit at room temperature for about 10 minutes before serving — this takes the chill off the filling and allows the raspberry flavor to come forward. I do not recommend microwaving these bombs, as the glaze will melt and the texture of the cheesecake will become rubbery.
One more thing from my experience: if you are making these for a special occasion, I highly recommend glazing them no more than 6 hours before serving. The glaze is at its most brilliant and mirror-like within the first few hours after application. After that, it will still look beautiful, but the initial wow factor of that ultra-glossy, diamond-like shine is at its peak right after the glaze sets.
Variations & Easy Swaps
| Variation | Key Change | Best For | Difficulty Impact |
|---|---|---|---|
| Rose & Pistachio | Add 1 tsp rose water to filling and glaze; top with crushed pistachios | Middle Eastern flavor lovers | No change |
| Gluten-Free | Use gluten-free graham crackers or crushed almonds | Gluten-free guests | No change |
| Chocolate Raspberry | Replace white chocolate with dark chocolate in glaze; add 2 tbsp cocoa powder to base | Chocolate lovers | Slightly harder (tempering) |
Rose & Pistachio Variation
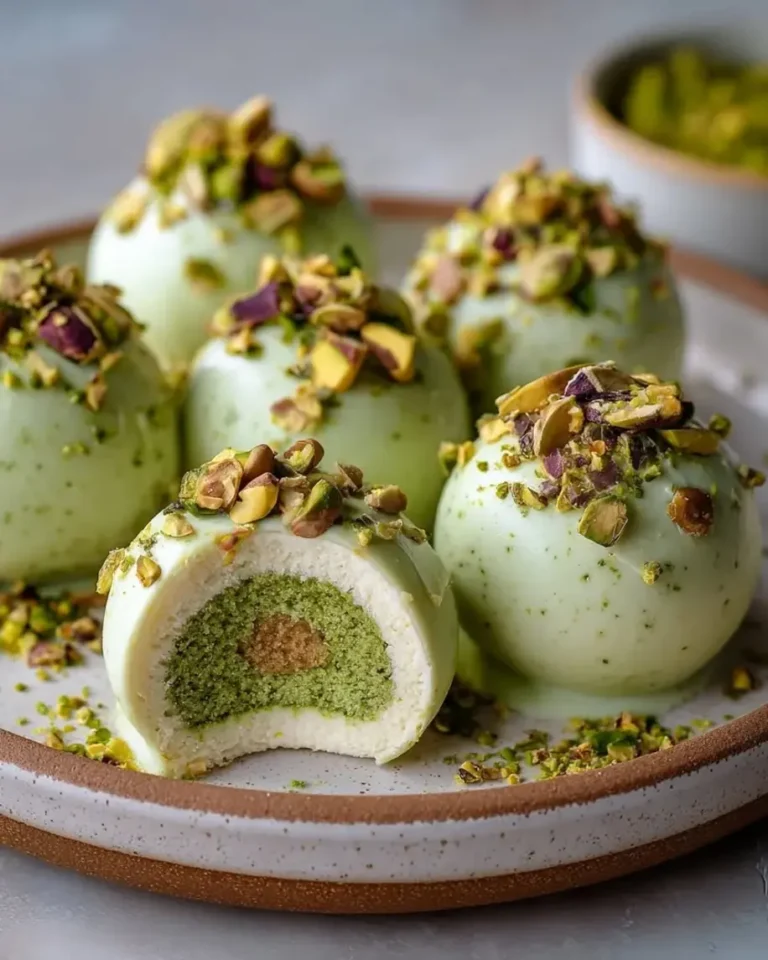
This variation is a nod to my Moroccan heritage. Add 1 teaspoon of rose water to the cheesecake filling and another 1/2 teaspoon to the glaze. Replace the graham cracker base with crushed pistachio cookies or simply add 1/4 cup of finely ground pistachios to the graham cracker mixture. Garnish with chopped pistachios and dried rose petals instead of the raspberry garnish. The floral notes of rose pair beautifully with the tart raspberry, and the pistachios add a lovely green color contrast against the pink glaze. This version is always a hit when I serve it at gatherings with a Middle Eastern theme.
Gluten-Free / Dairy-Free Variation
To make this recipe gluten-free, simply substitute the graham cracker crumbs with an equal amount of gluten-free graham crackers or crushed almond flour cookies. For a dairy-free version, you will need to make more substantial changes: use dairy-free cream cheese (such as a cashew-based brand), a vegan mascarpone substitute, and coconut cream in place of heavy cream. The white chocolate in the glaze can be replaced with a dairy-free white chocolate alternative. Note that the texture will be slightly less creamy, and the glaze may be a bit less glossy, but the flavor will still be excellent. I have tested this version for a friend with dairy intolerance, and it was well-received.
Seasonal Berry Twist
When I visit the Union Square Greenmarket in the summer, I often swap the raspberry puree for an equal amount of strawberry puree or a mix of blackberry and blueberry puree. The technique remains exactly the same, but the flavor profile changes with the season. In the fall, I sometimes use roasted pear puree with a pinch of cardamom and ginger — a combination that reminds me of the pear tarts I learned to make in Paris. The beauty of this recipe is its adaptability: once you master the base technique, you can experiment with any fruit puree that catches your fancy.
What is the best way to make a crystal glaze for raspberry cheesecake bombs that stays shiny?
The key to a crystal glaze that stays glossy for hours is temperature control and the right ratio of gelatin to liquid. After preparing the glaze with white chocolate, sweetened condensed milk, gelatin, and raspberry puree, let it cool to exactly 95°F before pouring. If it is too hot, the glaze will be thin and run off the frozen bombs, losing its mirror finish. If it is too cool, it will set in thick, uneven streaks. I also recommend adding edible pearl luster dust — it enhances the light-reflecting properties of the glaze and gives it that diamond-like shimmer. Apply the glaze to completely frozen bombs, and once coated, refrigerate them for 15 minutes to set the glaze fully. The glaze will remain shiny for at least 4–6 hours after application.
Can I use frozen raspberries instead of fresh for the cheesecake bomb filling?
Absolutely — frozen raspberries work beautifully in this recipe. In fact, I often use frozen raspberries when fresh ones are out of season, and I find their flavor is consistently good because they are frozen at peak ripeness. To make the raspberry puree, simply thaw the frozen berries, then blitz them in a blender or food processor and strain through a fine-mesh sieve to remove the seeds. If the puree seems watery after thawing, simmer it gently in a small saucepan for 5–8 minutes to reduce and concentrate the flavor. Let it cool completely before using. This slight reduction also helps prevent the filling from becoming too icy when frozen.
How long do diamond raspberry cheesecake bombs need to chill before serving?
After glazing, the cheesecake bombs need only 15 minutes in the refrigerator before they are ready to serve. This brief chill allows the crystal glaze to set completely and the cheesecake filling to soften from its frozen state to a mousse-like consistency. If you serve them straight from the freezer after glazing, the filling will be too hard and the glaze may crack when you bite into it. If you prefer a firmer texture, you can refrigerate them for up to 30 minutes, but I find the 15-minute mark gives the ideal balance — the filling is creamy and luscious, while the glaze remains perfectly glossy and intact. For best results, do not leave them at room temperature for more than 20 minutes before serving, as the glaze may begin to soften and lose its mirror finish.
What can I use as a substitute for cream cheese in the cheesecake bomb recipe?
If you need a substitute for cream cheese, the best option is full-fat Greek yogurt mixed with a little cornstarch to thicken it. For every 12 oz of cream cheese, use 1.5 cups of full-fat Greek yogurt blended with 2 tablespoons of cornstarch. This substitution will give you a tangy, creamy filling that is lighter than the original but still holds its shape well. Another option is a combination of silken tofu and a splash of lemon juice for acidity — blend until smooth and use in the same quantity. Keep in mind that tofu-based fillings will be less rich and may have a slightly softer set. I have tested both substitutions in my NYC kitchen, and while the texture is different, the flavor is still delightful. For the best results, stick with full-fat cream cheese if you can, as it provides the ideal balance of richness, tang, and stability.
Can I make these raspberry cheesecake bombs without gelatin?
Yes, you can substitute the gelatin with agar-agar, a plant-based alternative derived from seaweed. Use the same amount of agar-agar as gelatin (2 teaspoons for the filling and 1 tablespoon for the glaze), but the preparation method is different. Agar-agar must be brought to a full boil in liquid to activate its setting power — simply blooming it in cold water will not work. For the filling, dissolve the agar-agar in 1/4 cup of water, bring it to a boil, then whisk it into the cheesecake mixture. For the glaze, dissolve the agar-agar in the water and sweetened condensed milk mixture and bring it to a boil before pouring over the white chocolate. Note that agar-agar sets at room temperature and creates a firmer, slightly less creamy texture than gelatin. The glaze may also be slightly less glossy, but it will still be beautiful.
How do I get the crystal glaze to be completely smooth and mirror-like?
The secret to a mirror-like glaze is in the preparation and straining. After you whisk together the white chocolate, sweetened condensed milk, gelatin mixture, and raspberry puree, pour the glaze through a fine-mesh sieve into a clean bowl. This removes any small lumps of undissolved gelatin or chocolate that could mar the surface. Next, use an immersion blender for 10–15 seconds to emulsify the glaze fully — this step is crucial for breaking down any tiny air bubbles that would create a dimpled finish. Finally, let the glaze cool to 95°F while stirring occasionally. When you pour it over the frozen bombs, do it in one smooth motion, starting from the center and letting the glaze flow evenly over the sides. Do not go back to touch up drips, as this can create streaks. One continuous pour is the best way to achieve that flawless, mirror-like surface.
Can I use a different mold shape for these cheesecake bombs?
Absolutely — while diamond-shaped molds give these bombs their name and a jewel-like appearance, you can use any silicone mold you have on hand. Round dome molds, heart shapes, or even mini bundt molds will work beautifully. The key is to use a silicone mold that is flexible enough to release the frozen bombs easily. If you use a larger mold, you may need to adjust the freezing time — a larger volume will take longer to freeze solid. For smaller molds, reduce the freezing time slightly. No matter the shape, the technique remains the same: press the biscuit base into the bottom, fill with the cheesecake mixture, freeze until solid, unmold, and glaze. I have made these as round domes for a more classic look, and they were just as stunning.
How do I store leftover glazed cheesecake bombs?
Store leftover glazed cheesecake bombs in an airtight container in the refrigerator for up to three days. Place them in a single layer, or separate layers with parchment paper to prevent the glaze from sticking. The glaze will lose some of its mirror shine over time, but the flavor will remain delicious. If you need to store them longer, you can freeze the glazed bombs for up to one month. To freeze, place them on a baking sheet in the freezer for 1 hour until the glaze is hard, then transfer to a freezer-safe container with parchment between layers. When you are ready to serve, thaw them in the refrigerator for 2–3 hours. Note that freezing and thawing may cause the glaze to develop slight condensation, which can dull the shine slightly — but they will still be beautiful and delicious.
Can I make the raspberry puree ahead of time?
Yes, making the raspberry puree ahead of time is a great way to streamline the process. You can prepare the puree up to 3 days in advance and store it in an airtight container in the refrigerator. To make the puree, blend fresh or frozen raspberries until smooth, then strain through a fine-mesh sieve to remove the seeds. If you are using frozen raspberries, thaw them first and consider simmering the puree for 5–8 minutes to concentrate the flavor and reduce excess water. Let the puree cool completely before storing. If you are making it more than 3 days ahead, you can freeze the puree in an airtight container for up to 3 months. Just thaw it in the refrigerator overnight before using. Having the puree ready makes the day of preparation much smoother and faster.
Why did my crystal glaze turn out cloudy instead of clear and shiny?
A cloudy glaze is usually caused by one of three issues. First, the white chocolate may have overheated — if it gets too hot, the cocoa butter separates and creates a grainy, dull finish. Always use finely chopped white chocolate and pour the hot liquid over it, then whisk gently. Second, the gelatin may not have been fully dissolved — make sure the gelatin is completely bloomed and then stirred into the hot liquid until no granules remain. Third, air bubbles can create a cloudy appearance. After whisking the glaze, let it sit for 2–3 minutes to allow any bubbles to rise to the surface, then gently pop them with a toothpick or pass an immersion blender through the glaze to emulsify it. Straining the glaze through a fine-mesh sieve before using will also help eliminate any particles that could cause cloudiness.
Share Your Version!
I absolutely love hearing from you all — there is nothing that makes my day quite like seeing your photos of these diamond raspberry cheesecake bombs in your own kitchens. If you make this recipe, please leave a star rating and a comment below letting me know how it turned out. Did you try one of the variations? Did you invent your own twist? I read every single comment and I always respond.
Tag me in your photos on Instagram or Pinterest @leosfoods — I want to see your glossy, sparkly creations! And if you have a question about a specific step or ingredient, drop it in the comments. I am here to help you succeed in your kitchen, just like my mother and my Parisian mentors helped me. From my NYC kitchen to yours — I hope this recipe brings as much warmth to your table as it does to mine. — Stella 🧡
Love This Recipe? Save It to Pinterest!
If you enjoyed this Diamond Raspberry Cheesecake Bombs with Crystal Glaze recipe, don’t let it get lost in your browser tabs! 😄 Pin it now so you can find it again anytime — and explore hundreds more tried-and-tested recipes waiting for you on my Pinterest boards.
👉 Follow Stella on Pinterest @stellarecipeblog
📌 Pin this recipe · 🔁 Re-pin your favorites · 💬 Tag me when you make it — I love seeing your creations!
“`
Print
Diamond Raspberry Cheesecake Bombs with Crystal Glaze
Decadent raspberry cheesecake bombs with a graham cracker base, coated in a shimmering crystal glaze.
- Yield: 6 1x
Ingredients
- For the Raspberry Cheesecake Bombs:
- 12 oz cream cheese, softened
- 1/2 cup mascarpone cheese
- 1/2 cup heavy cream
- 1 cup raspberry puree
- 1/3 cup granulated sugar
- 1 tsp vanilla extract
- 2 tsp gelatin powder
- 2 tbsp cold water
- 1 tbsp lemon juice
- Pinch of salt
- For the Biscuit Base:
- 1 cup graham cracker crumbs
- 3 tbsp melted butter
- 1 tbsp granulated sugar
- 1/2 tsp cinnamon
- For the Crystal Glaze:
- 1 cup white chocolate, finely chopped
- 1/2 cup sweetened condensed milk
- 1/4 cup water
- 1 tbsp gelatin powder
- 3 tbsp cold water
- 2 tbsp raspberry puree
- 1/2 tsp edible pearl luster dust
- A few drops pink food coloring
- For Garnish (optional):
- 2 tbsp crushed freeze-dried raspberries
- 1 tbsp white chocolate curls
- Edible silver flakes
Instructions
- Bloom gelatin in cold water for 5 minutes.
- Mix graham cracker crumbs, melted butter, sugar, and cinnamon until evenly combined. Press into diamond-shaped silicone molds to create the base layer.
- Beat cream cheese, mascarpone cheese, heavy cream, raspberry puree, sugar, vanilla extract, lemon juice, and salt until smooth and creamy.
- Warm a small portion of the cheesecake mixture and dissolve the bloomed gelatin. Fold it back into the remaining mixture until fully incorporated.
- Fill the molds with the raspberry cheesecake mixture and smooth the tops.
- Freeze for at least 4 hours until completely firm.
- For the crystal glaze, bloom gelatin in cold water for 5 minutes.
- Heat sweetened condensed milk and water until steaming. Remove from heat and stir in gelatin until dissolved.
- Pour over white chocolate and whisk until smooth and glossy. Add raspberry puree, pearl luster dust, and pink food coloring until a crystal-like shine is achieved.
- Allow the glaze to cool until slightly thickened but still pourable.
- Unmold the frozen cheesecake bombs and place on a wire rack. Pour the crystal glaze evenly over each bomb, allowing excess glaze to drip away.
- Transfer to serving plates and refrigerate for 15 minutes.
- Finish with crushed freeze-dried raspberries, white chocolate curls, and edible silver flakes.
Nutrition
- Calories: 440
- Sugar: 33g
- Fat: 29g
- Carbohydrates: 40g
- Protein: 7g
Tried This Recipe? Leave a Comment!
Did you make this recipe? I’d love to hear how it turned out! Please leave a comment and a rating below. Your feedback helps other home cooks and supports cheerychop.com!
For more delicious inspiration, follow me on Pinterest!