Show-Stopping Pistachio Liquid Core Domes Recipe
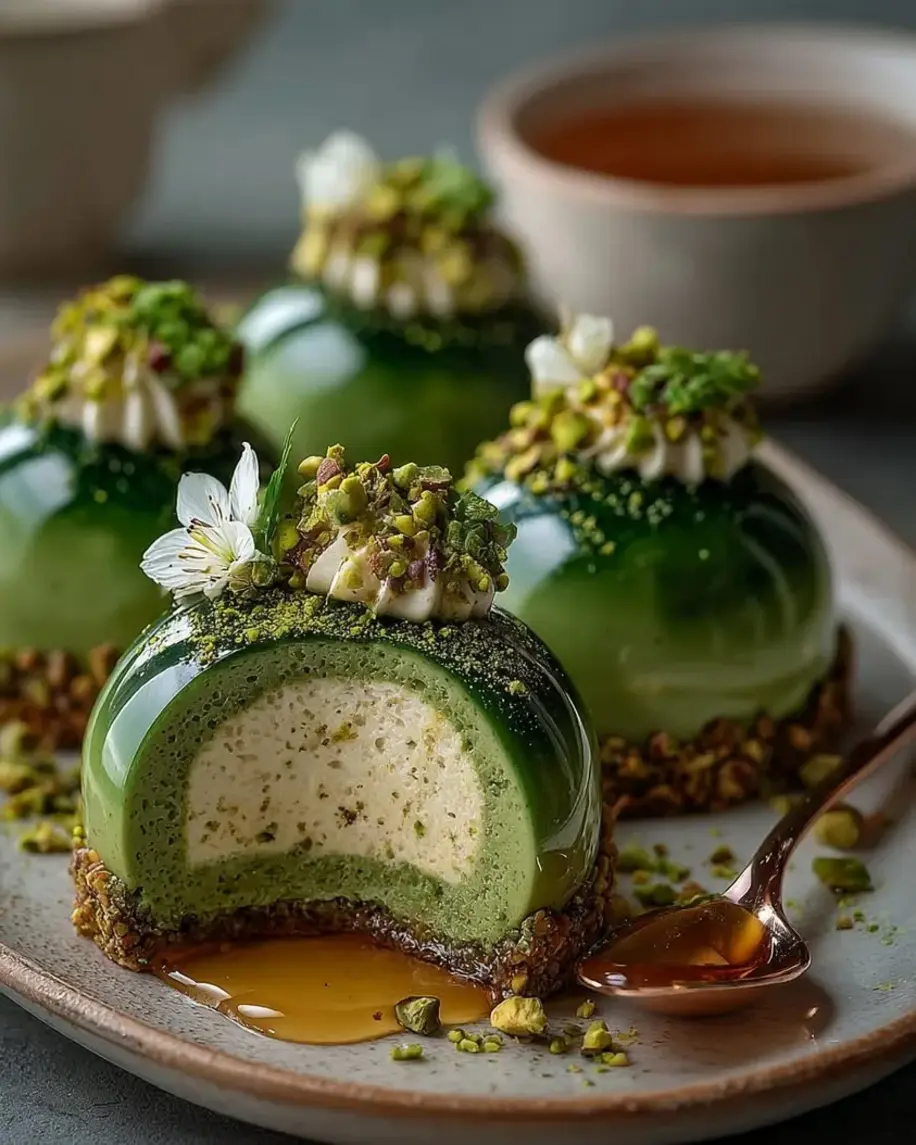
Table of Contents
Emerald Pistachio Liquid Core Domes – A Show-Stopping Dessert with a Surprise Center
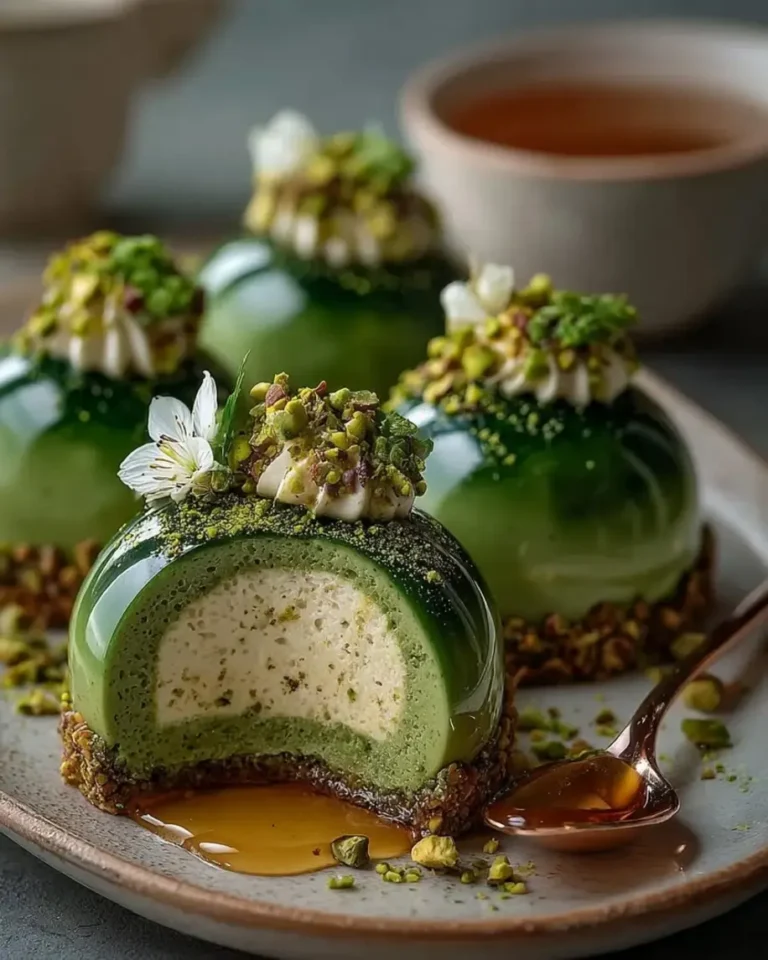
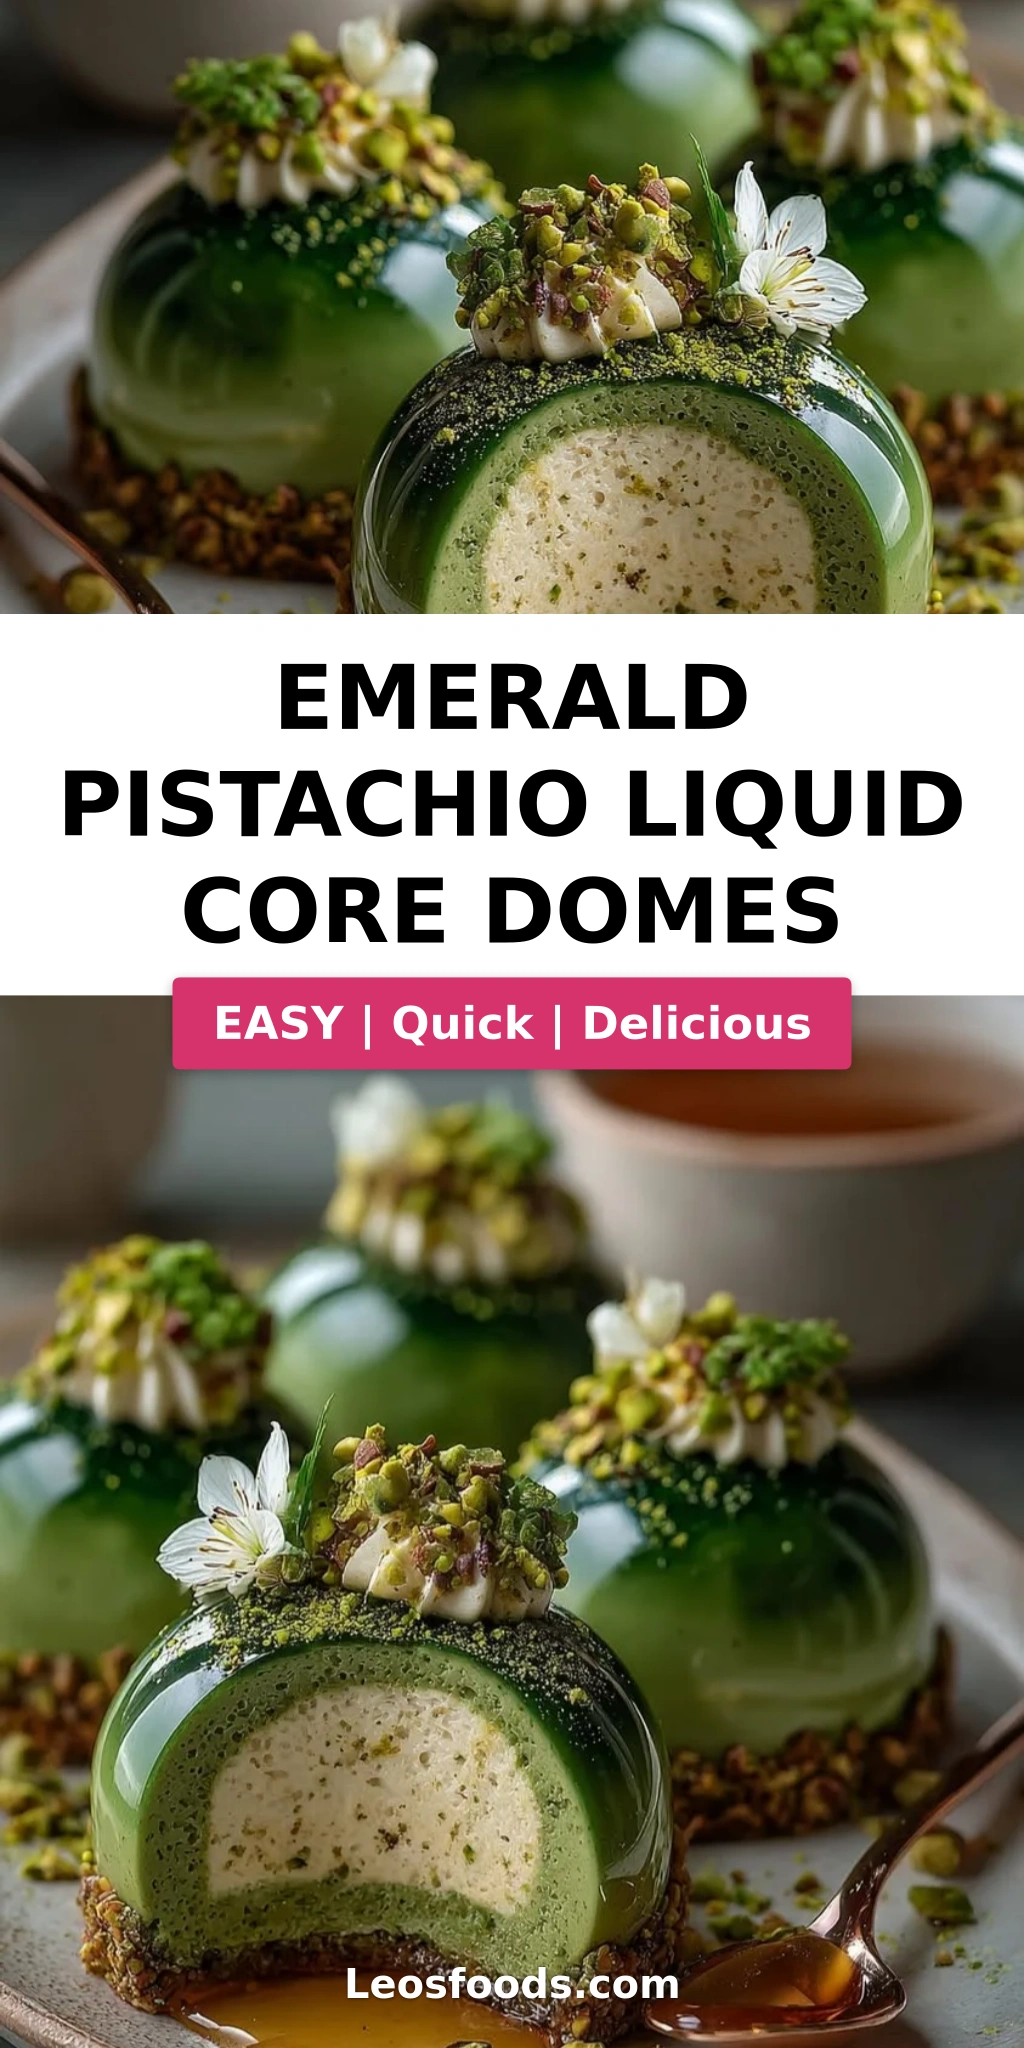
I still remember the first time I made a mirror glaze dome in Paris — I was a pastry student at Le Cordon Bleu, and my instructor, a stern but brilliant French chef, told me that a great dessert should tell a story before anyone takes a bite. This pistachio liquid core domes recipe is exactly that: a story of my Moroccan childhood where pistachios filled every holiday pastry, the French technique I fell in love with in Paris, and the bold, creative energy of my NYC kitchen today. The moment you cut into one of these Emerald Pistachio Domes, a silky pistachio liquid core spills out — and that surprise is pure magic.
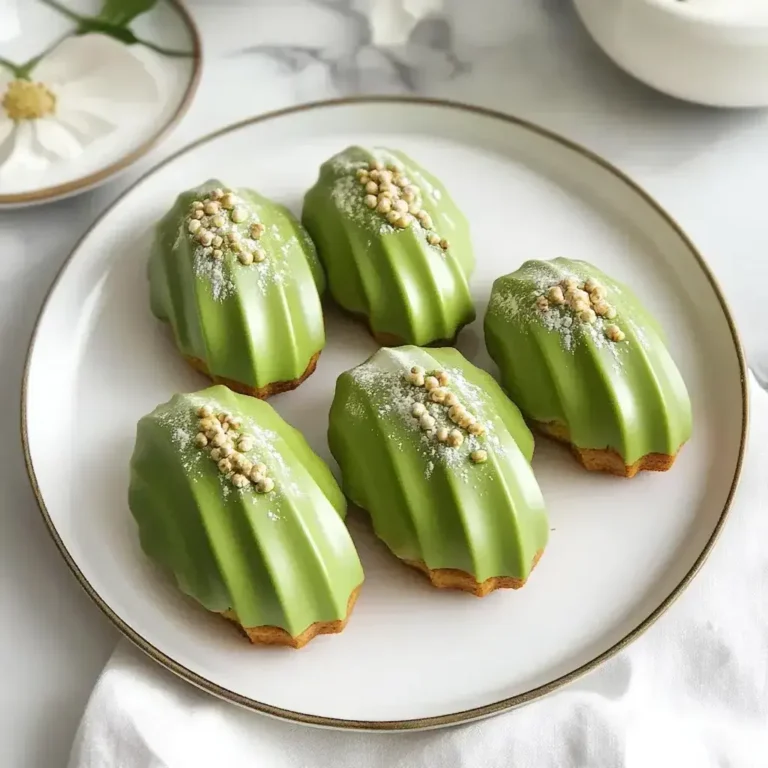
Imagine the richest pistachio mousse you’ve ever tasted — creamy, nutty, and light as air — encased in a glossy emerald mirror glaze that shimmers like a jewel. Then, hidden in the center, a luscious liquid core of pistachio butter and cream that flows out the second your spoon breaks through. The texture contrast is everything: the firm, chilled mousse against the velvety liquid center, all wrapped in a sweet, glossy shell. A hint of vanilla and a pinch of salt elevate the pistachio flavor to something deeply satisfying and not overly sweet.
I’ve tested this pistachio mousse domes recipe more times than I can count — tweaking the gelatin ratio, perfecting the glaze temperature, and making sure the liquid core stays perfectly fluid even after hours in the freezer. What I’m sharing with you today is the version that works every single time. I’ll walk you through each step, from blooming gelatin to achieving that flawless mirror glaze, and I’ll show you how to avoid the most common pitfalls — because yes, I’ve made every mistake so you don’t have to. 💡 Stella’s Pro Tip: The temperature of your glaze is everything — too hot and it runs off, too cold and it clumps. I’ll show you the sweet spot.
Why This Pistachio Liquid Core Domes Recipe Is the Best
The Flavor Secret: Most pistachio desserts rely on extracts and artificial pastes, but I use real pistachio butter — the kind made from 100% roasted pistachios with no added sugar or oils. It gives the mousse and the liquid core an intense, toasty nuttiness that you simply can’t get from a bottle. Growing up in Morocco, my mother would grind pistachios by hand with a mortar and pestle for her pastries, and that aroma of freshly crushed nuts is what I chase in every pistachio recipe I create. This recipe captures that authentic depth.
Perfected Texture: The magic of this dessert is in the engineering — a liquid core that stays fluid inside a frozen mousse dome, all wrapped in a mirror glaze that sets to a flawless shine. I spent weeks testing gelatin ratios and freezing times to make sure the core remains pourable while the mousse holds its shape. The technique comes straight from my Paris training, where we learned that precision in temperature and timing separates a good dessert from a great one. Every element here has a purpose and a tested method.
Foolproof & Fast: Even though this dessert looks incredibly impressive — and trust me, it will steal the show at any dinner party — the steps are surprisingly straightforward. I’ve broken down every stage into clear, manageable tasks, and I’ve included visual cues so you know exactly what to look for. Whether you’re a confident home baker or someone trying their first mirror glaze, this emerald pistachio domes recipe is designed to make you look like a professional pastry chef. The only special equipment you need is a silicone dome mold, and I’ll even share a workaround if you don’t have one.
Pistachio Liquid Core Domes Recipe Ingredients
Every Sunday morning, I walk to the Union Square Greenmarket in NYC, and in the fall and winter, I stock up on nuts from the lovely folks at the nut stand. That’s where I get the pistachios I roast and grind into my own pistachio butter. But I know not everyone has time for that — so I’ve tested this recipe with store-bought pistachio butter too, and it works beautifully. Here’s exactly what you’ll need for these mirror glaze domes.
Ingredients List
- For the Pistachio Mousse:
- 8 oz (225 g) cream cheese, softened
- 1/2 cup pistachio butter
- 1/4 cup granulated sugar
- 1 tsp vanilla extract
- 1 1/4 cups heavy cream, whipped
- 2 tsp powdered gelatin
- 2 tbsp cold water
- For the Pistachio Liquid Core:
- 1/3 cup pistachio butter
- 2 tbsp heavy cream
- 1 tbsp powdered sugar
- 1/2 tsp vanilla extract
- Pinch of salt
- For the Emerald Mirror Glaze:
- 1/2 cup water
- 3/4 cup granulated sugar
- 1/2 cup sweetened condensed milk
- 2 tbsp light corn syrup
- 2 1/2 tsp powdered gelatin
- 3 tbsp cold water
- 6 oz (170 g) white chocolate, finely chopped
- 1 tsp pistachio extract
- Emerald green gel food coloring
- 1 drop black gel food coloring
- For Garnish (optional):
- Chopped roasted pistachios
- Edible gold flakes
- Micro mint leaves
Ingredient Spotlight
Pistachio Butter: This is the heart of the recipe. Look for 100% pure pistachio butter with no added sugar or oil — widely available at Whole Foods, specialty grocery stores, or online. If you can’t find it, make your own by blending roasted shelled pistachios in a food processor for 8–10 minutes until smooth. The flavor will be even more vibrant. Avoid pistachio spreads that contain palm oil or added sweeteners, as they’ll change the texture of both the mousse and the liquid core.
Cream Cheese: Use full-fat block cream cheese (not the spreadable kind in a tub) for the best structure. The cream cheese gives the mousse a stable base with a subtle tang that balances the sweetness of the pistachio butter and the glaze. Philadelphia cream cheese is my go-to. If you’re dairy-sensitive, a high-quality dairy-free cream cheese works, but the texture will be slightly less firm.
White Chocolate: For the mirror glaze, use a good-quality white chocolate with at least 30% cocoa butter — I prefer Valrhona or Guittard. Avoid white chocolate chips that contain stabilizers, as they can make the glaze grainy. The white chocolate provides the creamy base for the glaze and helps achieve that brilliant emerald color when you add the food coloring.
Powdered Gelatin: This is what gives both the mousse and the glaze their structure. I use Knox brand powdered gelatin, which is widely available in US grocery stores. Make sure you bloom it in cold water for exactly 5 minutes — this step is non-negotiable for a smooth, lump-free result. If you prefer a vegetarian alternative, agar-agar can work, but the setting properties are different, so I don’t recommend swapping it in this particular recipe.
| Original Ingredient | Best Substitution | Flavor / Texture Impact |
|---|---|---|
| Pistachio butter | Homemade pistachio paste (roast & blend pistachios) | More intense nut flavor; slightly grittier texture |
| Cream cheese | Mascarpone cheese | Richer, less tangy; mousse slightly softer |
| White chocolate | High-quality white chocolate chips (e.g., Ghirardelli) | Slightly less smooth glaze; still workable |
| Heavy cream (mousse) | Coconut cream (full-fat, chilled) | Dairy-free; subtle coconut flavor; lighter texture |
| Powdered gelatin | Sheet gelatin (use same weight) | Same result; sheet gelatin dissolves more gently |
How to Make Emerald Pistachio Liquid Core Domes — Step-by-Step
I know this recipe looks like a lot of steps, but I promise you — each one is simple, and I’ll guide you through every detail. Make sure you read through the entire recipe before you start, and give yourself enough time for the freezing stages. The payoff is absolutely worth it.
Step 1: Prepare the Liquid Core
Stir together the pistachio butter, heavy cream, powdered sugar, vanilla, and a pinch of salt until the mixture is completely smooth and homogenous. You want a consistency that’s thick but still spoonable — like a soft caramel. Drop small spoonfuls (about 1 teaspoon each) onto a parchment-lined baking sheet. You should have 8 portions. Freeze for exactly 1 hour, or until solid. These frozen cores will be placed inside the mousse domes later.
💡 Stella’s Pro Tip: Don’t skip the salt — it balances the sweetness and makes the pistachio flavor pop. I use fleur de sel from France for this, but any fine sea salt works beautifully.
Step 2: Bloom the Gelatin
In a small bowl, sprinkle the 2 teaspoons of powdered gelatin over the 2 tablespoons of cold water. Do not stir — just let it sit undisturbed for 5 minutes. The gelatin will absorb the water and form a firm, jelly-like mass. This process, called blooming, ensures the gelatin dissolves evenly and gives your mousse a silky-smooth texture without any lumps.
⚠️ Common Mistake to Avoid: Never bloom gelatin in warm or hot water — it will clump and won’t dissolve properly. Always use cold water, and let it sit for the full 5 minutes.
Step 3: Make the Pistachio Mousse Base
In a large bowl, beat the softened cream cheese with the pistachio butter, granulated sugar, and vanilla extract until the mixture is completely smooth, creamy, and free of any lumps. A hand mixer or stand mixer with the paddle attachment works best. Scrape down the sides and bottom of the bowl at least once to ensure everything is evenly incorporated. The mixture should be pale green and smell intensely of pistachios.
Step 4: Fold in Whipped Cream
In a separate bowl, whip the heavy cream to soft peaks — when you lift the whisk, the cream should hold a gentle droop, not stand straight up. Gently melt the bloomed gelatin in the microwave for 8–10 seconds or over a double boiler until it’s liquid, then quickly stir it into the cream cheese mixture. Now, using a rubber spatula, fold the whipped cream into the cream cheese mixture in three additions. Fold gently but thoroughly until no white streaks remain. The mousse should be light, airy, and uniform in color.
💡 Stella’s Pro Tip: Whip your cream in a chilled metal bowl for the best volume. And when folding, use a gentle figure-8 motion — this keeps the air bubbles intact and gives you a lighter mousse.
Step 5: Assemble the Domes
Spoon the pistachio mousse into a piping bag (or a zip-top bag with the corner snipped off). Fill each cavity of your silicone dome mold about halfway. Take the frozen liquid cores out of the freezer and press one gently into the center of each dome — make sure it’s fully surrounded by mousse and not touching the edges of the mold. Pipe the remaining mousse on top, filling each cavity to the brim. Use an offset spatula to smooth the tops so they’re completely flat — this ensures the domes sit evenly when you unmold them.
⚠️ Common Mistake to Avoid: If the frozen core is touching the edge of the mold, the liquid center will leak out during glazing. Make sure it’s fully encased in mousse on all sides.
Step 6: Freeze Solid
Place the filled silicone mold in the freezer on a flat surface (a baking sheet works perfectly). Freeze for at least 6 hours, but preferably overnight. The domes need to be completely frozen solid — if they’re even slightly soft in the center, they won’t unmold cleanly and the mirror glaze won’t adhere properly. This is the most important waiting step in the entire recipe.
Step 7: Prepare the Emerald Mirror Glaze
Bloom the 2 1/2 teaspoons of gelatin in 3 tablespoons of cold water for 5 minutes. In a small saucepan, combine the water, granulated sugar, sweetened condensed milk, and light corn syrup. Heat over medium heat, stirring occasionally, until the mixture is steaming and the sugar has fully dissolved — about 3–4 minutes. Do not let it boil. Remove from heat and stir in the bloomed gelatin until completely dissolved. Pour this hot liquid over the finely chopped white chocolate in a heatproof bowl. Let it sit for 1 minute, then blend with an immersion blender until perfectly smooth and emulsified. Add the pistachio extract, then add emerald green gel food coloring a drop at a time, plus one drop of black gel coloring to deepen the color. Use an immersion blender to eliminate any air bubbles. Cool the glaze to 90–95°F (32–35°C) before using.
💡 Stella’s Pro Tip: An instant-read thermometer is your best friend here. If the glaze is above 95°F, it will be too thin and will run off the domes. If it’s below 90°F, it will be too thick and won’t self-level. That 5-degree window is the sweet spot for a flawless mirror finish.
Step 8: Glaze and Garnish
Unmold the frozen domes from the silicone mold and place them on a wire rack set over a baking sheet (to catch the drips). Working quickly, pour the cooled mirror glaze over each dome, starting at the top and letting it flow down the sides. Make sure the entire surface is covered. Let the excess drip off for about 30 seconds. Use a small offset spatula to cleanly lift each glazed dome off the rack and transfer it to a serving plate. Garnish immediately with chopped roasted pistachios, edible gold flakes, and micro mint leaves. Serve chilled — the domes should still be frozen when you serve them, and they will thaw slightly as they sit.
⚠️ Common Mistake to Avoid: Don’t let the domes sit at room temperature before glazing — they must be frozen solid. If they start to soften, the glaze will slide off unevenly and the liquid core may leak.
| Step | Action | Duration | Key Visual Cue |
|---|---|---|---|
| 1 | Prepare liquid core | 10 mins prep + 1 hr freeze | Core is solid but not rock-hard |
| 2 | Bloom gelatin | 5 mins | Gelatin is firm and jelly-like |
| 3 | Make mousse base | 5 mins | Smooth, pale green, no lumps |
| 4 | Fold in whipped cream | 5 mins | Light, airy, uniform color |
| 5 | Assemble domes | 10 mins | Core fully encased in mousse |
| 6 | Freeze domes | 6+ hrs or overnight | Completely solid to the touch |
| 7 | Prepare mirror glaze | 15 mins + cool to 90-95°F | Smooth, glossy, emerald green |
| 8 | Glaze and garnish | 10 mins | Even coverage, glossy finish |
Serving & Presentation
These Emerald Pistachio Liquid Core Domes are a showpiece dessert, and how you present them matters. I like to serve each dome on a chilled white plate — the contrast between the bright emerald glaze and the white ceramic is stunning. For an extra touch, you can drizzle a little extra pistachio butter or a raspberry coulis around the base of the dome. The tartness of raspberries cuts through the richness of the mousse and glaze beautifully.
When I serve these at dinner parties in my NYC apartment, I always announce “watch for the liquid center” right before everyone takes their first bite — and the collective gasp when the pistachio core flows out is pure joy. A sprinkle of chopped roasted pistachios adds crunch, edible gold flakes add a touch of luxury (perfect for holidays or celebrations), and a tiny micro mint leaf adds a fresh, vibrant green accent that echoes the emerald glaze.
| Pairing Type | Suggestions | Why It Works |
|---|---|---|
| Side | Raspberry coulis, fresh berries | Tartness balances the sweet, nutty mousse |
| Beverage | Earl Grey tea, espresso, dessert wine (Sauternes) | Tea and coffee cut richness; wine complements pistachio |
| Garnish | Chopped pistachios, gold flakes, micro mint, edible flowers | Adds texture, color contrast, and elegance |
| Drizzle | Warm pistachio butter, salted caramel, dark chocolate sauce | Enhances the nutty profile or adds contrast |
Make-Ahead, Storage & Reheating
One of the best things about this emerald pistachio domes recipe is that almost all of the work can be done in advance — which is a lifesaver when you’re hosting a dinner party. In my busy NYC schedule, I usually make the domes on a Friday evening, freeze them overnight, and glaze them the next afternoon, just an hour or so before guests arrive. The glazed domes can sit in the fridge for up to 4 hours before serving, which takes the stress out of last-minute dessert prep.
| Method | Container | Duration | Reheating Tip |
|---|---|---|---|
| Refrigerator (glazed) | Covered container, single layer | Up to 4 hours | Serve directly from fridge — no reheating needed |
| Freezer (unglazed) | Airtight container, parchment between layers | Up to 2 weeks | Glaze directly from frozen — no thawing needed |
| Make-Ahead | Freeze cores + mousse separately | Cores: 1 week; Mousse: 2 days | Assemble and freeze domes up to 2 days before serving |
A quick word on storage: once the domes are glazed, they should be kept refrigerated and served within 4 hours for the best texture and appearance. The mirror glaze can soften if left at room temperature for too long, and the liquid core will start to warm up and become less dramatic when you cut into it. If you need to store glazed domes longer than 4 hours, it’s better to freeze them unglazed and glaze them fresh the day you serve — the mirror glaze is always most stunning on the day it’s made.
Variations & Easy Swaps
One of the reasons I love this recipe is how versatile it is. Over the years, I’ve experimented with different flavor combinations — some inspired by my Moroccan roots, some by my French training, and some purely by what I find at the Union Square farmers market. Here are three variations that I’ve tested and absolutely love. Each one changes the personality of the dessert while keeping the same impressive structure.
| Variation | Key Change | Best For | Difficulty Impact |
|---|---|---|---|
| Moroccan Rose & Pistachio | Add rose water to mousse + core; rose petal garnish | Romantic occasions, Valentine’s Day, weddings | Easy — same process, just add flavor |
| Dairy-Free & Vegan | Use dairy-free cream cheese, coconut cream, vegan white chocolate | Dairy-free guests, plant-based diets | Medium — texture differs slightly |
| Dark Chocolate & Pistachio | Use dark chocolate in glaze; add cocoa to mousse | Chocolate lovers, bold flavor contrast | Easy — simple swap of chocolate type |
Variation 1: Moroccan Rose & Pistachio Domes
This is my personal favorite — it pays homage to my Moroccan heritage, where rose water is used in everything from pastries to tagines. Add 1 teaspoon of food-grade rose water to both the mousse base and the liquid core. For the glaze, reduce the pistachio extract to 1/2 teaspoon and add 1/2 teaspoon of rose water. Garnish with dried edible rose petals (crush them slightly between your fingers for a beautiful texture) along with the pistachios. The floral notes of rose pair beautifully with the earthy richness of pistachio — it’s a combination that feels both exotic and elegant.
Variation 2: Dairy-Free & Vegan Adaptation
I tested this version for a friend’s birthday party, and it was a hit even among the non-vegan guests. Use a high-quality dairy-free cream cheese (Miyoko’s is my favorite) and full-fat coconut cream instead of heavy cream — make sure to chill the coconut cream overnight and whip only the solid part. For the liquid core, use coconut cream in place of heavy cream. The mirror glaze needs vegan white chocolate (I like the brand iChoc). The texture is slightly less firm than the classic version, so freeze the domes for a full 8 hours before glazing. The coconut adds a whisper of tropical flavor that actually complements the pistachio beautifully.
Variation 3: Dark Chocolate & Pistachio Fusion
For those who love the classic chocolate-nut pairing, this variation is a showstopper. Replace the white chocolate in the mirror glaze with high-quality dark chocolate (70% cocoa), and omit the green food coloring — instead, let the dark chocolate shine with its natural deep brown color with a hint of emerald from a single drop of green gel. For the mousse, add 2 tablespoons of unsweetened cocoa powder sifted into the cream cheese mixture. The bitterness of the dark chocolate balances the sweetness of the pistachio in a way that feels sophisticated and grown-up. I love serving this version with a dollop of lightly sweetened whipped cream on the side.
What is the liquid core inside Emerald Pistachio Liquid Core Domes made of?
The liquid core is a simple but carefully balanced mixture of pistachio butter, heavy cream, powdered sugar, vanilla extract, and a pinch of salt. The pistachio butter gives it that rich, nutty flavor, while the heavy cream keeps it fluid even after freezing. The powdered sugar adds just enough sweetness without making it stiff, and the salt brightens all the flavors. The key is to freeze these cores for exactly one hour — they need to be solid enough to hold their shape when you place them into the mousse, but they’ll soften to a luscious liquid consistency once the domes come to serving temperature. Each dome gets one core, so every bite delivers that beautiful surprise of flowing pistachio cream.
How do you keep the pistachio dome shape from cracking when making liquid core domes?
Cracking usually happens for two reasons: the domes aren’t frozen solid enough before unmolding, or the mirror glaze is too cold. Make sure your domes freeze for at least 6 hours — overnight is even better. When you unmold, gently flex the silicone mold starting at the edges and work your way inward; never pull the dome out by its center. For the glaze, it must be between 90–95°F (32–35°C). If it’s too cold, it will be thick and can pull at the mousse surface as it sets, causing cracks. If it’s too hot, it will be thin and run off unevenly. Using an instant-read thermometer is the best way to nail this temperature window every time.
Can I make Emerald Pistachio Liquid Core Domes without a specialized mold?
Yes, absolutely! While silicone dome molds give you that perfect half-sphere shape, you can use other molds in a pinch. Small metal or glass bowls (like shallow dessert cups or even clean tea light holders) can work as substitutes — just line them with plastic wrap for easy removal. You can also use a muffin tin lined with plastic wrap or flexible silicone muffin cups. The shape won’t be as perfectly round, but the taste and texture will be identical. Another option is to freeze the mousse in a small loaf pan, then cut out rounds with a cookie cutter and shape them by hand. The most important thing is that the mold is freezer-safe and flexible enough to release the frozen domes without damage.
How far in advance can I prepare the liquid core for these pistachio domes?
You can prepare the liquid cores up to one week in advance and keep them frozen in an airtight container with parchment paper between the layers. Just make sure the container is sealed well to prevent freezer odors from affecting the delicate pistachio flavor. When you’re ready to assemble the domes, place the frozen cores directly into the mousse — no need to thaw them first. In fact, you want them frozen solid so they hold their shape and create that distinct liquid center. If you’re planning even further ahead, you can freeze the fully assembled (but unglazed) domes for up to two weeks, then glaze them directly from the freezer on the day you plan to serve.
Why did my mirror glaze turn out dull instead of shiny?
A dull mirror glaze is almost always caused by one of three issues: the glaze was too thick, too cold, or contained air bubbles. First, make sure you’re using an immersion blender to emulsify the glaze — this creates a smooth, homogenous mixture that reflects light beautifully. Second, temperature is critical: the glaze must be between 90–95°F when you pour it. If it’s below 90°F, it will set too quickly and lose its shine. Third, if your white chocolate seized or the gelatin wasn’t fully dissolved, the glaze can turn out grainy rather than glossy. Strain the glaze through a fine-mesh sieve before using to catch any undissolved bits, and always pour from a height of about 6 inches to help the glaze self-level smoothly over the dome.
Can I use regular pistachio paste instead of pistachio butter?
Yes, you can use pistachio paste, but there’s an important distinction. Pistachio butter is made from 100% ground pistachios with no additives, while pistachio paste often contains added sugar and oil. If you’re using a sweetened pistachio paste, reduce the sugar in the mousse by 1 to 2 tablespoons to compensate. The texture of the paste is usually finer and smoother than butter, which can actually work beautifully in the mousse and the liquid core. Just read the label carefully — if the paste contains palm oil or hydrogenated oils, it may not freeze and melt the same way, and the liquid core could end up greasy rather than creamy. I recommend using a high-quality paste from a specialty brand like Sicilian Pistachio Paste if you go this route.
How do I get the emerald green color in the mirror glaze?
Getting that brilliant emerald green is all about layering your food coloring. Start with an emerald green gel food coloring — I recommend Chefmaster or Americolor brands for the most vibrant results. Add it drop by drop to the prepared glaze and blend with an immersion blender after each addition until you reach a rich emerald shade. The game-changer is adding a single drop of black gel food coloring — this deepens the color and gives it that jewel-like intensity rather than looking like St. Patrick’s Day green. If your glaze looks more forest green than emerald, add one more tiny drop of black. Remember that the color will appear slightly lighter once the glaze sets on the dome, so aim for a shade that’s one tone deeper than your target. Avoid liquid food coloring, which can affect the glaze’s consistency.
Can I make these domes without gelatin?
Gelatin is essential for both the mousse structure and the mirror glaze in this specific recipe. The mousse needs gelatin to set firmly enough to hold the liquid core and support the glaze, while the glaze relies on gelatin for that signature glossy, sliceable finish. If you need a vegetarian or vegan alternative, I’ve tested this with agar-agar powder, but the results are different — the mousse sets more firmly and can feel slightly less creamy, and the glaze doesn’t achieve quite the same mirror shine. If you’re set on a gelatin-free version, I recommend trying the dairy-free variation I shared above, using a vegan jelking agent like carrageenan or a specialty vegan gelatin substitute, and expect a slightly different texture. The domes will still be delicious, just not as perfectly structured.
What’s the best way to transport these domes for a party?
Transporting these domes requires a little planning, but it’s totally doable. The safest method is to transport them frozen and unglazed — pack the frozen domes in a single layer in a sturdy container with a tight lid, with parchment paper between each dome to prevent sticking. Keep them in a cooler with ice packs during transit. Glaze them at the destination once they’re still frozen solid. If you need to transport them already glazed, place each dome in an individual cupcake liner or small paper cup to protect the glaze, and arrange them in a single layer in a shallow box or container. Keep them refrigerated during transport (a cooler works), and try to minimize any jostling. The glaze is delicate and can smudge if domes touch each other. I’ve brought these to countless dinner parties across NYC using this method!
How long do the domes need to sit at room temperature before serving?
This is a crucial detail! The domes should be served directly from the refrigerator — not at room temperature. Here’s why: the magic of this dessert is the contrast between the firm, chilled mousse and the liquid core that flows out when you cut into it. If the domes sit at room temperature for more than 10–15 minutes, the mousse will start to soften and the liquid core will become too thin, and the dramatic effect of cutting into them is lost. If you’re serving them straight from the freezer (after glazing), let them sit in the refrigerator for about 20-30 minutes first — this allows the mousse to soften just enough to be creamy while still holding its shape. The ideal serving temperature is around 38-40°F (3-4°C), which is standard refrigerator temperature.
Share Your Version!
I absolutely love hearing from you — there’s nothing that makes my day like seeing photos of these Emerald Pistachio Liquid Core Domes made in your own kitchen. If you try this recipe, please leave a star rating and a comment below telling me how it went. Did the liquid core flow the way you hoped? Did you try one of the variations? Your feedback helps me create better recipes, and it helps other home bakers know what to expect.
And if you’re on Instagram or Pinterest, tag me @leosfoods when you share your creation — I personally look at every single tag and I often feature my favorites in my stories. If you could ask me one question about this pistachio liquid core domes recipe, what would it be? Drop it in the comments and I’ll answer you personally. From my NYC kitchen to yours — I hope this recipe brings as much warmth to your table as it does to mine. — Stella 🧡
Love This Recipe? Save It to Pinterest!
If you enjoyed this Emerald Pistachio Liquid Core Domes recipe, don’t let it get lost in your browser tabs! 😄 Pin it now so you can find it again anytime — and explore hundreds more tried-and-tested recipes waiting for you on my Pinterest boards.
👉 Follow Stella on Pinterest @stellarecipeblog
📌 Pin this recipe · 🔁 Re-pin your favorites · 💬 Tag me when you make it — I love seeing your creations!
Made this recipe? Drop a ⭐️ star rating below and tell me how the liquid core turned out for you — I read every comment and I’d love to hear your story 🧡
Emerald Pistachio Liquid Core Domes
- Yield: 8 1x
Ingredients
- For the Pistachio Mousse:
- 8 oz (225 g) cream cheese, softened
- 1/2 cup pistachio butter
- 1/4 cup granulated sugar
- 1 tsp vanilla extract
- 1 1/4 cups heavy cream, whipped
- 2 tsp powdered gelatin
- 2 tbsp cold water
- ### For the Pistachio Liquid Core:
- 1/3 cup pistachio butter
- 2 tbsp heavy cream
- 1 tbsp powdered sugar
- 1/2 tsp vanilla extract
- Pinch of salt
- ### For the Emerald Mirror Glaze:
- 1/2 cup water
- 3/4 cup granulated sugar
- 1/2 cup sweetened condensed milk
- 2 tbsp light corn syrup
- 2 1/2 tsp powdered gelatin
- 3 tbsp cold water
- 6 oz (170 g) white chocolate, finely chopped
- 1 tsp pistachio extract
- Emerald green gel food coloring
- 1 drop black gel food coloring
- ### For Garnish (optional):
- Chopped roasted pistachios
- Edible gold flakes
- Micro mint leaves
Instructions
- Stir together the pistachio butter, heavy cream, powdered sugar, vanilla, and salt until smooth. Freeze small spoonfuls for 1 hour.
- Bloom the gelatin in cold water for 5 minutes.
- Beat the cream cheese, pistachio butter, sugar, and vanilla until smooth.
- Melt the bloomed gelatin and mix it into the cream cheese mixture.
- Fold in the whipped cream until fully combined.
- Fill silicone dome molds halfway with the pistachio mousse.
- Place a frozen pistachio liquid core in the center of each dome.
- Cover with the remaining mousse and smooth the tops. Freeze for at least 6 hours.
- Bloom the glaze gelatin in cold water.
- Heat the water, sugar, condensed milk, and corn syrup until steaming. Remove from the heat and stir in the gelatin.
- Pour over the white chocolate and blend until smooth.
- Add the pistachio extract and gel food coloring until an emerald green color is achieved. Cool to 90–95°F (32–35°C).
- Unmold the frozen domes and place them on a wire rack.
- Pour the mirror glaze evenly over each dome.
- Garnish with chopped pistachios, edible gold flakes, and micro mint leaves. Serve chilled.
Nutrition
- Calories: 420
- Sugar: 25 g
- Fat: 31 g
- Carbohydrates: 31 g
- Protein: 7 g
Tried This Recipe? Leave a Comment!
Did you make this recipe? I’d love to hear how it turned out! Please leave a comment and a rating below. Your feedback helps other home cooks and supports cheerychop.com!
For more delicious inspiration, follow me on Pinterest!