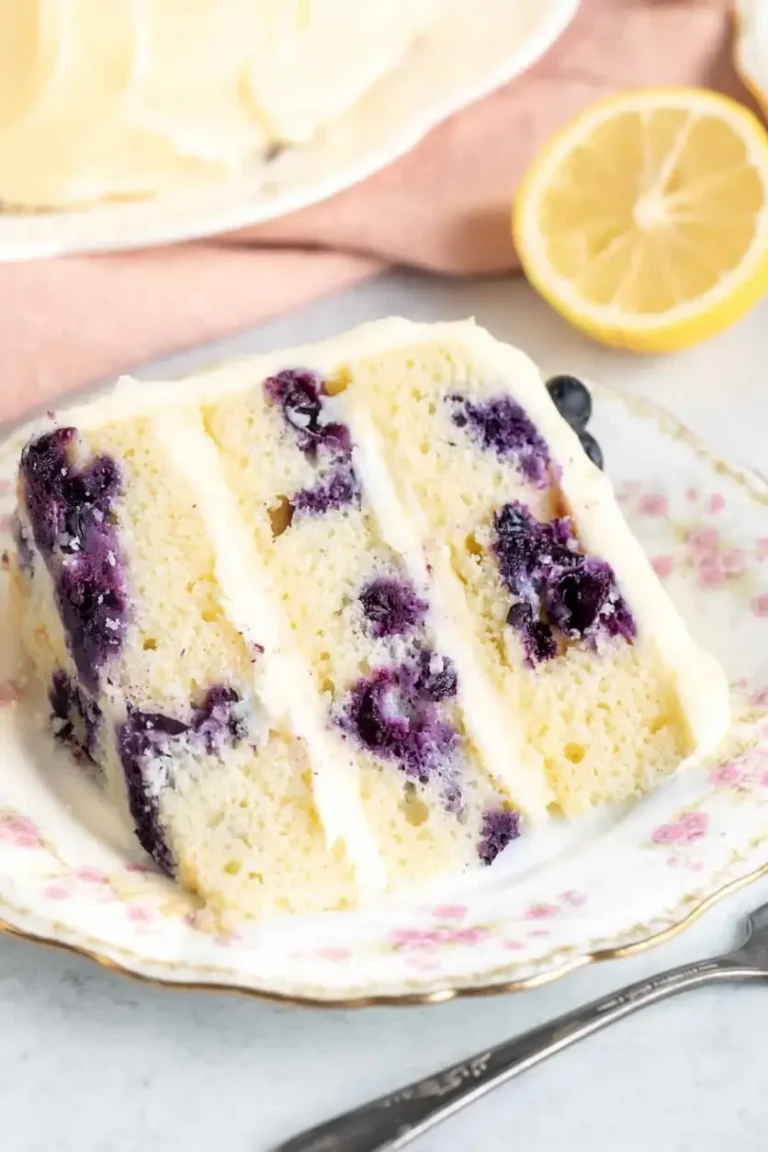
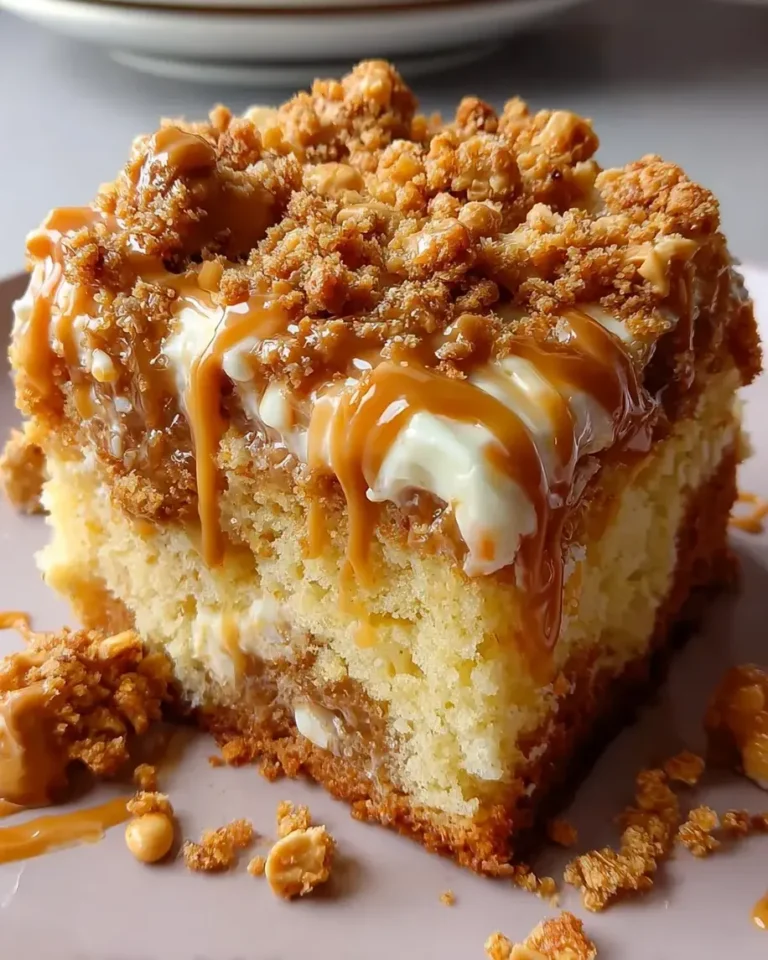
Show-Stopping Toasted Coconut Vanilla Mirror Domes
“`html
Table of Contents
Toasted Coconut Vanilla Mirror Domes – A Show-Stopping Dessert
There are desserts that taste incredible, and then there are desserts that stop the conversation — these toasted coconut vanilla mirror domes do both. I first discovered the magic of mirror glaze during my pastry training in Paris, where we spent weeks perfecting the art of glossy, reflective finishes. But it wasn’t until I moved to New York City and started experimenting with flavors from my Moroccan childhood that I truly made this dessert my own. The combination of toasted coconut, creamy white chocolate mousse, and that breathtaking vanilla mirror glaze is pure elegance on a plate.
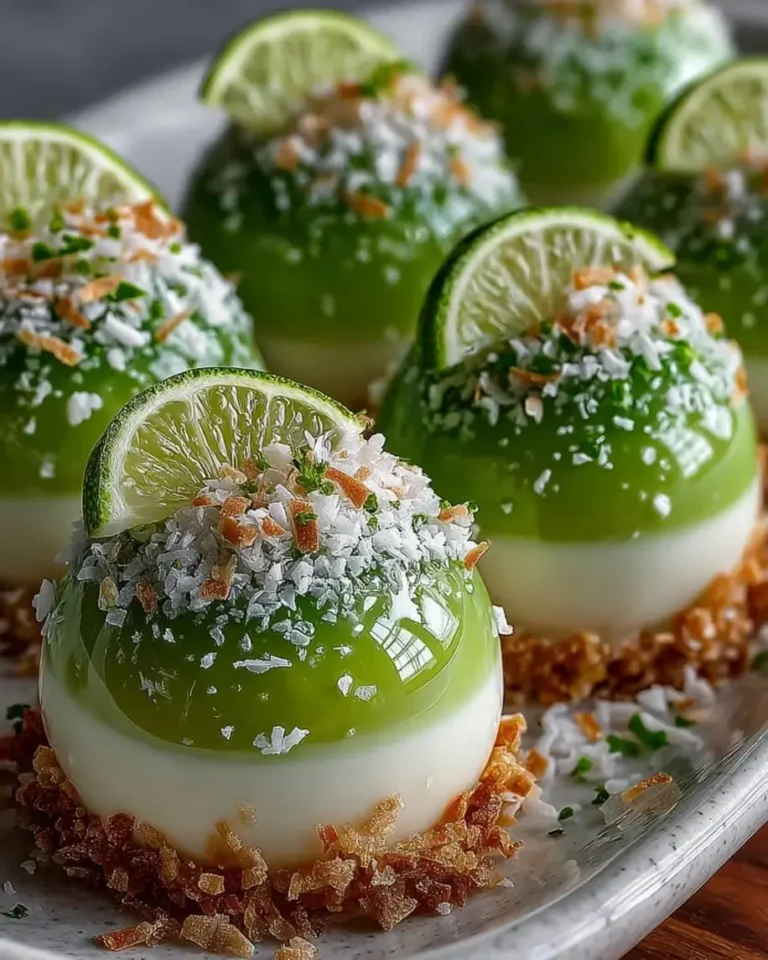
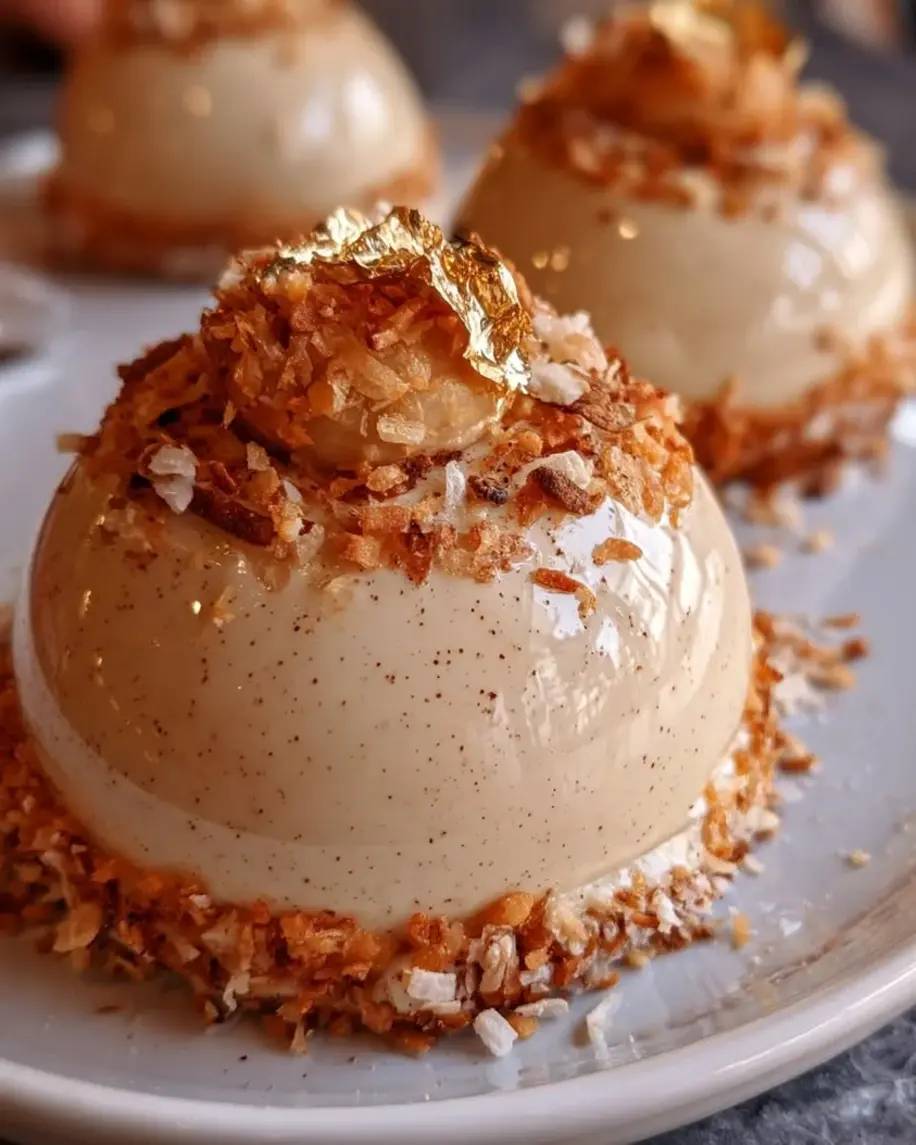
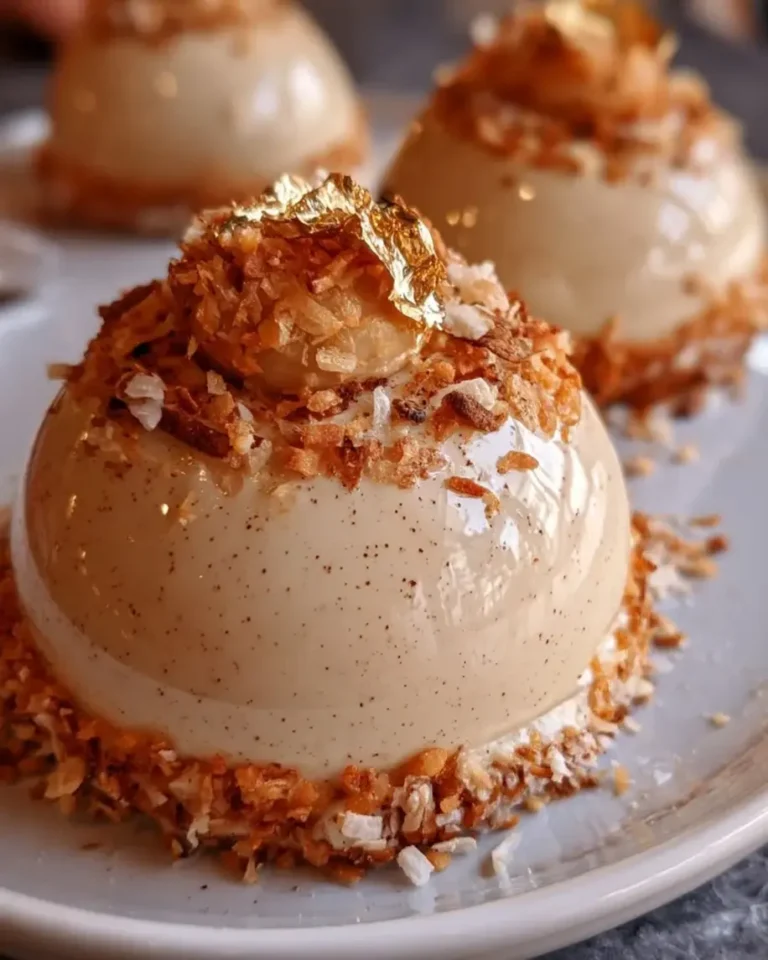
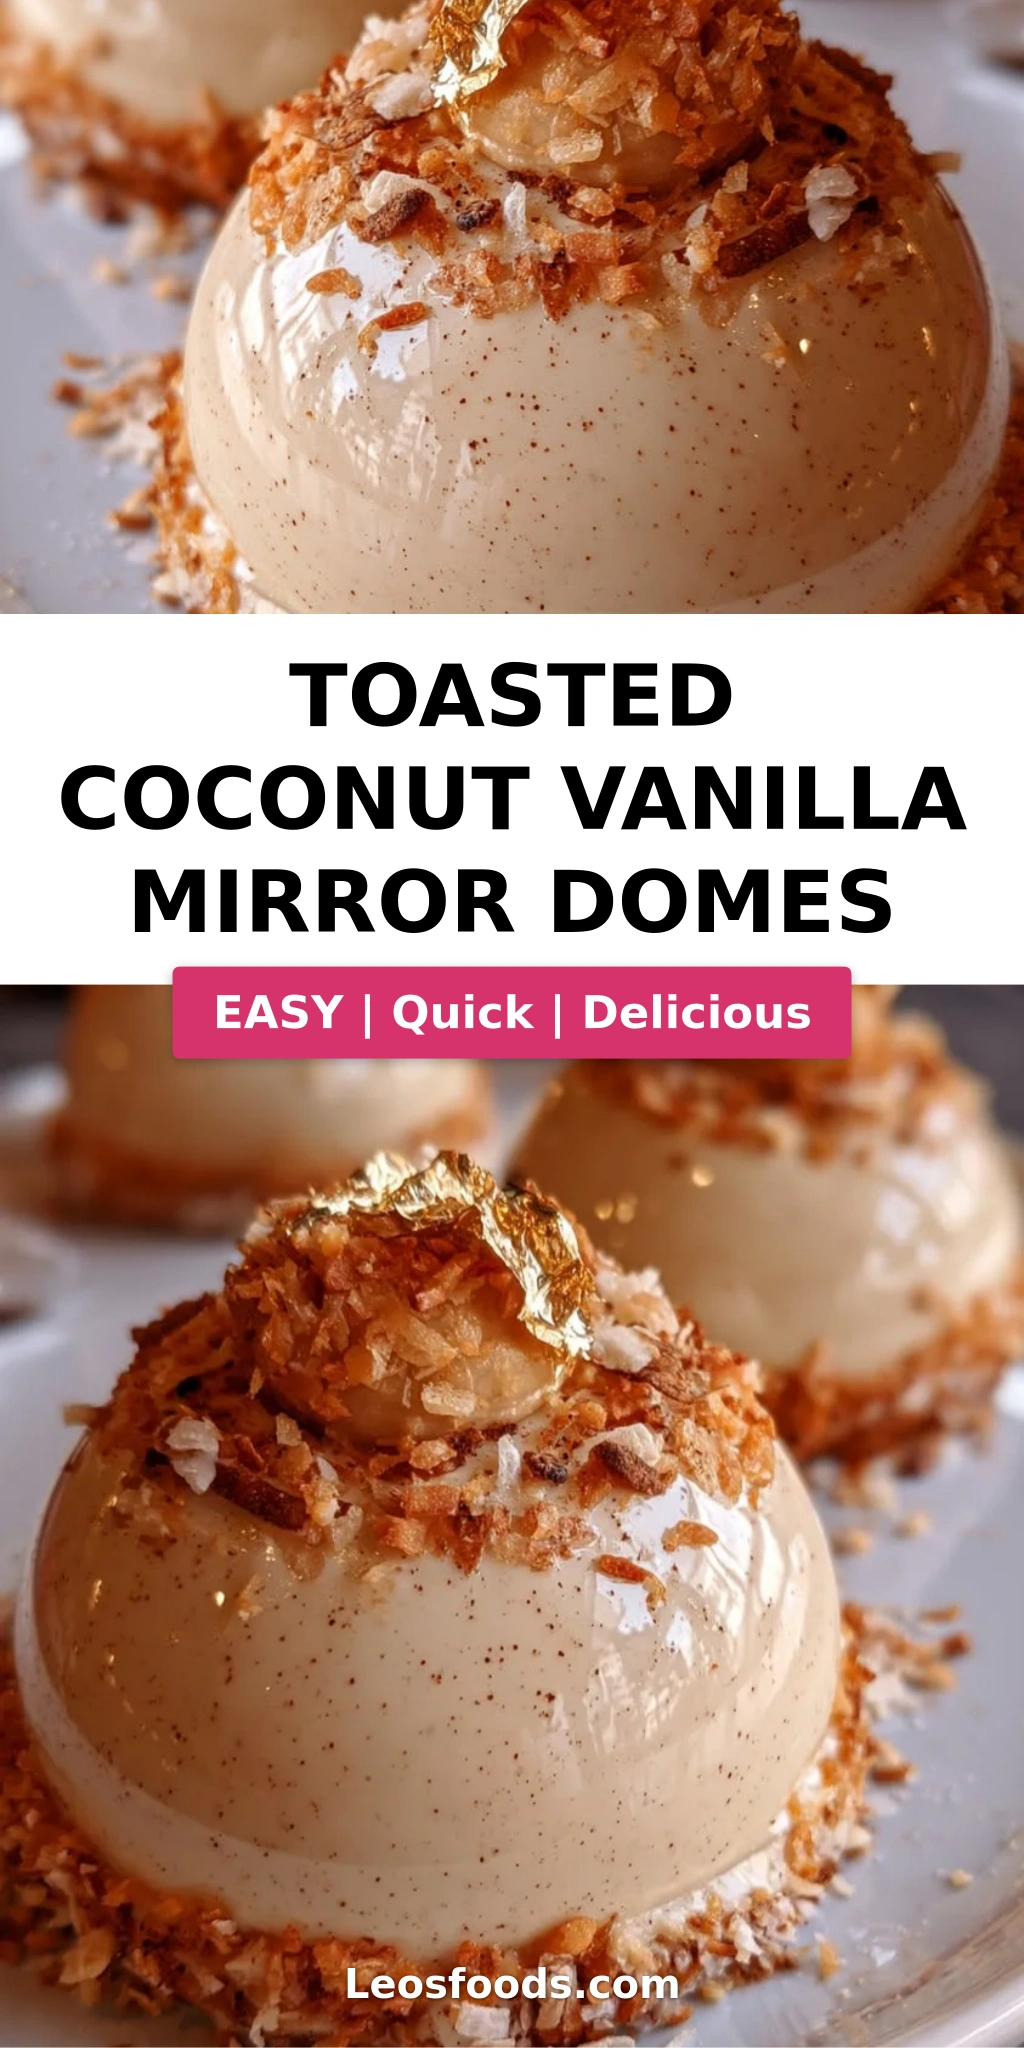
Picture this: a perfectly smooth, mirror-like dome that shimmers under the light, hiding a luscious coconut vanilla mousse with a surprise toasted coconut center. The first spoonful cracks through the glossy shell into the silkiest white chocolate mousse you’ve ever tasted, followed by the warm, nutty crunch of toasted coconut. The vanilla bean paste adds those beautiful little specks and an aromatic depth that’s simply irresistible. It’s the kind of dessert that looks like it belongs in a French patisserie window but is absolutely achievable in your home kitchen.
What makes my version special is the toasted coconut heart at the center — a gooey, buttery, slightly caramelized filling that adds texture and a deep, toasty flavor that perfectly balances the sweet white chocolate mousse. I’ve also streamlined the mirror glaze technique so it’s as foolproof as possible for home bakers. Whether you’re celebrating a birthday, hosting a dinner party, or just want to treat yourself, these domes are guaranteed to impress. And trust me, once you master that mirror glaze, you’ll want to put it on everything!
Why This Toasted Coconut Vanilla Mirror Domes Recipe Is the Best
The Flavor Secret: Most mirror dome recipes rely on just vanilla, but I add a layer of deeply toasted coconut in the center. Toasting the coconut with butter and condensed milk creates a almost praline-like richness that cuts through the sweetness of the white chocolate mousse. It’s a trick I learned from my mother’s kitchen in Morocco, where we always toasted nuts and coconut before using them — the difference in flavor is night and day.
Perfected Texture: The mirror glaze here is silky, shiny, and sets with a flawless finish. The key is cooling it to exactly 90°F (32°C) before pouring — I’ll walk you through exactly how to nail that temperature. The mousse itself is light yet stable, thanks to the perfect ratio of gelatin, whipped cream, and white chocolate. Each bite is a contrast of smooth glaze, airy mousse, and that chewy, caramelized coconut center.
Foolproof & Fast: Yes, there are several components, but I’ve broken it down into manageable steps with clear visual cues. The domes actually need to freeze for at least 6 hours, which means you can make them a day ahead and glaze them just before serving. I’ve also included tested substitutions for gelatin and dairy so you can adapt this recipe to your needs without losing that stunning mirror effect.
Toasted Coconut Vanilla Mirror Domes Ingredients
I pick up my white chocolate from the Chelsea Market — Valrhona is my go-to for its smooth melting and clean flavor. The coconut cream I find at the Asian market on Mott Street, where the quality is consistently better than what I find at standard supermarkets. And the vanilla bean paste? That’s from a little shop I discovered near the Flatiron Building — it’s worth seeking out a good one for those beautiful specks and deep vanilla flavor.
Ingredients List
- For the Coconut Vanilla Mousse:
- 1 cup heavy whipping cream
- 1/2 cup coconut cream
- 6 oz (170 g) white chocolate, finely chopped
- 1 tsp vanilla bean paste
- 2 tsp powdered gelatin
- 3 tbsp cold water
- For the Toasted Coconut Center:
- 1/2 cup sweetened shredded coconut
- 2 tbsp unsalted butter
- 2 tbsp sweetened condensed milk
- 1/4 tsp vanilla extract
- Pinch of sea salt
- For the Vanilla Mirror Glaze:
- 1/2 cup water
- 1/2 cup granulated sugar
- 1/3 cup sweetened condensed milk
- 6 oz (170 g) white chocolate, finely chopped
- 2 tsp powdered gelatin
- 3 tbsp cold water
- 1 tsp vanilla bean paste
- White gel food coloring (optional)
- For Garnish (optional):
- Toasted coconut flakes
- White chocolate curls
- Edible gold leaf
Ingredient Spotlight
White Chocolate: This is the backbone of both the mousse and the glaze. Use a good quality white chocolate like Valrhona or Guittard — the type you’d actually enjoy eating. Avoid white chips or melting wafers, as they contain stabilizers that can seize or create a grainy texture. A finely chopped bar melts evenly and blends seamlessly with the other ingredients. If you need a dairy-free version, look for a high-quality white chocolate made with cocoa butter and plant-based milk solids.
Coconut Cream: Not to be confused with coconut milk — coconut cream is thicker, richer, and gives the mousse its luxurious texture and subtle tropical notes. I use Chaokoh or Savoy brands, both available at most Asian grocery stores. Canned coconut cream works perfectly; just shake the can well before opening. In a pinch, you can use the thick layer from a can of full-fat coconut milk, but the texture will be slightly less stable.
Vanilla Bean Paste: This is my secret weapon for flavor and visual appeal. The paste gives you those beautiful black specks and a more intense, natural vanilla flavor than extract. Nielsen-Massey and Heilala are my preferred brands. If you only have vanilla extract, use 2 teaspoons and skip the food coloring for the glaze — the specks won’t be there, but the flavor will still be lovely.
Gelatin: Powdered gelatin is essential for both the mousse and the mirror glaze. It gives the mousse its structure and the glaze that signature mirror-like finish. Knox brand is widely available and reliable. For a vegetarian version, you can use agar-agar, but the setting properties are different — I’ll cover that in the FAQ below.
| Original Ingredient | Best Substitution | Flavor / Texture Impact |
|---|---|---|
| White chocolate | High-quality dairy-free white chocolate | Slightly less creamy, still delicious |
| Coconut cream | Full-fat coconut milk (thick part only) | Less rich, may need extra gelatin |
| Vanilla bean paste | 2 tsp vanilla extract | No specks, slightly less intense flavor |
| Powdered gelatin | Agar-agar (vegan, use 1 tbsp) | Firmer set, different mouthfeel |
How to Make Toasted Coconut Vanilla Mirror Domes — Step-by-Step
Take a deep breath and read through all the steps first — I promise, if you follow along carefully, you’ll end up with professional-looking domes that will have everyone asking for the recipe.
Step 1: Bloom the Gelatin
In a small bowl, sprinkle 2 teaspoons of powdered gelatin over 3 tablespoons of cold water. Stir gently with a fork until the gelatin is fully moistened. Let it sit for 5 minutes until it becomes a firm, jiggly mass — this is called “blooming” and is essential for proper setting.
💡 Stella’s Pro Tip: Always use cold water for blooming. Hot water will cause the gelatin to clump and won’t give you that smooth, even set.
Step 2: Toast the Coconut Center
Spread the shredded coconut in a dry skillet over medium heat. Stir constantly with a wooden spoon until the coconut turns golden brown with darker spots — about 3-4 minutes. It will smell incredibly nutty and toasty. Immediately stir in the butter, sweetened condensed milk, vanilla extract, and a pinch of sea salt. Cook for 1-2 minutes, stirring continuously, then transfer to a plate to cool completely. This mixture will become the gooey heart of your domes.
⚠️ Common Mistake to Avoid: Coconut burns quickly once it starts coloring. Keep stirring and remove from heat the moment it’s golden. Burnt coconut will taste bitter and harsh.
Step 3: Heat the Coconut Cream
Pour the coconut cream into a small saucepan and heat over medium heat until steam rises from the surface — don’t let it boil. Remove from heat and stir in the bloomed gelatin until completely dissolved. The mixture should be smooth and slightly thickened.
💡 Stella’s Pro Tip: If you see any lumps, strain the mixture through a fine-mesh sieve before pouring it over the white chocolate. A smooth base means a smooth mousse.
Step 4: Make the Mousse Base
Place the finely chopped white chocolate in a heatproof bowl. Pour the warm coconut cream mixture over the chocolate and let it sit for 1 minute, then stir gently until the chocolate is fully melted and the mixture is smooth. Stir in the vanilla bean paste. Let this cool to room temperature — about 15 minutes.
⚠️ Common Mistake to Avoid: If the mixture is too warm when you fold in the whipped cream, it will deflate the mousse. Wait until it’s just barely warm to the touch — about 85°F (29°C).
Step 5: Whip and Fold
In a separate bowl, whip the heavy cream to soft peaks — the cream should hold its shape but still be soft and billowy. Using a rubber spatula, fold one third of the whipped cream into the cooled coconut mixture to lighten it, then gently fold in the remaining cream until no streaks remain. Work carefully to keep as much air in the mixture as possible.
💡 Stella’s Pro Tip: Fold in a figure-8 motion, cutting through the center and lifting from the bottom. This incorporates the cream evenly without deflating it.
Step 6: Fill and Freeze
Fill silicone dome molds about halfway with the mousse. Drop a small spoonful (about 1 teaspoon) of the cooled toasted coconut mixture into the center of each dome, pressing it down slightly so it stays in the middle. Cover with more mousse until the mold is full, smoothing the tops with an offset spatula. Tap the molds gently on the counter to release any air bubbles. Freeze for at least 6 hours, or overnight — the domes must be completely solid before glazing.
⚠️ Common Mistake to Avoid: Don’t rush the freezing step. If the domes aren’t fully frozen, the glaze will warm them too quickly and cause cracks or a dull finish. Freeze overnight for the best results.
Step 7: Make the Mirror Glaze
Bloom the remaining 2 teaspoons of gelatin in 3 tablespoons of cold water for 5 minutes. In a small saucepan, combine 1/2 cup water, 1/2 cup sugar, and 1/3 cup sweetened condensed milk. Heat over medium heat, stirring occasionally, until the sugar dissolves and the mixture is steaming — about 3-4 minutes. Remove from heat and stir in the bloomed gelatin until fully dissolved. Pour this hot mixture over the remaining 6 oz of finely chopped white chocolate and let sit for 1 minute, then stir until smooth. Add the vanilla bean paste and a drop of white food coloring if using, and stir to combine.
💡 Stella’s Pro Tip: For that flawless mirror finish, you need the glaze at exactly 90°F (32°C). Use an instant-read thermometer — it’s your best friend here. Too hot and it will melt the domes; too cold and it will be too thick to flow evenly.
Step 8: Glaze the Domes
Remove the frozen domes from the silicone molds and place them on a wire rack set over a baking sheet (to catch the drips). Working one at a time, pour the glaze over each dome, starting from the center and letting it flow evenly over the sides. The excess will drip away — don’t try to spread it with a spatula. Let the glaze set for 1-2 minutes on the rack, then carefully transfer each dome to a serving plate using an offset spatula.
⚠️ Common Mistake to Avoid: Pour the glaze in one confident, steady stream. Stopping and starting will create uneven patches. If the glaze starts to thicken before you finish, briefly reheat it to 90°F again.
Step 9: Garnish and Set
While the glaze is still slightly tacky, add your garnishes — toasted coconut flakes, white chocolate curls, and tiny pieces of edible gold leaf. The glaze will be just firm enough to hold them in place. Refrigerate the glazed domes for at least 20 minutes before serving to allow the glaze to fully set and the mousse to soften slightly to the perfect spoonable texture.
💡 Stella’s Pro Tip: Edible gold leaf is very delicate — use tweezers to apply it, and handle it as little as possible. A little goes a long way toward making these look absolutely stunning.
| Step | Action | Duration | Key Visual Cue |
|---|---|---|---|
| 1 | Bloom gelatin | 5 min | Firm, jiggly mass |
| 2 | Toast coconut center | 5-6 min | Golden brown, nutty aroma |
| 3 | Heat coconut cream | 2-3 min | Steaming, not boiling |
| 4 | Make mousse base | 15 min to cool | Smooth, glossy, room temp |
| 5 | Whip and fold cream | 5 min | Soft peaks, no streaks |
| 6 | Fill and freeze | 6+ hours | Completely solid, no give |
| 7 | Make mirror glaze | 10 min | Smooth, 90°F (32°C) |
| 8 | Glaze domes | 5 min | Even coverage, drips stop |
| 9 | Garnish and set | 20 min fridge | Glaze set, garnishes stick |
Serving & Presentation
These toasted coconut vanilla mirror domes are spectacular on their own, but a thoughtful presentation elevates them even further. Serve each dome on a chilled white plate to make the glossy glaze pop. Add a small quenelle of coconut whipped cream or a drizzle of raspberry coulis for a pop of color that contrasts beautifully with the white glaze. The slight tartness of raspberry also cuts through the sweetness beautifully.
When I serve these at dinner parties in my NYC apartment, I like to arrange them on a marble slab with fresh edible flowers like violas or pansies scattered around — it adds an artistic, garden-fresh feel that wows guests before they even take a bite. For a more casual gathering, a simple dusting of toasted coconut flakes and a few white chocolate curls is all you need. Pair with a cup of strong espresso or a late-harvest Riesling to balance the sweetness.
One of my favorite ways to serve these is inspired by my Moroccan roots — with a small glass of hot mint tea on the side. The mint refreshes the palate between bites and complements the coconut and vanilla beautifully. It’s a combination that always sparks conversation at my table.
| Pairing Type | Suggestions | Why It Works |
|---|---|---|
| Side Dish | Raspberry coulis, mango purée, fresh berries | Bright acidity cuts the richness |
| Sauce / Dip | Chocolate ganache, caramel sauce, passion fruit curd | Adds depth and contrast |
| Beverage | Espresso, mint tea, late-harvest Riesling | Cleanses palate, balances sweetness |
| Garnish | Toasted coconut, white chocolate curls, gold leaf, edible flowers | Adds texture, color, and luxury |
Make-Ahead, Storage & Reheating
One of the best things about these toasted coconut vanilla mirror domes is that they’re incredibly make-ahead friendly — perfect for busy schedules or stress-free entertaining. I often make the full batch (domes frozen and unglazed) up to two weeks before a party, then glaze and garnish them the morning I plan to serve. The frozen domes act as a blank canvas, ready to be transformed with that glossy mirror finish whenever you need them.
| Method | Container | Duration | Reheating Tip |
|---|---|---|---|
| Refrigerator | Airtight container, single layer | Up to 3 days (glazed) | Serve cold, no reheating needed |
| Freezer | Wrap individually in plastic wrap, then foil | Up to 2 months (unglazed) | Glaze directly from frozen, then refrigerate 20 min |
| Make-Ahead | Freeze in silicone molds, then pop out and store in freezer bag | Up to 2 weeks in advance | Best to glaze on serving day |
If you’re storing glazed domes in the refrigerator, place them in an airtight container in a single layer — don’t stack them or the glaze will stick and smudge. To serve, let them sit at room temperature for about 5-7 minutes before plating; this takes the chill off the mousse without affecting the glaze. For frozen unglazed domes, transfer them directly from the freezer to a wire rack and glaze immediately — no need to thaw. The frozen surface helps the glaze set quickly and evenly.
One thing I’ve learned from my Parisian pastry days: never reheat a fully assembled dome. The mirror glaze will lose its shine and become dull. If you want to serve them warm, skip the mirror glaze and serve the mousse domes with a warm sauce instead — but honestly, these are best enjoyed cold, straight from the fridge, when the mousse is silky and the glaze is perfectly firm.
Variations & Easy Swaps
| Variation | Key Change | Best For | Difficulty Impact |
|---|---|---|---|
| Chocolate Mirror Domes | Swap white chocolate for dark chocolate in mousse and glaze | Chocolate lovers, less sweet | Same difficulty |
| Vegan / Dairy-Free | Use coconut cream for mousse, vegan white chocolate, agar-agar | Dairy-free diets, plant-based | Slightly more advanced |
| Mango-Passion Fruit Dome | Add mango purée to mousse, passion fruit seeds in center | Fruit-forward, summer entertaining | Same difficulty |
Chocolate Mirror Domes
For a deeper, more decadent version, replace the white chocolate in both the mousse and the glaze with high-quality dark chocolate (60-70% cocoa). The dark chocolate adds a subtle bitterness that balances the sweetness of the toasted coconut center and the condensed milk in the glaze. This variation reminds me of the rich chocolate desserts I studied in Paris — it’s sophisticated, less sweet, and pairs beautifully with a dollop of crème fraîche.
Vegan / Dairy-Free Version
I’ve developed this version for my dairy-free readers, and it’s surprisingly close to the original. Use full-fat coconut cream (chilled and whipped to stiff peaks) instead of heavy cream, and look for a high-quality vegan white chocolate made with cocoa butter and rice milk powder — brands like Pascha or iChoc work well. Replace the gelatin with agar-agar (1 tablespoon, bloomed in the same amount of water, then brought to a boil for 1 minute before using). The texture will be slightly firmer, but the flavor is still gorgeous.
Mango-Passion Fruit Dome
For a tropical twist that’s perfect for summer, fold 1/4 cup of mango purée into the mousse base before adding the whipped cream, and replace the toasted coconut center with a spoonful of passion fruit curd (or fresh passion fruit pulp mixed with a little sugar). The bright, tangy fruit cuts through the richness of the white chocolate beautifully. I discovered this combination at a farmers market in Union Square, where I found the most incredible passion fruits — it’s become one of my favorite summer variations.
What is the best way to toast coconut for a mirror glaze dome without burning it?
The key is to use medium heat and stir constantly — never walk away from the pan. Spread the shredded coconut in an even layer in a dry skillet and keep it moving with a wooden spoon or silicone spatula. The coconut will first turn pale golden, then quickly deepen to a warm brown. The moment you see the first dark spots and smell that nutty, toasty aroma, remove it from the heat immediately. It takes about 3-4 minutes total. I like to use a heavy-bottomed skillet for even heat distribution. If you’re nervous, you can also toast coconut in the oven at 325°F (163°C) on a baking sheet for 5-7 minutes, stirring halfway through — it’s more forgiving than stovetop but takes a bit longer.
Can I use a different type of glaze if I don’t have gelatin for the mirror effect?
Absolutely, though the finish won’t be the same mirror-like shine. You can make a simple white chocolate ganache glaze (just white chocolate and coconut cream, warmed and poured) — it will be creamy and delicious but won’t have that reflective, glass-like surface. For a gelatin-free mirror glaze, you can use agar-agar (1 tablespoon powdered, bloomed in cold water, then boiled for 1 minute). Agar-agar gives a firmer set and a slightly different texture, but the finish can still be quite glossy. Another option is to skip the glaze entirely and dust the domes with powdered sugar or cocoa powder, or coat them in toasted coconut flakes for a textured finish that’s just as beautiful in its own way.
How far in advance can I make toasted coconut vanilla mirror domes before serving?
You can make the unglazed domes up to 2 months ahead and store them in the freezer. Just wrap each dome individually in plastic wrap, then place them in a freezer-safe bag or container. When you’re ready to serve, glaze them directly from frozen — no need to thaw. The cold domes help the glaze set quickly. If you’ve already glazed the domes, they’ll keep in the refrigerator for up to 3 days in an airtight container, but the shine may dull slightly over time. For the best visual impact, I recommend glazing them no more than 24 hours before serving. The toasted coconut center can also be made a week in advance and stored in the refrigerator.
What pan or mold size works best for achieving the perfect dome shape?
Silicone dome molds are your best bet — they’re flexible, non-stick, and release the frozen domes easily. I recommend using half-sphere molds that are about 2.5 to 3 inches in diameter, which yields a generous individual serving. You can find these at specialty baking stores or online — brands like Silikomart or Norpro are reliable. If you don’t have dome molds, you can use a regular muffin tin lined with plastic wrap, but the shape won’t be as perfectly rounded. Another option is to use small glass bowls or ramekins lined with plastic wrap, then unmold after freezing. The key is that the molds need to be flexible enough to release the frozen domes without cracking the mousse.
Can I make these domes without an instant-read thermometer?
You can, but I strongly recommend using one for the glaze — it’s the most reliable way to know when it’s at the perfect pouring temperature of 90°F (32°C). Without a thermometer, you can test the glaze by dipping a clean finger: it should feel warm but not hot, similar to warm bath water. Another test is to dip a spoon into the glaze and watch how it flows off — if it runs off in a steady, even stream without being too thin or too thick, it’s likely close to the right temperature. For the mousse, you don’t need a thermometer as precisely — just wait until the coconut cream mixture is warm to the touch but not hot before folding in the whipped cream.
What can I use instead of white chocolate in the mousse or glaze?
For the mousse, you can substitute white chocolate with an equal amount of high-quality milk chocolate or even dark chocolate, depending on your preference. The texture will be similar, but the flavor will obviously change — milk chocolate will be sweeter, dark chocolate more intense. For the glaze, white chocolate gives that signature pale, mirror-like finish. If you use dark chocolate, the glaze will be dark brown but still glossy — just skip any food coloring. For a dairy-free option, look for vegan white chocolate made with cocoa butter and plant-based milk — it behaves almost identically to regular white chocolate in this recipe.
Why did my mirror glaze crack or become dull?
Cracking usually happens when the glaze is too cold when poured — if it’s below 85°F (29°C), it’s too thick and will set unevenly, creating cracks. Always warm it gently to 90°F (32°C) before using. Dullness can happen for several reasons: the glaze was too hot (above 95°F/35°C) and melted the frozen dome surface, creating a matte finish; the glaze wasn’t strained and had lumps; or the domes weren’t frozen solid enough when glazed. Another common culprit is condensation — if you move frozen domes from freezer to a humid room, moisture can form on the surface and cause the glaze to spot. Work quickly and confidently, and you’ll get that mirror shine every time.
Can I use coconut milk instead of coconut cream?
You can, but the texture will be less rich and the mousse may not set as firmly. Coconut cream has a higher fat content (usually around 20-25%) compared to canned coconut milk (about 15-18% fat). If you only have coconut milk, chill a can overnight, then skim off the thick top layer — that’s essentially coconut cream. Use that thick layer for the mousse, and save the watery part for another use. For the mirror glaze, you can use coconut milk instead of water for a more intense coconut flavor, but it may slightly reduce the clarity of the glaze. I’ve tested both, and the full coconut cream gives a noticeably better result.
Share Your Version!
I absolutely love seeing how you make these toasted coconut vanilla mirror domes your own. Did you add a twist to the filling? Try a different glaze color? Or maybe you nailed the mirror finish on your very first try — I want to hear about it! Drop a comment below with your experience, any questions you have, or your own creative variations. Your feedback helps me create better recipes for all of us in this beautiful cooking community.
If you’re sharing on Instagram or Pinterest, tag me @leosfoods and use #ToastedCoconutMirrorDomes so I can see your gorgeous creations and feature them on my stories. And if you loved this recipe, don’t forget to leave a star rating — it helps other home bakers find their next show-stopping dessert. From my NYC kitchen to yours — I hope this recipe brings as much warmth to your table as it does to mine. — Stella 🧡
Love This Recipe? Save It to Pinterest!
If you enjoyed this Toasted Coconut Vanilla Mirror Domes recipe, don’t let it get lost in your browser tabs! 😄 Pin it now so you can find it again anytime — and explore hundreds more tried-and-tested recipes waiting for you on my Pinterest boards.
👉 Follow Stella on Pinterest @stellarecipeblog
📌 Pin this recipe · 🔁 Re-pin your favorites · 💬 Tag me when you make it — I love seeing your creations!
👩🍳 Made these gorgeous domes?
Tag me @leosfoods on Instagram — I’d love to see your mirror glaze masterpiece!
⭐ Rate this recipe below and share your thoughts with the community!
“`
Print
Toasted Coconut Vanilla Mirror Domes
- Yield: 8 1x
Ingredients
- For the Coconut Vanilla Mousse:
- 1 cup heavy whipping cream
- 1/2 cup coconut cream
- 6 oz (170 g) white chocolate, finely chopped
- 1 tsp vanilla bean paste
- 2 tsp powdered gelatin
- 3 tbsp cold water
- For the Toasted Coconut Center:
- 1/2 cup sweetened shredded coconut
- 2 tbsp unsalted butter
- 2 tbsp sweetened condensed milk
- 1/4 tsp vanilla extract
- Pinch of sea salt
- For the Vanilla Mirror Glaze:
- 1/2 cup water
- 1/2 cup granulated sugar
- 1/3 cup sweetened condensed milk
- 6 oz (170 g) white chocolate, finely chopped
- 2 tsp powdered gelatin
- 3 tbsp cold water
- 1 tsp vanilla bean paste
- White gel food coloring (optional)
- For Garnish (optional):
- Toasted coconut flakes
- White chocolate curls
- Edible gold leaf
Instructions
- Bloom 2 tsp of gelatin in 3 tbsp cold water for 5 minutes.
- Toast the shredded coconut in a dry skillet over medium heat until golden. Stir in the butter, condensed milk, vanilla extract, and sea salt. Cook for 1–2 minutes, then cool completely.
- Heat the coconut cream until steaming. Stir in the bloomed gelatin until dissolved.
- Pour the warm coconut cream over the white chocolate and stir until smooth. Mix in the vanilla bean paste and let cool slightly.
- Whip the heavy cream to soft peaks and gently fold it into the coconut mixture.
- Fill silicone dome molds halfway with the mousse, add a spoonful of the toasted coconut filling, then cover with more mousse. Freeze for at least 6 hours or until completely firm.
- Bloom the remaining gelatin in the cold water for the mirror glaze.
- Heat the water, sugar, and condensed milk until the sugar dissolves. Remove from the heat and stir in the bloomed gelatin.
- Pour the hot mixture over the white chocolate. Add the vanilla bean paste and white food coloring, if using, then stir until smooth. Cool the glaze to about 90°F (32°C).
- Remove the frozen domes from the molds and place them on a wire rack.
- Pour the mirror glaze evenly over each dome, allowing the excess to drip away.
- Garnish with toasted coconut flakes, white chocolate curls, and edible gold leaf. Refrigerate for 20 minutes before serving.
Nutrition
- Calories: 365
- Sugar: 26 g
- Fat: 26 g
- Carbohydrates: 31 g
- Protein: 4 g
Tried This Recipe? Leave a Comment!
Did you make this recipe? I’d love to hear how it turned out! Please leave a comment and a rating below. Your feedback helps other home cooks and supports cheerychop.com!
For more delicious inspiration, follow me on Pinterest!