Midnight Blackberry Vanilla Mousse Bombs with Glossy Shine
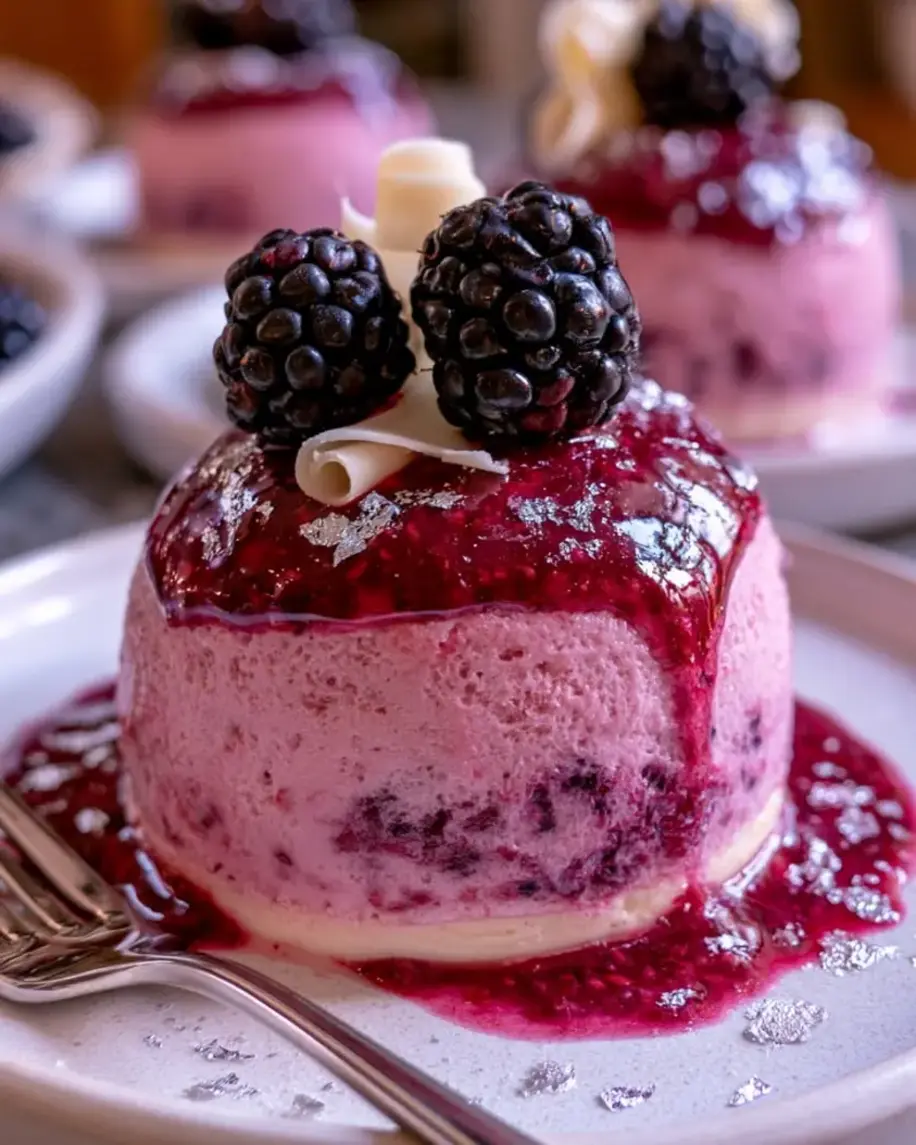
Table of Contents
Midnight Blackberry Vanilla Mousse Bombs with Glossy Shine – A Stunning Dessert That Tastes as Good as It Looks
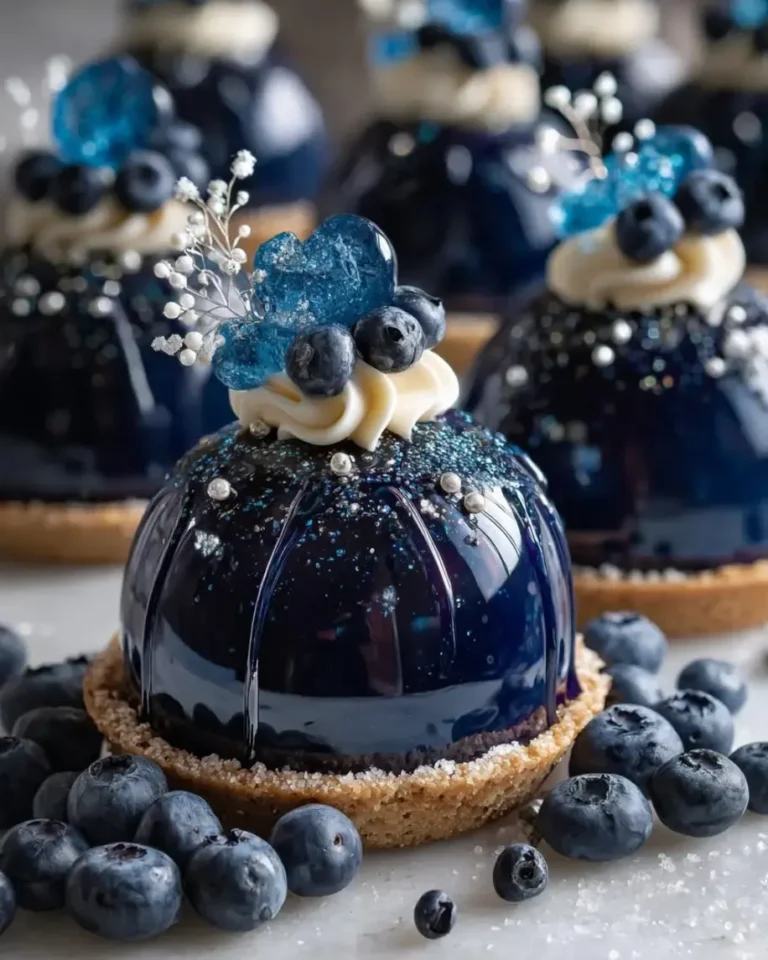
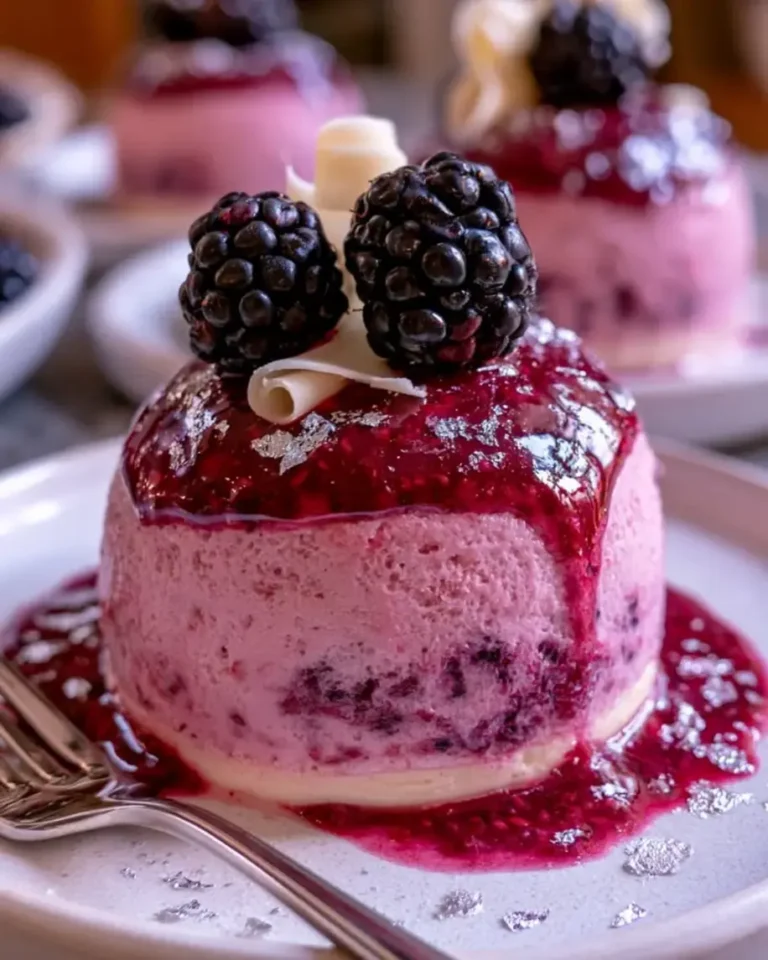
I still remember the first time I made a mirror glaze in my Paris pastry school — the way the glossy, liquid jewel slipped over a frozen dome felt like magic. Years later, standing in my little NYC kitchen, I blended that French technique with the bold, dark fruit flavors I grew up with in Morocco. These midnight blackberry vanilla mousse bombs are the result: a velvety blackberry-vanilla mousse wrapped around a creamy vanilla center, all coated in a glossy mirror glaze with a shimmering midnight hue. It’s a dessert that stops conversation cold — and then starts it right back up with happy moans.
The first bite cracks the glossy shell, giving way to an airy mousse that melts on your tongue, studded with the tart pop of blackberry purée. The sweet, thick vanilla center balances the fruit perfectly, like the best spoonful of pastry cream you’ve ever had. And that shine — it’s not just for looks. The mirror glaze seals in moisture and adds a silky texture that makes these bombs feel like a luxury affair. They’re perfect for a dinner party, a birthday, or simply because you deserve something gorgeous on your plate.
What makes my version different? I use blackberry purée that I make myself from farmers’ market berries (or good frozen ones), and I add a pinch of vanilla bean paste alongside extract for a deeper, more floral vanilla note. I also share my secret for getting that mirror glaze perfectly smooth — it’s all about temperature and a steady hand. One common mistake? Not freezing the centers long enough — they must be rock-solid to stay intact inside the mousse. I’ll walk you through every step so you can create these bombs with confidence.
Why This Midnight Blackberry Vanilla Mousse Bombs Recipe Is the Best
The Flavor Secret: Growing up in Morocco, I learned that fruit and floral flavors belong together. Here, blackberry’s natural tartness is mellowed by white chocolate and deepened with vanilla bean paste — a technique I picked up in Paris. The result is a mousse that’s fruity without being sour, and sweet without being cloying. The vanilla center adds a lush, milky richness that brings everything into balance.
Perfected Texture: The key to an airy mousse is folding the whipped cream gently and at the right temperature. If the blackberry mixture is too warm, the cream deflates; too cold, it seizes. I always cool the purée base to room temperature before folding. The mirror glaze is equally tricky — I cool it to exactly 90°F (32°C) so it flows like liquid silk. Stella’s Pro Tip: Test the glaze on the back of a spoon — it should coat evenly and leave a smooth, shiny surface.
Foolproof & Fast: Even though this looks like a professional pastry chef’s project, I’ve broken it into manageable parts. You can make the components over two days: the mousse base and centers one evening, then glaze and assemble the next. The freezing time is the longest step, but it’s hands-off. I promise, if you follow the temperatures and timing, you’ll get that glossy shine every time.
Midnight Blackberry Vanilla Mousse Bombs Ingredients
Every ingredient here plays a specific role. I buy my blackberries from the Union Square Greenmarket in season, but frozen work beautifully year-round. The white chocolate should be high-quality — I prefer Callebaut or Ghirardelli — because cheap chocolate can seize and ruin the glaze. And please, don’t skip the vanilla bean paste; it gives those gorgeous speckles and a rounder vanilla flavor.
Ingredients List
- For the Blackberry Vanilla Mousse:
- 1 cup heavy whipping cream
- 6 oz (170 g) white chocolate, finely chopped
- 1/2 cup blackberry purée (from fresh or frozen berries, see note)
- 1/4 cup whole milk
- 2 tsp powdered gelatin
- 3 tbsp cold water
- 1 tsp vanilla extract
- 1/2 tsp vanilla bean paste
- For the Vanilla Center:
- 1/2 cup vanilla pastry cream (homemade or quality store-bought)
- 2 tbsp sweetened condensed milk
- 1 tsp vanilla bean paste
- For the Glossy Mirror Glaze:
- 1/2 cup water
- 1/2 cup granulated sugar
- 1/3 cup sweetened condensed milk
- 6 oz (170 g) white chocolate, finely chopped
- 2 tsp powdered gelatin
- 3 tbsp cold water
- Black gel food coloring
- Purple gel food coloring
- Edible silver luster dust (optional, for shimmer)
- For Garnish (optional):
- Fresh blackberries
- White chocolate curls
- Edible silver flakes
Ingredient Spotlight
Blackberry Purée: You can make it by simmering 1½ cups fresh or frozen blackberries with 1–2 tbsp sugar until soft, then pressing through a fine-mesh sieve. I do it on a weekend and keep it in the fridge. The purée should be thick and intensely flavored — thin purée will make the mousse watery.
Gelatin: Powdered gelatin is easiest for home cooks. I bloom it in cold water (never hot — that kills its setting power). For a vegetarian option, you can use agar agar (see substitution table below), but the texture will be slightly less silky. Stella’s Pro Tip: Always bloom gelatin before adding to warm liquid, and stir until completely dissolved — no streaks!
White Chocolate: Use a good couverture or high-quality bar. White chocolate chips often contain stabilizers that don’t melt smoothly. I chop it finely so it melts evenly in the warm liquid. Callebaut is my go-to because it has a high cocoa butter content, which makes the mousse super creamy and the glaze extra shiny.
| Original Ingredient | Best Substitution | Flavor / Texture Impact |
|---|---|---|
| Heavy whipping cream | Coconut cream (chilled, solid part) | Slightly coconut flavor; mousse less stable, but works for dairy-free |
| Powdered gelatin | Agar agar (use 1 tsp, follow package directions) | Firmer, slightly less creamy; glaze may be less glossy |
| White chocolate | Dairy-free white chocolate (e.g., Enjoy Life brand) | Slightly grainier; still works, but watch melting temperature |
| Blackberry purée | Raspberry or strawberry purée | Different tartness; seeds may need extra straining |
How to Make Midnight Blackberry Vanilla Mousse Bombs — Step-by-Step
Let’s break it into simple, manageable steps. I’ll walk you through each stage with the exact timing and visual cues you need to nail that glossy shine.
Step 1: Make the Mousse Base
Bloom the gelatin for the mousse in 3 tbsp cold water for 5 minutes. Meanwhile, heat the whole milk in a small saucepan until just steaming — don’t let it boil. Remove from heat, add the bloomed gelatin, and stir until completely dissolved. Pour the hot milk over the finely chopped white chocolate in a bowl and stir gently until smooth. Then mix in the blackberry purée, vanilla extract, and vanilla bean paste. Let this mixture cool to room temperature — about 20 minutes.
💡 Stella’s Pro Tip: To speed up cooling, place the bowl over an ice bath and stir occasionally. But don’t let it get too cold — it should still be fluid, not set.
Step 2: Whip and Fold the Mousse
Whip the heavy cream to soft peaks — they should hold a gentle curl, not be stiff. Take a third of the whipped cream and fold it into the cooled blackberry mixture to lighten it. Then gently fold in the remaining cream until no white streaks remain. Don’t overmix; you want a light, airy mousse.
⚠️ Common Mistake to Avoid: Over-whipping the cream leads to a dense mousse. Stop as soon as you see soft, droopy peaks — they’ll set perfectly in the freezer.
Step 3: Make the Vanilla Centers
Combine the vanilla pastry cream, sweetened condensed milk, and vanilla bean paste until smooth. Spoon into small, round silicone molds (about 1-inch diameter) and freeze for at least 2 hours, or until completely firm. These centers are the surprise inside each bomb.
💡 Stella’s Pro Tip: If you don’t have small round molds, use a mini muffin pan lined with plastic wrap. The shape doesn’t have to be perfect — just uniform.
Step 4: Fill and Freeze the Bombs
Fill silicone dome molds (about 2–3 inches diameter) halfway with the blackberry mousse. Press one frozen vanilla center into each dome, then cover with the remaining mousse, making sure it fills all gaps. Smooth the flat surface with a spatula. Freeze for at least 6 hours, or overnight — the bombs must be completely solid before glazing.
⚠️ Common Mistake to Avoid: If the bombs aren’t frozen solid, the glaze will seep in and ruin the smooth surface. Give them the full 6 hours.
Step 5: Prepare the Mirror Glaze
Bloom the remaining gelatin in cold water for 5 minutes. In a saucepan, heat water, granulated sugar, and sweetened condensed milk until the sugar dissolves — stir constantly. Remove from heat, add bloomed gelatin, and stir until dissolved. Pour this hot liquid over the chopped white chocolate in a bowl and mix until smooth and glossy. Tint with black and purple gel food coloring to achieve a deep midnight shade — start with black, then add a drop of purple for complexity. Stir in edible silver luster dust if using. Cool the glaze to about 90°F (32°C) — it should feel warm, not hot, to the touch.
💡 Stella’s Pro Tip: Use an instant-read thermometer for accuracy. Too hot and the glaze will slide off. Too cool and it will clump. You can reheat gently in a water bath and re-cool as needed.
Step 6: Glaze the Bombs
Unmold the frozen mousse bombs carefully — they should slide out easily after a quick dip in hot water. Place them on a wire rack set over a tray. Pour the cooled mirror glaze evenly over each bomb, covering the top and sides completely. Let excess drip off. The glaze will set almost immediately. Garnish with fresh blackberries, white chocolate curls, or edible silver flakes while the glaze is still tacky.
⚠️ Common Mistake to Avoid: Do not pour the glaze from too high — it can create bubbles. Hold the ladle close to the bomb and pour in a steady stream.
Step 7: Chill and Serve
Place the glazed bombs in the refrigerator for at least 20 minutes before serving — this allows the centers to soften slightly while the glaze stays firm. Serve on a chilled plate for a dramatic presentation.
| Step | Action | Duration | Key Visual Cue |
|---|---|---|---|
| 1 | Bloom gelatin, heat milk, add to white chocolate | 10 min | Smooth, glossy white chocolate mixture |
| 2 | Whip cream to soft peaks; fold into cooled base | 10 min | Light, fluffy mousse with no streaks |
| 3 | Mix center ingredients; freeze in small molds | 2 hr freezing | Solid, easy to pop out of molds |
| 4 | Fill dome molds with mousse + center; freeze | 6+ hr freezing | Firm to the touch; no give when pressed |
| 5 | Prepare mirror glaze; tint and cool | 15 min + cooling | Glaze coats spoon; reaches 90°F |
| 6 | Unmold, pour glaze, garnish | 5 min | Smooth, shiny, even coating |
| 7 | Chill in fridge | 20 min | Glaze set, center slightly softened |
Serving & Presentation
These mousse bombs are showstoppers on any table. I love to serve them on a dark slate or black plate to make the silver shimmer pop. Arrange three on a rectangular platter with a few fresh blackberries and white chocolate curls scattered around. For an extra wow factor, dust a little edible silver luster dust over the plate before placing the bombs — it catches the light beautifully.
In my NYC apartment, I often pair these with a strong espresso or a glass of ice-cold Sauternes (the sweetness matches the vanilla). But honestly, even a tall glass of milk works — the richness of the mousse asks for something simple. They also sit beautifully beside a scoop of vanilla ice cream or a dollop of crème fraîche to cut the sweetness. If you’re entertaining, you can arrange them on a tiered stand for a dramatic dessert display.
In Morocco, we love to finish a meal with a sweet bite and fresh mint tea. These bombs, with their midnight color and glossy finish, would fit right in at a modern Moroccan soirée — a blend of my two worlds.
| Pairing Type | Suggestions | Why It Works |
|---|---|---|
| Side Dish | Fresh mint leaves, blackberry compote, crushed pistachios | Adds freshness, texture, and color contrast |
| Sauce / Dip | Warm chocolate sauce, salted caramel, raspberry coulis | Enhances richness or adds tartness |
| Beverage | Espresso, Sauternes, Moroccan mint tea, sparkling water | Cuts sweetness; tea adds aromatic contrast |
| Garnish | Edible flowers, gold leaf, crushed freeze-dried blackberries | Elevates visual appeal; adds crunch or color |
Make-Ahead, Storage & Reheating
As a busy NYC food blogger, I always make these bombs at least a day ahead. They’re perfect for parties because the mousse freezes beautifully and the glaze stays shiny for up to 24 hours in the fridge. Here’s how I plan:
| Method | Container | Duration | Reheating Tip |
|---|---|---|---|
| Refrigerator | Airtight container lined with paper towels | Up to 2 days | No reheating needed; serve cold. Glaze may soften slightly. |
| Freezer | Freeze unglazed bombs on a tray, then wrap individually in plastic wrap and foil | Up to 1 month | Thaw in fridge overnight, then glaze and serve the next day. |
| Make-Ahead | Complete all steps except garnishing | 1–2 days ahead | Keep glazed bombs in fridge; garnish just before serving. |
One note: Once glazed, these bombs cannot be refrozen without ruining the shine — condensation will form. So plan accordingly. Also, if you’re making them well ahead, freeze the unglazed mousse bombs for up to two weeks. The day before your event, thaw them in the refrigerator, then prepare the glaze and pour. That way the glaze is at its freshest and shiniest.
Variations & Easy Swaps
| Variation | Key Change | Best For | Difficulty Impact |
|---|---|---|---|
| Fruity Center Swap | Replace vanilla center with raspberry or passion fruit curd | Bright, tangy surprise inside | Same level; just swap filling |
| Dairy-Free Version | Use coconut cream & dairy-free white chocolate (e.g., Enjoy Life) | Guests with dairy allergies | Similar; use cold coconut cream for whipping |
| Midnight Raspberry Glaze | Replace blackberry purée with raspberry; add pink food coloring | Spring or Valentine’s Day | No change |
Variation 1: Fruity Center Swap
I love the surprise of a tart fruit center inside a sweet mousse. Try passion fruit curd (quick to make with passion fruit pulp, eggs, sugar, and butter) or a simple raspberry jam thinned with a little lemon juice. The acidity cuts through the richness beautifully. It’s a trick I learned from a Parisian pastry chef — always add a contrasting element inside a mousse bomb to keep the palate guessing.
Variation 2: Dairy-Free Version
Going dairy-free? Use full-fat coconut cream (the thick layer from a can of full-fat coconut milk) in place of heavy cream. Chill the can overnight and scoop off the solid cream. It whips to soft peaks, but won’t be quite as stable — so fold gently. For the white chocolate, look for dairy-free bars that are soy-based. The mirror glaze can be made with a plant-based condensed milk alternative. I’ve tested this, and while the texture is slightly less airy, the flavor is still rich and the shine stays lovely.
Variation 3: Seasonal Flavor Twist
When summer peaches arrive at my NYC farmers market, I swap the blackberry purée for peach purée (blanched, peeled, and puréed). The mousse takes on a golden hue, and I top the bombs with a tiny slice of fresh peach and a sprig of basil. For fall, try a spiced pumpkin purée with a pinch of cinnamon and cardamom — very Moroccan! Just keep the purée well-strained so it doesn’t add too much water to the mousse.
What is the best way to get a glossy shine on chocolate mousse bombs at home?
The key to a high-gloss mirror glaze is precise temperature control. You need to cool the glaze to exactly 90°F (32°C) before pouring — any hotter and it slides off too quickly, any cooler and it sets with a dull finish. Use an instant-read thermometer. Also ensure the bombs are frozen solid so the glaze sets instantly. I also recommend using a high-quality white chocolate with a high cocoa butter content — that’s what gives the glaze its mirror-like sheen. Finally, strain the glaze through a fine-mesh sieve before using to remove any tiny air bubbles.
Can I use frozen blackberries instead of fresh for the vanilla mousse filling?
Absolutely! Frozen blackberries work beautifully because they are picked at peak ripeness and tend to be juicier. Simply thaw them, then press through a fine-mesh sieve to remove seeds and create a smooth purée. You may need to simmer the purée briefly to reduce excess liquid if it’s too thin — a watery purée can make the mousse weepy. I often use frozen berries when fresh are out of season, and the result is just as vibrant and flavorful.
How far in advance can I make midnight blackberry vanilla mousse bombs for a party?
You can make the unglazed bombs up to one month in advance and store them tightly wrapped in the freezer. Glaze them the day before serving — the glaze stays shiny for about 24 hours in the fridge. For best results, glaze them no more than 12–24 hours ahead and keep them refrigerated uncovered (or loosely covered) so condensation doesn’t form. Garnish just before serving to keep everything fresh.
What can I substitute for gelatin to keep the mousse bombs stable and shiny?
For a vegetarian option, agar agar can replace powdered gelatin in both the mousse and the glaze. Use 1 teaspoon of agar agar powder per 2 teaspoons of gelatin, and follow the package directions because agar needs to be boiled to activate. The texture will be a bit firmer and slightly less silky. For the glaze, the shine may be slightly less mirror-like, but still impressive. Another option is to use a commercial gelatin substitute like “Vege-Gel,” but I’ve found agar works most reliably for this recipe.
Can I use blackberry jam instead of purée?
Yes, but with adjustments. Blackberry jam is thicker and sweeter than purée. To substitute, thin the jam with a little warm water until it reaches the consistency of a thick syrup — about 1 part jam to 1 part water. You may also want to reduce the added sugar in the mousse recipe. The flavor will be less fresh and more cooked, but it still works in a pinch. Strain the jam through a sieve to remove seeds for a smoother mousse.
Why did my mirror glaze crack or have bubbles?
Cracks usually happen if the glaze is too cold when poured, or if the frozen bomb isn’t completely smooth. Make sure your bombs are frozen solid and that the glaze is exactly 90°F. Bubbles form from pouring the glaze too vigorously or from incorporating air when mixing. To avoid bubbles, stir the glaze gently and let it sit for a minute before pouring. If you see bubbles, pop them with a toothpick or warm the glaze slightly and re-strain it.
How do I store leftover mousse bombs?
Store leftover glazed bombs in the refrigerator in an airtight container with the lid slightly ajar to prevent condensation. They’ll keep for up to 2 days, but the shine will fade gradually. For longer storage, freeze unglazed bombs (see my make-ahead notes). I don’t recommend refreezing once glazed. If the glaze gets dull, you can’t restore the shine — so try to glaze only what you plan to serve within a day.
Can I make this recipe without a silicone dome mold?
Yes! You can use a standard 12-cup muffin tin (metal or silicone). If using a metal tin, line each cup with a strip of parchment paper for easy release, or spray well with nonstick spray. The shape will be more like a half-dome than a perfect sphere, but it still looks beautiful. You can also use small glass bowls coated with nonstick spray — just freeze them and pop the bombs out by dipping the bowls briefly in warm water.
What other food colorings can I use for the mirror glaze?
Gel-based food colorings (like Americolor or Wilton) are best because they don’t water down the glaze. For a midnight blackberry look, use a mix of black and deep purple or dark red. You can also use natural options like black cocoa powder mixed with a little purple spirulina powder, but the shade won’t be as intense. Avoid liquid food coloring — it can affect the glaze’s consistency and make it too thin.
Are these mousse bombs suitable for kids?
Yes! Kids love the surprise center and the shiny “mirror” coating. You can make smaller versions using mini dome molds. The only thing to watch for is the gelatin content — some vegetarian families might prefer an agar substitution (see FAQ above). Also, the glaze has a tiny amount of caffeine if you use a chocolate-based glaze, but this white chocolate version is caffeine-free. My own niece and nephew devour these at family gatherings.
Share Your Version!
I hope you feel ready to make these midnight blackberry vanilla mousse bombs — and I cannot wait to see your glossy results! When you make them, please leave a star rating and a comment below telling me how it went. Did you try a variation? What garnish did you choose? Your feedback helps other home cooks feel confident giving this recipe a try.
Snap a photo of your creation and share it on Instagram or Pinterest — tag me @leosfoods so I can see your shine. And if you have a question that I didn’t answer here, drop it in the comments and I’ll personally reply. From my NYC kitchen to yours — I hope this recipe brings as much warmth to your table as it does to mine. — Stella 🧡
Love This Recipe? Save It to Pinterest!
If you enjoyed this Midnight Blackberry Vanilla Mousse Bombs recipe, don’t let it get lost in your browser tabs! 😄 Pin it now so you can find it again anytime — and explore hundreds more tried-and-tested recipes waiting for you on my Pinterest boards.
👉 Follow Stella on Pinterest @stellarecipeblog
📌 Pin this recipe · 🔁 Re-pin your favorites · 💬 Tag me when you make it — I love seeing your creations!
Midnight Blackberry Vanilla Mousse Bombs with Glossy Shine
- Yield: 8 1x
Ingredients
- For the Blackberry Vanilla Mousse:
- 1 cup heavy whipping cream
- 6 oz (170 g) white chocolate, finely chopped
- 1/2 cup blackberry purée
- 1/4 cup whole milk
- 2 tsp powdered gelatin
- 3 tbsp cold water
- 1 tsp vanilla extract
- 1/2 tsp vanilla bean paste
- For the Vanilla Center:
- 1/2 cup vanilla pastry cream
- 2 tbsp sweetened condensed milk
- 1 tsp vanilla bean paste
- For the Glossy Mirror Glaze:
- 1/2 cup water
- 1/2 cup granulated sugar
- 1/3 cup sweetened condensed milk
- 6 oz (170 g) white chocolate, finely chopped
- 2 tsp powdered gelatin
- 3 tbsp cold water
- Black gel food coloring
- Purple gel food coloring
- Edible silver luster dust
- For Garnish (optional):
- Fresh blackberries
- White chocolate curls
- Edible silver flakes
Instructions
- 1. Bloom the gelatin for the mousse in 3 tbsp cold water for 5 minutes.
- 2. Heat the milk until just steaming, then stir in the bloomed gelatin until dissolved.
- 3. Pour the hot milk over the white chocolate and stir until smooth.
- 4. Mix in the blackberry purée, vanilla extract, and vanilla bean paste. Allow the mixture to cool to room temperature.
- 5. Whip the heavy cream to soft peaks and gently fold it into the blackberry mixture.
- 6. Combine the vanilla pastry cream, sweetened condensed milk, and vanilla bean paste until smooth. Spoon into small silicone molds and freeze until firm.
- 7. Fill silicone dome molds halfway with the blackberry mousse, place a frozen vanilla center in each, then cover with the remaining mousse. Freeze for at least 6 hours, or until completely firm.
- 8. Bloom the remaining gelatin in the cold water for the mirror glaze.
- 9. Heat the water, sugar, and condensed milk until the sugar dissolves. Remove from the heat, stir in the bloomed gelatin, then pour over the white chocolate and mix until smooth.
- 10. Tint the glaze with black and purple gel food coloring to create a deep midnight shade, then stir in the edible silver luster dust. Cool the glaze to about 90°F (32°C).
- 11. Unmold the frozen mousse bombs and place them on a wire rack over a tray. Pour the glossy mirror glaze evenly over each bomb.
- 12. Garnish with fresh blackberries, white chocolate curls, and edible silver flakes. Refrigerate for 20 minutes before serving.
Nutrition
- Calories: 340
- Sugar: 28 g
- Fat: 23 g
- Carbohydrates: 31 g
- Protein: 4 g
Tried This Recipe? Leave a Comment!
Did you make this recipe? I’d love to hear how it turned out! Please leave a comment and a rating below. Your feedback helps other home cooks and supports cheerychop.com!
For more delicious inspiration, follow me on Pinterest!