Easy No-Bake Blueberry Cheesecake Crumble Domes
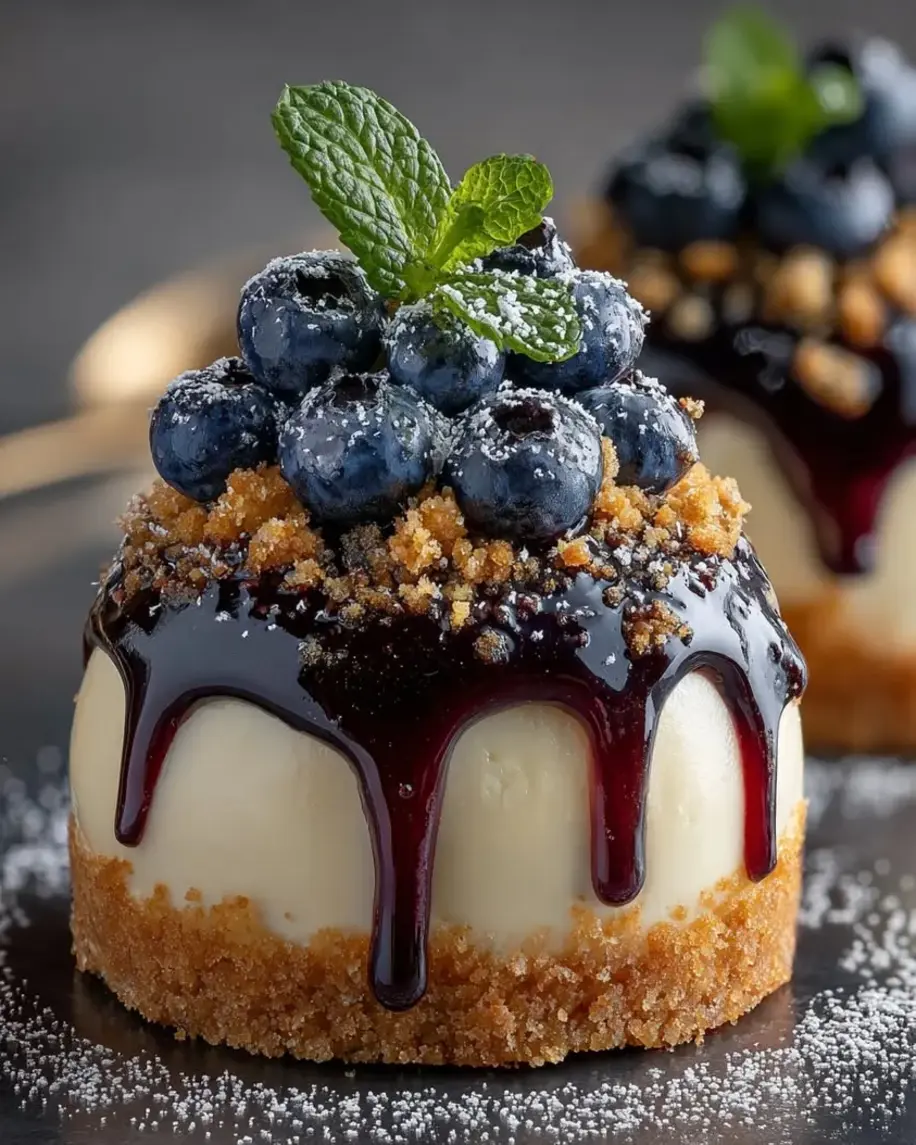
Table of Contents
Blueberry Cheesecake Crumble Domes – No-Bake Elegance in Every Bite
I still remember the first time I made these blueberry cheesecake crumble domes — it was a sweltering August afternoon in my tiny NYC apartment, and I was craving something that felt both luxurious and refreshing without turning on the oven. My Parisian pastry chef training kicked in: I wanted the creamy richness of a classic cheesecake, but with a lighter, no-bake approach that would hold its shape beautifully. These individual no bake cheesecake domes are the result — a dessert that looks like it came from a high-end patisserie but comes together in your own kitchen with simple ingredients and a little patience. The first bite of that silky blueberry cheesecake filling against the buttery crumble base, all topped with a glossy, jewel-toned glaze — it was pure magic.
The beauty of these mini cheesecake domes lies in their contrasting textures and layers of flavor. The filling is impossibly smooth — thanks to a touch of gelatin for structure and freshly whipped cream for lightness — studded with whole blueberries that burst with every bite. The crumble base, made with graham cracker crumbs and toasted pecans, adds a nutty, buttery crunch that anchors each dome. And that glaze? It’s a simple simmer of blueberries, sugar, and a whisper of lemon, cooked down into a spoonable ruby-garnet sauce that cascades over the domes like a silky veil. It’s the kind of dessert that makes people at your dinner party gasp a little when you bring it to the table.
What sets my version apart is the technique I learned in Paris for stabilizing no-bake cheesecakes without making them heavy. The secret is blooming gelatin in cold water and dissolving it into warm cream before folding it into the cream cheese mixture — this gives the domes a silky, mousse-like texture that holds its shape perfectly when unmolded. A common mistake I see home cooks make is skipping the full freeze time; those 6 hours are non-negotiable for clean, beautiful domes. Trust me — I’ve tested this blueberry cheesecake recipe a dozen times to get it just right. From my NYC kitchen to yours, these domes are going to become your new signature dessert.
Why This Blueberry Cheesecake Crumble Domes Recipe Is the Best
The Flavor Secret — I’ve layered blueberry into this dessert three ways: whole berries folded into the filling, a handful folded in for texture, and a concentrated glaze on top. This triple-blueberry approach means you get bright, fruity flavor in every spoonful, balanced by the tangy cream cheese and the warm, nutty crumble. It’s a technique I borrowed from my mother’s Moroccan cooking, where she’d layer the same ingredient in different forms to build depth.
Perfected Texture — The key is the gelatin-to-cream ratio. Too much gelatin and the filling turns rubbery; too little and your domes will slump. I spent three test batches dialing in the exact amount: one teaspoon of powdered gelatin bloomed in two tablespoons of cold water gives you a filling that’s firm enough to unmold but still luxuriously creamy on the palate. My Parisian chef taught me that the best no-bake desserts should feel like a cloud — light, airy, and utterly indulgent.
Foolproof & Fast — Despite their elegant appearance, these blueberry dessert cups (or domes!) are surprisingly beginner-friendly. The active prep time is only about 30 minutes, and the rest is hands-off freezing. No water baths, no cracking, no complicated pastry work. If you can beat cream cheese and whip cream, you can make these. I’ve had friends who consider themselves baking-phobic pull these off for dinner parties with zero stress.
Blueberry Cheesecake Crumble Domes Ingredients
I source most of my ingredients from the Union Square Greenmarket in NYC — the blueberries there in peak summer are outrageously good, bursting with sweetness and that deep, jammy flavor that makes this dessert sing. But even when I’m shopping at my local grocery store, I know exactly what to look for. Here’s everything you’ll need to make these stunning domes.
Ingredients List
- For the Blueberry Cheesecake Filling:
- 8 oz (225 g) cream cheese, softened
- 1/3 cup powdered sugar
- 1 tsp vanilla extract
- 1 tbsp fresh lemon juice
- 1 cup heavy whipping cream
- 1 cup fresh blueberries
- 1 tsp unflavored powdered gelatin
- 2 tbsp cold water
- For the Crumble Base:
- 1 1/2 cups graham cracker crumbs
- 1/4 cup finely chopped toasted pecans
- 4 tbsp unsalted butter, melted
- 1 tbsp brown sugar
- For the Blueberry Glaze:
- 1 cup fresh blueberries
- 2 tbsp granulated sugar
- 1 tbsp water
- 1 tsp cornstarch
- 1 tsp lemon juice
- For Garnish (optional):
- Fresh blueberries
- Graham cracker crumbs
- Fresh mint leaves
Ingredient Spotlight
Cream Cheese — This is the backbone of your filling. Use block-style cream cheese (not the spreadable kind in a tub) for the best structure. Let it soften fully to room temperature — about 1 hour on the counter — so it beats into a silky smooth base without lumps. Philadelphia brand is my go-to, but any full-fat block cream cheese works beautifully.
Fresh Blueberries — I recommend fresh blueberries for both the filling and the glaze. They hold their shape better when folded into the cheesecake mixture and give the glaze a brighter, more vibrant flavor. Look for berries that are deep blue with a silvery bloom — that’s a sign of freshness. If you’re using frozen, see the FAQ section below for my tested tips.
Unflavored Powdered Gelatin — This is your secret weapon for stable, sliceable (or in this case, unmoldable) no-bake cheesecake. Knox brand is widely available in US grocery stores in the baking aisle. Never skip the blooming step — letting the gelatin sit in cold water for 5 minutes ensures it dissolves evenly and gives you a smooth, lump-free filling.
Graham Cracker Crumbs — They provide that classic cheesecake crust texture we all love. You can buy them pre-crushed or crush whole graham crackers in a zip-top bag with a rolling pin. For a gluten-free alternative, use gluten-free graham crackers or crushed gluten-free cookies.
| Original Ingredient | Best Substitution | Flavor / Texture Impact |
|---|---|---|
| Cream Cheese | Dairy-free cream cheese (e.g., Kite Hill) | Slightly tangier; may need 1 extra tbsp cornstarch for structure |
| Heavy Whipping Cream | Coconut cream (chilled, whipped) | Coconut flavor; lighter, less stable structure |
| Graham Cracker Crumbs | Shortbread cookies or vanilla wafers | Sweeter, more buttery crumble |
| Powdered Sugar | Granulated sugar (blitzed in blender) | Slightly grittier; use only if necessary |
| Pecans | Walnuts or almonds (toasted, finely chopped) | Similar nutty crunch; different flavor nuance |
How to Make Blueberry Cheesecake Crumble Domes — Step-by-Step
I’ve broken this down into clear, manageable steps so you can follow along with confidence. Remember: the freezing time is your friend, not a hurdle. Let’s make some gorgeous domes!
Step 1: Bloom the Gelatin
In a small bowl, sprinkle 1 teaspoon of unflavored powdered gelatin over 2 tablespoons of cold water. Let it stand undisturbed for 5 minutes. It will look like a firm, jiggly sponge — that’s exactly what you want. This step is crucial because it hydrates the gelatin so it dissolves evenly later, giving you a silky-smooth cheesecake filling with no lumps.
💡 Stella’s Pro Tip: Always use cold water for blooming gelatin. Warm water can cause the gelatin to clump and create an uneven texture. Set a timer for exactly 5 minutes — it’s easy to forget and over-bloom, which weakens the gelatin’s setting power.
Step 2: Make the Cheesecake Base
In a large bowl, beat 8 oz of softened cream cheese with 1/3 cup powdered sugar, 1 teaspoon vanilla extract, and 1 tablespoon of fresh lemon juice until the mixture is completely smooth and fluffy — about 2 minutes with a hand mixer on medium speed. Scrape down the sides and beat again briefly. The lemon juice brightens the flavor and helps balance the sweetness.
⚠️ Common Mistake to Avoid: Don’t use cold cream cheese straight from the fridge. It will create a lumpy, grainy mixture that no amount of beating can fully smooth out. Let it sit on the counter for at least 45–60 minutes before you start.
Step 3: Dissolve the Gelatin
Heat 2 tablespoons of the heavy cream (from your 1 cup) in a small saucepan or microwave until steaming hot — not boiling. Remove from heat and immediately stir in the bloomed gelatin, whisking constantly until fully dissolved. Let it cool for 2–3 minutes, then pour it into your cream cheese mixture while beating on low speed. This method ensures the gelatin disperses evenly without seizing.
💡 Stella’s Pro Tip: If you see any tiny lumps of undissolved gelatin after whisking, strain the cream mixture through a fine-mesh sieve before adding it to the cream cheese. Better safe than sorry — lumps in the filling will show up as rubbery spots in your finished domes.
Step 4: Whip and Fold the Cream
Whip the remaining heavy cream (about 3/4 cup) in a chilled bowl until soft peaks form — when you lift the whisk, the cream should hold a gentle peak that droops slightly at the tip. Gently fold the whipped cream into the cream cheese mixture in two additions, using a rubber spatula in a sweeping motion. Be patient and gentle; you want to keep as much air as possible for a light, mousse-like texture.
⚠️ Common Mistake to Avoid: Over-folding is just as bad as under-folding. Stop as soon as no white streaks remain. If you keep going, you’ll deflate the cream and end up with a dense, heavy filling instead of a light, airy one.
Step 5: Fold in Blueberries and Fill Molds
Gently fold in half of the fresh blueberries (about 1/2 cup) into the cheesecake mixture. Spoon the mixture evenly into silicone dome molds — you can use half-sphere molds (about 2.5 inches in diameter) or even silicone muffin cups if you don’t have dome molds. Smooth the tops with a small offset spatula. Freeze for at least 6 hours, or overnight, until completely solid.
💡 Stella’s Pro Tip: For clean, professional-looking domes, tap each filled mold gently on the counter a few times to release any air bubbles. Then use a toothpick to pop any visible bubbles on the surface before freezing.
Step 6: Make the Crumble Base
In a medium bowl, combine 1 1/2 cups graham cracker crumbs, 1/4 cup finely chopped toasted pecans, 4 tablespoons melted unsalted butter, and 1 tablespoon brown sugar. Stir with a fork until the mixture resembles wet sand and holds together when pressed. Line a baking sheet with parchment paper. Using a 2-inch round cookie cutter or a small ring mold, press the crumble mixture firmly into 8 even rounds that are slightly larger than the base of your dome molds. Chill for at least 30 minutes to firm up.
⚠️ Common Mistake to Avoid: The crumble rounds must be well-chilled before you place the domes on them. If they’re even slightly warm, they’ll crumble apart when you add the dome. I like to make them a day ahead and keep them in the fridge.
Step 7: Make the Blueberry Glaze
In a small saucepan, combine 1 cup fresh blueberries, 2 tablespoons granulated sugar, 1 tablespoon water, 1 teaspoon cornstarch, and 1 teaspoon lemon juice. Stir to combine. Bring to a simmer over medium heat, then reduce the heat and cook for 4–5 minutes, stirring occasionally, until the blueberries have burst and the mixture has thickened to a syrupy consistency. Remove from heat and let cool completely — the glaze will continue to thicken as it cools.
💡 Stella’s Pro Tip: For a super-smooth glaze, strain the mixture through a fine-mesh sieve after cooking, pressing on the solids to extract all the liquid. I prefer it slightly rustic with the berry skins, but either way is gorgeous. If you want extra shine, stir in 1 teaspoon of light corn syrup after straining.
Step 8: Unmold and Assemble
Remove the frozen cheesecake domes from the molds — they should pop out easily from silicone. If they resist, let them sit at room temperature for 1–2 minutes. Place each dome on a chilled crumble round, flat side down. Spoon or pour the cooled blueberry glaze over each dome, letting it cascade naturally down the sides. Refrigerate for 30 minutes to let the glaze set slightly and the dome soften to a creamy, mousse-like texture.
⚠️ Common Mistake to Avoid: Don’t skip the 30-minute refrigerate step! Serving the domes straight from frozen will give you an icy, hard texture instead of the luscious, creamy consistency you want. That half-hour in the fridge is the magic window where the texture transforms.
Step 9: Garnish and Serve
Just before serving, garnish each dome with a few fresh blueberries, a sprinkle of graham cracker crumbs, and a tiny sprig of mint. The bright green mint against the deep blue glaze and golden crumble is absolutely stunning. Serve immediately and watch your guests’ faces light up!
💡 Stella’s Pro Tip: For an extra touch of elegance, dust the plate with a tiny pinch of flaky sea salt before placing the dome on it. The salt enhances the blueberry flavor and balances the sweetness beautifully.
| Step | Action | Duration | Key Visual Cue |
|---|---|---|---|
| 1 | Bloom gelatin in cold water | 5 mins | Firm, jiggly, sponge-like mass |
| 2 | Beat cream cheese mixture | 2 mins | Smooth, fluffy, no lumps |
| 3 | Dissolve gelatin in warm cream | 2 mins | Clear, smooth liquid, no specks |
| 4 | Whip cream to soft peaks | 3-4 mins | Gentle peaks that droop slightly |
| 5 | Fold and fill molds | 5 mins | Evenly distributed berries, smooth top |
| 6 | Press crumble rounds | 10 mins + 30 mins chill | Holds together when pressed |
| 7 | Simmer blueberry glaze | 4-5 mins + cooling | Thickened, syrupy, coats spoon |
| 8 | Unmold and assemble | 5 mins + 30 mins fridge | Clean release, glaze cascades |
| 9 | Garnish and serve | 5 mins | Bright garnishes, ready to impress |
Serving & Presentation
These blueberry cheesecake crumble domes are showstoppers on any dessert table. I love serving them on simple white plates to let the deep purple glaze and golden crumble take center stage. For dinner parties, I arrange the domes on a large wooden board or marble slab, garnished with a scatter of fresh blueberries and mint sprigs — it feels both rustic and elegant, a nod to the markets in Marrakech where fruit is displayed like jewels.
Temperature is everything here. After the 30-minute refrigerator rest, the domes should be creamy and mousse-like — not too firm, not too soft. If you’re serving them straight from the fridge, let them sit at room temperature for 5-10 minutes to take the chill off. The glaze should be glossy and slightly thickened, but still pourable. I sometimes drizzle a little extra glaze around the plate for a dramatic, artistic effect.
For a truly memorable dessert course, pair these domes with a small glass of dessert wine or a strong espresso — the bitterness of the coffee cuts through the richness of the cheesecake beautifully. In the summer, I serve them with a scoop of vanilla bean ice cream or a dollop of lightly sweetened crème fraîche. The contrast of cold, creamy, and crunchy is irresistible.
| Pairing Type | Suggestions | Why It Works |
|---|---|---|
| Side Dish | Vanilla bean ice cream, crème fraîche, lemon sorbet | Adds cool, creamy contrast to the rich dome |
| Sauce / Dip | Extra blueberry glaze, lemon curd, white chocolate sauce | Enhances the blueberry flavor or adds sweetness |
| Beverage | Espresso, late-harvest Riesling, jasmine tea | Coffee cuts richness; wine complements fruit |
| Garnish | Fresh mint, edible flowers, flaky sea salt | Adds color, freshness, and a flavor pop |
Make-Ahead, Storage & Reheating
One of the things I love most about this blueberry cheesecake recipe is how beautifully it works for entertaining. In my busy NYC life, I’m all about make-ahead desserts that actually get better with time. These domes are the perfect party dessert because almost all the work happens days before your guests arrive, leaving you on the day-of with just the final assembly and garnishing.
| Method | Container | Duration | Reheating Tip |
|---|---|---|---|
| Refrigerator | Airtight container, layered with parchment | Up to 3 days | Serve straight from fridge; let sit 10 mins before serving |
| Freezer | Freezer-safe container, wax paper between layers | Up to 2 months | Thaw in fridge overnight; glaze after thawing |
| Make-Ahead | Freeze domes and crumble separately | Up to 3 days before serving | Assemble, glaze, and garnish day of serving |
For the best texture, I recommend freezing the domes and crumble rounds separately up to 3 days before your party. On the day you’re serving, remove the domes from their molds, place them on the crumble bases, and let them thaw in the refrigerator for about 2 hours. Then make the glaze fresh (it takes only 5 minutes) and pour it over the domes. This way, the glaze stays glossy and the crumble stays crunchy — the perfect contrast.
If you have leftovers (which honestly is rare!), store the assembled domes in an airtight container in the refrigerator for up to 3 days. The crumble will soften slightly from the moisture of the glaze, but they’ll still be delicious. Don’t freeze already-glazed domes — the glaze will become watery when thawed. Instead, freeze unglazed domes and add the glaze after thawing.
Variations & Easy Swaps
One of the reasons I love this recipe so much is how adaptable it is. Whether you’re catering to dietary restrictions or just want to play with different flavors, these domes are a fantastic canvas. Here are some of my favorite variations that I’ve tested in my own kitchen.
| Variation | Key Change | Best For | Difficulty Impact |
|---|---|---|---|
| Lemon-Blueberry Domes | Add 1 tbsp lemon zest to filling; use lemon glaze | Spring parties, citrus lovers | Easy (no extra steps) |
| Gluten-Free Version | Use gluten-free graham crackers or almond flour crust | Gluten-sensitive guests | Easy (simple swap) |
| Mixed Berry Domes | Replace blueberries with raspberries, blackberries, or a mix | Summer berry season, variety | Easy (same method) |
Lemon-Blueberry Domes
This is my personal favorite variation. Add the zest of one lemon to the cream cheese mixture along with the lemon juice, and replace the water in the blueberry glaze with fresh lemon juice for an extra citrusy kick. The lemon brightens the blueberries in a way that reminds me of the lemon tarts I made in pastry school in Paris — it’s a classic pairing for a reason. I often serve these at spring brunches with a sprinkle of candied lemon zest on top.
Gluten-Free Version
To make these domes gluten-free, simply swap the graham cracker crumbs for a gluten-free alternative. I’ve had excellent results using gluten-free vanilla wafer crumbs (like Mi-Del or Kinnikinnick brands) or a mixture of almond flour and crushed gluten-free shortbread cookies. The texture is slightly less crunchy but still wonderfully buttery. If using almond flour, toast it lightly in a dry skillet first to deepen the flavor. This version has been a hit at my dinner parties with gluten-sensitive friends.
Mixed Berry Domes
When summer hits its peak at the NYC farmers markets, I love making these with a mix of berries — raspberries, blackberries, and halved strawberries all work beautifully. The flavor profile becomes more complex and the visual effect is stunning, with jewel-toned berries peeking through the glaze. For the glaze, use a mix of whatever berries you have, or stick with blueberry as the base and add others to the filling. The cooking time stays the same, but be gentle when folding more delicate berries like raspberries into the filling.
Share Your Version!
I absolutely love hearing how these blueberry cheesecake crumble domes turn out in your kitchens. Did you try the classic version or one of the variations? Did your dinner guests gasp when you brought them to the table? Drop a star rating and a comment below — your feedback helps other home cooks decide whether to try this recipe, and I personally read every single one.
If you share a photo on Instagram or Pinterest, tag me @leosfoods so I can see your beautiful creations. I love nothing more than scrolling through my feed and seeing those glossy domes with the glaze cascading down the sides — it makes my day, every time. And if you have a question about a specific step or substitution I didn’t cover here, ask away in the comments. I’m here for you!
From my NYC kitchen to yours — I hope this recipe brings as much warmth to your table as it does to mine. — Stella 🧡
Love This Recipe? Save It to Pinterest!
If you enjoyed this Blueberry Cheesecake Crumble Domes recipe, don’t let it get lost in your browser tabs! 😄 Pin it now so you can find it again anytime — and explore hundreds more tried-and-tested recipes waiting for you on my Pinterest boards.
👉 Follow Stella on Pinterest @stellarecipeblog
📌 Pin this recipe · 🔁 Re-pin your favorites · 💬 Tag me when you make it — I love seeing your creations!
What can I use instead of graham crackers for the crumble in blueberry cheesecake domes?
Absolutely! There are several delicious alternatives to graham crackers for the crumble base. My top recommendation is crushed shortbread cookies or vanilla wafers — they provide a similar buttery sweetness and crunch. For a nuttier flavor, try crushed digestive biscuits or speculoos cookies. If you’re avoiding gluten, use gluten-free graham crackers or a mixture of almond flour and crushed gluten-free cookies. For a lower-sugar option, crushed unsweetened rice cereal or oat flour mixed with melted butter works, though the texture will be less crunchy. Whichever you choose, keep the ratio of 1 1/2 cups crumbs to 4 tablespoons melted butter and 1 tablespoon brown sugar for the right consistency.
How do you get the cheesecake domes to hold their shape without collapsing?
The key to stable, perfectly shaped cheesecake domes lies in three things: gelatin, thorough freezing, and patience. First, the gelatin (1 teaspoon bloomed in 2 tablespoons cold water) provides the structural backbone — it’s non-negotiable for domes that hold their shape. Second, you MUST freeze the filled molds for at least 6 hours, preferably overnight. The domes need to be completely solid before unmolding. Third, when you unmold, work quickly and place each dome directly onto its chilled crumble base. If a dome sticks to the mold, let it sit at room temperature for 1-2 minutes and try again. Once assembled, the 30-minute rest in the refrigerator allows the dome to soften to a creamy texture while still maintaining its beautiful shape.
Can I use frozen blueberries for the blueberry cheesecake crumble domes?
Yes, you can use frozen blueberries, but with a few important adjustments. For the cheesecake filling, use frozen blueberries straight from the freezer without thawing — fold them in gently to avoid turning the mixture purple. However, note that frozen berries release more moisture than fresh, which can slightly soften the filling’s structure. For this reason, I recommend adding only half the amount of blueberries (about 1/4 cup) to the filling when using frozen. For the glaze, frozen blueberries work beautifully — in fact, they often break down faster and create a richer, deeper color. Simmer them for an extra minute or two until they’ve fully released their juices. If you’re using frozen blueberries for both, your domes will still be delicious, just slightly less firm in texture.
How far in advance can I make blueberry cheesecake crumble domes for a party?
These domes are perfect for entertaining because they can be made largely in advance. Here’s my recommended timeline: up to 3 days before your party, prepare the cheesecake filling, fill the molds, and freeze them solid. Make the crumble rounds and store them in an airtight container in the refrigerator. On the day of your party, remove the domes from their molds, place them on the crumble bases, and let them thaw in the refrigerator for about 2 hours. Make the blueberry glaze fresh (it takes just 5 minutes) and pour it over the domes. Garnish just before serving. This approach gives you a stunning, stress-free dessert with almost no last-minute work. The domes can also be frozen for up to 2 months if you want to prepare even further ahead.
What size silicone dome molds should I use for this recipe?
I recommend using half-sphere silicone dome molds that are about 2.5 to 3 inches in diameter. This size yields substantial individual servings that are elegant without being overwhelming. Each dome uses roughly 1/4 cup of filling, and the recipe makes exactly 8 domes with these dimensions. If your molds are smaller (2 inches), you’ll get 10-12 domes with a shorter freeze time (about 4 hours). If they’re larger (3.5 inches), you’ll get 6-7 domes and need 8+ hours of freezing. Silicone is essential for easy unmolding — rigid metal or plastic molds will not work. I found a great set of silicone half-sphere molds at my local kitchen supply store in NYC, but they’re widely available online. If you don’t have dome molds, you can use silicone muffin cups as a substitute.
Can I make these blueberry cheesecake crumble domes dairy-free?
Yes, with some thoughtful substitutions you can create a dairy-free version that’s still creamy and delicious. Replace the cream cheese with a high-quality dairy-free alternative — I’ve had good results with Kite Hill brand’s plain cream cheese style. For the heavy cream, use canned coconut cream that’s been chilled overnight; scoop the solidified cream and whip it just as you would dairy cream. The coconut cream adds a subtle coconut flavor that pairs surprisingly well with blueberries. Use a dairy-free butter alternative (like Miyoko’s or Earth Balance) for the crumble base. Note that dairy-free cream cheese is softer than the dairy version, so the filling may be slightly less firm. I recommend adding an extra 1/2 teaspoon of gelatin to compensate. The domes may need an additional hour of freezing to set completely.
Why did my cheesecake filling turn purple when I added the blueberries?
Don’t worry — purple filling is completely normal and still delicious! The blueberry juices naturally bleed into the cream cheese mixture, especially if you’re using very ripe or frozen berries. If you want to minimize color bleeding, there are a few tricks. First, make sure your blueberries are as dry as possible — pat them gently with a paper towel before folding them in. Second, fold the berries in at the very last moment, using just a few gentle strokes. Third, you can gently coat the blueberries in a tiny amount of cornstarch (about 1 teaspoon) before adding them; the starch absorbs excess moisture and helps keep the berries intact. That said, I personally love the subtle purple swirl that gives each dome a unique, handcrafted look — it’s a beautiful visual cue that real blueberries are inside.
What can I serve with these blueberry cheesecake domes for a complete dessert?
These domes are rich and satisfying on their own, but they pair beautifully with a few simple accompaniments. For a classic dessert plate, serve each dome with a small scoop of vanilla bean ice cream or a dollop of lightly sweetened crème fraîche — the cool, creamy element balances the richness of the cheesecake. A drizzle of extra blueberry glaze or a swirl of lemon curd on the plate adds both flavor and visual appeal. For beverages, a strong espresso or cappuccino cuts through the sweetness beautifully, while a glass of late-harvest Riesling or Moscato d’Asti complements the berry flavors. If you’re serving these as part of a larger dessert spread, pair them with something light and citrusy, like lemon bars or a fresh fruit salad, to balance the richness. In the summer, I love serving them alongside a pitcher of iced mint tea.
How do I store leftover blueberry cheesecake crumble domes?
Leftover assembled domes (with glaze and garnishes) should be stored in an airtight container in the refrigerator for up to 3 days. Place them in a single layer with a piece of wax paper or parchment between each dome to prevent sticking. The crumble base will soften over time from the moisture of the glaze and filling, but they’ll still taste wonderful. If you want to keep the crumble crunchy, store the unassembled components separately: freeze the plain domes in an airtight container for up to 2 months, keep the crumble rounds in the fridge, and store the glaze in a sealed jar in the fridge for up to 1 week. Assemble only what you plan to serve. I do not recommend freezing already-glazed domes — the glaze becomes watery and loses its glossy shine after thawing.
Can I skip the gelatin in this no-bake cheesecake dome recipe?
I don’t recommend skipping the gelatin if you want your domes to hold their iconic shape. Gelatin is the structural backbone that allows the filling to set firmly enough to be unmolded from a silicone dome and placed on a crumble base without collapsing. Without it, the filling would remain too soft and mousse-like to hold its shape — you’d end up with a puddle rather than a dome. However, if you prefer a softer, mousse-style dessert that you can serve in a glass or dish, you can omit the gelatin and simply chill the filling in serving cups. The flavor will be the same, but the presentation will be different. If you’re vegetarian, you can use agar-agar as a substitute: use 1 teaspoon agar-agar powder dissolved in 2 tablespoons water, bring to a boil, then cool slightly before adding. Note that agar-agar sets more firmly and at a higher temperature than gelatin, so the texture will be slightly different.
Did You Make This Recipe? I’d Love to Know!
⭐ Leave a star rating and tell me how your blueberry cheesecake crumble domes turned out in the comments below.
📸 Tag @leosfoods on Instagram or Pinterest — I feature my favorites in my stories!
💬 What’s your favorite no-bake dessert? I’m always looking for new ideas to test in my NYC kitchen.
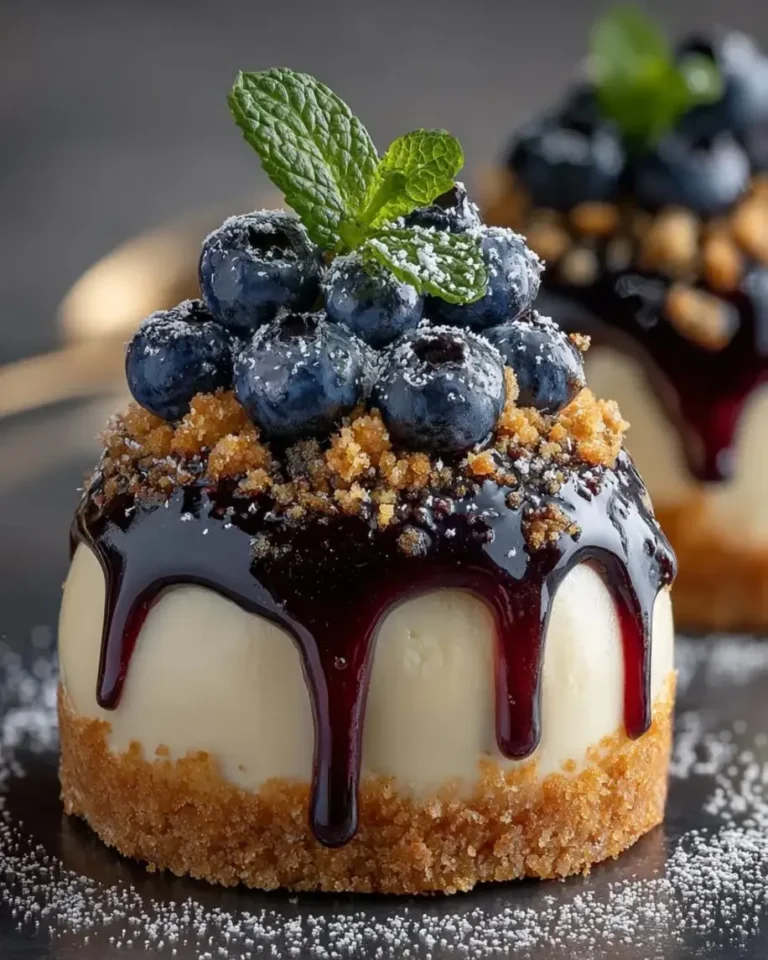
Blueberry Cheesecake Crumble Domes
Elegant individual desserts featuring creamy blueberry cheesecake encased in a crumble base and topped with a glossy blueberry glaze.
- Yield: 8 1x
Ingredients
- For the Blueberry Cheesecake Filling:
- 8 oz (225 g) cream cheese, softened
- 1/3 cup powdered sugar
- 1 tsp vanilla extract
- 1 tbsp fresh lemon juice
- 1 cup heavy whipping cream
- 1 cup fresh blueberries
- 1 tsp unflavored powdered gelatin
- 2 tbsp cold water
- For the Crumble Base:
- 1 1/2 cups graham cracker crumbs
- 1/4 cup finely chopped toasted pecans
- 4 tbsp unsalted butter, melted
- 1 tbsp brown sugar
- For the Blueberry Glaze:
- 1 cup fresh blueberries
- 2 tbsp granulated sugar
- 1 tbsp water
- 1 tsp cornstarch
- 1 tsp lemon juice
- For Garnish (optional):
- Fresh blueberries
- Graham cracker crumbs
- Fresh mint leaves
Instructions
- Bloom the gelatin in the cold water and let it stand for 5 minutes.
- Beat the cream cheese, powdered sugar, vanilla, and lemon juice until smooth.
- Heat 2 tbsp of the heavy cream until steaming, then stir in the bloomed gelatin until dissolved. Cool slightly and mix into the cream cheese mixture.
- Whip the remaining heavy cream to soft peaks and gently fold it into the cheesecake mixture.
- Fold in half of the blueberries and spoon the mixture into silicone dome molds. Freeze for at least 6 hours or until firm.
- Combine the graham cracker crumbs, toasted pecans, melted butter, and brown sugar. Press into small rounds that match the base of each dome and chill until firm.
- In a saucepan, combine the remaining blueberries, granulated sugar, water, cornstarch, and lemon juice. Simmer for 4–5 minutes until thickened, then cool.
- Unmold the frozen cheesecake domes and place each on a crumble base.
- Spoon or pour the cooled blueberry glaze over each dome, allowing it to cascade down the sides.
- Refrigerate for 30 minutes before serving.
- Garnish with fresh blueberries, graham cracker crumbs, and mint leaves.
Nutrition
- Calories: 365
- Sugar: 19 g
- Fat: 26 g
- Carbohydrates: 30 g
- Protein: 5 g
Tried This Recipe? Leave a Comment!
Did you make this recipe? I’d love to hear how it turned out! Please leave a comment and a rating below. Your feedback helps other home cooks and supports cheerychop.com!
For more delicious inspiration, follow me on Pinterest!