Easy Blueberry Coconut Dream Domes Dessert Recipe
Table of Contents
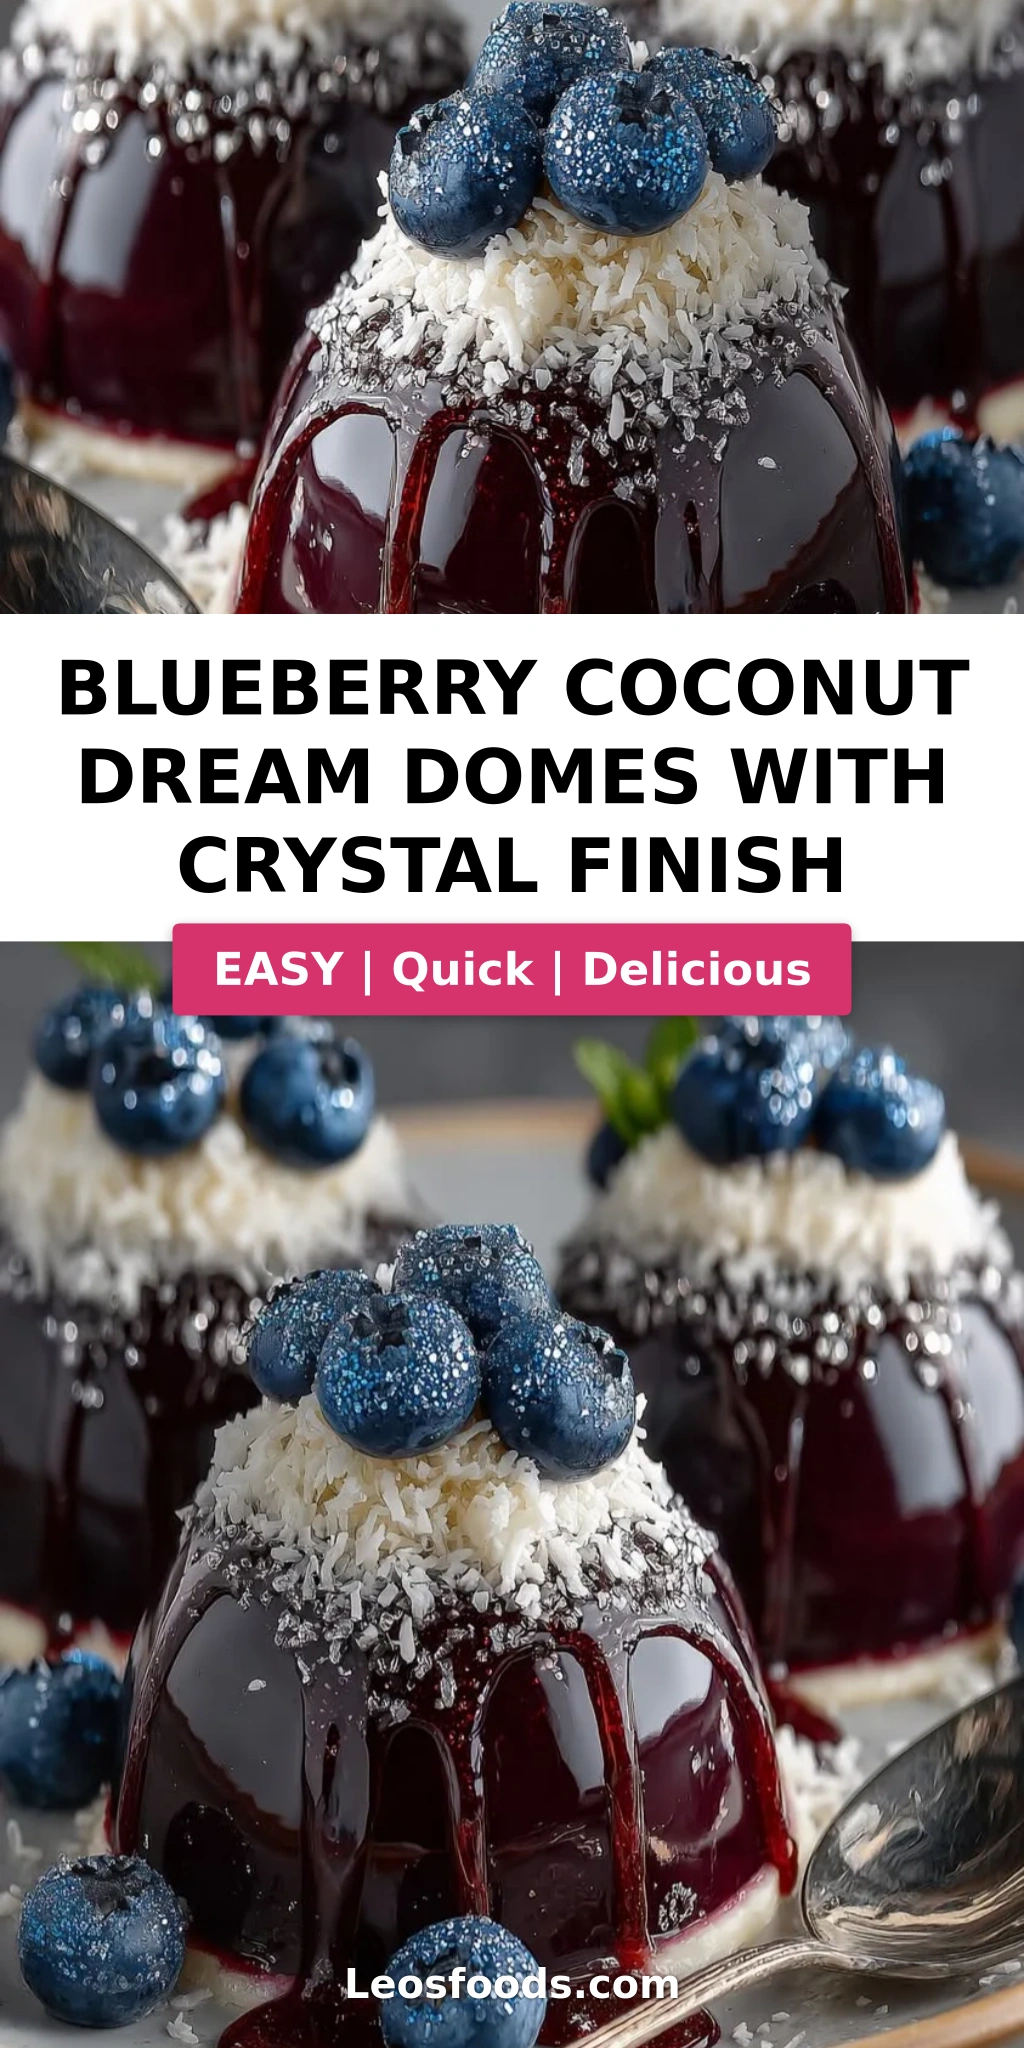
Blueberry Coconut Dream Domes with Crystal Finish – A Stunning Dessert for Any Occasion
I still remember the first time I saw a mirror-glazed dessert in a Paris patisserie window – it was like a jewel, perfectly smooth and impossibly shiny. That moment changed the way I think about dessert. These Blueberry Coconut Dream Domes with Crystal Finish are my love letter to that memory, blending the tropical comfort of coconut with the bright tartness of blueberry, all wrapped in a shimmering crystal glaze that catches the light like morning dew on a berry. Growing up in Morocco, my mother often made fresh blueberry compotes for special occasions, and I’ve carried that tangy-sweet tradition into my New York kitchen where I now teach home cooks how to create showstopping desserts without the stress. This blueberry coconut mousse recipe is proof that elegant desserts can be approachable – let me show you how.
Imagine cutting into a glossy dome and discovering a cloud-light blueberry coconut mousse with a surprise coconut center that tastes like a tropical vacation. The first bite delivers a burst of blueberry, followed by the subtle creaminess of coconut, and then that glossy crystal finish – made with white chocolate and a touch of edible shimmer – that crackles softly as you break through. The texture is impossibly smooth, with the mousse melting on your tongue while the coconut center adds a gentle chew. I always add a pinch of vanilla from a bottle I brought back from a trip to Madagascar; it deepens the fruitiness in a way that makes everyone ask for the recipe. This blueberry coconut dream domes recipe is the perfect balance of elegance and comfort – it’s the dessert I make when I want to impress without spending all day in the kitchen.
What makes my version truly special is the crystal-clear finish – a technique I perfected during my culinary training in Paris, where we spent weeks mastering mirror glazes. Most recipes skip the crucial step of cooling the glaze to the right temperature, which leads to streaks or a cloudy finish. My approach ensures a flawless, mirror-like surface every time. Plus, I’ve added a few shortcuts that will save you time without sacrificing quality. For example, you can use high-quality frozen blueberries for the puree – I’ll explain exactly how. And I’ll share my secret for keeping the coconut center perfectly round so it stays centered in each dome. This is the vegan crystal glazed domes recipe (with dairy alternatives easily swapped) that will make you feel like a professional pastry chef. Let’s get cooking!
Why This Blueberry Coconut Dream Domes Recipe Is the Best
The flavor secret lies in the double-coconut approach: coconut cream in the mousse for richness and a sweetened shredded coconut center for texture. This combo gives you both creaminess and a satisfying chew, echoing the desserts I used to enjoy at street stalls in Marrakesh – where coconut and fruit were always paired with a touch of floral sweetness. The blueberry puree is gently cooked with lemon juice to brighten the flavor, then folded with whipped cream for a mousse that’s airy yet stable. I’ve tested this blueberry coconut mousse recipe dozens of times to get the perfect balance – it’s not too sweet, with just enough tang to cut through the richness.
Perfected texture is everything in a dome dessert. The gelatin in both the mousse and the glaze must be bloomed properly and dissolved at the right temperature. During my Paris training, I learned that even a few degrees of difference can make a gelatin setup seize or weep. Here, I give you the exact temperatures and visual cues so your mousse sets silky-smooth and your crystal glaze pours like liquid glass. The result is a dome that holds its shape beautifully but still feels light on the palate – something many home recipes miss.
Foolproof and fast – yes, even with all those steps! Because I’ve streamlined the process into logical stages. While the mousse is setting, you can prepare the coconut centers and even make the glaze ahead of time. The actual hands-on time is under 30 minutes, and the rest is just waiting for the freezer and fridge to do their work. This blueberry coconut dream domes recipe is designed for busy people who want a stunning dessert without a full day of labor. Whether you’re a weekend baker or someone preparing for a dinner party, you’ll feel confident every step of the way.
Blueberry Coconut Dream Domes Ingredients
Every time I shop for these ingredients at the Union Square Greenmarket, I feel like a kid in a candy store. The blueberries in summer are phenomenal, but I also love using frozen wild blueberries from the freezer aisle – they’re smaller and more intensely flavored. For the coconut, I always grab a can of full-fat coconut cream (not coconut milk) from a trusted Thai brand – it makes all the difference in texture. Let’s walk through what you need.
Ingredients List
- For the Blueberry Coconut Mousse:
- 2 cups blueberry puree (from fresh or frozen berries)
- 1/3 cup granulated sugar
- 1 tbsp lemon juice
- 1/2 tsp vanilla extract
- 1/2 cup coconut cream
- 1 cup heavy cream (cold)
- 2 tsp powdered gelatin
- 2 tbsp cold water (for blooming gelatin)
- For the Coconut Center:
- 1 cup shredded coconut (unsweetened or sweetened – your choice)
- 1/4 cup sweetened condensed milk
- 1 tbsp coconut cream
- 1/2 tsp vanilla extract
- For the Crystal Finish Glaze:
- 1 cup white chocolate, finely chopped
- 1/3 cup sweetened condensed milk
- 1/4 cup water
- 1/2 cup granulated sugar
- 2 tsp powdered gelatin
- 2 tbsp cold water (for blooming gelatin)
- Blue food coloring, as needed
- Edible crystal shimmer dust, as needed
- For Garnish (optional): fresh blueberries, toasted coconut flakes
Ingredient Spotlight
Blueberry Puree: You can use fresh or frozen blueberries. If using frozen, thaw them completely and drain any excess liquid before pureeing. The puree should be thick but smooth. I like to strain it through a fine-mesh sieve to remove seeds for a silky mousse. Substitute: raspberry or blackberry puree will work, but expect a slightly different flavor profile.
Coconut Cream: This is the thick, creamy top layer of unsweetened canned coconut milk. Do not shake the can – spoon off the solid part. If you only have coconut milk, you can refrigerate it overnight and scoop out the cream. Substitute: full-fat coconut milk (mixed well) will work but yields a looser mousse; you may need to add a bit more gelatin.
White Chocolate for Glaze: Use a high-quality white chocolate that contains cocoa butter (at least 30%). Avoid white morsels that are mostly sugar and oil – they won’t produce a smooth, shiny glaze. Substitute: if you need dairy-free, use a good-quality vegan white chocolate. The shimmer will still be stunning.
| Original Ingredient | Best Substitution | Flavor / Texture Impact |
|---|---|---|
| Blueberry puree | Raspberry puree | Slightly tarter, but equally vibrant |
| Coconut cream | Full-fat coconut milk (refrigerated) | Slightly less rich; add 1 tsp more gelatin |
| Heavy cream | Chilled full-fat coconut cream (for dairy-free) | Lighter mousse; whip well |
| White chocolate | Dairy-free white chocolate | Slightly different sheen; still works |
| Gelatin | Agar-agar (2 tsp flakes boiled 2 min) | Firmer mousse; glaze may be less shiny |
How to Make Blueberry Coconut Dream Domes — Step-by-Step
Trust me, each step builds on the last, but I’ve broken it down so you never feel lost. Let’s start with the gelatin – the foundation of both the mousse and the glaze.
Step 1: Bloom the Gelatin
For the mousse, sprinkle 2 tsp powdered gelatin over 2 tbsp cold water in a small bowl. Let it sit for 5–10 minutes until it’s a firm, sponge-like mass. Do the same with 2 tsp gelatin and 2 tbsp cold water for the glaze later. Blooming gelatin is crucial – it ensures even dissolution later.
💡 Stella’s Pro Tip: Use very cold water (ice-cold works best) and make sure the gelatin is completely hydrated. If you’re in a hurry, you can bloom in the fridge for 5 minutes.
Step 2: Make the Blueberry Puree Base
In a medium saucepan, combine 2 cups blueberry puree, 1/3 cup granulated sugar, 1 tbsp lemon juice, and 1/2 tsp vanilla extract. Heat over medium heat, stirring occasionally, until the mixture is warm (about 140°F / 60°C) but not boiling. Remove from heat and whisk in the bloomed gelatin until fully dissolved. Let the mixture cool to room temperature.
⚠️ Common Mistake to Avoid: Don’t let the puree boil – it can break the gelatin and make the mousse grainy. Keep the heat gentle.
Step 3: Whip and Fold the Mousse
In a chilled bowl, whip 1 cup heavy cream to soft peaks (when the cream holds a gentle shape but still droops). In a separate large bowl, stir the cooled blueberry mixture with 1/2 cup coconut cream until smooth. Gently fold the whipped cream into the blueberry-coconut mixture in three additions, using a rubber spatula. Fold until no white streaks remain – be light-handed to keep the mousse airy.
💡 Stella’s Pro Tip: If the blueberry mixture is still warm, it will deflate the cream. Let it cool completely, but don’t let it set – it should still be liquid but not warm.
Step 4: Prepare the Coconut Center
In a small bowl, mix 1 cup shredded coconut, 1/4 cup sweetened condensed milk, 1 tbsp coconut cream, and 1/2 tsp vanilla extract until the mixture holds together when pressed. Roll into 10 walnut-sized balls (about 1 tbsp each). Place them on a parchment-lined tray and chill in the refrigerator for at least 20 minutes – this helps them keep their shape when nestled into the dome.
⚠️ Common Mistake to Avoid: Don’t skip the chilling step! Warm centers will sink into the mousse and create uneven domes.
Step 5: Assemble the Domes
Lightly grease half-sphere silicone molds (2.5-inch diameter). Spoon a small amount of blueberry mousse into each mold, filling about halfway. Press a chilled coconut center into the center, slightly off to one side so it stays hidden. Cover with more mousse to fill the mold, smoothing the top with an offset spatula. Tap the mold gently on the counter to release air bubbles.
💡 Stella’s Pro Tip: For perfectly centered fillings, pipe a small disk of mousse at the bottom, place the center, then pipe mousse on top. Less mess, better symmetry.
Step 6: Freeze the Domes
Place the filled molds in the freezer for at least 4 hours, or until completely firm. The domes must be solidly frozen before you unmold them – they’ll be easier to handle and the glaze will flow smoothly over the cold surface.
💡 Stella’s Pro Tip: Freeze overnight if you can. The mousse sets better and the dome holds its shape perfectly under the glaze. I often prep these a day ahead.
Step 7: Prepare the Crystal Glaze
While the domes freeze, make the glaze. In a small saucepan, combine 1/4 cup water, 1/2 cup granulated sugar, and 1/3 cup sweetened condensed milk. Heat over medium heat until the sugar dissolves and the mixture is smooth (about 160°F / 70°C). Remove from heat and stir in the bloomed glaze gelatin until fully dissolved. Pour this hot liquid over 1 cup finely chopped white chocolate in a heatproof bowl. Let sit 1 minute, then stir until smooth and glossy. Add blue food coloring a drop at a time until you reach a pale sky blue, then stir in a pinch of edible crystal shimmer dust for that frosty, magical look.
⚠️ Common Mistake to Avoid: If the glaze is too hot when you add the white chocolate, it will separate and become oily. Let the sugar mixture cool to 135°F / 57°C before pouring over the chocolate.
Step 8: Glaze the Domes
Unmold the frozen domes by gently pressing the bottom of the silicone molds. Place them on a wire rack set over a baking sheet (to catch drips). The glaze should be pourable but not too thin – it should coat the back of a spoon thickly. Pour the glaze evenly over each dome, starting from the top center and letting it cascade down. Use a spatula to help cover any bare spots, then let the excess drip off. Let the glaze set for 10–15 minutes at room temperature.
💡 Stella’s Pro Tip: For a super-smooth finish, ensure the domes are completely frozen and free of condensation. If you see beads of moisture, pat them dry with a paper towel before glazing.
Step 9: Garnish and Serve
Once the glaze has set slightly but is still tacky (about 5 minutes in), gently transfer each dome to serving plates or a parchment-lined tray. Garnish with fresh blueberries and toasted coconut flakes if desired. Serve immediately while the glaze is firm yet glossy. These are best enjoyed within a few hours of glazing for the most dramatic presentation.
⚠️ Common Mistake to Avoid: Don’t wait too long to serve – the glaze can soften if left at room temperature for hours. Keep chilled until just before serving.
| Step | Action | Duration | Key Visual Cue |
|---|---|---|---|
| 1 | Bloom gelatin for mousse | 5–10 mins | Gelatin becomes spongy |
| 2 | Heat blueberry mixture | 5 mins | Steam rises, not boiling |
| 3 | Whip cream and fold | 5–8 mins | Soft peaks, homogenous color |
| 4 | Make coconut centers | 10 mins | Balls hold together |
| 5 | Fill molds | 10 mins | Mousse level with rim |
| 6 | Freeze domes | 4+ hours | Firm to the touch |
| 7 | Make glaze | 15 mins | Smooth, glossy, pale blue |
| 8 | Glaze domes | 5 mins | Full coverage, shiny |
| 9 | Garnish and serve | 5 mins | Glaze set, garnishes fresh |
Serving & Presentation
These Blueberry Coconut Dream Domes are born showstoppers. I like to place each dome on a white plate or a slate board to make the color pop. A light dusting of coconut flakes around the plate adds texture and echoes the filling. For a dinner party, I sometimes serve them with a small dollop of lightly sweetened whipped cream or a drizzle of fresh blueberry coulis on the side – it adds another layer of flavor and color. In the summer, I pair them with a glass of iced hibiscus tea (reminds me of Morocco) or a crisp sparkling wine for a brunch style.
If you’re bringing these to a gathering, assemble and glaze them at home, then transport them on a chilled tray. They’ll hold up for an hour or so if kept cool. The shimmer dust catches the light beautifully, so I always place them near a window or under soft candlelight. My kids love to help with the coconut centers – it’s a great hands-on step for little fingers.
| Pairing Type | Suggestions | Why It Works |
|---|---|---|
| Side Dish | Fresh fruit salad, coconut sorbet | Fruit acidity balances sweet glaze |
| Sauce / Dip | Tart berry coulis, chocolate sauce | Adds contrast to the mild mousse |
| Beverage | Iced tea, sparkling rosé, espresso | Cuts through richness, refreshes palate |
| Garnish | Edible flowers, mint, gold leaf | Elevates visual appeal |
Make-Ahead, Storage & Reheating
I rely on make-ahead magic for my busy NYC schedule. You can prepare the mousse and assemble the domes up to two days before serving – just keep them in the freezer, tightly covered. The glaze can be made a day ahead and stored in the fridge, then gently reheated to pourable consistency (around 100°F / 38°C). But note: once glazed, these domes are best enjoyed within 24 hours. The glaze can sweat if stored too long in the fridge.
| Method | Container | Duration | Reheating Tip |
|---|---|---|---|
| Refrigerator | Covered airtight | Up to 2 days (unglazed) | Not recommended – glaze loses sheen |
| Freezer | Sealed container or wrapped | Up to 1 month (unglazed) | Thaw in fridge 4 hrs, then glaze |
| Make-Ahead | Freeze filled molds | Up to 2 days before glazing | Glaze directly from frozen |
If you have leftovers after glazing (rare in my house!), you can store them in the fridge for up to 24 hours. The glaze may soften slightly, but the flavor remains wonderful. I wouldn’t recommend freezing after glazing – the glaze will crack and become cloudy. For the best experience, enjoy these domes as a fresh, cold dessert. They’re not meant to be reheated; serve chilled straight from the fridge.
Variations & Easy Swaps
| Variation | Key Change | Best For | Difficulty Impact |
|---|---|---|---|
| Chocolate-Dipped | Dark chocolate glaze instead of crystal | Chocolate lovers | Easy – no shimmer needed |
| Dairy-Free | Use vegan cream, white chocolate, and gelatin substitute | Dairy-sensitive guests | Medium – careful with substitutes |
| Raspberry Twist | Replace blueberry with raspberry puree | Berry variety | Easy – same process |
Chocolate-Dipped Variation
For a more decadent take, swap the crystal glaze for a dark chocolate mirror glaze. Use 1 cup dark chocolate (70% cocoa), 1/2 cup heavy cream, and 1 tbsp corn syrup – heat together until smooth and glossy. This version is less sweet and pairs beautifully with the coconut center. It reminds me of a French entremet I once made at Le Cordon Bleu – deeply rich, yet balanced by the light mousse. Top with a sprinkle of sea salt if you’re feeling fancy.
Dairy-Free Version
To make this coconut dome dessert entirely dairy-free, substitute the heavy cream with chilled full-fat coconut cream (the solid part from a refrigerated can). Use vegan white chocolate for the glaze (ensure it’s made with cocoa butter and not palm oil). Replace the gelatin with agar-agar: for the mousse, use 2 tsp agar flakes boiled in the blueberry mixture for 2 minutes; for the glaze, 1 tsp agar flakes. The texture will be slightly firmer but still delightful. I’ve tested this for a vegan friend’s birthday and it was a huge hit – just be sure to cool the glaze to 125°F before pouring for best results.
Raspberry Twist
When I find gorgeous raspberries at the Union Square market in June, I swap them for blueberries. Use an equal amount of raspberry puree (strained to remove seeds). The flavor is tarter, so I add an extra tablespoon of sugar. The pinkish-red color underneath the crystal finish is stunning – like a geode. This variation works beautifully for Valentine’s Day or Mother’s Day brunch. Garnish with fresh raspberries and a dusting of freeze-dried raspberry powder for extra pop.
Frequently Asked Questions
What is the best way to achieve a crystal-clear finish on blueberry coconut dream domes?
The key to a crystal-clear mirror glaze is temperature control. Make sure your frozen domes are completely solid and free of condensation – pat them dry with a paper towel before glazing. The glaze itself should be around 90°F to 95°F (32°C to 35°C) when you pour it; too hot and it will melt the mousse, too cool and it won’t flow smoothly. Use a fine-mesh strainer to remove any lumps before pouring, and add the shimmer dust just before glazing for maximum sparkle. The white chocolate must be high-quality with cocoa butter – avoid compound chocolate. Finally, pour in one steady motion from the center and let the glaze cascade naturally – don’t brush or spread it.
Can I use frozen blueberries instead of fresh for the blueberry coconut dream domes?
Absolutely! Frozen blueberries work beautifully and often have a more concentrated flavor because they are flash-frozen at peak ripeness. Thaw the berries completely and drain off any excess liquid before pureeing – otherwise your mousse may become too watery and not set properly. I often use frozen wild blueberries, which are smaller and more tart, giving the mousse a deeper color. If using frozen, you may need to adjust the sugar slightly depending on sweetness. The rest of the recipe stays the same. Just be sure to puree and strain through a sieve to remove any seeds or tough skins.
How long do blueberry coconut dream domes need to set in the freezer before serving?
For the best results, freeze the assembled domes for at least 4 hours, but overnight is ideal. The mousse must be completely firm to the touch – if it feels soft or gives when you press it, it needs more time. Freezing solid ensures that the dome holds its shape when unmolded and doesn’t thaw too quickly under the glaze. If you’re in a hurry, you can speed up the process by freezing the filled molds on a metal baking sheet (metal conducts cold faster). But never rush the freezing step – a partially frozen dome will collapse and create a messy glaze.
What can I substitute for coconut cream in blueberry coconut dream domes?
If you don’t have coconut cream, you can use full-fat coconut milk that has been refrigerated overnight – spoon off the thick top layer and use that. For a non-coconut option, you can substitute with mascarpone cheese or even full-fat Greek yogurt thinned with a little cream. Keep in mind that mascarpone will add richness and a different flavor profile, while yogurt will make the mousse slightly tangier. If using a substitute, you may need to adjust the gelatin slightly: coconut cream has more fat, which helps stabilize the mousse, so with a lower-fat substitute, add an extra 1/2 tsp gelatin for stability.
Can I make these blueberry coconut dream domes without gelatin?
Yes, you can replace gelatin with agar-agar for a vegetarian or vegan version. Use 2 tsp agar-agar flakes (or 1 tsp powder) for the mousse – dissolve it in the blueberry mixture and boil for 1-2 minutes to activate. For the glaze, use 1 tsp agar flakes in the same way. Note that agar sets much firmer than gelatin, so the mousse will be more like a panna cotta texture. Also, agar does not freeze as well as gelatin, so the domes may be harder to unmold. I recommend using silicone molds and freezing overnight. The glaze will also set more quickly, so work fast. The crystal finish may be slightly less shiny, but still beautiful.
What is the best way to store leftover glazed domes?
Glazed domes are best enjoyed within 24 hours of glazing. Store them in an airtight container in the refrigerator, but be aware that the moisture from the fridge can cause the glaze to sweat and lose its mirror shine. If you have leftovers, you can place them on a paper towel-lined tray and cover loosely with plastic wrap. Avoid storing them near strong-smelling foods (like onions) because the white chocolate glaze can absorb odors. Do not freeze glazed domes – the glaze will crack and become cloudy. For longer storage, freeze unglazed domes for up to a month and glaze them fresh when needed.
Can I use a different fruit puree for the mousse?
Absolutely! This blueberry coconut mousse recipe is very adaptable. Raspberry, strawberry, mango, or passion fruit purees work wonderfully. Keep in mind that the sweetness level varies: mango is sweeter than raspberry, so adjust the sugar accordingly. The acidity also affects the gelatin – very acidic fruits like passion fruit or cranberry may require a bit more gelatin (add 1/2 tsp extra). For the best color and shine, choose fruits that have a bright, natural hue. I’ve made a fantastic version with cherry puree in the summer, and it was sensational with the coconut center.
Why did my glaze come out cloudy or streaky?
Cloudy or streaky mirror glaze is usually caused by one of three issues. First, the glaze temperature was wrong – either too cool (above 95°F) so it didn’t flow evenly, or too hot (above 110°F) which can cause the white chocolate to separate. Second, your domes had condensation – moisture beads on the frozen mousse will create streaks. Pat them dry with a paper towel before glazing. Third, you might have overmixed the glaze or added food coloring too early. Always stir gently after adding color. For the clearest finish, use a digital thermometer and strain the glaze through a fine-mesh sieve just before pouring.
Can I prepare the coconut centers in advance?
Yes, the coconut centers can be made up to 3 days ahead and stored in an airtight container in the refrigerator. They can also be frozen for up to a month. If frozen, thaw them in the fridge for an hour before assembling the domes. The centers are very forgiving because they are dense and sweet. Just be sure to roll them into uniform balls so each dome has a consistent center. I sometimes make a double batch and keep a few in the freezer for quick desserts – they’re perfect for adding to parfaits or topping ice cream too.
What type of edible shimmer dust should I use for the crystal finish?
For a true crystal look, use an edible luster dust that is specifically labeled as “fine” or “super-fine” – these give a smooth, reflective shine without grittiness. Brands like Rainbow Dust or Chefmaster work well. Avoid large glitter pieces that are meant for decoration only. You want a shimmer that dissolves into the glaze, not sits on top. I use a very small amount – about 1/8 teaspoon – whisked into the glaze at the end. If you want an extra-frosty, icy finish, you can also dust a tiny amount of shimmer on the domes after the glaze sets using a clean brush.
Share Your Version!
I’d love to see how your Blueberry Coconut Dream Domes turn out! Did you try a different fruit puree or a dairy-free version? Drop a comment below and let me know – your feedback helps other readers who are thinking of making this recipe. If you post a photo on Instagram or Pinterest, tag @leosfoods so I can share your creation in my stories. And if you have any questions about achieving that crystal-clear finish, ask away – I read every comment and I’m happy to help troubleshoot.
From my NYC kitchen to yours — I hope this recipe brings as much warmth to your table as it does to mine. — Stella 🧡
Love This Recipe? Save It to Pinterest!
If you enjoyed this Blueberry Coconut Dream Domes recipe, don’t let it get lost in your browser tabs! 😄 Pin it now so you can find it again anytime — and explore hundreds more tried-and-tested recipes waiting for you on my Pinterest boards.
👉 Follow Stella on Pinterest @stellarecipeblog
📌 Pin this recipe · 🔁 Re-pin your favorites · 💬 Tag me when you make it — I love seeing your creations!
Blueberry Coconut Dream Domes with Crystal Finish
Blueberry Coconut Dream Domes with Crystal Finish
Ingredients
- For the Blueberry Coconut Mousse:
- 2 cups blueberry puree
- 1/3 cup granulated sugar
- 1 tbsp lemon juice
- 1/2 tsp vanilla extract
- 1/2 cup coconut cream
- 1 cup heavy cream
- 2 tsp powdered gelatin
- 2 tbsp cold water
- For the Coconut Center:
- 1 cup shredded coconut
- 1/4 cup sweetened condensed milk
- 1 tbsp coconut cream
- 1/2 tsp vanilla extract
- For the Crystal Finish Glaze:
- 1 cup white chocolate, finely chopped
- 1/3 cup sweetened condensed milk
- 1/4 cup water
- 1/2 cup granulated sugar
- 2 tsp powdered gelatin
- 2 tbsp cold water
- Blue food coloring, as needed
- Edible crystal shimmer dust, as needed
- For Garnish (optional):
- Fresh blueberries
- Toasted coconut flakes
Instructions
- 1. Bloom gelatin in cold water and set aside.
- 2. Heat blueberry puree, sugar, lemon juice, and vanilla until warm.
- 3. Stir in gelatin until dissolved and allow the mixture to cool.
- 4. Whip heavy cream to soft peaks and fold together with coconut cream into the blueberry mixture.
- 5. Mix shredded coconut, condensed milk, coconut cream, and vanilla until combined.
- 6. Roll the coconut mixture into small balls and chill for 20 minutes.
- 7. Fill dome molds halfway with blueberry mousse.
- 8. Place a coconut ball in the center of each dome and cover with more mousse.
- 9. Freeze until completely firm, about 4 hours.
- 10. Bloom gelatin in cold water for the glaze.
- 11. Heat water, sugar, and condensed milk until smooth.
- 12. Remove from heat and stir in gelatin.
- 13. Pour over white chocolate and mix until glossy.
- 14. Add blue food coloring and crystal shimmer dust.
- 15. Cool glaze to a pourable consistency.
- 16. Unmold frozen domes and place on a wire rack.
- 17. Pour glaze evenly over each dome until fully coated.
- 18. Allow the glaze to set for 10–15 minutes.
- 19. Garnish with fresh blueberries and toasted coconut flakes.
- 20. Serve chilled.
Nutrition
- Calories: 330
- Sugar: 30 g
- Fat: 18 g
- Carbohydrates: 39 g
- Protein: 4 g
Tried This Recipe? Leave a Comment!
Did you make this recipe? I’d love to hear how it turned out! Please leave a comment and a rating below. Your feedback helps other home cooks and supports cheerychop.com!
For more delicious inspiration, follow me on Pinterest!