Decadent Caramel Gold Cheesecake Bombs with Molten Center
“`html
Table of Contents
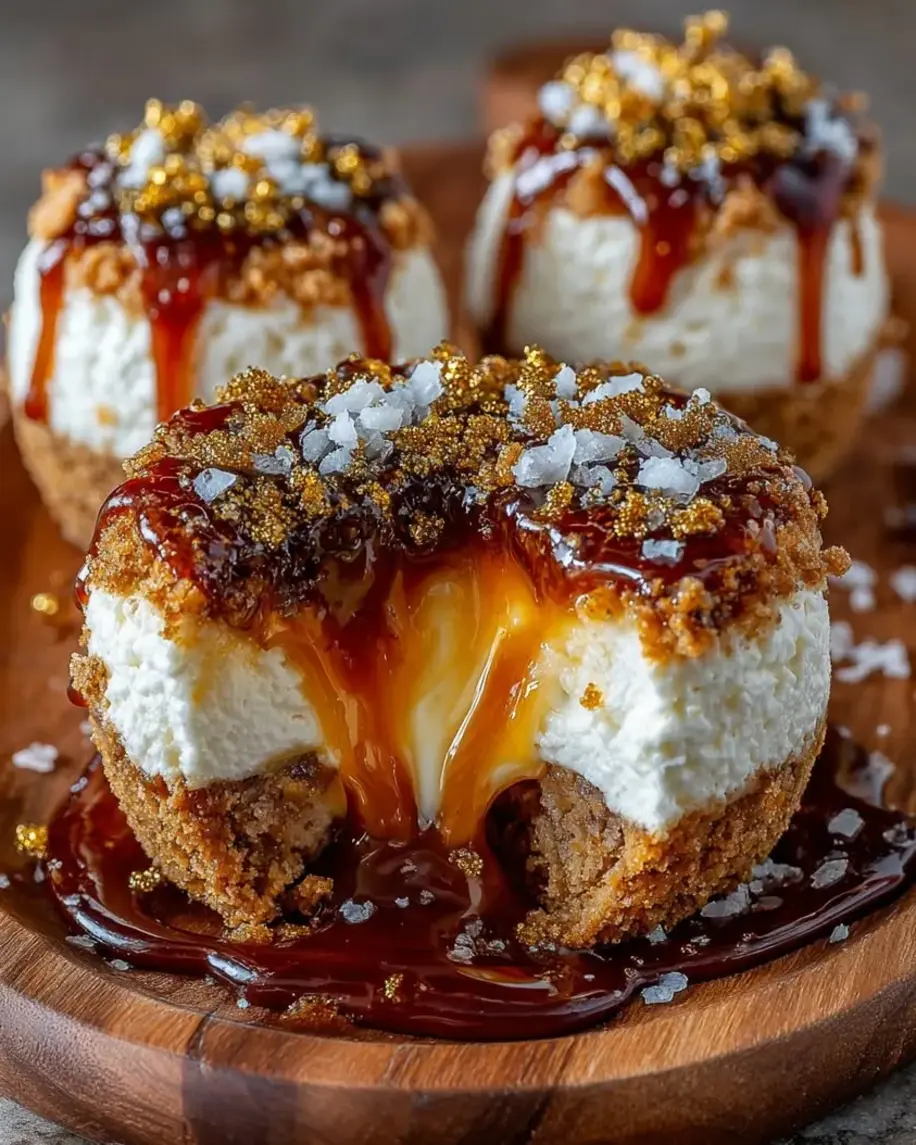
Caramel Gold Cheesecake Bombs with Molten Center – Decadent Gold-Topped Truffles with a Runny Caramel Heart
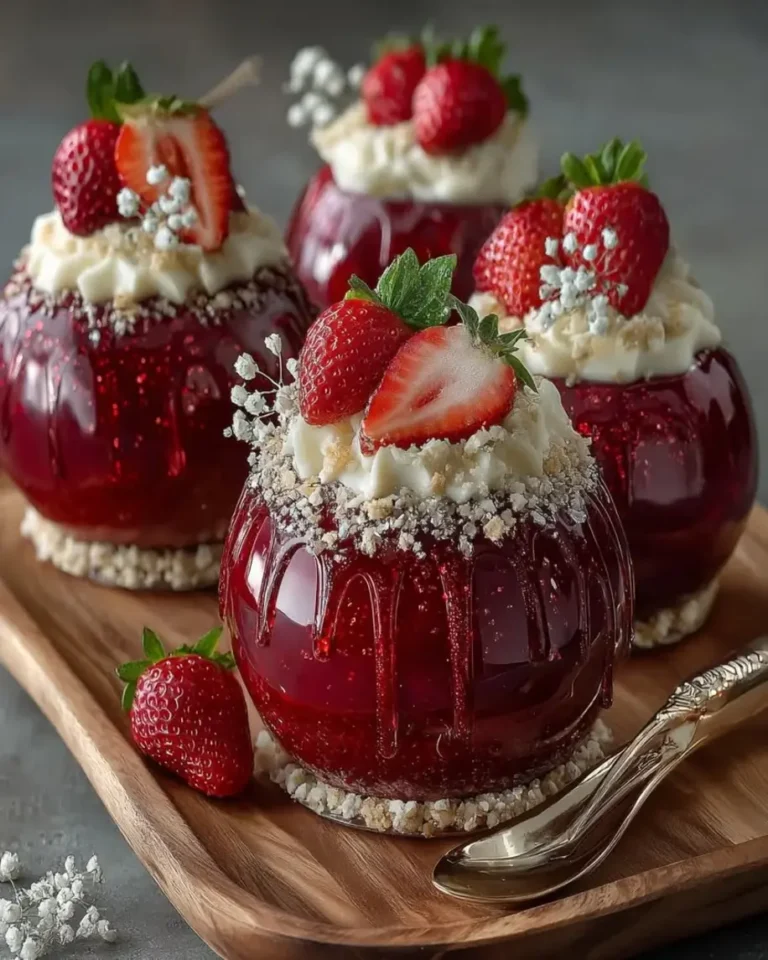
I still remember the first time I bit into a dessert that looked like a jewel and tasted like pure gold. It was a rainy afternoon in my tiny Parisian apartment, and I had just finished a week-long pastry intensive focused on chocolate shells and hidden fillings. That moment of cracking through a thin, shimmering shell to reveal a molten caramel center — it was magic. These caramel gold cheesecake bombs with molten center are my love letter to that memory, reimagined with a buttery graham cracker base, a whisper of sea salt, and the unmistakable warmth of North African caramel, the kind my mother used to make with honey and butter in our kitchen in Morocco. This molten cheesecake bombs recipe is built around a luxurious cheesecake mousse that cradles a from-scratch caramel heart, all encased in an edible gold white chocolate shell. It’s elegant enough for a New Year’s Eve party and simple enough for a weekend baking project.
Close your eyes and imagine this: a delicate, glossy dome brushed with edible gold dust that catches the light like a treasure. You break through the shell with a spoon — it cracks with a gentle snap — and your first bite reveals a cloudlike cheesecake mousse that melts on your tongue. Then comes the real surprise: a warm, runny caramel center infused with brown sugar, butter, and a pinch of sea salt that spills out slowly, coating each spoonful in liquid gold. The graham cracker base adds a nostalgic crunch, grounding the richness with a toasty, buttery note. The texture progression alone is breathtaking — crisp shell, airy mousse, silky caramel, and sandy crumb — and the flavor balance is spot-on: sweet but not cloying, salty enough to keep you reaching for the next bite.
What sets this gold cheesecake dessert apart from other truffle-style recipes is the technique I developed during my time at Le Cordon Bleu in Paris. Instead of a dense baked cheesecake that’s rolled into balls, I use a whipped cheesecake mousse stabilized with chilled heavy cream, which stays light and scoopable even after hours in the freezer. The caramel center is cooked just long enough to thicken but not so long that it becomes firm — it stays pourable even at room temperature. And the white chocolate shell? I’ve tested it a dozen times to get that perfect snap without cracking during unmolding. One common mistake home bakers make is rushing the freezing step before unmolding, which causes the bombs to lose their shape. Trust me — patience with the freezer is your best friend here. Let me show you exactly how to make these showstoppers with confidence.
Why This Caramel Gold Cheesecake Bombs Recipe Is the Best
The flavor secret in my caramel gold cheesecake bombs with molten center lies in the dual-layered caramel. Most recipes use store-bought caramel sauce straight from the jar, which works in a pinch but lacks depth. I simmer my caramel with brown sugar, butter, vanilla, and a pinch of sea salt until it darkens just slightly, developing a toffee-like complexity that cuts through the sweetness of the white chocolate. Growing up in Morocco, my mother would caramelize honey with butter and cinnamon for our pastries — that memory inspired me to add a touch of brown sugar to this caramel for a deeper, almost smoky sweetness that you don’t get from plain caramel sauce. It’s a small step that makes a world of difference.
The texture of these molten cheesecake bombs is where my French pastry training really shines. Instead of a heavy cream cheese filling that can feel leaden, I whip the cream cheese with powdered sugar and vanilla until it’s silky, then fold in softly whipped heavy cream to create a light, airy mousse. This technique — called “crème légère” in French pastry — gives the bombs a cloudlike texture that contrasts beautifully with the dense, fudgy caramel center and the crisp white chocolate shell. The graham cracker base, pressed into the molds before freezing, adds a buttery crunch that grounds each bite. Every texture has a purpose, and every layer is designed to work together in perfect harmony.
This recipe is also surprisingly foolproof for home bakers. Yes, there are several components, but each one is straightforward and forgiving. The cheesecake mousse doesn’t require eggs or baking, so there’s no risk of curdling or cracking. The caramel center can be made ahead and kept in the fridge for up to a week. And the white chocolate shell, while it requires a bit of patience for layering, is incredibly forgiving — if it cracks, you can simply brush on another layer to patch it up. I’ve made these bombs with my neighbor’s teenage daughter, and she nailed them on her first try. If you can melt chocolate and work a hand mixer, you can absolutely make these gold cheesecake dessert bombs.
Caramel Gold Cheesecake Bombs with Molten Center Ingredients
When I make these caramel gold cheesecake bombs with molten center, I shop with intention. I head to the Union Square farmers market for fresh cream and butter, then stop by my local baking supply shop for the edible gold luster dust — a little goes a long way, and it transforms these bombs from “homemade dessert” to “boutique patisserie” in seconds. The ingredients are simple, but each one plays a starring role. Let me walk you through what you need and why each ingredient matters.
Ingredients List
- For the Cheesecake Filling:
- 8 oz (225 g) cream cheese, softened
- 1/3 cup powdered sugar
- 1 tsp vanilla extract
- 1 cup heavy whipping cream, chilled
- For the Molten Caramel Center:
- 1/2 cup caramel sauce
- 2 tbsp brown sugar
- 1 tbsp butter
- 1 tsp vanilla extract
- 1 pinch sea salt
- For the Biscuit Base:
- 1 cup graham cracker crumbs
- 3 tbsp unsalted butter, melted
- For the Gold Shell:
- 10 oz (280 g) white chocolate, melted
- 1 tsp coconut oil
- 1 tsp edible gold luster dust
- For Garnish (optional):
- Flaky sea salt
- Crushed caramel shards
Ingredient Spotlight
Cream Cheese: This is the backbone of your cheesecake mousse. Look for full-fat block cream cheese, not the spreadable kind in a tub. The block cream cheese has a higher fat content and fewer stabilizers, which gives you a smoother, richer texture. I use Philadelphia or the Whole Foods 365 brand — both work beautifully. If you can only find reduced-fat cream cheese, it will still work, but the mousse may be slightly less stable and a bit thinner. Let it soften at room temperature for at least 30 minutes before beating; cold cream cheese will give you a lumpy mousse that won’t fold evenly with the whipped cream.
White Chocolate: Since the shell is the first thing people see and taste, use a high-quality white chocolate that you actually enjoy eating on its own. I prefer Guittard or Callebaut white chocolate wafers, which melt smoothly and have a clean, creamy flavor without being overly sweet. Avoid white chocolate chips from most grocery brands — they often contain added stabilizers that prevent smooth melting and can leave a waxy mouthfeel. The coconut oil in the shell helps the chocolate flow into the molds and gives it a beautiful shine, but don’t skip it or the chocolate may be too thick to brush evenly.
Edible Gold Luster Dust: This is what makes your caramel gold cheesecake bombs with molten center truly sparkle. Edible luster dust is made from mica and food-safe coloring, and it’s available at baking supply stores or online. One teaspoon is enough for the entire batch — you mix it directly into the melted white chocolate before brushing the molds. Don’t use non-toxic craft glitter or non-edible gold powder; those are not safe for consumption. If you can’t find gold luster dust, you can leave the shells plain white and drizzle with gold-colored candy melts, but the dust gives a more elegant, professional finish.
Heavy Whipping Cream: This creates the light, airy texture in the cheesecake mousse. Make sure your cream is very cold — straight from the refrigerator — and whip it to soft peaks only. Over-whipping will give you a grainy, butter-like texture that won’t fold smoothly into the cream cheese. If you over-whip by accident, you can add a tablespoon of cold cream and whisk gently to bring it back, but it’s better to stop early. I always chill my bowl and beaters in the freezer for 10 minutes before whipping cream — it speeds up the process and gives you a more stable foam.
| Original Ingredient | Best Substitution | Flavor / Texture Impact |
|---|---|---|
| Cream cheese (full-fat block) | Neufchâtel cheese | Slightly less rich, thinner mousse — still works well |
| White chocolate (high-quality) | White candy melts + 1 tsp coconut oil | Less creamy flavor, slightly waxy — use only in a pinch |
| Heavy whipping cream | Canned coconut cream (chilled, whipped) | Adds coconut flavor, lighter texture — good for dairy-free |
| Graham cracker crumbs | Shortbread cookie crumbs or digestive biscuits | Sweeter, more buttery base — equally delicious |
| Edible gold luster dust | Gold-colored sanding sugar (sprinkle on top) | Less subtle shimmer, more sparkly crunch — no brushing required |
How to Make Caramel Gold Cheesecake Bombs with Molten Center — Step-by-Step
These caramel gold cheesecake bombs with molten center come together in seven straightforward steps. I’ve broken down each stage with the exact techniques I teach in my NYC baking workshops, so you can follow along with confidence. Take your time, read each step before you begin, and remember — the freezer is your secret weapon.
Step 1: Prepare the Biscuit Base
Mix 1 cup of graham cracker crumbs with 3 tablespoons of melted unsalted butter until every crumb is evenly moistened and the mixture resembles wet sand. Press about a tablespoon of the mixture into the bottom of each silicone dome mold, using your fingers or the back of a small spoon to create an even, compact layer about 1/4 inch thick. Place the molds in the refrigerator and chill for 15 minutes to allow the butter to set and the base to firm up. This step ensures the base stays intact when you unmold the finished bombs.
💡 Stella’s Pro Tip: For a cleaner press, lightly grease your fingers with a drop of coconut oil before pressing the crumbs into the molds. The crumbs won’t stick to your hands, and you’ll get a perfectly smooth, even base every time.
Step 2: Make the Molten Caramel Center
In a small saucepan over medium heat, combine 1/2 cup caramel sauce, 2 tablespoons brown sugar, 1 tablespoon butter, 1 teaspoon vanilla extract, and a pinch of sea salt. Stir constantly with a whisk until the butter melts and the mixture comes to a gentle simmer. Let it bubble for 2–3 minutes, stirring often, until it thickens slightly and turns a shade darker — you should see the bubbles slow down and the mixture coat the back of a spoon. Remove from the heat immediately and let it cool completely to room temperature. Do not refrigerate, as the caramel will become too thick to spoon into the molds.
⚠️ Common Mistake to Avoid: Cooking the caramel for too long will make it hard and chewy instead of molten and runny. Watch the clock and the visual cues: the moment it coats a spoon and the bubbles slow, it’s done. If you’re unsure, err on the side of undercooking — you can always simmer it a little longer, but you can’t undo a caramel that’s turned into toffee.
Step 3: Prepare the Cheesecake Mousse
In a large mixing bowl, beat 8 oz of softened cream cheese with 1/3 cup powdered sugar and 1 teaspoon vanilla extract until smooth and creamy, about 2 minutes with a hand mixer on medium speed. There should be no lumps — scrape the bowl and beaters halfway through. In a separate cold bowl, whip 1 cup of chilled heavy whipping cream to soft peaks: the cream should hold a gentle ribbon when you lift the whisk but still be soft enough to fold. Gently fold the whipped cream into the cream cheese mixture using a rubber spatula, using broad sweeping motions until the mousse is uniform and airy. Do not overmix, or the mousse will deflate and become dense.
💡 Stella’s Pro Tip: Chill your mixing bowl and beaters in the freezer for 10 minutes before whipping the cream. This simple trick, which I learned at Le Cordon Bleu, gives you a stable, fluffy whip in half the time and prevents the cream from turning buttery.
Step 4: Create the Gold Shell
Melt 10 oz of white chocolate in a heatproof bowl set over a pot of simmering water (or in the microwave in 20-second bursts, stirring between each). Once fully melted and smooth, stir in 1 teaspoon of coconut oil and 1 teaspoon of edible gold luster dust until the color is even and the mixture is glossy. Using a small pastry brush, paint a thin, even layer of the gold chocolate inside each silicone dome mold, covering the entire surface from edge to edge. Place the molds in the refrigerator for 10 minutes until the chocolate is firm to the touch, then apply a second layer. This double-coating technique ensures the shells are thick enough to hold their shape when unmolded and provides that satisfying crack when you bite into them.
⚠️ Common Mistake to Avoid: Brushing the chocolate too thickly in a single layer will cause it to pool at the bottom of the mold and create uneven shells. Always apply two thin layers, chilling between each, for a clean, even coating. If you see air bubbles, gently tap the mold on the counter before refrigerating.
Step 5: Assemble the Bombs
Spoon or pipe the cheesecake mousse into each gold-lined mold, filling them about halfway. Use a small spoon to create a shallow well in the center of the mousse. Drop about 1 teaspoon of the cooled caramel center into each well — the caramel should settle into the well without overflowing. Cover the caramel completely with the remaining cheesecake mousse, smoothing the tops level with the edge of the mold. If you have extra mousse, you can pipe it on for a perfectly even finish. The mousse should completely seal the caramel so that no liquid leaks into the shell.
💡 Stella’s Pro Tip: Fill a piping bag with the cheesecake mousse and snip a 1/2-inch opening. Pipe a ring of mousse around the inside of each shell, drop in the caramel, then pipe more mousse on top. This gives you clean, even layers without disturbing the shell or the caramel.
Step 6: Freeze and Unmold
Place the assembled molds in the freezer and freeze for at least 3 hours, or overnight for best results. The bombs need to be fully solid to unmold cleanly — if they’re even slightly soft in the center, the shells can crack or the mousse can stick to the mold. To unmold, gently flex the silicone mold at the edges to release the seal, then carefully pop each bomb out by pushing up from the bottom. If a bomb resists, let it sit at room temperature for 30 seconds and try again — the shell will soften just enough to release without breaking. Transfer the unmolded bombs to a wire rack set over a baking sheet.
⚠️ Common Mistake to Avoid: Unmolding too early is the number one reason these bombs fail. The cheesecake mousse needs to be rock-solid to support the weight of the shell during unmolding. If you’re in a hurry, freeze for at least 4 hours — I always freeze overnight and unmold the next day for perfect results.
Step 7: Garnish and Serve
Once the bombs are unmolded, place them on a serving platter or individual dessert plates. If desired, drizzle lightly with leftover caramel sauce — warm it slightly so it flows, but not so hot that it melts the gold shell. Sprinkle a few flakes of flaky sea salt and a pinch of crushed caramel shards over the top of each bomb for a professional finish. The salt balances the sweetness of the white chocolate and caramel, while the caramel shards add a crunchy textural contrast. Serve the bombs chilled but not frozen hard — let them sit at room temperature for 5–8 minutes before serving to allow the mousse to soften slightly and the caramel center to become molten.
💡 Stella’s Pro Tip: For the most dramatic presentation, serve each bomb on a small plate with a tiny pitcher of warm caramel sauce on the side. Encourage your guests to pour the sauce over the bomb themselves right before eating — watching the gold shell glisten under the caramel is pure theater.
| Step | Action | Duration | Key Visual Cue |
|---|---|---|---|
| 1 | Prepare biscuit base | 15 min chill | Crumbs hold together when pressed |
| 2 | Make molten caramel | 3 min simmer | C oats spoon, bubbles slow |
| 3 | Prepare cheesecake mousse | 5 min | Smooth, airy, no lumps |
| 4 | Create gold shell | 20 min (2 coats + chill) | Smooth, shiny, no bare spots |
| 5 | Assemble bombs | 10 min | Caramel sealed inside mousse |
| 6 | Freeze and unmold | 3+ hours freeze | Rock-solid, pops out cleanly |
| 7 | Garnish and serve | 5 min | Gold shell glistens, caramel drips |
Serving & Presentation
The beauty of these caramel gold cheesecake bombs with molten center is that they look like they belong in a glass case at a French pâtisserie, yet they’re surprisingly easy to serve. I like to place each bomb on a small, dark-colored plate or a slate board — the contrast makes the gold shell pop beautifully. For a more dramatic presentation, you can set the bombs on a bed of edible gold sprinkles or crushed caramel shards, which adds both visual flair and a little extra crunch. If you’re serving these at a dinner party, consider pairing each plate with a small dollop of lightly sweetened crème fraîche or a quenelle of vanilla bean ice cream — the tangy cream cuts through the sweetness of the caramel and white chocolate beautifully.
In my NYC apartment, I often serve these bombs as the grand finale to a Moroccan-inspired dinner — think lamb tagine with apricots, couscous with saffron and almonds, and then these golden bombs for dessert. The combination of North African warmth and French elegance is a conversation starter every time. I also love to serve them alongside a tiny cup of strong, dark-roast coffee or a glass of late-harvest Riesling. For a holiday party, I’ve even stacked them into a pyramid on a mirrored cake stand and watched guests light up as they cracked through the gold shells. The flaky sea salt and caramel shards on top catch the light and add a professional finish that’s well worth the extra minute of effort.
| Pairing Type | Suggestions | Why It Works |
|---|---|---|
| Side Dish | Crème fraîche, vanilla ice cream, fresh berries | Adds acidity and freshness to balance rich, sweet bomb |
| Sauce / Dip | Extra caramel sauce, chocolate ganache, berry coulis | Enhances the molten center experience with extra flavor |
| Beverage | Espresso, late-harvest Riesling, spiced chai | Coffee cuts sweetness, wine complements caramel, chai adds warmth |
| Garnish | Flaky sea salt, crushed caramel shards, edible gold sprinkles | Adds crunch, salt contrast, and a luxurious finish |
Make-Ahead, Storage & Reheating
Living in New York City means my schedule is always packed, so I’ve designed these caramel gold cheesecake bombs with molten center to be the ultimate make-ahead dessert. I often prepare a double batch on a Sunday afternoon and keep them in the freezer for up to three months — they’re my secret weapon for last-minute dinner parties, holiday gatherings, and even just a Wednesday night treat when I need a little gold in my life. The components are all freezer-friendly, and the bombs actually improve in texture after a day or two, as the flavors meld and the mousse firms up to a perfect, creamy consistency.
| Method | Container | Duration | Reheating Tip |
|---|---|---|---|
| Refrigerator | Airtight container, single layer | Up to 5 days | Serve chilled — let sit 5 min at room temp to soften mousse |
| Freezer | Airtight container, layers separated by parchment | Up to 3 months | Thaw in fridge 4 hours — do not microwave or the shell will melt |
| Make-Ahead | Assemble in molds, freeze, then unmold | 3 months in freezer | Unmold while frozen, then transfer to serving plates and thaw |
I’ve learned through years of testing that the best way to reheat these bombs without compromising the shell is to let them thaw gradually in the refrigerator. If you want the caramel center to be warm and flowing when you serve, you can microwave each bomb for 5–6 seconds on 50% power — just enough to warm the center without melting the gold shell. I tested this method during a rushed dinner party prep, and it worked perfectly: the mousse stayed cool and creamy, the shell remained crisp, and the caramel became beautifully runny. For best results, always garnish with flaky sea salt and caramel shards after thawing, so the garnish stays crunchy and doesn’t get absorbed into the mousse.
Variations & Easy Swaps
One of the things I love most about these caramel gold cheesecake bombs with molten center is how adaptable they are. Over the years, I’ve experimented with dozens of flavor combinations — some inspired by my Moroccan heritage, others born from late-night tinkering in my NYC kitchen with whatever I had in the pantry. Below are three of my favorite variations, each tested and perfected so you can confidently make them your own.
| Variation | Key Change | Best For | Difficulty Impact |
|---|---|---|---|
| Chocolate Lover’s Variation | Use dark chocolate shell + hazelnut caramel center | Chocolate enthusiasts, holiday gifting | Same — just swap chocolate type |
| Gluten-Free Version | Use gluten-free graham crackers or almond flour crust | Gluten-free guests, Celiac-friendly | Same — easy swap |
| Dairy-Free & Vegan Twist | Use coconut cream, vegan cream cheese, and dark chocolate | Vegan and dairy-free diets | Medium — requires careful substitution |
Chocolate Lover’s Variation
For a deeper, more intense flavor profile, swap the white chocolate shell for high-quality dark chocolate (60–70% cacao) and replace the caramel center with a hazelnut caramel made by stirring 2 tablespoons of hazelnut butter into the caramel sauce before simmering. The bitterness of the dark chocolate balances the sweetness of the caramel beautifully, and the hazelnut adds a nutty warmth that reminds me of the markets in Marrakech, where roasted nuts and honey caramel are sold in little paper cones. This version is particularly stunning during the colder months and pairs beautifully with a glass of single-malt scotch or a robust espresso. The technique remains exactly the same — just melt dark chocolate instead of white, and add the hazelnut butter to the caramel in step 2.
Gluten-Free Version
Making these caramel gold cheesecake bombs with molten center gluten-free is nearly effortless. Simply substitute the graham cracker crumbs with an equal amount of gluten-free graham cracker crumbs (I use the brand Kinnikinnick or Schär) or use finely ground almond flour mixed with 2 tablespoons of coconut sugar and 3 tablespoons of melted butter. The almond flour version is actually my personal favorite — it adds a subtle nuttiness and a slightly more tender, buttery base that complements the white chocolate shell beautifully. Be sure to check that your caramel sauce and white chocolate are certified gluten-free if you’re serving guests with Celiac disease. All other ingredients are naturally gluten-free, so this swap is seamless.
Dairy-Free & Vegan Twist
Creating a dairy-free version of these bombs took a few rounds of testing, but the result is genuinely delicious. Replace the cream cheese with a high-quality vegan cream cheese (Miyoko’s is my go-to) and the heavy cream with chilled, full-fat coconut cream (the solid part from a can of coconut milk that has been refrigerated overnight). The coconut cream whips to soft peaks just like dairy cream, though it has a lighter, airier texture. For the shell, use a dairy-free white chocolate or a dark chocolate that’s labeled vegan. The caramel center is naturally dairy-free if you use vegan butter and a caramel sauce made without cream. The texture of the vegan version is a little lighter and more mousse-like, but the molten center still flows beautifully, and the gold shell shines just as bright. This version has become a hit at my friends’ potlucks, where it disappears faster than I can make it.
What is the best type of chocolate to use for the molten center in caramel gold cheesecake bombs?
For the molten center itself, you’re actually using a caramel sauce base that’s thickened with brown sugar and butter — not chocolate. But if you’re asking about the best chocolate for the shell, I highly recommend using a high-quality white chocolate couverture like Guittard, Callebaut, or Valrhona. These brands contain real cocoa butter, which melts smoothly and sets with a beautiful gloss. Avoid white chocolate chips from most grocery store brands, as they often contain added vegetable oils and stabilizers that prevent smooth melting and can leave a waxy finish on your shells. For a darker shell, a 60–70% dark chocolate with a high cocoa butter content works beautifully and provides a lovely bitterness to balance the sweet caramel.
How do you prevent the cheesecake bombs from cracking when forming them around a molten center?
The number one cause of cracking is unmolding too early, before the cheesecake mousse is fully frozen. You need to freeze the assembled bombs for at least 3 hours — overnight is even better — so the mousse becomes rock-solid and can support the weight of the shell during unmolding. The second most common cause is applying the white chocolate shell too thinly. I always brush two layers of chocolate into the molds, chilling between layers, to create a sturdy shell that can flex slightly without breaking. If a shell does crack, don’t panic — you can brush a tiny amount of melted chocolate over the crack and freeze for 10 minutes to patch it. Finally, when unmolding, gently flex the silicone mold at the edges to release the seal before pushing the bomb out from the bottom.
Can I make caramel gold cheesecake bombs ahead of time and freeze them for later?
Absolutely — in fact, these caramel gold cheesecake bombs with molten center are designed to be made ahead and frozen for up to 3 months. I recommend freezing them in the silicone molds for at least 3 hours until solid, then unmolding and transferring the bombs to an airtight container with layers separated by parchment paper. When you’re ready to serve, simply transfer the frozen bombs to the refrigerator and let them thaw for about 4 hours. If you want the caramel center to be warm and flowing, microwave each bomb on 50% power for 5–6 seconds after thawing. Never microwave a frozen bomb directly from the freezer, as the shell can crack from the temperature shock. The texture of the mousse remains perfectly creamy even after freezing, and the caramel stays molten.
What can I substitute for cream cheese to make a lighter version of these cheesecake bombs?
If you’re looking for a lighter version, you can substitute Neufchâtel cheese for the cream cheese — it has about one-third less fat and slightly more moisture, but it still whips up smoothly and provides that classic tangy cheesecake flavor. Another option is to use part-skim ricotta that has been blitzed in a food processor until completely smooth, then mixed with a little Greek yogurt for tanginess. The ricotta version will be lighter in texture and slightly less rich, but still delicious. For a dairy-free lighter version, use a vegan cream cheese made from cashews or almonds — Miyoko’s is my favorite. The texture of the mousse will be slightly less dense and a bit more airy, but it holds together beautifully and the flavor is still undeniably cheesecake-like.
Can I use store-bought caramel sauce instead of making my own molten center?
Yes, you can use a high-quality store-bought caramel sauce in a pinch, but I strongly recommend simmering it with brown sugar, butter, vanilla, and sea salt as described in the recipe. Store-bought caramel sauces are often thinner and less flavorful than homemade, and they can make the bombs soggy if they seep into the cheesecake mousse. The quick simmering step takes only 3 minutes and transforms even a basic caramel sauce into a thick, molten center with a complex, toffee-like flavor. If you’re truly short on time, look for a thick, premium caramel sauce — I’ve had good results with the Trader Joe’s fleur de sel caramel sauce. Just be aware that the center will be runnier and may not hold its shape as well during assembly.
How long do caramel gold cheesecake bombs need to freeze before unmolding?
The bombs need to freeze for a minimum of 3 hours to be solid enough to unmold cleanly. I recommend freezing overnight for the best results — your freezer schedule should allow for at least 4 hours if you’re in a rush. The mousse must be rock-solid all the way through, not just on the surface. If you try to unmold when the center is still soft, the weight of the white chocolate shell can cause the bomb to collapse or crack. To test readiness, gently press the bottom of a silicone mold with your thumb — the bomb should feel hard and should not give at all. If there’s any give, put it back in the freezer for another hour. Once unmolded, the bombs can be served immediately while still very cold, or thawed in the fridge for 4 hours for a softer mousse texture.
What can I use instead of silicone dome molds for this recipe?
Silicone dome molds give you the classic half-sphere shape and make unmolding easy, but you can also use a standard 12-cup muffin tin lined with paper liners, or small silicone cupcake molds. If using a metal muffin tin, line each cup with a paper liner, brush the inside of the liner with melted chocolate to create the shell, and proceed with the recipe as written. The paper liners will peel away easily after freezing, and you’ll get a ruffled, cupcake-style look that’s actually quite charming. Another option is to use small silicone ice cube trays with rounded cavities — just be sure to check that the cavities are at least 1.5 inches deep to accommodate the base, mousse, and caramel center. If your molds are shallower, simply make smaller bombs and adjust the filling quantities proportionally.
Can I add alcohol to the caramel center for an adult version?
Absolutely! Adding a splash of spirits to the caramel center is a wonderful way to customize these bombs for an adult gathering. I’ve tested this with bourbon, dark rum, and even a little Armagnac — each brings a unique character. Add 1 to 2 tablespoons of your chosen spirit to the caramel sauce at the same time as the vanilla extract, just before simmering. The alcohol will cook off slightly but leave behind its flavor. Bourbon adds a warm, vanilla-and-oak note that pairs beautifully with the caramel and white chocolate; dark rum brings a rich, molasses-like sweetness that echoes the brown sugar. For a special occasion, I sometimes add a tablespoon of Grand Marnier and a pinch of orange zest to the caramel — it’s bright, sophisticated, and absolutely divine. Just don’t add more than 2 tablespoons, or the caramel may become too thin to stay contained within the mousse.
How should I store leftover caramel gold cheesecake bombs?
Store leftover bombs in an airtight container in the refrigerator for up to 5 days, or in the freezer for up to 3 months. If storing in the fridge, place them in a single layer with the tops facing up, and cover loosely with plastic wrap before sealing the container — this prevents condensation from forming on the gold shell. For longer freezer storage, wrap each bomb individually in plastic wrap, then place them in a freezer-safe bag or container with layers separated by parchment paper. The plastic wrap prevents freezer burn and protects the delicate gold finish. When you’re ready to enjoy them, thaw in the refrigerator for about 4 hours, or let them sit at room temperature for 20 minutes if you prefer a softer, more mousse-like texture. Always add the flaky sea salt and caramel shard garnish after thawing for maximum crunch.
Why did my white chocolate shell turn out streaky instead of smooth and gold?
Streaky shells are usually caused by uneven mixing of the edible gold luster dust or by brushing the chocolate too thickly. Make sure you stir the luster dust into the melted white chocolate thoroughly — it can take a full minute of whisking to achieve a uniform color. If the dust is clumping, sift it through a fine-mesh strainer before adding it to the chocolate. Another common culprit is applying the chocolate in one thick layer instead of two thin layers. Thick layers tend to settle unevenly in the mold, creating areas of varying thickness that look streaky when set. Always apply two thin coats, chilling the mold for 10 minutes between coats. Finally, make sure your molds are completely dry before brushing — any moisture will cause the chocolate to seize and become streaky or dull. If your shell is already streaky, you can brush a third, very thin layer of gold chocolate over the set shell to even out the color.
Share Your Version!
I absolutely love seeing how you make these caramel gold cheesecake bombs with molten center your own. Whether you stuck to the classic recipe, tried the dark chocolate shell, or added a splash of bourbon to the caramel center — I want to hear about it! Leave a star rating and a comment below to tell me how it went. Did the caramel flow beautifully? Did your family fight over the last bomb? Your feedback helps other readers gain confidence to try this dessert for their own special occasions.
Be sure to snap a photo of your golden creations and tag @leosfoods on Instagram or Pinterest — I love nothing more than scrolling through my feed and seeing your beautiful bombs. If you have a specific question about a substitution or a technique, drop it in the comments and I’ll personally answer within 48 hours. This community is built on sharing, learning, and celebrating the joy of cooking with warmth and confidence. From my NYC kitchen to yours — I hope this recipe brings as much warmth to your table as it does to mine. — Stella 🧡
Love This Recipe? Save It to Pinterest!
If you enjoyed this Caramel Gold Cheesecake Bombs with Molten Center recipe, don’t let it get lost in your browser tabs! 😄 Pin it now so you can find it again anytime — and explore hundreds more tried-and-tested recipes waiting for you on my Pinterest boards.
👉 Follow Stella on Pinterest @stellarecipeblog
📌 Pin this recipe · 🔁 Re-pin your favorites · 💬 Tag me when you make it — I love seeing your creations!
“`
Print
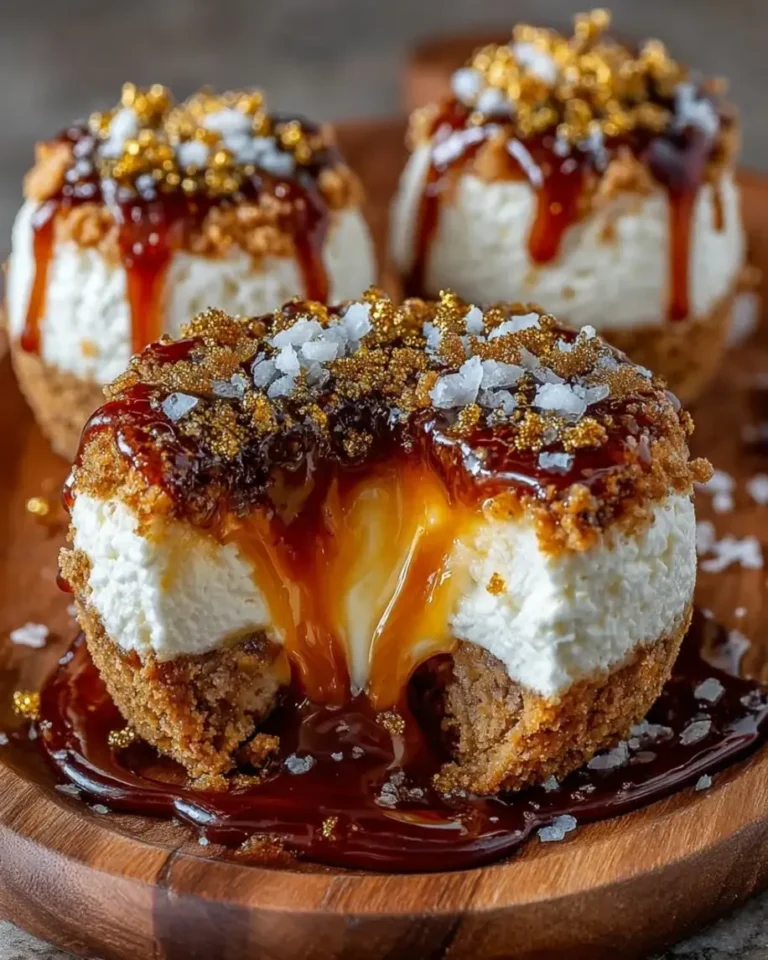
Caramel Gold Cheesecake Bombs with Molten Center
Decadent cheesecake truffles with a molten caramel center, a graham cracker base, and a shimmering gold white chocolate shell.
- Total Time: 3 hours 50 minutes
- Yield: 8 1x
Ingredients
- For the Cheesecake Filling:
- 8 oz (225 g) cream cheese, softened
- 1/3 cup powdered sugar
- 1 tsp vanilla extract
- 1 cup heavy whipping cream, chilled
- For the Molten Caramel Center:
- 1/2 cup caramel sauce
- 2 tbsp brown sugar
- 1 tbsp butter
- 1 tsp vanilla extract
- 1 pinch sea salt
- For the Biscuit Base:
- 1 cup graham cracker crumbs
- 3 tbsp unsalted butter, melted
- For the Gold Shell:
- 10 oz (280 g) white chocolate, melted
- 1 tsp coconut oil
- 1 tsp edible gold luster dust
- For Garnish (optional):
- Flaky sea salt
- Crushed caramel shards
Instructions
- 1. Mix graham cracker crumbs with melted butter until evenly combined.
- 2. Press into silicone dome molds to form a thin base layer and chill for 15 minutes.
- 3. In a small saucepan, combine caramel sauce, brown sugar, butter, vanilla, and sea salt. Simmer for 2–3 minutes until slightly thickened. Cool completely.
- 4. Beat cream cheese, powdered sugar, and vanilla until smooth.
- 5. Whip heavy cream to soft peaks and gently fold into the cheesecake mixture to create a light mousse.
- 6. Brush melted white chocolate mixed with coconut oil and gold luster dust into molds. Chill until set, then apply a second layer.
- 7. Fill each shell halfway with cheesecake mousse.
- 8. Add a spoonful of cooled caramel center into each mold.
- 9. Cover with more mousse and smooth the tops.
- 10. Freeze for at least 3 hours until fully set.
- 11. Unmold carefully and place on a rack.
- 12. Drizzle lightly with leftover caramel if desired.
- 13. Garnish with flaky sea salt and crushed caramel shards.
- 14. Chill briefly before serving.
Notes
For best results, use high-quality white chocolate and edible gold luster dust. The bombs must be fully frozen before unmolding to maintain shape.
- Prep Time: 45 minutes
- Cook Time: 5 minutes
- Method: Dessert
- Cuisine: American
Nutrition
- Calories: 335
- Sugar: 25 g
- Fat: 24 g
- Carbohydrates: 28 g
- Protein: 4 g
Tried This Recipe? Leave a Comment!
Did you make this recipe? I’d love to hear how it turned out! Please leave a comment and a rating below. Your feedback helps other home cooks and supports cheerychop.com!
For more delicious inspiration, follow me on Pinterest!