Cheesy Garlic Chicken Wraps
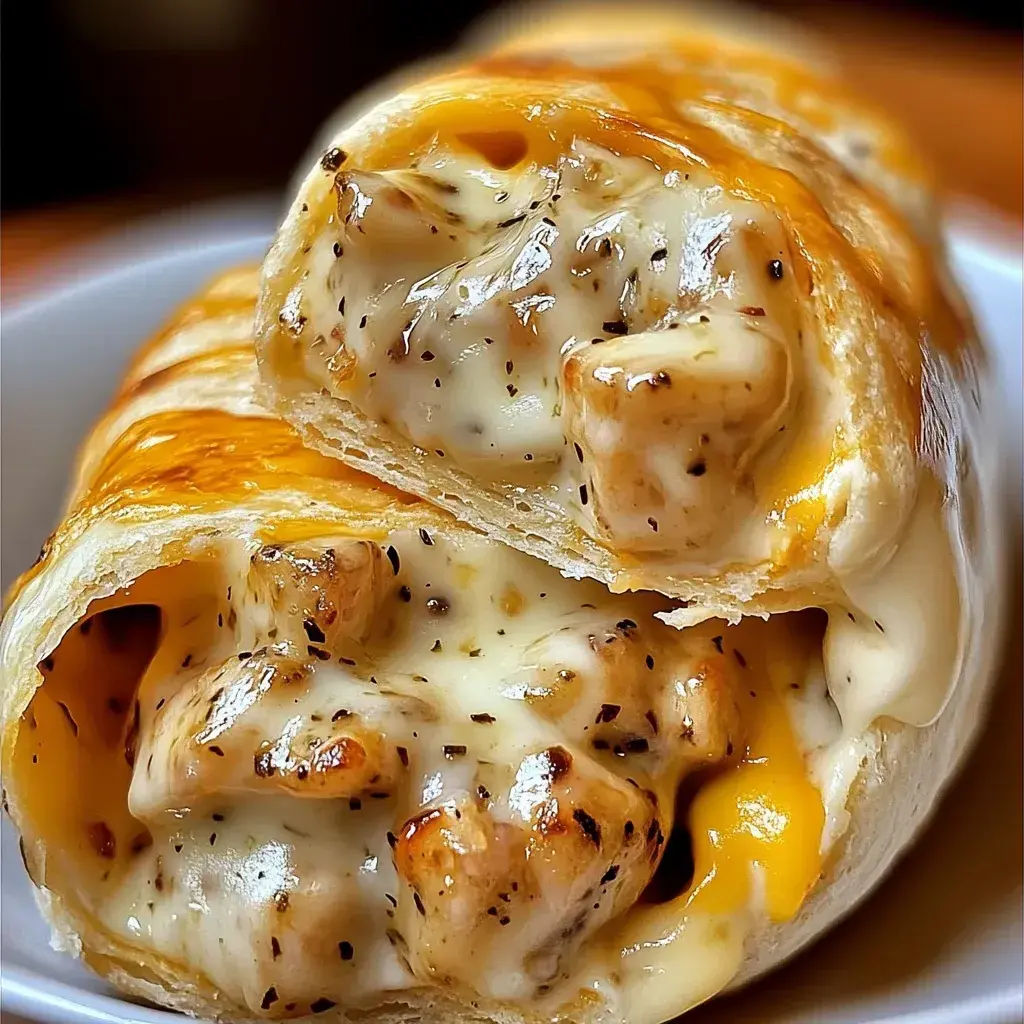
Table of Contents
Cheesy Garlic Chicken Wraps: Crispy Cheesy Garlic Swirl – Fresh, Quick, and Family‑Friendly
As a kid in the lush souks of Marrakech, I learned that a simple ingredient, when treated with love, can transform a dish from ordinary to unforgettable. Those memories carried over to my culinary school years in Paris, where I mastered the art of balancing flavors. Now, in the bustling streets of New York City, I bring that spirit to your kitchen with these Cheesy Garlic Chicken Wraps – a crispy, cheesy garlic swirl that marries Moroccan spice, French technique, and the quick‑fire comfort of modern NYC food culture.
Picture the buttery crunch of tortilla dancing with a velvety cheese–garlic sauce that tingles the palate. The shredded chicken, infused with garlic powder and Italian seasoning, breathes a Mediterranean warmth, while a splash of sour cream adds a silky finish. The moment the warm embrace of melted mozzarella contacts a hot skillet, the aroma of garlic and melted cheese rises like a fragrant perfume, setting the stage for a meal that feels both indulgent and home‑like.
I distill years of experience into a recipe that’s quick and foolproof, trusting that even the busiest New Yorkers can whip up a lunch that feels gourmet. Pay attention to the sequence of adding the cheeses—and remember not to over‑cook the garlic, which can become bitter. A key tweak? Stir the cheese mix in the skillet after you remove it from heat so it stays silky rather than separating. With these few mindful steps, you’ll capture that restaurant‑style flavor in home comfort.
Why This Cheesy Garlic Chicken Wraps Recipe Is the Best
The flavor secret comes from blending classic Mediterranean garlic with a touch of French beurre blanc technique—melted butter tempered with gently cooked garlic so that the mixture brightens the chicken without bitterness. That memory of a Moroccan soup spoonful of garlic rubbed on bread rings true in every bite of this wrap.
Perfected texture hinges on an early cheese blend that coats each chicken grain, turning the filling into a silky custard that never curdles. By combining the cheese with a touch of sour cream before the final heat, the wrap remains moist while achieving a golden, bubbly crust.
Foolproof & fast: the steps are linear, the ingredients pantry‑friendly, and you can assemble the entire meal while the skillet heats. Lay the tortillas, spread the mixture, roll, and sear; the whole process takes under 25 minutes, ideal for a weekday dinner or a weekend lunch that feels like a treat.
Cheesy Garlic Chicken Wraps Ingredients
I pick my mozzarella from the boutique cheese shop on the Lower East Side, while the fresh parsley and rotisserie chicken come from a local farmer’s market that offers seasonal produce. The combination of Moroccan spice and New York sensibility makes every bite memorable.
Ingredients List
- 2 cups cooked chicken (shredded or diced)
- 1 ½ cups shredded mozzarella or cheddar cheese
- ¼ cup cream cheese (softened)
- 2 Tbsp butter (melted)
- 3 cloves garlic (minced)
- ¼ cup sour cream
- 1 tsp garlic powder
- 1 tsp Italian seasoning
- 4 large tortillas
- Salt and pepper (to taste)
- Fresh parsley (for garnish, optional)
Ingredient Spotlight
Chicken: Philly‑style rotisserie chicken from a New York market ensures tender flesh. If you prefer a cleaner flavor, use a skin‑less, boneless breast; the lightness pairs well with the cheese.
Mozzarella: Opt for part‑skim or whole‑milk mozzarella depending on how rich you want the wrap. For an indulgent version, choose whole‑milk; for a lighter take, swap for part‑skim.
Tortillas: A corn‑based flour tortilla gives a sweet, neutral base. If you need a gluten‑free option, use corn tortillas or a certified gluten‑free flour tortilla.
| Original Ingredient | Best Substitution | Flavor / Texture Impact |
|---|---|---|
| Chicken | Ground turkey or chicken thighs | Lighter or richer; turkey adds lean protein. |
| Mozzarella | Cheddar or provolone | Sharper, less melt; cheddar for a sharper bite. |
| Tortillas | Flour tortillas (gluten‑free) | Lighter weight; maintains crispness with gluten‑free benefit. |
How to Make Cheesy Garlic Chicken Wraps — Step‑by‑Step
Let’s turn a handful of pantry staples into a show‑stopper that’s ready in just 25 minutes.
Step 1: Saute Garlic
Heat the 2 Tbsp of butter in a medium skillet over medium heat. Add the minced garlic and sauté until fragrant and golden, about 1–2 minutes. Keep a close eye on it—fermented or burnt garlic turns a sweet note into bitterness. Remove from heat after it reaches just a light amber hue.
💡 Stella’s Pro Tip: Cook the garlic over a slightly lower fire if you’re in a cold apartment kitchen to avoid rapid charring.
Step 2: Heat Chicken
Add the 2 cups of cooked chicken into the skillet, pinch in the garlic powder, Italian seasoning, salt, and pepper. Stir gently to coat the chicken evenly and cook through, about 3–4 minutes. This subtle warming keeps the fibers tender and enhances the aromatic spices.
⚠️ Common Mistake to Avoid: Letting the chicken sit too long on high heat can dry it out—toss it just until it’s heated through.
Step 3: Mix Cheeses
In a bowl, whisk together the softened cream cheese, sour cream, and 3/4 cup of the shredded mozzarella/cheddar. Emulsify until the mixture is creamy, lumpy free, and pale. This forms a sauce that melts beautifully inside the wrap.
💡 Stella’s Pro Tip: Use a hand mixer for a silkier texture—rumor has it a whisk gives a smoother finish.
Step 4: Combine Mix
Remove skillet from heat and fold the sautéed garlic and chicken into the cheese sauce. Stir until everything is fully whorled together; the mixture will be slightly thick and fragrant. Keep warm while you finish the fillings.
⚠️ Common Mistake to Avoid: Over‑shaking the mixture inside the skillet can cause the cheese to break; gently fold it in instead.
Step 5: Assemble Wraps
Lay each tortilla flat and divide the chicken mixture into four equal portions. Spoon a generous portion onto each tortilla’s center, then scatter the remaining 3/4 cup of shredded cheese over the top. Fold the sides over, then roll tightly to enclose the filling.
💡 Stella’s Pro Tip: Lightly oil a spatula so you can press down on the wrap evenly—this seals the edges and guarantees an even grill.
Step 6: Cook Wraps
Heat a clean skillet or grill pan on medium. Place the rolled wraps seam‑side down and sear for 2–3 minutes per side until golden brown and the cheese inside melts into a gooey center. Keep the heat steady to avoid burning the tortilla while letting the inside soften.
⚠️ Common Mistake to Avoid: Dramatically high heat will scorch the tortilla before the filling melts—keep it moderate.
| Step | Action | Duration | Key Visual Cue |
|---|---|---|---|
| 1 | Saute garlic in butter | 1–2 min | Light amber scent and color |
| 2 | Warm chicken with spices | 3–4 min | Chicken glistens, nothing browned |
| 3 | Whisk cheese mixture | 2 min | Smooth, pale blend |
| 4 | Combine into skillet | 1 min | Thick, fragrant sauce |
| 5 | Assemble wraps | 2 min | Tortilla rolled tight |
| 6 | Cook to golden brown | 2–3 min per side | Golden crust, gooey inside |
Serving & Presentation
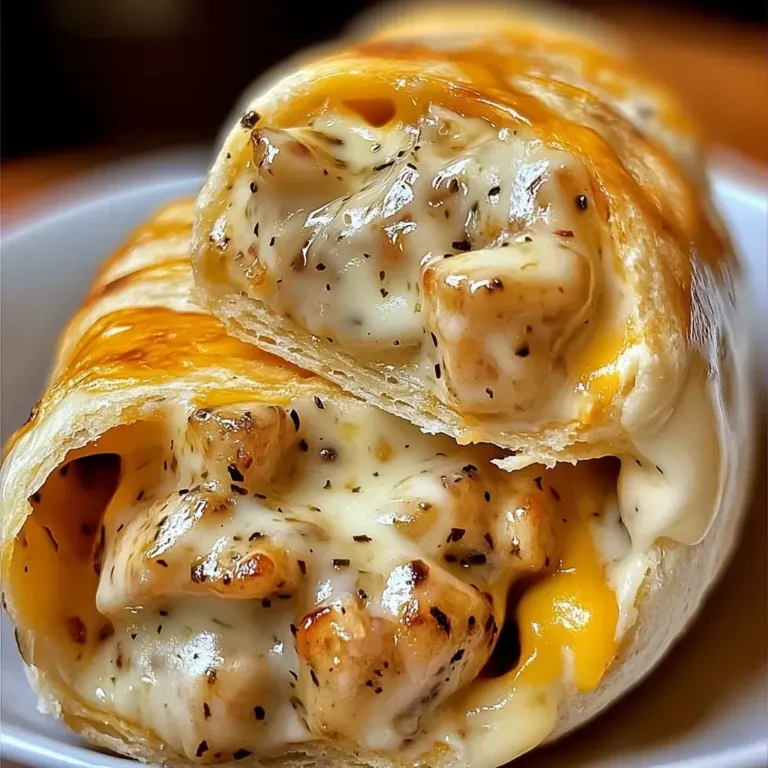
Cut each wrap in half to reveal the molten cheese cascade that looks as good as it tastes. Sprinkle fresh parsley over the halves for a pop of color and a sheaf of Moroccan green. Serve with a side of tzatziki or a light salad of mixed greens dressed with lemon vinaigrette.
The Moroccan feel comes alive with the lamb‑like warmth of the cheese and the aromatic garlic, while the French touch is in the butter‑smoothed glaze. In New York, complement it with a chilled glass of crisp white wine or a refreshing sparkling water with a splash of lemon.
| Pairing Type | Suggestions | Why It Works |
|---|---|---|
| Side Dish | Quinoa tabbouleh, cucumber salad, roasted sweet potato wedges | Freshness cuts through richness, adds crunch. |
| Sauce / Dip | Tzatziki, garlic aioli, spicy harissa yogurt | Cooling or spicy contrast enhances flavor. |
| Beverage | Dry Riesling, sparkling water with lemon, light beer | Acidic or effervescent cuts through creamy glaze. |
| Garnish | Fresh parsley, crushed pistachios, lemon zest | Brightens the dish while adding texture. |
Make‑Ahead, Storage & Reheating
I love the idea of prepping wraps for the week, especially on a hectic Monday. I assemble all tortillas and fillings, keep them in separate slices in an airtight container, and store in the fridge for up to 3 days. For longer, freeze the whole stack in a freezer bag—I reheat them in a skillet until crisp again.
| Method | Container | Duration | Reheating Tip |
|---|---|---|---|
| Refrigerator | Plastic Lidded Container | 3 days | Reheat 2–3 min per side. |
| Freezer | Zip‑Top Bag | 1 month | Bring to room temp then sear. |
| Make-Ahead | Separate tortillas & filling | Up to 2 days | Assemble and finish in skillet. |
When reheating in a skillet, lightly spray with olive oil to restore that crispy exterior. I’ve found that a quick sear of 30 seconds per side brings back the original crunch and the melty cheese stays luscious, not dry.
Variations & Easy Swaps
| Variation | Key Change | Best For | Difficulty Impact |
|---|---|---|---|
| Mediterranean Moroccan Twist | Add ground cumin, paprika, a pinch of saffron, and roasted olive oil to the cheese mix. | Gluten-free, spice lovers. | Low. |
| Gluten‑Free Low‑Carb | Swap flour tortillas for collard green wraps. | Easily portable lunches. | Medium. |
| Summer Salsa Option | Stir in diced mango or pineapple with red bell pepper for a tropical kick. | Perfect for BBQs. | Low. |
Mediterranean Moroccan Twist
Add a pinch of ground cumin, paprika, and crushed saffron strands to the cheese blend; finish with a drizzle of extra‑virgin olive oil. The warm spices echo my mother’s Tagine simmer, turning the wrap into a fragrant ode to the streets of Fez.
Gluten‑Free Low‑Carb
Use thick collard green leaves as your wrapper. The leafy green stays fresh, offers a mild vegetal crisp, and keeps the carb count low. The cheese clings beautifully to the fibers, offering a vegan‑friendly dairy alternative with a protein boost.
Summer Salsa Option
Stir in diced mango, pineapple, and a splash of lime juice; the result is a sweet, citrusy salsa that pops alongside the savory filling. A perfect pivot for rooftop patios and sunshine‑filled brunches.
Can I use leftover chicken for these wraps?
Absolutely! Leftover roasted or grilled chicken works wonderfully. If the meat is too dry, shred it with a fork and toss in a splash of broth or a little extra sour cream to keep it moist. The key is to heat it gently in the skillet so it stays tender and mingles with the garlic‑cheese swirl.
What kind of tortilla gives the best texture?
For a classic feel, a flour tortilla offers a supple, slightly sweet base that crisps nicely when grilled. If you’re gluten‑free or just crave a more rustic chew, a corn tortilla or a whole‑wheat tortilla works beautifully. The thickness matters—thicker wraps hold the filling without tearing.
What if I don’t have butter?
You can replace the butter with olive oil or a neutral oil like grapeseed. The flavor profile will slightly shift—olive oil adds a fruity note that complements the garlic, while a neutral oil keeps the taste focused on the cheese and chicken.
Is there an easy way to keep the wraps from being soggy?
Yes! Squeeze a thin coat of flour or cornstarch onto the tortilla before filling to absorb excess moisture. Alternatively, let the wrap rest for 30 seconds after searing, then cover loosely with foil to keep it warm but not steam‑dry. I’ve found a quick press in a lightly oiled pan gives a crisp edge.
Can I make this wrap vegetarian?
Definitely – swap the chicken for a hearty mix of lentils, black beans, or sautéed mushrooms, and add a splash of vegetable broth to maintain moisture. The cheese and garlic still tie the flavors, and the result is a protein‑rich vegetarian staple that satisfies anyone’s craving.
What is the best way to reheat leftover wraps?
Reheat in a non‑stick skillet over medium heat for 1‑2 minutes each side, flipping once. If you prefer an oven, preheat to 375 °F, place wraps on a parchment‑lined tray, and bake for 8–10 minutes. The skillet gives a crispier exterior while keeping the cheese gooey.
Can I add vegetables to the filling?
Absolutely! Diced bell peppers, zucchini ribbons, or fresh spinach tossed briefly in the skillet add vitamins and color. Fold them into the cheese‑chicken mixture; the quick sautéing will keep them crisp and prevent the wrap from feeling too mushy.
How much garlic should I use for a milder taste?
A single clove of minced garlic, or roughly ¼ teaspoon of garlic powder, will give you a gentle aroma without overpowering the cheese. If you’re sensitive to raw garlic, start with a smaller garlic salt or a light touch of dehydrated garlic flakes, then adjust to your preference.
Can I use a different cheese altogether?
Cheddar, Gouda, provolone, or a blend of pepper jack work wonderfully. Each offers a distinct flavor profile—pepper jack adds a subtle heat, Gouda gives a buttery depth, and cheddar delivers a sharper bite. Just remember that high‑moisture cheeses melt better, ensuring the wrap stays creamy.
Is this recipe suitable for portioned meal prep?
It’s a gold‑mine for meal prep! Assemble individual wraps and store them in an airtight container. Refrigerate up to three days or freeze for a month. When you’re ready to eat, refresh in a skillet or microwave briefly. The cheese stays gooey, and the tortilla crisps up nicely.
Share Your Version!
I’d love to see how you tweak this recipe. Drop a star rating and comment below—did you add a hint of harissa or swap the tortillas? Share a photo on Instagram or Pinterest and tag @leosfoods to spread the love. If you prefer a lower‑carb version, ask me what substitution worked best for you; I’m always curious about creative tweaks.
From my NYC kitchen to yours — I hope this recipe brings as much warmth to your table as it does to mine. — Stella 🧡
Love This Recipe? Save It to Pinterest!
If you enjoyed this Cheesy Garlic Chicken Wraps recipe, don’t let it get lost in your browser tabs! 😄 Pin it now so you can find it again anytime — and explore hundreds more tried‑and‑tested recipes waiting for you on my Pinterest boards.
👉 Follow Stella on Pinterest @chefrecipes2
📌 Pin this recipe · 🔁 Re-pin your favorites · 💬 Tag me when you make it — I love seeing your creations!
If you tried these Cheesy Garlic Chicken Wraps, let me know what you loved, what you tweaked, or which variation you’re excited to try next. Your feedback fuels my next culinary adventure—drop a comment, rate the recipe, or share a photo tagging @leosfoods. Happy cooking!
Cheesy Garlic Chicken Wraps
Ingredients
- 2 cups cooked chicken (shredded or diced)
- 1 ½ cups shredded mozzarella or cheddar cheese
- ¼ cup cream cheese (softened)
- 2 tbsp butter (melted)
- 3 cloves garlic (minced)
- ¼ cup sour cream
- 1 tsp garlic powder
- 1 tsp Italian seasoning
- 4 large tortillas
- Salt and pepper (to taste)
- Fresh parsley (for garnish, optional)
Instructions
- Sauté Garlic:
- In a skillet, melt the butter over medium heat. Add the minced garlic and sauté for 1-2 minutes until it becomes fragrant.
- Tip: Be careful not to burn the garlic as it will turn bitter.
- Heat Chicken:
- Add the cooked chicken to the skillet. Season with garlic powder, Italian seasoning, salt, and pepper. Stir well to coat the chicken evenly and heat through.
- Tip: Use leftover rotisserie chicken for added flavor and convenience.
- Mix Cheeses:
- In a bowl, combine the softened cream cheese, sour cream, and half of the shredded cheese. Mix until smooth.
- Tip: Ensure the cream cheese is softened for easy mixing.
- Combine Chicken and Cheese Mixtures:
- Remove the skillet from heat. Add the chicken to the cream cheese mixture and stir until fully combined.
- Assemble Wraps:
- Lay out the tortillas and divide the chicken mixture evenly in the center of each. Sprinkle the remaining shredded cheese on top. Fold the sides of each tortilla over the filling and roll tightly into wraps.
- Cook Wraps:
- Heat a clean skillet or grill pan over medium heat. Place the wraps seam-side down and cook for 2-3 minutes per side, until golden brown and the cheese is melted.
- Tip: Press down gently with a spatula for even browning and to help seal the wraps.