Easy Sheet Pan Creamy Garlic Parmesan Shrimp Roll-Ups
“`html
Table of Contents
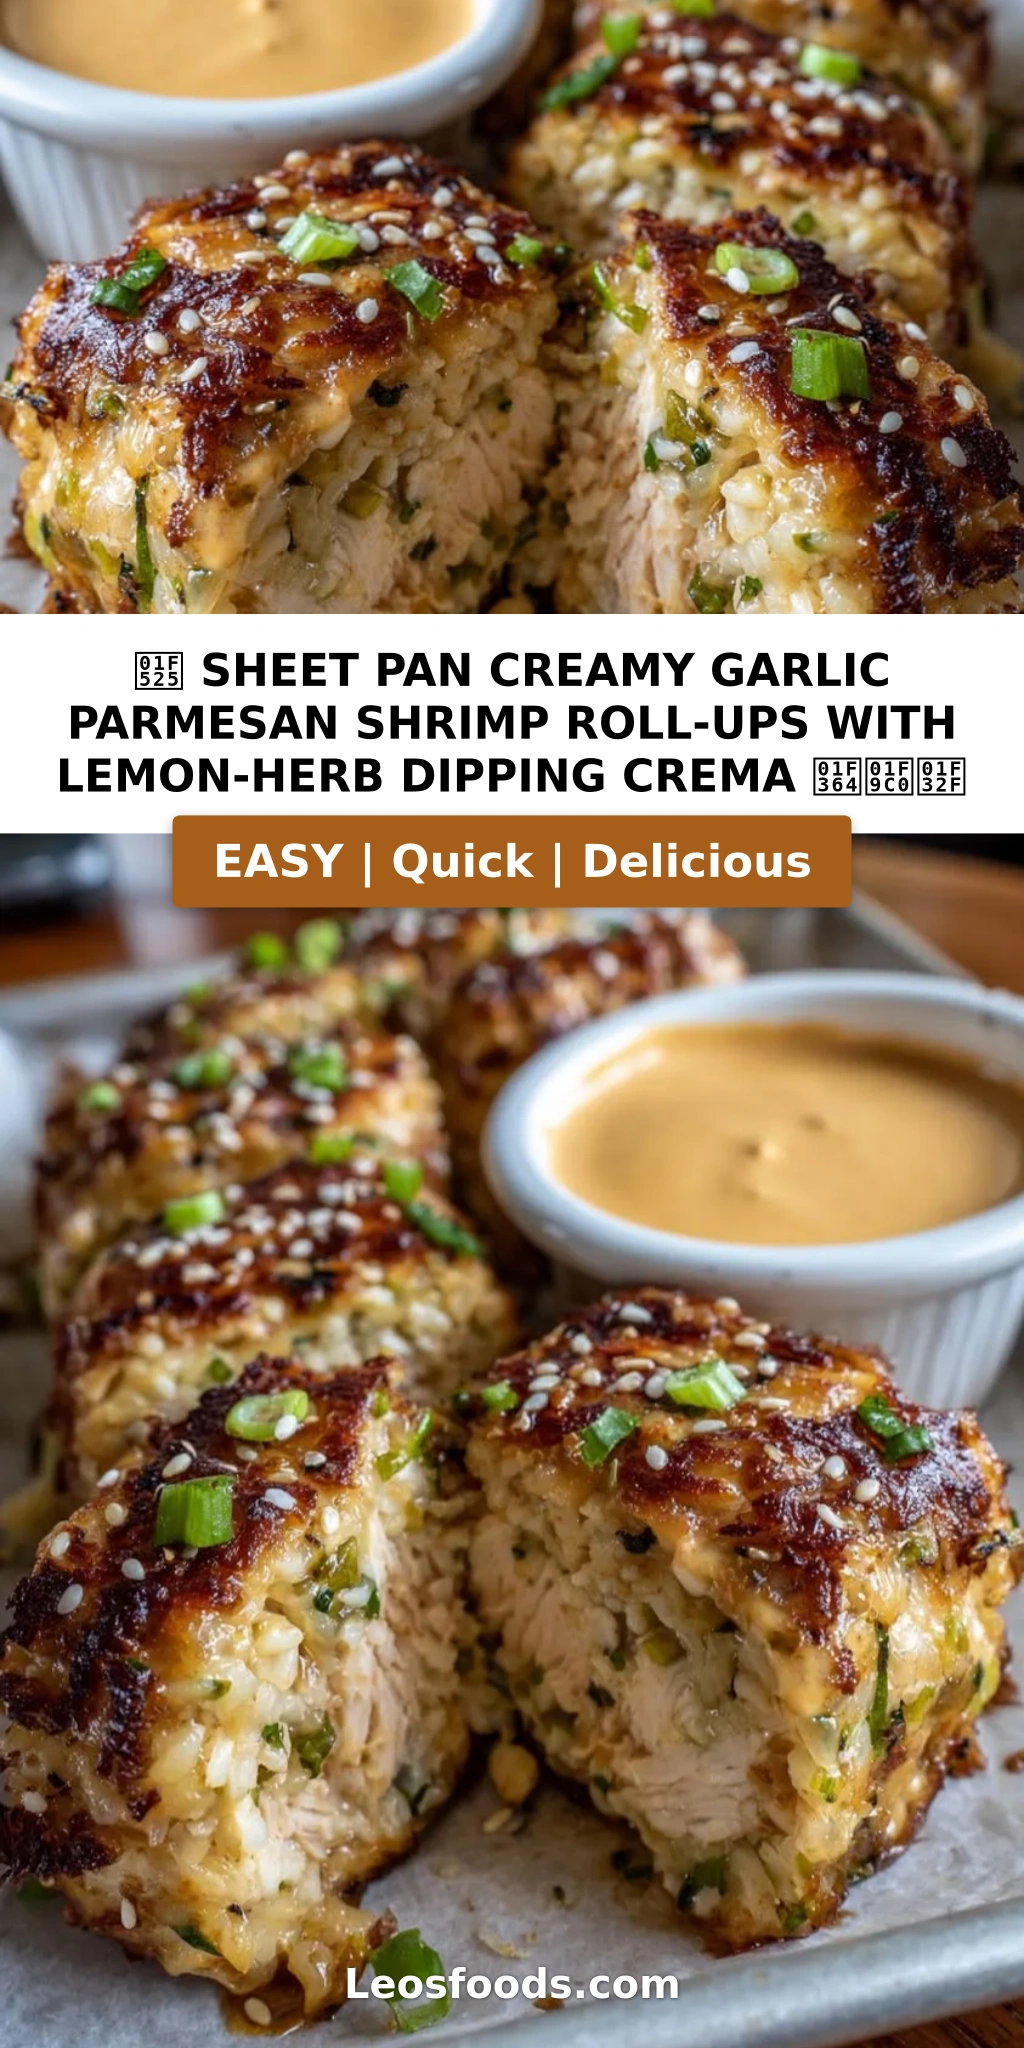
🔥 Sheet Pan Creamy Garlic Parmesan Shrimp Roll-Ups with Lemon-Herb Dipping Crema 🍤🧀🌯 – The Easiest High-Protein Appetizer You’ll Ever Make
Every time I slide a sheet pan of these creamy garlic parmesan shrimp roll-ups into my New York City oven, I’m whisked back to my mother’s kitchen in Morocco, where fresh bread and family always surrounded the table. This recipe is my love letter to those memories — soft flour tortillas wrapped around a rich, garlicky shrimp filling, baked until the edges turn golden-brown and impossibly crispy. In our fast-paced NYC life, finding a high-protein appetizer that’s both impressive and effortless feels like winning the lottery. These sheet pan shrimp roll-ups deliver exactly that: restaurant-quality flavor with minimal cleanup, ready in just 33 minutes from start to finish.
Can you imagine the aroma? Garlic and butter sizzling together, mingling with sweet shrimp and the nutty depth of Parmesan cheese as it melts into gooey perfection. The first bite gives you a satisfying crunch from the baked tortilla, followed by an explosion of creaminess from the mozzarella and cream cheese filling. Then, just when you think it can’t get better, you dip it into the lemon-herb crema — bright, tangy, and refreshingly cool against the rich, savory roll-up. It’s a contrast of temperatures and textures that I learned to appreciate during my pastry training in Paris, where balance is everything.
I’ve tested this recipe dozens of times to get every detail right — the ideal bake time, the perfect tortilla-to-filling ratio, and the secret to keeping the roll-ups crisp without drying out the shrimp. My training at a prestigious culinary school in Paris taught me that sauce work is the soul of any dish, and this lemon-herb crema is proof. Plus, my Moroccan roots inspire me to always add a little warmth and spice. Whether you’re feeding a crowd on game day or meal-prepping for a busy week, these sheet pan shrimp roll-ups are guaranteed to impress — and I’m about to share every one of my secrets with you.
Why This Sheet Pan Shrimp Roll-Ups Recipe Is the Best
The Flavor Secret: What truly sets these sheet pan shrimp roll-ups apart is how the flavors layer and build. The cream cheese acts as a silky base that carries the garlic, Italian seasoning, and smoky paprika throughout every bite. The Parmesan brings a salty, nutty umami that deepens as it bakes, while the mozzarella delivers that satisfying stretch we all crave. Growing up in Morocco, I learned that bold, layered flavors are non-negotiable — and this filling embodies that philosophy perfectly.
Perfected Texture: The texture journey here is what makes these baked shrimp tortilla roll-ups unforgettable. The tortillas crisp up beautifully on the outside while remaining soft and tender on the inside, thanks to the moisture from the creamy filling. My chef training in Paris taught me the importance of contrast, and that’s exactly what you get: crackly edges, creamy centers, and juicy shrimp in every bite. Baking at 375°F on a parchment-lined sheet pan ensures even browning without the bottom burning — a technique I refined through countless trial runs.
Foolproof & Fast: With just 15 minutes of prep and 18 minutes of oven time, this high protein shrimp appetizer is perfect for busy weeknights and last-minute entertaining. There’s no complicated dough, no deep frying, and no tedious wrapping — just mix, roll, brush, and bake. The ingredients are budget-friendly and available at any US grocery store. Even if you’re new to cooking seafood, this recipe is nearly impossible to mess up, thanks to clear visual cues and forgiving bake times.
Sheet Pan Shrimp Roll-Ups Ingredients
I pick up my shrimp from the fish counter at the Union Square Greenmarket when I can, but high-quality frozen shrimp from Whole Foods or Trader Joe’s works beautifully too. The key is buying large shrimp (21–25 count) so they stay juicy and meaty inside the roll-ups. Everything else on this list is a pantry staple in my NYC kitchen, and I’m willing to bet you already have most of it on hand.
Ingredients List
- The Cheesy Shrimp Filling:
- 1 lb large shrimp, peeled, deveined, and coarsely chopped
- 4 oz cream cheese, softened
- 1 cup mozzarella cheese, shredded
- ½ cup Parmesan cheese, grated
- 2 cloves garlic, minced
- 1 tsp Italian seasoning
- ½ tsp paprika
- Salt and black pepper, to taste
- The Roll-Ups & Glaze:
- 8 soft flour tortillas (or low-carb flatbreads)
- 2 tbsp butter, melted
- ½ tsp garlic salt
- ½ tsp dried parsley
- The High-Protein Lemon-Herb Crema:
- ½ cup plain Greek yogurt
- 1 tbsp fresh parsley & chives, finely chopped
- Juice of ½ lemon
- 1 tsp olive oil
- Pinch of salt
Ingredient Spotlight
Shrimp: The star of the show, shrimp provides a sweet, delicate flavor and meaty texture. Look for large (21–25 count) wild-caught shrimp with a firm, translucent appearance. If frozen, thaw overnight in the fridge and pat dry before chopping. For a tested substitution, use finely diced chicken breast — it cooks similarly but offers a milder flavor.
Cream Cheese: This is the glue that holds the filling together while adding luxurious creaminess. Choose full-fat for the best texture and flavor. Softened cream cheese blends more smoothly into the filling. A great substitution is mascarpone for a richer, silkier result, or strained ricotta for a lighter option.
Parmesan Cheese: Aged Parmesan brings sharp, nutty umami that elevates the entire filling. Buy a wedge and grate it fresh for the best flavor — pre-shredded contains anti-caking agents that affect melting. Pecorino Romano is a great swap, though it’s saltier, so adjust your added salt accordingly.
Greek Yogurt: The base of our creamy lemon herb dipping sauce, Greek yogurt delivers tangy brightness and high protein without the heaviness of sour cream. Choose plain, full-fat or 2% for a thicker texture. Sour cream works in a pinch, though the crema will be slightly thinner.
Flour Tortillas: These are the vehicle that holds everything together. 8-inch flour tortillas are ideal — pliable enough to roll tightly but sturdy enough to hold the filling. Low-carb or whole wheat tortillas work well as substitutions, but corn tortillas are trickier since they crack easily.
| Original Ingredient | Best Substitution | Flavor / Texture Impact |
|---|---|---|
| Shrimp | Diced chicken breast | Milder flavor, slightly drier but still delicious |
| Cream cheese | Mascarpone | Richer, silkier texture; higher fat content |
| Parmesan | Pecorino Romano | Saltier and sharper; reduce added salt |
| Greek yogurt | Sour cream | Less tangy, thinner crema |
| Flour tortillas | Low-carb tortillas | Slightly denser, fewer carbs |
How to Make Sheet Pan Shrimp Roll-Ups — Step-by-Step
Trust me, if you can roll a burrito, you can absolutely nail this recipe. Let’s walk through each step together — I’ll be right here with pro tips and warnings so you get perfectly golden, creamy-centered sheet pan shrimp roll-ups every single time.
Step 1: Mix the Cheesy Shrimp Filling
Preheat your oven to 375°F (190°C). In a medium mixing bowl, combine the softened cream cheese, shredded mozzarella, grated Parmesan, minced garlic, Italian seasoning, paprika, salt, and pepper. Stir until everything is well incorporated. Gently fold in the chopped raw shrimp, making sure every piece is coated with the creamy mixture.
💡 Stella’s Pro Tip: Soften your cream cheese at room temperature for at least 30 minutes before mixing. Cold cream cheese creates lumps and makes it harder to distribute the spices evenly. Trust me, this tiny step makes a world of difference in the texture of your filling!
Step 2: Roll the Tortillas
Warm the tortillas in the microwave for about 10 seconds — this makes them pliable and prevents cracking. Spoon about ¼ cup of filling down the center of each tortilla, leaving a little room at the edges. Roll tightly into a tube, tucking in the ends slightly like a burrito, and place seam-side down on your prepared sheet pan.
⚠️ Common Mistake to Avoid: Overfilling is the #1 reason tortillas split open in the oven. If you can’t close the tortilla comfortably, scoop out a tablespoon of filling. A tight roll ensures the filling stays inside and the edges crisp up properly.
Step 3: Brush & Bake
In a small bowl, whisk together the melted butter, garlic salt, and dried parsley. Brush this mixture generously over the top of each roll-up — this is what gives them that beautiful golden sheen and extra crispy edges. Bake for 18–20 minutes, or until the roll-ups are golden brown and the filling is bubbling at the seams.
💡 Stella’s Pro Tip: Line your sheet pan with parchment paper — not wax paper! Parchment prevents sticking and makes cleanup a breeze. It also promotes even browning by releasing heat gently. For extra crispiness, place the pan on the bottom rack for the last 2 minutes.
Step 4: Make the Lemon-Herb Crema
While the roll-ups bake, prepare the crema. In a small bowl, whisk together the Greek yogurt, finely chopped parsley and chives, fresh lemon juice, olive oil, and a pinch of salt. It should be smooth, thick, and pourable — like a luxurious sauce. Taste and adjust the lemon if needed.
💡 Stella’s Pro Tip: Use freshly squeezed lemon juice — both the bright aroma and the clean acidity make a huge difference compared to bottled juice. If you want extra zest, add ½ teaspoon of lemon zest to the crema for an even more vibrant kick.
Step 5: Serve Hot & Enjoy
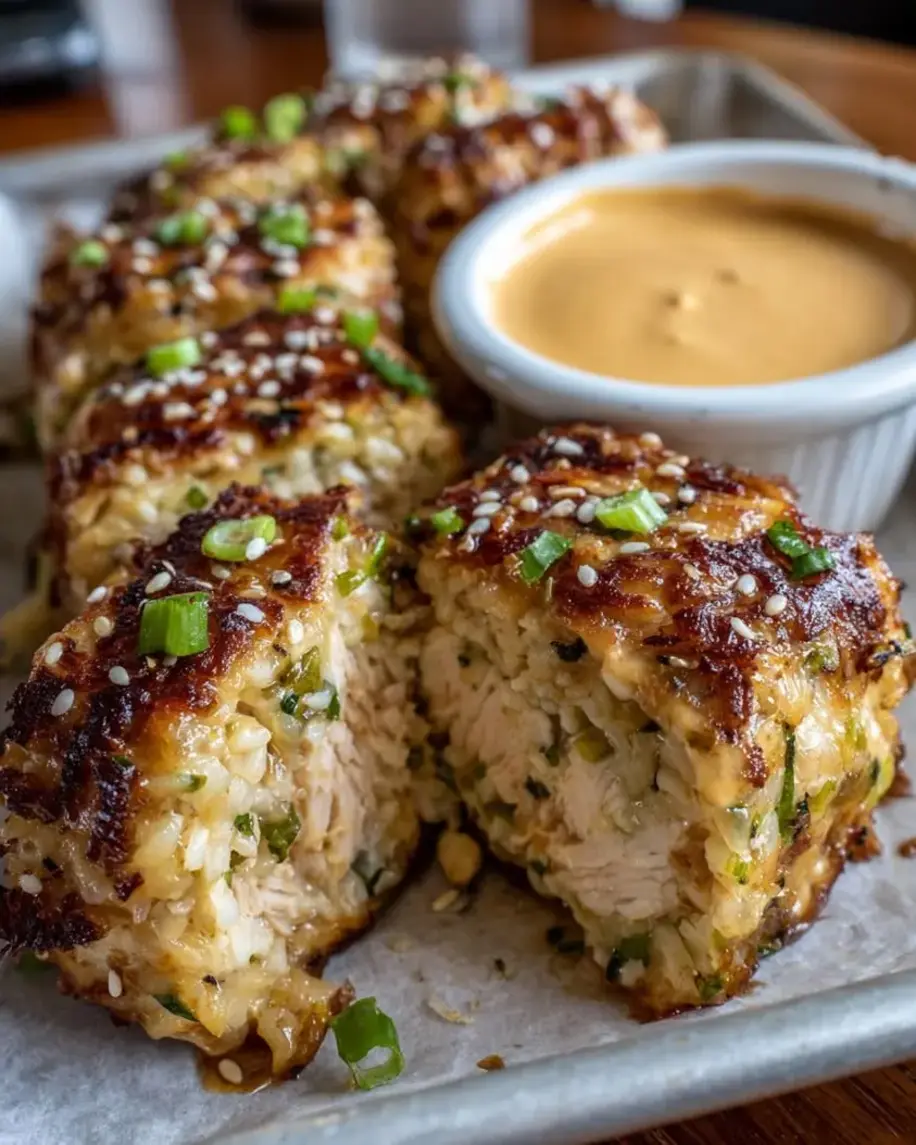
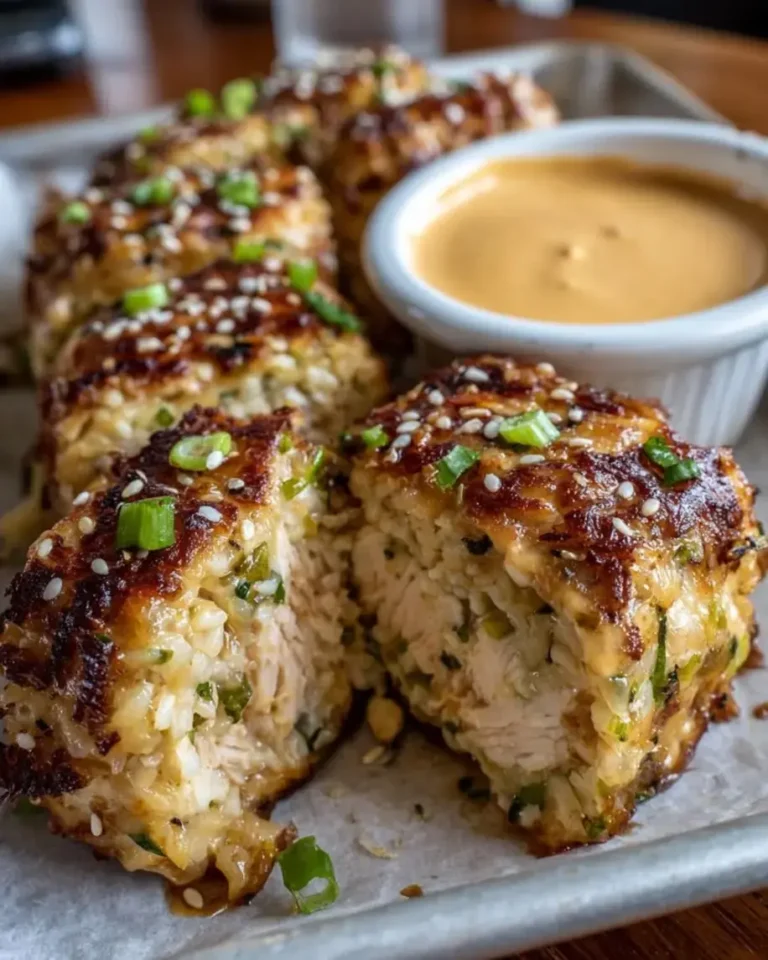
Once the roll-ups come out of the oven, let them rest for 2–3 minutes before slicing. This allows the filling to set slightly, preventing it from oozing out when you cut. Slice each roll-up diagonally for an elegant presentation, arrange on a platter, and serve hot with the lemon-herb crema on the side for dipping.
⚠️ Common Mistake to Avoid: Don’t cut into the roll-ups immediately — they’ll fall apart and the filling will spill everywhere. Those brief 2–3 minutes of resting are crucial for clean slices. Patience is a virtue, especially when it comes to cheesy appetizers!
| Step | Action | Duration | Key Visual Cue |
|---|---|---|---|
| 1 | Mix filling | 5 mins | Shrimp evenly coated in creamy mixture |
| 2 | Roll tortillas | 8 mins | Tight tubes, seam-side down |
| 3 | Brush & bake | 18–20 mins | Golden brown, crispy edges, bubbling seams |
| 4 | Make crema | 3 mins | Smooth, thick, vibrant green herbs |
| 5 | Serve | 2 mins | Warm, golden, glistening with butter |
Serving & Presentation
These sheet pan shrimp roll-ups deserve an elegant presentation. On a large platter, arrange the sliced roll-ups in a fan pattern with the cut sides facing up so the creamy filling is visible. Place the lemon-herb crema in a small bowl in the center, garnished with an extra sprinkle of chopped herbs. A drizzle of olive oil and a pinch of paprika adds a gorgeous finishing touch that reminds me of the vibrant colors of the spice souks in Marrakech.
For a weeknight dinner, I love serving these alongside a crisp green salad with a simple vinaigrette — the freshness cuts through all that richness. Or, when I’m craving comfort food, I pair them with roasted garlic mashed potatoes. In my NYC apartment, these creamy garlic parmesan shrimp roll-ups have become my go-to for book club meetings and dinner parties alike. They’re always the first plate to disappear!
| Pairing Type | Suggestions | Why It Works |
|---|---|---|
| Side Dish | Roasted asparagus, arugula salad, lemon herb rice | Fresh acidity and crunch contrast the creamy richness |
| Sauce / Dip | Extra lemon crema, marinara, sriracha aioli | Additional layers of flavor — tangy, sweet, or spicy |
| Beverage | Sauvignon Blanc, lemon sparkling water, light lager | Crisp acidity cuts through the cheese and butter |
| Garnish | Fresh parsley, lemon zest, red pepper flakes | Bright color and fresh flavor elevate the plate |
Make-Ahead, Storage & Reheating
I’m a huge proponent of meal prepping, especially living in New York City where time is precious. These sheet pan shrimp roll-ups are remarkably forgiving when it comes to make-ahead entertaining. You can assemble them a full day in advance, keep them covered in the fridge, and simply brush with butter and bake when your guests arrive. That means beautiful, hot, bubbly appetizers with zero last-minute stress — one of the best tricks I’ve learned from hosting countless dinner parties in my tiny NYC kitchen.
| Method | Container | Duration | Reheating Tip |
|---|---|---|---|
| Refrigerator | Airtight container | 3–4 days | Air fryer at 350°F for 5–7 minutes |
| Freezer | Freezer-safe wrap | 2 months | Bake from frozen at 350°F for 12–15 minutes |
| Make-Ahead | Covered baking dish | 1 day | Add 3–4 minutes to bake time |
From my experience, the air fryer is absolutely the best way to reheat these roll-ups — it brings back that crispy exterior in minutes. If you’re reheating in the microwave, expect a softer, chewier texture; it’s still delicious, but you’ll miss the crispy edges. For make-ahead entertaining, assemble the roll-ups but hold the butter glaze until just before baking — this ensures the tortillas brown beautifully and stay crisp rather than steaming.
Variations & Easy Swaps
These sheet pan shrimp roll-ups are endlessly adaptable to your taste buds and dietary needs. Here are some of my favorite variations that I’ve tested in my own kitchen, each bringing a new personality to the same simple technique — no matter how you customize them, the creamy garlic parmesan shrimp filling stays the hero.
| Variation | Key Change | Best For | Difficulty Impact |
|---|---|---|---|
| North African Harissa Kick | Add 1–2 tsp harissa paste | Spice lovers | Easy |
| Gluten-Free & Dairy-Free | GF tortillas, dairy-free cheese & cream cheese | Dietary needs | Easy |
| Mediterranean Twist | Fold in sun-dried tomatoes & olives | Mediterranean flavor fans | Easy |
Variation 1: North African Harissa Kick
Inspired by my Moroccan roots, this variation adds a wonderful fiery twist. Mix 1–2 teaspoons of harissa paste into the cream cheese filling before folding in the shrimp. Harissa’s roasted red pepper and smoky chili notes pair beautifully with the sweet shrimp and creamy cheese. In Paris, I discovered rose harissa at a little épicerie — if you can find it, it adds a gorgeous floral fragrance alongside the heat. This version brings bold North African flavor into every bite while keeping the dish approachable for American palates.
Variation 2: Gluten-Free & Dairy-Free
For those avoiding gluten or dairy, this recipe is surprisingly accommodating. Swap the flour tortillas for certified gluten-free tortillas — cassava or almond flour versions work best as they’re the most pliable. For dairy, use a plant-based cream cheese alternative and dairy-free mozzarella shreds. Nutritional yeast can stand in for Parmesan, adding that sought-after umami note. The texture changes slightly — the filling won’t be quite as creamy — but the flavors still shine beautifully. I’ve tested this variation with several brands, and the result is consistently delicious.
Variation 3: Mediterranean Sun-Dried Tomato Twist
This is a seasonal favorite I discovered at the NYC farmers market one summer. Chop 3–4 sun-dried tomatoes (drained from oil) and fold them into the filling alongside the shrimp. Add a handful of chopped kalamata olives if you’re feeling adventurous. The concentrated sweetness of the tomatoes pairs magnificently with the creamy cheese base, and the briny olives echo the coastal flavors I grew up with in Morocco. It’s like a Mediterranean vacation in every single roll-up!
How do you keep shrimp roll-ups from getting soggy on a sheet pan?
The key to preventing soggy sheet pan shrimp roll-ups lies in three simple techniques. First, make sure your filling is thick enough — the cream cheese and Parmesan absorb moisture from the shrimp as they bake. Second, roll the tortillas tightly and place them seam-side down on a parchment-lined sheet pan, which creates a barrier against the pan’s heat. Third, brushing the tops with melted butter before baking creates a light crispy crust. Also, avoid overstuffing your tortillas, as excess filling releases steam and creates sogginess. Bake at 375°F for 18–20 minutes to achieve that perfect golden-brown exterior.
Can I use frozen shrimp for creamy garlic parmesan shrimp roll-ups?
Absolutely! Frozen shrimp works beautifully in this recipe, and honestly, I often use it myself given how convenient it is. The most important step is thawing the shrimp completely — I recommend transferring them from the freezer to the refrigerator the night before you plan to make the dish. Once thawed, pat the shrimp dry with paper towels before chopping. Excess moisture is the enemy of crispy roll-ups, so drying thoroughly is crucial. I recommend raw shrimp rather than pre-cooked frozen shrimp, as the raw shrimp will cook perfectly inside the roll-ups during baking and stay juicy.
What can I substitute for parmesan in the creamy garlic sauce?
If you’re out of Parmesan, you have several excellent options. Pecorino Romano is my top recommendation — it’s a sheep’s milk cheese with a similar salty, sharp profile, though it’s slightly saltier, so adjust your added salt accordingly. Grana Padano also works well as a close cousin with a milder flavor. For a dairy-free substitution, nutritional yeast adds a wonderful umami depth that mimics Parmesan’s savory character. Freshly grated Swiss cheese or aged Asiago can also work in a pinch. Just remember that hard, aged cheeses will melt better and offer more concentrated flavor than soft cheeses.
How long should you bake shrimp roll-ups at 400°F to make sure they’re fully cooked?
At 400°F, I recommend baking sheet pan shrimp roll-ups for 15–18 minutes. Since the shrimp are coarsely chopped and mixed into a creamy filling, they cook fairly quickly. The roll-ups are done when the tortillas are deeply golden and the filling is visibly bubbling at the seams — a clear sign the center has reached a safe temperature. If you want to be precise, use a meat thermometer to check that the internal temperature has reached 165°F. Keep in mind this 15–18 minute range is slightly shorter than the 18–20 minutes at 375°F that works best for this recipe.
Can I make sheet pan shrimp roll-ups ahead of time?
Yes! These roll-ups are perfect for make-ahead entertaining, which is something I do all the time for gatherings in my NYC apartment. Assemble the roll-ups completely according to the recipe, but don’t brush them with the melted butter glaze yet. Cover the pan tightly with plastic wrap and refrigerate for up to 24 hours. When you’re ready to serve, simply brush with the butter mixture and bake at 375°F for 20–22 minutes — adding just a few extra minutes to account for the chilled tortillas. The filling actually benefits from the extended resting time as the flavors have more time to meld together beautifully.
What kind of tortillas work best for baked shrimp roll-ups?
For best results, I recommend 8-inch soft flour tortillas. They’re flexible enough to roll tightly around the filling without cracking while sturdy enough to hold everything together during baking. Low-carb or whole wheat tortillas are also excellent choices — they tend to crisp up nicely. If you’re using corn tortillas, warm them well and handle gently, as they’re prone to cracking. Look for tortillas that are soft and pliable in the package, avoiding any that are cracked or stiff. The tortilla quality really matters since they hold everything together through the baking process.
How do I know when the shrimp is fully cooked inside the roll-ups?
Since the shrimp are chopped and mixed into the filling, the visual cues are simpler than with whole shrimp. First, look for the filling to be bubbling at the seams of the tortillas — this indicates the center has reached a high enough temperature to cook the shrimp. Second, if you peek inside one roll-up, the shrimp should be pink and opaque, no longer gray or translucent. An instant-read thermometer inserted into the center of a roll-up should register at least 165°F, which is the safe internal temperature for fully cooked seafood. Shrimp cook fast, so the bubbling cue is your best visual guide.
Can I use sour cream instead of Greek yogurt for the lemon-herb crema?
Yes, you can absolutely swap Greek yogurt for sour cream in this lemon-herb crema. Greek yogurt is thicker and tangier with a higher protein content, but sour cream will deliver a similar creamy texture with a slightly milder flavor. If you’re using sour cream, I’d suggest adding just a squeeze more lemon juice to brighten the tanginess that Greek yogurt naturally provides. Full-fat sour cream will give you the smoothest, richest crema. For a twist, you could also use a 50/50 blend of Greek yogurt and sour cream, which gives you the best of both worlds — that’s actually one of my favorite French technique-inspired shortcuts.
Share Your Version!
I’d love to see your take on these sheet pan shrimp roll-ups! Whether you followed the recipe exactly or added your own spin with a different protein or spice blend, your feedback helps our community grow and learn together. Drop a star rating below, share your experience in the comments, and let me know which variation you tried — I genuinely read every single comment and love hearing how my recipes turn out in your kitchens.
If you share on Instagram or Pinterest, be sure to tag @leosfoods so I can see your beautiful creations. And here’s a question I’m dying to know the answer to: which variation are you most excited to try — the North African harissa kick, the Mediterranean twist, or the classic as written? Let me know in the comments!
From my NYC kitchen to yours — I hope this recipe brings as much warmth to your table as it does to mine. — Stella 🧡
Love This Recipe? Save It to Pinterest!
If you enjoyed these Sheet Pan Creamy Garlic Parmesan Shrimp Roll-Ups with Lemon-Herb Dipping Crema, don’t let them get lost in your browser tabs! 😄 Pin this recipe now so you can find it again anytime — and explore hundreds more tried-and-tested recipes waiting for you on my Pinterest boards.
👉 Follow Stella on Pinterest @stellarecipeblog
📌 Pin this recipe · 🔁 Re-pin your favorites · 💬 Tag me when you make it — I love seeing your creations!
Did you make these sheet pan shrimp roll-ups? 🍤
I’d love to hear how they turned out! Drop a comment below or tag me in your photos — I read every single one and would be thrilled to feature your creation. Save this recipe, share it with a friend who needs a game-day hero, and happy cooking! 😊
🔥 Sheet Pan Creamy Garlic Parmesan Shrimp Roll-Ups with Lemon-Herb Dipping Crema 🍤🧀🌯
Soft tortillas packed with a rich garlic-shrimp and mozzarella center, baked on a sheet pan until golden and crispy, then dunked into a thick lemon-herb crema.
- Total Time: 33 mins
- Yield: 4 (makes 8 roll-ups) 1x
Ingredients
- The Cheesy Shrimp Filling:
- 1 lb large shrimp, peeled, deveined, and coarsely chopped
- 4 oz cream cheese, softened
- 1 cup mozzarella cheese, shredded
- ½ cup Parmesan cheese, grated
- 2 cloves garlic, minced
- 1 tsp Italian seasoning
- ½ tsp paprika
- Salt and black pepper
- The Roll-Ups & Glaze:
- 8 soft flour tortillas (or low-carb flatbreads)
- 2 tbsp butter, melted
- ½ tsp garlic salt
- ½ tsp dried parsley
- The High-Protein Lemon-Herb Crema:
- ½ cup plain Greek yogurt
- 1 tbsp fresh parsley & chives, finely chopped
- Juice of ½ lemon
- 1 tsp olive oil
- Pinch of salt
Instructions
- Mix Filling: Preheat oven to 375°F (190°C). In a bowl, combine cream cheese, mozzarella, Parmesan, minced garlic, Italian seasoning, paprika, salt, and pepper. Fold in the raw chopped shrimp.
- Roll: Warm tortillas for 10 seconds to make them pliable. Spoon filling down the center of each tortilla and roll tightly into a tube.
- Brush & Bake: Place roll-ups seam-side down on a parchment-lined sheet pan. Whisk melted butter, garlic salt, and dried parsley; brush generously over top. Bake for 18–20 minutes until golden brown and crispy.
- Make Crema: Whisk Greek yogurt, herbs, lemon juice, olive oil, and salt until smooth.
- Serve: Slice roll-ups diagonally, arrange on a platter, and serve hot with the thick lemon-herb crema for dipping!
- Prep Time: 15 mins
- Cook Time: 18 mins
Tried This Recipe? Leave a Comment!
Did you make this recipe? I’d love to hear how it turned out! Please leave a comment and a rating below. Your feedback helps other home cooks and supports cheerychop.com!
For more delicious inspiration, follow me on Pinterest!