Creamy Golden Coconut Curry Chicken Skillet Recipe

Table of Contents
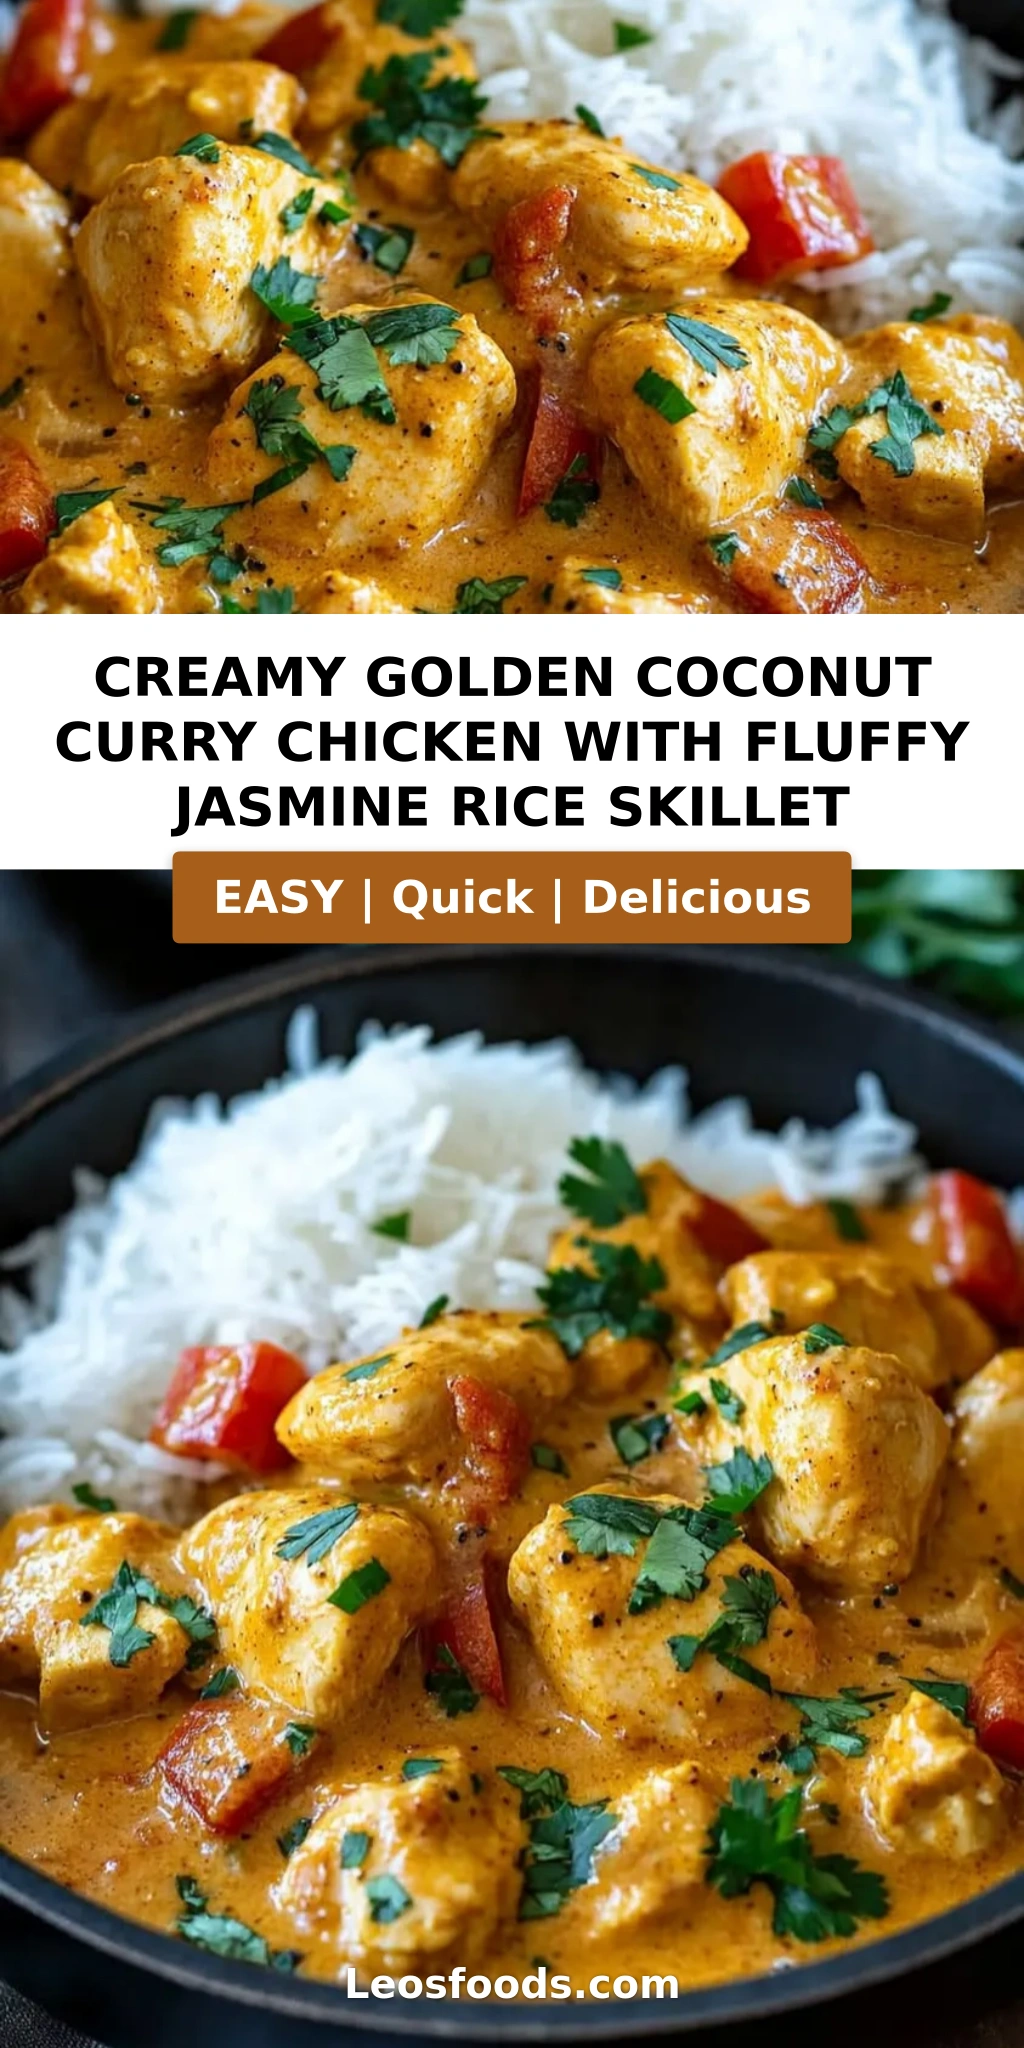
Creamy Golden Coconut Curry Chicken with Fluffy Jasmine Rice Skillet – A One-Skillet Wonder for Busy Weeknights
I still remember the first time I made this creamy golden coconut curry chicken in my tiny Parisian kitchen, fresh out of culinary school. I was homesick for my mother’s Moroccan tagines, but I had only a single skillet and a handful of ingredients. That night, I reached for a can of coconut milk, a jar of yellow curry powder, and some jasmine rice I had picked up from a little épicerie near the Place Monge. What came together in that one pan was pure magic — a dish that tasted like warmth itself. This creamy golden coconut curry chicken recipe is the exact one-skillet coconut chicken and rice I’ve been making ever since, now perfected in my NYC kitchen and shared with you.
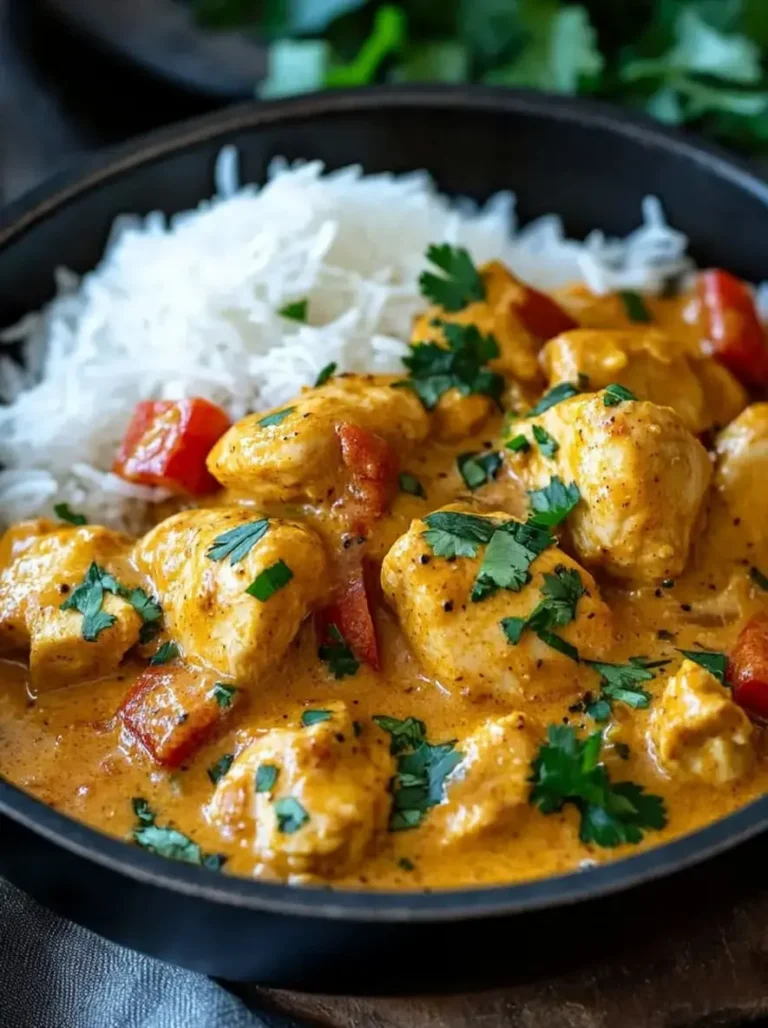
Imagine this: tender, golden-browned chicken thighs nestled in a rich, velvety sauce that’s brilliantly tinted from turmeric and yellow curry powder. The jasmine rice cooks right in that same creamy coconut broth, soaking up every drop of flavor until each grain is fluffy, fragrant, and lightly kissed with gold. Sweet bell pepper and bright broccoli add pops of color and a tender-crisp bite, while a whisper of soy sauce and honey rounds everything out with savory depth. The aroma alone — ginger, garlic, curry, coconut — will fill your kitchen and have everyone drifting in, asking, “What’s for dinner?”
What sets my version apart from other coconut curry chicken recipes is the technique: I build the sauce in layers, bloom the spices in hot oil to unlock their full potential, and let the rice steam directly in the curry rather than cooking it separately. This isn’t just a time-saver — it’s a flavor infuser. The rice absorbs the golden turmeric chicken curry essence from the inside out. One skillet, 45 minutes, and dinner is done. I’ll show you exactly how to nail the texture, avoid a mushy rice pitfall, and get that gorgeous golden color every time. As we say in my mother’s kitchen, “The secret is in the patience.” Let’s cook.
Why This Creamy Golden Coconut Curry Chicken Recipe Is the Best
The Flavor Secret. Growing up in Morocco, I learned that a great curry is all about the foundation. My mother would toast whole spices in a dry pan before grinding them — that’s the same principle I bring to this one-skillet coconut chicken and rice. By blooming the curry powder and turmeric in hot oil with garlic and ginger, you wake up their essential oils. The result? A deep, complex golden turmeric chicken curry that tastes like it simmered for hours, not minutes. This is the same layering technique I refined during my French training, where building a sauce from the bottom up is gospel.
Perfected Texture. The biggest challenge with an all-in-one skillet rice dish is getting the rice fluffy, not gluey. My chef’s trick? Rinse the jasmine rice thoroughly until the water runs clear to remove excess starch, then let it steam covered without peeking for the full 18 minutes. The coconut milk and broth create a luscious cooking liquid that the rice absorbs evenly, leaving you with distinct, separate grains that are tender and fragrant. The chicken thighs stay juicy because they’re seared first, locking in moisture before the braise.
Foolproof & Fast. I’ve tested this easy coconut chicken and rice skillet more times than I can count — for busy weeknights when my NYC schedule runs late, for Sunday meal prep, and for friends who claim they can’t cook. Every single time, it delivers. There’s no rice cooker needed, no separate pots to wash, and no complicated technique. If you can brown chicken and stir a pot, you can make this creamy golden coconut curry chicken. It’s forgiving, adaptable, and consistently stunning. That’s why it’s the most-requested recipe on my blog.
Creamy Golden Coconut Curry Chicken Ingredients
I source most of my spices from the Little India neighborhood on Lexington Avenue here in NYC — the curry powders there are vibrantly fresh and nothing like the faded jars you find at big-box stores. The coconut milk I always buy full-fat from a can (never the carton stuff), and the jasmine rice comes from a bulk bin at my local farmers market in Union Square. Every ingredient in this easy coconut chicken and rice skillet has a story, and each one plays a role in creating that luscious, golden result.
Ingredients List
- 1 ½ lbs boneless chicken thighs, cut into bite-sized pieces
- 1 cup jasmine rice, rinsed
- 1 can (13.5 oz) coconut milk
- 1 cup chicken broth
- 2 tablespoons coconut oil or olive oil
- 1 medium onion, diced
- 3 cloves garlic, minced
- 1 tablespoon fresh ginger, grated
- 2 tablespoons yellow curry powder
- 1 teaspoon turmeric
- 1 red bell pepper, sliced
- 1 cup broccoli florets
- 1 tablespoon soy sauce
- 1 teaspoon honey
- Salt and black pepper to taste
- Fresh cilantro for garnish
- Lime wedges for serving
Ingredient Spotlight
Coconut Milk (full-fat, canned). This is the backbone of the sauce. The fat in full-fat coconut milk emulsifies with the broth to create a creamy, luxurious texture that light coconut milk simply cannot replicate. Look for cans with no guar gum if possible — I like Aroy-D or Chaokoh. If you must lighten it, use one can full-fat plus extra broth, but expect a thinner sauce.
Yellow Curry Powder & Turmeric. Together, these two create that signature golden hue and layered warmth. Curry powder brings cumin, coriander, fenugreek, and other spices; turmeric adds earthiness and brilliant color. Bloom them in hot oil for about 30 seconds to remove any raw spice taste — this is the single most impactful step in the whole recipe. I buy my turmeric fresh and grate it when I can, but high-quality ground turmeric works beautifully.
Jasmine Rice. Long-grain jasmine rice is ideal because its slight stickiness and floral aroma complement coconut curry beautifully. Rinsing is non-negotiable — it washes away surface starch that would turn your golden turmeric chicken curry into a gummy mess. I use a fine-mesh sieve and run cold water over the rice for about a minute until the water runs clear.
| Original Ingredient | Best Substitution | Flavor / Texture Impact |
|---|---|---|
| Full-fat coconut milk | Light coconut milk + 2 tbsp cashew cream | Less rich, thinner sauce; still creamy |
| Yellow curry powder | Garam masala + ½ tsp extra turmeric | Warmer, less bright; deeper color |
| Chicken thighs | Boneless chicken breasts, cubed | Leaner, slightly drier; reduce cook time by 3 min |
| Jasmine rice | Basmati rice | Similar fluffy texture, more aromatic |
| Fresh ginger | 1 tsp ground ginger + 1 tsp fresh lemon juice | Less pungent, slightly one-dimensional |
How to Make Creamy Golden Coconut Curry Chicken — Step-by-Step
Trust me — if you can follow these eight simple steps, you will have a restaurant-worthy creamy golden coconut curry chicken on the table in 45 minutes flat. I’ve broken down every visual cue and timing detail so you feel confident at each stage.
Step 1: Brown the Chicken
Heat the oil in a large skillet (12-inch works best) over medium-high heat. Pat the chicken pieces dry with paper towels, then season generously with salt and black pepper. Add the chicken in a single layer — do not overcrowd the pan. Cook for 4–5 minutes, turning once, until the pieces are golden brown on all sides. The chicken does not need to be cooked through at this stage; you are building flavor and texture. Remove the chicken to a plate and set aside.
💡 Stella’s Pro Tip: Browning is about the Maillard reaction — that’s the chemical magic that creates deep, savory flavor. If your skillet is crowded, the chicken will steam instead of brown. Work in two batches if needed, and use a stainless steel or cast iron skillet for the best crust.
Step 2: Sauté Aromatics
Reduce the heat to medium. Add the diced onion to the same skillet and sauté for 2 minutes, scraping up any browned bits from the bottom with your spoon. Add the minced garlic and grated ginger, then cook for another 1–2 minutes until the mixture is fragrant and the onion is translucent. The sizzle should be gentle — you want to soften, not burn.
⚠️ Common Mistake to Avoid: Garlic and ginger burn quickly because they contain natural sugars. If your heat is too high, they’ll turn bitter and acrid. Keep the flame at medium and stir constantly. The second you smell them become nutty and sweet, you’re ready for the next step.
Step 3: Bloom the Spices
Stir in the curry powder and turmeric. Cook, stirring constantly, for 30 to 45 seconds. The spices will darken slightly and become intensely fragrant. This step is the key to that deep, golden turmeric chicken curry flavor — never skip it. Immediately add a splash of chicken broth if the spices start to stick.
💡 Stella’s Pro Tip: Blooming spices in hot oil (or ghee, if you have it) releases fat-soluble flavor compounds that water alone cannot extract. This is a classic French technique called “dégraisser” adapted for North African cooking. The result is a curry that tastes layered and complex, not flat.
Step 4: Add Rice and Liquid
Add the rinsed jasmine rice to the skillet and stir to coat every grain with the spiced oil. Pour in the coconut milk and chicken broth, then add the browned chicken back to the pan, nestling it into the liquid. Stir everything gently to combine, then bring the mixture to a gentle simmer — you should see small bubbles around the edges, not a rolling boil.
⚠️ Common Mistake to Avoid: Boiling the liquid too vigorously will break the coconut milk emulsion and make the sauce grainy. It will also cook the rice too fast on the outside while leaving the center underdone. A gentle simmer — just a few lazy bubbles — is what you want. Adjust your heat after the first 2 minutes.
Step 5: Cover and Simmer
Cover the skillet tightly with a lid (or use foil if your skillet lacks a lid). Reduce the heat to medium-low and let it cook undisturbed for 18–20 minutes. Do not lift the lid during this time — every time you lift it, steam escapes, and steam is what cooks the rice. Set a timer and resist the temptation.
💡 Stella’s Pro Tip: If you absolutely must peek (I know, it’s hard), do it only after 15 minutes. Check by tilting the pan slightly — if you see a little liquid pooled at the bottom, it needs 3–5 more minutes. If the liquid is absorbed and the rice looks fluffy, it’s done. Trust the timer, but trust your eyes more.
Step 6: Add Vegetables
During the last 5 minutes of cooking, quickly remove the lid and scatter the sliced red bell pepper and broccoli florets over the top. Do not stir them in — just let them rest on the surface of the rice. Replace the lid and finish cooking for the remaining time. This steaming method keeps the vegetables tender-crisp and brightly colored, not mushy.
⚠️ Common Mistake to Avoid: Adding the vegetables at the beginning of the 18-minute simmer will turn them into overcooked, dull-colored mush. Bell pepper and broccoli need only 4–5 minutes of gentle steam to become perfectly tender with a slight crunch. If you prefer them very soft, add them at the 10-minute mark instead.
Step 7: Season and Finish
Remove the skillet from the heat and stir in the soy sauce and honey. The soy sauce adds umami depth that balances the sweetness of the coconut milk, while the honey rounds out the acidity of the turmeric. Taste and adjust seasoning with additional salt, pepper, or a squeeze of lime if needed. Fluff the rice gently with a fork to incorporate the vegetables and sauce.
💡 Stella’s Pro Tip: The honey and soy sauce are my secret finishing touch — a little trick I learned from a Thai chef friend in a shared kitchen in NYC. They add a savory-sweet complexity that makes the golden turmeric chicken curry taste more “complete.” If you’re vegan, swap honey for maple syrup and use tamari instead of soy sauce.
Step 8: Garnish and Serve
Transfer the creamy golden coconut curry chicken and rice to warm bowls. Garnish generously with fresh cilantro and serve with lime wedges on the side. A squeeze of lime right before eating brightens all the flavors and cuts through the richness of the coconut milk. Serve hot, and watch everyone reach for seconds.
⚠️ Common Mistake to Avoid: Skipping the lime wedge is a missed opportunity. Acidity is essential in coconut-based dishes — it lifts the heaviness and makes the curry more refreshing. Don’t just add it as a garnish; actually squeeze it over each serving. The difference is night and day.
| Step | Action | Duration | Key Visual Cue |
|---|---|---|---|
| 1 | Brown chicken | 4–5 min | Golden crust on all sides |
| 2 | Sauté aromatics | 3–4 min | Onion translucent, garlic fragrant |
| 3 | Bloom spices | 30–45 sec | Spices darken slightly, intense aroma |
| 4 | Add rice + liquid | 2 min | Gentle simmer around edges |
| 5 | Cover and simmer | 18–20 min | Liquid absorbed, rice fluffy |
| 6 | Add vegetables | Last 5 min | Bright color, tender-crisp |
| 7 | Season and finish | 1 min | Sauce glossy, well blended |
| 8 | Garnish and serve | 2 min | Cilantro, lime wedges |
Serving & Presentation
This creamy golden coconut curry chicken is a complete one-pan meal on its own, but the way you serve it can elevate it from cozy weeknight dinner to something truly special. I like to spoon the golden turmeric chicken curry into wide, shallow bowls so the rice spreads out and the sauce pools beautifully. A generous handful of fresh cilantro on top, a few lime wedges on the side, and maybe a sprinkle of red pepper flakes if you like heat — that’s my go-to presentation when I’m serving friends in my NYC apartment.
In my mother’s home in Morocco, we would have served this with crusty bread for sopping up the sauce, and maybe a simple cucumber and tomato salad on the side. Here in New York, I love pairing it with a crisp, cold glass of Sauvignon Blanc or a sparkling lime and mint drink. The acidity cuts through the coconut richness beautifully. If I’m making it for a crowd, I’ll double the recipe, set out bowls of toasted coconut, chopped peanuts, and extra lime, and let everyone build their own bowl.
| Pairing Type | Suggestions | Why It Works |
|---|---|---|
| Side Dish | Cucumber salad, naan bread, steamed green beans | Cool, fresh Crunch balances rich sauce |
| Sauce / Dip | Extra lime wedges, sriracha, coconut yogurt | Adds brightness or heat as desired |
| Beverage | Sauvignon Blanc, lime & mint sparkler, iced chai | Acidity and spice complement the curry |
| Garnish | Fresh cilantro, red pepper flakes, toasted coconut | Adds color, texture, and a pop of flavor |
Make-Ahead, Storage & Reheating
One of the best things about this easy coconut chicken and rice skillet is how well it holds up. I often make a double batch on Sunday to fuel my busy NYC workweek — it tastes even better the next day once the flavors have melded overnight. The key is storing the components properly to keep the rice fluffy and the chicken moist.
| Method | Container | Duration | Reheating Tip |
|---|---|---|---|
| Refrigerator | Airtight glass container | Up to 4 days | Add 1 tbsp water, cover, reheat on low stovetop |
| Freezer | Freezer-safe container or zip-top bag | Up to 3 months | Thaw overnight in fridge, reheat with splash of broth |
| Make-Ahead | Prepare through step 5, cool, refrigerate | Up to 2 days in advance | Add vegetables and reheat covered on low |
When reheating, I strongly recommend the stovetop over the microwave. The microwave tends to dry out the rice and make the chicken rubbery. Instead, transfer your portion to a small skillet, add a tablespoon of water or chicken broth, cover, and warm over medium-low heat for 5–7 minutes, stirring once halfway through. The gentle steam will revive the rice and keep the chicken tender. For the freezer, I like to portion the creamy golden coconut curry chicken into individual containers so I can grab one for lunch without thawing the whole batch.
Variations & Easy Swaps
I love that this coconut curry chicken recipe is endlessly adaptable. Whether you’re craving a spicy Moroccan kick, need a dairy-free option (it already is!), or want to eat with the seasons, there’s a variation here for you. Each one has been tested in my kitchen — and approved by my family.
| Variation | Key Change | Best For | Difficulty Impact |
|---|---|---|---|
| Spicy Moroccan Curry | Add harissa, cinnamon, cumin | Heat lovers, North African flavor | Easy (no extra steps) |
| Vegan Chickpea & Sweet Potato | Swap chicken for chickpeas + sweet potato | Plant-based dinners | Easy (same method) |
| Seasonal Green & Pea | Swap broccoli for asparagus or snow peas | Spring/summer freshness | Easy (same method) |
Spicy Moroccan Curry Variation
For a taste of my childhood, add 1 tablespoon of harissa paste (I like Mina or homemade) along with the curry powder, plus ½ teaspoon of ground cinnamon and ½ teaspoon of cumin. The harissa brings a smoky, fruity heat that pairs beautifully with the coconut milk. This version reminds me of the street food stalls in Marrakech — deeply spiced, bold, and comforting. If you can’t find harissa, use 1 teaspoon of sriracha plus a pinch of smoked paprika.
Vegan Chickpea & Sweet Potato Variation
This dairy-free and completely plant-based version swaps the chicken for 1 can of drained chickpeas and 1 medium sweet potato, peeled and cubed to ½-inch pieces. Add the sweet potato at the same time as the rice (it needs the full 18–20 minutes to become tender) and stir in the chickpeas during the last 5 minutes with the bell pepper and broccoli. The sweet potato adds natural sweetness that complements the golden turmeric chicken curry flavors beautifully. Use tamari instead of soy sauce to keep it gluten-free.
Seasonal Green & Pea Variation
When spring arrives in NYC, I swap the broccoli for 1 cup of asparagus (cut into 2-inch pieces) or snow peas. Add them during the last 4 minutes of cooking instead of 5, as they cook faster. I also like to toss in ½ cup of frozen peas at the very end for a burst of sweetness and color. This variation feels lighter and brighter — perfect for warmer weather. The key is not to overcook the delicate greens; they should still have a slight snap when you bite into them.
What is the best way to get a rich golden color in a coconut curry chicken?
The secret to a deep, rich golden color is two-fold: use high-quality turmeric and bloom it properly. First, always use a combination of yellow curry powder (which already contains turmeric) and an extra teaspoon of ground turmeric. Second — and this is the game-changer — bloom the spices in hot oil for 30 to 45 seconds before adding any liquid. Heating the turmeric in oil releases its fat-soluble pigments (curcuminoids), which intensify the golden hue. I also recommend using full-fat coconut milk, as the fat helps carry the color and makes the sauce look even more vibrantly golden. If you want an extra boost, add a pinch of annatto powder or a saffron thread steeped in warm water — both are traditional in Moroccan and Indian cooking for achieving that gorgeous sunset color.
Can I use chicken thighs instead of chicken breasts for this creamy coconut curry recipe?
Absolutely — and I actually recommend chicken thighs over breasts for this particular dish. Boneless, skinless chicken thighs are more forgiving because they have a higher fat content, which means they stay tender and moist even after simmering in the coconut sauce for 20 minutes. Chicken breasts, especially when cubed, can dry out quickly if even slightly overcooked. If you prefer breasts, reduce the simmering time by 2–3 minutes and check for doneness early. Cut the breasts into slightly larger pieces (1½-inch cubes) to help retain moisture. Either way, this creamy golden coconut curry chicken will be delicious — but thighs give you that extra succulence that makes the dish truly luxurious.
How long does it take to cook jasmine rice in the skillet with the curry sauce?
Jasmine rice takes 18 to 20 minutes to cook perfectly in the skillet with the curry sauce, simmering gently over medium-low heat with the lid on. The exact time depends on your skillet, your stove, and how tightly your lid fits. I always set a timer for 18 minutes, then check by tilting the pan to see if there is any liquid pooling at the bottom. If the liquid is absorbed and the rice grains are tender and separate, it is done. If there is still a little liquid, re-cover and cook for 2 more minutes, then check again. Remember to rinse the rice thoroughly before adding it — this removes excess starch and helps the grains cook up fluffy rather than sticky. Do not lift the lid during the first 15 minutes of cooking, as every escape of steam extends the cook time.
What can I use as a substitute for coconut milk in this golden curry chicken dish?
If you cannot use coconut milk due to allergy or preference, the best substitute is a combination of full-fat oat milk or unsweetened cashew milk plus 2 tablespoons of raw cashew butter or coconut cream (if coconut is acceptable). The cashew butter adds the richness and body that coconut milk normally provides. Alternatively, you can use 1 cup of heavy cream (or full-fat Greek yogurt thinned with a little broth) mixed with 1 cup of chicken broth — this creates a creamy, tangy sauce that is luscious but not coconut-forward. Keep in mind that the flavor profile will shift: using dairy-based substitutes will make the golden turmeric chicken curry taste more like a traditional French-style curry cream sauce, while nut-based milks will add a subtle nuttiness. The color will remain beautifully golden as long as you bloom the turmeric and curry powder properly.
Can I make this creamy golden coconut curry chicken in a slow cooker or Instant Pot?
Yes, but I recommend the stovetop skillet method for the best texture and flavor. For an Instant Pot, use the sauté function to brown the chicken and bloom the spices, then add the rice, coconut milk, and broth. Pressure cook on high for 5 minutes with a natural release of 10 minutes. Add the vegetables after the pressure cooking and use the residual heat to steam them. For a slow cooker, brown the chicken and bloom the spices on the stovetop first, then transfer everything except the rice and vegetables to the slow cooker. Cook on low for 4 hours, then stir in the rice and cook on high for another 30–40 minutes until the rice is tender. Add vegetables in the last 10 minutes. The texture will be softer and less distinct than the one-skillet method, but it is still very flavorful. The one-skillet approach remains my favorite for this coconut curry chicken recipe because the rice cooks evenly and the sauce reduces to the perfect consistency.
Is this golden turmeric chicken curry recipe spicy? How can I adjust the heat level?
As written, this creamy golden coconut curry chicken is very mild — the yellow curry powder and turmeric provide warmth and depth without significant heat. The dish is designed to be family-friendly, so there is no chili or cayenne in the base recipe. If you want more heat, add ½ teaspoon of red pepper flakes or a chopped fresh chili (like serrano or Thai bird) along with the garlic and ginger. For a smoky heat, stir in 1 teaspoon of smoked paprika or chipotle powder. If you are serving a mix of adults and kids, I recommend keeping the base mild and serving sriracha or a spicy chili crisp on the table so everyone can customize their own bowl. The coconut milk naturally tempers heat, so even if you add a decent amount of chili, the sauce will remain pleasantly warm rather than fiery.
Can I use brown rice instead of jasmine rice in this one-skillet coconut chicken and rice?
You can, but you will need to adjust the liquid and cook time significantly. Brown rice requires about 40–45 minutes of simmering and about ½ cup more liquid than white jasmine rice. If you substitute brown rice, increase the chicken broth to 1½ cups and simmer covered for 40–45 minutes, checking at the 35-minute mark. Add the vegetables during the last 8 minutes of cooking. The texture will be chewier and nuttier, and the sauce will reduce more, so you may want to add an extra splash of broth or coconut milk before serving. I personally love the earthy flavor of brown rice with golden turmeric chicken curry, but it is a different eating experience — heartier and more substantial. For the quick, fluffy texture that defines this recipe, jasmine rice is still your best bet.
What vegetables can I add to this coconut curry chicken recipe besides broccoli and bell pepper?
This recipe is very flexible, and I frequently change the vegetables based on what is in season at my NYC farmers market. Some excellent additions include: snow peas or sugar snap peas (add in the last 3 minutes), zucchini or yellow squash (add in the last 5 minutes, cut into half-moons), carrots (shave into ribbons with a peeler and add in the last 4 minutes), spinach or kale (stir in at the very end until just wilted, about 1 minute), and frozen peas (stir in off the heat — the residual heat is enough). Mushrooms, especially shiitake or cremini, are wonderful and can be sautéed along with the onion at the beginning. Just keep the total vegetable volume to about 2 cups so the skillet does not become overcrowded. The golden turmeric chicken curry is forgiving, so feel free to use what you have on hand.
How do I store leftovers and reheat this creamy golden coconut curry chicken?
Store leftovers in an airtight container in the refrigerator for up to 4 days. The flavors actually deepen and meld overnight, making the second-day version even more delicious. For best results when reheating, use the stovetop: add a tablespoon of water or chicken broth to a small skillet, add the desired portion, cover, and warm over medium-low heat for 5–7 minutes, stirring once halfway. This gentle steaming method revives the rice and keeps the chicken tender. If you are in a rush, the microwave works too — place the portion in a microwave-safe bowl, cover with a damp paper towel, and heat in 1-minute intervals at 50% power, stirring between intervals. Freeze for up to 3 months in a freezer-safe container. Thaw overnight in the refrigerator before reheating. I often freeze individual portions of this easy coconut chicken and rice skillet for quick lunches throughout the month.
What can I serve with this golden curry chicken to make it a complete meal?
Because this one-skillet coconut chicken and rice already includes protein, starch, and vegetables, it is a complete meal on its own. However, if you wish to round it out further, I love serving it with a simple cucumber and tomato salad dressed with lemon juice and olive oil — the cool, fresh crunch contrasts beautifully with the warm, creamy curry. Warm naan or roti is excellent for sopping up every last drop of the golden sauce. For a heartier spread, add a side of roasted chickpeas dusted with cumin and smoked paprika, or a bowl of mango lassi for a cooling drink. If I am hosting a dinner party, I will set out small bowls of toasted coconut flakes, chopped cashews, sliced green onions, and extra lime wedges so guests can customize their bowls. The beauty of this creamy golden coconut curry chicken is that it pairs well with both simple and elaborate accompaniments.
Share Your Version!
I absolutely love hearing how this creamy golden coconut curry chicken turns out in your kitchen. Did you add extra spice? Swap in a different vegetable? Make it vegan with chickpeas? Drop a star rating below and leave a comment — your feedback helps other cooks feel confident trying this one-skillet coconut chicken and rice for the first time. And if you share a photo on Instagram or Pinterest, please tag me @leosfoods so I can see your beautiful creation. It makes my day every single time.
Speaking of which — I have a question for you: what is one ingredient you always keep on hand that makes any dinner feel special? For me, it is fresh cilantro and lime. They are my little luxuries, the finishing touches that turn a simple meal into something memorable. I would love to know yours in the comments.
From my NYC kitchen to yours — I hope this recipe brings as much warmth to your table as it does to mine. — Stella 🧡
Love This Recipe? Save It to Pinterest!
If you enjoyed this Creamy Golden Coconut Curry Chicken with Fluffy Jasmine Rice Skillet recipe, don’t let it get lost in your browser tabs! 😄 Pin it now so you can find it again anytime — and explore hundreds more tried-and-tested recipes waiting for you on my Pinterest boards.
👉 Follow Stella on Pinterest @stellarecipeblog
📌 Pin this recipe · 🔁 Re-pin your favorites · 💬 Tag me when you make it — I love seeing your creations!
Creamy Golden Coconut Curry Chicken with Fluffy Jasmine Rice Skillet
Creamy Golden Coconut Curry Chicken with Fluffy Jasmine Rice Skillet
- Total Time: 45 minutes
- Yield: 4 servings 1x
Ingredients
- 1 ½ lbs boneless chicken thighs, cut into bite-sized pieces
- 1 cup jasmine rice, rinsed
- 1 can (13.5 oz) coconut milk
- 1 cup chicken broth
- 2 tablespoons coconut oil or olive oil
- 1 medium onion, diced
- 3 cloves garlic, minced
- 1 tablespoon fresh ginger, grated
- 2 tablespoons yellow curry powder
- 1 teaspoon turmeric
- 1 red bell pepper, sliced
- 1 cup broccoli florets
- 1 tablespoon soy sauce
- 1 teaspoon honey
- Salt and black pepper to taste
- Fresh cilantro for garnish
- Lime wedges for serving
Instructions
- Heat oil in a large skillet over medium heat. Add chicken pieces and season with salt and pepper. Cook until lightly browned on all sides.
- Add onion, garlic, and ginger to the skillet. Sauté for 2-3 minutes until fragrant and softened.
- Stir in curry powder and turmeric, coating the chicken and vegetables with the spices.
- Add jasmine rice, coconut milk, and chicken broth. Mix everything together and bring to a gentle simmer.
- Cover the skillet and cook for 18-20 minutes, or until the rice is fluffy and the chicken is fully cooked.
- Add sliced bell pepper and broccoli during the last 5 minutes of cooking to keep them tender but slightly crisp.
- Stir in soy sauce and honey for extra depth of flavor. Adjust seasoning if needed.
- Remove from heat, garnish with fresh cilantro, and serve warm with lime wedges.
- Prep Time: 15 minutes
- Cook Time: 30 minutes
Nutrition
- Calories: 520 kcal
Tried This Recipe? Leave a Comment!
Did you make this recipe? I’d love to hear how it turned out! Please leave a comment and a rating below. Your feedback helps other home cooks and supports cheerychop.com!
For more delicious inspiration, follow me on Pinterest!