Dalgona Coffee | Iced Latte
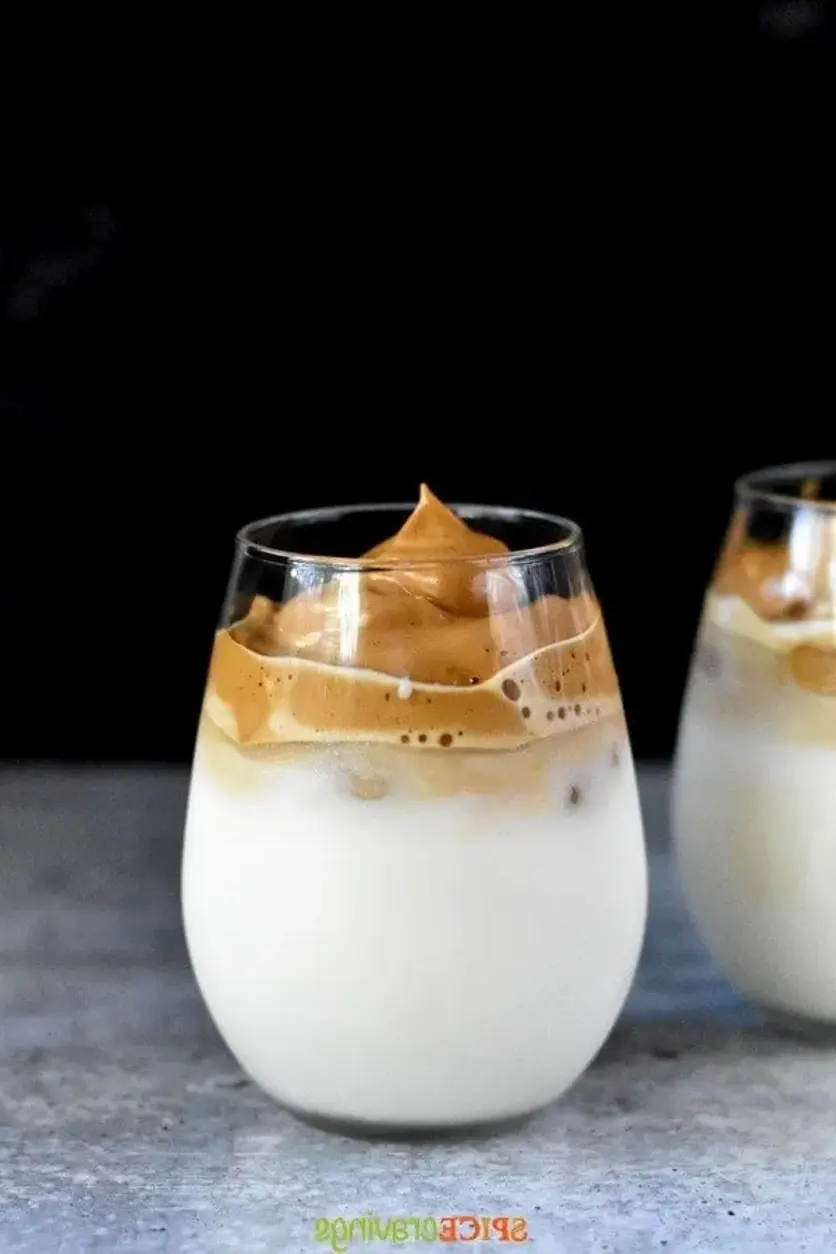
Table of Contents
Dalgona Coffee: The Viral Whipped Coffee You Need to Make at Home
I remember the first time I saw a video of someone whipping coffee into a cloud-like foam — it was during a slow afternoon in my NYC kitchen, and I was immediately transported back to my mother’s kitchen in Morocco. We have a tradition of serving sweet, strong coffee with a thick foam, known as “ksar” coffee, and it’s served with dates or small pastries. When I saw the viral dalgona coffee trend sweeping the internet, I knew I had to recreate it, but with my own twist — a touch of that Moroccan hospitality and a Parisian-trained precision. This dalgona coffee recipe is more than just a drink; it’s a sensory experience that starts with the rich, dark aroma of instant coffee and ends with a perfectly balanced sweetness.
The beauty of this whipped coffee is in its simplicity and its dramatic texture. The velvety, deep-brown coffee foam sits majestically atop a glass of ice-cold milk, creating a beautiful contrast — like a soft, sweet cloud floating over a snowy lake. When you take your first sip, the foam slowly melts into the milk, releasing an intense coffee flavor that’s balanced by the creamy, cool milk. The sugar gives it a candy-like sweetness, while the instant coffee provides a robust, bitter note that keeps it from being cloying. It’s a textural journey: the thick, airy foam on top, followed by the cold, liquid milk below.
What makes my version of this iced latte stand out is the technique I learned in Paris. I use a specific whipping method that creates a perfectly stable, silky foam — not too stiff and not too runny. It’s the same principle from my pastry days: the key to a perfect mousse is air incorporation. In this recipe, I’ll share my secret for getting that perfect foam without a mixer. Plus, I’ll show you how to tweak the sweetness and milk choices so it perfectly suits your taste. This is a foolproof recipe that brings a touch of café-style indulgence to your home, no fancy equipment needed.
Why This Dalgona Coffee Recipe Is the Best
The Flavor Secret: The magic of this recipe lies in the quality of the instant coffee. I’ve tested this with several brands and found that a high-quality, freeze-dried instant coffee (like Nescafé Gold or a specialty brand) makes a smoother, more aromatic foam. The coffee flavor is clean and intense, without any bitter aftertaste. My Moroccan roots taught me to appreciate the depth of coffee, and this recipe honors that — the sugar caramelizes slightly as you whip it, creating a flavor that’s reminiscent of a good caramel latte, but with a pure coffee soul.
Perfected Texture: The secret to a perfect dalgona foam is the ratio of coffee to sugar to hot water — it’s 1:1:1 by volume. But the real technique, honed from my years in Paris, is in the whisking motion. You need to use a fast, circular motion that traps air efficiently, creating a matrix of tiny bubbles. I’ll teach you the exact movement in the steps below. This ensures your whipped coffee is thick, glossy, and holds its shape for a full 10 minutes, giving you plenty of time to take a photo or two before you sip!
Foolproof & Fast: This recipe is incredibly forgiving. It takes just 10 minutes from start to finish, and you don’t need any special equipment beyond a bowl and a whisk (or a hand mixer for an even quicker version). It’s perfect for beginners because it’s hard to mess up — if it’s too thin, you just whip it a little longer; too thick, a splash of hot water fixes it. I’ve made this dozens of times in my NYC apartment, and it’s never failed to impress a neighbor or a friend stopping by for a quick chat.
Dalgona Coffee (Whipped Coffee) Ingredients
I buy my instant coffee from a small shop near Union Square, and I always pick up a jar of raw cane sugar from the local market — it has a deeper, more molasses-like flavor that works beautifully here. These simple ingredients come together to create something truly special.
Ingredients List
- 2 tbsp hot water
- 2 tbsp instant coffee (decaf works too)
- 2 tbsp sugar (raw, cane or palm sugar)
- 2 cups low fat milk, cold (can use full-fat or 1%)
- 1 cup ice cubes
Ingredient Spotlight
Instant Coffee: This is the star of the show. Use a good quality freeze-dried instant coffee. Avoid the cheaper, powdery ones as they can turn bitter. The coffee provides the entire flavor profile of the foam, so its quality really matters. A medium-roast variety is ideal for a balanced, not-too-acidic result.
Sugar: The sugar isn’t just for sweetness — it’s essential for the foam’s structure. When whipped with the coffee and water, it helps create a stable, airy matrix. I prefer raw cane sugar, but white granulated works perfectly. For a deeper flavor, try palm sugar — it adds a slight caramel undertone that’s fantastic.
Hot Water: The hot water is the medium that dissolves the coffee and sugar, starting the chemical reaction that allows them to whip into a foam. It needs to be just off the boil — around 200°F — to dissolve everything completely. Too cold, and the sugar won’t dissolve; too hot, and it can scald the coffee, making it bitter.
Milk: The milk acts as the canvas for your coffee foam. The fat content matters for the overall mouthfeel. Low fat milk lets the coffee flavor shine through the most, while full-fat milk adds a creamier, richer texture. I often use 2% for the perfect middle ground. For a dairy-free version, oat milk is the best choice as it has a neutral flavor and smooth texture that doesn’t overpower the coffee.
| Original Ingredient | Best Substitution | Flavor / Texture Impact |
|---|---|---|
| 2 tbsp instant coffee | 2 tbsp decaf instant coffee | Same texture, same flavor but no caffeine. Perfect for an evening treat. |
| 2 tbsp sugar (raw, cane) | 2 tbsp coconut sugar or maple syrup (use 1.5 tbsp syrup) | Coconut sugar adds a subtle caramel flavor; maple syrup will make the foam slightly softer. |
| 2 cups low fat milk | 2 cups oat milk (barista blend) | Creamy texture, slightly nutty flavor. Avoid almond milk as it can curdle. |
How to Make Dalgona Coffee — Step-by-Step
Making this whipped coffee is wonderfully simple, but a few key tricks will guarantee picture-perfect results every time. Let me walk you through it.
Step 1: Whip the Coffee
In a medium bowl, combine the hot water, instant coffee, and sugar. Using a whisk, start whipping vigorously in a fast, circular motion. The key here is to incorporate as much air as possible. After about 2-3 minutes of consistent whipping, you’ll see the mixture lighten in color and start to thicken. Continue whipping for another 2-3 minutes until it forms stiff, glossy peaks — like the consistency of a thick meringue or whipped cream. You should be able to hold the bowl upside down without it falling out!
💡 Stella’s Pro Tip: Use a large enough bowl to avoid splashing. A balloon whisk is best because its wires trap maximum air. If your arm gets tired (it happens!), switch to a hand mixer on medium-high speed for 2 minutes — it works perfectly.
Step 2: Assemble the Drin
Fill two tall glasses or mugs with ice. Pour 1 cup of cold milk into each glass, leaving about an inch of space at the top. Using a spoon, gently dollop half of the whipped coffee mixture on top of the milk in each glass. Do not stir yet. The beautiful presentation is part of the experience! When you’re ready to drink, stir everything together vigorously with a long spoon until the foam is fully incorporated into the milk, creating a uniform, light-brown latte.
⚠️ Common Mistake to Avoid: Adding the foam to warm milk! The temperature contrast is what makes this drink so special. Always use cold milk and plenty of ice. Warm milk will cause the foam to melt and sink before you get that photogenic layering.
| Step | Action | Duration | Key Visual Cue |
|---|---|---|---|
| 1 | Whip coffee, sugar, and hot water | 4-6 minutes | Thick, glossy, stiff peaks that hold their shape |
| 2 | Assemble drink with milk and ice | 2 minutes | Dollop of foam floats on top, doesn’t sink |
Serving & Presentation
Presentation is everything with this drink — it’s a visual showstopper. Serve it in a clear tall glass so the beautiful layers are on full display: the dark, fluffy coffee foam on top, the cold white milk below, and the ice cubes glistening. I love to add a sprinkle of cocoa powder, a few coffee granules, or a small pinch of cinnamon on top of the foam right before serving. It adds a touch of elegance and a hint of an extra spice, nodding to the Moroccan tradition of spicing coffee with cinnamon or cardamom.
Pair this iced latte with a light, sweet snack. It’s wonderful alongside a small piece of dark chocolate, a Moroccan-made “feqqas” (almond biscotti), or a buttery shortbread cookie. The sweetness of the coffee is best balanced by something slightly savory or nutty. In my NYC kitchen, I often serve it with a slice of lemon drizzle cake or a simple almond croissant. For a truly indulgent breakfast, it’s fantastic with warm, buttery croissants.
| Pairing Type | Suggestions | Why It Works |
|---|---|---|
| Side Dish | Shortbread cookies, almond biscotti | The buttery, slightly savory notes balance the sweet coffee foam. |
| Sauce / Dip | Not applicable, but a side of whipped cream for extra decadence | Adds even more creamy richness to the drink. |
| Beverage | This is the beverage itself! Serve with a glass of sparkling water. | Sparkling water cleanses the palate between sips of the intense coffee. |
| Garnish | Cocoa powder, cinnamon, ground cardamom | Adds visual appeal and a subtle flavor layer that complements the coffee. |
Make-Ahead, Storage & Reheating
This whipped coffee is best enjoyed fresh, right after you make it, because the foam is at its peak. However, I understand busy mornings in NYC. You can make the whipped coffee base (the foam without the milk) ahead of time, but it will deflate. The best make-ahead strategy is to whip the coffee mixture, then store it in an airtight container in the fridge for up to 2 hours. It will firm up slightly, but you can give it a quick 15-second whip with a whisk to bring back its airy texture before assembling the drink.
| Method | Container | Duration | Reheating Tip |
|---|---|---|---|
| Refrigerator | Airtight container | Up to 2 hours | Rewhip for 15 seconds before using. |
| Freezer | Ice cube tray | Up to 1 month | Freeze the whipped coffee in cubes. Thaw and rewhip briefly. |
| Make-Ahead | Keep foam separate from milk | 2 hours in advance | Store foam in the fridge, then dollop fresh onto chilled milk. |
If you do have leftover foam, it’s not great the next day, but I’ve found a clever trick: stir it into a homemade coffee ice cream base or use it as a flavorful topping for plain yogurt. The flavor is still fantastic, even if the texture has softened. But I can promise you, this drink is so good that leftovers are rare!
Variations & Easy Swaps
One of the things I love most about this recipe is how versatile it is. Here are a few of my favorite variations, each with a unique twist inspired by my travels and training.