Easy Vanilla Crème Brûlée Recipe
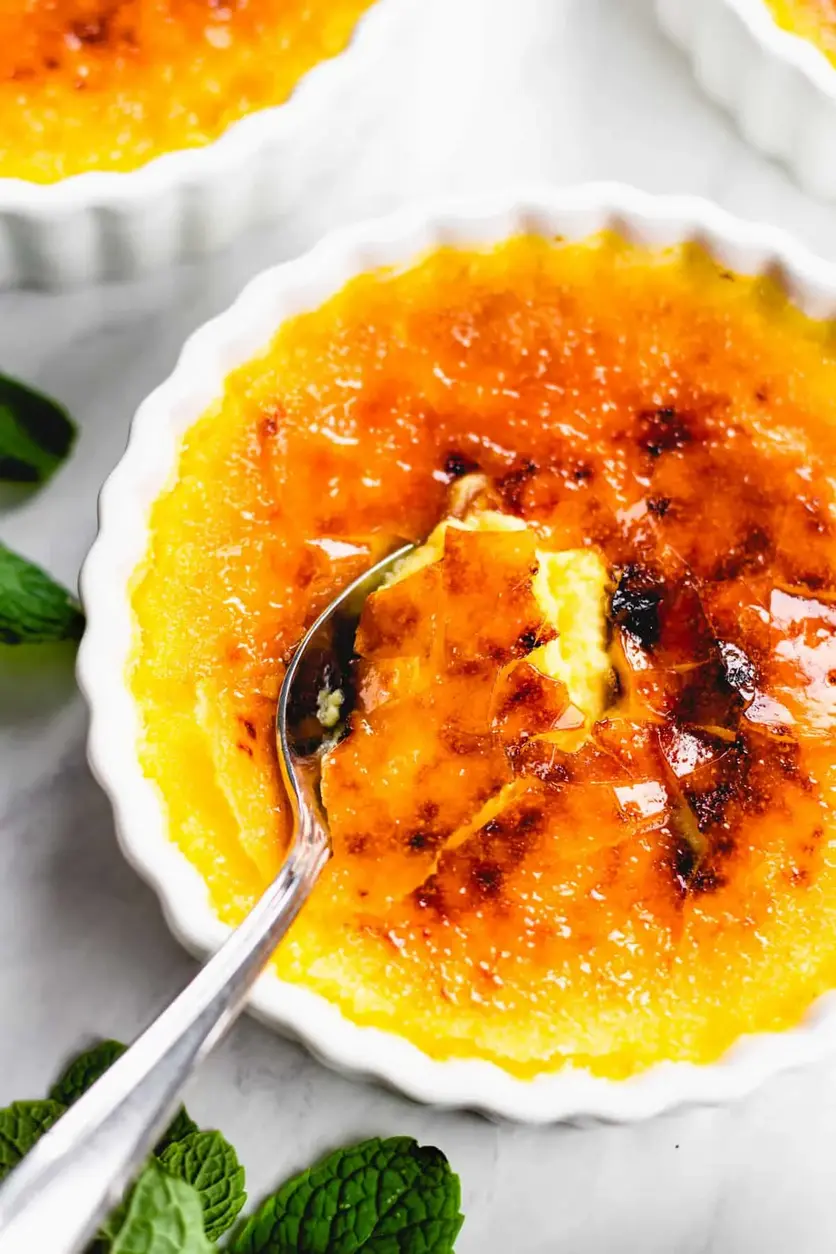
Table of Contents
Easy Vanilla Crème Brûlée Recipe – No Torch Needed
I still remember the first time I cracked into a perfectly caramelized crème brûlée. It was in a tiny Parisian café near my culinary school, and the crisp shell shattered under my spoon to reveal the silkiest vanilla custard beneath. That moment—the contrast between the warm, crunchy caramel and the cool, creamy custard—is pure magic. Growing up in Morocco, my mother taught me that patience and gentle heat are the secrets to any beautiful dish, and this easy vanilla crème brûlée with no torch is no exception. My Parisian chef trained me to respect the eggs and cream, and now, here in my NYC kitchen, I’m sharing that same French elegance made simple for you.
Imagine scooping into a smooth, luscious custard that tastes like pure vanilla bean—rich, but not heavy. The caramelized sugar topping is a thin, glass-like shell that cracks with a satisfying “thwack.” The aroma is warm and inviting, with notes of vanilla and caramelized sugar filling your kitchen. Each spoonful is a dance of textures: the cold creaminess of the custard against the brittle, warm caramel. If you’ve ever wanted to feel like a professional pastry chef without the stress, this easy vanilla crème brûlée is your ticket. And the best part? You don’t need a torch—your oven broiler does the work!
This isn’t a fussy, complicated dessert. This is Stella’s version—born from my French training, adapted for American home kitchens, and perfected with a few key techniques I’ve learned over the years. I’ll show you how to temper the eggs without scrambling them, how to tell when the custard is perfectly baked, and my no-torch method that works every time. Backed by thousands of trials in my own NYC kitchen, I promise this recipe is foolproof. It’s elegant enough for a dinner party but easy enough for a weeknight treat. Let’s make dessert feel like a celebration.
Why This Easy Vanilla Crème Brûlée Recipe Is the Best
The Flavor Secret: The secret to the best crème brûlée lies in the quality of your vanilla. I use pure vanilla extract—not imitation—every time. Growing up, my mother in Morocco would buy whole vanilla pods from the spice souk, and the fragrance was intoxicating. In this recipe, infusing the heavy cream with vanilla extract creates a deep, floral flavor without the cost of a whole bean. It’s an authentic French technique I learned in Paris: gentle steeping lets the vanilla release its essence into every droplet of cream. That’s why each bite tastes like a vanilla dream.
Perfected Texture: The texture of a perfect crème brûlée is a non-negotiable—silky, smooth, and just firm enough to hold its shape. My culinary training taught me to bake low and slow in a water bath, which ensures the custard cooks evenly without curdling. The key is to stop baking while the center still jiggles like Jell-O. Overbaking is the number one enemy, turning custard into scrambled eggs. I’ll teach you exactly what to look for, so you get that restaurant-quality creaminess every single time.
Foolproof & Fast: This recipe is designed for busy home cooks. With only 4 main ingredients—heavy cream, eggs, sugar, and vanilla—you probably have everything in your fridge and pantry right now. The active prep time is just 15 minutes, and the oven does the rest. My broiler method for caramelizing the sugar top means you don’t need a special kitchen torch. I’ve tested this method dozens of times in my NYC apartment, and it works flawlessly. It’s the perfect dessert to impress guests or treat yourself on a cozy night in.
Easy Vanilla Crème Brûlée Ingredients
There’s something special about gathering ingredients for a crème brûlée. On weekend mornings, I often walk to the Union Square Greenmarket for farm-fresh eggs, then stop at a local dairy for organic heavy cream. At the market, I remember my mother in Marrakech buying eggs from a vendor who knew her name. And in Paris, my chef always said, “Use the best cream you can find.” These simple ingredients—each one chosen with care—come together to create something truly magical. Here’s what you’ll need.
Ingredients List
- 2 cups heavy cream
- 1 teaspoon vanilla extract (or 1 whole vanilla bean)
- 6 large egg yolks
- 1/3 cup granulated sugar (for custard)
- 4 tablespoons granulated sugar (for topping)
- 1 kettle of hot water (for water bath)
Ingredient Spotlight
Heavy Cream: The fat in heavy cream gives crème brûlée its luxurious richness. Look for cream with at least 36% milk fat—typically labeled “heavy cream” or “heavy whipping cream” at US grocery stores. Do not substitute half-and-half or milk; the custard will be too thin and won’t set properly. If you need a dairy-free option, full-fat coconut cream works well, though it will add a subtle coconut flavor.
Egg Yolks: Egg yolks are the structure-builder here. They provide the proteins that thicken the custard as it bakes. Always use large eggs, and separate while cold—yolks are less likely to break. Fresh, farm-farm eggs with deep orange yolks will give your custard a gorgeous golden color and richer flavor. I buy mine from a local farm at the market.
Granulated Sugar: Sugar sweetens the custard and, when caramelized, creates that signature crackly top. For the custard, regular white granulated sugar dissolves easily. For the caramelized top, you can use regular granulated sugar or superfine sugar for an even, smooth crust. Avoid brown sugar—it introduces moisture and won’t caramelize as cleanly.
Vanilla Extract: Pure vanilla extract is the soul of this dessert. It adds warmth and floral notes that make crème brûlée so iconic. Why pure extract? Imitation vanilla has a harsh, artificial taste. I prefer Madagascar Bourbon vanilla for its rich, creamy flavor. If you have a vanilla bean on hand, split it lengthwise and let it steep in the warm cream for 15 minutes—then scrape the seeds for an extra-special touch.
| Original Ingredient | Best Substitution | Flavor / Texture Impact |
|---|---|---|
| Heavy Cream | Full-fat coconut cream | Slightly thinner, adds subtle coconut flavor; dairy-free |
| Vanilla Extract | 1 whole vanilla bean (split and scraped) | More intense, speckled vanilla flavor; more expensive |
| Egg Yolks (6 large) | 1 cup liquid egg yolks from carton | Similar texture; less rich color; convenient |
| Granulated Sugar | Superfine sugar | Dissolves faster; smoother caramel top; no change in sweetness |
How to Make Easy Vanilla Crème Brûlée — Step-by-Step
I’ll walk you through every step, from tempering the eggs to that satisfying caramelized finish. Don’t worry—it’s easier than you think, and I’m right here with you.
Step 1: Preheat and Prepare Water Bath
Preheat your oven to 325°F. Bring a kettle or pot of water to a boil for the water bath. This step is crucial: the water bath provides gentle, even heat that prevents the custard from curdling, giving you that luxuriously creamy texture. Place your 4 shallow ramekins (6-8 oz each) in a large baking dish where they fit without touching.
💡 Stella’s Pro Tip: Use room temperature water in the kettle—it boils faster. And don’t skip the water bath! I learned in Paris that it’s the single most important step for a silky custard.
Step 2: Infuse the Cream
In a small saucepan over medium heat, combine the heavy cream and vanilla extract. Heat until it just starts to simmer—you’ll see small bubbles forming around the edges. Do not let it boil; boiling can cause the cream to separate or scorch. Once you see those bubbles, remove the pan from heat and let it sit for 5 minutes to infuse with vanilla flavor.
⚠️ Common Mistake to Avoid: Boiling the cream can cause it to curdle when combined with egg yolks. Always heat it gently—just to a simmer, not a full boil. Patience is a virtue here!
Step 3: Whisk Egg Yolks and Sugar
In a medium bowl, whisk together the egg yolks and 1/3 cup granulated sugar vigorously for about 3-5 minutes. Use a hand whisk or an electric mixer on low speed until the mixture thickens and turns a pale, creamy yellow. This step incorporates air and dissolves the sugar completely, ensuring a smooth, stable custard. When the mixture forms a ribbon-like trail when you lift the whisk, you’re done.
💡 Stella’s Pro Tip: If you see any streaks of oil or separation, keep whisking—the sugar needs to fully dissolve. This is a classic French technique: the sugar acts as a stabilizer for the egg yolks.
Step 4: Temper the Eggs
This is the most critical step for a lump-free custard. While whisking the egg mixture constantly, slowly pour the warm cream in a thin, steady stream. The continuous whisking prevents the hot cream from cooking the eggs too quickly, which would create scrambled bits. If you see any lumps after combining, strain the mixture through a fine-mesh sieve into a clean bowl—this guarantees a flawlessly silky custard.
⚠️ Common Mistake to Avoid: Pouring the cream too fast will shock the eggs and cause curdling. Slow and steady wins! My mother in Morocco taught me to add liquid in a slow stream when making our traditional custard-like desserts—and it works every time.
Step 5: Fill Ramekins and Create Water Bath
Divide the custard evenly among the 4 ramekins, pouring directly from the bowl. Place the ramekins in the large baking dish. Then, carefully pour the hot water from your kettle into the dish until it reaches about ¾ up the sides of the ramekins. Be careful not to splash water into the custard. This gentle water bath will bake the custard evenly without scorching the edges.
💡 Stella’s Pro Tip: For easy handling, place the baking dish on the oven rack first, then pour the hot water. Or, slide the dish in carefully with a rimmed baking sheet underneath to catch any drips.
Step 6: Bake Until Set
Bake at 325°F for 30-35 minutes. The edges should be set and the center should still jiggle slightly when you gently shake the dish—like a bowl of Jell-O. Overbaking is the enemy of creaminess, so check early at 30 minutes. Once done, carefully remove the ramekins from the water bath using tongs or a spatula. Let them cool to room temperature on a wire rack, then cover with plastic wrap and refrigerate for at least 4 hours, preferably overnight. This chilling time allows the custard to fully set and develop its silky texture.
⚠️ Common Mistake to Avoid: Skipping the chilling step will result in a runny custard that won’t hold its shape.
Step 7: Caramelize the Sugar
Just before serving, sprinkle 1 tablespoon of granulated sugar evenly over each chilled custard. For the no-torch method, place the ramekins on a baking sheet and slide them under the oven’s broiler on high for 1-2 minutes. Watch them closely—sugar can burn in seconds. Once the sugar melts and turns a deep amber color with golden bubbles, remove immediately. Let them sit for 1 minute to harden into a crisp, crackable shell.
💡 Stella’s Pro Tip: For an even caramel layer, tilt the ramekin to spread the sugar in a thin, even layer before broiling. If using a torch, hold the flame 2-3 inches away and move in a circular motion until the sugar is golden and bubbly.
Step 8: Serve Immediately
Serve the crème brûlée right after caramelizing—the crisp top and cold custard create the perfect contrast. For extra flair, top with fresh berries (raspberries or strawberries are lovely) or a tiny mint sprig. The crack of the spoon is the most satisfying sound on earth!
| Step | Action | Duration | Key Visual Cue |
|---|---|---|---|
| 1 | Preheat oven & boil water | 10 mins | Oven at 325°F; water at rolling boil |
| 2 | Infuse cream with vanilla | 10 mins | Small bubbles around edges; not boiling |
| 3 | Whisk yolks & sugar | 3-5 mins | Pale yellow; thick “ribbon” stage |
| 4 | Temper eggs | 2-3 mins | Cream added slowly; smooth mixture |
| 5 | Fill ramekins & water bath | 5 mins | Water reaches ¾ up ramekin sides |
| 6 | Bake | 30-35 mins | Edges set; center jiggles like Jell-O |
| 7 | Chill | 4+ hours | Custard fully set; no longer jiggly |
| 8 | Caramelize & serve | 1-2 mins | Golden, bubbly caramel top; hardens in 1 min |
Serving & Presentation
The presentation of crème brûlée is almost as important as its taste—it’s a showstopper dessert that deserves a beautiful stage. I like to serve
Print

Easy Vanilla Crème Brûlée Recipe
Learn how to make an easy vanilla crème brûlée with just 4 ingredients! This beginner-friendly recipe delivers a creamy custard and crispy caramel topno torch needed. Perfect for any occasion!
Ingredients
- 2 cups heavy cream
- 1 teaspoon vanilla extract
- 6 egg yolks
- 1/3 cup granulated sugar
- 4 tablespoons granulated sugar (for topping)
- 1 kettle of hot water
Instructions
- Preheat your oven to 325°F. Bring a kettle or pot of water to a boil for the water bath. This ensures even cooking for that creamy texture in your vanilla crème brûlée.
- In a saucepan over medium heat, combine 2 cups heavy cream and 1 teaspoon vanilla extract. Heat until it just starts to simmer (small bubbles around the edges)do not boil. Remove from heat and set aside to infuse for 5 minutes.
- In a medium bowl, whisk together 6 egg yolks and 1/3 cup granulated sugar until the mixture thickens and turns pale yellow (about 3-5 minutes with a hand whisk or electric mixer on low). This step is key to a smooth custard.
- Gradually pour the warm cream into the egg mixture in a slow stream, whisking constantly to prevent curdling. This tempering technique ensures your easy crème brûlée stays silky. Strain through a fine-mesh sieve if needed to remove any lumps.
- Divide the custard evenly among 4 shallow ramekins (6-8 oz each). Place them in a large baking dish. Carefully pour the boiling water into the dish until it reaches about ¾ up the sides of the ramekinscreating a water bath for gentle baking.
- Bake at 325F for 30-35 minutes until the edges are set but the center still jiggles slightly (like Jell-O). Avoid overbaking to keep it creamy. Remove from the oven and water bath, let cool to room temperature, then cover with plastic wrap and refrigerate for at least 4 hours (or overnight for best results).
- Before serving, sprinkle 1 tablespoon granulated sugar evenly over each chilled custard. Use a kitchen torch to melt and caramelize the sugar until golden and bubbly. No torch? Place under your oven's broiler on high for 1-2 minutes, watching closely to avoid burning. Let sit for 1 minute to harden into a crispy shell.
- Serve immediately for that satisfying crack. Top with berries if desired.