Peanut Butter Dog Treats
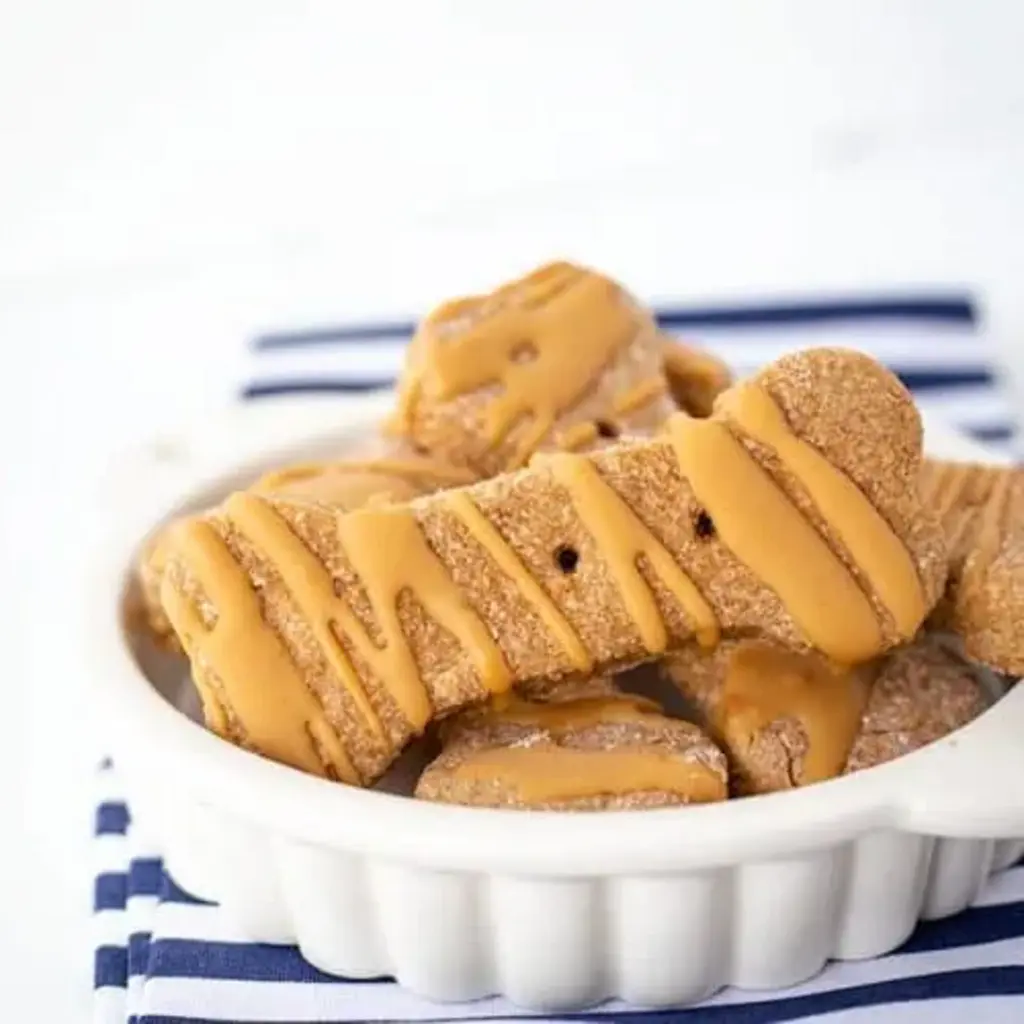
Table of Contents
Peanut Butter Dog Treats – With a Charming Peanut Butter Drizzle – A Nutty Treat for Your Four‑Paw Friends
Every time I stroll through the crowded farmers’ market of Manhattan, I taste the tender, fragrant onions that my mother cooks in Marrakesh and I feel the same calm. The scent of peanut butter from the stalls reminds me of my early childhood, when I would sneak a spoonful from the jar on the kitchen counter. That nostalgia is the heart of this recipe: homemade peanut butter dog treats that bring a dash of love and a generous swirl of peanut butter drizzle to your canine companion’s snout.
The dough feels heavenly, like a sandy coastline from Morocco stitched with French precision. When baked, the aroma is an irresistible blend of sweet peanut, toasty whole wheat, and a gentle sheen from the coconut oil. The treats rise to a subtly golden finish—crisp on the edges and tender inside—while the drizzle forms a glossy, decadent swirl that crackles just enough to intrigue any sniffing nose.
The secret behind this version is the infusion of a peanut butter drizzle. After baking, I swirl a warmed mini glaze of peanut butter and coconut oil over each cookie. That bright finish not only looks adorable but keeps the treats moist and flavorful for days. A common mistake I see is letting the glaze cool entirely before drizzling—it hardens and creates a brittle shell. Always keep it loose and pour it when just warm so your pups get a soft, melt-in-the-mouth finish.
Why This Peanut Butter Dog Treats Recipe Is the Best
This recipe blends my Casablanca beachfront breakfasts and my Parisian pastry finesse. The peanut butter drizzle is a simple yet elegant technique that mirrors the glaze on a croissant. That dry, quick swirl brings a level of flavor you won’t find in factory‑made bones.
The texture is perfected by the use of whole wheat flour and a mild hydration ratio that tells the dough to release just enough steam without overriding the peanut heart. The result is a treat that stays cakey inside, while the crust provides just enough crunch to satisfy a playful snout.
It’s fast, foolproof and safe for every pooch who loves peanut butter. Even the most novice baker will find that the dough isn’t sticky and the instructions are straightforward—perfect for a busy New York resident who still wants to give a handmade gift to their furry friend.
Peanut Butter Dog Treats Ingredients
While I gather my pantry staples in my tiny Manhattan loft, I end up in an East Village bakery to pick up the finest whole‑wheat flour and artisanal peanut butter. The fresh, creamy consistency of the peanut butter, combined with the chewy, nutty base, was inspired by the delicate spices I once seasoned with Ras el Hanout in my mother’s kitchen.
Ingredients List
- 1 cup creamy peanut butter
- 2 large eggs
- 2½ cups whole wheat flour
- ¾ cup water
- ¼ cup creamy peanut butter (for glaze)
- 1½ tablespoons coconut oil (for glaze)
Ingredient Spotlight
Creamy peanut butter is the cornerstone of this recipe. When choosing, look for a brand with no added sugar or hydrogenated oils; spread it out on a clean plate to see if the color is consistent. It imparts both sweet and savory flavors that excite any dog’s palate. Substitution: A 1:1 swap with almond butter works, but the treats will be slightly nutty and drier.
Whole wheat flour gives a wholesome, slightly nutty texture while keeping the treats free from refined carbs. Buy organic when possible; it has fewer pesticides and a richer flavor. If you’re gluten‑free, replace it with oat flour and a pinch of xanthan gum for structure.
Coconut oil in the glaze provides a silky, buttery finish and a subtle tropical hint. A toasted coconut oil will taste slightly sweeter and promote a cruncher exterior. If you prefer a lighter glaze, substitute with melted milk instead; the treats will be slightly lighter in hue.
| Original Ingredient | Best Substitution | Flavor / Texture Impact |
|---|---|---|
| 1 cup creamy peanut butter | 1 cup almond butter | Less sweet, slightly drier, nuttier aroma |
| 2½ cups whole wheat flour | 2½ cups oat flour + 1 tsp xanthan gum | Gluten‑free, slight chewy texture, may need a pinch of salt |
| Coconut oil for glaze | Melting milk or ghee | Lighter glaze, more buttery flavor, less sheen |
How to Make Peanut Butter Dog Treats — Step-by-Step
You’ll need only a few kitchen tools: a mixing bowl, a hand mixer or whisk, a rolling pin, cookie cutters, and a parchment‑lined sheet. The process is as straightforward as a French beurre‑manger, but the results are unforgettable. Let’s dive in.
Step 1: Preheat Oven
Heat your oven to 350°F (176°C). Line a cookie sheet with parchment paper to prevent sticking and ensure even browning. The pre‑heat time keeps the oven at a steady temperature, which is crucial for the treats to rise properly.
💡 Stella’s Pro Tip: Use a room‑temperature oven peeker or pre‑heat a foil sheet in the oven to gauge the exact temperature before placing the treats.
Step 2: Mix Peanut Butter and Eggs
In a large bowl, combine 1 cup creamy peanut butter with 2 eggs. Beat with a hand mixer or whisk until the mixture is smooth and creamy, revealing a yellowish consistency that indicates the eggs are fully incorporated.
⚠️ Common Mistake to Avoid: Over‑mixing the batter can cause gluten development, resulting in overly chewy treats. Stir just until combined.
Step 3: Add Flour and Water
Add 2½ cups whole wheat flour and ¾ cup water to the mixture. Beat until you see a dough that forms a slightly sticky ball yet holds together when wrung. The dish will be a bit wetter than typical cookie dough due to the peanut butter’s natural oils.
💡 Stella’s Pro Tip: If the dough is too dry, add a teaspoon of water at a time; if too wet, sprinkle a tablespoon of flour at a time until you hit the right consistency.
Step 4: Roll and Cut Dough
Dust a clean surface with whole wheat flour. Transfer the dough onto the surface and roll it out to ¼‑inch thickness using a rolling pin. Cut shapes with a cookie cutter, spacing them one inch apart on the parchment sheet. Because the dough is cohesive, the cookies will not spread while baking, retaining their distinct shapes.
⚠️ Common Mistake to Avoid: Forgetting to space the cookies; uneven spacing can cause storms of cookies that bake unevenly.
Step 5: Make Decorative Holes
Using a fork or a small skewer, press a decorative hole into each cookie—like the claws on a dog bone. This is both a whimsical touch and a subtle way to keep the cookies from spreading slightly as they bake.
💡 Stella’s Pro Tip: A tiny piece of parchment under the cookie before baking prevents sticking while the hole stays clear.
Step 6: Bake to Golden Perfection
Place the cookie sheet in the oven and bake for 18 minutes or until the edges are lightly golden brown. Keep an eye on the cookies; the smaller ones might finish quicker, and you don’t want them to turn a deep brown.
⚠️ Common Mistake to Avoid: Baking for too long can dry out the treats, making them hard and unappetizing for dogs.
Step 7: Prepare Peanut Butter Drizzle
In a small microwave‑safe bowl, combine ¼ cup creamy peanut butter with 1½ tablespoons coconut oil. Microwave for 30 seconds, then stir until it forms a runny but thick glaze. The right thickness is key—too runny and it runs off; too thick and it hardens on dust.
💡 Stella’s Pro Tip: A quick stir every 10 seconds while microwaving prevents melting unevenly and preserves a shiny glaze.
Step 8: Drizzle Over Cool Cookies
Lay the freshly baked dog bones on wax paper. Use a spoon or a tiny squeeze bag to drizzle the warm glaze over each treat. The glaze pools lightly, melting back into the surface for an elegant, glossy coat that sets as it cools.
⚠️ Common Mistake to Avoid: Drizzling on hot cookies; the glaze will run and create a slick, unappetizing surface.
| Step | Action | Duration | Key Visual Cue |
|---|---|---|---|
| 1 | Preheat oven | 5 min (until 350°F) | Steam visible in the oven |
| 2 | Mix peanut butter & eggs | 3 min | Uniform yellow batter |
| 3 | Add flour & water | 4 min | Dough forms a pliable ball |
| 4 | Roll & cut dough | 5 min | No spreading on sheet |
| 5 | Make holes | 2 min | Clear metallic holes |
| 6 | Bake | 18 min | Golden edges |
| 7 | Prepare glaze | 2 min | Runny but thick consistency |
| 8 | Drizzle over cookies | Instantly | Glossy finish sets on cooling |
Serving & Presentation
Let the glazed cookies cool for at least 10 minutes before serving. The top glaze sets to a thin, caramel shine that stays moist, while the inner crumb remains soft. Present the treats on a simple wooden board, sprinkling a pop‑of‑green from fresh rosemary or mint for a Moroccan touch—my favorite garnish for a sunny rooftop.
Pair these treats with a glass of bone‑friendly broth or a small scoop of plain Greek yogurt for a balanced snack that satisfies taste buds and keeps your pup’s belly full. A splash of fresh, chopped parsley adds a bright counterpoint that’s as visual as it is healthy.
| Pairing Type | Suggestions | Why It Works |
|---|---|---|
| Side Dish | Raw carrots, roasted sweet‑potato cubes | Adds crunch and sweetness, balanced by the treat’s saltiness |
| Sauce / Dip | Plain Greek yogurt, low‑fat cottage cheese | Cool down a warm treat, offers protein |
| Beverage | Filtered water, homemade bone broth | Hydration and digestive aid, enhancing treat’s flavor |
| Garnish | Fresh parsley, dried mint flakes, edible mint leaf | Bright green pops of color, adds mild herbal notes |
Make-Ahead, Storage & Reheating
I love baking these treats ahead of the hectic NYC week. After baking, let them cool completely and slide them into an airtight container. A 25‑treat batch stays fresh for up to three months frozen or eight days in the refrigerator. I keep freeze‑packed cookies in a zip‑lock bag with a cold pack for quick access on the way to the dog park.
| Method | Container | Duration | Reheating Tip |
|---|---|---|---|
| Refrigerator | Airtight jar or zip‑lock bag | Up to 8 days | Pop in for a quick thaw; no heat needed |
| Freezer | Baking sheet or paper pack, then bag | Up to 3 months | Reheat briefly at 350°F for 4–5 min for crispness |
| Make‑Ahead | Separate dough layers | Up to 2 days | Assemble on day of service; bake fresh |
In the chill of late evenings, I remember the calm that comes from partially freezing the treats and letting them rest at room temperature the next day; the glaze softens and the texture becomes more inviting for an even more delicious hand‑made snack.
Variations & Easy Swaps
| Variation | Key Change | Best For | Difficulty Impact |
|---|---|---|---|
| Glazed with Cinnamon and Honey | Replace glaze oil with honey and cinnamon powder | Dogs who love sweet treats | Same effort, no extra risk |
| Gluten-Free Peanut Butter Bites | Use oat flour + xanthan gum; skip cookies | Pups with wheat allergy | Requires a bit more mixing time |
| Seasonal Maple-Glazed Pods | Swap coconut oil for maple syrup glaze | Winter holidays, festive dog parties | Minimal additional prep |
Glazed with Cinnamon and Honey
I once spent a Sunday afternoon in the 34th street market adding a cinnamon swirl to my standard drizzle, using raw honey for a soft, amber glaze that left the treats smelling like a Moroccan spice market oasis. The cinnamon adds a warm, spicy counterpoint, creating a texture that’s almost buttery with a savory undertone.
Gluten‑Free Peanut Butter Bites
Swap the whole wheat flour with oat flour, adding a pinch of xanthan gum to boost structure. The bite size is smaller, holding its shape because the oats absorb more liquid. The overall flavor stays peanut‑centric while the texture becomes slightly chewier, which many pups instantly love.
Seasonal Maple‑Glazed Pods
During holiday seasons, I replace the coconut oil in the glaze with pure maple syrup and a touch of vanilla extract. The maple drizzle brightens the treats with a sweet, earthy tone reminiscent of a holiday market in Manhattan, while the vanilla keeps the treats subtly aromatic.
Are dog treats safe for dogs with nut allergies?
When dogs have a documented allergy to peanuts, any treat with peanut butter is a no‑go. Peanut allergies can range from mild to severe, and crossing the line can trigger itching, swelling, hives, or even anaphylaxis. As always, consult your vet before feeding anything new. If you’re uncertain, swap the peanut butter with a hypoallergenic nut spread, such as rice or oat butter, and keep the portion size small until you see how your companion reacts. That way you can enjoy a similar texture and flavor with peace of mind.
How long do homemade dog treats last?
Freshly baked, airtight dog treats can typically stay good for up to ten days in the refrigerator if kept cool and dry. By freezing them, you extend the shelf life to three months. When thawing, let them sit on the counter for a few minutes to return to room temperature, or heat them briefly in a 350°F oven for a few minutes to revive the texture. Always use your nose: a bad odor or mold means discard.
Can I add healthy ingredients like pumpkin to the dough?
Yes, a tablespoon of pumpkin puree or canned pumpkin enriches the dough with fiber, vitamin A, and a mild, earthy flavor that complements the peanut base. It also helps bind the dough, giving an extra fluffy crumb. Watch the moisture level: pumpkin adds a wetness, so you may need to reduce the water by a tablespoon or add a touch more flour to keep the dough from becoming too sticky. The end result is a nutritionally balanced treat that still excels in flavor.
Do these treats need to be frozen before serving?
No, freezing is entirely optional. The snacks bake to a firm, crisp texture that stays fresh at room temperature for a few hours. Freezing is advantageous if you plan to store for later or if your dog’s paw pads are sensitive and a cooler ingredient will be soothing. Just remember to let the treats thaw completely before serving; otherwise, the glaze may become too soft and lose its visual appeal.
How many treats can I give my dog per day?
Dietary guidance for dogs varies by size, age, and activity level, but a general rule is that treats should not exceed 10% of a dog’s daily caloric intake. For an average medium‑sized dog, a single treat may be 20–30 calories, so you could safely give three or four treats a day. Use the treat count as a rewarding supplement rather than a meal replacement, and adjust the number depending on the dog’s weight loss or gain goals.
What’s the best way to store peanut butter dog treats?
Store in a cool, dry place: an airtight container with a hermetic seal keeps the treats crisp and prevents moisture ingress. If you open the container mid‑batch, make sure to replace the seal or use a secondary zip‑lock bag to keep the research from dust. Freezing pairs especially well with the glaze, as it preserves the glossy finish and stops the treats from drying out.
Can I replace the whole wheat flour with oat flour for gluten‑free?
Absolutely! Oat flour has an indifferent gluten presence, offering a slightly sweet, mild grain flavor. Since oat flour hides more moisture, add a teaspoon of xanthan gum each cup to help the dough set. This change is completely safe and baker‑friendly. The treats will have a softer, slightly chewier bite but keep the peanut butter sweetness intact.
Are there any vegetables that pair well with these treats for extra nutrition?
Yes—shredded carrots, finely chopped spinach, or pumpkin puree all make fantastic add‑ins. If you fold shredded carrots into the dough, the treats gain extra beta‑carotene and natural sweetness that brightens the peanut’s richness. A spoonful of finely grated spinach adds a subtle earthiness and iron content, making the snacks a balanced source of nutrients for dogs that love a taste of greens.
Share Your Version!
I’d love to see your twist on these treats! Drop a star rating and leave a comment on the post; it’s a small nudge that keeps my little culinary experiments alive. Snap a photo of your dogs chewing on your creations and tag me on Instagram or Pinterest—if I spot a good one, I’ll repost with a shout‑out.
What unusual flavor did you add to the original? Did the glaze set up plain or sweet? I’m curious to hear your adjustments, especially any birthing of a unique angle that made the treats one‑of‑a‑kind for your pup’s palate.
From my NYC kitchen to yours — I hope this recipe brings as much warmth to your table as it does to mine. — Stella 🧡
Love This Recipe? Save It to Pinterest!
If you enjoyed this Peanut Butter Dog Treats recipe, don’t let it get lost in your browser tabs! 😄 Pin it now so you can find it again anytime — and explore hundreds more tried‑and‑tested recipes waiting for you on my Pinterest boards.
👉 Follow Stella on Pinterest @exorecipe
📌 Pin this recipe · 🔁 Re-pin your favorites · 💬 Tag me when you make it — I love seeing your creations!
Have your own recipe, or just want to share a moment from your kitchen? Drop me a line! No more hesitation: comment, rate, or tweet a photo of your canine companion enjoying their treat. I’m all ears—and paws!
Peanut Butter Dog Treats
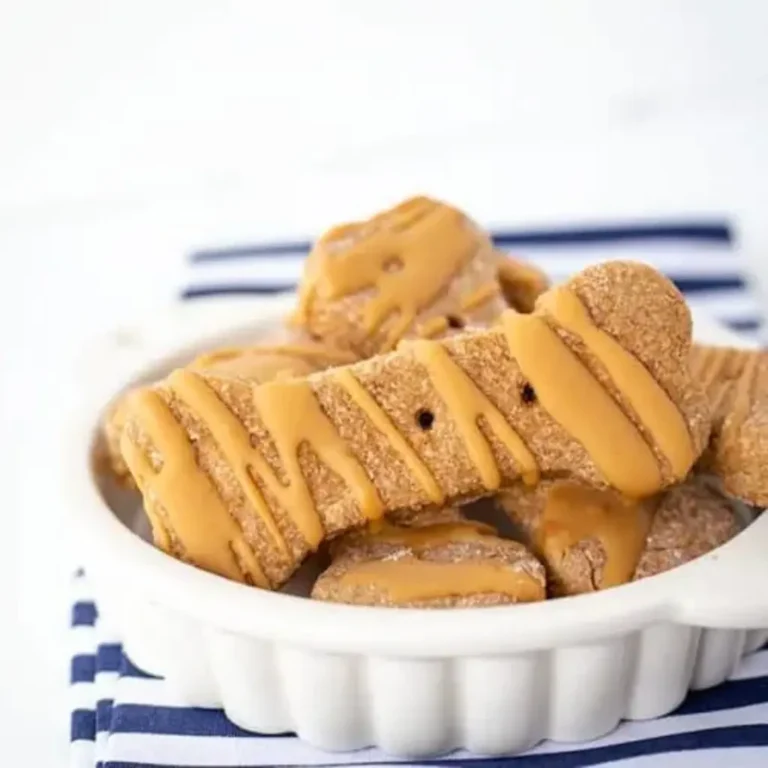
These Homemade Peanut Butter Dog Treats will make your peanut butter loving dogs go crazy! Theyre not only filled with peanut butter, but they have a cute peanut butter drizzle on them.
Ingredients
- 1 cup creamy peanut butter
- 2 large eggs
- 2 1/2 cups whole wheat flour
- 3/4 cup water
- 1/4 cup creamy peanut butter
- 1 1/2 tablespoons coconut oil
Instructions
- Preheat oven to 350 degrees F. Line a cookie sheet with parchment paper.
- In a large mixing bowl, add in the1 cup creamy peanut butter and 2 large eggs. Beat with hand mixer until combined.
- Add in the 2 1/2 cups whole wheat flour and 3/4 cup waterBeat until the dough forms a ball.
- Dust your work surface with whole wheat flour.
- Roll the dough out to a 1/4-inch thickness.
- Cut out with the cookie cutter and place an inch apart on the prepared cookie sheet. They won't spread.
- Press holes into the cookie using a fork or a skewer.
- Bake for 18 minutes or until the edges are golden brown. This will depend on the size of your cookie cutter. Mine was 3 1/4-inch long.
- Store in an airtight container. The cookies freeze well after being baked and will last up to 3 months in the freezer.
- In a small microwave-safe bowl, add in the 1/4 cup creamy peanut butter and 1 1/2 tablespoons coconut oil Microwave for 30 seconds and stir to combine. It should be a runny consistency but be thick enough that it doesn't thin out and not hold its shape.
- Lay the dog bones out on wax paper.
- Use a spoon or add the drizzle to the sandwich bag and cut a small hole in the corner, drizzle the glaze over top of each dog treat.