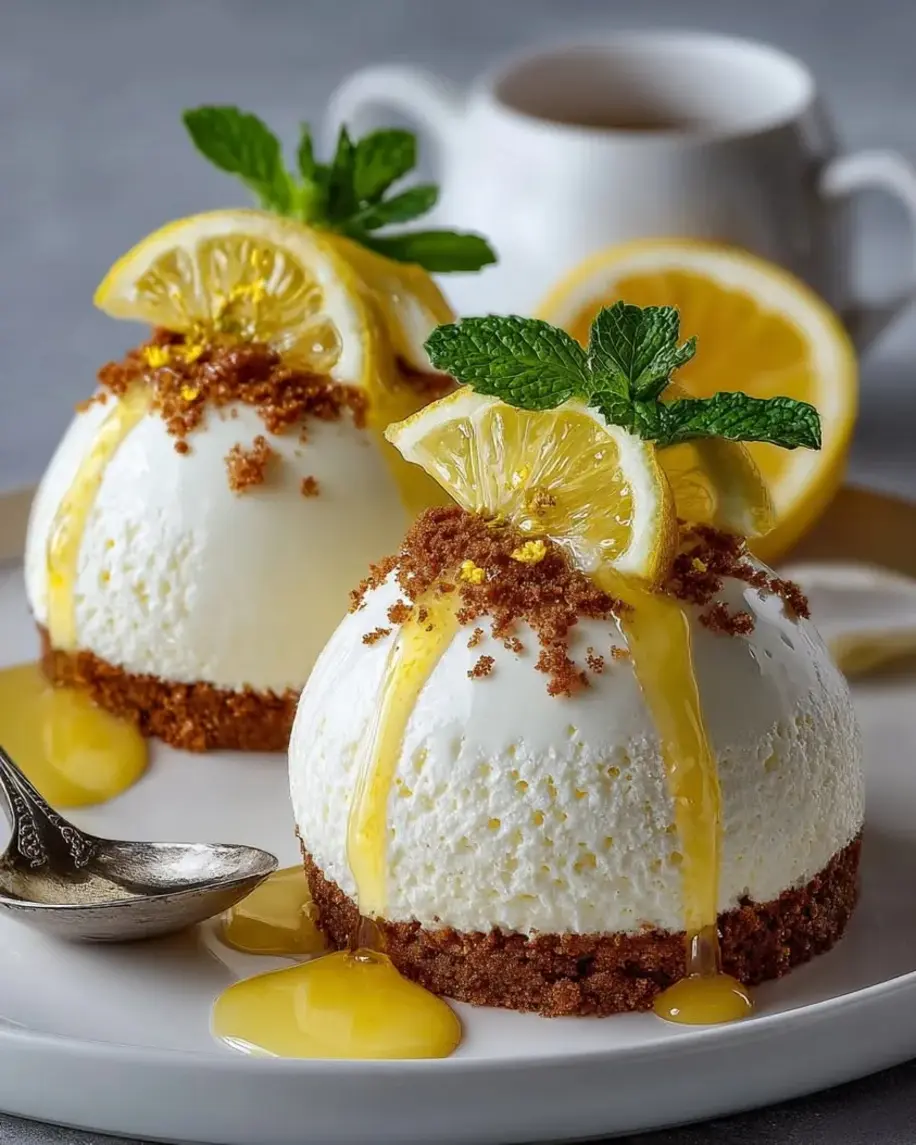
Light & Silky Honey Lemon Ricotta Mousse Domes
“`html
Table of Contents
Honey Lemon Ricotta Mousse Domes – A No‑Bake Delight
I still remember the first time I tasted ricotta mousse in a little pastry shop tucked away in the Marais district of Paris — it was light, creamy, and kissed with citrus. That memory stayed with me, and years later, standing in my own NYC kitchen, I knew I had to create a version that carried both that French elegance and the warm, honeyed notes of my Moroccan childhood. These Honey Lemon Ricotta Mousse Domes are exactly that: a no‑bake dessert that feels impressive but comes together with simple, honest ingredients. The honey I use reminds me of the amber‑colored pots my mother would bring from the souk in Marrakech, and the lemon zest brightens every bite like a burst of sunshine.
The texture is what truly sets this dessert apart — silky, airy, almost cloud‑like — thanks to the combination of whole milk ricotta and softly whipped cream. A touch of gelatin gives the domes just enough structure to hold their beautiful shape, while the honey lemon glaze adds a glossy, tangy‑sweet finish that pools gently over the cookie base. Each spoonful delivers a contrast of creamy mousse, crunchy crumb, and that bright citrus kick. It’s the kind of dessert that makes you close your eyes for a second — and that, to me, is the sign of a truly great recipe.
I’ve tested this recipe more times than I can count, tweaking the honey‑to‑lemon ratio until it sang, and perfecting the unmolding technique so that even a home cook can get that pristine dome shape. My Parisian pâtisserie training taught me that precision matters, but my mother taught me that heart matters more. In this recipe, I give you both: a foolproof method and a flavor that feels like home. Below you’ll find my best pro tip for a silky‑smooth mousse and the one mistake I see beginners make most often — so you can nail these domes on your very first try.
Why This Honey Lemon Ricotta Mousse Domes Recipe Is the Best
The Flavor Secret — I didn’t want a dessert that was just sweet; I wanted one with depth. The honey I use is a wildflower honey from upstate New York that I find at the Union Square farmers market. It has floral notes that pair beautifully with the bright acidity of fresh lemon juice and zest. This isn’t a one‑note dessert — it’s layered, complex, and surprisingly sophisticated for a no‑bake treat. My French training taught me to balance sweetness with acidity, and that’s exactly what this recipe delivers.
Perfected Texture — The key to a mousse that’s both light and luxuriously creamy is the way you handle the ricotta. I pass it through a fine‑mesh sieve before mixing — a technique I learned at Le Cordon Bleu — which removes any graininess and gives you the smoothest possible base. Then, folding the whipped cream in gently but thoroughly ensures the mousse is airy without being fragile. The gelatin is added at just the right temperature so it sets evenly, giving you domes that unmold cleanly every time.
Foolproof & Fast — Even if you’ve never worked with gelatin or dome molds before, this recipe is designed to build your confidence. The steps are straightforward, the ingredients are easy to find in any US grocery store, and the chilling time does most of the work for you. I’ve also included a tested workaround if you don’t have dome molds — so there’s no barrier to making these beauties. Whether you’re hosting a dinner party or simply treating yourself on a quiet evening, these honey lemon ricotta mousse domes will make you feel like a pastry chef.
Honey Lemon Ricotta Mousse Domes Ingredients
I buy my ricotta from a little Italian market in Greenwich Village — they import a sheep’s milk variety that is impossibly creamy, though whole milk grocery store ricotta works beautifully too. The honey I source from a vendor at the Brooklyn Flea who keeps bees in the Catskills. Every ingredient in this recipe has a role, and each one matters. Let me walk you through what you’ll need.
Ingredients List
- For the Ricotta Mousse Domes:
- 1 1/2 cups whole milk ricotta cheese
- 1 cup heavy cream
- 1/3 cup honey
- 2 tbsp powdered sugar
- 1 tsp vanilla extract
- 1 tbsp lemon zest (from about 2 lemons)
- 2 tbsp fresh lemon juice
- 1 tsp unflavored gelatin
- 2 tbsp warm water
- For the Lemon Cookie Base:
- 1 cup crushed butter cookies (like shortbread or tea biscuits)
- 3 tbsp melted butter
- 1 tbsp brown sugar
- Pinch of salt
- For the Honey Lemon Glaze:
- 1/3 cup honey
- 2 tbsp fresh lemon juice
- 1 tsp cornstarch
- 2 tbsp water
- For Garnish (optional):
- Thin lemon slices
- Fresh mint leaves
- Extra lemon zest
Ingredient Spotlight
Whole Milk Ricotta — This is the soul of the mousse. Whole milk ricotta gives you a luscious, creamy texture that part‑skim just can’t match. Look for a brand that lists only milk, cream, salt, and acid (like Galbani or Calabro). If you can find fresh ricotta at a specialty store, even better — it has a lighter, more delicate texture. I always pass my ricotta through a fine sieve before using to ensure it’s perfectly smooth.
Honey — Honey is both the sweetener and a flavor anchor here. Use a mild, floral honey like orange blossom or wildflower so it doesn’t overpower the lemon. Avoid dark, robust honeys like buckwheat, which can be too assertive. If you’re in a pinch, agave nectar works as a 1:1 substitute, though the flavor will be less complex.
Unflavored Gelatin — Gelatin gives the mousse enough structure to hold its dome shape. I use Knox brand, which is widely available in US grocery stores. The key is to let it bloom in warm water for exactly 5 minutes, then melt it gently — never boil it, or it will lose its setting power. For a vegetarian option, I recommend agar agar, though the texture will be slightly firmer (see the FAQ section for details).
Lemon — Fresh lemon zest and juice are non‑negotiable. Bottled lemon juice has a flat, one‑dimensional acidity that will make your mousse taste dull. Use a Microplane to zest the lemons before juicing them — you’ll get the fragrant oils from the peel without any bitter white pith. I always buy organic lemons when I can, especially for the zest.
| Original Ingredient | Best Substitution | Flavor / Texture Impact |
|---|---|---|
| Whole milk ricotta | Full‑fat Greek yogurt (strained) | Lighter, tangier mousse; slightly less creamy |
| Honey | Agave nectar or maple syrup | Agave is neutral; maple adds a distinct woodsy note |
| Unflavored gelatin | Agar agar (1 tsp, prepared per package) | Firmer set, slightly less silky; vegetarian |
| Butter cookies | Graham crackers or vanilla wafers | Sweeter, slightly different crunch |
| Heavy cream | Coconut cream (chilled, whipped) | Dairy‑free; adds a hint of coconut flavor |
How to Make Honey Lemon Ricotta Mousse Domes – Step‑by‑Step
Making these domes is easier than you think — just follow each step, and you’ll have a restaurant‑worthy dessert that looks like you spent hours in the kitchen. I’ve broken it down so you can prep, set, and glaze with confidence.
Step 1: Bloom the Gelatin
In a small bowl, sprinkle 1 teaspoon of unflavored gelatin over 2 tablespoons of warm water. Stir gently and let it sit for 5 minutes. The mixture will become thick and spongy — that’s exactly what you want. This process, called blooming, rehydrates the gelatin so it dissolves evenly into the mousse later.
💡 Stella’s Pro Tip: Use warm water (about 100°F / 38°C) — not hot. If the water is too hot, it can weaken the gelatin’s setting power. I always test it on my wrist, like I would for a baby’s bottle.
Step 2: Make the Ricotta Mousse Base
In a large bowl, whisk together 1 1/2 cups whole milk ricotta cheese, 1/3 cup honey, 2 tablespoons powdered sugar, 1 teaspoon vanilla extract, 1 tablespoon lemon zest, and 2 tablespoons fresh lemon juice until smooth and well combined. The mixture should be creamy and fragrant. I like to use a whisk here rather than an electric mixer — it keeps the ricotta from becoming too thin.
⚠️ Common Mistake to Avoid: Don’t over‑whip the ricotta. If you use a mixer on high speed, the ricotta can break down and become watery. Gentle whisking by hand gives you the best texture.
Step 3: Whip and Fold the Cream
In a separate bowl, whip 1 cup of heavy cream until soft peaks form — this means the cream holds a gentle shape when you lift the whisk but isn’t stiff. Using a rubber spatula, fold the whipped cream into the ricotta mixture in two additions. Fold gently with a figure‑eight motion until no white streaks remain. The mousse should be light, airy, and uniformly pale yellow.
💡 Stella’s Pro Tip: Chill your bowl and whisk in the freezer for 10 minutes before whipping the cream. It whips faster and holds its shape better — a trick I learned during my pastry externship in Paris.
Step 4: Add the Gelatin
Melt the bloomed gelatin gently — you can microwave it in 5‑second bursts or set the bowl over a pan of simmering water. Stir until it’s completely liquid and clear. Immediately drizzle it into the mousse while stirring continuously, making sure it’s fully incorporated before you stop. The gelatin helps the domes hold their shape when unmolded.
⚠️ Common Mistake to Avoid: If you pour the gelatin into a cold mixture without stirring quickly, it will form little jelly strands. Keep stirring as you add it, and make sure the mousse isn’t ice‑cold when you add the gelatin.
Step 5: Fill the Molds and Chill
Pour the mousse into silicone dome molds (about 1/2 cup capacity each). Tap the molds gently on the counter to release any air bubbles. Refrigerate for at least 4 hours, or overnight for best results. The mousse needs this time to set fully — don’t rush it.
💡 Stella’s Pro Tip: Place the filled molds on a small baking sheet before refrigerating — they’ll be easier to move and less likely to tip over. If you don’t have dome molds, see my FAQ answer below for a clever workaround.
Step 6: Make the Cookie Base
Combine 1 cup crushed butter cookies, 3 tablespoons melted butter, 1 tablespoon brown sugar, and a pinch of salt in a small bowl. Mix until the crumbs are evenly moistened. Press about 2 tablespoons of the mixture onto each serving plate in a 3‑inch circle, pressing firmly with the back of a spoon. This creates a sturdy, crunchy base for the dome.
⚠️ Common Mistake to Avoid: If the cookie base is too loose, it will crumble when you place the dome on top. Press it firmly, and if it seems dry, add another teaspoon of melted butter.
Step 7: Make the Glaze
In a small saucepan, combine 1/3 cup honey and 2 tablespoons fresh lemon juice. In a separate small bowl, whisk 1 teaspoon cornstarch with 2 tablespoons water until smooth. Stir the cornstarch mixture into the saucepan and bring to a gentle simmer over medium heat. Cook for 1–2 minutes, stirring constantly, until the glaze becomes glossy and slightly thickened. Remove from heat and let it cool for 5 minutes.
💡 Stella’s Pro Tip: For an extra‑shiny glaze, add a tiny pinch of baking soda at the very end — it reduces the acidity and gives the glaze a beautiful clarity. This is a trick I picked up from a pastry chef in Lyon.
Step 8: Unmold and Assemble
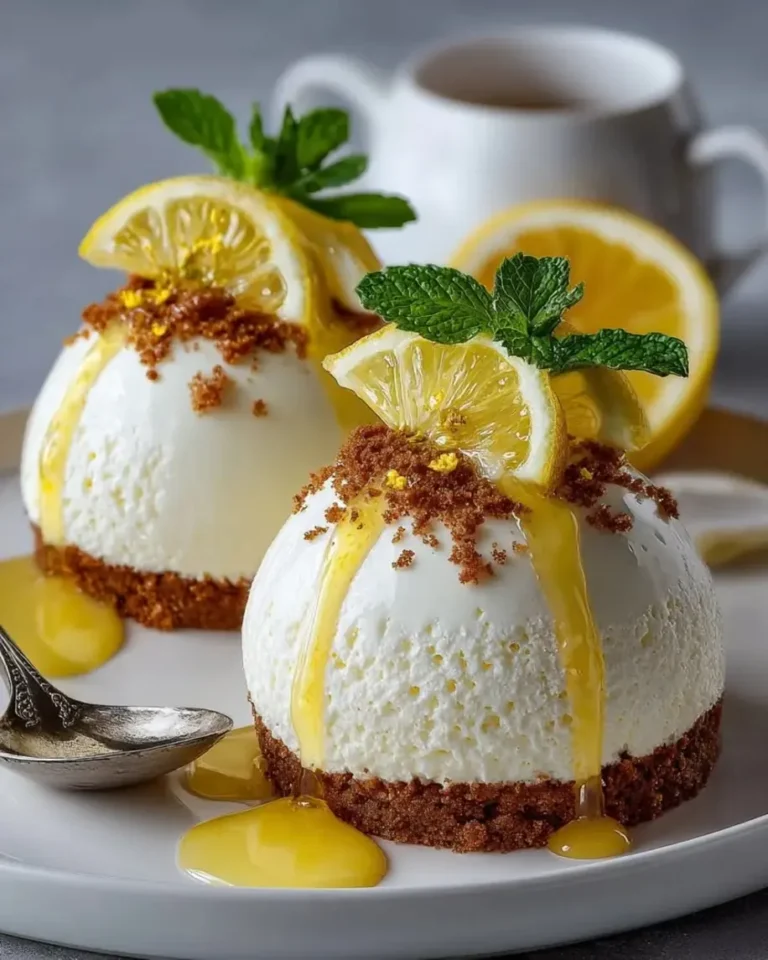
Remove the domes from the refrigerator. Gently press around the edges of the silicone mold to release the mousse, then invert each dome onto a prepared cookie base. If the domes resist, warm the outside of the mold with your hands for a few seconds. Spoon the honey lemon glaze over the top of each dome, letting it drip down the sides naturally.
⚠️ Common Mistake to Avoid: Don’t unmold the domes straight from the fridge if they feel too soft — give them the full 4 hours. If they stick, place the mold in warm water for 5 seconds (not longer, or the mousse will melt).
Step 9: Garnish and Serve
Garnish with thin lemon slices, fresh mint leaves, and an extra sprinkle of lemon zest. Serve immediately, or refrigerate for up to 2 hours after glazing. The domes are best enjoyed within 24 hours of assembly.
💡 Stella’s Pro Tip: For a striking presentation, add a few tiny edible flowers alongside the mint — they bring a pop of color and a delicate floral note that complements the honey beautifully.
| Step | Action | Duration | Key Visual Cue |
|---|---|---|---|
| 1 | Bloom gelatin in warm water | 5 mins | Gelatin becomes thick, spongy |
| 2 | Whisk ricotta with honey, sugar, vanilla, lemon | 3 mins | Smooth, pale yellow, fragrant |
| 3 | Whip cream to soft peaks; fold into ricotta | 5 mins | Light, airy, no white streaks |
| 4 | Melt gelatin; stir into mousse | 1 min | No gelatin streaks visible |
| 5 | Fill dome molds; refrigerate | 4+ hrs | Mousse is firm to the touch |
| 6 | Mix cookie base; press onto plates | 5 mins | Firm, compact crumb layer |
| 7 | Simmer glaze ingredients | 3 mins | Glossy, slightly thickened |
| 8 | Unmold onto cookie base; glaze | 5 mins | Clean dome shape, glaze drips evenly |
| 9 | Garnish and serve | 2 mins | Bright, fresh, ready to enjoy |
Serving & Presentation
These honey lemon ricotta mousse domes are made to impress. I love serving them as the grand finale to a spring dinner party — they look like something from a high‑end pastry case, but they’re made with love in your own kitchen. Place each dome on a white plate to let the golden glaze and bright lemon garnish really pop. A small dollop of extra whipped cream on the side is always welcome, and I sometimes add a light dusting of powdered sugar for a snow‑capped effect.
For a touch of Moroccan flair, I like to sprinkle a few crushed pistachios over the glaze — the green against the yellow is gorgeous, and the nutty crunch contrasts beautifully with the silky mousse. In the summer, I’ll add a few fresh raspberries alongside the lemon slices for a burst of tartness. The dessert is rich enough to stand alone, but it also pairs wonderfully with a cup of hot mint tea (a nod to my Moroccan roots) or an espresso.
When I’m hosting in my NYC apartment, I sometimes prepare the domes on individual wooden boards or slate tiles for a rustic‑elegant look. The key is to keep the plating clean and simple — let the dome be the star. If you’re making these for a special occasion like Mother’s Day or a birthday, write each guest’s name on a small card placed next to their plate. It’s a small touch that makes everyone feel celebrated.
| Pairing Type | Suggestions | Why It Works |
|---|---|---|
| Side Dish | Fresh berries, citrus salad, or a light sorbet | Adds brightness and acidity to balance the sweetness |
| Sauce / Dip | Extra honey lemon glaze, warm berry coulis, or caramel | Enhances the citrus‑honey profile with complementary sweetness |
| Beverage | Moroccan mint tea, espresso, or a dry Moscato | The tea’s freshness and coffee’s bitterness cut the richness |
| Garnish | Lemon slices, mint sprigs, crushed pistachios, edible flowers | Adds color, texture, and aromatic freshness |
Make‑Ahead, Storage & Reheating
One of the things I love most about this dessert is how well it works for entertaining. In my busy NYC life, being able to prepare something in advance is a total game‑changer. The mousse domes can be made a day ahead and stored in the molds, then unmolded and glazed just before serving. Here’s everything you need to know about storing, freezing, and reheating — though honestly, these are best enjoyed fresh.
| Method | Container | Duration | Reheating Tip |
|---|---|---|---|
| Refrigerator | Covered container or mold | Up to 2 days | Serve cold; no reheating needed |
| Freezer | Molded, wrapped in plastic wrap | Up to 1 month | Thaw in fridge 4 hrs; glaze after thawing |
| Make‑Ahead | In the mold, covered | 1 day in advance | Unmold, glaze, and garnish just before serving |
If you’re freezing the domes, do so in the silicone molds — wrap each mold tightly in plastic wrap and then in foil. To thaw, transfer the molds to the refrigerator overnight. Once thawed, proceed with unmolding and glazing. I don’t recommend freezing after glazing, as the glaze can become watery when thawed.
The cookie base is best assembled fresh, but you can prepare the crumb mixture up to 3 days ahead and store it in an airtight container at room temperature. The glaze can also be made ahead and stored in the refrigerator for up to 1 week — just warm it gently and stir before using. If the glaze thickens too much, add a few drops of warm water to loosen it.
Variations & Easy Swaps
This recipe is wonderfully adaptable. Whether you’re catering to dietary needs, looking for a seasonal twist, or just want to experiment, these variations will keep the dessert feeling fresh and exciting. I’ve tested each one in my own kitchen, so you can swap with confidence.
| Variation | Key Change | Best For | Difficulty Impact |
|---|---|---|---|
| Orange Blossom Ricotta Domes | Replace lemon zest with orange zest; add 1 tsp orange blossom water | A floral, North African‑inspired twist | Easy |
| Gluten‑Free Version | Use gluten‑free butter cookies or almond flour crust | Gluten‑free guests; celiac‑friendly | Easy |
| Dairy‑Free / Vegan Version | Use coconut cream and cashew‑based ricotta; agar agar for gelatin | Dairy‑free or vegan diets | Medium |
Orange Blossom Ricotta Domes
This is my favorite variation — it takes me straight back to the streets of Marrakech, where the scent of orange blossom fills the air. Simply replace the lemon zest with orange zest (use the same amount — 1 tablespoon) and add 1 teaspoon of orange blossom water to the ricotta mixture. The floral notes pair beautifully with the honey, and the orange gives the dessert a warmer, more perfumed character. I recommend using a mild honey like acacia or orange blossom honey to reinforce the theme.
Gluten‑Free Version
For a gluten‑free cookie base, I use gluten‑free shortbread cookies (brands like Pamela’s or Kinnikinnick work well) or make a simple almond flour crust: combine 1 cup almond flour, 2 tablespoons melted butter, 1 tablespoon brown sugar, and a pinch of salt, then press onto plates. The almond version adds a lovely nutty flavor that complements the honey. The mousse itself is naturally gluten‑free, so this is an easy adaptation.
Dairy‑Free / Vegan Version
To make this dessert dairy‑free, I use full‑fat coconut cream (chilled and whipped) in place of heavy cream, and a store‑bought cashew‑based ricotta (like Kite Hill) or a homemade one from soaked cashews and lemon juice. For the gelatin, use agar agar — 1 teaspoon, bloomed in 2 tablespoons water and then brought to a simmer before adding. The texture is slightly firmer and less silky than the original, but still absolutely delicious. I tested this version for a friend’s birthday and it was a hit.
Share Your Version!
I truly believe that the best recipes are the ones we share and make our own. Whether you’re making these honey lemon ricotta mousse domes for a special celebration or a quiet weekend treat, I’d love to hear how they turn out. Leave a star rating and a comment below — tell me which variation you tried, or how you customized the garnish. Your feedback helps other readers and inspires me to keep creating.
Tag me in your photos on Instagram @leosfoods or on Pinterest — I love seeing your beautiful creations! If you have a question that isn’t answered here, drop it in the comments and I’ll get back to you personally. From my NYC kitchen to yours — I hope this recipe brings as much warmth to your table as it does to mine. — Stella 🧡
How do you make honey lemon ricotta mousse domes without a dome mold?
You absolutely can! If you don’t have silicone dome molds, use a regular muffin tin lined with plastic wrap. Press the wrap into each cavity so it overhangs the edges, then fill with the mousse. Refrigerate for at least 4 hours, then lift the mousse out using the plastic wrap. You’ll get a rounded top that mimics a dome shape. Another option is to use small glass bowls or ramekins — just oil them lightly and tap out the mousse after chilling. The shape won’t be a perfect hemisphere, but it will still be beautiful and delicious. For a freeform version, simply spoon the mousse onto the cookie base and create a dome shape with a spatula.
What is the best substitute for gelatin in honey lemon ricotta mousse domes?
For a vegetarian or vegan substitute, agar agar is your best bet. Use 1 teaspoon of agar agar powder (or 1 tablespoon of agar agar flakes) bloomed in 2 tablespoons of cold water for 10 minutes. Then bring it to a simmer in a small saucepan, stirring until fully dissolved, and let it cool slightly before adding to the mousse. Agar agar sets more firmly than gelatin and at room temperature, so the mousse will be a bit firmer and less delicate. I’ve found that a 1:1 substitution by weight works well, but the texture is slightly different — more like a panna cotta than a classic mousse. For a completely different approach, you can omit the gelatin entirely and serve the mousse as a soft, spoonable dessert in small cups or glasses.
Can you make honey lemon ricotta mousse domes ahead of time and freeze them?
Yes, you can! The mousse domes freeze beautifully if you follow a few key steps. After filling the silicone molds, wrap each mold tightly in plastic wrap and then in a layer of aluminum foil. Freeze for up to 1 month. To serve, transfer the molds to the refrigerator and let them thaw overnight — about 8 to 10 hours. Do not try to unmold while frozen, as the mousse will be too brittle and may crack. Once thawed, unmold and glaze as directed. I recommend freezing the domes unglazed, as the glaze can become watery after freezing and thawing. Make the glaze fresh just before serving for the best texture and shine.
How do you get a smooth, shiny glaze for honey lemon ricotta mousse domes?
A smooth, shiny glaze comes down to two things: the cornstarch slurry and gentle heating. Make sure you whisk the cornstarch and water together until completely smooth before adding to the honey and lemon juice — any lumps will become visible in the finished glaze. Simmer the glaze over medium heat, stirring constantly with a silicone spatula, until it thickens and becomes glossy (about 1–2 minutes). Don’t let it boil vigorously, or the honey can crystallize and make the glaze cloudy. For extra shine, add a tiny pinch of baking soda at the end — this reduces the acidity and lightens the color. Strain the glaze through a fine‑mesh sieve before spooning it over the domes for the most professional finish.
Can I use low‑fat ricotta for honey lemon ricotta mousse domes?
I don’t recommend it. Whole milk ricotta is essential for the rich, creamy texture that makes this mousse so luxurious. Low‑fat or part‑skim ricotta has a much higher water content and a grainier texture, which can make the mousse watery and less stable. If you’re watching your calories, you can use a combination of half whole‑milk ricotta and half full‑fat Greek yogurt that has been strained overnight to remove excess liquid. This gives you a lighter result with better texture than low‑fat ricotta alone. Another option is to use a high‑quality full‑fat ricotta but reduce the amount by 1/4 cup and increase the heavy cream slightly to maintain the right consistency.
How long does it take for the mousse to set in the refrigerator?
The mousse needs at least 4 hours in the refrigerator to set properly, but I always recommend overnight for the best results. The gelatin needs time to fully activate and create a stable structure that will hold the dome shape when unmolded. After 4 hours, the mousse will be firm enough to unmold but may be slightly softer at the center. If you’re in a hurry, you can speed up the process by placing the molds in the freezer for 45–60 minutes, then transferring them to the refrigerator for another 2 hours. Just be careful not to freeze them solid, as that can create ice crystals that affect the texture. For the smoothest, creamiest result, patience is your friend — give it the full chilling time.
What can I use instead of butter cookies for the base?
There are plenty of delicious alternatives! Graham crackers are my top pick — they have a similar sweetness and a slightly more rustic texture. You can also use vanilla wafers, shortbread cookies, or even digestive biscuits. For a nutty twist, try using crushed amaretti cookies (Italian almond cookies) — they’re naturally gluten‑free and add a lovely almond flavor that pairs beautifully with the honey and lemon. If you want a completely different direction, use crushed pistachios or almonds mixed with a little melted butter and brown sugar for a nut‑based crust. Just keep the proportions the same: 1 cup of crumbs to 3 tablespoons of melted butter and 1 tablespoon of brown sugar.
Why did my ricotta mousse turn out watery or grainy?
Watery or grainy mousse usually comes down to one of three issues. First, the ricotta itself may have had too much moisture — always drain fresh ricotta in a cheesecloth‑lined sieve over a bowl for 30 minutes before using. This removes excess liquid. Second, the gelatin may not have been properly dissolved — make sure you bloom it in warm water for the full 5 minutes and then melt it gently until completely clear before adding. Third, over‑whipping the cream can cause it to separate into butter and buttermilk, which will make the mousse grainy. Whip the cream only until soft peaks form — it should still be smooth and silky. If your mousse does turn out watery, you can try adding an extra 1/2 teaspoon of gelatin dissolved in 1 tablespoon of warm water and folding it in, but it’s better to get it right from the start.
Can I use bottled lemon juice instead of fresh for honey lemon ricotta mousse domes?
I strongly recommend using fresh lemon juice. Bottled lemon juice is pasteurized and often contains preservatives, which give it a flat, artificial taste that can’t compete with bright, fresh citrus. The zest is even more important — it contains essential oils that provide the aromatic lemon flavor that makes these domes so special, and bottled juice simply can’t replicate that. For the best flavor, buy organic lemons so you can use the zest without worrying about wax or pesticides. One lemon typically yields about 2 tablespoons of juice and 1 tablespoon of zest, so you’ll need 2–3 lemons for this recipe. It’s worth the extra few minutes of juicing, I promise.
Is honey lemon ricotta mousse domes an Italian dessert?
The inspiration draws from Italian ricotta‑based desserts like ricotta mousse or cannoli filling, but this recipe is my own creation that blends Italian, French, and Moroccan influences. The use of ricotta and the dome shape nod to Italian and French pastry traditions — I learned the dome‑molding technique during my pastry training in Paris. The honey and lemon combination, however, is very Mediterranean and also reflects the flavors I grew up with in Morocco, where honey and citrus are used together in both sweet and savory dishes. So while the technique has Italian roots, the final result is a unique cross‑cultural dessert that I like to think of as a reflection of my own journey: Moroccan heritage, French training, and New York creativity.
Love This Recipe? Save It to Pinterest!
If you enjoyed this Honey Lemon Ricotta Mousse Domes recipe, don’t let it get lost in your browser tabs! 😄 Pin it now so you can find it again anytime — and explore hundreds more tried-and-tested recipes waiting for you on my Pinterest boards.
👉 Follow Stella on Pinterest @stellarecipeblog
📌 Pin this recipe · 🔁 Re-pin your favorites · 💬 Tag me when you make it — I love seeing your creations!
💬 Did You Make This Recipe?
I’d love to hear how your Honey Lemon Ricotta Mousse Domes turned out! Leave a ⭐ rating and a comment below — your feedback makes my day and helps other readers too. Tag me in your photos on Instagram @leosfoods or on Pinterest so I can see your beautiful creations!
✨ What’s the one thing that surprised you most about making these domes? Let me know in the comments! ✨
“`
Print
Honey Lemon Ricotta Mousse Domes
- Yield: 4 1x
Ingredients
- For the Ricotta Mousse Domes:
- 1 1/2 cups whole milk ricotta cheese
- 1 cup heavy cream
- 1/3 cup honey
- 2 tbsp powdered sugar
- 1 tsp vanilla extract
- 1 tbsp lemon zest
- 2 tbsp fresh lemon juice
- 1 tsp unflavored gelatin
- 2 tbsp warm water
- For the Lemon Cookie Base:
- 1 cup crushed butter cookies
- 3 tbsp melted butter
- 1 tbsp brown sugar
- Pinch of salt
- For the Honey Lemon Glaze:
- 1/3 cup honey
- 2 tbsp fresh lemon juice
- 1 tsp cornstarch
- 2 tbsp water
- For Garnish (optional):
- Thin lemon slices
- Fresh mint leaves
- Extra lemon zest
Instructions
- 1. In a small bowl, dissolve gelatin in warm water and let sit for 5 minutes.
- 2. In a large bowl, whisk ricotta cheese, honey, powdered sugar, vanilla extract, lemon zest, and lemon juice until smooth.
- 3. In a separate bowl, whip heavy cream until soft peaks form. Fold into the ricotta mixture.
- 4. Melt the gelatin mixture gently and stir into the mousse until fully combined.
- 5. Pour the mousse into silicone dome molds and refrigerate for at least 4 hours until firm.
- 6. Combine crushed butter cookies, melted butter, brown sugar, and salt. Press lightly onto serving plates to create the base.
- 7. In a saucepan, heat honey and lemon juice. Mix cornstarch with water and stir into the saucepan. Simmer for 1–2 minutes until glossy.
- 8. Unmold the ricotta domes onto the cookie base and spoon the glaze over the top.
- 9. Garnish with lemon slices, mint leaves, and extra lemon zest before serving.
Nutrition
- Calories: 390
- Sugar: 24g
- Fat: 26g
- Carbohydrates: 32g
- Protein: 9g

Tried This Recipe? Leave a Comment!
Did you make this recipe? I’d love to hear how it turned out! Please leave a comment and a rating below. Your feedback helps other home cooks and supports cheerychop.com!
For more delicious inspiration, follow me on Pinterest!