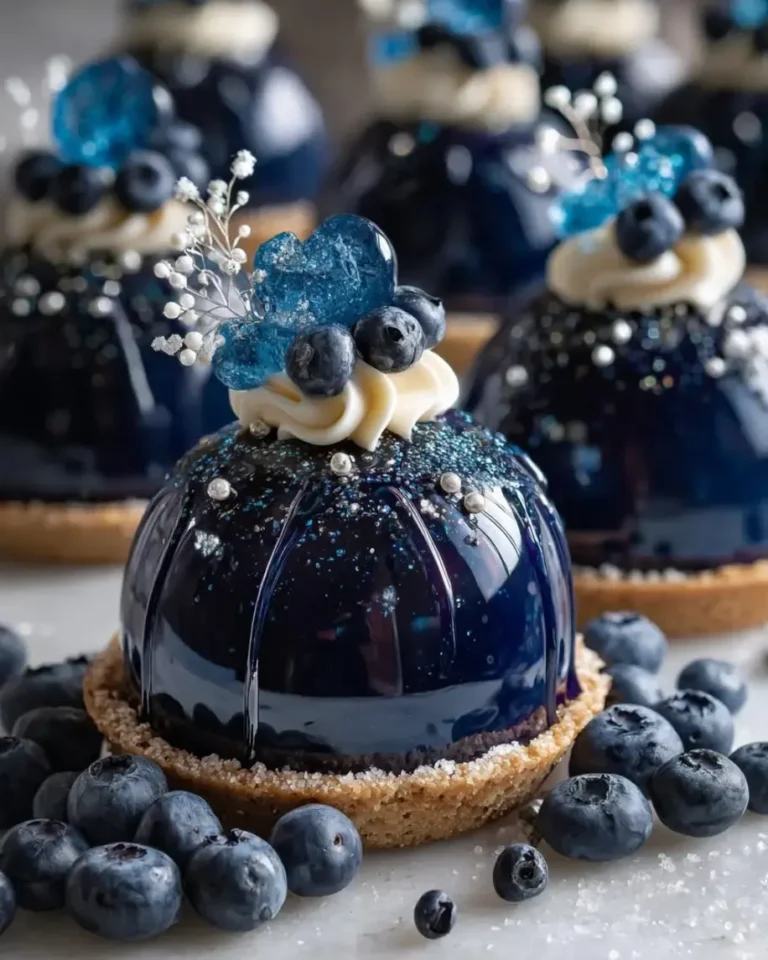
Glossy Emerald Kiwi White Chocolate Mirror Domes Recipe
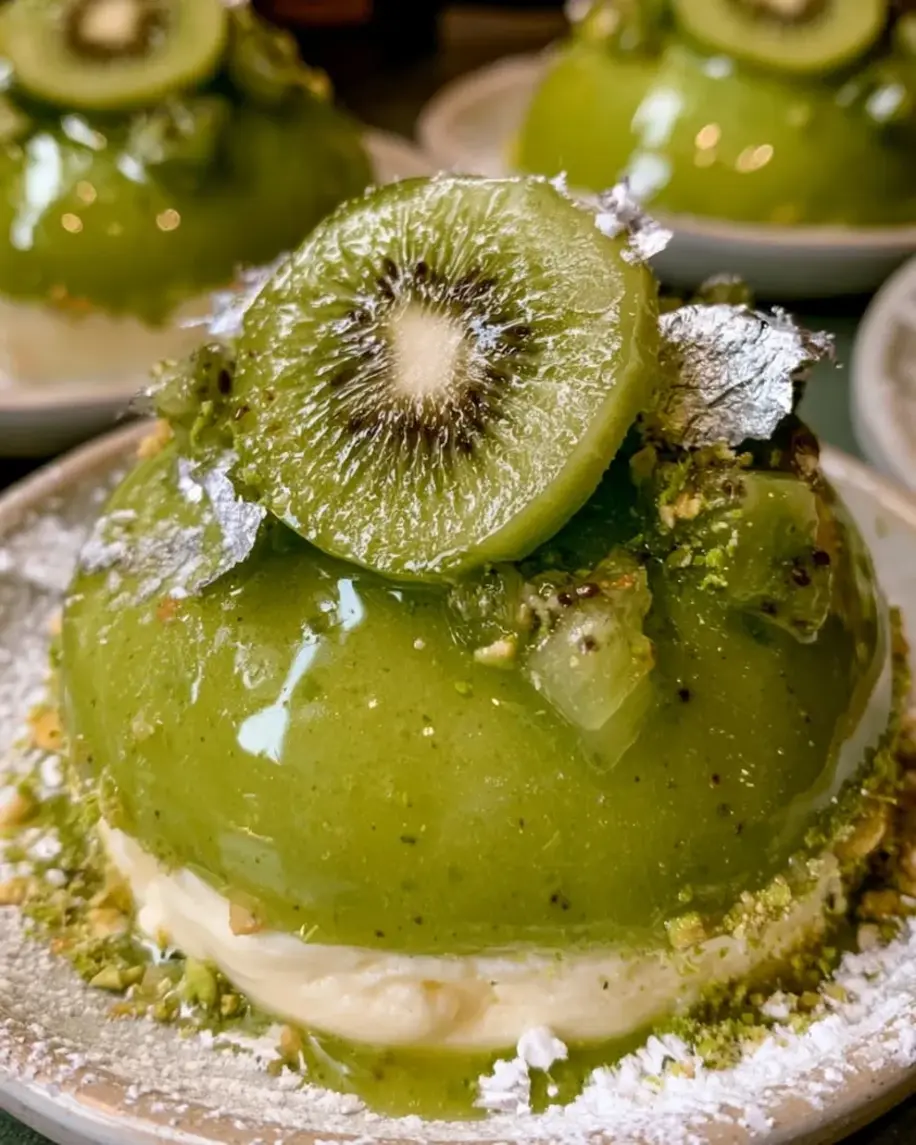
Table of Contents
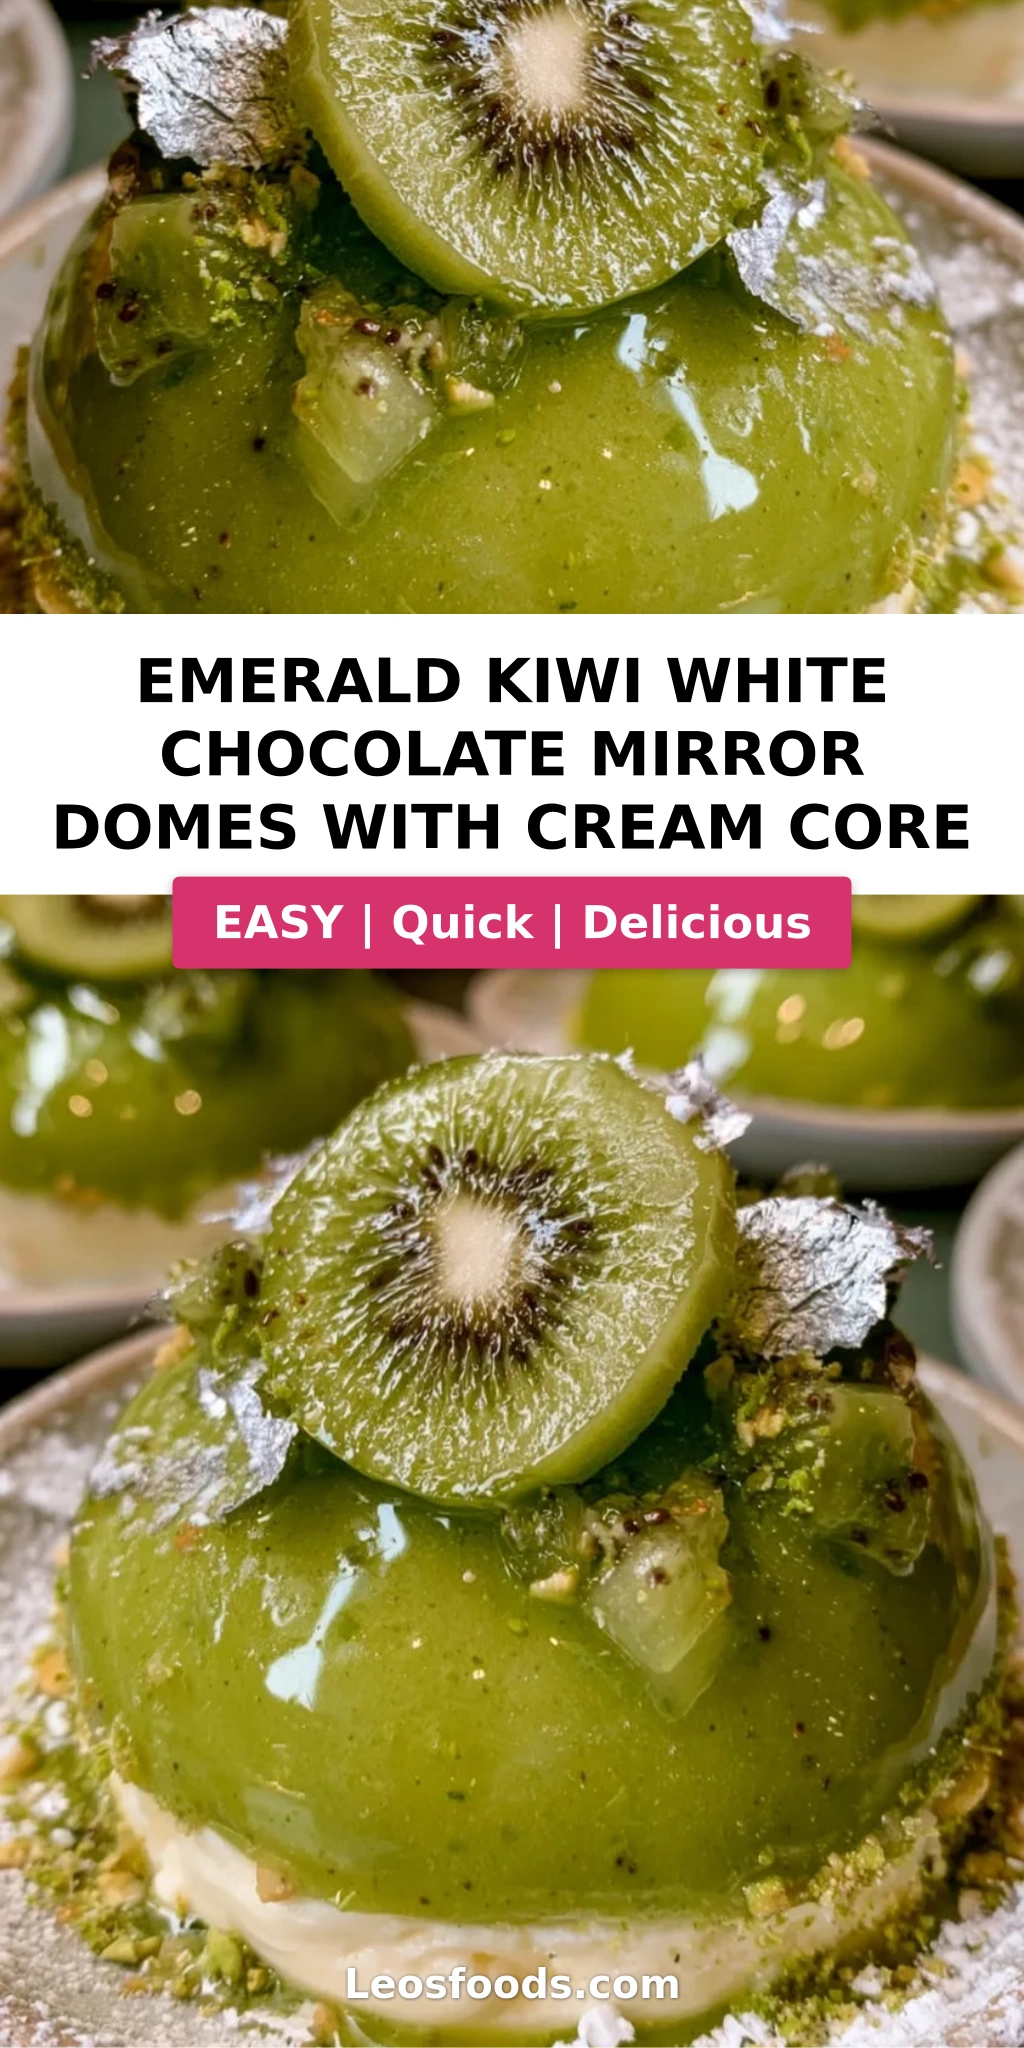
Emerald Kiwi White Chocolate Mirror Domes Recipe with Cream Core — A Showstopping Kiwi Cheesecake Dome Dessert
I still remember the first time I laid eyes on a glossy dome dessert in a Parisian pâtisserie window. The mirror finish was so flawless I thought it was a piece of jewelry, not a cake. Years later, here I am in my Greenwich Village kitchen, recreating that magic with this emerald kiwi white chocolate mirror domes recipe. My inspiration runs deep: in my mother’s Moroccan kitchen, green was always the color of hospitality — fresh mint for tea, preserved lemons, and slow-cooked herbs scattered over tagines. I wanted to bottle that warmth into a single, shimmering dessert that you can confidently make at home. This kiwi cheesecake dome dessert is the happy marriage of my Parisian pastry training, my Moroccan heritage, and my love of bold American flavors — and I’ve simplified the white chocolate mirror glaze recipe so it doesn’t require a pastry degree.
Now, imagine the moment you crack through that emerald mirror glaze with a spoon. The glaze shatters just slightly before giving way to a silky layer of white chocolate and a cloud-light kiwi cheesecake mousse. Hidden at the very center is a soft mascarpone cream core that melts slowly on your tongue — a sweet little surprise that makes every bite feel like opening a gift. The kiwi purée, brightened with a splash of lime juice and a whisper of lime zest, cuts through the richness with a tangy, tropical brightness. There’s texture, there’s tartness, there’s sweetness, there’s that unmistakable glossy shine that makes this dessert the star of any dinner party, birthday, or spring celebration.
I’ve baked this emerald kiwi white chocolate mirror domes dessert dozens of times, testing it in every season and with every brand of chocolate I could find. I’ve made every mistake in the book so you don’t have to. Lumpy glaze? I’ve been there. Domes that crack because the freezer was too cold? Been there too. In this post, I’ll share my favorite baker’s tricks, including the exact temperature you need for the white chocolate mirror glaze, the best way to prevent air bubbles in your mirror glaze cake domes, and the one ingredient you should never skip. If you’ve never worked with gelatin or mirror glaze before, don’t worry — I’ll walk you through every single step like we’re baking side by side in my NYC apartment.
Why This Emerald Kiwi White Chocolate Mirror Domes Recipe Is the Best
The Flavor Secret: It’s all about balance. I grew up watching my mother balance sweet and sour in her Moroccan tagines, and I brought that same instinct to dessert. The kiwi purée is zingy, the lime zest adds floral brightness, and the white chocolate base keeps everything rich without ever being cloying. The mascarpone core adds a gentle, milky sweetness that makes each bite feel a little more luxurious — this truly is the ultimate kiwi dessert with mascarpone cream.
Perfected Texture: Three textures tell a story here: the crackling mirror glaze on the outside, the mousse-like kiwi cheesecake dome in the middle, and the dense, almost panna-cotta-like mascarpone core hidden in the center. It’s the kind of bite that makes people stop mid-sentence and just say, “Whoa.” The gelatin sets the filling just enough to hold its shape, while the whipped cream keeps it airy and light — a delicate dance that I’ve calibrated over many test batches.
Foolproof & Fast: Don’t be scared of the mirror glaze. Yes, it’s a pastry-school technique, but with a digital thermometer, an immersion blender, and a little patience, you can absolutely pull this off at home. I’ve trimmed every corner that would compromise quality, and I’ve kept all the steps that genuinely make a difference. You’re in safe hands.
Emerald Kiwi White Chocolate Mirror Domes Recipe Ingredients for the Perfect Cream Core
Here’s what you’ll need to stock your kitchen for these creamy kiwi dome desserts. My favorite source is the Union Square Greenmarket for gorgeous fresh kiwis, but a supermarket kiwi will absolutely work. In Paris, I learned to treat fruit like gold — always taste it before you bake with it, because a ripe kiwi makes all the difference.
Ingredients List
- For the Kiwi Cheesecake Dome:
- 16 oz (450 g) cream cheese, softened
- 1/2 cup powdered sugar
- 1 tsp vanilla bean paste
- 3/4 cup fresh kiwi purée (about 3–4 ripe kiwis)
- 1 tbsp fresh lime juice
- 1 tsp finely grated lime zest
- 1 cup heavy cream, whipped to soft peaks
- 2 tsp unflavored gelatin
- 2 tbsp cold water
- For the Soft Cream Core:
- 1/2 cup mascarpone cheese
- 1/4 cup heavy cream
- 2 tbsp powdered sugar
- 1/2 tsp vanilla extract
- For the Emerald White Chocolate Mirror Glaze:
- 1/2 cup sweetened condensed milk
- 1/4 cup water
- 2 tsp unflavored gelatin
- 2 tbsp cold water
- 7 oz (200 g) white chocolate, finely chopped
- 1 tsp light corn syrup
- Emerald green gel food coloring
- 1/2 tsp edible pearl luster dust
- For Garnish (optional):
- Fresh kiwi slices
- White chocolate curls
- Edible silver leaf
Ingredient Spotlight
Kiwi Purée: You’ll need about three to four ripe kiwis to yield 3/4 cup of purée. In US grocery stores, green kiwi gives the most vibrant emerald hue, while golden kiwi tastes sweeter but produces a paler color. I look for kiwis that give slightly to gentle pressure — a sign they’re perfectly ripe and juicy. Overripe kiwis can make the filling weep.
Mascarpone: This Italian cream cheese is richer, sweeter, and less tangy than American cream cheese. It’s the backbone of the soft cream core and adds that velvety, melt-in-the-mouth quality. You’ll find it in most supermarkets’ specialty cheese section, usually near the mozzarella. Good quality mascarpone is thick enough to hold a spoon straight up.
White Chocolate: Quality matters more than anything else here. Look for white chocolate with cocoa butter listed as one of the first ingredients — I prefer Valrhona or Callebaut. Cheap white chocolate brands often use palm oil, which makes the glaze gritty and clumpy. High-quality white chocolate also melts more smoothly and gives the glaze that beautiful, glassy finish.
Gelatin: Unflavored gelatin is available in most US supermarkets in the baking aisle (Knox is the most common brand). One packet typically contains 2 1/4 teaspoons. Here, I use 2 teaspoons for the cheesecake and 2 teaspoons for the glaze — the exact amounts are in the recipe. Gelatin sets differently depending on temperature, so patience is key.
Cream Cheese: For the kiwi cheesecake filling, use full-fat block cream cheese. The kind that comes in a tub for spreading has too much water content, which can make your domes soft and less stable. Let the cream cheese soften at room temperature before you start mixing — this prevents lumps.
| Original Ingredient | Best Substitution | Flavor / Texture Impact |
|---|---|---|
| Fresh kiwi purée | Frozen kiwi purée (thawed and drained) | Slightly less vibrant color, flavor still bright |
| Mascarpone cheese | Cream cheese + 2 tbsp heavy cream | Tangier, less silky, but still delicious |
| White chocolate | High-quality dairy-free white chocolate | Less creamy, lower sweetness, use reputable brand |
| Unflavored gelatin powder | Agar agar (1 tsp) | Firmer set, vegan-friendly, a bit brittle |
| Heavy cream | Full-fat coconut cream | Coconut note, dairy-free, whips beautifully |
Nutrition Information
| Nutrient | Amount Per Serving |
|---|---|
| Calories | 405 kcal |
| Carbohydrates | 31 g |
| Fat | 30 g |
| Protein | 6 g |
| Sugar | 23 g |
How to Make Emerald Kiwi White Chocolate Mirror Domes with Cream Core — Step-by-Step
Take a deep breath and set up your station: a kitchen scale, a digital thermometer, your silicone molds, and a free afternoon. I’ll guide you through each step the way I do in my own kitchen.
Step 1: Make the Soft Cream Core
Whisk together the mascarpone, heavy cream, powdered sugar, and vanilla in a medium bowl until completely smooth and creamy. Spoon the mixture into small silicone hemisphere molds (about 1-inch round), filling each cavity almost to the top. Tap the mold gently on the counter to release air bubbles, then freeze for at least 2 hours, or until completely firm.
💡 Stella’s Pro Tip: Use a piping bag to fill the tiny cream core molds — it keeps things tidy and prevents drips. If you don’t have small hemisphere molds, an ice cube tray with rounded cavities works beautifully.
Step 2: Bloom the Cheesecake Gelatin
In a small bowl, sprinkle the unflavored gelatin evenly over the cold water. Let it sit undisturbed for 5 minutes. The gelatin will absorb the water and swell into a thick, sponge-like mass — that’s your bloom, and it’s essential for a smooth texture.
⚠️ Common Mistake to Avoid: Never add gelatin powder directly to warm liquid without blooming it first. If you dump it into the kiwi purée, you’ll end up with stringy, lumpy pockets of gelatin in your cheesecake filling.
Step 3: Warm the Kiwi Purée with Gelatin
Warm 2 tablespoons of the fresh kiwi purée in a small saucepan over low heat until it’s just steaming — about 30 to 45 seconds. Remove from the heat and stir in the bloomed gelatin until it has fully dissolved, leaving no streaks behind.
💡 Stella’s Pro Tip: Don’t let the kiwi purée boil. Kiwi contains an enzyme called actinidin that can break down gelatin if it gets too hot. Warm, not boiling, is the golden rule.
Step 4: Beat the Cheesecake Filling
In a large mixing bowl, beat the softened cream cheese, powdered sugar, and vanilla bean paste with an electric mixer on medium speed until silky smooth — about 1 minute. Add the remaining kiwi purée, lime juice, and lime zest, then continue beating until fully combined, scraping down the sides of the bowl as you go.
⚠️ Common Mistake to Avoid: Make sure your cream cheese is truly softened to room temperature. Cold cream cheese creates lumps in the filling that will never quite smooth out, even with a powerful mixer.
Step 5: Fold in the Whipped Cream
Pour the gelatin-kiwi mixture into the cream cheese base and stir until well combined. Then, using a rubber spatula, gently fold in the softly whipped heavy cream. Work slowly and stop folding as soon as there are no white streaks visible — you want to preserve as much air as possible.
💡 Stella’s Pro Tip: Whipped cream should be soft and pillowy, not stiff. When soft peaks hold their shape briefly before drooping, you’ve reached the perfect fold-in consistency.
Step 6: Fill the Dome Molds
Fill each dome mold cavity halfway with the kiwi cheesecake mixture. Gently press one frozen cream core into the center of each cavity, then cover it completely with more cheesecake filling. Smooth the tops with an offset spatula and tap the mold on the counter to settle the filling. Freeze for at least 6 hours or overnight until completely solid.
⚠️ Common Mistake to Avoid: Don’t skip the tap step. Air bubbles trapped under the surface will show up as rough spots on your domes after glazing. Tap firmly but not so hard that the filling splashes out of the mold.
Step 7: Bloom the Glaze Gelatin
In a second small bowl, sprinkle the glaze gelatin over the cold water and allow it to bloom for 5 minutes while you prepare the other glaze ingredients.
💡 Stella’s Pro Tip: Always prepare both gelatin mixtures before you start anything else. The timeline runs smoothly when your gelatins are already blooming while you’re mixing the cheesecake filling.
Step 8: Heat the Condensed Milk Mixture
In a small saucepan, combine the sweetened condensed milk and water. Heat over medium-low until the mixture is steaming gently, then remove it from the heat and stir in the bloomed glaze gelatin until fully dissolved.
⚠️ Common Mistake to Avoid: Keep the heat moderate. If the condensed milk mixture starts simmering, tiny bubbles will be trapped in your glaze and become visible when it sets on the domes.
Step 9: Make the Emerald White Chocolate Mirror Glaze
Pour the hot condensed milk mixture over the finely chopped white chocolate in a deep bowl. Let it stand for 1 minute, then stir slowly in a small circular motion until the chocolate is fully melted and smooth. Mix in the corn syrup, emerald green gel food coloring, and edible pearl luster dust, then use an immersion blender to eliminate any air bubbles. Cool the glaze to about 90°F (32°C) before glazing.
💡 Stella’s Pro Tip: Use an immersion blender for at least 30 seconds — it’s the best way to get that perfectly glossy, uniform color. Keep the blender submerged to avoid whipping air into the glaze.
Step 10: Unmold and Glaze the Domes
Remove the frozen domes from the freezer and gently unmold them from the silicone mold. Place each dome on a wire rack set over a baking tray. Test the glaze temperature with a thermometer, then pour the emerald mirror glaze evenly over each dome, letting the excess drip off into the tray.
⚠️ Common Mistake to Avoid: If your glaze is much hotter than 90°F, it will run right off the frozen dome and leave streaks. If it’s cooler, it will set too fast and leave a dull finish. Trust the thermometer!
Step 11: Set the Glaze
Carefully transfer the glazed domes to serving plates using a stiff offset spatula. Refrigerate for 20–30 minutes to allow the glaze to set into that beautiful, tap-able mirror finish.
💡 Stella’s Pro Tip: Don’t skip the refrigeration step — the glaze needs that quiet time to stabilize. Cold domes are also easier to move without fingerprints melting the shine.
Step 12: Garnish and Serve
Before serving, garnish with fresh kiwi slices, white chocolate curls, or a delicate piece of edible silver leaf. Serve immediately and enjoy the look on your guests’ faces when they crack through that glossy shell.
⚠️ Common Mistake to Avoid: Add the edible silver leaf or kiwi garnish right before serving, not before refrigerating. If it sits too long, fresh kiwi will weep and leave little water droplets on your perfect mirror finish.
| Step | Action | Duration | Key Visual Cue |
|---|---|---|---|
| 1 | Make the soft cream core | 10 min + 2 hr freeze | Mascarpone mixture is smooth and glossy |
| 2 | Bloom cheesecake gelatin | 5 min | Gelatin swells into a sponge-like mass |
| 3 | Warm kiwi purée + gelatin | 1 min | Purée is steaming but not boiling |
| 4 | Beat cheesecake filling | 3 min | Silky, lump-free base |
| 5 | Fold in whipped cream | 2 min | No white streaks, airy mousse texture |
| 6 | Fill the dome molds | 15 min + 6 hr freeze | Cream core fully covered, tops smooth |
| 7 | Bloom glaze gelatin | 5 min | Gelatin absorbs all the water |
| 8 | Heat condensed milk mixture | 3 min | Steam rises, no simmer |
| 9 | Make the mirror glaze | 5 min + cooling | Glossy, vibrant emerald color |
| 10 | Unmold and glaze the domes | 3 min | Even coverage, drips run smoothly off |
| 11 | Set the glaze | 20–30 min | Glaze is firm and fingerprint-free |
| 12 | Garnish and serve | 5 min | Finished garnish, mirror shine intact |
Serving & Presentation
When it comes to serving these emerald kiwi white chocolate mirror domes, I like to bring a bit of fine-dining drama to the table. Place each dome on a chilled white plate with a small swoosh of extra kiwi sauce or a delicate dollop of crème fraîche. The contrast of the deep emerald dome against a clean white plate is pure art — and it photographs beautifully for social media.
During the warmer months here in NYC, I love serving these mirror glaze cake domes with a handful of fresh berries scattered around the plate. Raspberries, in particular, bring a bright red pop that complements the emerald glaze. For extra indulgence, a few curls of white chocolate on the side add a delicate, nutty sweetness that rounds out the experience.
| Pairing Type | Suggestions | Why It Works |
|---|---|---|
| Side Dish | Fresh raspberries, lime sorbet, coconut panna cotta | Bright fruit and coconut complement the emerald glaze |
| Sauce / Dip | Extra kiwi coulis, salted caramel, white chocolate ganache | Adds richness or freshness depending on your mood |
| Beverage | Espresso, Champagne, Moroccan mint tea | Mint tea echoes my Moroccan roots and cuts the sweetness |
| Garnish | Edible silver leaf, candied lime zest, fresh mint | Simple, elegant details that elevate a showstopping dessert |
Make-Ahead, Storage & Reheating
Between running recipe tests and chasing my two kids around Brooklyn, I know a thing or two about working ahead. These domes are actually the perfect make-ahead dessert for a weekend dinner party — here’s my exact plan for the busy NYC host who still wants to deliver a five-star dessert.
| Method | Container | Duration | Reheating Tip |
|---|---|---|---|
| Refrigerator | Airtight cake dome or covered platter | Up to 2 days | Serve slightly chilled; no reheating needed |
| Freezer | Sealed dark container, domes separated by parchment | Up to 1 month | Thaw in fridge overnight, never at room temp |
| Make-Ahead | Glaze up to 24 hours before serving | 1 day in advance | Keep refrigerated, garnish just before serving |
If you’re making these for a special occasion, I recommend glazing the domes the morning of your dinner. The glaze stays beautifully glossy for up to 24 hours in the refrigerator, and the chilled finish makes them easier to plate after dinner service. I’ve kept these mirror glaze cake domes in the freezer for a full month once, glazed and all, and they still looked stunning after a slow thaw in the fridge.
One important tip I learned the hard way: never let the domes sit at room temperature for long before serving. The heat will soften the glaze and cause condensation to form, dulling that gorgeous shine. Keep them chilled right up until the moment you set them on the table.
Variations & Easy Swaps
| Variation | Key Change | Best For | Difficulty Impact |
|---|---|---|---|
| Tropical Mango-Passionfruit | Mango purée instead of kiwi | Summer parties, exotic flavors | No change |
| Dairy-Free Coconut | Coconut cream + dairy-free white chocolate | Vegan & dairy-free friends | Medium |
| Berry-Basil | Strawberry-basil purée instead of kiwi | Garden parties, berry season | No change |
Variation 1: Tropical Mango-Passionfruit Domes
In Paris, I worked with a pastry chef who made a mango-passionfruit version of everything in summer. For a tropical twist, replace the kiwi purée with ripe mango purée and add a teaspoon of passionfruit seeds to the cheesecake filling. The mango is naturally sweeter, so reduce the powdered sugar by 2 tablespoons. The glaze shifts beautifully from emerald to a sunny amber color, and the passionfruit seeds add a delightful pop of tartness with every bite.
Variation 2: Dairy-Free & Gluten-Free Domes
To make this recipe dairy-free, swap the mascarpone for thick coconut cream, use a plant-based cream cheese, and choose a high-quality dairy-free white chocolate that melts well. The mirror glaze will still shine beautifully thanks to the gelatin and corn syrup. Keep in mind the texture will be slightly lighter and the flavor will have a delicate coconut note that pairs wonderfully with lime. The recipe is naturally gluten-free — just double-check that your white chocolate and food colorings are certified gluten-free.
Variation 3: Berry-Basil Summer Domes
One of my favorite finds at the NYC farmers market is a pint of fragrant strawberries in June. For a seasonal detour, purée 3/4 cup of strawberries with a small handful of fresh basil leaves and swap that for the kiwi purée. The herb note is unexpected and bright, and the glaze color becomes a rich pink — equally stunning. This version reminds me of French summer tarts I used to make in pastry school, where basil and strawberry were the perfect romantic pairing.
Frequently Asked Questions
What is the best way to create a glossy mirror glaze for the kiwi domes?
The key to a flawless glossy mirror glaze is temperature control and a uniform mixture. Your glaze should be about 90°F (32°C) before pouring, and the frozen domes should be very cold — that temperature shock helps the glaze set evenly. Use an immersion blender to eliminate air bubbles, strain the glaze through a fine mesh sieve if you don’t have a blender, and pour in one steady, confident stream. Also, use high-quality white chocolate with a good cocoa butter content, and add the edible pearl luster dust for that extra luminous shine.
Can I substitute white chocolate with a different type of chocolate for the mirror glaze?
Yes, you can absolutely use milk or dark chocolate for the mirror glaze, but the emerald green color will look different and the taste will shift too. Since the glaze sits on top of a kiwi cheesecake and mascarpone cream, milk chocolate works nicely, but dark chocolate can easily overwhelm the delicate kiwi and mascarpone flavors, and the green food coloring will look less vivid on a dark base. If you do swap it, reduce the corn syrup slightly and expect a deeper, richer hue — a burgundy or deep red gel color looks gorgeous with dark chocolate.
How far in advance can I make and store these white chocolate mirror dome desserts?
You can prepare the kiwi cheesecake domes up to 3 days in advance before glazing. Store them tightly covered in the freezer, then glaze and refrigerate them the same day. Once glazed, the domes stay beautiful for 24 hours in the fridge. For longer storage, unglazed domes can be frozen for up to one month. In all cases, thaw in the refrigerator — never at room temperature — to avoid condensation ruining the mirror finish. That’s how I prep for my busiest weekends in NYC.
What can I use instead of kiwi for the emerald color or flavor if kiwi is unavailable?
If kiwi is out of season, you can create a similarly vibrant emerald flavor with other green fruits and vegetables. A peeled and pureed honeydew melon, combined with a squeeze of lime, gives a very similar fresh green color and a delicious, sweet-tart flavor. Another option is blanched spinach or kale blended with apple juice to achieve the emerald hue without a strong vegetable taste. For the glaze, simply adjust the green food coloring as needed to hit your perfect shade.
Why did my mirror glaze crack or lose its shine after I poured it?
A mirror glaze cracks when the temperature difference between the glaze and the frozen dome is too extreme, or when the dome was not completely level during pouring. It loses its shine when the glaze is too hot, which makes it separate, or when the dome is pulled out of the freezer too early and condensation forms on the surface. The fix: make sure the domes are fully frozen solid — at least 6 hours — and cool your glaze to 90°F (32°C) before glazing.
Can I use frozen kiwi to make the kiwi purée?
Yes, frozen kiwi works wonderfully, and it’s honestly a great option when fresh kiwi isn’t in season. Thaw the kiwi completely before blending, then drain off any excess liquid to keep your purée thick and concentrated. The color may be slightly duller than fresh kiwi, so you can add a few drops of green gel food coloring to brighten it up. I keep frozen kiwi in my freezer all the time for quick purées like this one.
Do I need a special dome mold to make these desserts?
Silicone sphere molds are the most reliable for a smooth half-sphere shape, but you can absolutely use other silicone molds if that’s what you have. A regular silicone muffin mold or even a small silicone bowl mold will give you a dome-like shape. The key is to use flexible silicone, not rigid plastic or metal, so the domes slide out without sticking. If you’re making these without a mold, you can also pipe the cheesecake filling into frozen chocolate spheres, as I did during my Parisian internship.
Can I make this recipe dairy-free or gluten-free?
Yes, this recipe can be made dairy-free and gluten-free. For dairy-free, replace the cream cheese with a plant-based cream cheese, use coconut cream instead of heavy cream, and swap the mascarpone for a thick coconut cream. Find a dairy-free white chocolate that melts well. For gluten-free, the recipe is naturally free of gluten — just check the labels on your white chocolate and food colorings. The texture will be slightly less creamy, but the flavor will still be bright and delicious.
What type of gelatin works best — powder or sheets?
I use unflavored powdered gelatin for this recipe because it’s easy to find in US supermarkets and easy to measure. One packet (2 1/4 teaspoons) will set about 2 cups of liquid, but for our specific recipe, I use 2 teaspoons per dome batch. If you prefer sheet gelatin, use about 4 sheets (2 grams each) for each 2-teaspoon bloom. Just remember to bloom sheets in ice water for 5–10 minutes, then squeeze out the excess water before dissolving.
My mirror glaze is too thick to pour — how do I fix it?
If your mirror glaze sits too long at room temperature, it will start to set and become unpoppable. The quickest fix is to place the bowl in a warm-water bath for 15–20 seconds at a time, stirring gently until it flows again. Don’t microwave it, because you can easily overheat and cause the chocolate to seize. Re-warm the glaze slowly until it returns to that 90°F (32°C) sweet spot, then pour it immediately. This is why I always recommend glazing domes one batch at a time.
Share Your Version!
Now it’s your turn! I hope you feel ready to make a batch of these emerald kiwi white chocolate mirror domes in your own kitchen. I’ve watched hundreds of home bakers succeed with this recipe — even those who’d never touched a mirror glaze before — and I know you can too.
Tag @leosfoods when you share your creations on Instagram or Pinterest, leave a star rating below, and comment to tell me: what flavor core would you put in your domes? Mascarpone, like mine, or maybe a strawberry cream surprise? I read every single comment!
From my NYC kitchen to yours — I hope this recipe brings as much warmth to your table as it does to mine. — Stella 🧡
Love This Recipe? Save It to Pinterest!
If you enjoyed this Emerald Kiwi White Chocolate Mirror Domes with Cream Core recipe, don’t let it get lost in your browser tabs! 😄 Pin it now so you can find it again anytime — and explore hundreds more tried-and-tested recipes waiting for you on my Pinterest boards.
👉 Follow Stella on Pinterest @stellarecipeblog
📌 Pin this recipe · 🔁 Re-pin your favorites · 💬 Tag me when you make it — I love seeing your creations!
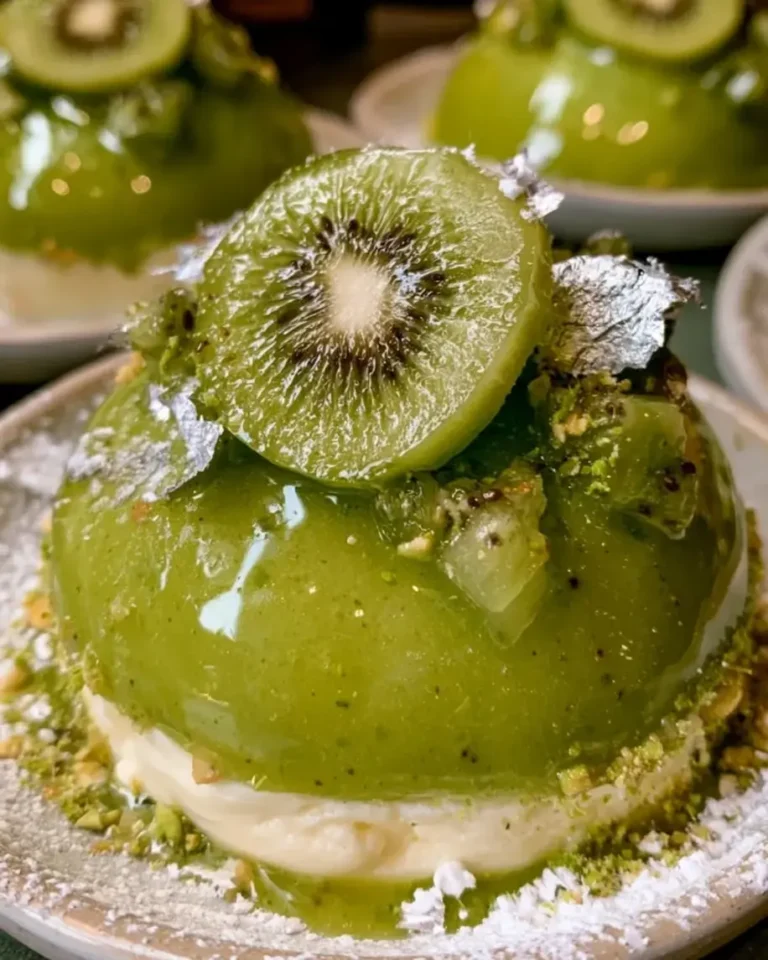
Emerald Kiwi White Chocolate Mirror Domes with Cream Core
Emerald Kiwi White Chocolate Mirror Domes with Cream Core
- Yield: 8 1x
Ingredients
- For the Kiwi Cheesecake Dome:
- 16 oz (450 g) cream cheese, softened
- 1/2 cup powdered sugar
- 1 tsp vanilla bean paste
- 3/4 cup fresh kiwi purée
- 1 tbsp fresh lime juice
- 1 tsp finely grated lime zest
- 1 cup heavy cream, whipped to soft peaks
- 2 tsp unflavored gelatin
- 2 tbsp cold water
- For the Soft Cream Core:
- 1/2 cup mascarpone cheese
- 1/4 cup heavy cream
- 2 tbsp powdered sugar
- 1/2 tsp vanilla extract
- For the Emerald White Chocolate Mirror Glaze:
- 1/2 cup sweetened condensed milk
- 1/4 cup water
- 2 tsp unflavored gelatin
- 2 tbsp cold water
- 7 oz (200 g) white chocolate, finely chopped
- 1 tsp light corn syrup
- Emerald green gel food coloring
- 1/2 tsp edible pearl luster dust
- For Garnish (optional):
- Fresh kiwi slices
- White chocolate curls
- Edible silver leaf
Instructions
- Whisk together the mascarpone, heavy cream, powdered sugar, and vanilla until smooth and creamy. Spoon into small silicone molds and freeze until firm.
- Bloom the gelatin for the cheesecake filling in the cold water for 5 minutes.
- Warm 2 tablespoons of the kiwi purée and stir in the bloomed gelatin until completely dissolved.
- Beat the cream cheese, powdered sugar, vanilla bean paste, remaining kiwi purée, lime juice, and lime zest until silky smooth.
- Stir the gelatin mixture into the cheesecake filling, then gently fold in the whipped cream until fully incorporated.
- Fill each dome mold halfway with the cheesecake mixture. Place a frozen cream core in the center and cover with the remaining filling. Smooth the tops and freeze for at least 6 hours or until solid.
- Bloom the gelatin for the mirror glaze in the cold water for 5 minutes.
- Heat the condensed milk and water until steaming. Stir in the gelatin until dissolved.
- Pour the hot mixture over the white chocolate and let stand for 1 minute. Stir until smooth, then mix in the corn syrup, emerald green food coloring, and edible pearl luster dust. Cool the glaze to about 90°F (32°C).
- Unmold the frozen domes and place them on a wire rack over a baking tray. Pour the emerald mirror glaze evenly over each dome.
- Transfer the glazed domes to serving plates and refrigerate for 20–30 minutes before serving.
- Garnish with fresh kiwi slices, white chocolate curls, and edible silver leaf.
Nutrition
- Calories: 405
- Sugar: 23 g
- Fat: 30 g
- Carbohydrates: 31 g
- Protein: 6 g
Tried This Recipe? Leave a Comment!
Did you make this recipe? I’d love to hear how it turned out! Please leave a comment and a rating below. Your feedback helps other home cooks and supports cheerychop.com!
For more delicious inspiration, follow me on Pinterest!