No-Bake Lemon Coconut Cloud Hearts Dessert Recipe
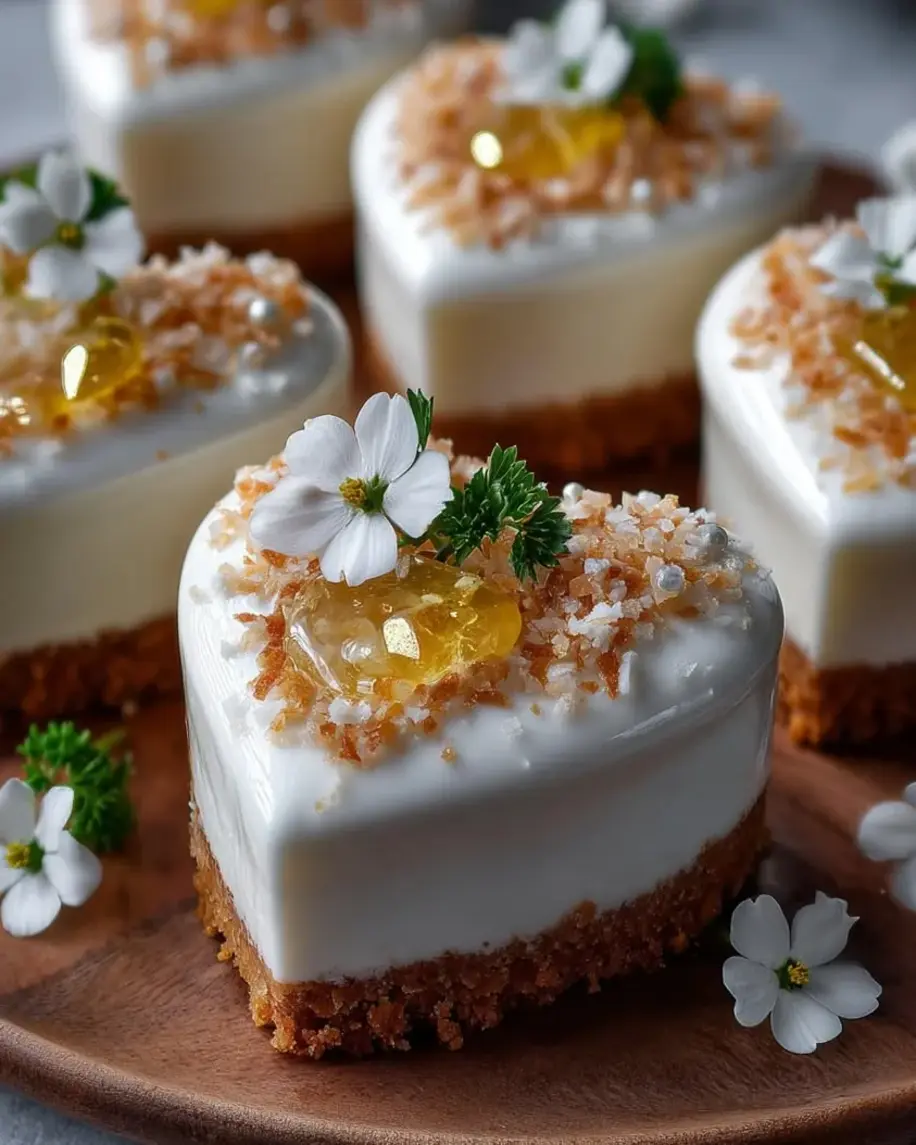
Table of Contents
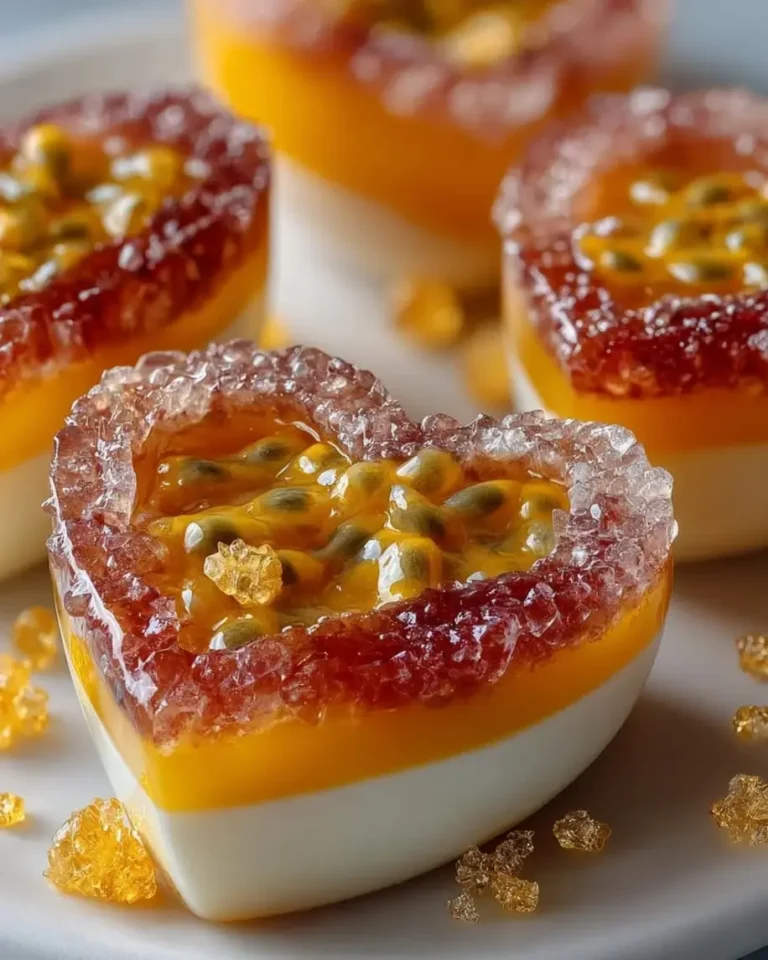
Lemon Coconut Cloud Hearts with Pearl Glaze – A No-Bake Dream
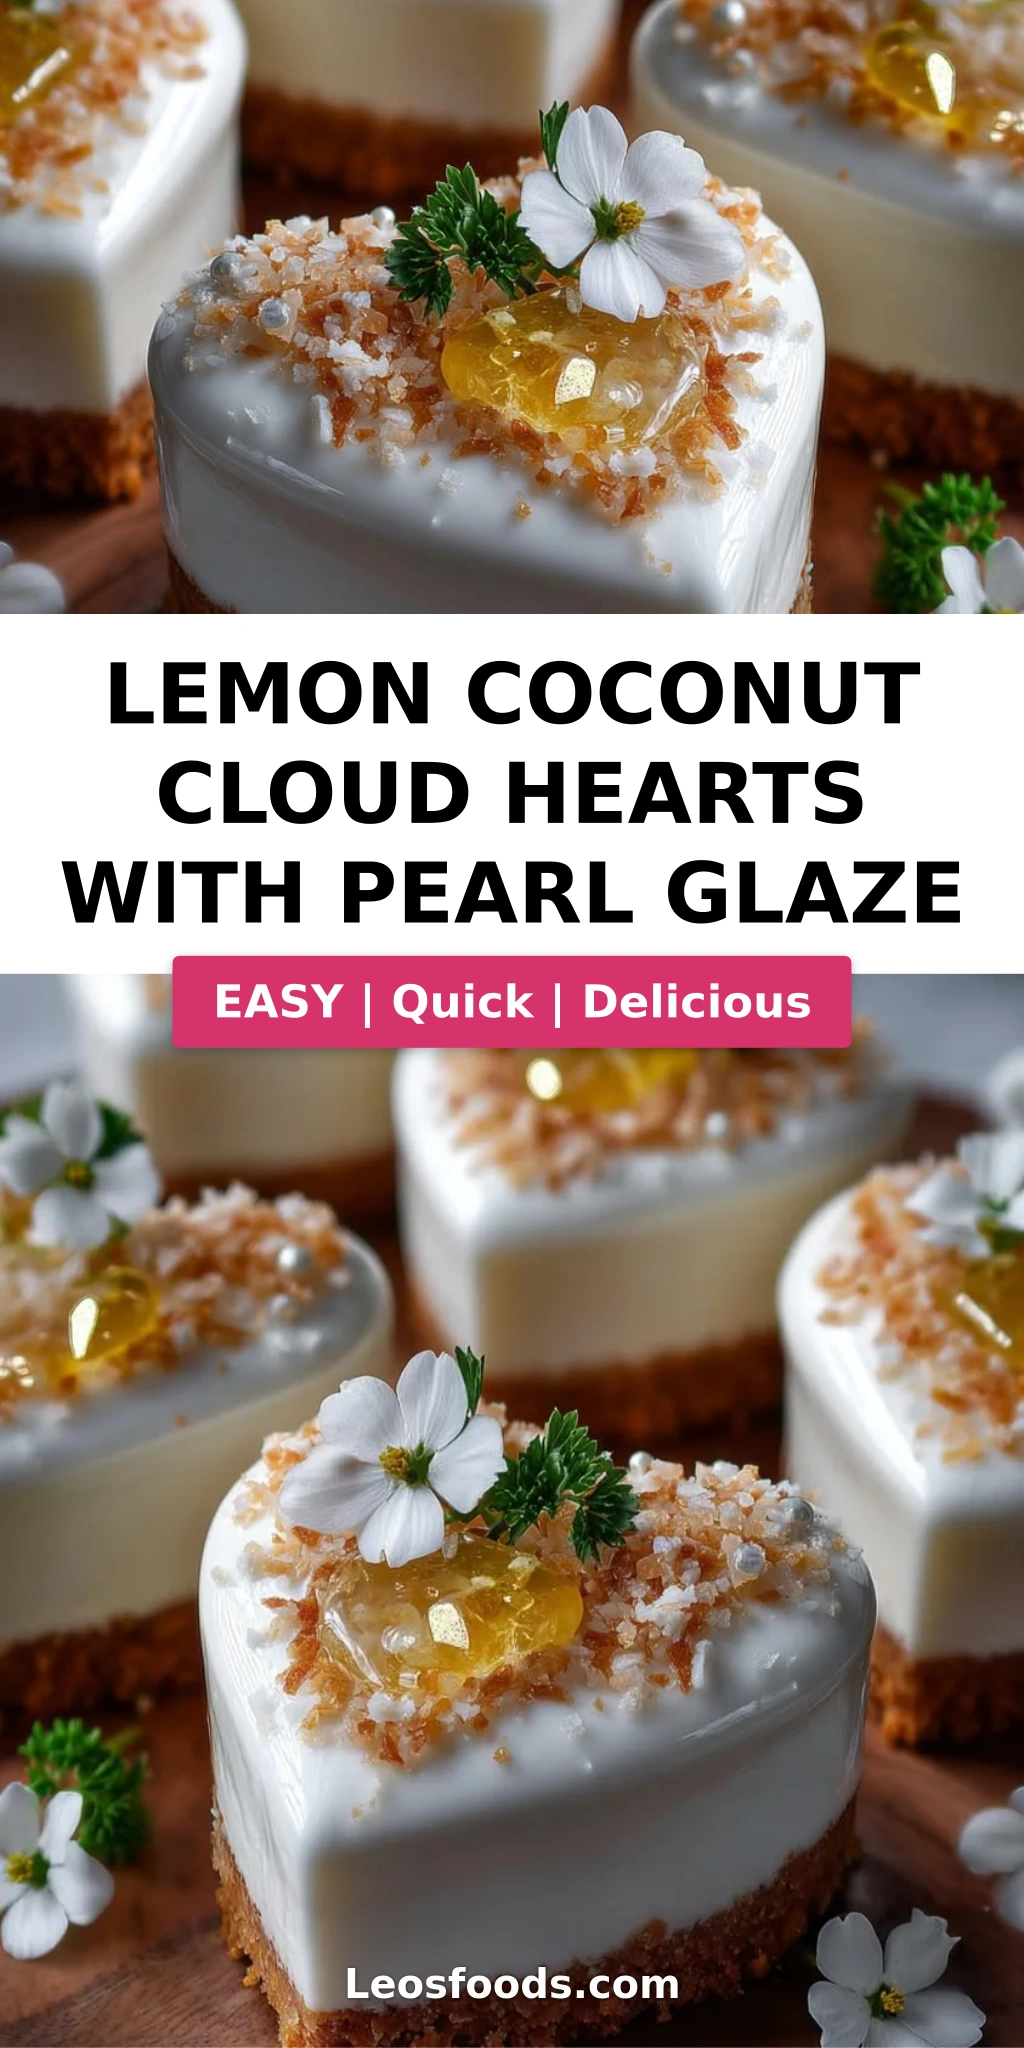
I still remember the first time I made these lemon coconut cloud hearts — it was a rainy Sunday in my tiny NYC kitchen, and I was missing the bright, sunny flavors of my grandmother’s citrus gardens back in Morocco. These delicate heart-shaped desserts with a coconut biscuit base, cloud-like lemon coconut mousse, and a shimmering pearl glaze are the love child of my French pastry training and my North African roots. Every bite is like a little bite of joy — tangy, sweet, creamy, and absolutely gorgeous on the plate.
Imagine the most luscious lemon mousse you’ve ever had — light as air, with a whisper of coconut cream that adds richness without weighing it down. That mousse sits on a buttery, coconut-kissed cookie crust, and the whole thing is bathed in a glossy pearl glaze that catches the light like morning dew. The lemon zest brings a bright, sunny zing, while the toasted coconut garnish adds a nutty, warm finish. It’s a dessert that feels fancy but comes together with surprising ease — no oven required, just a little patience while it sets.
I’ve tested this recipe a dozen times to get the texture just right — the mousse needs to be firm enough to hold its shape when unmolded but still melt-in-your-mouth silky. My version uses a trick I learned at Le Cordon Bleu in Paris: folding whipped cream into cream cheese in stages to keep the mixture light and stable. The result? A no-bake lemon dessert that rivals anything you’d get at a patisserie. Plus, that pearl glaze? It’s surprisingly simple to make at home with everyday ingredients. I’m so excited to share every detail with you — from how to pick the best lemons at the farmers market to my secret for a flawless glaze every time.
Why This Lemon Coconut Cloud Hearts Recipe Is the Best
The Flavor Secret: The combination of lemon and coconut is a classic for a reason — the brightness of citrus cuts through the creamy richness of coconut beautifully. But what makes my version stand out is the double hit of coconut: coconut cream in the mousse for silky depth, plus toasted coconut in the base and as a garnish for texture and toasty flavor. And the pearl glaze isn’t just pretty — it adds a subtle sweetness that ties everything together. This is a lemon coconut mousse dessert that tastes like sunshine and feels utterly indulgent.
Perfected Texture: One of the biggest challenges with no-bake mousse desserts is getting them to set firmly without becoming dense or rubbery. My technique — beating the cream cheese until completely silky, then folding in softly whipped cream in two batches — creates a mousse that’s stable enough to unmold cleanly but still impossibly light. The coconut biscuit base is pressed thin so it stays crunchy, not soggy. Every layer has a purpose and a perfect texture.
Foolproof & Fast: Even though this looks like a showstopper dessert, it’s surprisingly beginner-friendly. There’s no baking, no candy thermometer, no complicated techniques. The heart-shaped silicone molds make shaping effortless — just press, fill, freeze, and glaze. The pearl glaze is a simple melt-and-stir situation that comes together in minutes. Whether you’re making these for a Valentine’s Day dinner, a bridal shower, or just because you want something beautiful for dessert, this recipe delivers every time.
Lemon Coconut Cloud Hearts Ingredients
I source my lemons from the Union Square Greenmarket in NYC — the organic Meyer lemons are my favorite when they’re in season, but regular lemons work beautifully too. For the coconut, I always use unsweetened shredded coconut and full-fat coconut cream (the kind that comes in a can, not the sweetened cream of coconut). Here’s everything you’ll need to make these lovely heart-shaped desserts.
Ingredients List
- For the Lemon Coconut Mousse:
- 8 oz (225 g) cream cheese, softened
- 1 cup heavy whipping cream, chilled
- 1/3 cup powdered sugar
- 1/4 cup coconut cream
- 1 tbsp lemon zest
- 2 tbsp fresh lemon juice
- 1 tsp vanilla extract
- For the Coconut Biscuit Base:
- 1 cup vanilla cookie crumbs
- 1/4 cup shredded coconut
- 3 tbsp unsalted butter, melted
- For the Pearl Glaze:
- 1/2 cup white chocolate, melted
- 2 tbsp sweetened condensed milk
- 1 tbsp coconut oil
- 1 tsp edible pearl luster dust
- For Garnish (optional):
- Toasted coconut flakes
- Fine lemon zest
Ingredient Spotlight
Cream Cheese: This is the backbone of the mousse, providing richness and structure. Use full-fat block cream cheese (not the spreadable kind in a tub) for the best texture. Let it come to room temperature before beating — about 30 minutes on the counter — so it blends smoothly without lumps. If you need a dairy-free version, use a high-quality vegan cream cheese, but note that the texture will be slightly less firm.
Coconut Cream: This adds a lush, tropical depth to the mousse without making it heavy. Look for unsweetened coconut cream in the Asian foods aisle or near the canned coconut milk. Don’t confuse it with cream of coconut (which is sweetened and used in cocktails). If you can’t find coconut cream, use the thick top layer from a can of full-fat coconut milk.
White Chocolate & Edible Pearl Luster Dust: The glaze gets its gorgeous shimmer from edible pearl luster dust, which you can find at baking supply stores or online. Use a good-quality white chocolate that you’d actually eat — avoid baking chips that contain stabilizers, as they don’t melt as smoothly. The coconut oil in the glaze keeps it glossy and helps it set with a beautiful sheen.
| Original Ingredient | Best Substitution | Flavor / Texture Impact |
|---|---|---|
| Cream cheese | Vegan cream cheese (full-fat) | Slightly less firm set; still delicious |
| Heavy whipping cream | Full-fat coconut cream (chilled, whipped) | More coconut flavor; slightly less stable |
| Vanilla cookie crumbs | Graham cracker crumbs or shortbread crumbs | Slightly different sweetness; works well |
| White chocolate | Coconut butter (manna) for dairy-free | Less sweet, more coconut flavor; thicker |
How to Make Lemon Coconut Cloud Hearts — Step-by-Step
This pearl glaze recipe comes together more easily than you might think — just follow these steps carefully and you’ll have stunning heart-shaped desserts that look like they came from a fancy bakery.
Step 1: Make the Coconut Biscuit Base
In a medium bowl, mix the vanilla cookie crumbs, shredded coconut, and melted butter until the mixture resembles wet sand and holds together when pressed. You want every crumb evenly moistened.
💡 Stella’s Pro Tip: For the best texture, use a food processor to grind your vanilla cookies into fine crumbs. You want a uniform consistency so the base presses evenly into the molds.
Step 2: Press and Chill the Base
Press about 1 tablespoon of the crumb mixture into each heart-shaped silicone mold, using your fingers or the bottom of a small glass to compact it firmly into a thin, even layer. Pop the molds into the fridge for 15 minutes to set.
⚠️ Common Mistake to Avoid: Don’t press the base too thick — you want just enough to cover the bottom of each heart. A thick base will throw off the delicate balance of the dessert.
Step 3: Make the Mousse Base
In a large mixing bowl, beat the softened cream cheese with powdered sugar, coconut cream, lemon zest, lemon juice, and vanilla extract until smooth and completely free of lumps. Use an electric mixer on medium speed for about 2 minutes — scrape the bowl well.
💡 Stella’s Pro Tip: Make sure your cream cheese is truly at room temperature. Cold cream cheese will leave lumps that no amount of beating can fully remove, and those lumps will show in your finished mousse.
Step 4: Whip the Cream
In a separate chilled bowl, whip the heavy cream to soft peaks — when you lift the whisk, the cream should form gentle peaks that droop slightly at the tips. Be careful not to overwhip; you want it light and billowy.
⚠️ Common Mistake to Avoid: Overwhipped cream can turn grainy and separate. Stop as soon as you see soft peaks — the cream should still look silky, not stiff.
Step 5: Fold It Together
Add about one-third of the whipped cream to the cream cheese mixture and fold gently with a spatula to lighten the base. Then add the remaining whipped cream and fold just until no white streaks remain. The mixture should be airy, smooth, and cloud-like.
💡 Stella’s Pro Tip: Use a large rubber spatula and a gentle hand — cut through the center, scrape the bottom, and fold over. Repeat in a J-shaped motion. Over-folding will deflate the mousse and make it dense.
Step 6: Fill the Molds
Spoon or pipe the mousse mixture into each heart mold, filling right to the top. Use an offset spatula or the back of a spoon to smooth the tops evenly. Tap the molds gently on the counter to release any air bubbles.
⚠️ Common Mistake to Avoid: Don’t overfill the molds — the mousse will expand slightly as it freezes. Leave just a tiny bit of space at the top to ensure clean unmolding later.
Step 7: Freeze
Place the filled molds on a baking sheet and freeze for at least 3 hours, or until completely firm. The mousse needs to be solid enough to unmold cleanly — be patient, this step is crucial.
💡 Stella’s Pro Tip: Freeze the molds on a flat, level surface so the hearts come out even. If you’re short on time, you can freeze for just 2 hours, but the hearts will be softer and harder to glaze cleanly.
Step 8: Make the Pearl Glaze
In a small heatproof bowl, combine the melted white chocolate, sweetened condensed milk, coconut oil, and edible pearl luster dust. Stir gently until the mixture is smooth, glossy, and uniformly shimmering. If it thickens as it sits, warm it briefly over a bowl of hot water.
💡 Stella’s Pro Tip: The pearl luster dust is what gives this glaze its magical shimmer. Make sure to use edible-grade dust — regular craft glitter is NOT safe to eat. Stir it in gently to avoid creating bubbles.
Step 9: Unmold and Glaze
Remove the frozen hearts from the molds by gently flexing the silicone. Place each heart on a wire rack set over a baking sheet. Pour the pearl glaze evenly over each heart, letting the excess drip off the sides. Work quickly — the glaze sets fast on the cold surface.
⚠️ Common Mistake to Avoid: Don’t let the frozen hearts sit out while you glaze them one by one — keep them in the freezer until you’re ready. If they start to soften, the glaze won’t adhere smoothly.
Step 10: Garnish and Chill
While the glaze is still wet, sprinkle toasted coconut flakes and a little fine lemon zest over each heart. Transfer the glazed hearts to a clean plate and chill for 20 minutes before serving. This allows the glaze to set beautifully and the mousse to soften slightly to the perfect creamy texture.
💡 Stella’s Pro Tip: For the most elegant look, use a fine-mesh sieve to sprinkle the lemon zest — it creates a delicate, even shower of color that looks professional.
| Step | Action | Duration | Key Visual Cue |
|---|---|---|---|
| 1 | Mix cookie crumbs, coconut, melted butter | 3 mins | Wet sand texture |
| 2 | Press into molds, chill | 15 mins chill | Firm, compacted base |
| 3 | Beat cream cheese, sugar, coconut cream, lemon, vanilla | 2 mins | Smooth, lump-free |
| 4 | Whip cream to soft peaks | 3–4 mins | Soft drooping peaks |
| 5 | Fold cream into cream cheese mixture | 1–2 mins | Light, airy, no streaks |
| 6 | Fill molds, smooth tops | 5 mins | Level, even fill |
| 7 | Freeze | 3+ hours | Firm to touch, solid |
| 8 | Mix glaze ingredients | 3 mins | Glossy, shimmering |
| 9 | Unmold, pour glaze | 5 mins | Smooth, even coating |
| 10 | Garnish, chill | 20 mins chill | Glaze set, hearts glistening |
Serving & Presentation
These lemon coconut cloud hearts are pure romance on a plate. I love serving them on a simple white platter to let the pearl glaze really pop — the shimmer catches the light and makes the hearts look almost jewel-like. For a special touch, arrange them on a bed of toasted coconut flakes and scatter a few edible flowers or tiny mint leaves around the plate. The contrast of the glossy hearts against the matte coconut is stunning.
These are best enjoyed slightly chilled — straight from the fridge, not frozen. The mousse should be creamy and soft, like a cloud, with the biscuit base offering a gentle crunch. I like to serve them after a light meal, perhaps a fresh salad with citrus vinaigrette, to keep the whole menu bright and uplifting. A glass of chilled Prosecco or a floral green tea pairs beautifully with the lemon and coconut flavors.
If you’re making these for a celebration, consider stacking two hearts on each plate with a dollop of whipped cream and a sprinkle of lemon zest between them for height. Or serve them individually on small dessert plates with a drizzle of extra pearl glaze and a single edible flower on top. They’re also lovely alongside a bowl of fresh berries — the tartness of raspberries or blueberries is a perfect counterpoint to the sweet, creamy mousse.
| Pairing Type | Suggestions | Why It Works |
|---|---|---|
| Side Dish | Fresh berries, citrus salad | Bright acidity cuts the richness |
| Sauce / Dip | Raspberry coulis, passion fruit sauce | Tart fruit complements lemon-coconut |
| Beverage | Prosecco, mint tea, lemon verbena iced tea | Light, floral, or bubbly — cleanses palate |
| Garnish | Toasted coconut, lemon zest, edible flowers, mint | Adds texture, color, and fragrance |
Make-Ahead, Storage & Reheating
One of the best things about this no-bake lemon dessert is how well it works for entertaining. I often prepare the hearts through step 7 (freezing) a day or two ahead, then glaze and garnish them a few hours before serving. This makes hosting so much less stressful — you can focus on your guests instead of being stuck in the kitchen. Here’s my tested advice for storing and make-ahead prep.
| Method | Container | Duration | Reheating Tip |
|---|---|---|---|
| Refrigerator | Airtight container, layered with parchment | Up to 3 days | Serve cold — no reheating needed |
| Freezer | Freezer-safe container, separated by wax paper | Up to 1 month | Thaw in fridge 30 mins before serving |
| Make-Ahead | Freeze unglazed, then glaze day of serving | Up to 2 days in advance | Glaze while frozen for best shine |
If you’re storing leftovers (though I honestly never have any!), place them in an airtight container in the fridge. The glaze may soften slightly after a day, but the hearts will still taste wonderful. For freezer storage, keep them unglazed — freeze the plain mousse hearts, then glaze them fresh when you’re ready to serve. The glaze is best within a few hours of application; it stays glossy but can weep if stored too long.
One thing to note: these hearts are meant to be served chilled, not frozen solid. If you’ve frozen them, transfer to the fridge about 30 minutes before serving so the mousse softens to a creamy, dreamy texture. Don’t let them sit at room temperature for more than 20–30 minutes, as the biscuit base can start to soften.
Variations & Easy Swaps
| Variation | Key Change | Best For | Difficulty Impact |
|---|---|---|---|
| Vegan / Dairy-Free | Vegan cream cheese, coconut cream in place of heavy cream, dairy-free white chocolate | Dairy-sensitive guests, plant-based diet | Medium — coconut cream needs careful whipping |
| Gluten-Free | Gluten-free vanilla cookies (like GF graham crackers) for the base | Celiac or gluten-sensitive guests | Easy — simple swap, texture unchanged |
| Lime-Coconut | Substitute lime zest and lime juice for lemon | A different citrus twist, tropical flair | Easy — same technique, different flavor |
Lime-Coconut Hearts
This is one of my favorite variations — especially in the summer when limes are at their peak. Simply replace the lemon zest and lemon juice with the same amount of lime zest and lime juice. The flavor is a little more floral and slightly less sharp, with a beautiful green-tinted zing. I sometimes add a tiny pinch of ground cardamom to the mousse for a Moroccan-inspired twist — it pairs beautifully with lime and coconut.
Gluten-Free Version
Making these hearts gluten-free is incredibly simple. Just swap the vanilla cookie crumbs for your favorite gluten-free vanilla cookie or graham cracker crumbs. I’ve tested this with both gluten-free shortbread cookies and gluten-free vanilla wafers — both work beautifully. The texture of the base stays perfectly crunchy and buttery. All other ingredients are naturally gluten-free, so this is an easy win for anyone with celiac disease or gluten sensitivity.
Berry Swirl Version
For a pop of color and a fruity twist, swirl in a tablespoon of raspberry or strawberry puree into the mousse just before filling the molds. To make the puree, simmer 1/2 cup of berries with a tablespoon of sugar until soft, then strain and cool. Gently fold it into the mousse for a few turns — don’t overmix, you want distinct ribbons of fruit. This is a gorgeous option for Valentine’s Day or a romantic dinner.
Can I substitute the lemon juice with lime juice in Lemon Coconut Cloud Hearts?
Absolutely! Lime juice is a wonderful substitute for lemon juice in this recipe. Use the same amount — 2 tablespoons of fresh lime juice — and replace the lemon zest with lime zest for a consistent flavor profile. The resulting hearts will have a slightly more floral, tropical citrus note that pairs beautifully with the coconut. I’ve tested this swap and it works perfectly. Just keep in mind that lime juice is a little less acidic than lemon, so the mousse may taste slightly milder.
How long do Lemon Coconut Cloud Hearts with Pearl Glaze need to set before serving?
The hearts need to freeze for at least 3 hours to become firm enough to unmold cleanly. After glazing, they need an additional 20 minutes in the fridge to allow the pearl glaze to set and the mousse to soften to a creamy, cloud-like texture. So total setup time from start to serving is about 3 hours and 20 minutes, plus prep time. I recommend making the unglazed hearts a day ahead and freezing them overnight — that way you can glaze and serve them the next day with minimal stress.
What is the best way to store leftover Lemon Coconut Cloud Hearts to keep them fresh?
Store leftovers in an airtight container in the refrigerator, layered with parchment or wax paper to prevent sticking. They’ll stay fresh for up to 3 days. The glaze may soften slightly after a day, but the hearts will still taste delicious. If you want to store them longer, freeze the unglazed hearts for up to 1 month — just wrap them individually in plastic wrap and place in a freezer-safe container. When you’re ready to serve, thaw in the fridge for 30 minutes, then glaze fresh.
Do I need any special equipment to shape the Lemon Coconut Cloud Hearts?
Yes, you’ll need heart-shaped silicone molds to achieve the signature shape. Silicone is essential because the frozen mousse hearts need to be flexible to unmold cleanly — rigid metal or plastic molds won’t work. Look for molds with individual heart cavities, about 2–3 inches in size. You can find them at baking supply stores, online, or even at some craft stores. Aside from the molds, you’ll need a mixing bowl, an electric mixer (hand or stand), a spatula for folding, and a wire rack for glazing.
Can I make these heart-shaped desserts without a silicone mold?
While silicone molds give you the cleanest heart shape, you can improvise with small heart-shaped cookie cutters placed on a parchment-lined baking sheet. Press the biscuit base inside the cutter, then fill with mousse and freeze. Once frozen, gently remove the cutter. The edges won’t be as perfectly smooth as with silicone molds, but the shape will still be recognizable. Alternatively, you can use small heart-shaped paper cups (like mini muffin cups) — just peel the paper off after freezing.
Can I use bottled lemon juice instead of fresh lemon juice?
I strongly recommend using fresh lemon juice for this recipe. Bottled lemon juice often has a flat, slightly bitter taste and may contain preservatives that can affect the texture of the mousse. Fresh lemon juice provides a bright, clean acidity that really lifts the dessert. Plus, you’ll need the zest from the lemons anyway, so it makes sense to buy fresh lemons. For the best flavor, choose organic lemons if you can — the zest is more aromatic and free from wax.
Why did my pearl glaze turn out cloudy instead of glossy?
A cloudy glaze usually happens for one of three reasons: the white chocolate was overheated (use gentle heat, preferably a double boiler), the coconut oil was not fully incorporated, or the edible pearl luster dust was not stirred in evenly. To fix it, gently reheat the glaze over warm water (not direct heat) and whisk until smooth. Make sure your white chocolate is good quality — cheap chocolate can seize or turn grainy. Also, avoid getting any water into the glaze, as chocolate is sensitive to moisture.
Can I use sweetened shredded coconut instead of unsweetened for the base?
You can, but I recommend using unsweetened shredded coconut for the best balance of flavors. The mousse and glaze are already sweet, so unsweetened coconut keeps the dessert from becoming overly sugary. If you only have sweetened coconut on hand, reduce the amount of powdered sugar in the mousse slightly (by about 1 tablespoon) to compensate. Also, sweetened coconut tends to brown faster when toasted, so watch it carefully if you’re toasting it for the garnish.
Can I add a layer of fruit jam between the biscuit base and the mousse?
Yes, that’s a lovely idea! A thin layer of raspberry, strawberry, or apricot jam would add a beautiful burst of fruit flavor and color. After pressing the biscuit base into the molds and chilling it, spread about 1/2 teaspoon of jam over the base before adding the mousse. Make sure the jam is at room temperature so it spreads easily without disturbing the base. This addition works beautifully for a Valentine’s Day or anniversary dessert — the red jam peeking through adds a romantic touch.
How do I toast coconut flakes for the garnish?
Toasting coconut flakes is easy and adds so much flavor. Spread the flakes in a single layer on a baking sheet and toast in a 325°F oven for 5–8 minutes, stirring halfway through. Watch carefully — coconut can go from golden to burnt very quickly. You can also toast them in a dry skillet over medium heat, stirring constantly for 2–3 minutes until fragrant and lightly browned. Let the toasted coconut cool completely before using it as a garnish. Store any leftover toasted coconut in an airtight container.
Share Your Version!
I absolutely love hearing how these lemon coconut cloud hearts turn out in your kitchen! Did you try the lime-coconut variation? Did you add a berry swirl or a layer of jam? Drop a comment below and let me know how it went — I read every single one and I’ll do my best to answer your questions. And if you’re feeling proud (you should be!), snap a photo and tag me on Instagram or Pinterest — I’d love to see your beautiful creations.
If you try this recipe, please leave a star rating — it helps other home cooks find it too. And if you have a question I didn’t cover, just ask in the comments. That’s how we learn and grow together in the kitchen. From my NYC kitchen to yours — I hope this recipe brings as much warmth to your table as it does to mine. — Stella 🧡
Love This Recipe? Save It to Pinterest!
If you enjoyed this Lemon Coconut Cloud Hearts recipe, don’t let it get lost in your browser tabs! 😄 Pin it now so you can find it again anytime — and explore hundreds more tried-and-tested recipes waiting for you on my Pinterest boards.
👉 Follow Stella on Pinterest @stellarecipeblog
📌 Pin this recipe · 🔁 Re-pin your favorites · 💬 Tag me when you make it — I love seeing your creations!
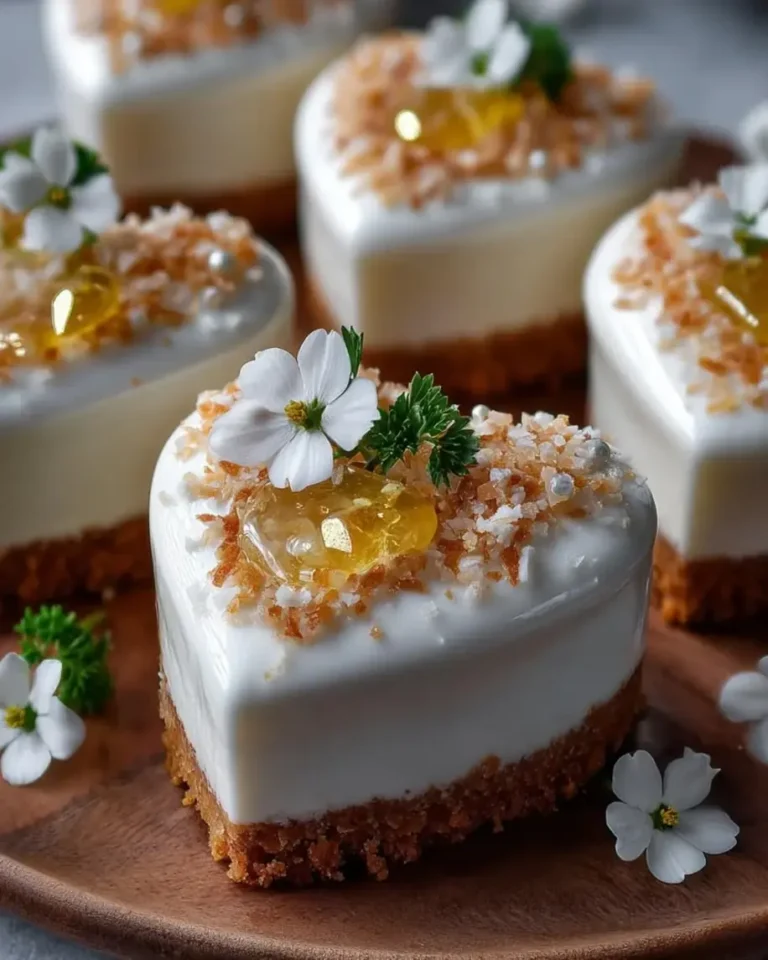
Lemon Coconut Cloud Hearts with Pearl Glaze
Delicate heart-shaped desserts with a coconut biscuit base, lemon coconut mousse, and a shimmering pearl glaze.
- Yield: 8 1x
Ingredients
- For the Lemon Coconut Mousse:
- 8 oz (225 g) cream cheese, softened
- 1 cup heavy whipping cream, chilled
- 1/3 cup powdered sugar
- 1/4 cup coconut cream
- 1 tbsp lemon zest
- 2 tbsp fresh lemon juice
- 1 tsp vanilla extract
- For the Coconut Biscuit Base:
- 1 cup vanilla cookie crumbs
- 1/4 cup shredded coconut
- 3 tbsp unsalted butter, melted
- For the Pearl Glaze:
- 1/2 cup white chocolate, melted
- 2 tbsp sweetened condensed milk
- 1 tbsp coconut oil
- 1 tsp edible pearl luster dust
- For Garnish (optional):
- Toasted coconut flakes
- Fine lemon zest
Instructions
- 1. Mix the cookie crumbs, shredded coconut, and melted butter until combined.
- 2. Press the mixture into heart-shaped silicone molds to form a thin base layer and chill for 15 minutes.
- 3. Beat the cream cheese, powdered sugar, coconut cream, lemon zest, lemon juice, and vanilla until smooth.
- 4. In a separate bowl, whip the heavy cream to soft peaks.
- 5. Fold the whipped cream into the lemon mixture until light and airy.
- 6. Fill the heart molds with the mousse mixture and smooth the tops.
- 7. Freeze for at least 3 hours or until firm.
- 8. Combine melted white chocolate, condensed milk, coconut oil, and pearl luster dust until glossy.
- 9. Unmold the frozen hearts and place on a wire rack.
- 10. Pour the pearl glaze evenly over each heart, allowing excess to drip off.
- 11. Garnish with toasted coconut flakes and fine lemon zest if desired.
- 12. Chill for 20 minutes before serving.
- Method: Dessert
Nutrition
- Calories: 295
- Sugar: 16 g
- Fat: 23 g
- Carbohydrates: 20 g
- Protein: 3 g
Tried This Recipe? Leave a Comment!
Did you make this recipe? I’d love to hear how it turned out! Please leave a comment and a rating below. Your feedback helps other home cooks and supports cheerychop.com!
For more delicious inspiration, follow me on Pinterest!