
Low Carb Strawberry Cheesecake Cups
Low Carb Strawberry Cheesecake Cups
Hello, dear friends! Today, I want to share a delightful treat that has become a staple in my home. Imagine this: a breezy Sunday afternoon with the sun casting a warm glow through the kitchen window. The comforting hum of jazz softly playing in the background, and the smell of fresh strawberries wafting through the air as you prepare a batch of Low Carb Strawberry Cheesecake Cups.
These delectable little cups have been my go-to dessert whenever I crave something sweet yet guilt-free. They remind me of the summer picnics we used to have with my family, where strawberries were always the star of the show. Now, let’s dive into creating this delicious dessert that is as satisfying as it is beautiful.
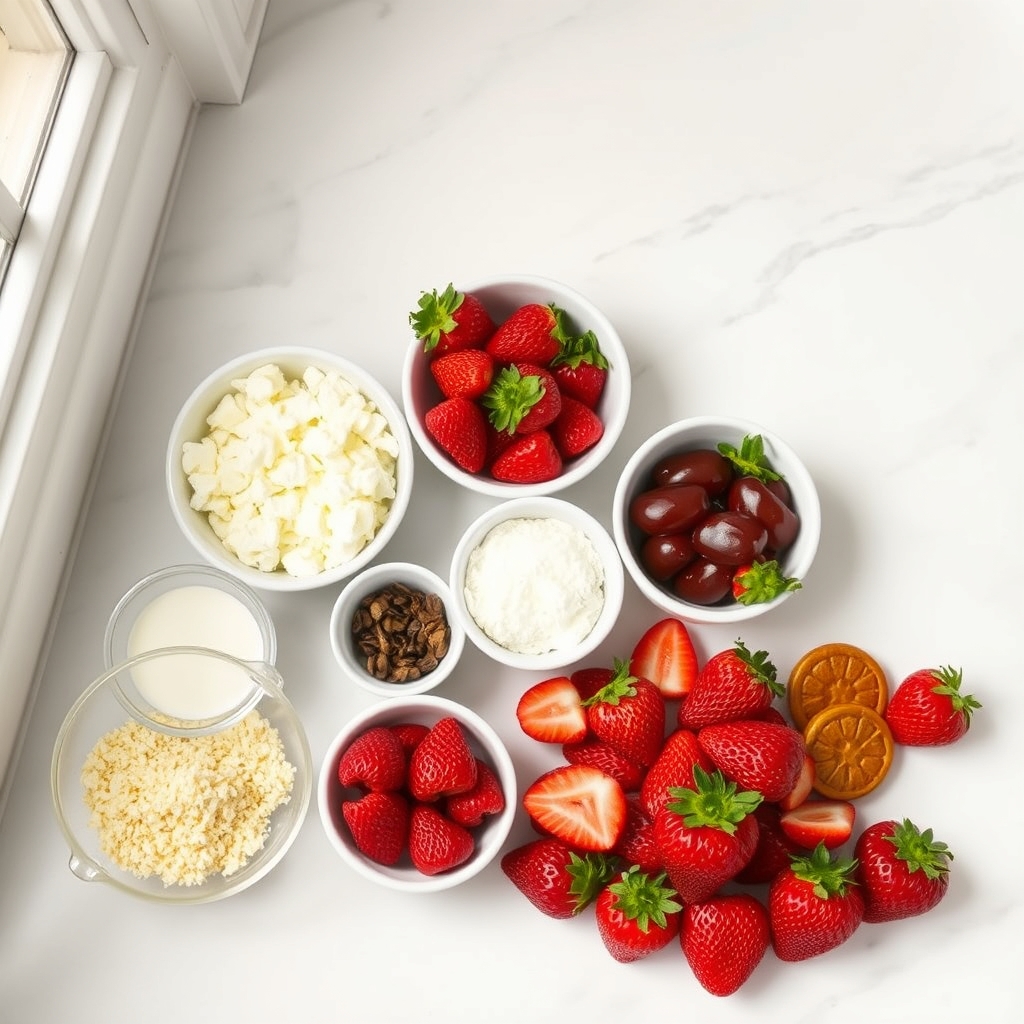
Ingredients
- Almond Flour: Our base ingredient for the crust. It gives a lovely, nutty flavor while keeping things low carb. Almond flour is a fantastic gluten-free alternative to traditional flour.
- Butter: Melted and golden, butter is the magic that binds our crust together and adds richness.
- Erythritol: The perfect sugar substitute, providing sweetness without the carbs. Feel free to adjust to your taste.
- Cream Cheese: Smooth and creamy, it forms the luscious filling of our cheesecake cups. Be sure to let it come to room temperature for easy mixing.
- Vanilla Extract: A splash of vanilla enhances the cream cheese’s flavor, making it irresistible.
- Heavy Cream: This adds a velvety texture to our filling. Whip it until soft peaks form for the perfect consistency.
- Fresh Strawberries: The star of the show! Juicy and sweet, they bring a burst of freshness that complements the creamy filling.
Instructions
Now that we have our ingredients ready, let’s journey into the creation of these delightful cheesecake cups.
- Prepare the Crust: Preheat your oven to 350°F (175°C). In a medium bowl, combine almond flour, melted butter, and erythritol. Mix until you have a crumbly mixture. Press this mixture evenly into the bottom of your cupcake liners. Bake for about 8-10 minutes until golden. The aroma will be heavenly!
- Make the Filling: In a large mixing bowl, beat the cream cheese until smooth and creamy. Add erythritol and vanilla extract, blending until well incorporated. Gently fold in the whipped heavy cream until the mixture is light and fluffy.
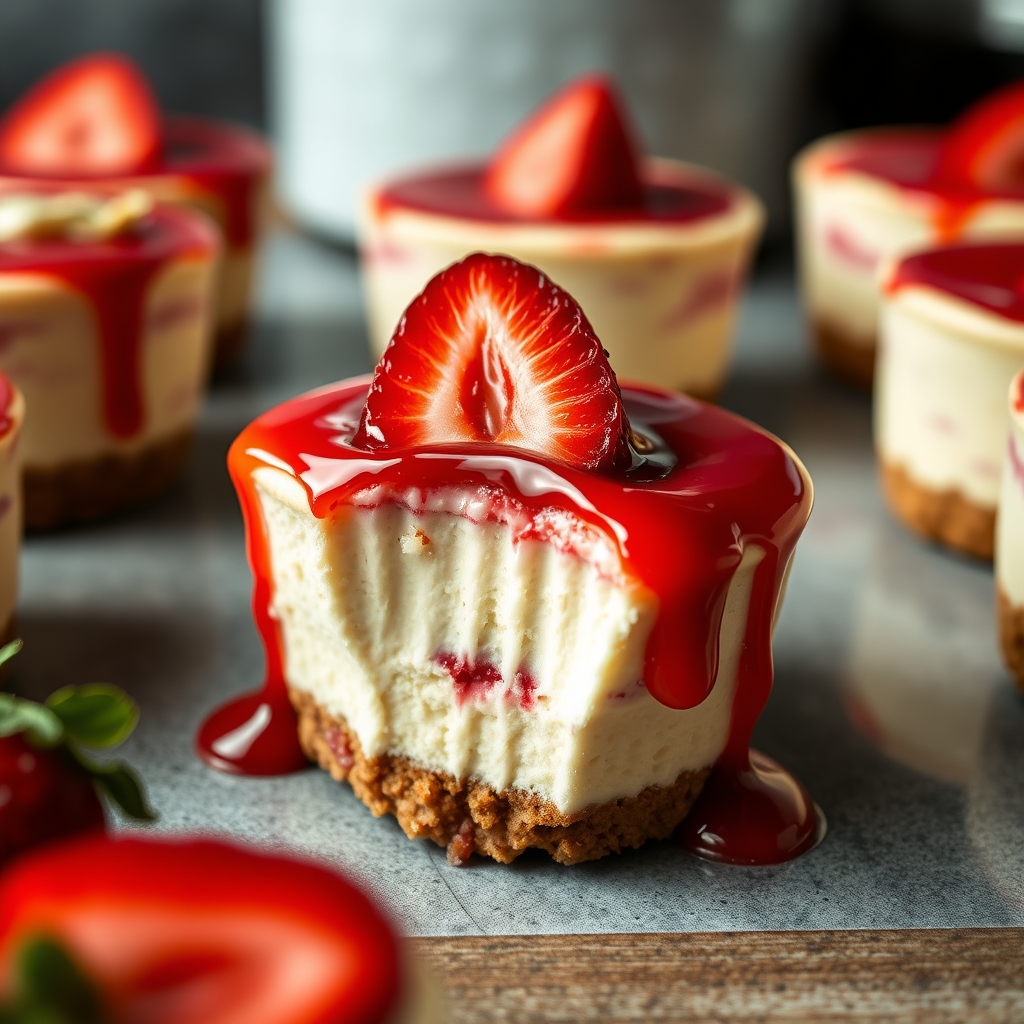
- Assemble the Cups: Spoon the cream cheese mixture over the cooled crusts. Smooth the tops with a spatula for a neat finish. Top each cup with freshly sliced strawberries. The vibrant red berries are not just a treat for the taste buds, but also for the eyes.
Stay tuned for the second part where we’ll talk about the final touches, storage tips, and, of course, how to savor these delightful cups. Until then, enjoy the process and the delicious aromas filling your kitchen!
Pro Tips for Perfect Cheesecake Cups
My dear friends, if there’s one thing I’ve learned from years of baking, it’s that the little details make all the difference. When preparing your Low Carb Strawberry Cheesecake Cups, make sure your cream cheese is at room temperature. This simple step ensures a silky-smooth filling that’s utterly delightful. Also, don’t rush the chilling process; allow your cheesecake cups to set in the fridge for at least 4 hours. Patience is key to achieving that perfect texture.
Variations and Substitutions
For those of you eager to experiment, there are several delightful variations you can try. Swap strawberries for raspberries or blueberries for a different berry twist. If you’re dairy-free, substitute the cream cheese with a plant-based cream cheese alternative and replace heavy cream with coconut cream. For a nut-free option, use sunflower seed flour instead of almond flour for the crust. The possibilities are as endless as your creativity!
Perfect Pairings
These cheesecake cups pair beautifully with a light, aromatic tea such as a floral Earl Grey or a refreshing peppermint blend. If you’re hosting, serve them alongside a platter of fresh berries and a dollop of whipped cream for an elegant touch. Their cool, creamy texture makes them a fantastic dessert choice after a rich, savory meal.
Storage and Reheating Guidance
If you have leftovers (a rare occurrence, I assure you!), store your cheesecake cups in an airtight container in the refrigerator for up to 5 days. They can also be frozen for up to a month; just thaw them overnight in the fridge before serving. While these cups are best enjoyed cold, if you prefer a warmer dessert, allow them to come to room temperature naturally rather than reheating to preserve their texture.
Frequently Asked Questions
Can I make these cheesecake cups ahead of time?
Absolutely! These cheesecake cups are perfect for preparing in advance. I often make them the day before a gathering to ensure they’re perfectly set and ready to impress.
What if I don’t have a muffin tin?
No worries! You can use small ramekins or even paper cupcake liners placed on a baking sheet as an alternative. Just be sure that whatever you use is safe for the oven and sturdy enough to hold the filling.
How can I reduce the sweetness?
If you prefer a less sweet dessert, simply reduce the amount of sweetener in the filling. Start by reducing it by a tablespoon and taste-test from there until it suits your palate.
A Warm, Encouraging Final Note
As you embark on creating these Low Carb Strawberry Cheesecake Cups, remember that cooking is an act of love. Each step, from mixing to baking to sharing, is a way to express care for yourself and those around you. Whether you’re crafting these cups for someone special or simply treating yourself, know that each bite is a moment of joy. I hope this recipe brings as much happiness to your home as it does to mine. Happy baking!
Low Carb Strawberry Cheesecake Cups
These Low Carb Strawberry Cheesecake Cups are the perfect blend of creamy cheesecake and fresh strawberries, all while keeping your carb count in check. A delightful dessert for those on a keto diet or anyone looking to indulge without the guilt!
Ingredients
For the Crust:
- For the Crust:
- 1 cup almond flour
- 2 tablespoons melted butter
- 1 tablespoon granulated erythritol
- 1/2 teaspoon vanilla extract
- For the Cheesecake Filling:
- 8 ounces cream cheese, softened
- 1/4 cup powdered erythritol
- 1 teaspoon vanilla extract
- 1/4 cup heavy whipping cream
- For the Strawberry Topping:
- 1 cup fresh strawberries, hulled and sliced
- 1 tablespoon powdered erythritol
- 1 teaspoon lemon juice
Instructions
1. Prepare the Crust:
- Preheat your oven to 350°F (175°C) and line a muffin tin with paper liners.
- In a small bowl, combine almond flour, melted butter, granulated erythritol, and vanilla extract until the mixture resembles wet sand.
- Press about 1 tablespoon of the crust mixture into the bottom of each muffin liner, smoothing with the back of a spoon.
- Bake the crusts for 8-10 minutes or until lightly golden. Remove from oven and let them cool completely.
- In a large bowl, beat the cream cheese and powdered erythritol together until smooth and creamy.
- Add in vanilla extract and heavy whipping cream, and continue to beat until well combined and fluffy.
- Spoon or pipe the cheesecake filling evenly over each cooled crust, smoothing the tops with a spatula.
- In a separate bowl, toss sliced strawberries with powdered erythritol and lemon juice.
- Spoon the strawberry mixture evenly over each cheesecake cup.
- Refrigerate the cheesecake cups for at least 2 hours to set before serving.
Notes
For an extra touch of flavor, try adding a pinch of cinnamon to the crust mixture. You can also substitute raspberries or blueberries for the strawberries if you prefer.