Marshmallow Brownies
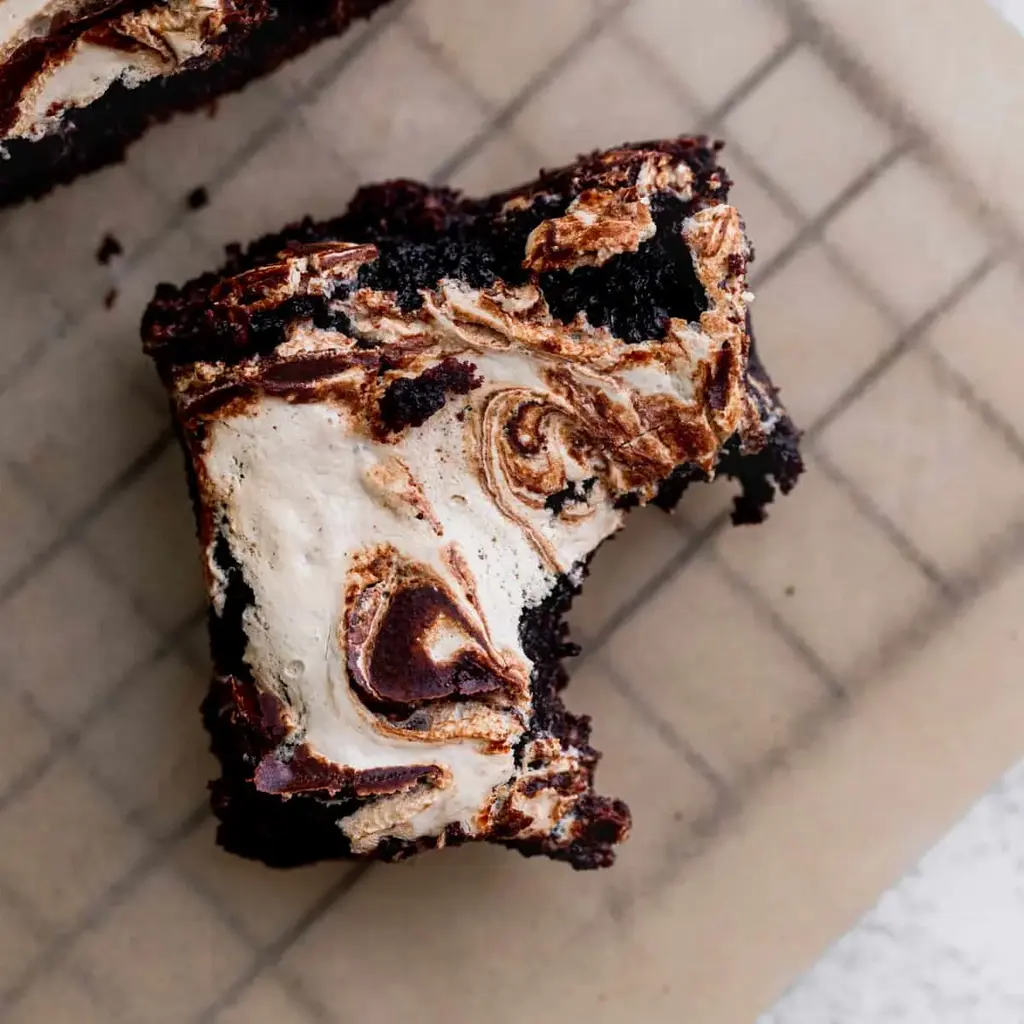
Table of Contents
Marshmallow Brownies – The Ultimate Fluffy & Fudgy Delight
When I first tasted my dad’s Moroccan tagine, I was captivated by how the sweet and savory flavors danced together. Ever since, I’ve carried that sense of aromatic blend into my NYC kitchen. Today I’m sharing my heart‑warming, absolutely fudgy Marshmallow Brownies—where a swirl of marshmallow fluff rises like a cloud, giving each bite a signature lightness and decadent chocolate richness that’s perfect for any occasion.
Feel the rich chocolate undertone, complemented by the subtle house‑made sugar glaze that caramelizes just enough for a crisp, silky on‑top finish. The combination of semi‑sweet chocolate chips and the silky smooth marshmallow creates a layered texture: a dense, chewy center, a velvety exterior, and a finish that’s almost like a caramelized confection. My Parisian pastry school taught me to balance fat and sugar carefully; that’s why these brownies keep a perfect crumb that just falls apart in your mouth.
What sets this version apart is the simple technique of swirling marshmallow fluff over the batter, which transforms ordinary brownies into an indulgent showstopper that’s both visually stunning and irresistibly sweet. I’ll also share one quick pro tip—always use a light hand with the swirl to keep the batter glossy—and warn against a common mistake: over‑mixing, which can make the brownies tough. Trust me, after a few trials, you’ll master this effortless, show‑stopping sweet.
Why This Marshmallow Brownies Recipe Is the Best
The flavor secret lies in using Dutch‑process cocoa, which shields the chocolate from the sharpness of acid, giving those brownies a deep, velvety chocolate core that’s less bitter and more satisfying. Coupled with a modest amount of vanilla and an extra tablespoon of butter, the bittersweet balance is truly sublime.
Perfected texture comes from this timing trick: letting the batter sit for 10 minutes before baking allows the cocoa and flour to fully hydrate, creating a tender crumb that clings together without crumbling. Swirling the marshmallow just before baking gives it a crisp crust, an effect I observed at a rooftop patisserie in NYC that specializes in fusion desserts.
Foolproof for beginners? Absolutely. The recipe’s step‑by‑step approach keeps panic at bay, while the critical pro tip about light brushing of marshmallow protects the delicate structure from sogginess. Once mastered, you’ll serve a batch that feels like a professional bakery creation and complete a heartfelt family dessert tradition.
Marshmallow Brownies Ingredients
I get these beauties from a local stone‑ware shop down in the West Village, where the chocolate chips arrive fresh and the butter is story‑told from a family farm. There’s something comforting about sprinkling a pinch of Dirazpseudo Morocco spice in a rustic kitchen—now this recipe melds that nostalgic scent with today’s quick‑prep chocolate bliss.
Ingredients List
- 2 cups White granulated sugar
- 3 Large eggs
- 1 Egg yolk
- 1/2 cup Unsalted butter, melted
- 2 tsp Pure vanilla extract
- 1/2 cup Oil (canola or vegetable)
- 3/4 cup All‑purpose flour
- 1 cup Unsweetened cocoa powder (Dutch‑process)
- 1 1/2 TBSP Cornstarch
- 1/2 tsp Salt
- 1 cup Semi‑sweet chocolate chips
- 1 cup Marshmallow creme
Ingredient Spotlight
Unsweetened Dutch‑process cocoa powder – The type of cocoa not only smooths the bitterness but also adds a buttery undertone that’s essential for a truly deep flavor. When shopping in a health food store, look for a brand that lists “European cocoa” or “dutch‑processed” on the label. As a substitute, you could use regular unsweetened cocoa but add a pinch of sugar to balance the extra bite.
Marshmallow creme – This airy filling is the star of the show. Use a light‑filled type rather than the thick “peanut” variant to avoid an overly chewy texture. If you’re avoiding dairy, pick an all‑vegan marshmallow; it’s swapped in a 1:1 ratio and keeps the fluffiness front and center.
Semi‑sweet chocolate chips – They provide pockets of melted chocolate that contrast nicely with the dense brownie base. For a richer finish, you can replace half the chips with dark chocolate chunks. If you prefer a stronger chocolate note, substitute 1/4 cup of baking chocolate with identical weight.
| Original Ingredient | Best Substitution | Flavor / Texture Impact |
|---|---|---|
| Unsweetened Dutch‑process cocoa | Regular unsweetened cocoa + 1/4 tsp sugar | Slightly more bitter but still rich; adds a touch of sweetness |
| Marshmallow creme | Vegan marshmallow | Lightly less sticky; maintains airy texture |
| Semi‑sweet chocolate chips | Dark chocolate chunks | More intense cacao flavor; slightly firmer bite |
How to Make Marshmallow Brownies — Step-by-Step
Let’s dive into the step‑by‑step routine that turns simple pantry staples into a showcase of chocolateed delight.
Step 1: Preheat Pan
Preheat the oven to 325°F. Spray a 9X9‑inch baking pan with non‑stick spray, line the bottom and two sides with parchment, then give it another spray wash. This foundation keeps the brownies lift‑free and ready for the glossy marshmallow finish.
💡 Stella’s Pro Tip: Use parchment that’s slightly oversized so the glaze edges don’t overflow when you swirl.
Step 2: Sift Dry Mix
In a medium bowl, sift together flour, Dutch‑process cocoa, cornstarch, and salt. A fine sift ensures a silky crumb and eliminates clumps that could ruin the texture.
⚠️ Common Mistake to Avoid: Skipping the sift pollutes the batter and leads to uneven distribution of chocolate.
Step 3: Whisk Sugar & Egg
Using a whisk attachment, beat sugar, 3 eggs, and yolk on high for 5 minutes until pale and fluffy. This introduces air, leavening the brownies for a tender bite.
💡 Stella’s Pro Tip: Let the batter chill a few minutes after whisking; it helps it thicken before adding wet ingredients.
Step 4: Add Butter, Oil, Vanilla
Fold in melted butter, oil, and vanilla into the egg mixture, then stir in the dry ingredients until just combined. Fold in chocolate chips with a rubber spatula, keeping the mixture glossy.
⚠️ Common Mistake to Avoid: Overmixing after adding flour separates gluten and produces a rubbery crumb.
Step 5: Batter & Marshmallow
Pour batter into the prepared pan. Microwave marshmallow fluff for 20‑30 seconds until just melted. Using a teaspoon, dollop marshmallow onto the batter, then lightly swirl with a butter knife, creating a gentle floral pattern that melts into the brownies during bake.
💡 Stella’s Pro Tip: Add a pinch of sea salt on top of the marshmallow to elevate the chocolate’s richness.
Step 6: Bake
Bake for 45‑55 minutes; the brownies are done when a toothpick inserted comes out slightly wet. If a chunk of batter drips, bake an extra 5 minutes.
⚠️ Common Mistake to Avoid: Baking too long, which dries out all the marshmallow and the center crumbles.
Step 7: Cool, Cut & Serve
Let cool on a rack until fully set before cutting into squares. The finished product will show a glossy, caramel‑like crust with a cloud‑like marshmallow peak that melts as you bite.
💡 Stella’s Pro Tip: Chill the brownies an hour before slicing to preserve the marshmallow layers and make clean cuts.
| Step | Action | Duration | Key Visual Cue |
|---|---|---|---|
| 1 | Preheat & prepare pan | 5 min | Glitter‑like parchment edge |
| 2 | Sift dry mix | 3 min | Silky sifted flour |
| 3 | Whisk sugar & eggs | 5 min | Pale fluffy batter |
| 4 | Melt butter, mix wet & dry | 4 min | Glossy batter sheen |
| 5 | Swirl marshmallow | 2 min | Floral swirl pattern |
| 6 | Bake | 45‑55 min | Crust slightly golden |
| 7 | Cool & cut | Cool to room temp | Visible marshmallow peaks |
Serving & Presentation
Plate a few squares on a slate board, then drizzle a single line of silky dark chocolate sauce. Add a tuft of fresh mint or a dusting of crushed pistachios for a Moroccan‑tinged crunch—a nod to my roots. If you’re feasting with friends, serve them warm with a glass of red wine for a bold, savory–sweet combo.
Another classic NYC style is to finish the brownies with a splash of espresso or a dusting of espresso powder. The coffee aroma cuts the chocolate bite, ending each bite with an uplifting finish that would make a Parisian café jealous.
| Pairing Type | Suggestions | Why It Works |
|---|---|---|
| Side Dish | Fresh berries, whipped cream, or caramel sauce | Acidity or creaminess balances chocolate richness. |
| Sauce / Dip | Chocolate ganache, caramel glaze, or nut butter | Enhances depth while complementing airy marshmallow. |
| Beverage | Espresso, cinnamon lattes, or full‑bodied red wine | Espresso adds bitterness; wine adds warmth. |
| Garnish | Pistachio fragments, sea salt flakes, or fresh mint | Textures and colors create culinary drama. |
Make-Ahead, Storage & Reheating
In the hectic rhythm of city life, I often bake a big tray to keep around for quick snacks. These brownies store beautifully because the marshmallow keeps the layers moist in the fridge, and they can be reheated without losing texture.
| Method | Container | Duration | Reheating Tip |
|---|---|---|---|
| Refrigerator | Loft‑sealed airtight box | 5‑7 days | Microwave 30 seconds or warm at 350°F for 5 min. |
| Freezer | Plastic wrap + foil | 3‑4 months | Thaw overnight; reheat in oven 350°F 5 min. |
| Make‑Ahead | Portioned paper cups | 2‑3 days in advance | Assemble on day of service, bake as written. |
When reheating, I always cover the brownies with foil to prevent the marshmallow from turning translucent. Warm up just until the center can’t be felt cold, preserving that airy peak. This method keeps the brownies looking fresh while preventing any caramelization that would run off.
Variations & Easy Swaps
| Variation | Key Change | Best For | Difficulty Impact |
|---|---|---|---|
| Salted Caramel Swirl | Drop caramel flakes into batter before marshmallow | Indulgent dessert baristas | Minimal extra step |
| Gluten‑Free | Swap all‑purpose flour for 1:1 gluten‑free blend | All‑diet clients | Just the same effort, but requires a gluten‑free blend. |
| Pumpkin Spice Twist | Add 1 tsp pumpkin spice to dry mix | Fall gatherings | Easy sig, just one spice addition |
Salted Caramel Swirls
I once balanced a caramel drizzle across a drizzle of salted caramel, creating a splash of sweet‑salty flavor. The caramel’s viscosity, when brushed over the rising brownie, forms a decadent burst that separates itself without topping the frothy marshmallow.
Gluten‑Free Makeover
Switch the flour with a pre‑made gluten‑free blend that contains xanthan gum, letting you maintain the brownie’s chewiness. It takes a touch more moisture—add a tablespoon of soy milk—but results in a delightfully chewy, chocolate‑loaded bite.
Pumpkin Spice Twist
A pinch of pumpkin spice (ground cinnamon, nutmeg, ginger, cloves) gives a warm, autumnal aroma that hides under the chocolate, typical of NY farmers market finds during October. This subtle adjustment can turn a simple brownie into a seasonal treat.
What’s the difference between regular cocoa and Dutch‑process cocoa?
Regular cocoa stays acidic, producing a more puckering, sharp chocolate aroma. Dutch‑process cocoa—treated with alkali—is neutralized and results in a smoother, buttery chocolate flavor. That softens bitterness, especially useful in fudgy brownies where the texture should dominate over sharp notes.
How long can these brownies stay fresh?
Once baked, store them in an airtight container at room temperature for up to 5 days. If you want them to hold longer, give them a 5‑7 day fridge time or freeze for a month. They keep the flaky marshmallow and silky chocolate layers intact, however, if you over‑freeze, the marshmallow can become gummy.
Can I use a different type of sweetener?
Yes! Swap the white granulated sugar for brown sugar for a caramel edge, or use raw sugar for a slightly denser crumb. Keep the same quantity or feel free to reduce by a tablespoon if experimenting with refined sweetener, as its lighter texture may alter the batter consistency.
Is it safe to leave the brownie batter on the counter while it stands?
It’s fine to let the batter rest on the counter for about 10–15 minutes. The rest hydrates the flour and cocoa particles, which helps the batter set evenly during bake. However, avoid long periods as the eggs may begin to separate; keep it covered with a damp cloth and refrigerate if it’s more than 30 minutes.
How do I heat pre‑baked brownies while keeping the marshmallow intact?
The trick is to use gentle heat. Put the brownies in a pre‑heated oven at 350 °F and warm for 5 minutes. Cover them loosely with foil to lock in moisture, preventing the marshmallow from drying or overtopping the chocolate. That keeps the layers flowing while reviving the gooey center.
What’s a good garnish for an elegant dessert plate?
Almond slices, chocolate shavings, or a delicate dusting of cocoa powder create a polished look. For a spicy twist, a light sprinkling of cayenne peanut butter or a drizzle of maple‑salted caramel highlights the marshmallow’s sweetness, turning a simple square into a gallery piece.
Can I replace egg yolk with a binder?
Yes: use 1 tablespoon of ground flaxseed mixed with 3 tablespoons of water, set for 5 minutes to create a gel. It will give the brownies a slight texture shift toward a softer crumb and replace egg bitterness, making them suitable for dietary restrictions.
Do the brownies stay gooey if I bake them longer?
Overbaking will dry the interior, turning the gooey marshmallow into a firm crust. To preserve the lusciousness, stop at the first sign of a slightly wet center. If you prefer a firmer bite, you can actually turn the baking to a quick “brown” finish—shorter time but precise timing keeps the toppings crisp, not dry.
Share Your Version!
If you baked these, drop me a rating and let me know how you tweaked everything! If you can, snap a photo and post it on Instagram or Pinterest, tagging @leosfoods so we can see your beautiful creations.
Would you combine a cacao‑rich swirl with a hint of espresso? Tell me how you’ll give this classic a personal signature—share your variant or ask your favorite ingredient swap!
From my NYC kitchen to yours — I hope this recipe brings as much warmth to your table as it does to mine. — Stella 🧡
Love This Recipe? Save It to Pinterest!
If you enjoyed this Marshmallow Brownies recipe, don’t let it get lost in your browser tabs! 😄 Pin it now so you can find it again anytime — and explore hundreds more tried‑and‑tested recipes waiting for you on my Pinterest boards.
👉 Follow Stella on Pinterest @chefrecipes2
📌 Pin this recipe · 🔁 Re-pin your favorites · 💬 Tag me when you make it — I love seeing your creations!
Got a brownie secret or a fun twist? Share it in the comments below—let’s bake together and fill the kitchen with love!
Marshmallow Brownies
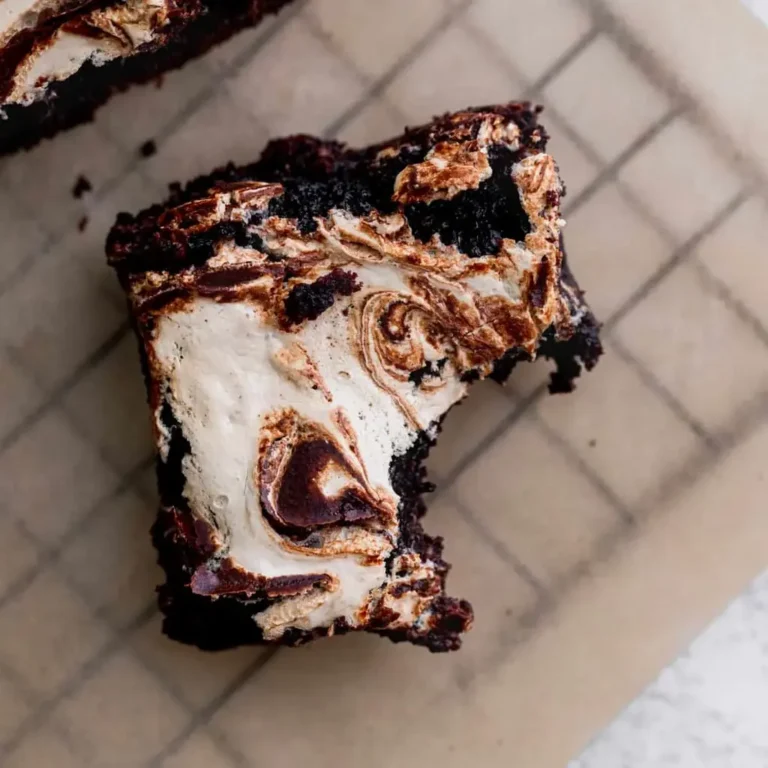
These marshmallow brownies are super fudgy chocolate brownie with chocolate chips. It has marshmallow fluff swirled on top.
Ingredients
- 2 cups White granulated sugar
- 3 Large eggs
- 1 Egg yplk
- 1/2 cup Unsalted butter (melted)
- 2 tsp Pure vanilla extract
- 1/2 cup Oil (canola or vegetable)
- 3/4 cup All-purpose flour
- 1 cup Unsweetened cocoa powder (Use dutch process cocoa powder)
- 1 1/2 TBSP Cornstarch
- 1/2 tsp Salt
- 1 cup Semi-sweet chocolate chips
- 1 cup Marshmallow creme
Instructions
- Preheat the oven to 325°F. Spray a 9X9-inch baking pan with baking nonstick spray. Line the bottom and 2 sides of the pan with parchment paper and spray again.
- In a medium bowl, sift the flour, cocoa powder, and cornstarch together. Add in the salt and set aside.
- Using a mixer with a whisk attachment, beat the sugar, eggs, and egg yolk on high speed for 5 minutes. It will become pale in color. While that mixes, melt the butter in the microwave and let it cool.
- Add the oil, melted butter, and vanilla and mix on low until combined. Add in the dry ingredients and mix on low until just combined. Pour in the chocolate chips and use a rubber spatula to fold it in.
- Pour the brownie batter into the pan. Melt the marshmallow fluff in the microwave for 20-30 seconds and mix. Use a 1 teaspoon to dollop the marshmallow fluff on top of the brownie batter. Use a butter knife to very light swirl the marshmallow fluff.
- Bake for 45-55 minutes. It is done baking when you stick in a toothpick, and it is slightly wet. If a lot of batter comes out, then bake for another 5 minutes.
- Cool on a cooling rack completely before cutting into them and serving.