How to Make Midnight Blueberry Mirror Glaze Domes
“`html
Table of Contents
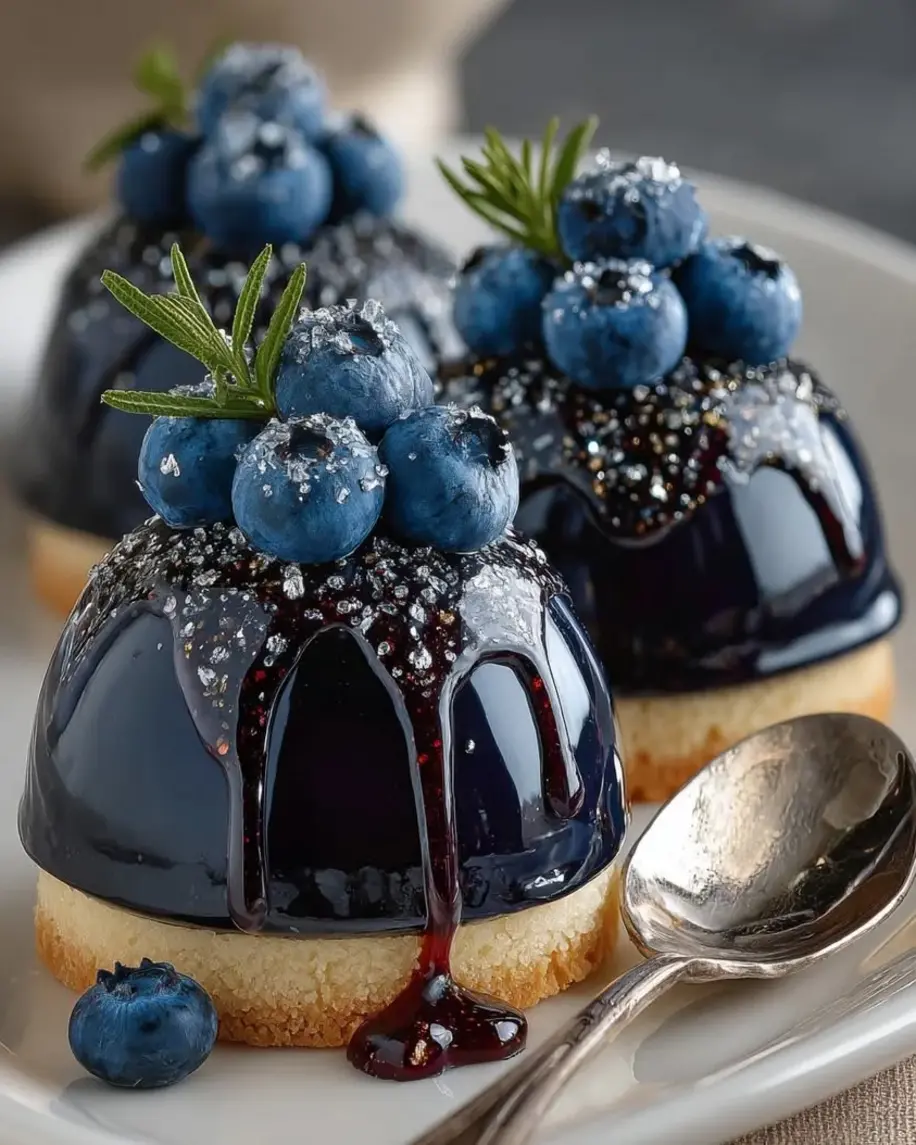
Midnight Blueberry Mirror Glaze Dream Domes – A Stunning Mirror Glaze Dessert
I still remember the first time I made a mirror glaze cake at pastry school in Paris. Our chef instructor said, “The glaze must be as dark and reflective as the midnight sky above the Seine.” That image has stayed with me ever since. This blueberry mirror glaze cake — my Midnight Blueberry Mirror Glaze Dream Domes — is the dessert I turn to when I want to impress without sacrificing the soulful, fruit-forward flavors I grew up with in Morocco. The deep, luminous glaze is a nod to those Parisian nights, but the blueberry mousse at its heart is pure North African warmth: bright, tangy, and unapologetically fruity. Every time I make these domes, I feel like I’m bridging two worlds — and trust me, you will too.
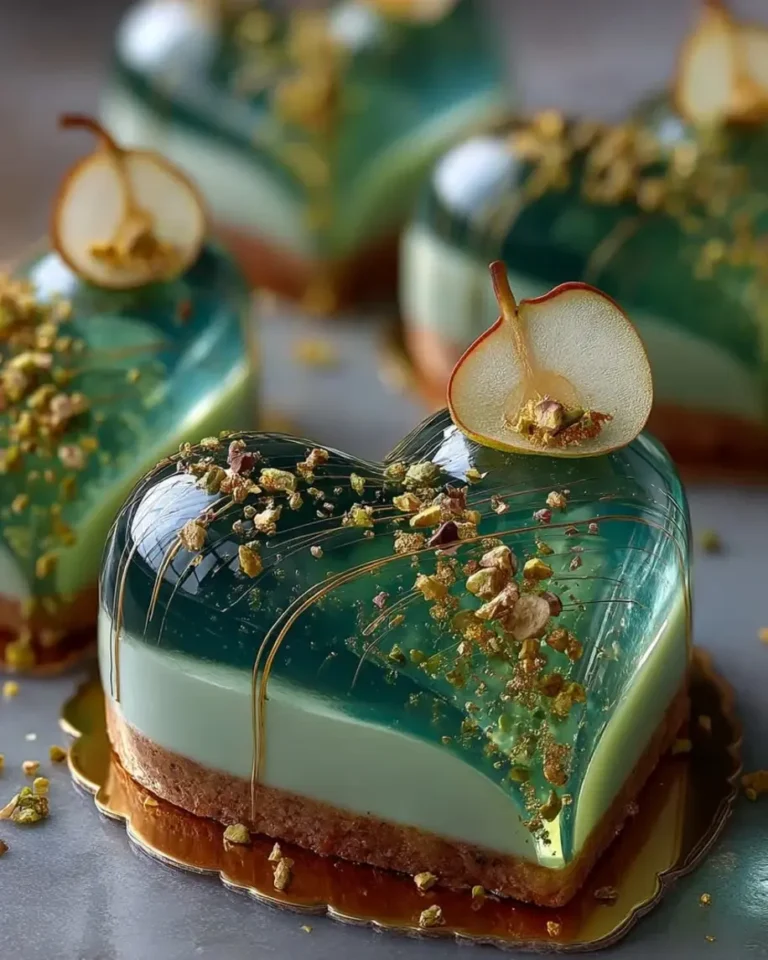
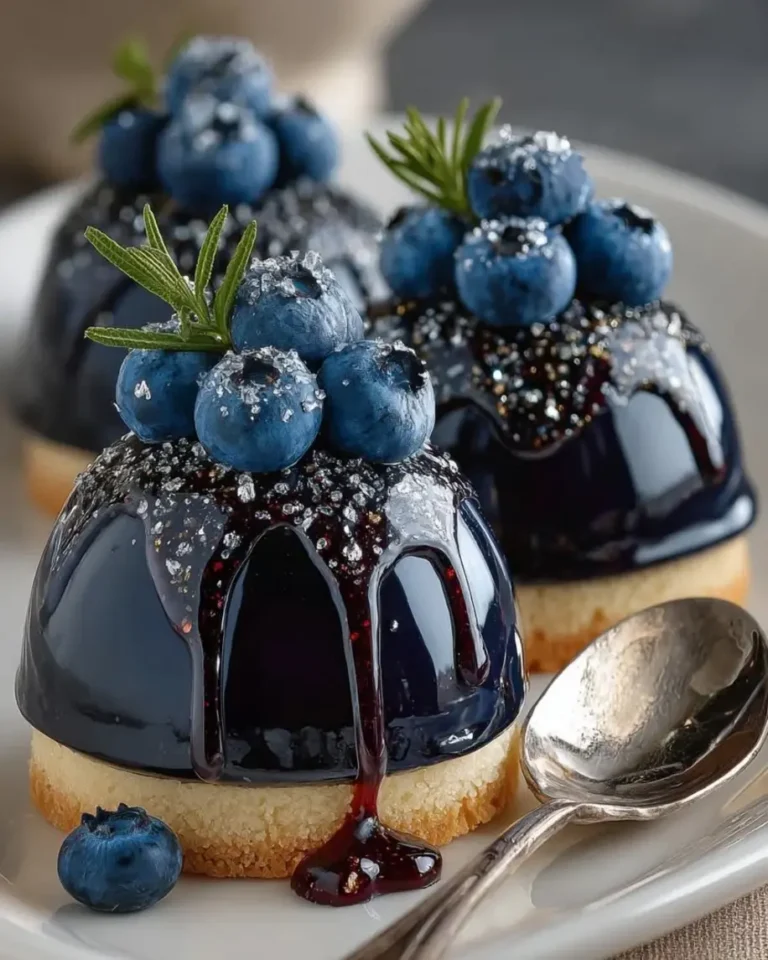
Imagine cutting into a glossy, midnight-blue dome and discovering a cloud-like blueberry mousse resting on a tender vanilla cake base. The first bite is cool and silky from the mousse, followed by the delicate crumb of the cake and the faint floral pop of fresh blueberries. The mirror glaze shatters ever so slightly on your tongue before melting away, leaving behind a whisper of white chocolate and a blush of berry. I finish each dome with a tiny mint leaf and a fleck of edible silver — because a dessert this beautiful deserves jewelry. It’s the kind of showstopper that makes people stop mid-conversation and just stare.
What makes my version different? I combine three gel colorants — navy, black, and violet — to create that dramatic midnight hue without any bitter aftertaste. I also add a touch of blueberry extract directly to the glaze, so every component of this midnight blueberry dessert tastes like the real thing. One common mistake home bakers make is pouring the glaze when it’s too warm, which causes it to run off the dome and pool at the bottom. I’ll show you exactly how to nail the temperature window so your mirror glaze dome recipe looks like it came from a French patisserie. And yes — you can absolutely use frozen blueberries and still get a stunning result. Let’s get started, friends.
Why This Blueberry Mirror Glaze Cake Recipe Is the Best
The Flavor Secret — Most mirror glaze cakes rely on artificial flavoring for the glaze, but I double down on real blueberry flavor. The mousse is made with fresh simmered blueberries and a splash of lemon juice to brighten the natural fruit. Then the glaze gets a dose of blueberry extract that complements — not overpowers — the white chocolate base. This layered approach means every spoonful tastes like ripe, sun-warmed blueberries, even though the glaze itself is a work of art. It’s a trick I picked up from a pastry chef in the 6th arrondissement, and it’s never failed me.
Perfected Texture — The mousse is where technique really matters. I whip the heavy cream to soft peaks before folding in the cooled blueberry purée — this guarantees a light, airy texture that doesn’t deflate when you unmold the domes. The vanilla cake base is intentionally thin and soft, almost like a sponge, so it doesn’t compete with the mousse. I bake it in a lined sheet pan, then cut circles slightly smaller than the dome molds. That tiny gap between cake and mold allows the mousse to encase the cake completely, giving you that clean, professional finish. My French training taught me that precision in the small things makes all the difference.
Foolproof & Fast — I know mirror glazes can be intimidating, but I’ve broken this blueberry mousse dome recipe into manageable steps that even a confident beginner can follow. The key is to bloom the gelatin properly, cool the glaze to exactly 90–95°F, and work quickly once you start pouring. I’ve tested this recipe seven times in my NYC kitchen to make sure the timing is forgiving and the results are consistent. Whether you’re making these for a birthday, a dinner party, or just because you want to feel like a pastry chef, this blueberry mirror glaze cake recipe will make you look like a pro.
Blueberry Mirror Glaze Cake Ingredients
I source my blueberries from the Union Square Greenmarket when they’re in season — there’s nothing like the tiny, intensely sweet wild blueberries from New Jersey in July. But even in the dead of winter, frozen wild blueberries work beautifully here. The white chocolate for the glaze is something I’m particular about: I use a high-quality Belgian couverture because it melts more smoothly and gives the glaze that glass-like sheen. For the gel food coloring, I recommend AmeriColor or Chefmaster — they’re concentrated, so you only need a drop or two, and they won’t alter the flavor. Here’s everything you’ll need.
Ingredients List
- For the Blueberry Mousse: 2 cups fresh or frozen blueberries, 1/4 cup granulated sugar, 1 tbsp lemon juice, 2 tsp powdered gelatin, 2 tbsp cold water, 1 1/4 cups heavy cream (chilled), 1 tsp vanilla extract
- For the Vanilla Cake Base: 1/2 cup all-purpose flour, 1/2 tsp baking powder, 1/8 tsp salt, 1/4 cup granulated sugar, 1 large egg, 2 tbsp unsalted butter (melted), 2 tbsp whole milk, 1/2 tsp vanilla extract
- For the Midnight Blueberry Mirror Glaze: 1/2 cup water, 3/4 cup granulated sugar, 1/2 cup sweetened condensed milk, 2 tbsp light corn syrup, 2 1/2 tsp powdered gelatin, 3 tbsp cold water, 6 oz white chocolate (finely chopped), 1/2 tsp blueberry extract, 1/2 tsp navy blue gel food coloring, 1 drop black gel food coloring, 1 drop violet gel food coloring
- For Garnish (optional): Fresh blueberries, edible silver leaf flakes, small mint leaves
Ingredient Spotlight
Blueberries: Frozen berries are actually ideal for the mousse because they release more juice when simmered, giving you a deeper color and more intense flavor. If using fresh, add an extra tablespoon of water to the pan to prevent sticking. I prefer wild blueberries when I can find them — they’re smaller, sweeter, and have a more concentrated taste.
White Chocolate: This is the backbone of the mirror glaze, so don’t skimp. Use a couverture or high-quality bar (Ghirardelli, Valrhona, or Callebaut) that contains cocoa butter. Chips often contain stabilizers that prevent smooth melting. Finely chop the chocolate so it melts evenly when you pour the hot liquid over it.
Gel Food Coloring: Liquid food coloring will ruin the glaze’s consistency and produce a murky color. Gel or paste colors are concentrated and water-based, so they blend seamlessly. The combination of navy blue, black, and violet creates that inky midnight hue — feel free to adjust the ratio to your preference.
Gelatin: Powdered gelatin is reliable and easy to find. Always bloom it in cold water for at least 5 minutes before using. If you prefer sheet gelatin, use 3 sheets (silver strength) for the mousse and 4 sheets for the glaze — but I find powdered gelatin gives more consistent results for home bakers.
| Original Ingredient | Best Substitution | Flavor / Texture Impact |
|---|---|---|
| Fresh blueberries | Frozen wild blueberries (no need to thaw) | Deeper color, more juice; slightly more intense flavor |
| White chocolate (couverture) | High-quality white chocolate bar (Ghirardelli, Valrhona) | Smoother glaze, better shine; avoid chips with stabilizers |
| Gel food coloring | Powdered food coloring (dissolved in a drop of water) | Similar results; need to blend thoroughly to avoid streaks |
| Powdered gelatin | Sheet gelatin (silver strength: 3 sheets for mousse, 4 for glaze) | Softer gel texture; sheets dissolve more evenly |
| Light corn syrup | Glucose syrup or honey (honey adds subtle floral note) | Honey changes flavor slightly; glucose gives identical shine |
How to Make Midnight Blueberry Dessert — Step-by-Step
Making these dream domes is a labor of love, but I promise every step is worth it. The process is divided into four parts: the mousse, the cake base, the glaze, and assembly. Work through each part in order, and you’ll be rewarded with eight stunning, professional-looking desserts. Let’s go.
Step 1: Bloom the Gelatin for the Mousse
Sprinkle the 2 teaspoons of powdered gelatin over 2 tablespoons of cold water in a small bowl. Let it sit undisturbed for 5 minutes until it becomes firm and jiggly. This process — called blooming — hydrates the gelatin so it dissolves evenly into the warm blueberry purée later. If you skip this step or rush it, you’ll end up with lumps in your mousse.
⚠️ Common Mistake to Avoid: Using warm or hot water to bloom the gelatin. Always use cold water — warm water will begin to dissolve the gelatin prematurely and create a weak, inconsistent set.
Step 2: Simmer the Blueberries
In a medium saucepan, combine the 2 cups of blueberries, 1/4 cup of sugar, and 1 tablespoon of lemon juice. Cook over medium heat, stirring occasionally, for 6–8 minutes until the berries soften and release their juice. The mixture should be bubbling gently and the berries should look collapsed. Remove from heat and let cool for 2 minutes, then blend using an immersion blender or transfer to a standard blender. For a completely smooth mousse, strain the purée through a fine-mesh sieve to remove the seeds.
Step 3: Dissolve the Gelatin Into the Purée
Add the bloomed gelatin to the warm blueberry purée and stir until completely dissolved. The heat from the purée will melt the gelatin smoothly. Let the mixture cool to room temperature — this is important because adding warm purée to the whipped cream will deflate it. If you’re in a hurry, place the bowl in an ice bath and stir occasionally until it cools.
💡 Stella’s Pro Tip: To speed up cooling, spread the purée in a thin layer on a plate and refrigerate for 5–7 minutes. Stir every minute or so to ensure even cooling.
Step 4: Whip the Cream and Fold
In a large chilled bowl, whip the 1 1/4 cups of heavy cream to soft peaks — you’re looking for a consistency that holds a gentle curve when you lift the whisk, not stiff or grainy. Add the 1 teaspoon of vanilla extract and whip for another 5 seconds to combine. Now gently fold the cooled blueberry mixture into the whipped cream using a rubber spatula. Use a light hand: cut down through the center, scrape along the bottom, and lift up. Repeat until no streaks remain. Over-mixing will deflate the mousse.
Step 5: Make the Cake Batter
Preheat your oven to 350°F (175°C) and line a 9×9-inch baking pan with parchment paper. In a small bowl, whisk together the 1/2 cup of flour, 1/2 teaspoon of baking powder, and 1/8 teaspoon of salt. In a separate medium bowl, beat the 1/4 cup of sugar and 1 large egg until pale and thickened — about 2 minutes. Add the 2 tablespoons of melted butter, 2 tablespoons of whole milk, and 1/2 teaspoon of vanilla extract, then fold in the dry ingredients until just combined. Pour the batter into the prepared pan and spread evenly.
Step 6: Bake and Cut the Cake Rounds
Bake the cake for 12–15 minutes until a toothpick inserted in the center comes out clean and the edges are lightly golden. Cool completely in the pan on a wire rack — about 30 minutes. Once cool, use a round cookie cutter (slightly smaller than your dome mold diameter) to cut 8 circles. Set them aside. The cake should be tender but sturdy enough to hold up to the mousse and glaze.
⚠️ Common Mistake to Avoid: Cutting the cake rounds while the cake is still warm. Warm cake will crumble and compress, making it difficult to get clean edges. Patience pays off here.
Step 7: Assemble and Freeze the Domes
Fill each silicone dome mold halfway with the blueberry mousse. Gently press a cake round onto the mousse, then add a little more mousse around the edges to fill any gaps. Smooth the bottom with an offset spatula so the base is flat. Place the filled molds on a baking sheet and freeze for at least 6 hours — overnight is even better. The domes must be fully frozen before glazing, or the glaze won’t adhere properly.
Step 8: Prepare the Glaze Gelatin
While the domes are freezing, bloom the gelatin for the glaze. Sprinkle 2 1/2 teaspoons of powdered gelatin over 3 tablespoons of cold water in a small bowl. Let it sit for 5 minutes until firm. This gelatin will give the mirror glaze its signature gel-like consistency that clings to the frozen domes.
Step 9: Heat the Glaze Base
In a small saucepan, combine 1/2 cup of water, 3/4 cup of sugar, 1/2 cup of sweetened condensed milk, and 2 tablespoons of light corn syrup. Heat over medium heat, stirring occasionally, until the mixture is steaming and the sugar has dissolved — about 3–4 minutes. Do not let it boil. Remove from the heat and stir in the bloomed gelatin until completely dissolved.
Step 10: Make the White Chocolate Glaze
Place the 6 ounces of finely chopped white chocolate in a heatproof bowl. Pour the hot glaze base over the chocolate and let it stand for 2 minutes — this allows the heat to begin melting the chocolate. Then blend with an immersion blender (or whisk vigorously) until completely smooth and shiny. Avoid incorporating too many air bubbles; if you see bubbles, let the glaze sit for a minute to let them rise to the surface.
💡 Stella’s Pro Tip: Use an immersion blender held at a slight angle to minimize aeration. If you don’t have one, a whisk works but be gentle — you want a glass-like finish, not a foamy one.
Step 11: Color and Temperature the Glaze
Add 1/2 teaspoon of blueberry extract, 1/2 teaspoon of navy blue gel food coloring, 1 drop of black gel food coloring, and 1 drop of violet gel food coloring. Stir until the color is uniform — it should look like a deep midnight sky. Now cool the glaze to 90–95°F (32–35°C). You can do this by placing the bowl in an ice bath and stirring gently, or simply letting it sit at room temperature and checking with an instant-read thermometer. This temperature window is critical: too hot and the glaze will slide off the domes; too cold and it will thicken and clump.
Step 12: Unmold the Frozen Domes
Remove the frozen domes from the freezer. Gently press on the bottom of each silicone mold to release the dome. If they stick, run the mold under warm water for a few seconds — but be careful not to melt the mousse. Place each dome on a wire rack set over a rimmed baking sheet (to catch the excess glaze). Work with one or two domes at a time, keeping the rest in the freezer.
Step 13: Pour the Mirror Glaze
Ensure the glaze is at exactly 90–95°F. Hold a frozen dome directly over the rack and pour the glaze evenly over the top in one continuous motion, starting from the center and moving outward. The glaze should coat the dome completely and smoothly. Let the excess drip off for about 10 seconds, then use a small spatula to clean the bottom edge if necessary. Transfer the glazed dome to a serving plate or a parchment-lined tray. Repeat with the remaining domes.
⚠️ Common Mistake to Avoid: Pouring the glaze too slowly or in multiple spots — this creates uneven coverage and streaks. One confident, continuous pour is the secret to a flawless mirror finish.
Step 14: Chill and Set
Once all the domes are glazed, refrigerate them for 1–2 hours to allow the glaze to set properly. The mousse will soften slightly during this time, making the domes pleasant to eat — not rock-hard but not mushy either. The glaze will become firm to the touch but still glossy.
Step 15: Garnish and Serve
Just before serving, top each dome with a small cluster of fresh blueberries, a tiny pinch of edible silver leaf flakes, and a small mint leaf. The silver adds a beautiful contrast against the dark blue glaze, and the mint provides a fresh aroma that complements the berry flavor. Serve immediately or keep refrigerated for up to 4 hours before serving.
| Step | Action | Duration | Key Visual Cue |
|---|---|---|---|
| 1 | Bloom gelatin for mousse | 5 mins | Gelatin is firm and jiggly |
| 2 | Simmer blueberries | 6–8 mins | Berries are soft, juices released |
| 3 | Dissolve gelatin in purée | 2 mins | No gelatin lumps remain |
| 4 | Whip cream and fold | 5 mins | Soft peaks, uniform color after folding |
| 5 | Make cake batter | 5 mins | Batter is smooth and thick |
| 6 | Bake and cut cake | 12–15 mins + cooling | Toothpick clean, edges golden |
| 7 | Assemble and freeze domes | 6 hrs minimum | Domes are solid to the touch |
| 8 | Bloom glaze gelatin | 5 mins | Gelatin is firm and jiggly |
| 9 | Heat glaze base | 3–4 mins | Steaming, sugar dissolved |
| 10 | Make white chocolate glaze | 2 mins + blending | Smooth, shiny, no lumps |
| 11 | Color and cool glaze | 5–10 mins | Deep midnight blue, 90–95°F |
| 12 | Unmold domes | 2 mins | Clean release from silicone |
| 13 | Pour mirror glaze | 1 min per dome | Glossy, even coverage |
| 14 | Chill to set | 1–2 hrs | Glaze is firm but glossy |
| 15 | Garnish and serve | 5 mins | Beautiful presentation |
Serving & Presentation
These domes are meant to be the star of the show. I like to serve them on simple white plates or slate boards so the deep blue glaze really pops. place each dome slightly off-center and add a small swoosh of extra mirror glaze or a drizzle of warm blueberry coulis on the plate for a painterly effect. The edible silver leaf catches the light beautifully — just a few flakes on top of each dome is enough to make it feel special. A tiny sprig of mint adds a bright green contrast that’s as much about color as it is about fragrance.
For a dinner party, I arrange all eight domes on a large wooden board with clusters of fresh blueberries and a few mint leaves scattered around. Guests love the reveal — and I always get asked, “Did you really make these at home?” The answer is yes, and with this recipe, you can too. If you’re serving these after a heavy meal, keep the portions modest; the mousse is rich enough that one dome per person is plenty.
| Pairing Type | Suggestions | Why It Works |
|---|---|---|
| Side Dish | Fresh berries, citrus segments, coconut sorbet | Bright acidity cuts the richness of the mousse and glaze |
| Sauce / Dip | Warm blueberry coulis, lemon curd, crème anglaise | Adds moisture and a second layer of flavor |
| Beverage | Earl Grey tea, espresso, dry sparkling rosé, lavender lemonade | Tea and lavender echo the floral notes; coffee balances sweetness |
| Garnish | Edible silver leaf, fresh mint, candied violets, gold leaf | Elevates the visual drama and adds a touch of luxury |
Make-Ahead, Storage & Reheating
As a busy NYC food blogger, I rely on make-ahead desserts like this one to keep my sanity intact. The great news is that these domes are designed to be made in stages. I often prepare the mousse and cake on a Saturday, assemble and freeze the domes overnight, then glaze them Sunday morning before guests arrive. The glaze itself can be made a day ahead and gently rewarmed to 90°F when you’re ready to pour. Here’s everything you need to know about storing and prepping these beauties in advance.
| Method | Container | Duration | Reheating Tip |
|---|---|---|---|
| Refrigerator | Airtight container, single layer | Up to 3 days (glazed) | Serve cold; no reheating needed. Let sit 5 mins at room temp. |
| Freezer | Individual wrap in plastic, then foil | Up to 1 month (unglazed) | Thaw in fridge 2 hrs, then glaze as directed |
| Make-Ahead | Freeze domes on a tray, then transfer to bag | Up to 2 weeks in advance | Glaze directly from frozen – no need to thaw first |
A few things I’ve learned from my own kitchen: if you’re making the glaze a day ahead, store it in a covered container in the refrigerator and reheat it gently in a heatproof bowl set over simmering water (or in 10-second bursts in the microwave, stirring between each). Add a teaspoon of warm water if it’s too thick. And never, ever refreeze a glazed dome — the condensation from thawing will ruin the mirror finish. Plan your assembly so that glazed domes go straight from the freezer to the glaze, then to the fridge to set, then to the table.
Variations & Easy Swaps
One of the things I love most about this recipe is how adaptable it is. Whether you’re catering to dietary needs or just want to switch up the flavors, I’ve tested several variations that work beautifully. Here are my three favorite ways to change things up.
| Variation | Key Change | Best For | Difficulty Impact |
|---|---|---|---|
| Raspberry-Rose Dream Domes | Replace blueberries with raspberries; add 1/4 tsp rose water to mousse and glaze | Romantic occasions, Valentine’s Day, bridal showers | Same difficulty; rose water is potent, measure carefully |
| Gluten-Free Version | Use 1:1 gluten-free flour blend (with xanthan gum) in the cake base | Gluten-sensitive guests | Same difficulty; cake texture is slightly more tender |
| Spiced Honey-Blueberry | Replace sugar in mousse with honey; add 1/4 tsp cinnamon and a pinch of cardamom to the blueberry purée | Fall and winter holidays | Same difficulty; honey adds complexity and depth |
Raspberry-Rose Dream Domes
This variation is inspired by the floral desserts I discovered in the patisseries of Paris. Replace the blueberries with an equal amount of raspberries — they don’t need to be strained, but I recommend it for the smoothest mousse. Add 1/4 teaspoon of rose water to both the mousse and the glaze. For the mirror glaze, use pink and red gel food coloring instead of navy/black/violet to achieve a soft rose hue. The floral notes pair beautifully with the white chocolate glaze, and the result is a dome that tastes like a garden in spring.
Gluten-Free Version
I tested this for a friend with celiac disease, and it worked like a charm. Substitute the all-purpose flour with a high-quality 1:1 gluten-free flour blend that contains xanthan gum (I recommend King Arthur Measure for Measure or Bob’s Red Mill 1:1). Because gluten-free flours absorb more liquid, add an extra tablespoon of milk to the cake batter. The cake will be slightly more delicate, so handle it gently when cutting the rounds. The mousse and glaze are naturally gluten-free, so this swap is easier than you might think.
Spiced Honey-Blueberry Variation
This one takes me right back to my mother’s kitchen in Morocco, where honey and warm spices were used in almost every dessert. Replace the 1/4 cup of granulated sugar in the mousse with 3 tablespoons of mild honey (like clover or orange blossom). Add 1/4 teaspoon of cinnamon and a pinch of cardamom to the blueberries while they simmer — the spices will infuse into the purée beautifully. Skip the blueberry extract in the glaze and use a clear vanilla extract instead, so the honey and spice flavors shine. The color will be slightly warmer — more of a midnight purple than blue — but just as stunning.
What is the best way to achieve a perfectly smooth mirror glaze for the blueberry domes?
The secret to a perfectly smooth mirror glaze lies in three things: temperature, aeration, and straining. First, make sure your glaze is between 90–95°F (32–35°C) before pouring. If it’s too hot, it will slide off the frozen dome and pool at the bottom; if too cold, it will thicken and clump. Second, use an immersion blender held at a slight angle to minimize air bubbles when blending the white chocolate and glaze base. If you see bubbles, let the glaze rest for 2–3 minutes so they rise to the surface. Third, for the absolute smoothest finish, strain the finished glaze through a fine-mesh sieve before pouring. This catches any undissolved gelatin or chocolate flecks. Also, make sure your frozen domes are completely smooth — any bumps or cracks in the mousse will telegraph through the glaze. I always run my finger over the unmolded domes to feel for imperfections before glazing.
Can I use frozen blueberries for the mirror glaze, or do they need to be fresh?
Yes, you can absolutely use frozen blueberries for both the mousse and the glaze — and in many ways, frozen berries are actually better. Frozen blueberries are harvested at peak ripeness and flash-frozen, so they often have more intense flavor and color than fresh berries that have traveled long distances. For the mousse, simply add the frozen berries directly to the saucepan with the sugar and lemon juice — no need to thaw them first. They will release more juice as they cook, giving you a deeper purple color and a more concentrated blueberry flavor. For the glaze, the blueberry extract provides the flavor, so the quality of the berries matters less for that component. If you use frozen berries, you may want to strain the purée more thoroughly to remove any seeds that might have broken during freezing and thawing.
How far in advance can I make the blueberry mirror glaze dream domes before serving?
You can make these domes up to two weeks in advance if you plan strategically. The unglazed frozen domes (mousse + cake base) can be stored in an airtight container in the freezer for up to two weeks. When you’re ready to serve, make the glaze fresh (or reheat a pre-made glaze), pour it over the frozen domes, and refrigerate for 1–2 hours to set. I don’t recommend glazing the domes more than 24 hours in advance — the glaze can absorb moisture from the refrigerator and lose its mirror-like shine over time. If you need to prep even further ahead, you can make the blueberry purée and freeze it in a sealed container for up to 3 months, then thaw it in the refrigerator overnight before making the mousse. The cake base is best baked fresh, but it can be made 2 days ahead and stored at room temperature in an airtight container.
What is the ideal temperature for pouring the mirror glaze over the domes to avoid dripping?
The ideal pouring temperature for a mirror glaze is between 90°F and 95°F (32°C to 35°C). At this temperature, the glaze is fluid enough to flow evenly over the frozen dome but thick enough to cling to the surface without running off. If your glaze is above 100°F, it will be too thin and will drip excessively, leaving you with a thin, uneven coating and a puddle of glaze at the bottom. If it’s below 85°F, it will start to set before it finishes flowing, resulting in streaks and thick patches. The best way to check is with an instant-read thermometer. When you pour, the glaze should coat the dome in a single, smooth layer with minimal dripping — just a few drips from the bottom edge. If you notice heavy dripping, the glaze is too warm; let it cool for 2–3 minutes and try again with a test dome.
Why did my mirror glaze crack when I cut into the dome?
A cracked mirror glaze usually happens for one of two reasons: the glaze was poured over a dome that wasn’t frozen solid enough, or the glaze set for too long in the refrigerator before serving. When the dome interior is still soft, the mousse shifts slightly as you cut, creating tension that cracks the firm glaze shell. Make sure your domes are frozen for at least 6 hours — overnight is ideal. Additionally, don’t refrigerate glazed domes for more than 4–6 hours before serving. The condensation inside the container can soften the glaze and make it more prone to cracking. If you need to hold them longer, store the glazed domes in a very cold refrigerator (below 38°F) in a single layer with no cover, and serve within 24 hours. When you’re ready to cut, use a sharp, thin-bladed knife dipped in hot water and wiped dry between cuts — this cleanly slices through the glaze without shattering it.
Can I make this recipe dairy-free or vegan?
Yes, with some thoughtful substitutions, you can make a dairy-free version of these domes. For the mousse, replace the heavy cream with full-fat coconut cream (chill two cans of coconut milk overnight, then scoop out the solid cream). The coconut flavor will be subtle but present. For the glaze, use a high-quality dairy-free white chocolate (I like the brands from Pascha or Enjoy Life) and replace the sweetened condensed milk with a dairy-free condensed milk alternative (Nature’s Charm makes one). Use a plant-based milk like oat or coconut milk in the cake base, and replace the butter with vegan butter or coconut oil. For the gelatin, use agar-agar powder — but note that agar sets at a different rate and temperature, so you’ll need to experiment. The texture will be slightly different — less creamy and more gel-like — but the visual result can still be stunning.
How do I clean and reuse silicone dome molds without scratching them?
Silicone dome molds are durable, but they can be scratched by abrasive sponges or metal utensils, which will affect the smoothness of your future domes. To clean them, first rinse off any residual mousse or glaze with warm water. Then soak them in warm, soapy water for 10–15 minutes — use a mild dish soap and a soft sponge or microfiber cloth. Avoid using steel wool, scrub brushes, or anything abrasive. For stubborn residue, make a paste of baking soda and water and gently rub it into the crevices with your fingers. Always air-dry the molds completely before storing them. If your domes are sticking more than they used to, you can lightly spray the molds with non-stick cooking spray or wipe them with a thin layer of neutral oil before filling. Never use a knife or metal tool to pry domes out of the mold — gently flexing the silicone from the base is all you need.
What can I do with leftover mirror glaze?
Leftover mirror glaze is a wonderful thing to have on hand. You can store it in a covered container in the refrigerator for up to 5 days. To reuse it, gently warm it in a heatproof bowl set over simmering water (or in 15-second microwave bursts, stirring between each) until it reaches 90–95°F again. If the glaze has thickened significantly, stir in a teaspoon of warm water or corn syrup to restore the consistency. Leftover glaze is perfect for dipping fresh strawberries, cherries, or even shortbread cookies — just let the excess drip off and refrigerate the dipped items until set. You can also drizzle it over ice cream, cheesecake, or pound cake for an instant upgrade. If you have a large amount, pour it into small silicone molds to create decorative chocolate discs or shapes that you can use to garnish future desserts.
My glaze has streaks in it — what went wrong?
Streaks in a mirror glaze are usually caused by one of three issues. First, the food coloring wasn’t fully incorporated — always use an immersion blender to blend the color into the glaze until it’s completely uniform. Second, the glaze was poured at the wrong temperature: if it’s too cool, it thickens unevenly as it flows, creating streaks and swirls. Third, the frozen dome had condensation on its surface — when you take the domes out of the freezer, any moisture on the surface will mix with the glaze and create lighter streaks. To prevent this, pat the frozen domes gently with a paper towel just before glazing. If you see streaks forming as you pour, you can’t fix them after the fact — your best bet is to scrape off the glaze, reheat and smooth the dome, and try again. Practice makes perfect, and even streaky domes will taste delicious!
Can I use a different fruit instead of blueberries?
Absolutely — this recipe is a template that works beautifully with many fruits. Strawberries, raspberries, blackberries, and cherries all make excellent substitutes. For stone fruits like peaches or mangoes, you’ll need to simmer them a bit longer (10–12 minutes) to break them down, and you may need to adjust the sugar depending on the fruit’s natural sweetness. For the mirror glaze, you’ll need to use a corresponding fruit extract or flavoring — strawberry extract for strawberry domes, for example — and adjust the food coloring accordingly. Keep in mind that fruits with high water content (like strawberries) may require a slightly longer simmer to concentrate the flavor and reduce excess liquid. The freezing, glazing, and assembly steps remain exactly the same. I’ve made a passion fruit version with a yellow mirror glaze that was absolutely stunning — so don’t be afraid to get creative!
Share Your Version!
I absolutely love seeing how you make these Midnight Blueberry Mirror Glaze Dream Domes your own. Drop a star rating below — it helps other readers know what to expect — and leave a comment telling me about your experience. Did you try one of the variations? Did your family go silent when they took the first bite? Share a photo on Instagram or Pinterest and tag @leosfoods — I personally look at every single tag and love featuring your creations on my stories. And here’s a question I’d love for you to answer: which flavor variation are you most excited to try — the Raspberry-Rose, the Spiced Honey-Blueberry, or something entirely your own? Your answer might just inspire my next recipe!
From my NYC kitchen to yours — I hope this recipe brings as much warmth to your table as it does to mine. — Stella 🧡
Love This Recipe? Save It to Pinterest!
If you enjoyed this Midnight Blueberry Mirror Glaze Dream Domes recipe, don’t let it get lost in your browser tabs! 😄 Pin it now so you can find it again anytime — and explore hundreds more tried-and-tested recipes waiting for you on my Pinterest boards.
👉 Follow Stella on Pinterest @stellarecipeblog
📌 Pin this recipe · 🔁 Re-pin your favorites · 💬 Tag me when you make it — I love seeing your creations!
“`
Print
Midnight Blueberry Mirror Glaze Dream Domes
- Yield: 8 1x
Ingredients
- ### For the Blueberry Mousse:
- 2 cups fresh or frozen blueberries
- 1/4 cup granulated sugar
- 1 tbsp lemon juice
- 2 tsp powdered gelatin
- 2 tbsp cold water
- 1 1/4 cups heavy cream, chilled
- 1 tsp vanilla extract
- ### For the Vanilla Cake Base:
- 1/2 cup all-purpose flour
- 1/2 tsp baking powder
- 1/8 tsp salt
- 1/4 cup granulated sugar
- 1 large egg
- 2 tbsp unsalted butter, melted
- 2 tbsp whole milk
- 1/2 tsp vanilla extract
- ### For the Midnight Blueberry Mirror Glaze:
- 1/2 cup water
- 3/4 cup granulated sugar
- 1/2 cup sweetened condensed milk
- 2 tbsp light corn syrup
- 2 1/2 tsp powdered gelatin
- 3 tbsp cold water
- 6 oz white chocolate, finely chopped
- 1/2 tsp blueberry extract
- 1/2 tsp navy blue gel food coloring
- 1 drop black gel food coloring
- 1 drop violet gel food coloring
- ### For Garnish (optional):
- Fresh blueberries
- Edible silver leaf flakes
- Small mint leaves
Instructions
- 1. Bloom the gelatin for the mousse in cold water for 5 minutes.
- 2. Simmer the blueberries, sugar, and lemon juice for 6–8 minutes until softened. Blend until smooth and strain if desired.
- 3. Stir the bloomed gelatin into the warm blueberry purée until dissolved. Let cool to room temperature.
- 4. Whip the heavy cream to soft peaks. Fold the vanilla and cooled blueberry mixture into the whipped cream.
- 5. Prepare the cake by mixing the flour, baking powder, salt, sugar, egg, melted butter, milk, and vanilla until smooth.
- 6. Bake in a lined pan at 350°F (175°C) for 12–15 minutes. Cool completely and cut circles slightly smaller than the dome molds.
- 7. Fill silicone dome molds halfway with blueberry mousse. Press a cake round onto each dome and smooth the bottoms. Freeze for at least 6 hours or overnight.
- 8. Bloom the glaze gelatin in cold water.
- 9. Heat the water, sugar, condensed milk, and corn syrup until steaming. Remove from the heat and stir in the gelatin.
- 10. Pour the hot mixture over the white chocolate. Let stand for 2 minutes, then blend until smooth.
- 11. Add the blueberry extract and gel food coloring until a deep midnight blue color is achieved. Cool the glaze to about 90–95°F (32–35°C).
- 12. Unmold the frozen domes and place them on a wire rack over a tray.
- 13. Pour the mirror glaze evenly over each dome in one continuous motion until fully coated.
- 14. Transfer the glazed domes to serving plates and refrigerate for 1–2 hours before serving.
- 15. Garnish with fresh blueberries, edible silver leaf flakes, and mint leaves.
Nutrition
- Calories: 395
- Sugar: 34 g
- Fat: 24 g
- Carbohydrates: 42 g
- Protein: 5 g
Tried This Recipe? Leave a Comment!
Did you make this recipe? I’d love to hear how it turned out! Please leave a comment and a rating below. Your feedback helps other home cooks and supports cheerychop.com!
For more delicious inspiration, follow me on Pinterest!